

Page 1
Date: Mar. 31, 1994
OPTION: SF-S52
No. : SP-1725
SF-S52
TROUBLE SHOOTING STAPLE FEEDING TROUBLE IN
THE STAPLE UNIT.
The problem of staple feeding in the staple unit of model SF-S51 was reported in
technical report no. SP-1660, but the same problem has occurred in model SF-S52 and
is hereby reported.
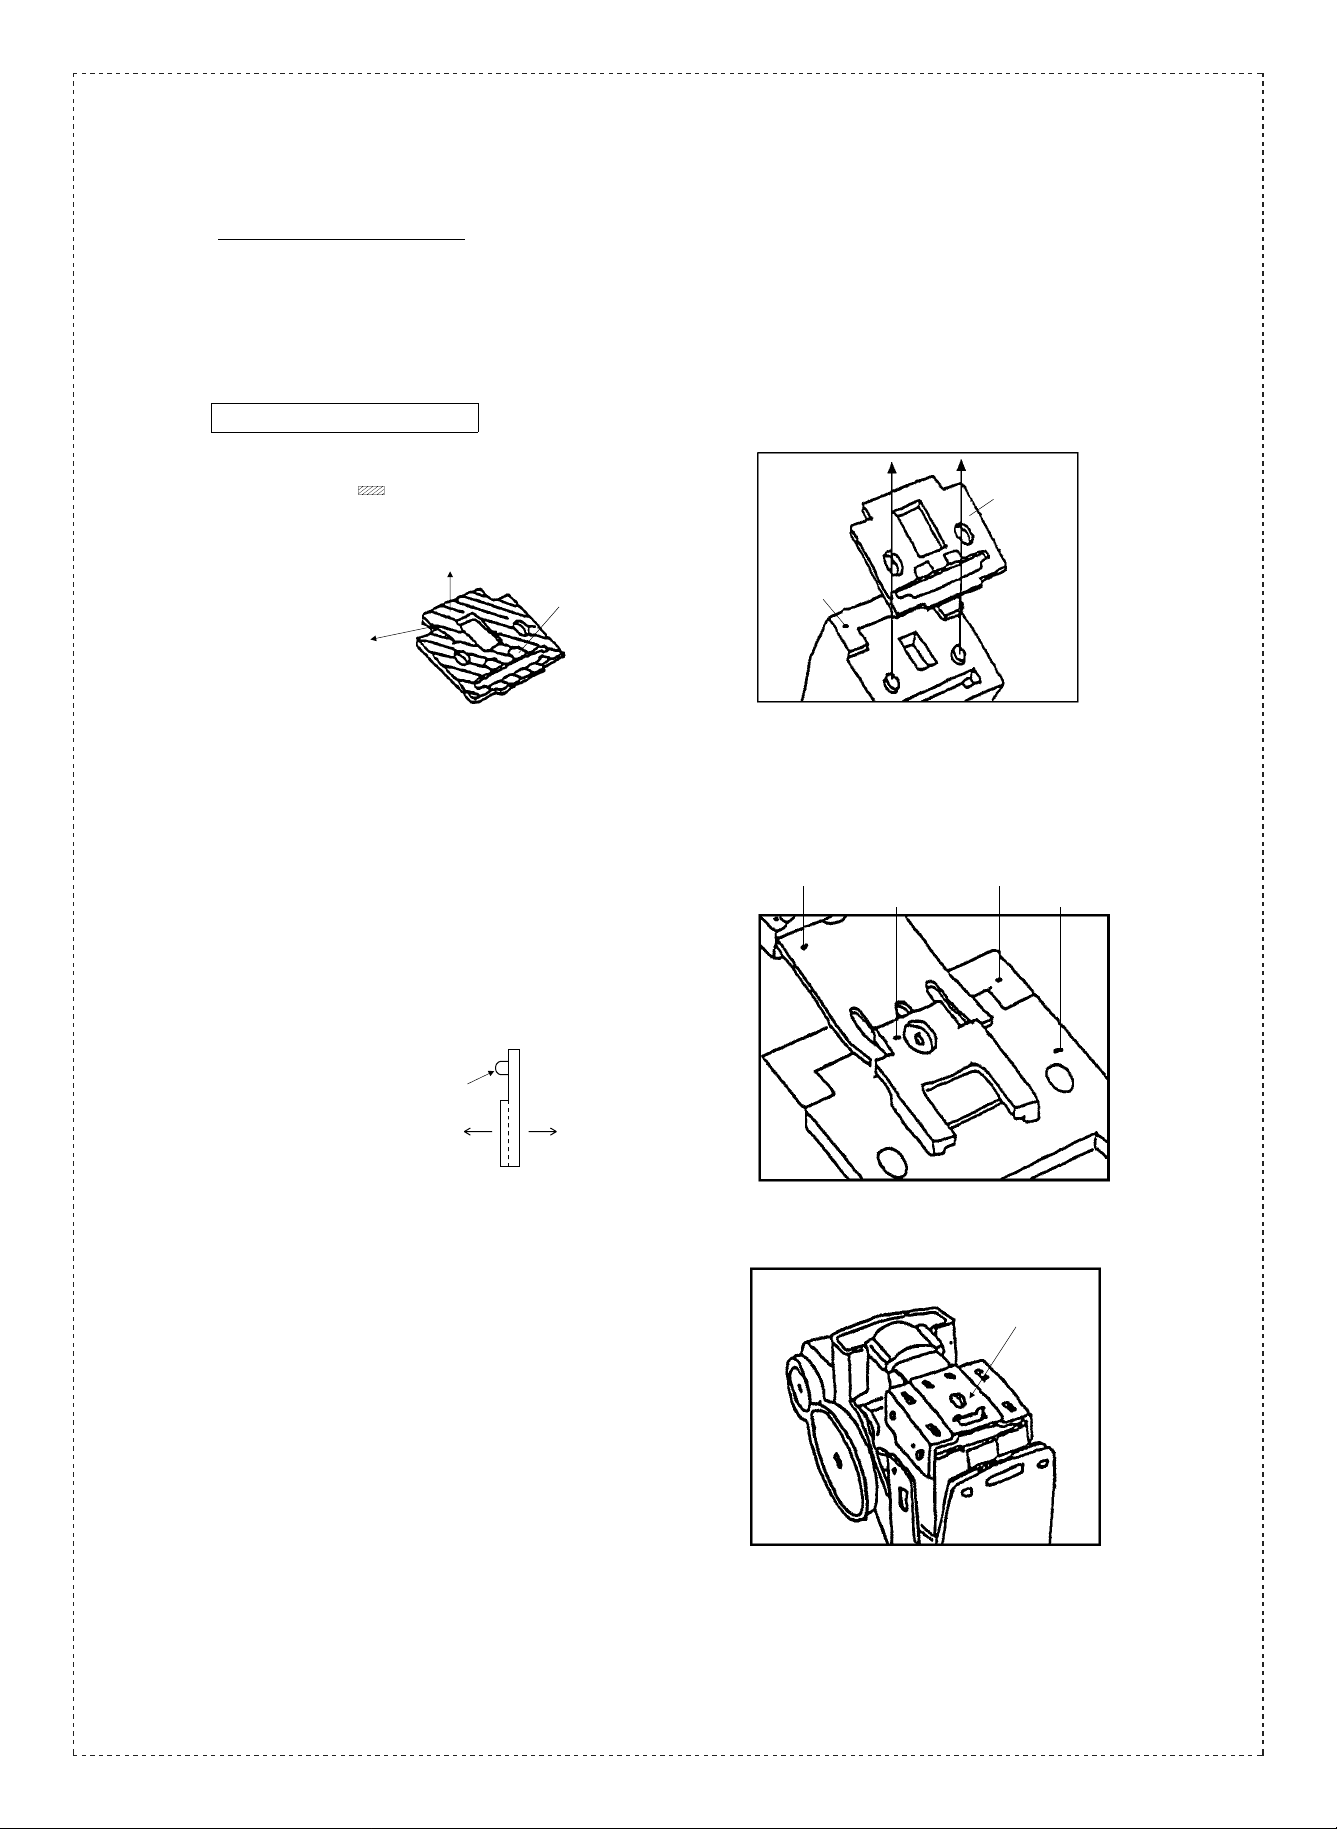
1.General: The staple opening of the face plate was too small, and staples sometimes could not
pass through during staple mode operations (staple sort, and manual staple
operations). The trouble shooting measures described below are requested.
2.Cause: Due to staple unit face plate parts irregularities, the staple opening was too small,
causing the resistance during staple feeding to be too strong for the staples to pass
through (A change in the face plate metal pattern was carried out in 1993 March, but
dimension variance in the metal pattern occurred).
Former
Driver plunger
Body
Front sheath
Face plate
Location where the
dimension variance
occurred in the staple
opening.
3.Description:
SHARP CORPORATION Reprography Division
In order to maintain the proper staple opening dimensions in the face plate, finishing
(polishing) of the metal pattern has been added.
Note: The feeder of model SF-S52 is different in shape from the feeder used in model
SF-S51. The driving power is about the same as the new type of feeder used in
model SF-S51, but for interchangeability with the SF-S51, the feeder of model
SF-S52 has been changed to the new type of feeder used in the SF-S51.
1/7
Green
C
Page 2
4.Action: (Factory action)
From 1993 December production.
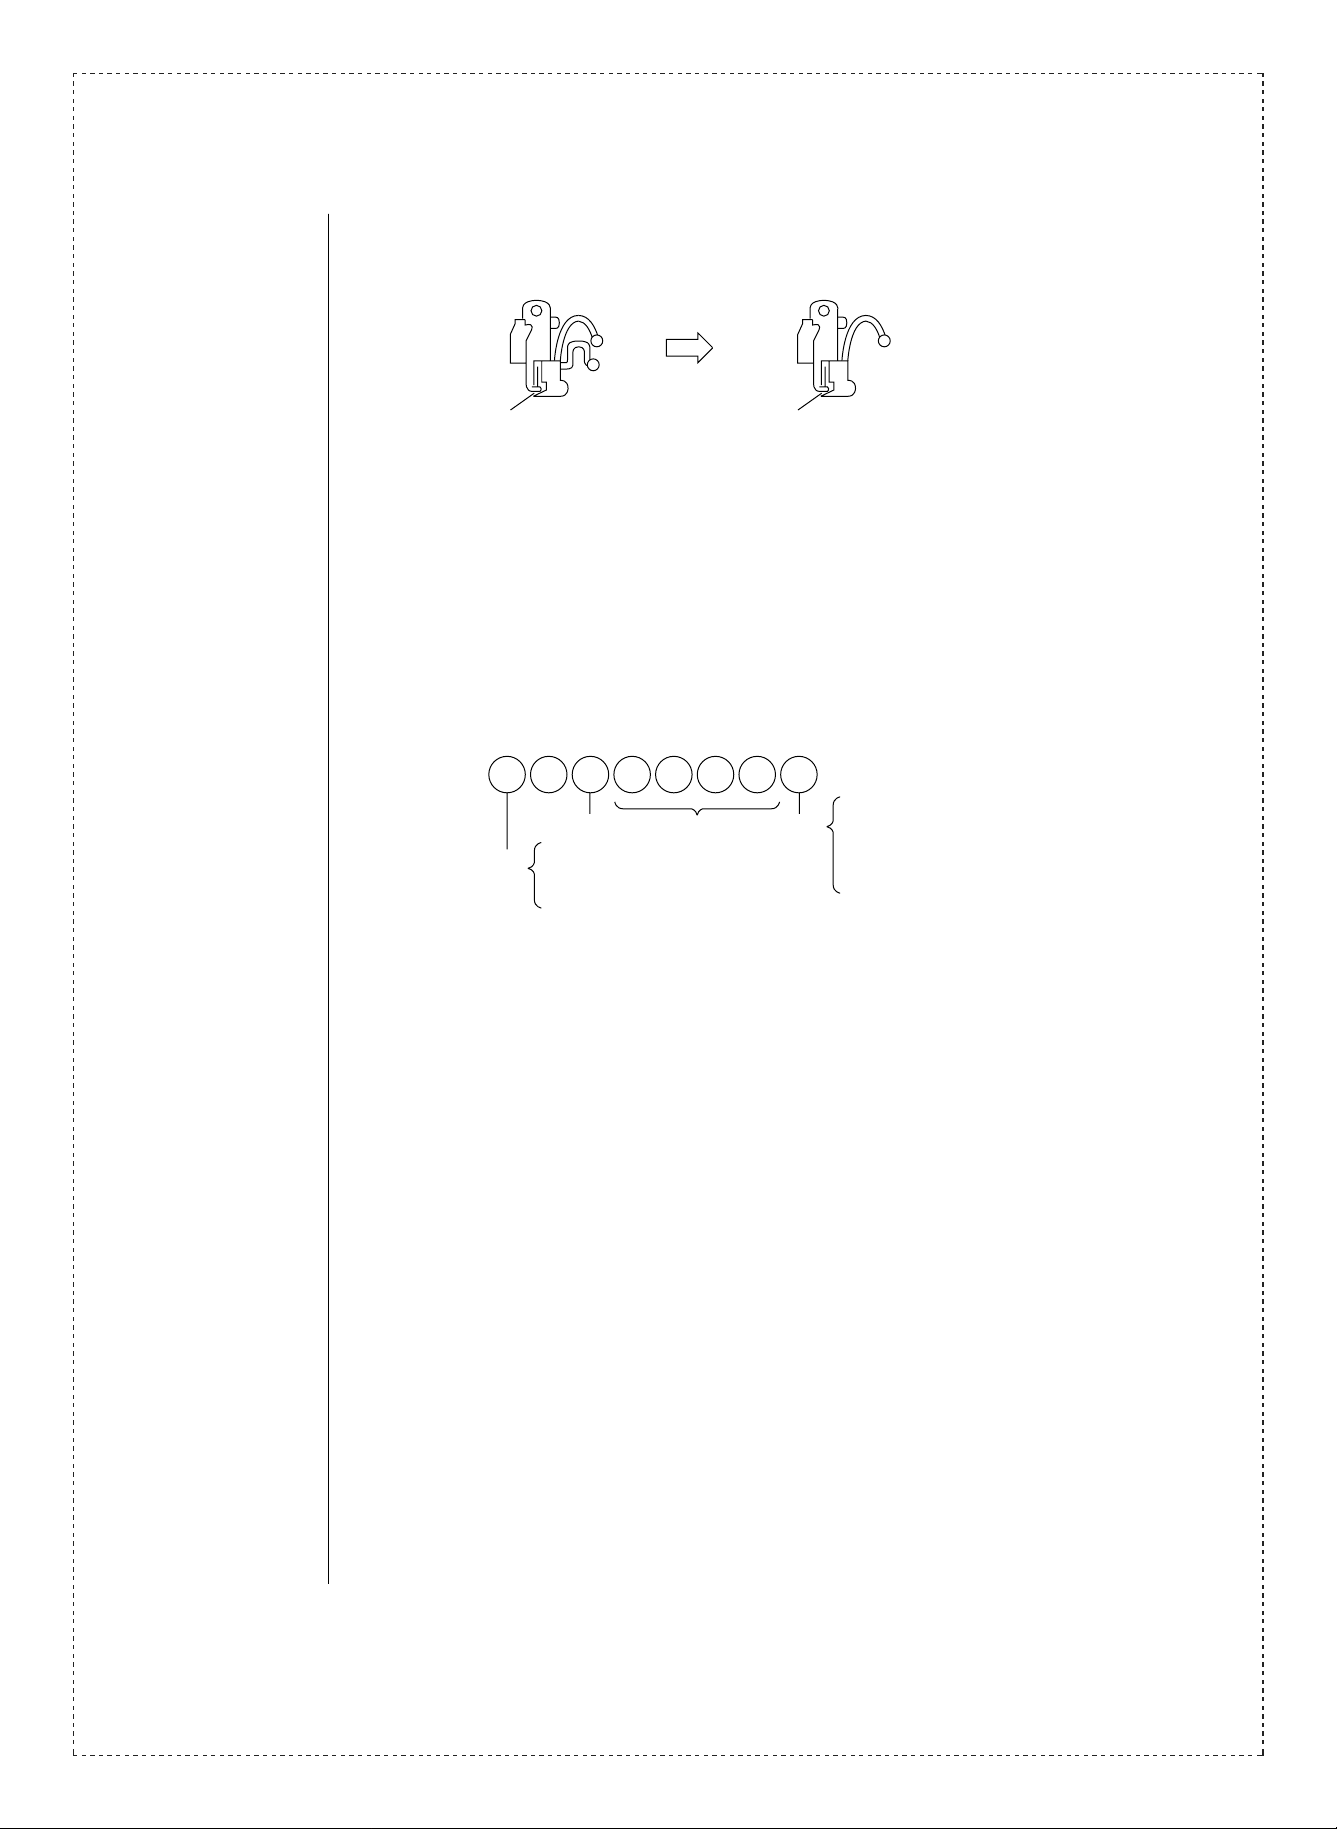
How to read the manufacturing number of model SF-S52.
???
Old New
DC
Maker code Date
=
2 1992
=
3 1993
=
4 1994
Serial number
(Interchangeable with model SF-S51)
=
1 to 9 January to September
=
0 October
=
X November
=
Y December
2/7
(Field action)
When the trouble described above occurs, The face plate and M shaped spring should
be replaced.
(Replacement parts).
• Face plate (polished).
• M shaped spring (once removed, the spring may become deformed and so a new
spring should also be replaced).
* As previously explained, the driving power of the feeder is the same for both old and
new models, and it is therefore not necessary to replace it.
Questions concerning replacement parts should be directed to the Product Quality
Control Section of the Copier Operations Division.
Page 3
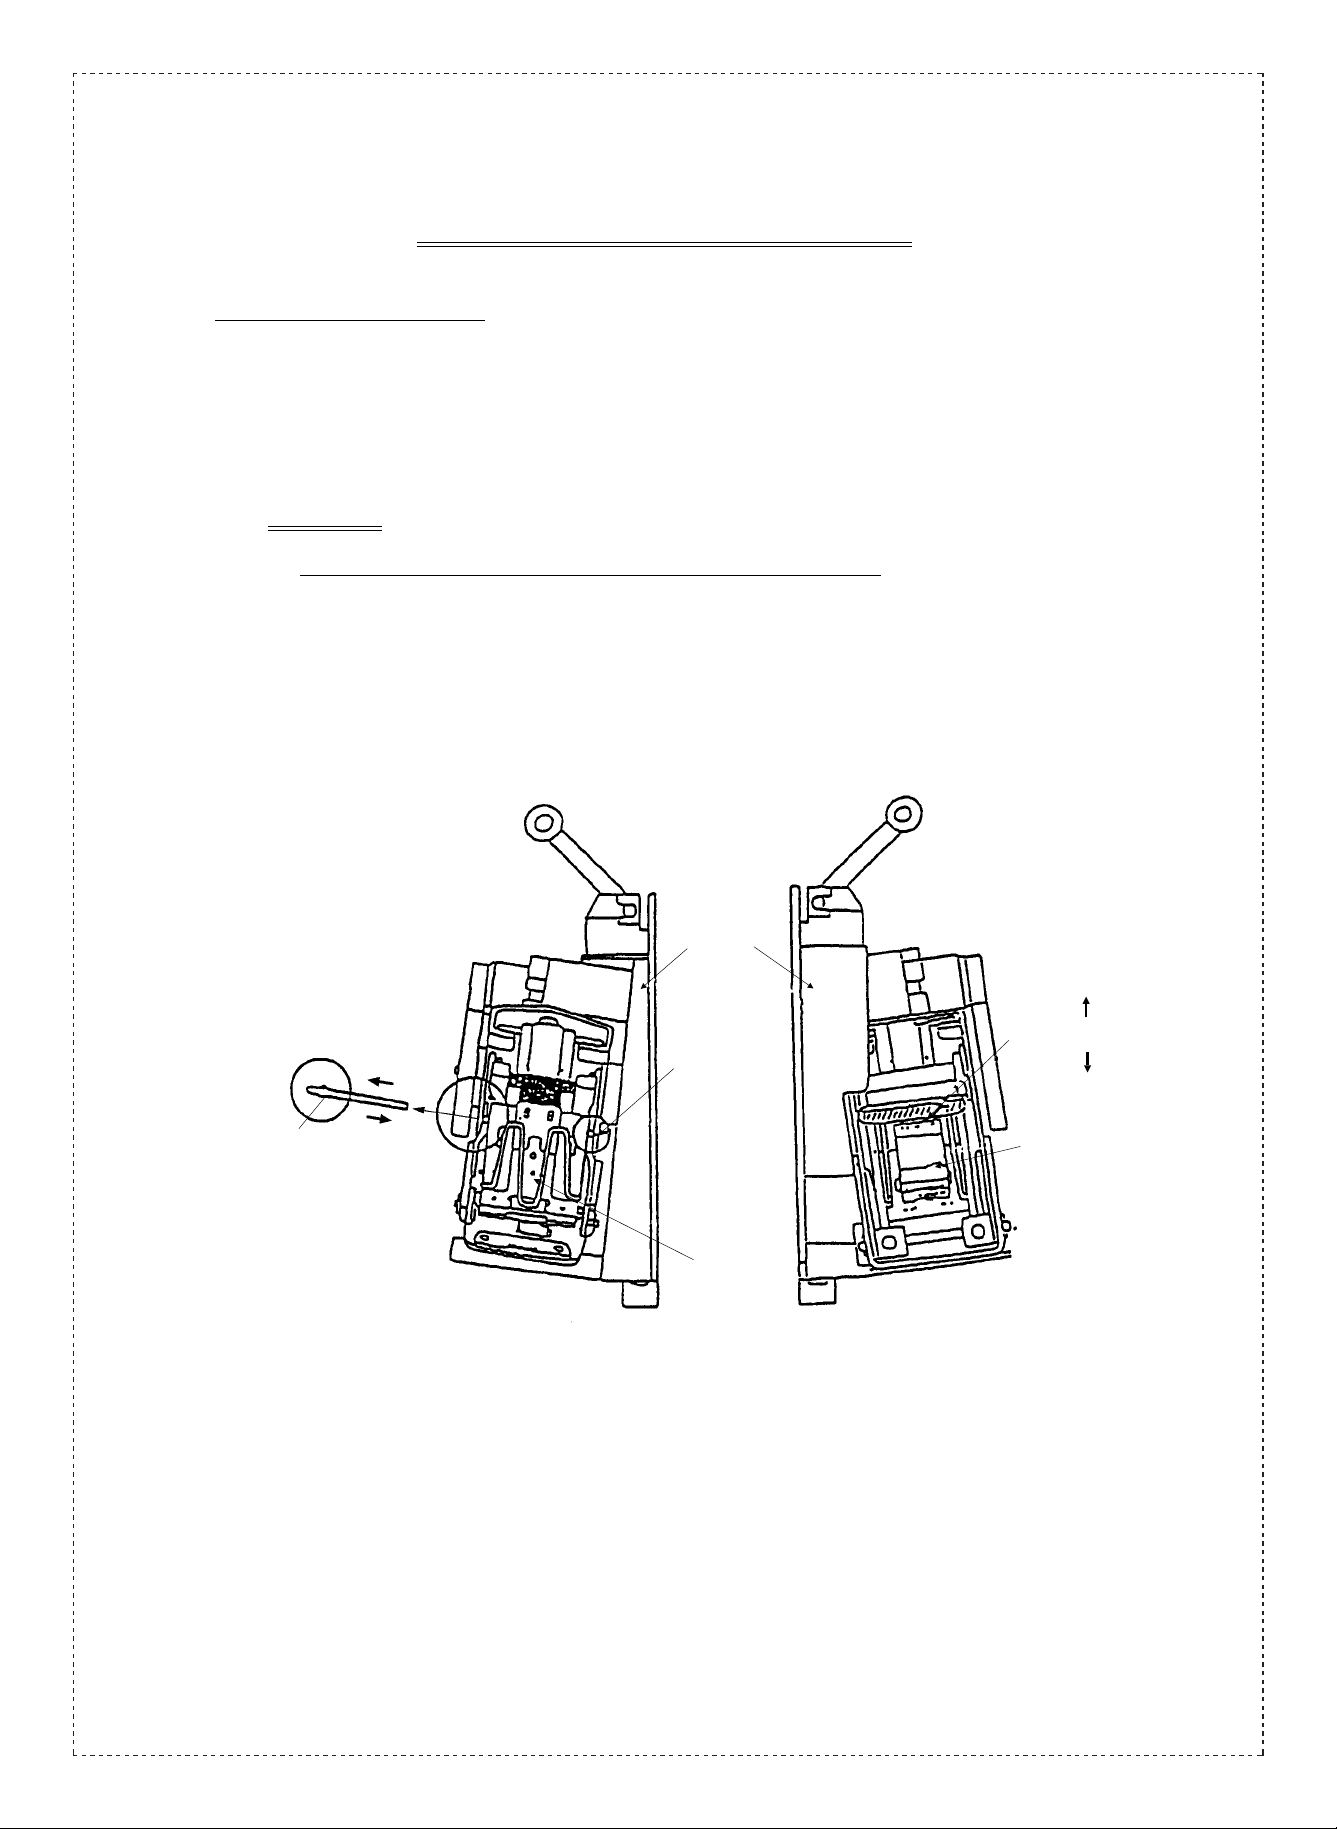
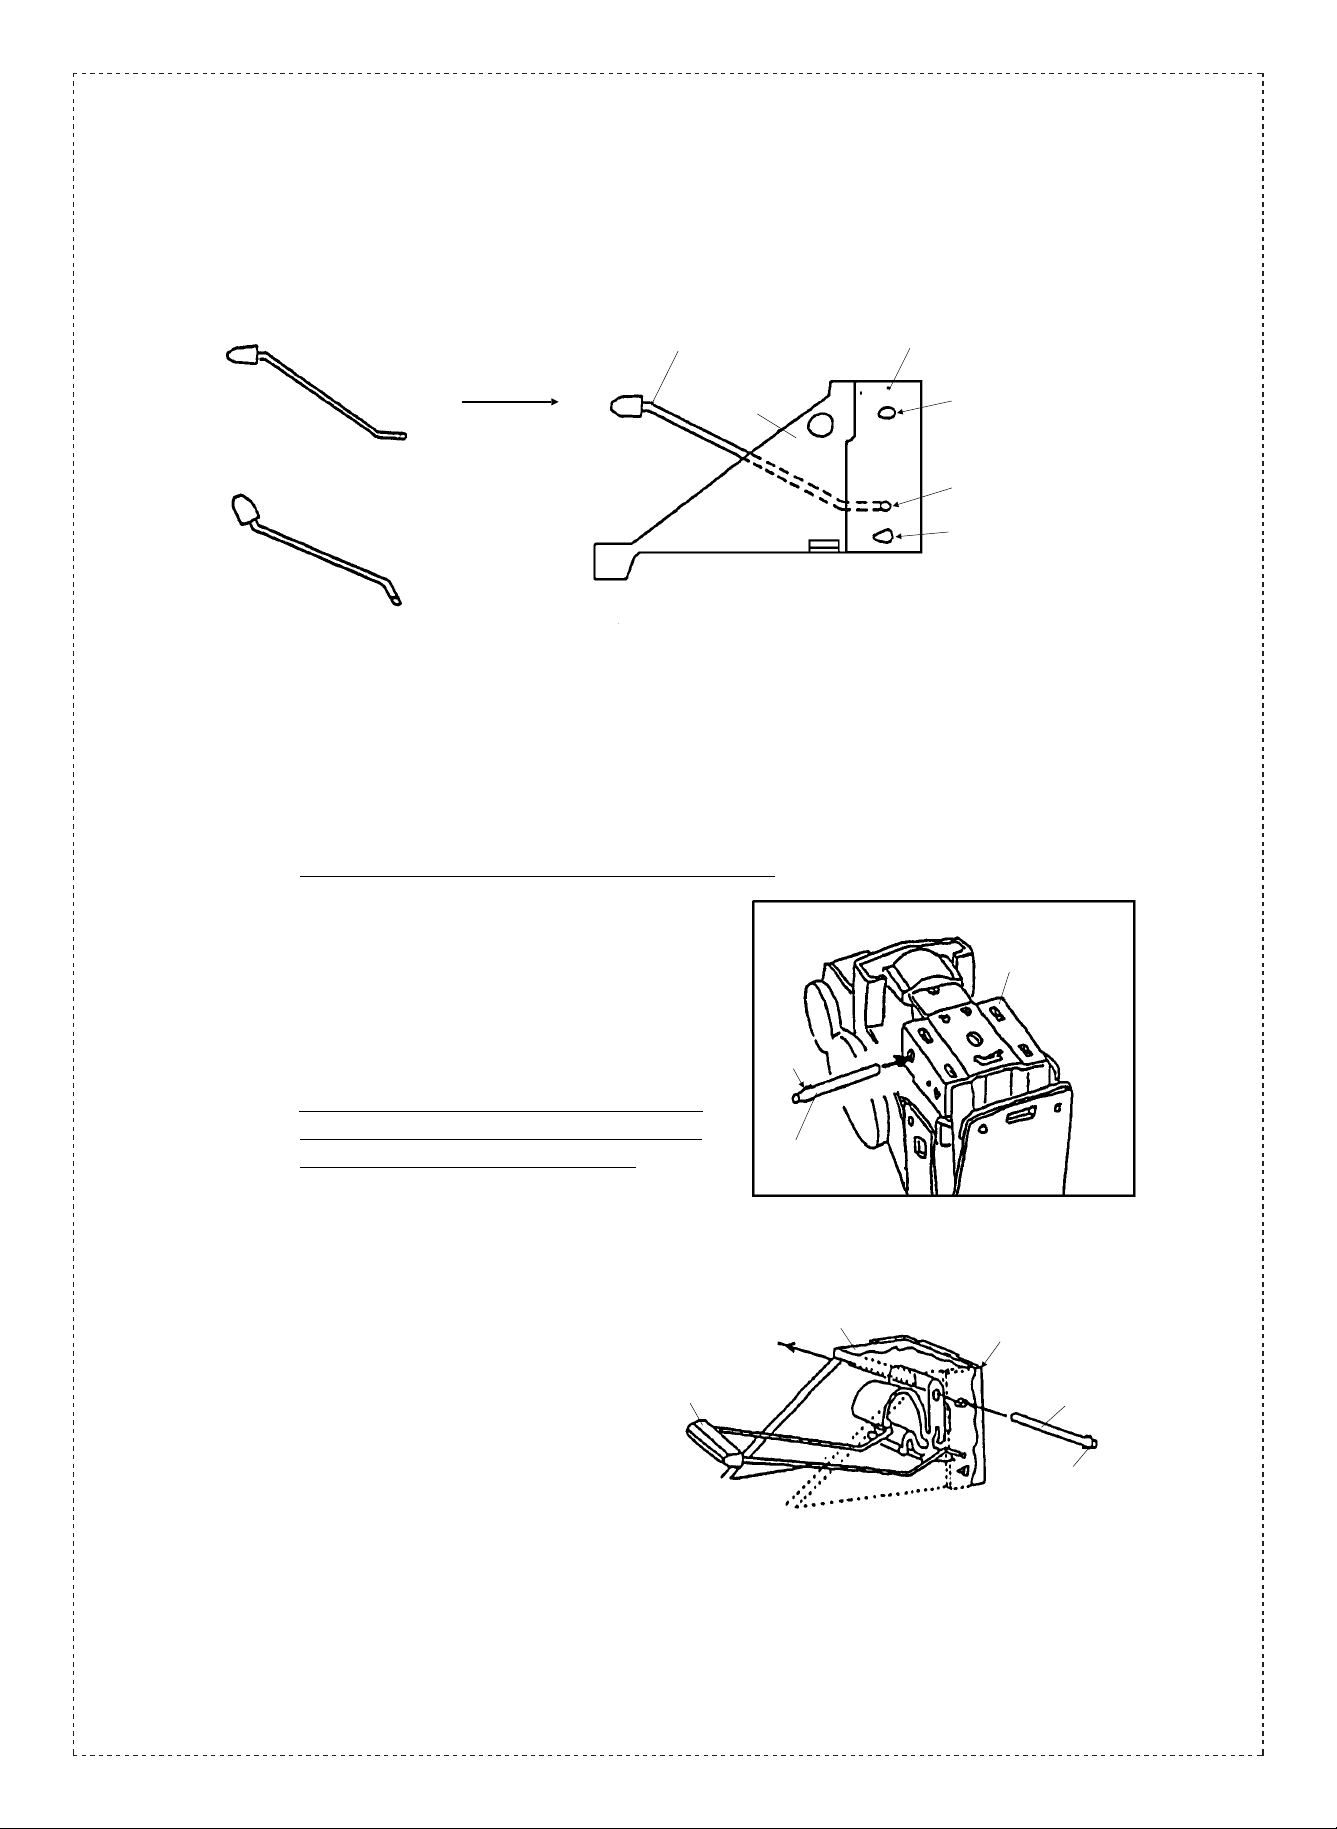
How to replace the face plate and the M-spring
When disassemble the stapler
1. Remove the stapler from the sorter.
2. Raise the cartridge spring (cf. Fig. 1), and remove the staple cartridge.
3. Pull out the body pin, and remove the feeder.
It has set direction.
Caution: The body pin has to be pulled out in one direction only as follows.
Lay down the stapler, and pat the body pin on the right side. Pull out the body pin in direction A as Fig. 1.
Using the plier (or the minus screwdriver), hold head of the body pin.)
And pat the plier (or the minus screwdriver).
body pin
rib
direction of pulling
B
cover
A
head of
body pin
(pat here)
anvil guard
remove the staple
cartridge upward
cartridge spring
install the staple
cartridge lower
feeder
Fig.1.
3/7
Page 4
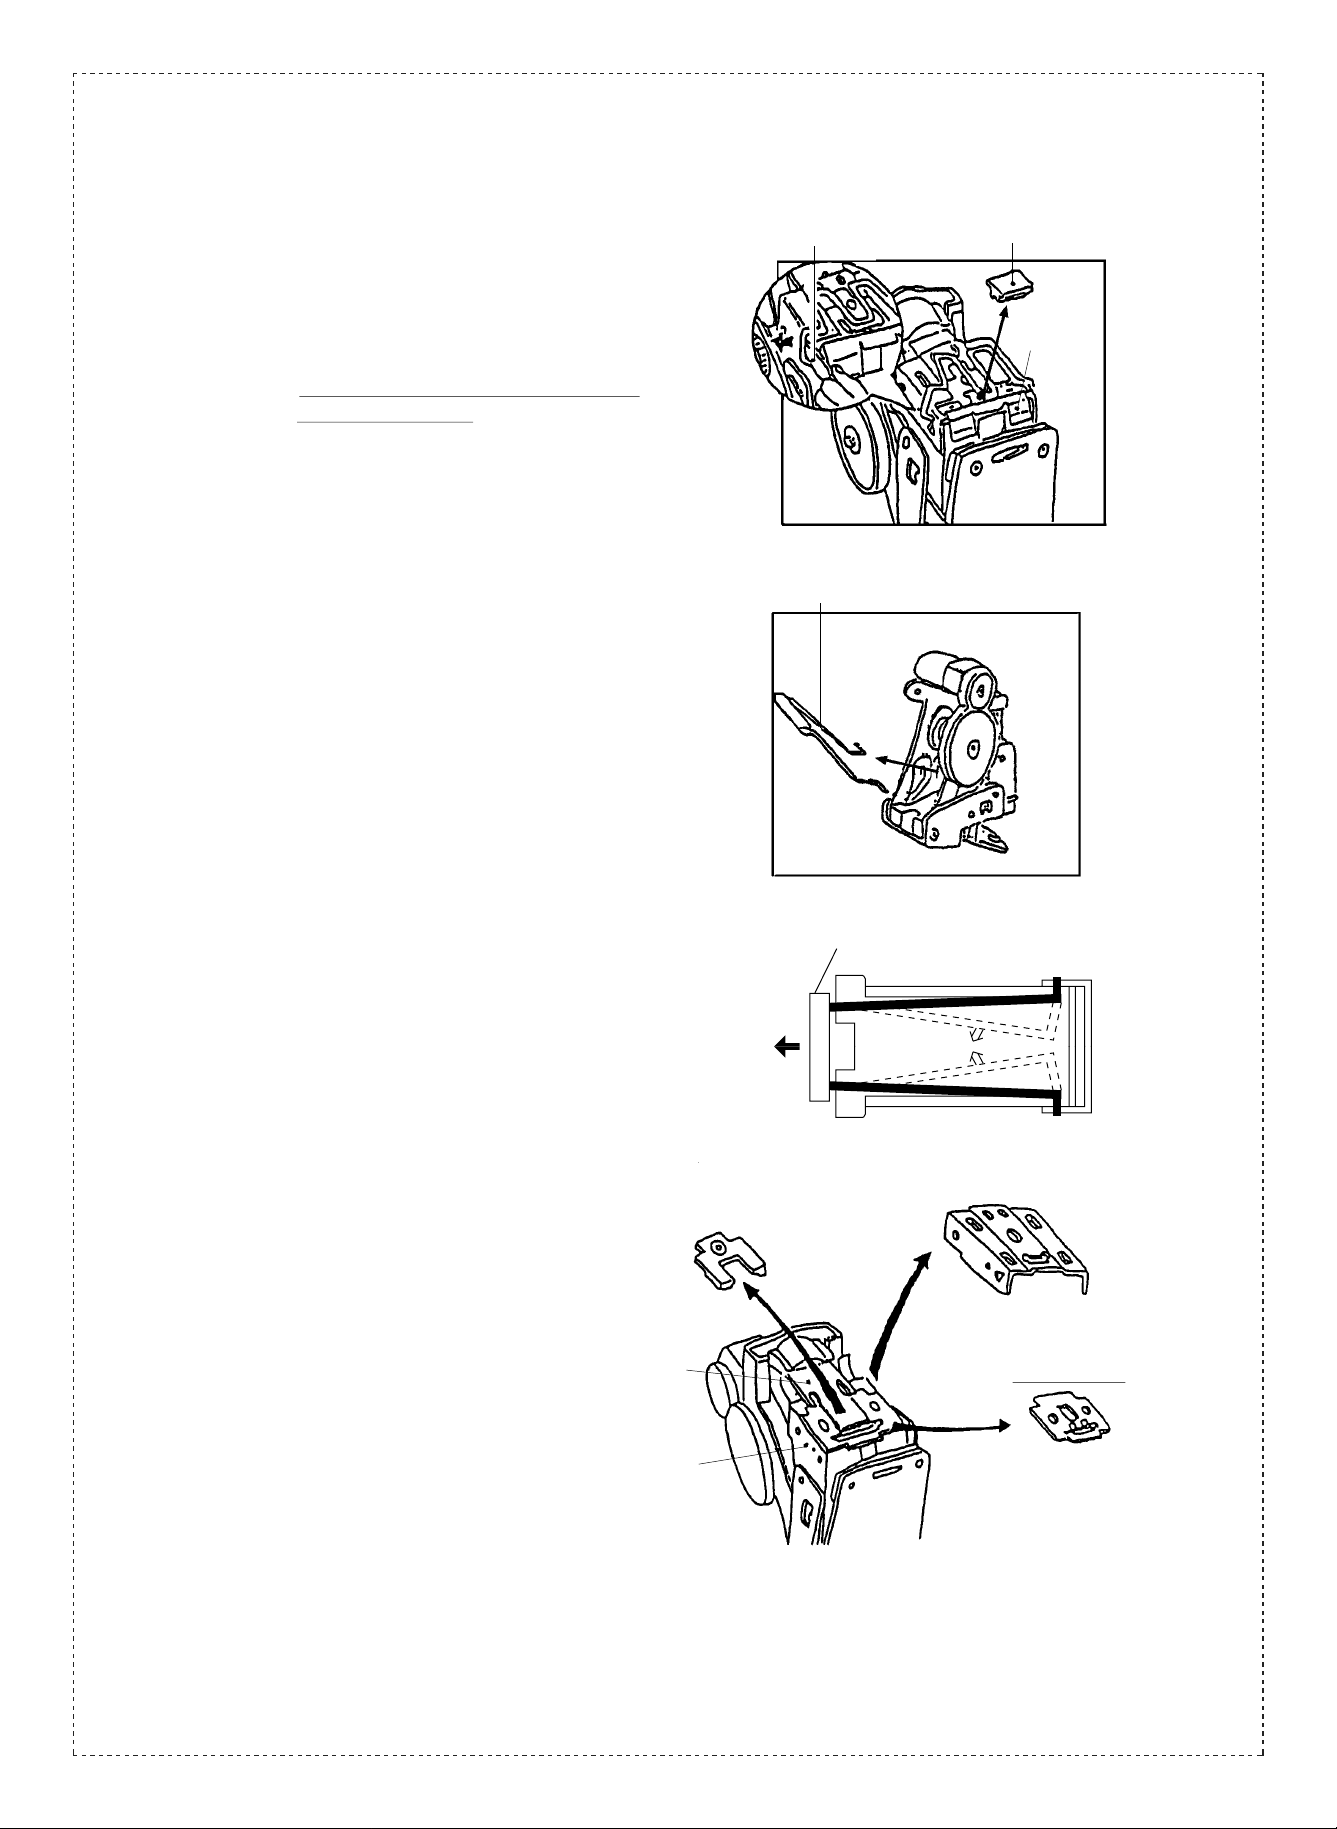
4. Remove the bending block and the anvil guard.
And using the minus screwdriver as Fig. 2,
remove the M-spring pulling up the right and
left side of it.
Caution: Don’t use the removed M-spring again,
due to deformation.
5. Remove the cartridge spring from back of the
stapler. Removing the cartridge spring, push the
cartridge spring from the outside to inside.
minus screwdriver
cartridge spring
bending block
anvil guard
Fig.2.
6. Remove the front sheath and the former from the
stapler as Fig.5. And remove the face plate under
the driver plunger. Removed face plate should be
replaced into new one.
driver pluger
body
former
cartridge spring
2
2
Fig.3.
1
Fig.4.
front sheath
1
new face plate
4/7
Fig.5.
Page 5
When assemble the stapler
1. Install the new face plate into bosses of the body as Fig.6 and 7.
At that time, take care not to put the face plate front side back.
When replace the face plate
Coat the designated grease on the surface of the
new face plate ( ) thinly.
(About one-half grain of cone)
surface
bosses of
the body
new face
plate
body
Fig.6.
Grease: LUBRIPLATE #105
Maker : FISKE BROTHERS REFINING CO.,
(New Jersey, Oh10)
2. Install the former on the driver plunger, to put the
projection of the former in the long hole of the driver
plunger as Fig.9.
side of the former
projection
under side
(back)
Fig.8.
upper side
(front)
3. Install the front sheath as Fig.10.
driver plunger
Fig.7.
former
body
face plate
Fig.9.
Fig.10.
front sheath
5/7
Page 6
4. Holding the front sheath by hand, and install the cartridge spring as Fig.11 and 12.
In case of installing the cartridge spring to the hole, push the cartridge spring to the inside. (cf.Fig.12)
front sheath
right
wrong
Fig.11.
cartridge spring
body
install position
Fig.12.
5. After installed the cartridge spring, install the feeder inside of the body by the body pin.
Caution: Install the feeder after the cartridge spring without fail.
insert the body pin
insert the cartridge spring
insert the M-spring
Install the feeder inside of the body as Fig.14. And
insert the body pin in a direction indicated by an
arrow as Fig.13 and 14.
Caution: Push the body pin through into the hole of the
feeder without fail. In case of it, don’t damage
the entrance of the hole of the feeder.
After the body pin inserted, pat the body pin to stick
out both ends of it from the body equally.
cartridge spring
rib
body pin
body
front sheath
Fig.13.
front sheath
body pin
rib
6/7
Fig.14.
Page 7

6. Install the bending block, the anvil guard and the M-spring.
➀ Install the bending block into the hole of the front
sheath.
It has no set direction.
➁ And then, install the anvil guard as Fig.15.
When replace the M-spring
➂ Hang both sides of the new M-spring on the holes
of the front sheath as Fig.16. (Don’t use the
removed M-spring.)
Using the plastic hammer, pat both sides of the
M-spring, and push the M-spring into the hole as
Fig.18.
Caution: Push the M-spring closely as Fig.18.
➁ anvil guard
➀ bending block
front sheath
Fig.15.
➂ M-spring
hole of the
front sheath
Replace of new parts is completed.
anvil guard
body
hole
Fig.17.
M-spring
anvil guard
body
Fig.18.
Fig.16.
insert the M-spring
push the M-spring closelypat here
push
M-spring
7/7
 Loading...