


HancomMobileOffice
Operation Manual

2 Copyright Notice
Copyright Notice
EULA(End User License Agreement)
HancomMobileOffice is protected by the software copyright law and
international copyright agreements.
HancomMobileWord 1.0, HancomMobileSheet 1.0, HancomMobilePresenter
1.0 are trademarks of HancomLinux, Inc. that comply with the general
copyright laws. Hancom is a trademark of Haansoft Inc., which is used by
HancomLinux, Inc. for Linux products.
Consequently, no alteration or modification of the software is allowed in any
way and no modification, reproduction or copying of any publications included
is permitted without prior consent of HancomLinux.
'HancomMobileOffice‘, 'HancomMobileWord', 'HancomMobileSheet' and
'HancomMobilePresenter' are trademarks of HancomLinux, Inc., 'Linux' is a
registered trademark owned by Linus Torvalds.
Microsoft Word, Microsoft Excel and Microsoft PowerPoint are either
registered trademarks or trademarks of Microsoft Corporation in the United
States and/or other countries. *.doc, *.xls and *.ppt files are file extensions of
Microsoft Office products.
CompactFlash is a trademark of SanDisk Corporation.
SD logo is a trademark.
HancomMobileOffice is owned by individuals or corporations who purchase
Mobile products.
Copyright
ⓒ
2002 HancomLinux, Inc. All rights reserved.

Caution 3
Copyright
According to copyright law, the reproduction, alteration and use of material
protected by copyright(music, pictures, etc.) are only permitted for personal or
private use.
If the user is not in possession of appropriate copyrights or has not received
the explicit permission from the copyright owner to reproduce, alter or use a
copy which has been made or modified in this way, this is considered to be
a violation of copyright law and gives the copyright owner the right to claim
damages. For this reason, avoid illegal use of material protected by copyright.
CAUTION
Before using HancomMobileOffice, first refer to the table referring to the
available functions when importing/exporting Microsoft Office files from the
Appendix. When importing/exporting Microsoft Office files, you may have
problems with the source files. To avoid such problems, you must first read
the description of importing/exporting functions below. HancomLinux, Inc. will
not be responsible for any possible problems that may rise in
importing/exporting, due to unsupported functions.
PRODUCT SUPPORT INFORMATION
HancomLinux will make every effort to provide you with the best customer
support possible.
For more information, please visit the following web site or contact us at the
e-mail address below.
* Web site : http://mobile.hancom.com
* Email : mobile@hancom.com

4 Contents
Contents
Copyright Notice ··········································································· 2
Caution ····························································································· 3
CHAPTER 1:
Introduction of HancomMobileOffice ········
About HancomMobileOffice ························································· 7
CHAPTER 2:
HancomMobileWord ······································
Introduction ······················································································ 8
Starting HancomMobileWord / 8
Screen Layout / 9
File Menu ······················································································ 10
New / 10
Open / 11
Save / 12
Save as / 13
Template / 14
Exit / 15
Edit Menu ······················································································ 15
Undo/Redo / 15
Cut / 15
Copy / 15
Paste / 15
Clear / 16
Select All / 16
Find/Replace / 16
Insert Menu ··················································································· 19
Image / 19
Date/Time / 19
Format Menu ················································································ 20
Format / 20
Paragraph / 21
Alignment / 24
Indent/Outdent / 24
Tools Menu ··················································································· 24
Show Toolbar / 24
Word Count / 25
Help Menu ····················································································· 25
help / 25
7
8

Contents 5
CHAPTER 3:
HancomMobileSheet ···································
Introducing HancomMobileSheet ·············································· 26
Introducing HancomMobileSheet / 26
Full Screen / 26
Tools and Dialog Boxes / 28
Spreadsheet Basics ···································································· 28
SpreadSheet Basics / 28
Data Input / 30
Entering Data by Type / 32
Creating Formulas / 36
File Menu ······················································································ 40
New / 40
Open / 40
Close / 40
Save & Save As / 40
Edit Menu ······················································································ 42
Undo / 42
Redo / 42
Cut / 42
Copy / 42
Paste / 42
Paste Special / 42
Paste Link / 44
Fill / 44
Clear / 44
Delete / 45
Delete Sheet / 45
Find/Replace / 45
Go To / 45
View Menu ···················································································· 46
Toolbars / 46
Formula Bar / 46
Protection Mark / 47
Grid line / 47
Full screen / 47
Zoom / 47
Split / 47
Freeze panes / 47
Workbook / 48
Insert Menu ··················································································· 48
Cells, Rows, Column, Work Sheet / 48
Function / 48
Name / 49
Hyperlink / 50
26

6 Contents
Format Menu ················································································ 50
Cells / 50
Rows / 53
Column / 54
Sheet / 54
Tools Menu ··················································································· 55
Protection / 55
Recalculate/Manual Calculation / 55
Sort / 56
Automatic Filter / 56
Function List ················································································· 59
CHAPTER 4:
HancomMobilePresenter ····························· 67
Introduction ···················································································· 67
Starting HancomMobilePresenter ············································· 67
Opening Presentation Documents / 68
Running Slide Shows / 68
Popup Menu ················································································· 69
Moving to a Desired Slide / 70
About Pen Marking / 71
Ending a Slide Show ································································· 72
Appendix ································································· 73
Microsoft Office 2000 ································································· 73
Functions Available when Importing Microsoft Word 2000 Files / 73
Functions Available when Exporting Microsoft Word 2000 Files / 75
Functions Available when Importing Microsoft Excel 2000 Files / 76
Functions Available when Exporting Microsoft Excel 2000 Files / 79
Functions Available when Importing Microsoft PowerPoint 2000 Files / 81
Microsoft Office 97 ······································································ 83
Functions Available when Importing Microsoft Word 97 Files / 83
Functions Available when Exporting Microsoft Word 97 Files / 85
Functions Available when Importing Microsoft Excel 97 Files / 86
Functions Available when Exporting Microsoft Excel 97 Files / 89
Functions Available when Importing Microsoft PowerPoint 97 Files / 91-

CHAPTER 1:
Introduction of HancomMobileOffice
7
CHAPTER 1: Introduction of HancomMobileOffice
About HancomMobileOffice
The following applications are included :
․
HancomMobileWord, A powerful word processor capable of creating
everything from the simplest document to the most complex report. You can
import and export Microsoft Word files. For details, see the Appendix.
․
HancomMobileSheet, Tackle even the most complex spreadsheet problems
with powerful functions and an intuitive interface. You can import and export
Microsoft Excel files. For details, see the Appendix.
․
HancomMobilePresenter, A powerful presentation viewer. You can import
Microsoft PowerPoint files. For details, see the Appendix.
HancomLinux will make every effort to provide you with the best customer
support possible.
For more information, please visit the following website or contact us at the
e-mail address below.
* Web Site : http://mobile.hancom.com
* Email : mobile@hancom.com
8
HancomMobileWord
CHAPTER 2:
CHAPTER 2: HancomMobileWord
Introduction
HancomMobileWord is a word processor program for PDA's. You can type text,
edit documents and insert images. Microsoft Word and HancomMobileWord
documents can be imported to your Zaurus SL-5500. For details, see the
Appendix. You can check and modify documents while away from your desk.
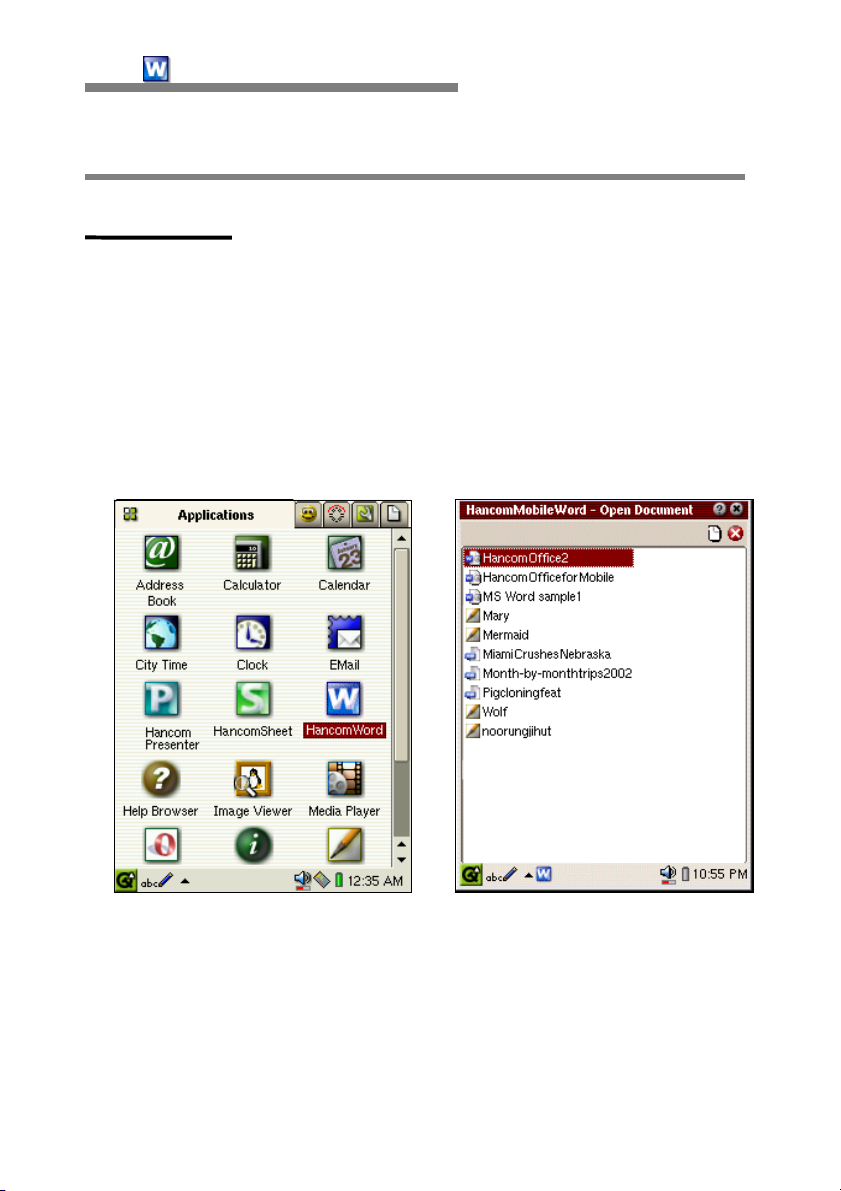
Starting HancomMobileWord
To start HancomMobileWord on your SL-5500, tap the [HancomWord] icon
with the stylus, on the "Applications" tab.
When you start HancomMobileWord for the first time, the document list
window will appear. If there are not any open files, a new document will
appear.
Saved files will be displayed in the SL-5500s "Documents" tab. You can tap on
HancomMobileWord or Microsoft Word files to directly run HancomMobileWord.
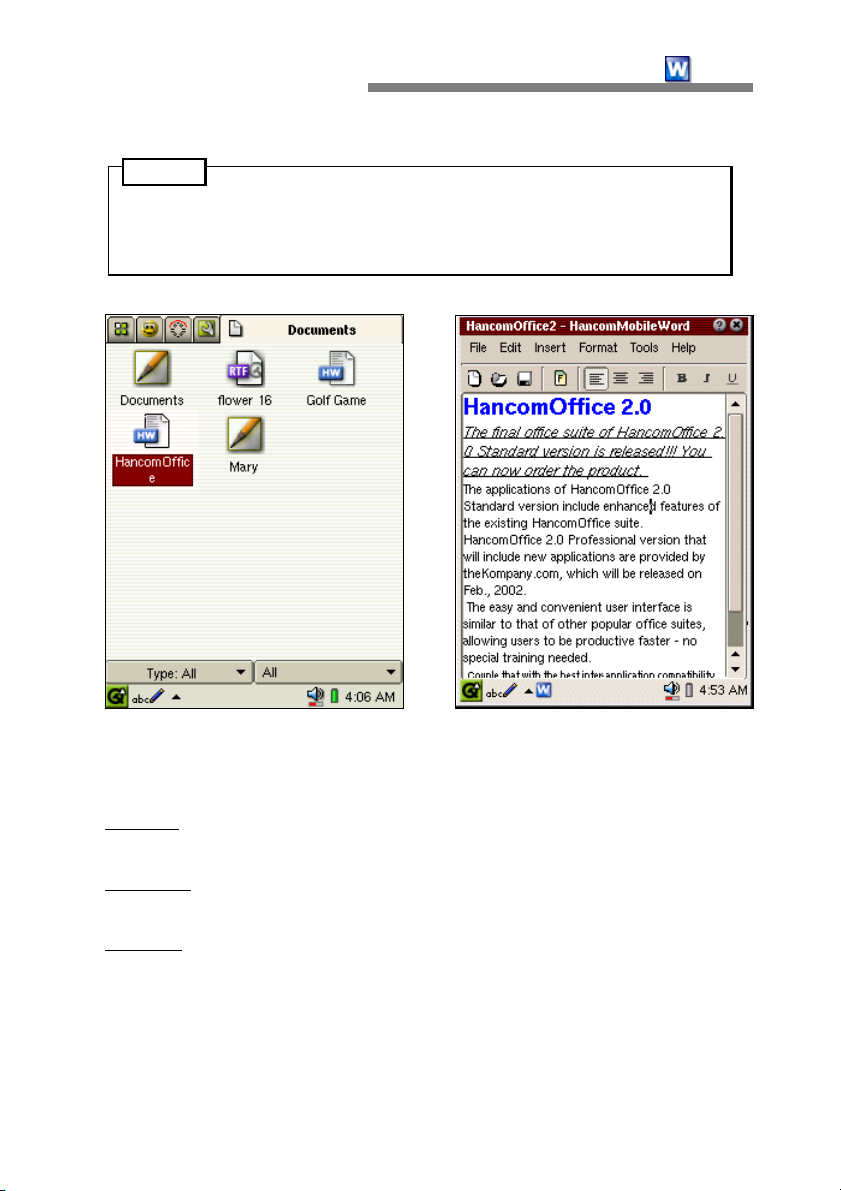
CHAPTER 2:
Caution
When you tap on text file documents, the document editor installed in
the SL-5500 runs as the default. Therefore, you cannot run HancomMobileWord by tapping saved text files.
HancomMobileWord
9
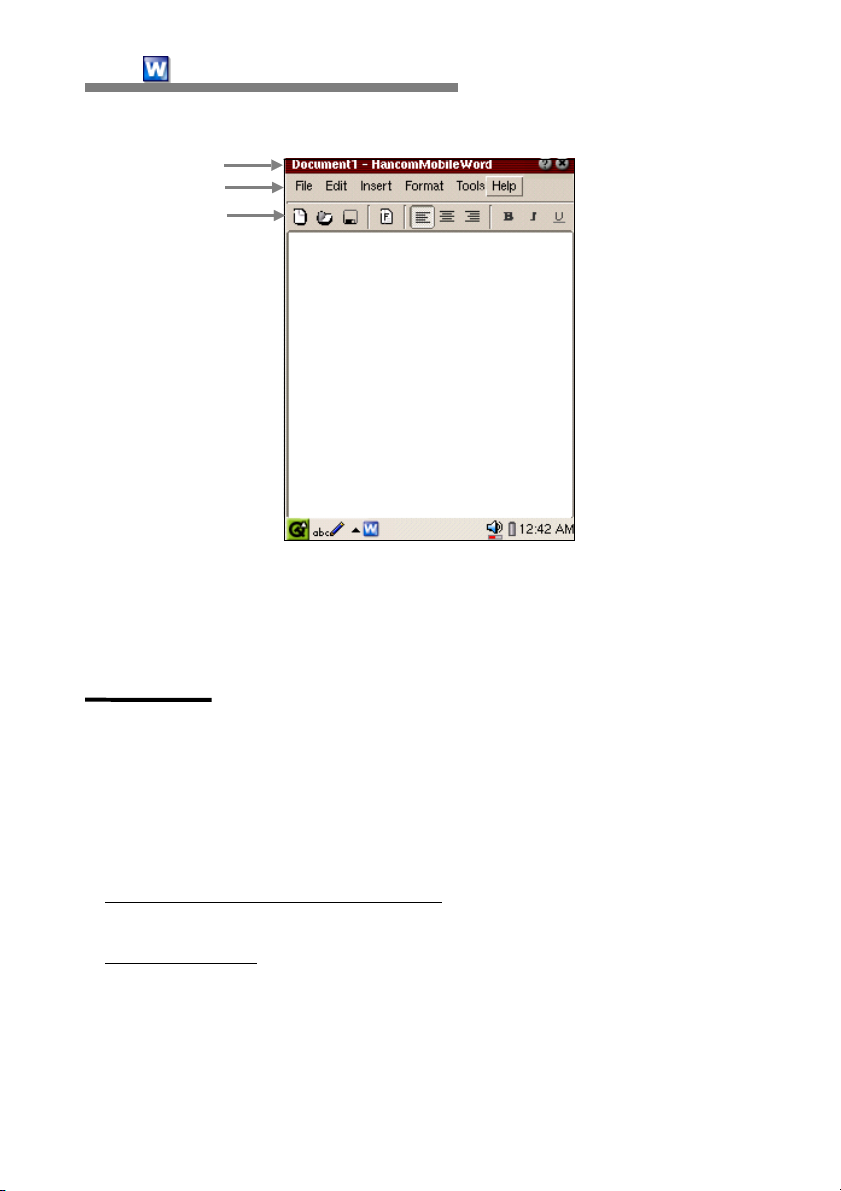
Screen Layout
When you start HancomMobileWord, the following menu items will appear.
- Titlebar
title.
-
-
: Shows a list of documents. 'Document 1' is displayed as a default
Menubar : Shows functions available in HancomMobileWord : File, Edit,
Insert, Format, Tools and Help menus.
Toolbar : Shows icons provided for frequently used menus, such as open,
save, change font, and paragraph alignment, etc.
10
HancomMobileWord
CHAPTER 2:
Titlebar
Menubar
Toolbar
ⓛ ② ③ ④ ⑤ ⑥ ⑦⑧ ⑨ ⑩
①
New
⑤
Align Left
Italic
⑨
②
Open
⑥
Align Center
Underline
⑩
③
Save
⑦
Align Right
④
⑧
Format
Bold
File Menu
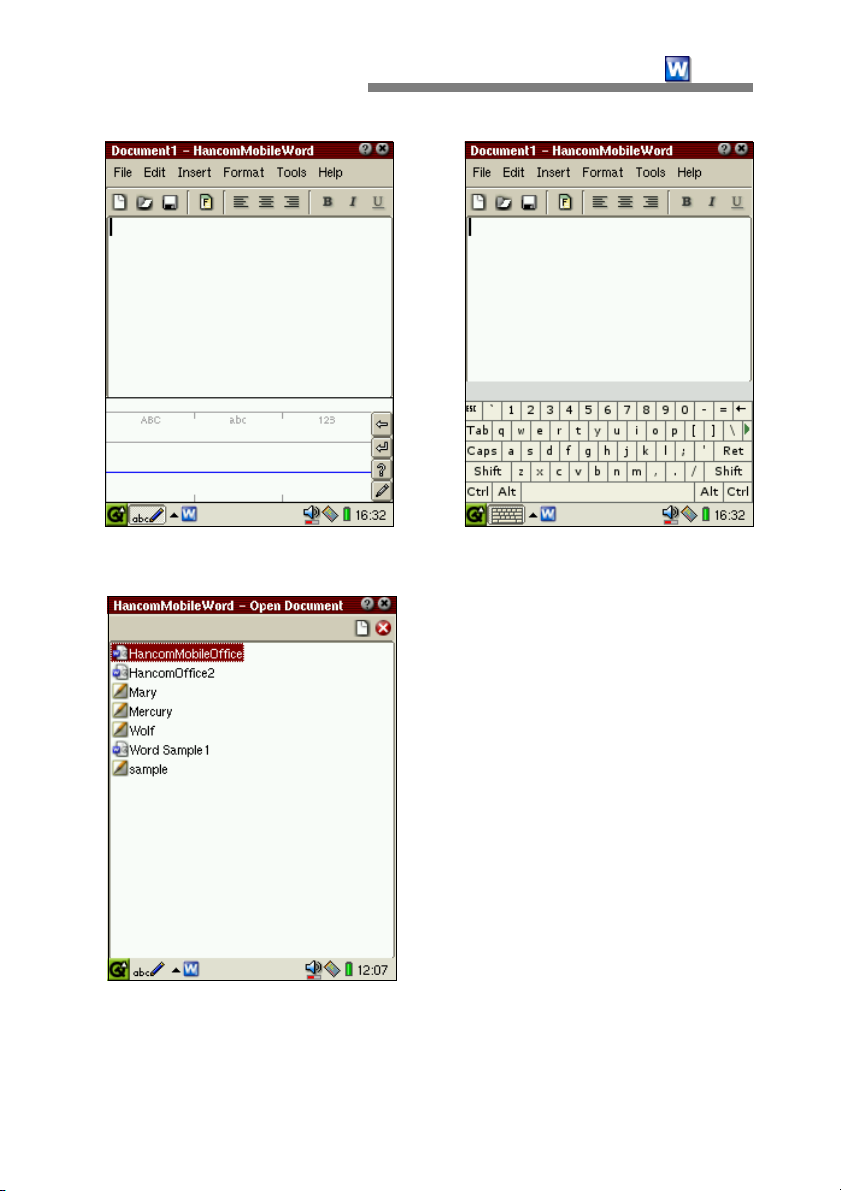
New
To create a document in HancomMobileWord, tap "File-New" or the "New"
icon on the toolbar.
•
Text Typing
You can type text in HancomMobileWord in one of the following ways.
- Typing using the Hardware keyboard
QWERTY keyboard for quick data input.
- Using the Stylus
: Tap the triangle(to the right of the input method icon) at
the bottom left of the screen to pop up a list of input methods. You can
handwrite with the stylus or use the software keyboard on the screen.
: You can type text on the built-in
Open
CHAPTER 2:
To view or edit the document written
and saved in HancomMobileWord, Tap
"File-Open" or the "Open" icon to pop
up the File List window. When you tap
a document, it will be opened in the
HancomMobileWord window.
HancomMobileWord
11
•
File Formats Importable into
HancomMobileWord
HancomMobileWord can read Hanco-
mMobileWord files(*.hmw), Microsoft
Word 97/2000 files(*.doc), rich text
format(*.rtf), text document files(*.txt)
extensions.
12
HancomMobileWord
CHAPTER 2:
Save
The word processor program can overwrite a document several times. To
overwrite a document, the document should be saved as a file. A saved
document will be saved again under the existing file name and format when
you select [File-Save] or tap the [Save] icon. If you attempt to open another
document or create a new one without saving the changes to the document,
a warning dialog box will prompt you to save the changes in the current
document.
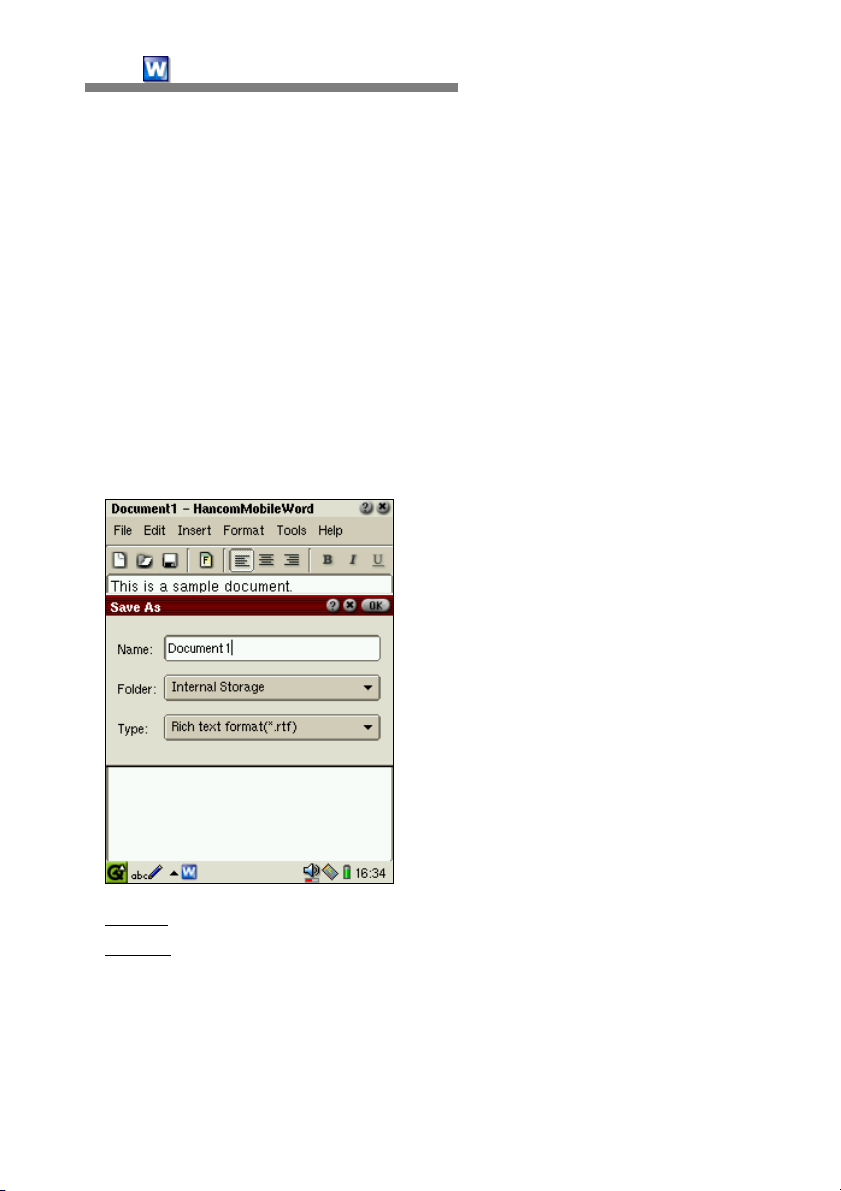
When you tap [File-Save] or the [Save] icon on the toolbar to save a newly
created document, the 'Save As' dialog box will appear, as shown below.
Items in the dialog box are :
- Name : Input the filename for the current document.
- Folder
will appear by tapping the combo box. As a default, files will be stored in
the internal storage(main memory). If an SD Card or CompactFlash Card is
being used with the SL-5500, they will appear in the list and you can save
files to these cards.
: Designate the location to save the document. The list of locations
CHAPTER 2:
- Type : Select the type of file to save the document as. The list of file types
available will appear when you tap the combo box button. The default file
type is .rtf, (rich text format). Currently, the file types available are
HancomMobileWord format(*.hmw), rich text format(*.rtf) and text file
format(*.txt).
Input a filename, select the folder to save the file to, and enter the file type.
Tap the OK button to save the document. The new document will be saved
under the designated filename.
HancomMobileWord
13
Save as
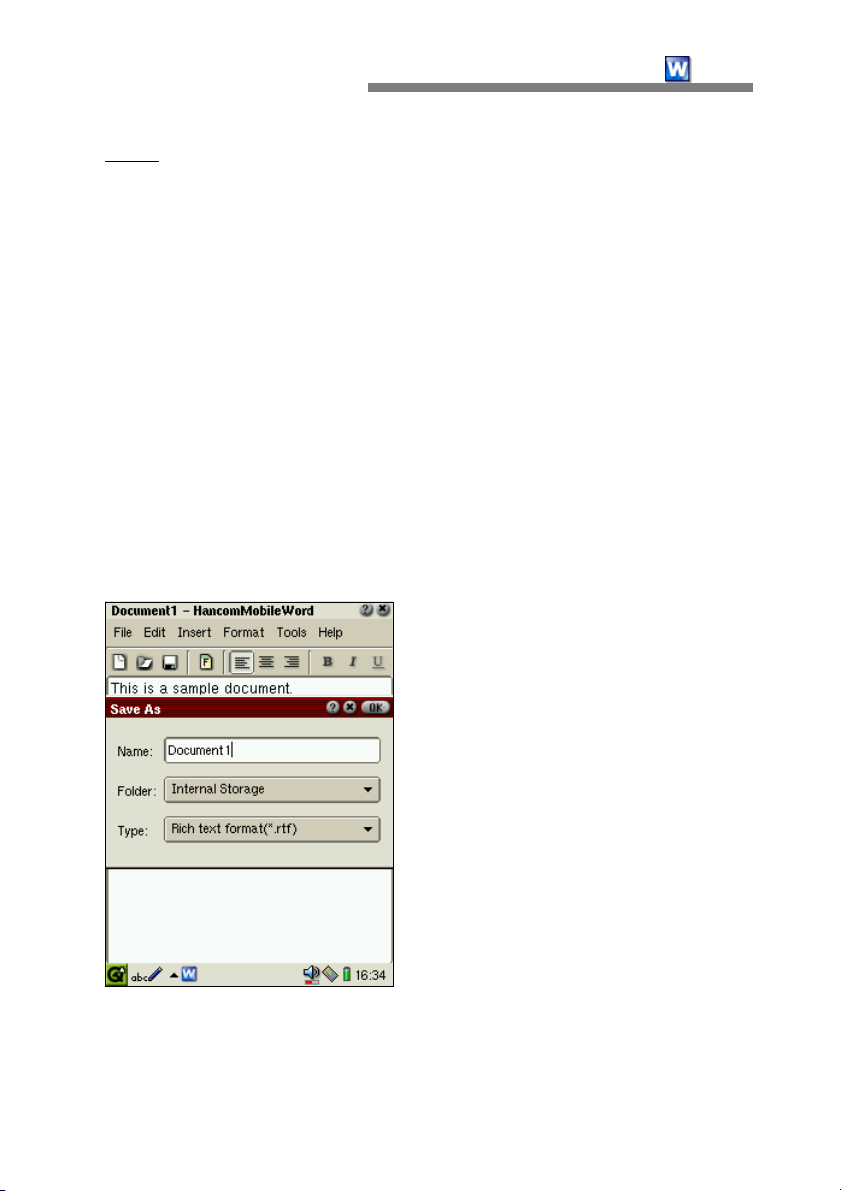
To save the current document as a new filename in a different format, select
"File-Save as". When you input "Save as", the following screen will pop up,
where you can select the file name and format.
Select a saving file format by typing a name in "Name" and tapping "Type" and
then tap OK. The current document will be saved as a new file name.
14
HancomMobileWord
CHAPTER 2:
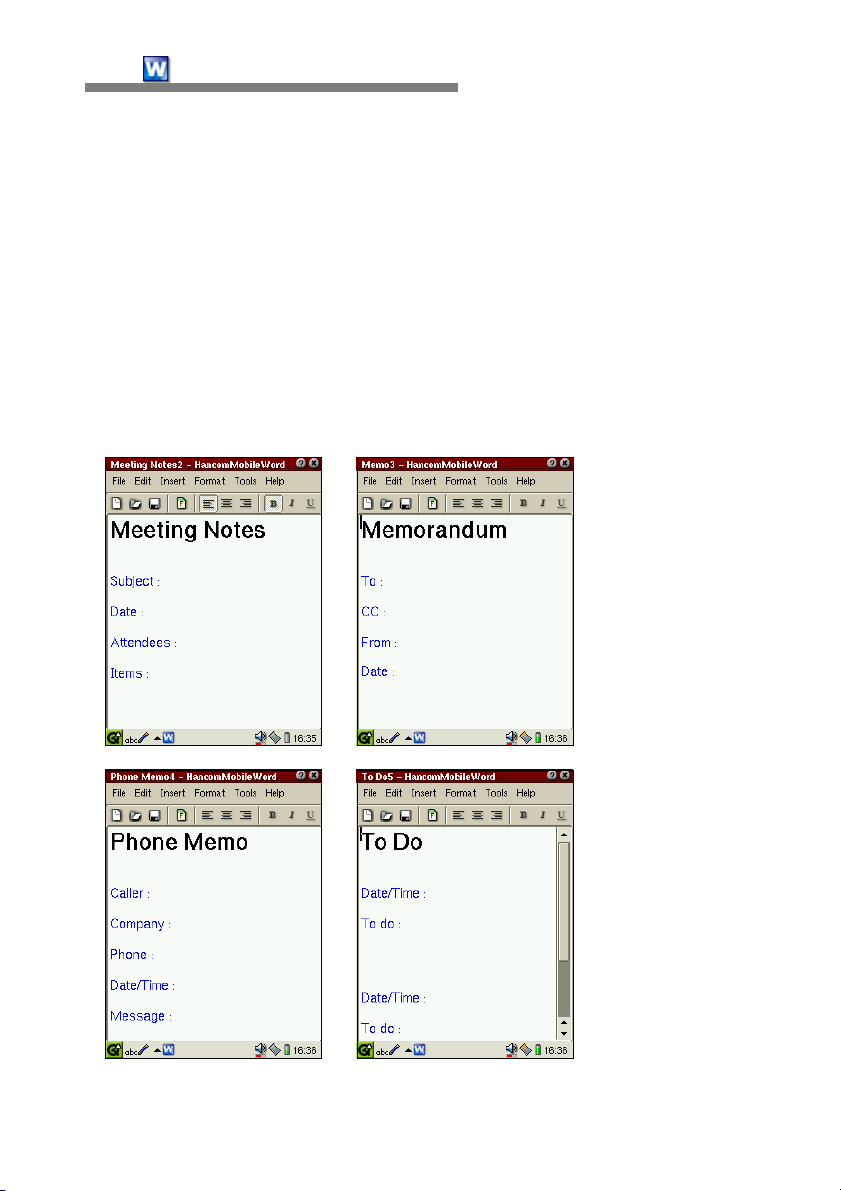
Template
Templates available in HancomMobileWord are predefined documents
frequently used, such as Meeting Notes, Memo, Phone Memo, and To Do.
Such predefined document templates allow HancomMobileWord beginners to
create a document quickly and conveniently by only typing text in a document.
HancomMobileWord template types are Meeting Notes, Memo, Phone Memo,
and To Do.
When you select [File-Template-Meeting Notes], a new template will appear
in HancomMobileWord. You can create an appointment document easily by
typing your schedule and the document title in the form, then save it.
CHAPTER 2:
easy
interface
for
creating
professional
documents.
HancomMobileWord
15
Exit
This command saves the file and exits HancomMobileWord. Instead of using
this command, you can tap
at the top right corner of the titlebar.
Edit Menu
Undo/Redo
In HancomMobileWord, Undo is used to cancel the last action and Redo to
recover to the previous status which was canceled by Undo.
Cut
The cut menu is used to temporarily cut data and move it to a different
location. The data can be re-added within the document by selecting
[Edit-Paste].
Note
Setting a selection area
Set a selection of desired contents in the document by dragging over
the selected area with the stylus.
Copy
Copy is operated pretty much the same as Cut, but leaves the original
information intact, so you have a copy of the selected content stored in
memory that can be pasted elsewhere.
Paste
You can paste content that was cut or copied anywhere you desire. Simply
move the cursor to the location and tap paste.
•
Document Content Copy and Paste
HancomWord
HancomWord is an intelligent and robust word processor providing an
16
HancomMobileWord
①
②
③
CHAPTER 2:
Select HancomWord in the first line by dragging the Stylus over it.
Select "Edit-Copy".
Type in the following, by using "Edit-Paste" to insert HancomWord.
HancomWord is a powerful tool for creating a professional document,
report, newsletter, and brochure.
Clear
This is used to clear a document by deleting the content that is currently
being edited. You are able to use Undo to retrieve your cleared information.
Select all
This command selects the entire document. It is useful for changing the font
or paragraph as well as applying Copy, Cut, and Delete commands to the
entire document.
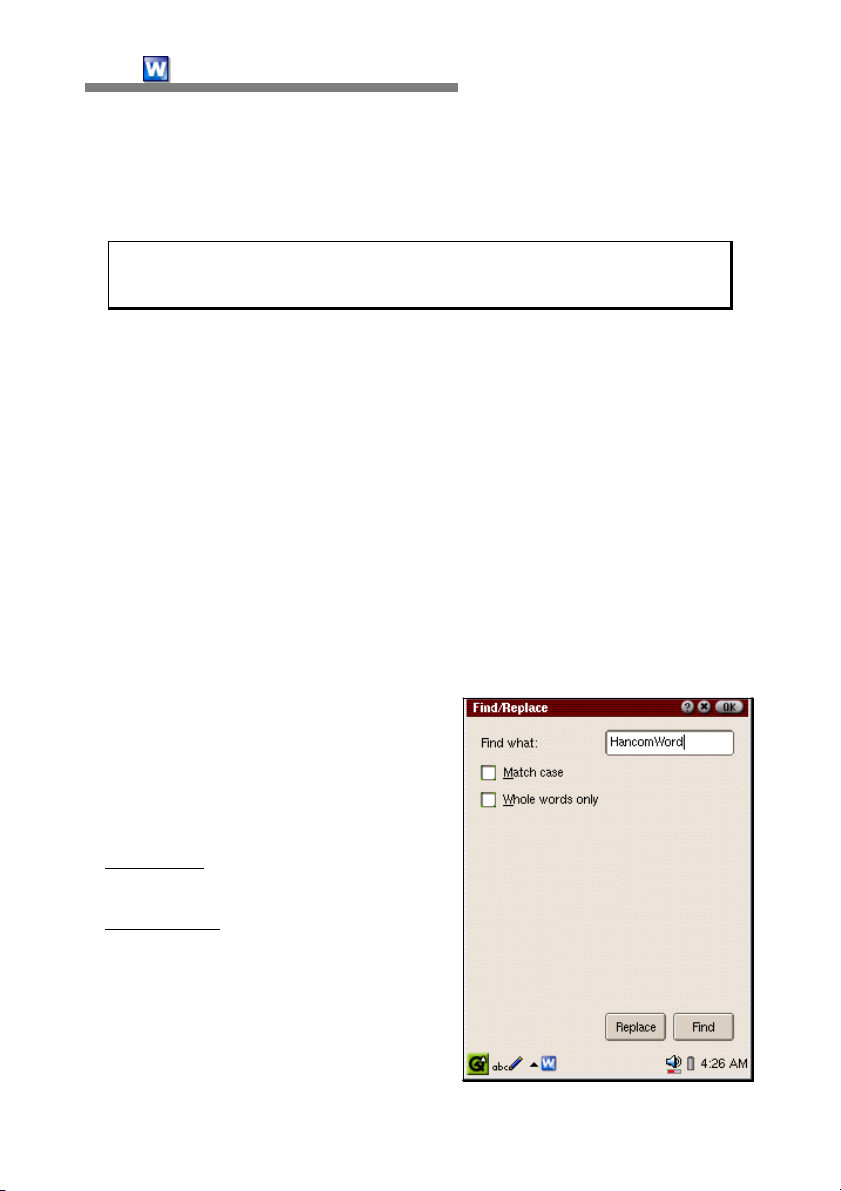
Find/Replace
The find command searches for a specific word or string of words in a
document. The Replace command replaces the word with a different one.
•
Find
If "Edit-Find/Replace" is selected after
the cursor is placed at the beginning
of the document or a desired location,
the screen will switch to the Find
screen as follows.
- Find what
for.
- Match case
finding words that are case sensitive.
For example, when you type
HancomWord into the box and select
the option, hancomword(lower case
'h') will not be recognized.
: Type in a word to look
: This is an option for
CHAPTER 2:
HancomMobileWord
17
- Whole words only : This is an option for finding the exact match for the
word typed in. Accordingly, this option will discard all words that match only
partially. For example, when you type Han only into the box and select the
option, HancomWord will not be recognized.
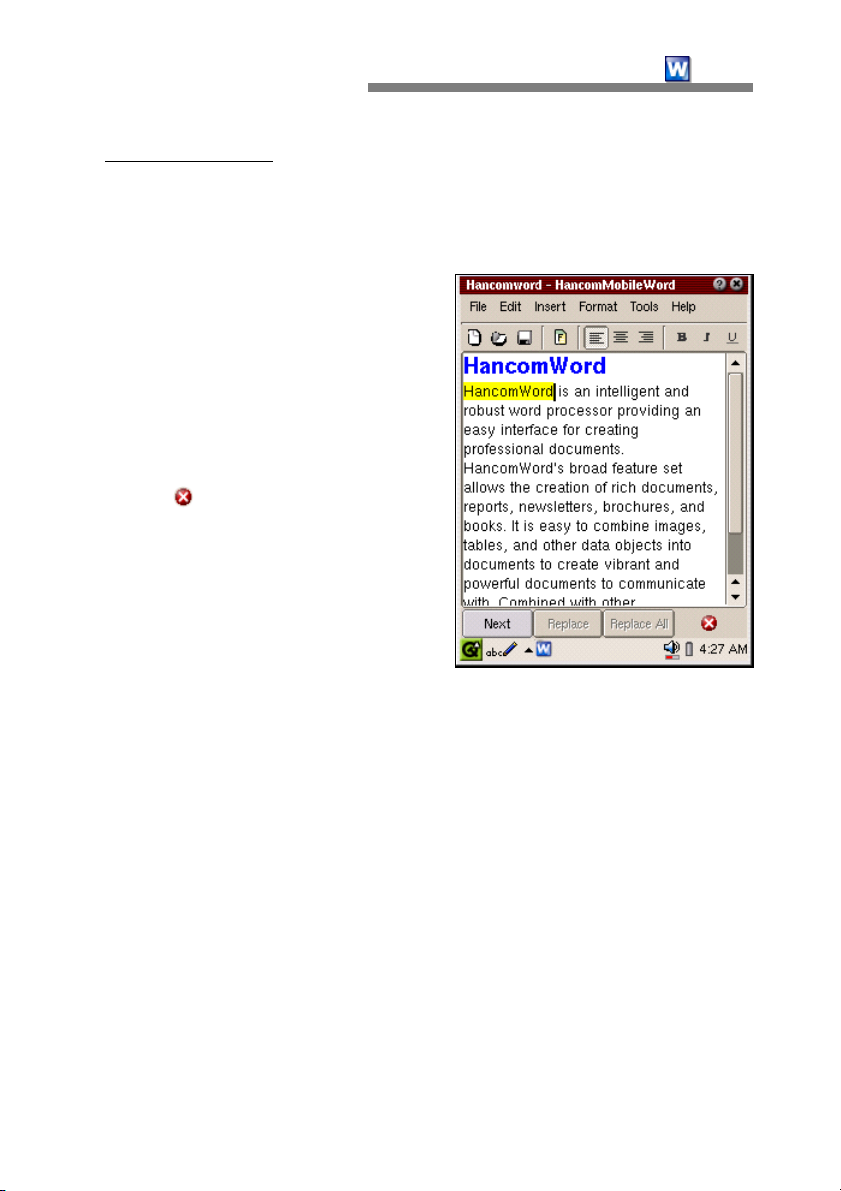
When you tap on the Find button, the
document edit screen will appear,
That is where you can see the
Find/Replace buttons at the bottom
of the screen.
When Next is selected, the find
command executes again. To cancel,
tap the
•
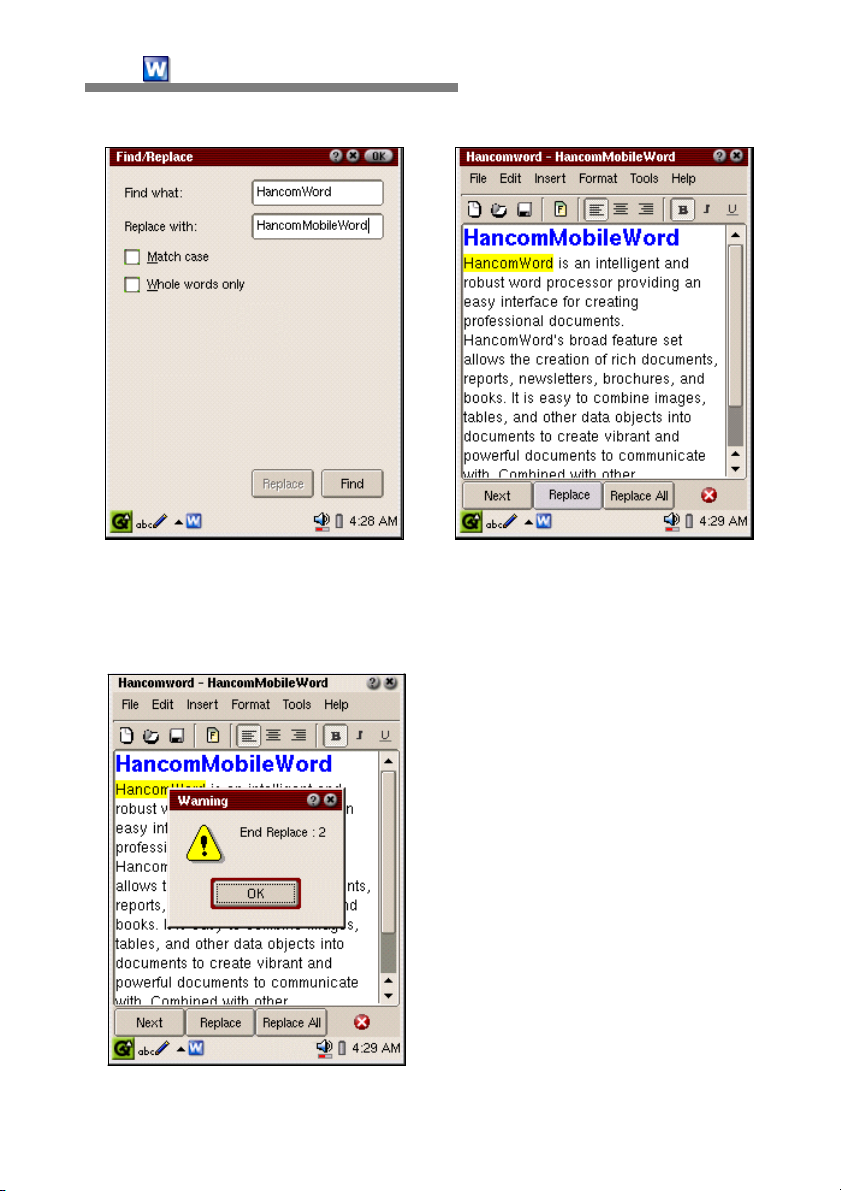
Replace
button.
When "Replace" is selected in the
Find window, the Replace with option
will appear. By typing in a word to
find and the new word to replace it
with, the command will be executed.
Unlike the [Edit-Find] window, in the Replace mode, additional "Replace" and
"Replace All" buttons will appear simultaneously.
When "Replace" is selected, existing words will be replaced with the new
words. Currently, the Replace command does not automatically find multiple
words for replacement. When there are additional words to be replaced,
simply tap "Next" to look for additional replacement words after typing in the
new word, then tap "Replace" again to replace the newly found word for
replacement.
18
HancomMobileWord
"Replace All" is used to replace the selected word in the entire document all
at once. After the command is completed, it will show how many selected
words have been found and replaced.
CHAPTER 2:
Tap OK to close the dialog.
CHAPTER 2:
HancomMobileWord
19
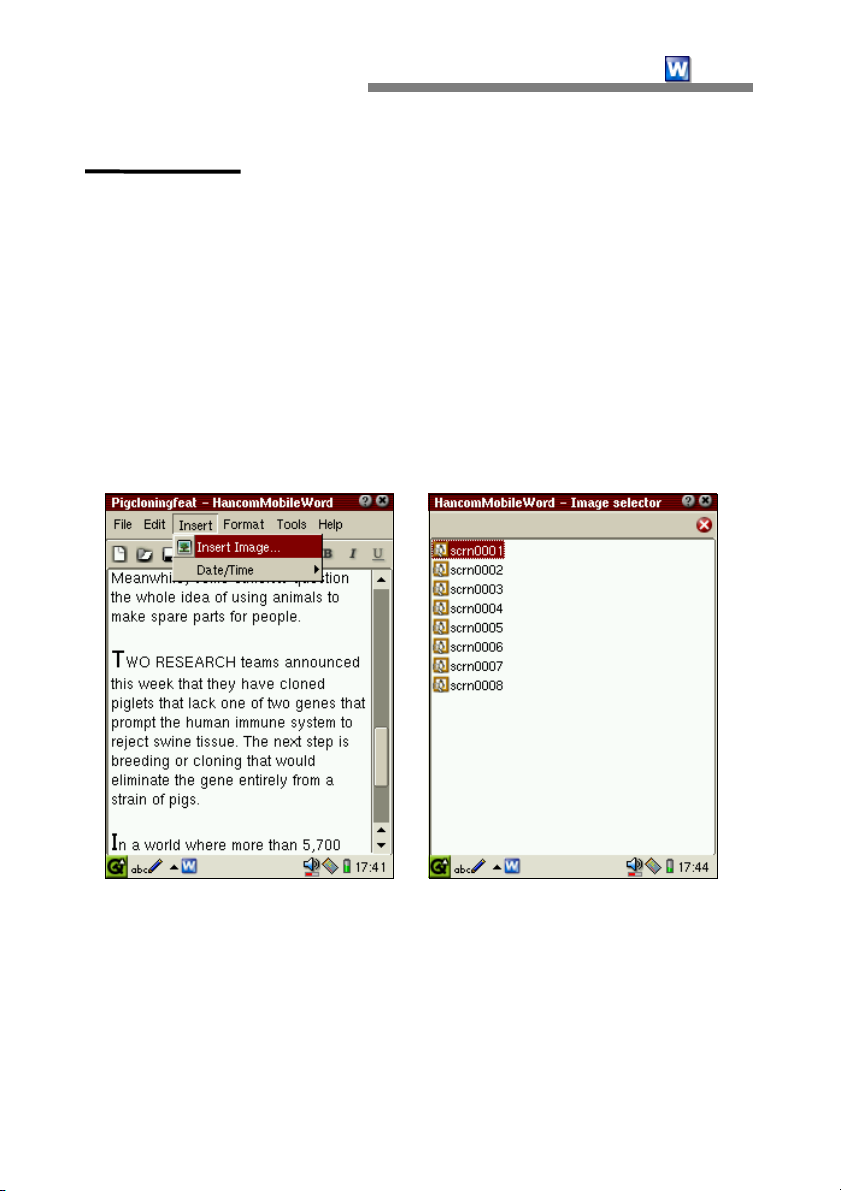
Insert Menu
Provides the user with functions for inserting an image file, date, and time
automatically into the prepared document.
Image
HancomMobileWord will insert images stored in the PDA into documents.
Simply place the cursor where the image is desired and select [Insert-Image].
The type of image files that can be inserted into HancomMobileWord
documents are those with *.bmp, *.gif, *.jpg, *.png extensions.
Once the image file list appears, select the images that you want inserted into
the document. The selected image will then appear in the document.
Date/Time
This function automatically sets a Date and/or Time to be inserted into the
document.
- Month/Day/Year
- Month/Day/Year Time (Hour:Minute AM/PM)
- Month/Day/Year Time (Hour:Minute:Second AM/PM)
- Hour:Minute AM/PM
- Hour:Minute:Second AM/PM
20
HancomMobileWord
be
CHAPTER 2:
Format Menu
Format menu is divided into two main parts, allowing the user to assign fonts
and alter paragraphs of the document content. You can select the Format menu
not only from the main menu, but also from the Tool collection icon.
Format
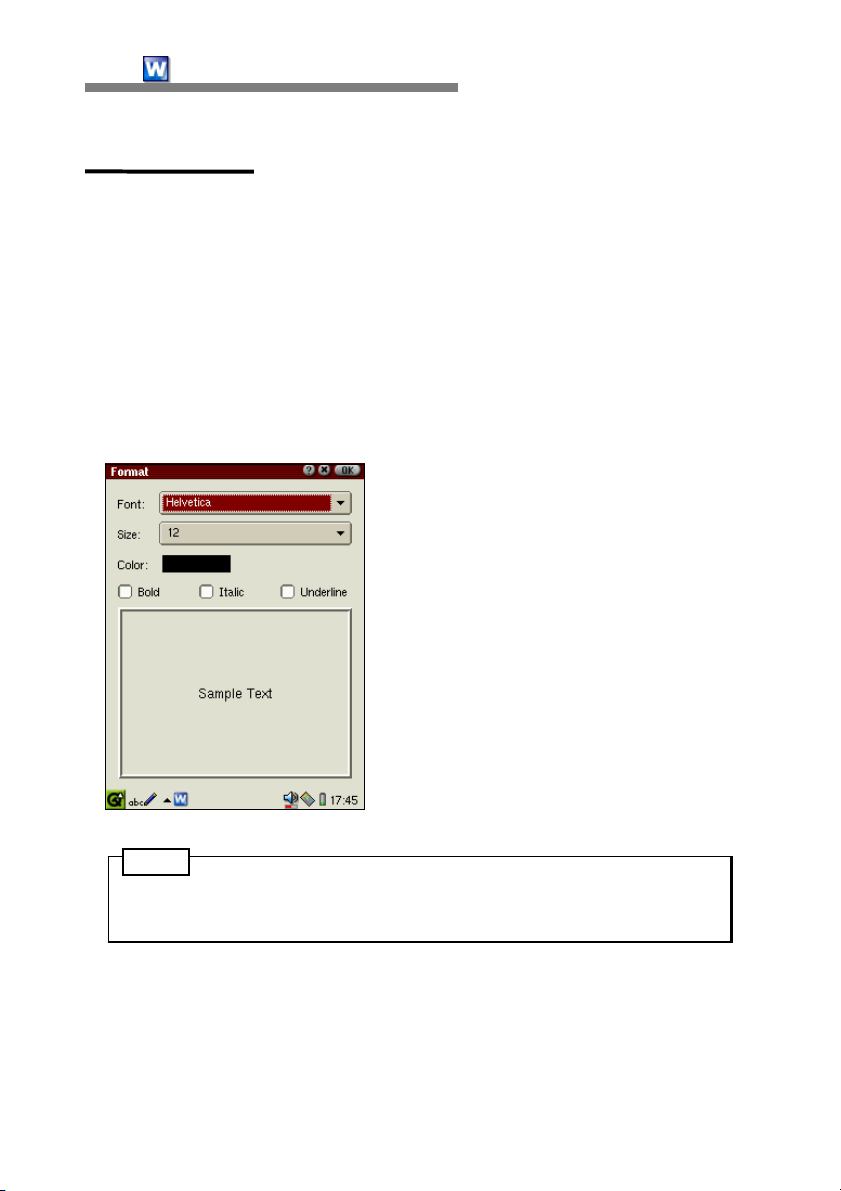
The Format menu is where you can change the font type, size and color and
select attributes such as bold, italic and underline, etc for the document. In
order to apply forms, select a string and select [Format-Format]. When the
Format dialog box appears, select the font type, size and color of your choice.
Currently, font attributes such as size, boldface and italicization can
changed only for some Helvetica type fonts.
You can change font type and size by selecting a font and size from the list.
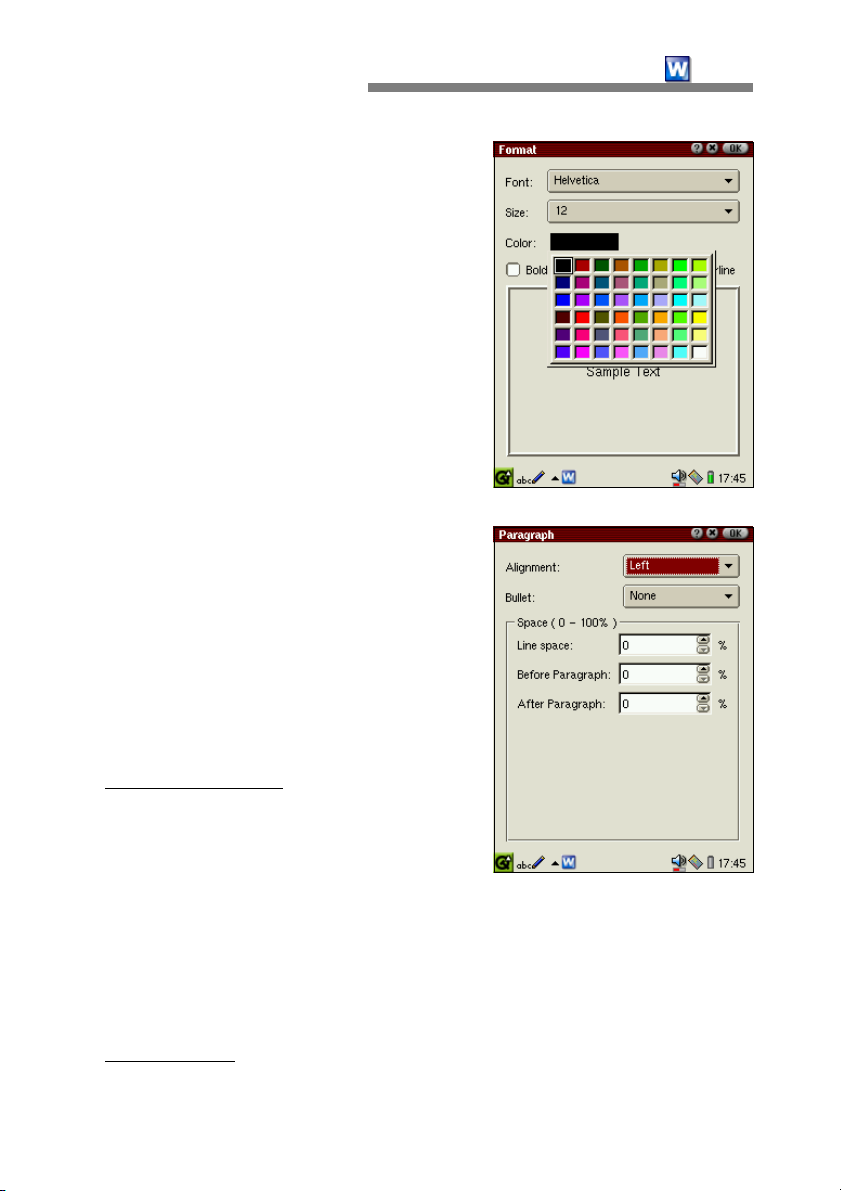
You can change the color by tapping on the color button and selecting from
the color pallette. After finding a desired color, tap OK.
Note
CHAPTER 2:
You can select Bold, Italic and Underline
by tapping on the check box with the
Stylus. To cancel the selection, tap the
check box again.
If you select a font type, the preview
window allows you to preview the results.
HancomMobileWord
21
Paragraph
To start a new paragraph in Hancom-
MobileWord, simply press the Enter key.
Paragraphs may be altered by using
[Format-Paragraph] which enables you to
group paragraphs into large bodies as well
as bullets as used in outlines. Also, you
can select line spacing and paragraph
numbering.
- Paragraph Formats
are only applied to individual paragraph
units. Therefore, if the cursor is placed
anywhere in a paragraph, the changes
will only be applied to the paragraph where the cursor is located.
Paragraphs that come before and after the paragraph with the cursor will
not be affected by the changes made. If the user wants to apply the
changes to multiple paragraphs simultaneously, the desired paragraphs
should be selected and changed accordingly.
- Form Toolbar
instead of a dialog box.
: Paragraph formats
: Paragraphs can be aligned easily from the Form Toolbar
22
HancomMobileWord
•
Alignment lets you decide the horizontal placement (also known as
'justification') of each line within the paragraph.
- Left Alignment
- Center Alignment
- Right Alignment
•
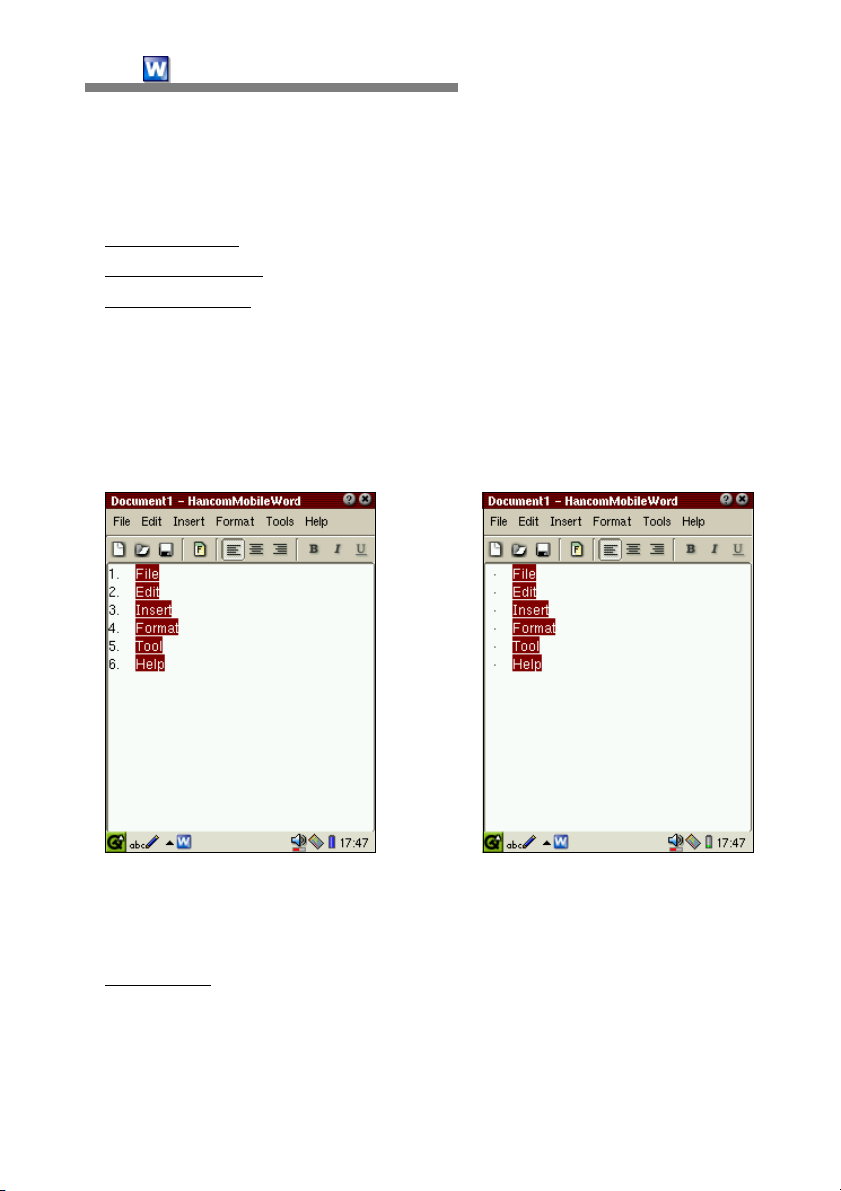
This function is used to organize content into ordered sections. Three options
are provided: None, Numbering, and Dots.
For example, when "Bullet-Numbering" is selected, paragraphs are
automatically numbered.
CHAPTER 2:
Alignment
Bullet
: Aligns paragraph to the left side
: Centers Paragraph
: Aligns paragraph to the right side.
•
Space
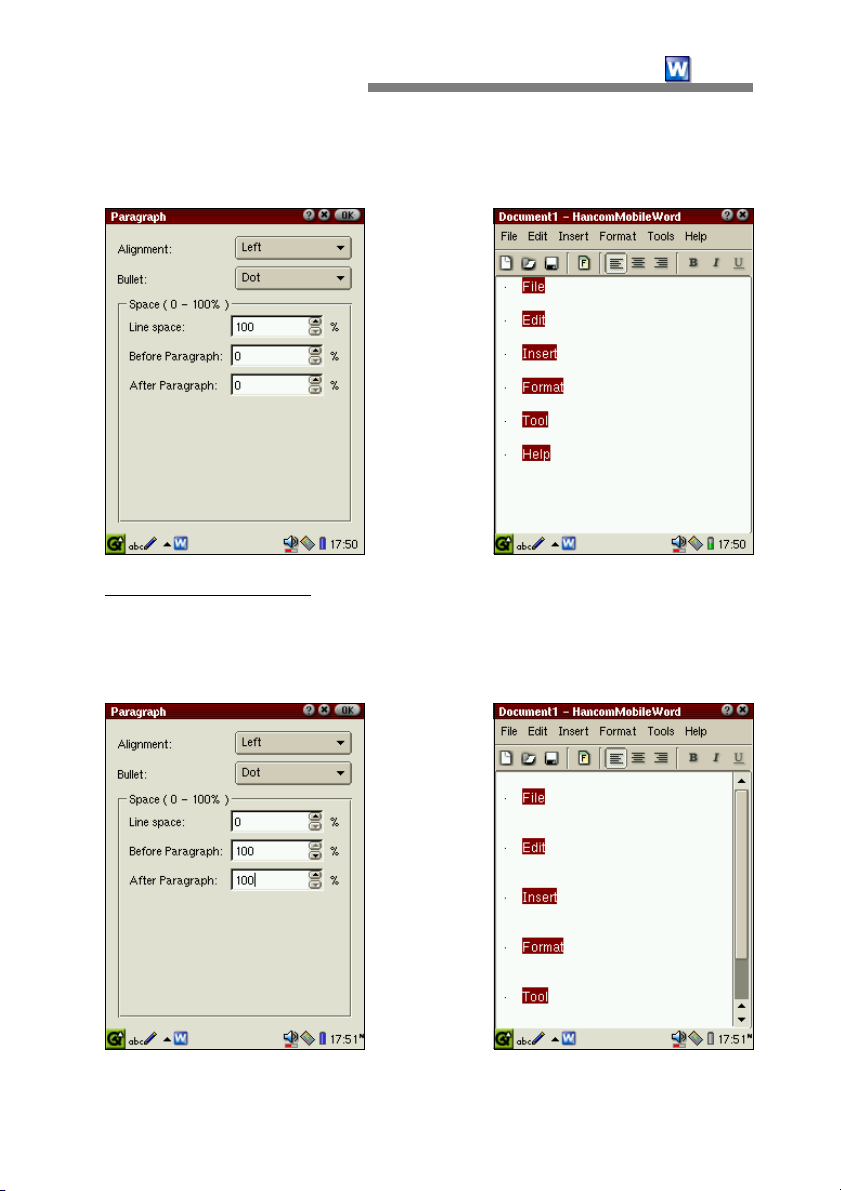
Space specification is a function that lets you control line spacing. Listed
buttons may be tapped or desired numerical values may be typed in.
- Line space
and paragraphs. Units are entered in as a percentage value of the space
between the lines. For example, when you input 100%, the line spacing is
set to the character height of the line to adjust paragraph spacing.
: This function allows users to assign the space between lines
CHAPTER 2:
HancomMobileWord
23
Therefore, if you input 50%, the line spacing becomes 1/2 of the height of
the characters in the current line.
- Before/After Paragraph : You may simply press the ENTER key to create
space between the title and body paragraph. However, inserting a space
using the Paragraph function enables the spacing to be changed
automatically.
24
HancomMobileWord
CHAPTER 2:
Alignment
Similar to [Format-Paragraph-Alignment], you may do this from the toolbar
or the main menu without loading the dialog box.
Indent/Outdent
This is a function for controlling paragraph indentation. By controlling
indentation, you may create a document that is easy to read.
Tools Menu
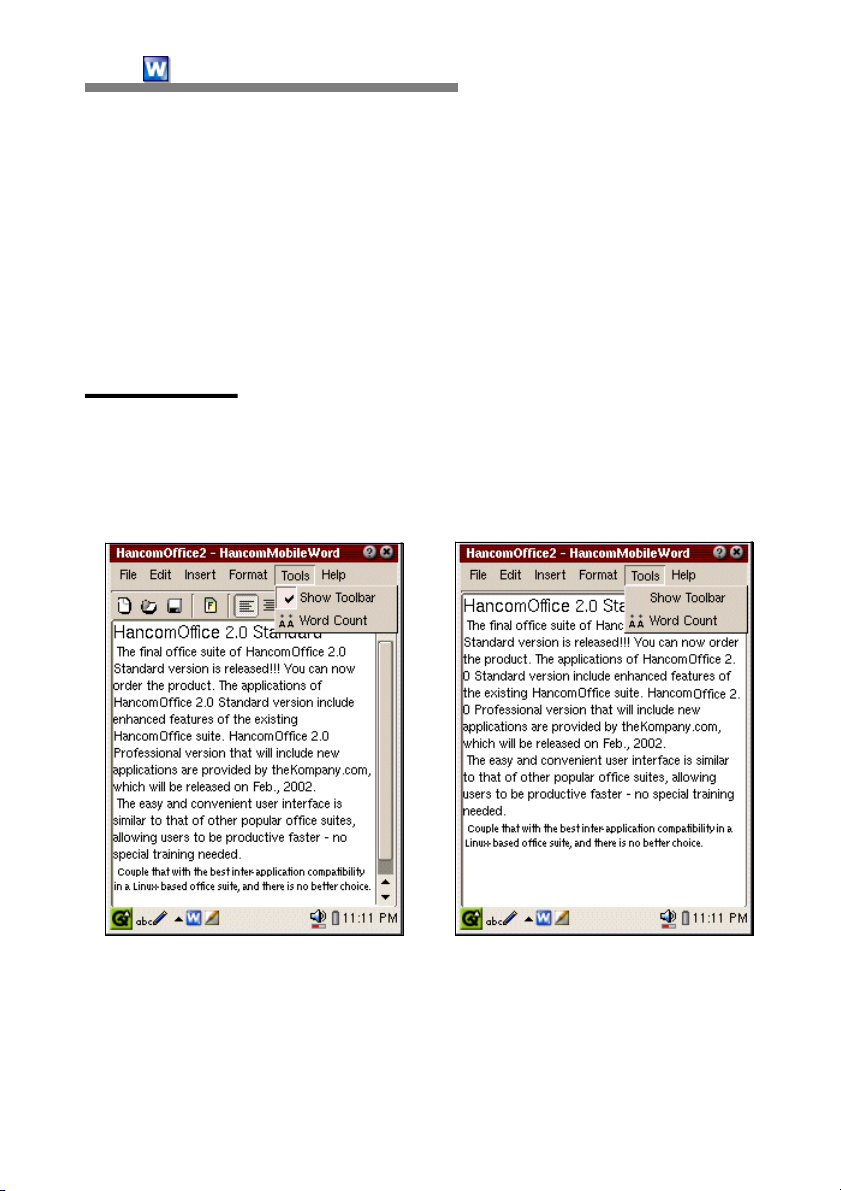
Show Toolbar
This function is used to display or hide the toolbar which shows the formatting
commands. Once the tool box is hidden, the Edit Window area can be viewed
by itself.
CHAPTER 2:
HancomMobileWord
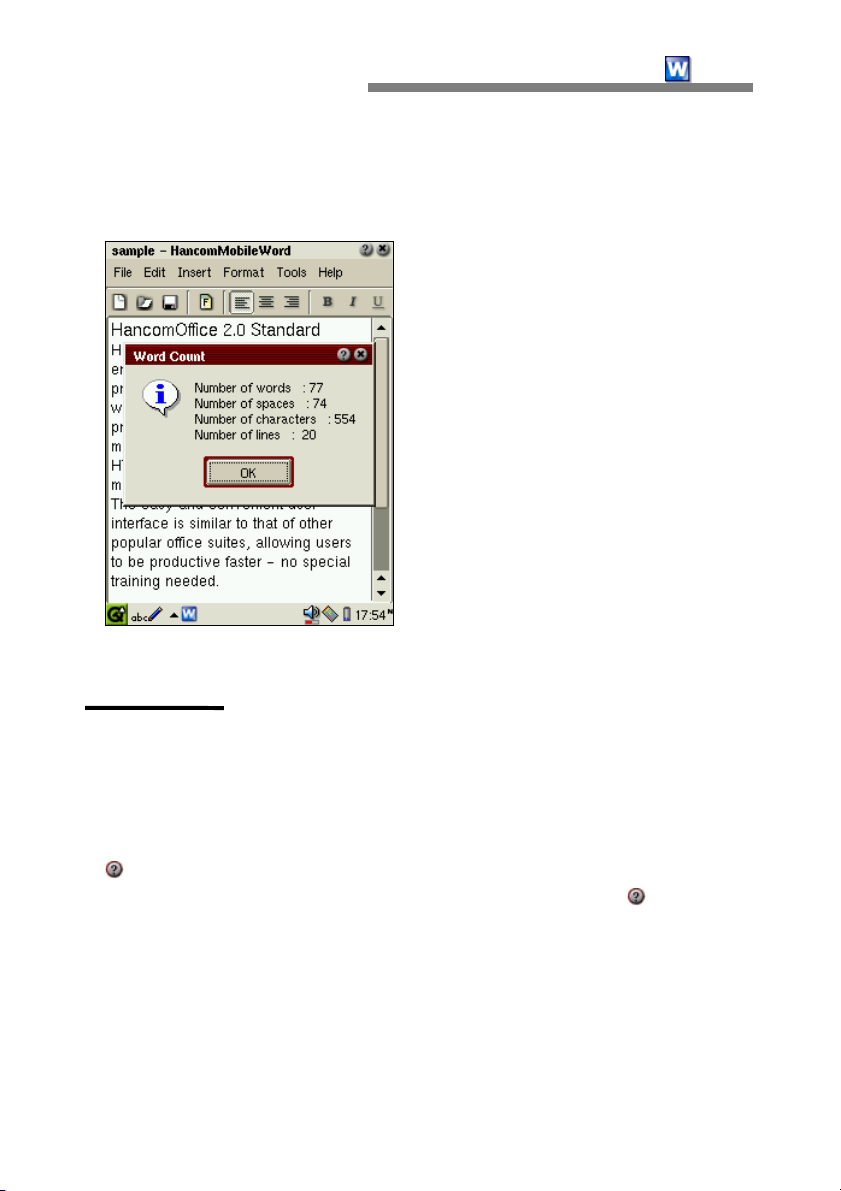
Word Count
This function is used for counting words in any document.
25
Help Menu
The [About] submenu appears in the Help menu. In the [About] menu, the
version, copyright, and homepage address of the HancomMobileWord product
installed in the SL-5500 is displayed. To acquire more information about
HancomLinux and its HancomMobileWord products, tap on the address.
help
On HancomMobileWord dialog box, there is a question mark( ) on the title
bar. If you tap on this, the help menu of HancomMobileWord will appear on
the screen.
26
CHAPTER 3:
HancomMobileSheet
CHAPTER 3: HancomMobileSheet
Introducing HancomMobileSheet
Introducing HancomMobileSheet
'Spread sheet' literally means, 'a spread out sheet of paper.' It is frequently
used in tasks that require complex calculations, or when creating complex
documents. Charts and graphs are not supported in HancomMobileSheet. By
applying simple formulas within cells, all calculations for simple and complex
computations can be done automatically and propagate throughout the
spreadsheet whenever the data is changed.
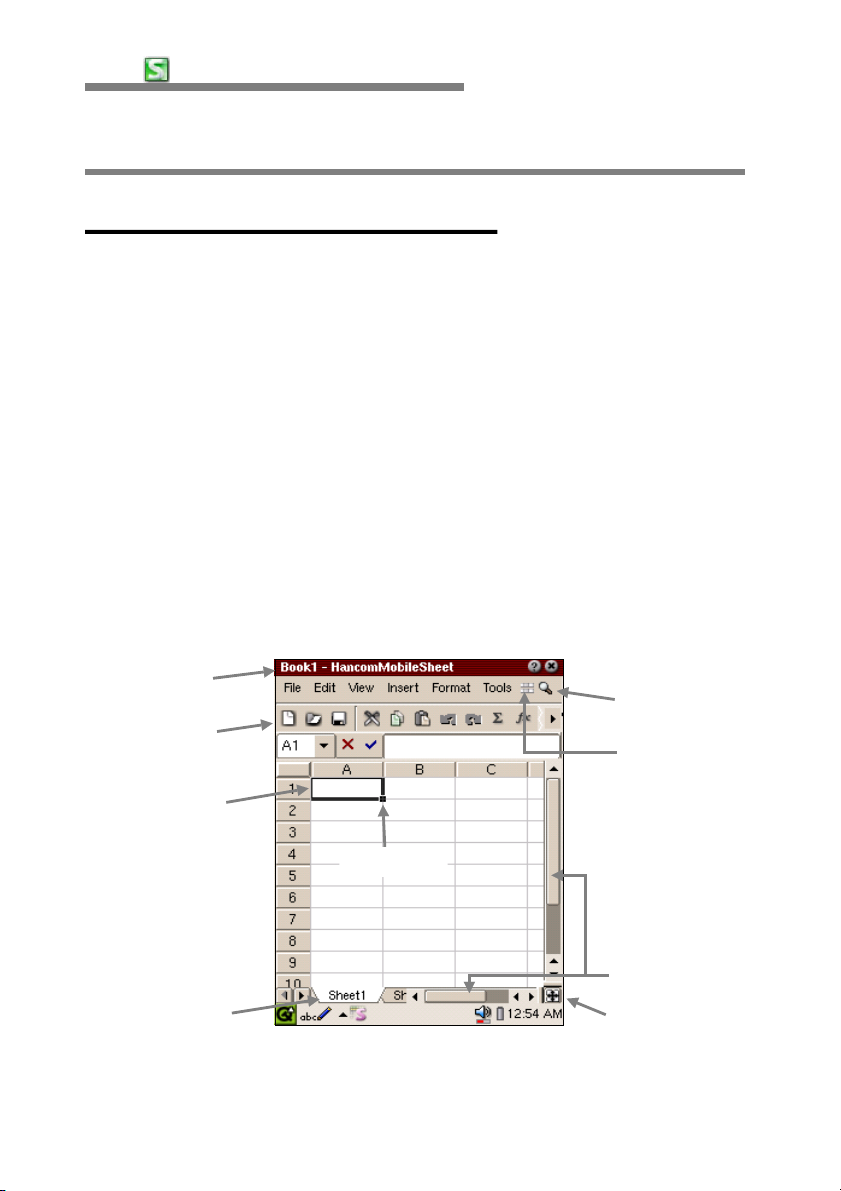
Full Screen
Prior to creating documents with HancomMobileSheet, this manual will first
familiarize you with some of the screen elements which compose a
spreadsheet. Let's first look at the screen interface to help you work more
efficiently. The following graphic shows how a new document looks on
HancomMobileSheet.
Titlebar
Toolbar
CellPoint
Sheet Tab
Zoom
Toggle Toolbar
Fill Handle
Horizontal/Vertical
Scroll bar
Full Screen

HancomMobileSheet
27
•
Documents and Sheets
CHAPTER 3:
Normally a new document will consist of 7 pages or "sheets". Each of the
sheets is stored as a part of a single document. You can add or remove
sheets from your document as needed. It's important to understand the
difference between a document and a sheet. A document is like a file cabinet
and a sheet is like the documents within the cabinet.
•
Sheet Tab
A name can be added to the tab associated with each sheet and the sheet is
easily selected by tapping on the tab and holding down. The currently active
sheet will be white in color and the inactive sheets will be grayed out.
•
Row and Column
The sheets take the shape of a grid pattern, consisting of horizontal and
vertical lines. The horizontal lines designated with letters are called columns,
and the vertical lines with the numbers are called rows. The squares that are
formed when the rows and columns intersect are called cells. Data is entered
into cells. One sheet consists of 512 columns(A
∼SR) and 16,384 rows. The
gray buttons on top of the columns are called column heads, and the numbers
on the buttons to the left of the rows are called row heads. Each coordinate of
a cell is designated according to these row and column heads. For example,
the first and top cell on the far left is called A1 and refers to the first row of
column A. When a cell is selected a bold outline will appear to distinguish it.
This is called the "Cell Point".
•
Scrollbar
You can scroll the screen vertically and horizontally by using the scroll bars in
the bottom right section of the application.
•
Titlebar
Titlebar indicates the currently opened file name.
•
Menubar
The Menubar contains all the commands for HancomMobileSheet. Simply
select one of them as you would with any other Windows style application.
28
the
•
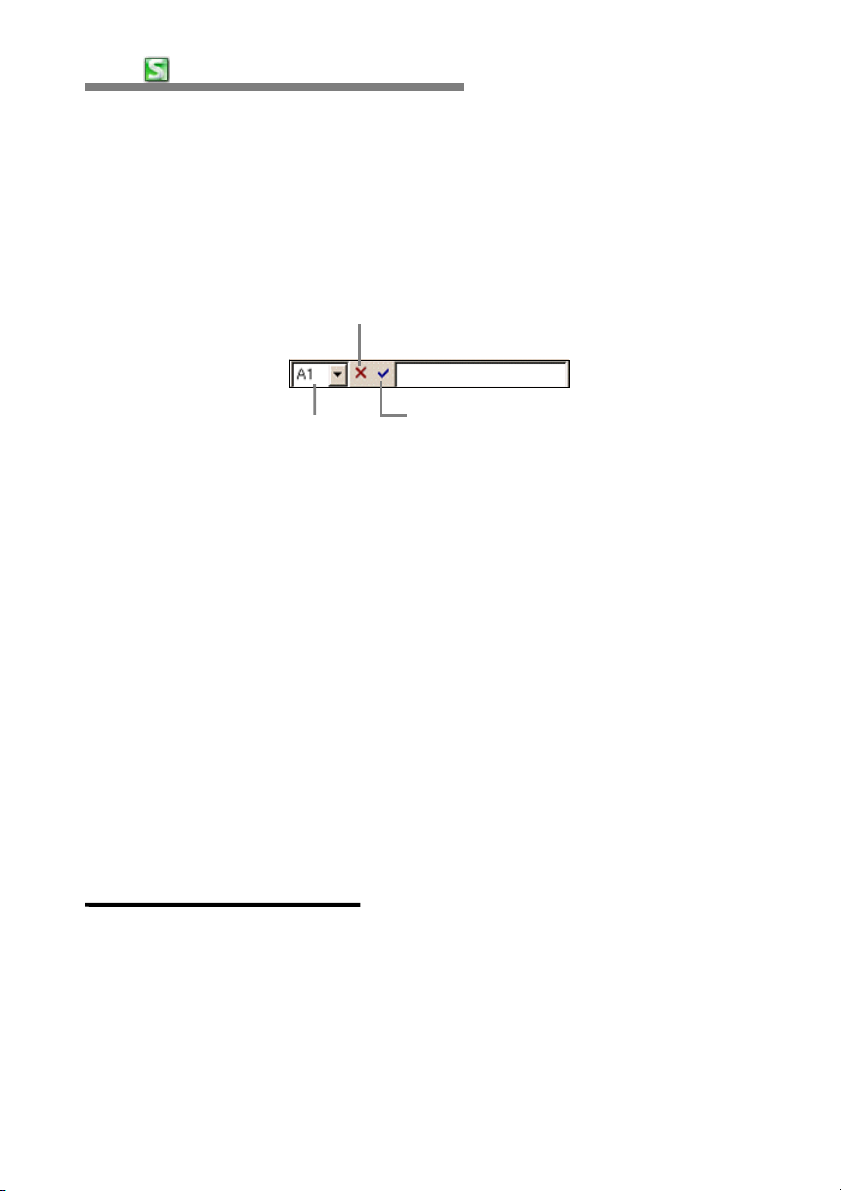
The Inputbar indicates the contents of the currently selected cell and allows
data to be input directly or to be revised. When a cell is selected and data is
typed the data is automatically displayed in the inputbar. The Inputbar can be
selected by tapping on "Inputbar".
CHAPTER 3:
Inputbar
Cancel Button : Cancel input of data
HancomMobileSheet
Name list : Indicates
Coordinate or the set area.
OK : Completes the input of data.
Tools and Dialog Boxes
•
Toolbars
To open a saved file, tap the [File-Open
icon in the toolbar to execute them in one tap. This is called a tool, and
HancomMobileSheet provides standard tools and templates which support
menu functions. Each toolbar appears on the screen when tapped once from
the [View] menu, and disappears when it is tapped again.
•
Dialog box
A dialog box will appears whenever you perform an operation that requires
HancomMobileSheet to communicate with you. A good example is the File
Open operation, in this case you need to tell which file to open.
…
] menu. However, you can use an
SpreadSheet Basics
SpreadSheet Basics
•
Area setup
When entering a date or calculating figures on a spreadsheet, you often have
to select one or more cells at a time. For entering data, you select either one
cell or a group of cells for copying or cutting.

HancomMobileSheet
29
•
Select cell
CHAPTER 3:
A single cell can be selected with the stylus, keyboard or formula bar.
- Stylus
- Formula bar
: Selects the desired cell by tapping the cell.
: You can select a cell in the formula bar by selecting the
coordinates of the cell in the name list box.
•
Selecting a Consecutive Area
- Area : An area means the selection of two or more cells. You can select a
continuous area by tapping down with the stylus and dragging the area you
want to select. Lets try selecting continuous cells B2~D5 by following the
instructions below.
① Press on cell B2.
②
While pressed, drag the stylus diagonally to cell D5. The color of the area is
inverted, indicating that the cells are selected.
Reference
1. The consecutive area is indicated with the colon(:). placed between
the cell coordinates. Example: Cells B2 to D7 are shown as B2:D7.
If you set 'the cell on the very top left : the cell on the very right
bottom', the cells within this area will be indicated in the coordinates.
2. To exit the area selected, use the stylus to select another cell that
is not selected.
- Rows and Columns
: To designate multiple continuous rows and columns,
select the column header or row header, and drag the stylus upward/
downward or to the left/right.

30
•
To select the current sheet, tap on the Select All button which is the top-left
cell where the column and row heads meet. Formatting options, including font
formatting, can then be applied to the entire sheet.
CHAPTER 3:
Selecting a Full Sheet
HancomMobileSheet
Data Input
•
Types of Data
- Value
: Value refers to the data that are directly input into the cells including
numbers or letters. Numbers 0
include date, time, number, percentage, fractions, exponents, letters, etc. To
change these values, re-input the different value into the input bar. In order
to change the format, select the [Format] menu and select the format
options. The fastest way is to use the template toolbar and select from the
templates which are presented.
- Calculating Formulas
Formulas start with the equal sign[=] and when the referred value changes,
the resulting value also changes automatically. This eliminates the
inconvenience of having to change all of the values at once.
: This means calculations that use values in other cells.
9 can be used, and the data format can
∼
•
Data Input
- Entering Data Into One Cell
is typed in it will be automatically displayed in the inputbar. Whenever a cell
containing contents is selected, the contents will appear in the inputbar.
Input is completed by either tapping on the
key, or by selecting another cell.
: When a cell is selected and a letter or number
button, pressing the ENTER

CHAPTER 3:
HancomMobileSheet
31
- Entering in the Selected Area : To enter a substantial amount of data, it is
useful to select a certain area first. Whenever you press the ENTER key
after typing data, the next cell will be selected automatically. Once you get
to the end of a column or row, the selection will cycle to the first cell in the
next row or column.
Type the example in cell A1 and cells A2∼D2.
①
Block the area from cell A3 through D5 by pressing and dragging the stylus.
②
③
With the area blocked ('selected'), type 'North East' and press the ENTER key.
The contents will be displayed in cell A3, and then cell A4 will be highlighted.
Continuously input the data into cells and press the ENTER key. Then, the cell
④
sign moves to columns C and D as the data is entered, as illustrated in the
following picture.

32
CHAPTER 3:
HancomMobileSheet
- Changing Input Data : When you select a cell with sheet contents using the
stylus or keyboard, it is displayed in the input line. Use the stylus to select
the input line, and when the cursor appears in the input line, you can
change or delete the content.
Entering Data by Type
•
Entering Numbers
Numeric values are aligned to the right of the cell by default, but can be
aligned to the left or center with the alignment function.
i) You can use symbols(+, -, (), ?, $, %, E, e, etc) and letters in combination with
numbers.
ii) If a [+] sign is used it will be ignored since positive values are assumed.
iii) For negative numbers, simply add the symbol [-] in front of the number.
•
Entering Letters
One cell can accommodate 255 English letters or 127 2-byte characters.
When you go beyond this limits, it happens to be cut.
Letters are typically left aligned in the cell, but can be aligned in different way
using the [Format] menu or toolbar. When the data to be entered is a
combination of letters and numbers, the format type is for letters. Excluding
that case where the letter data is the name of a cell, letters can not be used
in calculating formulas.

CHAPTER 3:
Text Prefix
ꋯ
Prefix Result Input Result
' Left 'Text Text
" Right "Text Text
^ Center ^Text Text
•
Entering Calculating formulas
HancomMobileSheet
33
Formulas are calculations using the cell data and are input similar to general
math calculations. To input a formula in HancomMobileSheet, you must start
with the equal sign[=]. There are two ways to write formulas. One is to directly
input the data, such as '3+4', into the cell. The other is to use the cell
number, such as 'A1+B1'. When the value of the cell number is changed, the
result value also changes automatically. This reduces time and effort.
•
Entering Numbers into formulas
In entering numbers into calculating formulas, numbers 0~9 can be used.
Commas, parentheses and currency symbols cannot be used together with
numbers in a calculation formula. Negative numbers are indicated with a [-] in
front of the number.
•
Entering Letters into formulas
For entering letters into calculating formulas, input the quotation mark["]. For
example if you input ="year 2000" then the letters 'year 2000' can be used
together with the formula sign [=]. Letters used in functions can also be used
with quotation marks in a formula.
•
Entering Dates
If the date or time is input according to the formats that are designated in
HancomMobileSheet, they will always follow one of those formats. Dates use
the slash [/] or dash [-]. For example, August 1, 2000 could be done as
08/01/2000.
•
Entering Time
You can either use a 12 or 24-hour format for inputting time. A time value is
distinguished by virtue of the colon [:] in the data. For using a 12 hour clock

34
inputbar.
CHAPTER 3:
HancomMobileSheet
you must indicate AM or PM and it must be preceded by a space after the
time.
Reference
1. Dates are stored as a numeric offset in days from January 1, 1900.
So the date 1900/1/10 would internally store the value 10. This
means that if you enter a numeric value into a cell that is
designated as a date, that value will be applied to the date and
converted to a date value. The same is true for time, everything is
an offset from midnight which starts at 0
2. The results of these appear as the same contents entered on the
screen. However the format of the contents in the cell and the
contents in the inputbar are different. In HancomMobileSheet dates
follow the format of 96/10/1, and only this format appears in the
•
Division of Input Contents and Screen Display
Same as displaying dates, sometimes the contents entered in a cell and in
the inputbar may appear differently. This format can be designated according
to your preferences.
(1) Commas can be set without direct input.
(2) When the figure of the number becomes too large, the numbers are indicated
in exponential format.
(3) When a formula or number with a set format is entered into a cell and ######
appears, this means that the width is too small. The width can be extended by
dragging the border of the column head.
(4) When there is an error in a cell, the number sign # will appear as indicated.
#0DIV, #CALC, #OPRND, #REFF, #NAME?, and etc all refer to formulas or
formats with errors.
(5) In standard formats when the cell width cannot be accommodated, ### will
appear. When there are too many letters compared to the cell width the
contents are shown to be shifted to the right cell. However, if there is data in
the right cell the contents exceeding the cell appear.

HancomMobileSheet
35
•
Data auto fill
CHAPTER 3:
This provides a function for inputting data that is increasing in set increments,
such as when inputting sequential dates or numbers, by dragging the area
with the stylus. When working with text, this provides a function for inputting
repeated content easily. This is a function that automatically inputs data such
as day of the week and quarter.
①
Input '100' in cell A1, and use the stylus to block an area by dragging to the
bottom corner of the cell. The numbers are filled in automatically, in increments
of 1.
Input '1' in cell A2, and '3' in cell B2, and block the area and then drag the
②
stylus across row 2. Data are filled in automatically in regular increments.
③
Input 'LasVegas' in cell A3 and drag the stylus. The 'LasVegas' string is
automatically input repeatedly.
④
Drag the stylus while a text string block is selected. The same data is filled in
as well.
Input 'Mon' in cell A4 and drag the stylus. The days are input to the selected
⑤
cells automatically.

36
•
CHAPTER 3:
Data Move and Copy
HancomMobileSheet
When creating data with HancomMobileSheet, you will likely want to copy and
change the data without directly entering it. For this, the copy and move
functions are very useful. Let's try to copy and move with the following data.
i) Copy and move with the Menu : When you use [Edit-Copy] the formula is
copied and when [Edit-Cut] is selected the formula is deleted. When an area is
selected the formula can be copied and the data is pasted at the same time.
ii) Copy and move with Tools : Formulas can be copied or deleted by using the
cut, copy, and paste functions.
iii) Copy and move with the Shortcut Menu : If you press down with the stylus for
a few moments a submenu(shortcut menu) will appear with the cut, copy and
paste functions(similar to doing a right click with the mouse on your PC.).
Creating Formulas
•
Basics of Formulas
SpreadSheet programs are convenient in that they provide functions for
complex calculations by using just a few formulas. In formulas there are
numbers and operators, but also cell addresses, functions, data area names,
file names, etc. The following are an example of formula usage.
Formula Explanation
=A1+B1 Adds the values of cells A1 and B1
=Sheet1!B4+B8 Adds the values of cell B4 of Sheet1 and cell B8 of the current sheet.
=sum(A1:B2)-2 Using the SUM function, adds the values of A1, A2, B1, B2 and subtract 2
•
Operator
The operator is a sign that indicates what the data in the cells will do.
① Arithmetic Operator : +(add), -(subtract), *(multiply), /(divide), %(percentage),
^(exponent)
② Comparison Operator : =(equal), >(larger), <(smaller), >=(larger or equal),
<=(smaller or equal), !=(unequal)

CHAPTER 3:
HancomMobileSheet
37
The formulas are calculated from left
to right and are calculated according to
the order of the operators. However,
data with parentheses have first
priority.
•
Creating Formulas
Operator Contents
- negative
% percentage
^ exponent
* / multiply, divide
+ - add, subtract
& letter combination
= > < >= <= != comparison
Formulas can be made to do any of a variety of calculations from simple
arithmetic to high-level mathematical calculations such as log and exponents.
You use them to perform complex calculations that can incorporate up to 183
overlapping functions. Calculation formulas can be created by using the
keyboard, stylus cell copy and move, or reference other sheet cells. It is
preferable to use calculation sheets using cell addresses, rather than inputting
them directly in the cell. When using cell addresses in calculation formula, you
must always start with the equal sign [=]. You can also use the keyboard or
stylus to select the address directly for creating calculation formulas.
①
Input the following data to enter a formula.
② Tap on cell B6 to create a formula calculating the number of shipments, and
enter [=]. When you press the UP arrow key you will see that the cell
addresses are changing in cell B6. Once the C3 cell is selected, press ENTER
and the formula will be created.

38
③
④
CHAPTER 3:
tap on cell D6 for a mathematical calculation, enter [=] and tap on cell B3.
Enter an asterisk [*] and tap on cell C3, then the formula will be completed.
The result appears when you press the ENTER key.
HancomMobileSheet
•
Relative and Absolute Reference
When you cut, copy and paste cells that contain formulas which include cell
references, they can either be copied with relative or absolute reference.
Pasting can be done by using [Paste] from either the [Edit] menu or by using
the toolbar.
i) Relative Reference : The cell sign that indicates the location of a cell consists of
the column and row heads. Relative Reference automatically changes to the
relative location where the row and column coordinates are copied, as the
cell with the coordinate input is being copied.
ii) Absolute Reference : Unlike relative reference where the cell address changes,
absolute reference is used when the cell addresses should not be changed, by
indicating with a dollar sign, [$]. There are three ways of applying absolute
reference only to columns. By putting a [$] in front of the column coordinates
and applying absolute reference only on rows, and applying absolute reference
to both rows and columns.

CHAPTER 3:
•
Inserting and Deleting in formulas
HancomMobileSheet
39
Reference errors appear when rows or columns are deleted and a deleted cell is
included in a formula.
For example: '=B1+C1' is entered in a cell. If cell B1 is deleted or the whole
column is deleted, a reference error will appear in cell A1. The result value of
the cell will be '200'. However as '=SUM(B2:C2)' is entered in cell A2, even if
column B is deleted, only the values of cells A2 and B2 are excluded. The
result of '=SUM(B2:B2)', (with cell C2 moved to the location of cell B2) is still
calculated. This indicates that it is preferable to use areas and functions,
rather than using a cell addressed directly with operators.
Reference
When the formula is entered incorrectly, HancomMobileSheet indicates
an error message. The error starts with '#' and the type of error is
indicated by the following letter code.
Types Meaning
This appears when the cell width is too small to accomodate all
####
#NAME?
#CALC When it is impossible to show the result.
#REFF When a cell related to a formula is being deleted.
#OPRND This appears when input data type is wrong.
#0DIV When the value is divided by 0.
#NUM When using an invalid numeric argument in a function.
#N/A
of the data. The width can be extended by double-tapping on
the border of the column head.
This will appear when you use unregistered cell or area as
registered one.
When using an unsorted data in functions same as LOOKUP,
VLOOKUP, HLOOKUP, and MATCH.
•
Formula Copy and Move
It is not necessary to enter the same formulas or functions all over again when
the same formulas need to be applied to other cells. Simply enter one formula
and copy it into other cells.

40
•
Not only you can refer to other cells with formulas or functions, but also to
sheets and sheets of other documents.
•
SUM(Σ) is a frequently used function that automatically provides the
summation of a set area. An area does not have to be manually set, as the
auto sum function automatically sets an area.
CHAPTER 3:
Reference to Other Sheets
Auto Sum
HancomMobileSheet
File Menu
New
Create a new workbook with an automatic temporary file name.
Tap on the New button on the tool bar or select the [File-New
①
②
A blank sheet will appear.
Reference
If there is a previously opened file, it will still exist under the new sheet
that has been opened. If you wish to view the previous document, open
the [View-Workbook] menu and select the name of the previous file.
] menu.
Open
To view or edit a previously saved document, you must first open the
document in the current window. The Open dialog box of HancomMobileSheet
provides a list of files. Simply tap the file you want to open.
Close
When the [File-Close] menu is run the current document will be closed. If the
final changes of the current document are not saved a dialog box asking
whether to save or not will appear.
Save & Save As
Most of the documents made in a spreadsheet are standardized documents
and can be endlessly edited for additional data and changes. Therefore
saving documents in a file is very important.

CHAPTER 3:
HancomMobileSheet
41
Currently the file types supported by HancomMobileSheet are its own
HancomMobileSheet file(*.hst) including files created in earlier version of
HancomMobileSheet and Microsoft Excel 95 files(*.xls).
Note that some of the form attributes may be lost or altered when the
spreadsheet is saved in XLS format.
•
Save
When saving the document for the first time, the save dialog box will appear.
Designate a name and tap on the OK button. The file names can accomodate
up to 127 2-byte characters or 255 letters or numbers. In the case that the
current file was a previous document and opened in the open menu, select
the save menu again, then the file will be saved without having to view the
dialog box.
•
Save As
This is used in creating a new document from the current document with a
different name. When the [File-Save as] menu is selected the save dialog box
appears.
Some portion of the cell format attributes may be lost when you import the
spreadsheet data created be Excel 97/2000.
Reference
The location to save to can be set to the Main Memory, a CompactFlash or SD Card.
Save Location
∙
Classification Location
When saving at Handset(hst)
When saving at Handset(xls) /root/Documents/application/excel
/root/Documents/application/HancomMobile
Sheet

42
CHAPTER 3:
HancomMobileSheet
Edit Menu
Undo
This function is used to cancel the last action.
Redo
This function is used to recover to the previous status which was canceled by
Undo.
Cut
The cut menu is used to temporarily cut data from the selected cell, or block
and move it to a different location. The data can be inserted within the
document by selecting [Edit-Paste].
Copy
Copy is used just like Cut, but leaves the original information intact, but now
you have a copy in the memory that can be pasted somewhere else.
Paste
Content that is cut or copied is placed in memory and can be pasted
(inserted) at a different location. There are several options available for
pasting such as [Paste special] and [Paste link].
When there are contents that are stored in memory by running copy or cut,
paste if used for removing or moving the contents elsewhere. There are
several ways to paste such as "Paste special", and "Paste link".
Paste Special
To paste previously cut or copied contents to other locations, just tap
[Edit-Paste]. However, there are cases where you may have to paste only the
data value or only the format of the cell. In these cases, [Paste special] is
useful.
When there are contents that have been copied and this menu is selected a
Paste dialog box like the following will appear.

HancomMobileSheet
43
•
CHAPTER 3:
Paste
This allows you to select an item to
paste among the copied contents, and
refers only to pasting the results of a
formula. When the Formula paste is
selected the copied results appear
according to which copy method is
used, relative reference or absolute
reference. Format refers to setting the
fonts, color etc. of the cell, regardless
of the values.
•
Operation
With similar looking data tables, this
shows the results of the summation,
subtraction, multiplication, and division by pasting the values of the data table.
①
Create data such as the following,
select a block and copy it. Tap on
cell A5, select [Edit-Paste special]
and select "Add".
The results of the adding appear as
②
the following.

44
CHAPTER 3:
HancomMobileSheet
Paste Link
"Paste link" copies changes, for example, when there is a sales invoice
composed of 3 sheets, and the sum value of Sheet1 and Sheet2 is pasted in
Sheet3, as the three sheets are linked the data will automatically change
according to any changes.
Fill
•
Down
Select an area, copy the data on the very top, and the data will be filled
automatically in all cells below.
•
Right
This function allows data to be filled by using the menu. You can select a
specific area, then the data on the very left of the area will be copied and
filled in all cells to the right.
•
Up
Select an area, copy the data on the very bottom and the data will be filled
in all the cells on the top.
•
Left
Select an area, copy the data on the very right and the data will be filled in
all of the cells on the very left.
Clear
•
All
This is the simplest way to clear data. This clears all data within the selected
area or cell. When data is cleared in this way not only are text or number
data cleared but also formats as well. This is very useful for initializing an
area and not having any hidden surprises.
•
Formats
Using this option allows you to clear all the formatting options such as font
and color, but the data remains intact.

CHAPTER 3:
•
Contents
This option just clears the data, and all formatting options are maintained, this
is the inverse of the previous function.
HancomMobileSheet
45
Delete
This option physically removes data,
rows and columns. As you can see
from the following dialog, you can
specify how to shift the data
accordingly.
Delete Sheet
This is used in deleting a sheet in the
current document.
Find/Replace
•
Find
This menu is used to find a word, text,
number or an equation within the
current document. The [Find] menu
can be set with a horizontal or vertical direction and also match the case of
the string as an option.
•
Replace
This menu is used to find and replace any text or a number on a sheet. The
find function can be set with a horizontal and vertical direction and match
case option. The text that has been previously entered on the find or replace
dialog box can be utilized in both the find and replace menus as well.
Go To
This helps you find cells without using the keyboard or stylus. For example if
you wish to find the 100th row of column SR, select [Edit-Go to] and directly
input the cell name in the dialog box and tap OK.

46
CHAPTER 3:
HancomMobileSheet
View Menu
Toolbars
You can close and open toolbars as needed for use, or to create a larger
working area on the screen.
•
Standard Tool
New Comma
Open Cell protection
Save Remove cell protection
Cut Ascending sort
Copy Descending sort
Paste Draw border
Undo Erase border
Redo Right range selection
Automatic sum Down range selection
Function
•
Formatting Tool
Bold Alignment Horizontal title
Italic Alignment Vertical title
Underline Currency
Alignment Left Percent
Alignment Center Increase decimal digit
Alignment Right Decrease decimal digit
Alignment Standard Cell color
Merge cells Font color
•
Etc.
Toggle Toolbar Full Screen
Zoom
Formula Bar
The inputbar indicates the contents of the currently selected cell. You may
change the contents of a cell at the Inputbar directly.

CHAPTER 3:
HancomMobileSheet
47
Protection Mark
Cells can be set to be protected so that cells should not be randomly deleted
or changed. Select [View-Protection Mark], then the Protected Cell will be
indicated by a symbol in blue in the upper left corner. By selecting this menu
once it is activated and by selecting it twice it is deactivated.
Grid line
This determines whether the grid lines for cell division on the sheet is indicated
or not.
Full screen
Displays the current window in full screen mode.
Zoom
To enlarge or to reduce the size of view screen, can be modified from
10%~400% or a user defined value.
Split
This function separates the current window into several windows and help the
view of multi-tasks.
Freeze panes
Freeze Panes fix a certain location within a file. The fixed location does not
move even when scrolled down, only the remaining parts move up and down,
left and right when scrolled. This is used when there is a substantial amount
of data, and you need to check what kind of data is being input. Freeze
Panes
freezes the upper row and left column to the fixed cell.
①
Select cell B2 as the pane to freeze.
When [View-Freeze panes] is selected a line appears and the pane is frozen
②
around that specific location.
You can cancel Freeze by selecting [View-Unfreeze panes
③
].

48
CHAPTER 3:
HancomMobileSheet
Workbook
This shows all the files that are currently open, and from here, you can open,
close, change names, and delete the files.
Insert Menu
Cells, Rows, Column, Work Sheet
Used when inserting a new cell. Select "Insert-Cells", and set the path of the
previous cell when inserting a cell in the dialog box. [Insert-Rows],
[Insert-Columns], [Insert-Worksheet] menus are used when inserting new
rows, columns, worksheets on the Sheet.
Function
•
Constitution of Functions
Functions consist of the function name, parentheses, and invariables. Each
invariable can include value, cell area, or letter according to the function type.
The number of invariables differ according to the functions and there are
various types of functions, including numbers, letters, area, and arrangement.
Select [Insert-Function...] and functions can be entered through the dialog
box.

CHAPTER 3:
Function Name Invariable
PV (pmt, nper, rate, fv, point)
•
Creating Functions
HancomMobileSheet
49
The following is a simple example of a function and invariables. The formula
of cell A4 uses multiple functions to perform a simple mathematical
calculation. The result of cell A5 is an example of using the result of one
function as an invariable of another function. Cell A5 is the average of the two
results combination of profits and expenses. In this way, a function can also
be used in a different function as an invariable. There are always parentheses
around functions, therefore the two parenthesis must always match, otherwise
an error will occur.
Name
To indicate a name in a certain area of
the Sheet, put the cursor in cell A1 and
select [Insert-Name], then the name
define dialog box will appear. Name the
area 'Jacky' and tap Add. then tap on
cell A1, the name 'Jacky' will be shown
in the name box, on the contrary you
can move to cell A1 by selecting 'Jacky'
using the name box.

50
CHAPTER 3:
HancomMobileSheet
Hyperlink
This function allows you to easily link to another document or an Internet web
page. The following example shows the how to call up another document with
an inserted hyperlink.
•
Inserting the Hyperlink
①
Select the cell to insert the hyperlink.
Choose the menu [Insert-Hyperlink...
②
Tap the Find button to find the document.
③
④
Press the OK button.
The contents of the corresponding cell will be underlined and the letters will
turn blue. Both the underline and font color can be changed by the user.
•
Hyperlink Dialog Boxes
- Cell Text
: If the chosen cell has a numeric input, the displayed text can be
changed. But with letters, the corresponding contents will be indicated in the
displayed text box and can be changed by the user.
- Recent File List
- Book mark
: Will display a list of recently opened files or web pages.
: This allows you to create a predefined link between cells or sheets.
].
Format Menu
Cells
Select [Format-Cells...] from the format menu to assign various cell formats.
•
Types of Data Format
Category Description
General General General data format of the input state
This appoints formats of decimal point figures, and
indication of commas and negative numbers.
Number 0
0.00 Displays down to 1/100
#,##0 Displays a comma for every 1000 unit
#,##0.00 Displays decimal a point and a comma

CHAPTER 3:
HancomMobileSheet
#,##0;-#,##0
#,##0;[Red]-#,##0 Commas and negative numbers are displayed in red
Number
Accounting
Currency "$"#,##0;-"$"#,##0 Monetary unit '$', displays a comma
Percentage 0% % display
Fraction # ?/?
Exponent 0.00E+00
#,##0.00;-#,##0.00
#,##0.00;[Red]-#,##0.00
_-* #,##0_-;-* #,##0_-;_-*
"-"_-;_-@* _-
_-* #,##0.00_-;-*
#,##0.00_-;_-* "-"_-;_-@* _-
_-"$"* #,##0_-;-"$"*
#,##0_-;_-* "-"_-;_-@* _-
_-"$"* #,##0.00_-;-"$"*
#,##0.00_-;_-* "-"_-;_-@* _-
"$"#,##0;[Red]-"$"#,##0
"$"#,##0.00;-"$"#,##0.00
"$"#,##0.00;[Red]-"$"#,##0.00
0.00% Displays a % and decimal point
# ??/??
##0.0E+0
Displays a comma. "-" is displayed for negative
numbers
Displays a decimal point and a comma. "-" represents negative numbers
Displays a decimal point and a comma. Negative
numbers are displayed using '-' are red
ex) _-* #,##0_-;-* #,##0_-;_-* "-"_-;_-@* _The form of accounting is divided into four levels.
Positive Number(_-* #,##0_-) ; Negative Number(-*
#,##0_-) ; 0(_-* "-"_-) ; Character(_-@* _-).
Positive Number: _- leaves space for the number
of - and the width of - symbol, the number leaves
space for the number of _ and the width of symbol which will be put right after comma.
Negative Number: After marking as - symbol, the
number leaves space for the number of _ and the
width of - symbol which will be put right after
comma.
0: _- leaves space for the number of _ and the
width of - symbol, and 0 leaves space for the
number of _ and the width of - symbol after
marked as "-".
Character: _- leaves space for the number of _
and the width of - symbol, and after marking as
character, it leaves space for the number of _ and
the width of - symbol.
Monetary unit '$', comma and negative numbers
are displayed in red
Monetary unit '$', A Comma, decimal point are
displayed. "-" is displayed for negative numbers
Monetary unit '$', Comma, decimal point, negative
numbers are displayed in red
Leave a space between the integer and fractions
and disignats a one figure digit for fractions
Leave a space between integers and fractions, and
designates two digits for fractions
Displays two digits above and under the decimal
point, and displays E+00 for the rest
Displays one digit above and under the decimal
point, and displays E+00 for the rest
51

52
CHAPTER 3:
HancomMobileSheet
Date
Time
Text @ Changes to text format
Etc 00000-0000 Shows a zip code
•
yyyy-m-d
yyyy/m/d
m/d/yyyy
yy-m-d
yy/m/d
yy-m
yy/m
m-d Month-day (1-1)
m/d Month/day (1/1)
h:nn AM/PM
h:nn:ss AM/PM
h:nn Hour:Minute
h:nn:ss Hour:Minute:Second
000-00-0000 Social Security Number
[<=9999999]###-####;(###)
###-####
Draw Border
year-month-day (1900-1-1)
year/month/day (1900/1/1)
month/day/year (1/1/1900)
year-month-day (00-1-1)
year/month/day (00/1/1)
year-month (00-1)
year/month (00/1)
Hour:Minute. Display AM for morning, PM for
afternoon
Hour:Minute:Second. Display AM for morning, PM
for afternoon
Displays 3 digit phone numbers
A border can easily be drawn by tapping the draw border button or by
selection from the line input window. According to the number of selected
cells, the number of 'text' letters indicated in 'the line input window' will differ.
When more than 2 cells are selected a line can be selected between the
cells.
- Order of Drawing border
Decide a color for the border. If left at the automatic setting, the standard color
①
will be used.
②
Choose the type of border.
Either select the position to locate the border from the line input window or tap
③
the corresponding button.

CHAPTER 3:
In order to draw a diagonal border, tap on the corresponding center part of
each cell.
•
Font
This is the menu used to set text font, size, color, and attributes. You can
change part or all of the text objects according to your preference.
•
Alignment
Select [Format-cells], and choose the alignment tab. Select the position of
the cell data in a horizontal or vertical direction.
- Horizontal Alignment
the left and the numeric numbers will be aligned on the right.
- Vertical Alignment
- Merge Cells
When several cells are merged together, the contents of the merged cell will
be in the top left cell. Cancelling the merge cell function will show the
hidden cells as before.
•
Pattern
Select the color for a cell by using this 64 color
palette. If left at the automatic setting, the standard
color will be used. For example, after selecting
"yellow" for the background color of the cell, the
background color of the cell will turn yellow.
: This function is used to merge several cells into a single cell.
: As the default setting, the letters will be aligned on
: Cell data is positioned vertically.
HancomMobileSheet
53
Row
•
Height/AutoFit
The default height of a row is set to '1' and modification is allowed. To return
to the default height, tap the [Autofit] menu or tap [Format-Row-Height]
menu and select [Use default].

54
•
To hide or unhide a row, tap the [Format-Row-Hide] menu and the row will
be hidden. To unhide the row, tap [Format-Row-Unhide].
CHAPTER 3:
Hide/Unhide
HancomMobileSheet
Column
•
Width/AutoFit Selection
The default width of the column is set to '8', but can be modified. To return
to the default width, tap the [Autofit selection] menu or tap [Format-
Column-Width] menu and select [Use default].
•
Hide/Unhide
To hide or unhide a column, tap the column head and tap [Format
-Column-Hide] menu, and the column will be hidden. To unhide the column,
tap [Format-Column-Unhide].
•
Standard Width
The default width is set to '8', but you can modify it as you like.
Sheet
•
Rename
Changes the name of the sheet.
•
Hide/Unhide
To hide or unhide a sheet, just tap the [Format-Sheet-Hide] menu and the
sheet will be hidden. A list of the hidden sheets will be shown in the dialog box
when you select the Unhide... button.

CHAPTER 3:
HancomMobileSheet
Tools Menu
Protection
This prevents any change to a cell or any designated area of the sheet, or to
an entire document.
•
Protect sheet
To prevent any new values from being
added to the sheet, tap the menu
[Tools-Protect sheet...]. You can select
the protection type. If you select [Cell],
no data in the cells can be edited.
If you select [Item], nothing including any
charts can be edited.
A protected sheet cannot be deleted. A
password can also be applied.
[Tools-Unprotect sheet] will be seen
when the sheet is protected. Selecting
this menu will remove the protection.
55
Recalculate/Manual Calculation
If many cells have an equation input, it can take a long time to carry out the
calculations. If there are many equations, select either the automatic or
manual calculation option to carry out the entire recalculation process. With
the automatic option, calculations are immediately carried out as soon as the
cell information changes.
With the manual option, tap the [Tools-Recalculate] menu to calculate the
total. Therefore before recalculation, the previous information will be indicated
in the cell. If the file is saved in a manual calculation state, recalculation will
be carried out to update the equation results, then saved.

56
CHAPTER 3:
HancomMobileSheet
Sort
Allows you to sequence information alphabetical or numerically in either
ascending or descending order.
•
Ascending
This is used when the order of the values are set from lower to higher. This
order is set in different ways according to the numbers, letters, date, etc. and
the standard for the "Ascending Order" is as the following.
①
Numbers are aligned to increasing order, starting from the lowest to highest.
②
Date and time are aligned from earlier to later.
③
Letters are aligned alphabetically from A to Z.
④
Cases whereby numbers and letters appear together are arranged in
numeric-alphabetical order.
⑤
When there is a blank cell within the aligned area, all blank cells will be placed
at the very end. This applies to the Descending Alignment as well.
•
Descending
Descending Alignment follows the opposite standards of Ascending Alignment.
Automatic Filter
This provides the ability to select only desired information among the various
data on the sheet. However, note that HancomMobileSheet only supports the
column auto filters. Data extraction using the condition formulas used in
previous spreadsheets will be implemented in the advanced filter.
•
Filter
When the filter command is run
HancomMobileSheet will ask whether
the filtered results will be created on a
new sheet or if the present data range
is to be created.
The database range will be automatically set to the consecutive range of data
where the cursor is located(in the selected cell). An auto filter created in a
new sheet will be linked to the original data, automatically changing according
to changes in the original data. When the auto filter is created, arrow buttons

CHAPTER 3:
HancomMobileSheet
57
are added to the top cells according to each selection. With column auto
filters, a column title table is created as in the left image below, with data on
the bottom.
•
Select in Automatic Filter
You will see the image below after selecting Singapore from the list. The
arrow in the field where a list has been selected is displayed in blue. Products
within the Singapore category include machines and electronics. To extract
only the electronics data, press the product column arrow and select
'electronics' in the list. As such, you can select one list to each in multiple
fields.
•
New Sheet
In order to create an auto filter in a new sheet, the filtered results are linked
to the original data. Therefore the filtered results will change when the original
data values are changed.
•
Cancel
To display the hidden contents without cancelling the filter, press the blue
arrow and select "Show All". If several columns are selected then the same
should be done in each field. Following are steps to cancel the auto filter
completely. Select [Tools-Automatic Filter] on the sheet containing the
filtered results. Select the menu, uncheck the "Check Mark", and then the
"Filter" will be cancelled. When the auto filter is created in the same location
as the original range, the original data will be displayed. In creating a filter on
a new sheet, only the selected contents will remain when cancelled. The
formula will disappear and only the cell values will remain.

58
•
CHAPTER 3:
Select Customize
HancomMobileSheet
The Customize menu is composed of two
options. The 'Top 10 Filter' will select
requested data upper values to lower
values. The second option "Customize"
allows the user to set the conditions.
For example, If you have selected item,
up, 10, this means that 10 items will be
selected starting from the larger values.
In the case of the Top 10, character cells
will not be apparent. When "Percentage"
is selected, the cell values within the top
10% among the total numeric values will
be selected and displayed.
-
User Defined : Select "User Defined" in the "Autofilter" List and the
following dialog box will appear.
The data matching the value and condition in the quantity field will be
extracted.
- The definition of the condition list is as the following.
= Extracts data that equals the selected data value
<> Extracts data unequal to the selected data.
< Extracts data smaller than the selected data.
> Extracts data larger than the selected data.
<= Extracts data smaller or equal to the selected data.
>= Extracts data larger or equal to the selected data.
start Char Extracts the data starting with the input character.
excluded start Char Extracts data excluding the data starting with the input data.
end char Extracts the data that ends with the input character.
excluded end Char Extracts data excluding the data where the input character comes at the end.
included char Extracts the data including the input character.
excluded char Extracts only the data not including the input character.
The character mentioned above refers not only to one letter, but also to text
strings. Select "OR" and the data values that match more than one condition
will be selected. When "AND" is selected, only data matching the first and
second conditions will be extracted.

CHAPTER 3:
HancomMobileSheet
59
Function List
You must add "(double-quotation) to the beginning at to the end when you are
to input Srting data.
ABS(value)
Returns the absolute value of a number.
ACOS(cos value) Returns the radian value of the inverse cosine value.
ACOSH(hyperbolic cos value)
AND(logical1, logical2, ...)
ASIN(sin value)
ASINH(hyperbolic sin value)
ATAN(tan value)
ATAN2(x value, y value)
ATANH(hyperbolic tan value)
AVGRELIDX(base period, compare period)
AVR(value1, value2,..)
BETA(alpha, beta)
BETADIST(value, alpha, beta)
BINOMIAL(trials, probability, cumulative)
CAUCHY(value, cumulative)
CAUCHYINV(probability)
CELL(type, range)
CHAR(value)
CHISQR(value, freedom, cumulative)
CHISQRINV(probability, freedom)
CHIVALUE(value, sample number, varianc
e of population)
CHOOSE(number, value1, value2,...)
Returns the inverse hyperbolic cosine of a number
Returns True(1) only if all arguments are true.
Returns the arc sine of a number in radians.
Returns the inverse hyperbolic sine of a number.
Returns the arc tangent of a number in radian value.
Returns the arc tangent of the specified x and y
coordinates, and radian value of the inverse tangent
between X-ax and a line connected with a point
whose coordinate is (x value, y value).
Returns the inverse hyperbolic tangent of a number.
Calculates average relative price index.
Calculates the arithmetic mean of the values.
Calculates beta function value according to alpha
and beta.
Returns the ratio of the probability variable X(value)
against the unknown number 'alpha' and 'beta'.
Calculates the probability of binominal distribution.
Calculates probability of Cauchy distribution.
Calculates the inverse of the cumulative probability
from Caushy distribution.
Returns information about the formatting, location, or
contents of the upper-left cell in a reference.
Returns the character specified by the value from the
character set.
Calculates probability of Chi-square distribution.
Calculates the inverse of the cumulative probability
from Chi-square distribution.
Calculates Chisquare statistic. value is sample
variance.
Returns a value from value arguments, based on an
index number.
CODE(character) Returns a numeric code for the first character.

60
CHAPTER 3:
HancomMobileSheet
COMBI(value, chosen number)
CONVERT(from_unit, to_unit, value)
CORREL(range1, range2)
CORRELMO(range1, range2)
COS(radian value)
COSH(radian value)
COUNT(value1, value2,...)
COUNTA(object value, value1, value2,...)
COUNTEXT(value1, value2,...)
COUNTIF(data range, condition)
COV(range1, range2)
COVMO(range1, range2)
CRITBINOMIAL(trial, probability, criterion
probability)
DATE(number)
DVAR(data, field, condition)
DB(cost, salvage, life, period, month)
DCOUNT(data, field, condition)
DDB(cost, salvage, life, period, rate)
DECTOHEX(decimal value, character
number)
DEGREE(radian value)
DEVSUMSQR(value1, value2,...)
DMAX(data, field, condition)
Calculates the number of combinations for a given
number of items.
Converts a value from metric to English systems and
vice versa.
Calculates the correlation coefficient of two cell
ranges, which have the data from sample.
Calculates the correlation coefficient of two cell
ranges, which have the data from population.
Returns the cosine of radian value.
Returns the hyperbolic cosine value of radian value.
Counts the number of cells that contain numbers.
Calculates the number of object value within values.
Counts the number of cells that contain character
and the result of formula is number.
Calculates the amount of data from data range that
meets the given condition.
Calculates covariance, the average of the products of
deviations of corresponding components of two
ranges, which is from sample.
Calculates covariance, the average of the products of
deviations of corresponding components of two
ranges, which is from population.
Calculates the largest value for which the cumulative
binomial distribution is less than or equal to a
criterion probability.
Calculates the date from a number.
Calculates the average of the field column which fits
the condition.
Calculates the depreciation of an asset for a
specified period using the fixed declining balance
method.
Calculates the amount of data that match the
conditions.
Calculates the depreciation of an asset for a
specified period using the double declining balance
method or some other method by rate.
Converts decimal value to hexadecimal.
Converts radians into degrees.
Calculates the sum of squares of deviations of data
points from their sample mean.
Calculates the largest value in the field that matches
the conditions.

CHAPTER 3:
HancomMobileSheet
61
DMIN(data, field, condition)
DPROD(data, field, condition)
DSTDEV(data, field, condition)
DSTDEVS(data, field, condition)
DSUM(data, field, condition)
DVAR(data, field, condition)
DVARS(data, field, condition)
EXACT(string1, string2)
EXP(value)
EXPDIST(value, lambda, cumulative)
FACT(value)
FDIST(value, freedom1, freedom2,cumulative)
FDISTINV(probability,freedom1, freedom2)
FINDTEXT(find what, within what)
FISHER(base period price, base period
quantity, compare period price, compare
period quantity, type)
FORECAST(value, independent range,
dependent range)
FREQUENCY(data range, interval hurdle
range)
FV(pmt, nper, rate, pv, point)
FVDIFF(rate array, principal)
GAMMA(value)
GAMMADIST(value, alpha, beta, cumulative)
GAMMALN(value)
Calculates the smallest value in the field that
matches the condition.
Calculates multiplication of data that matches the
condition.
Calculates standard deviation of data that matches
the condition.
Calculates sample standard deviation of data that
matches the condition.
Calculates summation of data that matches the
condition.
Estimates variance of data that matches the
condition.
Calculates sample variance of data that matches the
condition.
Compares two text strings and returns 1(true) if they
are the same one, returns 0(false) otherwise.
Calculates the exponent for basis e.
Calculates the probability from exponential
distribution.
Returns the factorial of a value.
Calculates the F probability distribution.
Calculates the inverse of the F probability
distribution.
Returns the first digit number of find what within
what.
Calculates the Fisher index.
Calculates prediction of dependent variable at the
value of an independent variable by regression.
Calculates the amount of data for each class from
data range by interval hurdle range. If data is less
than a hurdle range, it will increase the number of
that class.
Calculates the future value of an investment based
on periodic, constant payments and a constant
interest rate.
Calculates the future value of principal with applying
compound interest rate array.
Calculates the gamma value.
Calculates the probability of the gamma distribution.
Calculates the natural logarithm of the gamma
function.

62
CHAPTER 3:
HancomMobileSheet
GEODIST(value, probability, cumulative)
GEOMEAN(value1, value2, ...)
HATMOMEAN(value1, value2, ...)
HEXTODEC(hexadecimal value)
HLOOKUP(lookup value, data range, row
index, appropriate)
HOUR(number)
HYPERGEO(number of population, number
of success in population, number of sample,
success number in sample, cumulative)
IF(condition, true value, false value)
INDEX(data range, row number, column
number)
INOMINAL(real rate, number of period)
INT(value)
INTERCEPT(independent range, dependent
range)
IPMT(nper, per, rate, pv, fv, point)
IREAL(nominal rate, number of period)
IRR(value range, guess rate)
KURTOSIS(value1, value2,...)
LARGE(data range, value)
LAS(base period price, base period quantit-
y, compare period, type)
LEFT(string, value)
LENGTH(string)
LN(value)
LOG(base, value)
LOOKUP(lookup value, data range, result
range)
LOWER(string)
MAED(base period price, base period
quantity, compare period price, compare
period quantity, type)
Calculates the probability of the trial number of the
first success as random variable(value).
Calculates the geometric mean of value or range.
Calculates the harmonic mean of value.
Changes the hexadecimal value into a decimal
format.
Looks for a value in the top row of the data range,
and then returns a value in the same column from a
row specified by the row index.
Calculates the hour from the number.
Calculates the probability of the hypergeometric
distribution.
Calculates a value if a specified condition evaluates
to true and another value if it evaluates to false.
Returns a value within a data range according to row
number and column number.
Calculates nominal rate per year, which can make a
real rate with applying compound interest rate.
Rounds a number down to the nearest integer.
Calculates intersection of the Y axis from regression.
Calculates interest payment for a given period(nper)
for an investment in case of constant payments and
a constant interest rate.
Calculates real rate per year by applying compound
interest rate.
Calculates the internal rate of return at a regular
intervals.
Calculates kurtosis to determine relative pickness of
a distribution compared with normal distribution.
Returns the k-th largest value in a data range.
Calculates Laspeyres index.
Returns the leftmost characters in a text string.
Returns the number of character in a string.
Returns the natural logarithm of a value.
Returns the logarithm of a value to the base.
Returns a value of result range based on the result
of lookup value in data range.
Changes all uppercase letters into lowercase.
Calculates Marshall-Edgeworth index.

CHAPTER 3:
HancomMobileSheet
63
MATCH(lookup value, data range, match
type)
MAX(value1, value2, ...)
MEANDEV(value1, value2,...)
MEDIAN(value1, value2, ...)
MID(string, start, number of character)
MIN(value1, value2, ...)
MINUTE(number)
MIRR(value range, financial rate, reinvestm
ent rate)
MOD(value, divisor)
MODE(value1, value2, ...)
MOMENT(data range, power)
MONTH(number)
MULTINOMIAL(value1, value2, value3,...)
NEGABINOMIAL(number of trial, number
of success, probability, cumulative)
NORMAL(value, mean, standarddeviation,
cumulative)
NORMALINV(probability, average, standar
d deviation)
NORMALSTD(z, cumulative)
NORMALSTDINV(probability)
NOT(logical)
NOW( )
NPER(pmt, rate, pv, fv, point)
NPV(investment, rate)
NPVX(investment, rate, date)
OR(logical1, logical2, ...)
PAAS(base period price, base period
quantity, compare period, type)
PERMUT(value, choose)
PI()
PMT(nper, rate, pv, fv, point)
Returns the relative position of an item in an array
that matches a specified value in a specified order.
Returns the largest value in a set of value.
Calculates the value that divides sum of absolute
value of each deviation by the amount of data.
Returns the median.
Returns the characters to the starting value and the
number of characters.
Returns the smallest number in a set of values.
Calculates the minute from the number.
Calculates modified internal rate of return.
Returns the remainder after the value is divided by
the divisor.
Returns the most frequently occurring value.
Calculate the moment.
Calculates the month from the number.
Calculates the multinomial.
Calculates the probability of random variable, which
is number of trials before the number t-th success.
Calculates the probability of normal distribution.
Calculates the inverse of normal distribution.
Calculates the probability of standard normal
distribution.
Calculates the inverse of standard normal distribution.
Reverses the logic of its argument.
Shows the current date and time.
Calculates the number of periods of an investment.
Calculates the net present value of an investment,
witch substract present value of cash investment
from present value of cash income.
Calculates irregular net present value.
Returns False(0) only if all arguments are false.
Calculates the Paasche index.
Calculates the number of permutations for a given
number of objects that can be selected from value.
Returns the value of pi(π=3.14159265358979324).
Calculates the payment for a loan with a constant
payment.

64
loan
of
to
greater
according
of
the
be
of
is
asset
CHAPTER 3:
HancomMobileSheet
PMTPV(nper, per, rate, pv, fv, point)
PMTPVCUM(nper, start, end, rate, pv, fv)
POISSON(success, average, cumulative)
POWER(value, power)
PRODUCT(value1, value2,...)
PROPER(string)
PV(pmt, nper, rate, fv, point)
QUADMEAN(value1, value2, ...)
QUARTILE(data range, quartile number)
QUOTIENT(numerator, denominator)
RADIAN(degrees)
RAND( )
RANK(value, data range, direction)
RATE(pmt, nper, pv, fv, point, guess rate)
REPEAT(string, repeat number)
REPEATPERMUT(value, choose)
REPLACE(string, start, number of characte
r, new string)
RIGHT(string, value)
ROUND(value, digits)
ROUNDDOWN(value, digits)
ROUNDUP(value, digits)
SECOND(number)
SIGN(value)
SIMPAGGIDX(base period price, compare
period price)
SIN(radians)
SINH(radians)
SKEW(value1, value2, ...)
SLN(cost, salvage, life)
Calculates the payment for a given period for a
with a constant payment.
Calculates the cumulative payment for a series
period for a loan with a constant payment.
Calculates the probability from a poisson distribution.
Calculate the result of a value raised to a power.
Calculates the multiplication of all the values.
Changes the first character of each word
uppercase and following characters to lowercase.
Calculates the present value of an investment.
Calculates the quadratic mean.
Returns the quartile of a data set.
Returns the integer portion of a division.
Changes the degrees to radians.
Returns an evenly distributed random number
than or equal to 0 and less than 1.
Calculates the rank value in a data range
to direction.
Calculates the interest rate per a period of an annuity.
Returns a repeated character string of a string
repeating numbers. The repeate number for
REPEAT function must be natural number.
Calculates the number of permutations that can
selected from a value with adding to repeating.
Replaces characters with a new text string.
Returns the rightmost characters in a text string.
Rounds a value to a specified number of digits.
Rounds down a value according to the number
digits.
Rounds up a value according to the number of digits.
Calculates the seconds from a number.
Returns 1 if the value is positive, zero if the value
0, and -1 if the value is negative.
Calculates a simple aggregated price index.
Returns the sine value of radians.
Returns the hyperbolic sine of radians.
Calculates skewness of a distribution.
Calculates the straight-line depreciation of an
for one period.

CHAPTER 3:
HancomMobileSheet
65
SLOPE(independent range, dependent range)
SMALL(data range, value)
SQRT(value)
SQRTPI(value)
STANDARDIZE(value, average, standard
deviation)
STDEV(value1,value2,...)
STDEVMO(value1,value2,...)
STERR(independent range, dependent
range)
SUBSTITUTE(string, old string, new string,
position)
SUBTOTAL(type, data range)
SUM(value1, value2, ...)
SUMIF(data range, condition, sum range)
SUMPRODUCT(range1, range2, ...)
SUMSQ(value1, value2, ...)
SUMXMY2(range_x, range_y)
SYD(cost, salvage, life, point)
TAN(radians)
TANH(radians)
TDIST(value, freedom, cumulative)
TDISTINV(probability, freedom)
TRIM(string)
TRIMMEAN(data range, percent)
TRUNC(value, digits)
TVALUE(value, sample data range, mean
of population)
UNIFORM(min, max, value, cumulative)
UNION(string1, string2, ....)
UPPER(string)
VALUEIDX(base period price, base period
quantity, compare period price, compare
period quantity)
Calculates the slope from a simple regression.
Returns the k-th smallest value in a data range.
Calculates a positive square root of a value.
Calculates the square root of (value * pi).
Normalizes a value with average and standard
deviation.
Calculates the standard deviation of sample data.
Calculates the standard deviation of population.
Calculates the standard error of an estimated value
from a simple regression.
Substitutes an old string with a new string at the
position of an old string.
Calculates a subtotal by the type.
Adds all the numbers in a range of cells or values.
Adds the cells specified by a given condition.
Multiplies corresponding components in the given
ranges, and returns the sum of those products.
Returns the sum of the squares of values.
Returns the sum of the difference of squares of
corresponding values in two ranges.
Calculates the sum-of-years-digits depreciation of an
asset for a period.
Returns the tangent of radians.
Returns the hyperbolic tangent of radians.
Calculates the probability of T-distribution.
Calculates the inverse of T-distribution.
Removes all spaces from a string except for spaces
between words.
Calculates the mean taken by excluding a
percentage of data points from the top and bottom
tails of a data set.
Truncates a value to an integer by removing the
fractional part of the number.
Calculates the T statistic under unknown variance of
a population.
Calculates the probability of uniform distribution.
Joins strings into a unified string.
Changes all lowercase letters into uppercase.
Calculates a value index.

66
CHAPTER 3:
HancomMobileSheet
VAR(value1, value2, ...)
VARMO(value1, value2, ...)
VLOOKUP(lookup value, data range, colu
mn index, appropriate)
WEEK(number)
WEIBULL(value, intensity, average, cumula
tive)
WINDOMEAN(data range, percent)
YEAR(number)
Calculates variance based on a sample.
Calculates variance based on a population.
Searches for a value in the leftmost column data
range, and then returns a value in the same row
from a column specified by a column index.
Calculates the week day from a number. Sunday is
1, Monday is 2 ... Saturday is 7.
Calculates the probability of a Weibull distribution.
Calculates the mean taken by compensating a
percentage of data points from the top and bottom
tails of a data set.
Calculates the year corresponding to a number.

CHAPTER 4:
HancomMobilePresenter
67
CHAPTER 4: HancomMobilePresenter
Introduction
HancomMobilePresenter is a presentation tool for opening Microsoft PowerPoint
(*.ppt) and HancomPresenter(*.hpt) files and presenting slide shows.
You can use HancomMobilePresenter for SL-5500 to give sophisticated slide
shows.
Reference
Some objects or slide properties may not be displayed for PowerPoint
documents(*.ppt). For the functions available when using Microsoft
PowerPoint files, see the Appendix.
Starting HancomMobilePresenter
In the Applications folder of the Home screen, tap the [HancomPresenter] icon,
or move the focus to [HancomPresenter] by using the cursor key and then
press the SELECT or OK key.
The HancomMobilePresenter screen will be displayed.

68
CHAPTER 4:
HancomMobilePresenter
Opening Presentation Documents
The HancomMobilePresenter displays the following two document types on
the screen.
-
: Microsoft PowerPoint document
-
: HancomPresenter document
When you tap the presentation document you want to open, the first slide will
be displayed on the screen.
In the HancomMobilePresenter screen, you can move the focus to the desired
document by pressing the UP or DOWN cursor key on the slide cover. Then
press the SELECT or OK key to open the selected document.
Reference
You can open presentation
documents from the Documents
folder.
Tap the Documents tab from
the Home screen and then tap
the presentation document (
or
) to open.
Or move the focus to the
presentation document by using
the cursor key and then press
the SELECT or OK key.
Running Slide Shows
You can run slide shows simply by tapping on the screen after opening a
presentation document.

CHAPTER 4:
You can also run slide shows by using the following keys on the slide cover
after opening a presentation document.
- Up or Left cursor key : Moves the screen to the previous slide.
- Right or Down cursor key : Moves the screen to the next slide.
- SELECT key : Moves the screen to the next slide.
- Cancel key : Exits the slide show and returns to the main screen.
- Menu key : Opens and then closes the Popup menu.
- HOME key : Displays the Home screen and allows you to do any task. In
order to return to HancomMobilePresenter, tap
bottom of the screen.
HancomMobilePresenter
on the taskbar at the
69
Popup Menu
While pressing the (SHIFT key) on the hardware keyboard, tap on the screen
to use the following Popup menus.
The Menu key and Cursor key also allow you to select them. The Popup menu
pops up when you press the Menu key on the slide corver. Tap the desired
menu command or press the SELECT key to execute the focused command.

70
CHAPTER 4:
HancomMobilePresenter
First Slide
Previous Slide
Next Slide
Last Slide
Go To
Pen Show
Pen Hide
Erase Pen
Pen Color
Pause
Exit Slide Show
Moves the screen to the first slide.
Moves the screen to the previous slide.
Moves the screen to the next slide.
Moves the screen to the last slide.
Select this menu to move the screen to a desired slide.
Tap "Pen Show" to enter pen mode to mark simple contents on the slide.
To exit pen mode, tap "Pen Hide" from the Popup menu.
You can erase all contents that have been marked on the slide.
Tap this menu to select different pen colors.
You can momentarily pause animations. To continue with the slide show, tap
"Pause" again.(only *.hpt file)
Exits the slide show and returns to the main screen of the program.
Moving to a Desired Slide
The title of each slide is displayed
when you tap "Go To" from the Popup
menu(If there are no titles for the
slides, they will be displayed in a "1
Slide, 2 Slide..." format.).
You can move to a selected slide by
tapping the title or the number of the
slide.

CHAPTER 4:
HancomMobilePresenter
71
About Pen Marking
To mark simple contents on the slide, tap "Pen Show" from the Popup menu
and manually drag on the screen. By selecting a pen color, you enter pen
mode.
Tap "Pen Color" from the Popup menu
to select a variety of pen colors.
To finish using the pen marking, re-open
the Popup menu, and tap "Pen Hide".

72
CHAPTER 4:
To erase the contents marked on the
slide, tap "Erase Pen" from the
Popup menu.
HancomMobilePresenter
Ending a Slide Show
The Slide Show will end and the program will return to the main screen when
you tap the screen at the final slide.
You can also end the slide show by tapping "Exit Slide Show" from the Popup
menu or pressing the Cancel key.

Appendix
73
Appendix
Items listed in "Available" does not mean they fully support all of the office
97/2000 data formats and functions. Some of the functions may not be imported
and/or exported.
Microsoft Office 2000
1. Functions Available when Importing Microsoft Word 2000 Files
Features Available Not Available
Date and Time
Picture
Font
Paragraph
mm/dd/yyyy
․
mm/dd/yy hh:mm AM/PM
․
․
mm/dd/yy hh:mm:ss AM/PM
․
hh:mm AM/PM
hh:mm:ss AM/PM
․
PNG, BMP, GIF, JPEG
․
․
Font Style
(Regular, Bold, ltalic, Bold Italic,
Underline)
․
Size(Maximum 24 points)
․
Font color
Indents and Spacing
․
(Alignment : Left, Center, Right)
mm/dd/yy
․
Days of the Week, Month Day, Year
․
․
Month Day, Year
․
yyyy-mm-dd
․
Day-Month-yy
Month. Day. yy
․
Day Month Year
․
․
Month yy
Month-yy
․
hh:mm(24hours)
․
hh:mm:ss
․
․Language
Calendar Type
․
․
Use full width characters
․Update automatically
EMF, WMF, PICT, Etc...
․
AutoShapes
․
(Line, Arrows, Flowchart, Banners, Etc...)
WordArt
․
Chart
․
․
Font type
Underline color
․
․
Emphasis mark
․
Effects
Character Spacing
․
(Scale, Spacing Position, Kerning for fonts)
․
Text Effects (Animations)
Indents and Spacing
․
(Alignment : Justified, Distributed Outline
level, Indentation, Spacing, Tabs)
Line and Page Breaks
․

74
Appendix
Features Available Not Available
․
Text
․
Table
File -
Object - ․Insert Object
Break -
Page Numbers -
Auto Text -
Field -
Symbol -
Footnotes -
Caption -
Cross-reference -
Text Box -
Index and Tables -
Bookmark -
Hyperlink
-
Table (Size, Alignment, Text wrapping,
Options)
Row (Size, Options)
․
․
Column(Size : Preferrend width)
․
Cell (Size, Vertical Alignment, Options,
Margin)
Formula (Formula, Number format, Paste
․
function, Paste bookmark)
Insert file
․
․
Break types(Page break, Column break,
Text wrapping break)
Section break types(Next page, continuous,
․
Even page, Odd page)
Position
․
Alignment
․
․
Show number on first page
Number Format
․
․
Auto Correct
AutoFormat As You Type
․
AutoText
․
AutoFormat
․
Categories
․
․
Field names
Options
․
․
Symbols
Special Characters
․
․
Insert(Footnote, Endnote)
․
Numbering(AutoNumber, Custon mark,
Symbol)
․
Caption
Label, Postion
․
Numbering
․
AutoCaption
․
Reference type
․
Insert reference to
․
․
Insert as hyperlink
․
Include above/Below
Vertical
․
․
Horizontal
․
Index
Table of Contents
․
Table of Figures
․
․
Table of Authorities
․
Insert Bookmark
․
Insert Hyperlink

Appendix
2. Functions Available when Exporting Microsoft Word 2000 Files
Features Available Not Available
․
Fixed Font (Font type)
․
Fixed Font(Size, Color, Underline)
․
Helvetica Font (Size, Color, Bold,
Italic, Underline)
Micro Font(Size, Color, Underline)
Format
Paragraph
Indent Available -
Outdent
Image
Date and Time
․
․
Smallsmooth Font (Size, Color,
Underline)
․
Smoothtimes Font (Size, Color,
Underline)
Alignment (Left,Center, Right)
․
Bullet (None, Numbering, Dot)
․
․
Space (Line Space, Before
Paragraph, After Paragraph)
Available -
․
BMP, GIF, JEPG, PNG
mm/dd/yyyy
․
mm/dd/yyyy hh:mm AM/PM
․
mm/dd/yyyy hh:mm:ss AM/PM
․
hh:mm AM/PM
․
hh:mm:ss AM/PM
․
․Helvetica Font (Font type)
Micro Font (Font type)
․
․
Smallsmooth Font (Font type)
․Smoothtimes Font (Font type)
-
-
-
75

76
Appendix
3. Functions Available when Importing Microsoft Excel 2000 Files
Features Available Not Available
Function
Cell
Sheet
․
Part of Financial
․Part of Date & Time
Part of Math Trig
․
․
Part of Statistical
․Part of Lookup & Reference
Part of Database
․
․
Part of Text
․76 functions supported
Category(except types not exis-
․
ting on HancomMobileSheet.)
- General
- Number(except color tone)
- Currency(except color tone)
- Accrounting
- Date
- Time
- Percentage
- Fraction
- Scientific
- Text
- Special
․
Alignment
- Horizontal(General, Left, Center,
Right, Justify, Center Across
Selection)
- Vertical
․
․
Color) Color tone is changed to
․
․
(Top, Center, Bottom, Justify)
Font(Size, Bold, Italic, Underline
(single), Strikethrough,Color) Color
tone is changed to most similar
one.
Border (Border, Line Style, Line
most similar one.
Patterns(Color). Color tone is
changed to most similar one.
Name
․
Part of Financial
․Part of Date & Time
Part of Math Trig
․
․
Part of Statistical
․Part of Lookup & Reference
Part of Database
․
․
Part of Text
․Part of Information
Logical Functions
․
Font(Font, Underline(Double, Single
․
Accounting, Double Accounting), Superscript, Subscript)
Protection (Locked/Hidden)
․
․
Border(Diagonal)
․Alignment
- Horizontal(Left(Indent), Fill, Distributed)
- Vertical(Distributed)
- Orientation
- Text Control
․
Patterns(Pattern)
Hide
․
․
Background
Open
․
Setting(Alignment, Font, Font style, Size)
․
Header -
․
Text (Font, Font Style, Size, Underline,
Effect)
․
Page
․
Pages
Date
․
․
Time
․
File name
Tab
․

Appendix
Features Available Not Available
Text(Font, Font Style, Size, Underline,
․
Effect)
․Page
Pages
Footer -
Chart
Name -
Comment -
Clip Art -
Picture -
AutoShapes
Object -
Hyperlink
Height
Row
Column
Phonetic guide -
․
․
Hide
․
Width
․Hide
-
-
-
․
․
Date
․Time
File Name
․
․
Tab
․
Standard types
(Column, Bar, Line, Pie, XY(scatter),
Area, Doughnut, Radar, Surface,
Bubble, Stock, Cylinder, Con, Pyramid)
․
Customer types
․
Define
Label Ranges
․
Hidden comment
․
․
Show comment
Text(Font, Style, Size, Underline, Color,
․
Effect, Alignment)
․
Not Available
Insert Picture
․
․
Image control
․More Contrast
Less Contrast
․
․
More Brightness
․Less Brightness
Line Style
․
․
Transparent color
․
Line
Connectors
․
Basic Shapes
․
․
Block Arrows
Flowchart
․
Starts and Banners
․
․
Callouts
․
Word Art
․
Not Available
․
Exisiting File or Webpage
․
Place in This Document
Create New Document
․
E-mail Address
․
Standard Width
․
․
Font(Underline, Color, Strikethrough)
77

78
Appendix
Features Available Not Available
Protect sheet
Protection -
Scenario -
Macro -
Filter -
Subtotals -
Pivot Table -
Group and Outline -
Split -
Freeze Panes -
․
․
Protect workbook
AutoFilter
․
․
Group & Outline

Appendix
4. Functions Available when Exporting Microsoft Excel 2000 Files
Features Available Not Available
Function
Cells
Part of Financial Functions
․
․
Part of Date & Time Functions
․Part of Math Trig Functions
Part of Statistical Functions
․
․
Part of Lookup & Reference Functions
Part of Part of Database Functions
․
․
Part of Text Functions
․76 Functions Supported
․
Format
- General
- Number(except color tone)
- Currency(except color tone)
- Accrounting
- Date
- Time
- Percentage
- Fraction
- Scientific
- Text
- Special
․
Alignment
- Horizontal(General, Left, Center,
Right,Justify)
- Vertical(Top, Center, Bottom, Ju-
stify)
Font(Bold, Italic, Underline(single),
․
Strikethrough,Color) Color tone is
changed to most similar one.
Border(Border, Line Style, Line Co
․
-lor) Color tone is changed to most similar one.
Pattern(Color). Color tone is chang
․
ed to most similar one.
Part of Financial Functions
․
․
Part of Date & Time Functions
․Part of Math Trig Functions
Part of Statistical Functions
․
․
Part of Lookup & Reference Functions
․Part of Database Functions
Part of Text Functions
․
․
Part of Information Functions
․Part of Logical Functions
․Font(Font, Size)
Border(Diagonal)
․
․
Alignment
- Horizontal(Horizontal Title)
- Vertical(Vertical Title)
- Merge cells
79
Sheet
Recalculate -
Manual calculation -
Split -
Freeze panes -
Name -
․
Name
Hide
․

80
Appendix
Features Available Not Available
Hyperlink
Height
Row
Column
Protection -
Automatic Filter -
․
․
․
Hide
Width
-
AutoFit
․
AutoFit Selection
․
․
Standard Width
․
Hide
․
Cell Protect
Protect sheet
․
․Filter location
(Before Action-Dialog Box)
․
Filter (After Action)

Appendix
5. Functions Available when Importing Microsoft PowerPoint 2000 Files
Features Available Not Available
Text
Size
․
․
Bold
․Italic
Underline
․
․
Color
․Alignment
Font Type
․
․
Emboss
․Text Direction
Numbered
․
․
Bulleted
․Shadow
Superscript
․
․
Subscript
․Upholding Fixed
Line Break
․
81
․
Fill
․Line
Scale
Shapes
Line/Arrow
Text box
Image
WordArt
Master
Movies/Sounds -
․
․
Position on slide
․14 kinds of basic shapes
Line
․
․
Arrow
․Size
Scale
․
․
Position on slide
Fill
․
․
Line
Size
․
Scale
․
․
jpeg, png, bmp, gif(except Animation
GIF)
․
Size
․
Scale
Relative to original picture size
․
․
Best scale for slide show
․
Potision on slide
Slide
․
․
Title
․
Fill (Semitransparent)
․Alternative text
Size and rotate
․
․
Angle
Alternative text
․
․
Rotate
․Angle
Text anchor point, Effect
․
․
Internal margin
Alternative text
․
Angle
․
․
Rotate
wmf, pcx, bmz, tif, tiff, eps, etc...
․
Lock aspect ratio.
․
․
Crop from(Left, Topm Right, Bottom,
Brightness, Contrast)
․
Line(Color, Style, Dashed, Width)
Rotate
․
․
Image control
․
Alternative text
-
․
All functions
Handout
․
․
Notes
․
All functions

82
Appendix
Features Available Not Available
Fill color(Simple Color)
Comment
․
․
Line
․Size
Scale
․
․
Position on slide
․Text anchor point
Fill Color(Semitransparen)
․
Rotate
․
․
internal margin
․Alternative text
Word warp text in AutoShape
․
Resize AutoShape to fit text
․
Rotate text within Auto Shape by 90
․
․
Angle
Table
Clip Art
Slide
Chart
․
Text
Column
․
․
Rows
Slide Layout
․
․
Style
Color
․
․
Width
․
Fill color
Internal margin
․
․
All functions
Background
․
Header and Footer
․
․
Slide Number
Date and time
․
Slide Color Scheme
․
All functions
․

Appendix
Microsoft Office 97
1. Functions Available when Importing Microsoft Word 97 Files
Features Available Not Available
Date and Time
Picture
Font
mm/dd/yyyy
․
mm/dd/yy hh:mm AM/PM
․
mm/dd/yy hh:mm:ss AM/PM
․
․
hh:mm AM/PM
hh:mm:ss AM/PM
․
PNG, BMP, JPEG
․
Size(Maximum 24 points)
․
mm/dd/yy
․
Days of the Week, Month Day, Year
․
․
Month Day, Year
․yyyy-mm-dd
․Day-Month-yy
․Month. Day. yy
Day Month Year
․
Month yy
․
Month-yy
․
hh:mm (24hours)
․
hh:mm:ss
․
Language
․
․
Calendar Type
Use full width characters
․
Update automatically
․
․
EMF, WMF, PICT, Etc...
․
AutoShapes
(Line, Arrows, Flowchart, Banners, Etc...)
WordArt
․
Chart
․
Font type
․
․
Font color
․
Underline style
Underline color
․
․
Emphasis mark
․
Effects
Character Spacing
․
(Scale, Spacing Position, Kerning for fonts)
․
Text Effects (Animations)
83
․
Indents and Spacing
Paragraph
File -
Object -
Break -
(Alignment : Left, Center, Right)
․
Indents and Spacing
(Alignment : Justified, Distributed Outline
level, Indentation, Spacing, Tabs)
․
Line and Page Breaks
․
Insert file
Insert Object
․
․Break types(Page break, Column break,
Text wrapping break)
․
Section break types(Next page, continuous,
Even page, Odd page)

84
Appendix
Features Available Not Available
․
Position
․
Page Numbers -
Auto Text -
Field -
Symbol -
Footnotes -
Caption -
Cross-reference -
Text Box -
Index and Tables -
Bookmark -
Hyperlink
Bullets and
Numbering
Borders and
Shading
Background -
-
-
-
Alignment
Show number on first page
․
․
Number Format
․Auto Correct
AutoFormat As You Type
․
AutoText
․
AutoFormat
․
․
Categories
Field names
․
Options
․
․
Symbols
․Special Characters
․
Insert(Footnote, Endnote)
․
Numbering(AutoNumber, Custon mark,
Symbol)
․
Option(All Footnotes, All Endnotes)
․
Caption
Label, Position
․
Numbering
․
AutoCaption
․
Reference type
․
․
Insert reference to
․
Insert as hyperlink
․
Include above/Below
Vertical
․
․
Horizontal
Index
․
․
Table of Contents
․Table of Figures
Table of Authorities
․
․
Insert Bookmark
․
Insert Hyperlink
․
Bulleted(Text Bullet, Picture Bullet)
․Numbered(Number format, Number Style,
Start at, Number Position, Text Position)
․
Outline Numbered(Number format, Number
Style, Start at, Number Position, Text
Position)
․
Borders(Setting, Style, Color, Width)
Page Border(Setting, Style, Color, Width)
․
Shading(Fill, Patterns)
․
Color
․
Fill Effects
․

Appendix
2. Functions Available when Exporting Microsoft Word 97 Files
Features Available Not Available
Fixed Font(Font type)
Fixed Font(Size, Bold, Underline)
․
․
Helvetica Font (Size, Bold, Italic,
Underline)
Micro Font(Size, Bold, Underline)
Format
Paragraph
Indent Available -
Outdent
Image
Date and Time
․
․
Smallsmooth Font (Size, Bold,
Underline)
Smoothtimes Font (Size, Bold,
․
Underline)
Alignment (Left,Center, Right)
․
Bullet (None, Numbering, Dot)
․
․
Space (Line Space, Before
Paragraph, After Paragraph)
Available -
BMP, GIF, JEPG, PNG
․
․mm/dd/yyyy
mm/dd/yyyy hh:mm AM/PM
․
mm/dd/yyyy hh:mm:ss AM/PM
․
․
hh:mm AM/PM
․
hh:mm:ss AM/PM
․
․
Helvetica Font(Font type)
․Micro Font(Font type)
Smallsmooth Font(Font type)
․
․
Smoothtimes Font(Font type)
․Font color
-
-
-
85

86
Appendix
3. Functions Available when Importing Microsoft Excel 97 Files
Features Available Not Available
Function
Cell
Part of Financial
․
․
Part of Date & Time
․
Part of Math Trig
Part of Statistical
․
․
Part of Lookup & Reference
․
Part of Database
Part of Text
․
․
76 functions supported
․
Category (except types not existing on HancomMobileSheet.)
- General
- Number(except color tone)
- Currency(except color tone)
- Accrounting
- Date
- Time
- Percentage
- Fraction
- Scientific
- Text
- Special
Alignment
․
- Horizontal(General, Left, Center,
Right, Justify, Center Across
Selection)
- Vertical(Top, Center, Bottom, Ju-
stify)
Font(Size, Bold, Italic, Underline-
․
(single), Strikethrough,Color) Color
tone is changed to most similar
one.
Border (Border, Line Style, Line
․
Color) Color tone is changed to
most similar one.
Patterns (Color) Color tone is
․
changed to most similar one.
Part of Financial
․
․
Part of Date & Time
․
Part of Math Trig
Part of Statistical
․
․
Part of Lookup & Reference
․
Part of Database
Part of Text
․
․
Part of Information
․
Logical Functions
․
Font(Font, Underline(Double, Single Accounting, Double Accounting), Supersc- ript,
Subscript)
․
Protection (Locked/Hidden)
Border(Diagonal)
․
Alignment
․
- Horizontal(Left(Indent), Fill, Distributed)
- Vertical(Distributed)
- Orientation
- Text Control
Patterns(Pattern)
․
․
Name
Sheet
Header -
․
Hide
․Background
Open
․
․
Setting(Alignment, Font, Font style, Size)
․Text (Font, Font Style, Size, Underline,
Effect)
․
Page
․Pages
Date
․
․
Time
․File name
Tab
․

Appendix
Features Available Not Available
․
Text(Font, Font Style, Size, Underline,
Effect)
Page
․
․
Footer -
Chart
Name -
Comment -
Clip Art -
Picture -
AutoShapes
Object -
Hyperlink
Height
Row
Column
․
․
Hide
․
Width
․Hide
-
-
-
Pages
․
Date
Time
․
․
File Name
․
Tab
Standard types
․
(Column, Bar, Line, Pie, XY(scatter),
Area, Doughnut, Radar, Surface,
Bubble, Stock, Cylinder, Con, Pyramid)
Customer types
․
Define
․
․
Label Ranges
․Hidden comment
Show comment
․
․
Text(Font, Style, Size, Underline, Color,
Effect, Alignment)
Not Available
․
․
Insert Picture
Image control
․
More Contrast
․
․
Less Contrast
More Brightness
․
Less Brightness
․
․
Line Style
Transparent color
․
․
Line
․Connectors
Basic Shapes
․
․
Block Arrows
․Flowchart
Starts and Banners
․
․
Callouts
․
Word Art
Not Available
․
․Exisiting File or Web-page
Place in This Document
․
․
Create New Document
․E-mail Address
․
Standard Width
87

88
Appendix
Features Available Not Available
Phonetic guide -
Protection -
Scenario -
Macro -
Filter -
Subtotals -
Pivot Table -
Group and Outline -
Split -
Freeze Panes -
Font(Underline, Color, Strikethrough)
․
Protect sheet
․
․
Protect workbook
AutoFilter
․
․
Group & Outline

Appendix
4. Functions Available when Exporting Microsoft Excel 97 Files
Features Available Not Available
Part of Date Functions
․
․
Part of Account Functions
․Part of Logical Functions
Part of Find Functions
․
․
Function
Cells
Sheet ․Name
Recalculate
Manual calculation
Split - ․View Split
Freeze panes - ․View Freeze panes
Name - ․Range, Name
Part of Mathmatics Functions
․
Part of Statistic Functions
․Part of Database Functions
Part of Character Functions
․
․
76 Functions Supported
․
Format
- General
- Number(except color tone)
- Currency(except color tone)
- Accrounting
- Date
- Time
- Percentage
- Fraction
- Scientific
- Text
- Special
․
Alignment
- Horizontal(General, Left, Center,
Right,Justify)
- Vertical(Top, Center, Bottom, Justify)
Font(Bold, Italic, Underline(sing-
․
le),Strikethrough,Color) Color tone
is changed to most similar one.
Border (Border, Line Style, Line
․
Color) Color tone is changed to
mo-st similar one.
Patterns(Pattern, Color)Pattern and
․
Color tone are changed to most
similar one.
Part of Financial Functions
․
․
Part of Date & Time Functions
․Part of Math Trig Functions
Part of Statistical Functions
․
․
Part of Lookup & Reference Functions
․Part of Database Functions
Part of Text Functions
․
․
Part of Information Functions
Font(Font, Size)
․
Border(Diagonal)
․
․
Alignment
- Horizontal(Horizontal Title)
- Vertical(Vertical Title)
- Merge cells
․
Hide
89

90
Appendix
Features
Hyperlink
․
Row
Column
Protection -
Automatic Filter -
․
․
Height
Hide
Width
Available
Not Available
-
․Bookmark
Use relative path
․
AutoFit
․
․AutoFit Selection
Standard Width
․
․
Hide
․
Cell Protect
Protect sheet
․
․
Filter location
(Before Action-Dialog Box)
Filter (After Action)
․

Appendix
5. Functions Available when Importing Microsoft PowerPoint 97 Files
Animation
Features Available Not Available
Text
Shapes
Line/Arrow
․
Size
Bold
․
Color
․
․
Alignment
Italic
․
Underline
․
Fill
․
․
Line
․Scale
Position on slide
․
․
14 kinds of diagram
․
Line
․
Arrow
Size
․
․
Scale
․
Position on slide
․
Font Type
Emboss
․
Text Direction
․
․
Bulleted
Shadow
․
Superscript
․
․
Subscript
Upholding Fixed
․
Line Break
․
Fill(Semi-transparent)
․
Alternative text
․
․
Size and rotate
․
Angle
Alternative text
․
Rotate
․
․
Angle
91
Text Box
jpeg, png, bmp, gif(except
․
GIF)
․
Size
․
Image
WordArt
Master
Movies / Sounds -
Comment
Scale
Relative to original picture size
․
․
Best scale for slide show
․
Position on slide
․
Slide
․Title
․
Fill color(Simple Color)
Line
․
․
Size
․
Scale
Position on slide
․
․
Text anchor point
All functions
․
wmf, pcx, bmz, tif, tiff, eps, Etc...
․
Lock aspect radio
․
․
Crop from(Left, Top Right, Bottom,
Brightness, Contrast)
․
Line(Color, Style, Dashed, Width)
Image control
․
․
Rotate
․
Alternative text
-
All functions
․
․
Handout
․Notes
․
All functions
․
Fill Color (Semi-transparent)
Resize Auto Shape to fit text
․
Rotate text within Auto Shape by 90°
․
․
Alternative text
Angle
․
internal margin
․
․
Rotate
Word wrap text in Auto Shape
․

92
Appendix
Features Available Not Available
Clip Art
․Slide Layout
Slide Color Scheme
Slide
Chart -
․
All functions
․
․Background
Slide Number
․
․
Date and time
․Header and Footer
All functions
․
 Loading...