

Page 1
UM-Series Quick Setup Guide
A
Thank you for your purchasing a SHARP UM-Series personal computer.
Follow the instructions below to use the computer for the first time.
1. Be sure to check all the following items are included:
• Notebook Computer
• AC Adapter
• AC Power Cord
• Battery Pack
• Modem Cable
• LAN cable (European Users)
• Core for a LAN cable (Except European Users)
• External Monitor Cable Adapter
• Recovery CD-ROMs Pack
• Windows Quick Start Guide
• Operation Manual
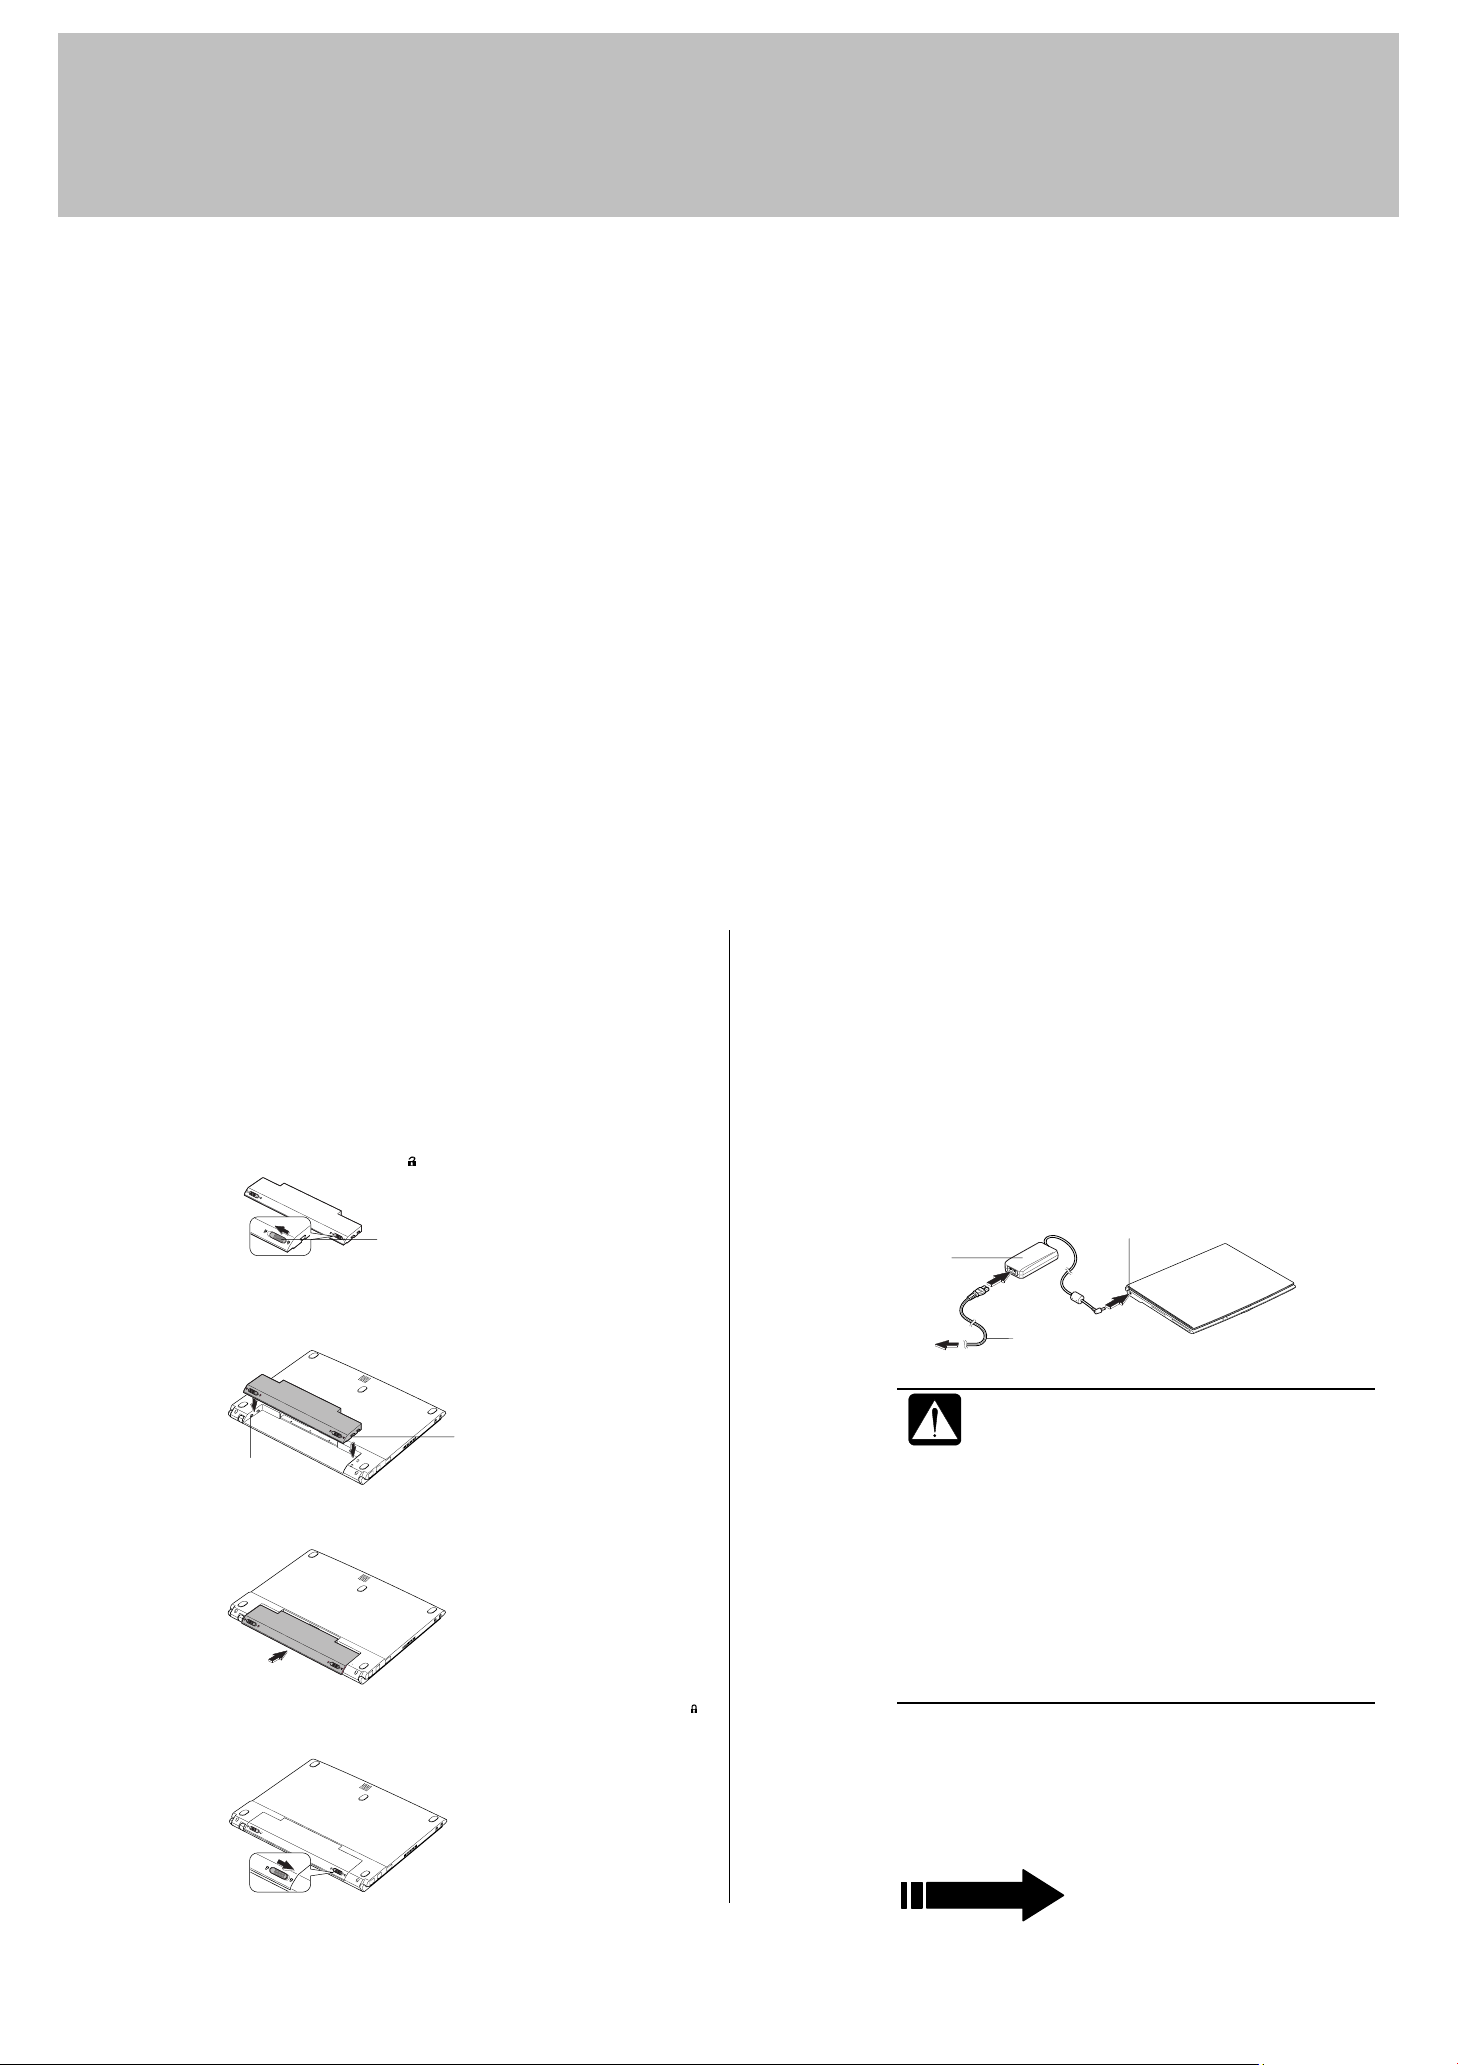
2. Install the battery pack into the
computer.
1. Place the computer upside down.
2. Slide the battery stopper on the battery pack to the
unlocked position( ).
Battery Stopper
3. Insert the battery pack into the computer by
matching the notched parts of the battery to the
projected parts on the computer.
Carefully inspect each component to make sure nothing is
missing or damaged. If any of these items is missing or
damaged, notify your dealer immediately. Be sure to save the
shipping materials and carton in case you need to ship or store
the computer in the future.
Always use the included LAN cable to insure compliance
with requirements of EMC regulations for computing
equipment.(European users)
Attach the included core to your LAN cable to insure
compliance with requirements of EMC regulations for
computing equipment.(Except European users)
Some brochures or supplements may be contained other than
the above.
3. Connect the computer to AC power.
1. Plug the AC adapter cable to the AC adapter jack
on the left side of your computer.
2. Plug the AC power cord into the AC adapter.
3. Plug the AC power cord into a wall outlet.
AC Adapter
To Wall
Outlet
AC Adapter Jack
C Power Cord
Notched Part
Projected Part
4. Push the battery pack until you hear the clicking
sound.
5. Slide the battery stopper to the locked position ( ).
• Always use the AC adapter included with
the computer or the optional one (may not
be available in some countries). Using
other AC adapters may damage the
computer.
• Always hold the AC power cord by its plug
when removing it from the wall outlet.
Never pull on the cord.
• When using the computer for the first time,
be sure to connect it to AC power. If using
the battery instead, you may not be able to
complete the Windows setup if the battery
does not have enough power.
Please turn over and go to the
next section
TINSE3331ACZZ
Page 2
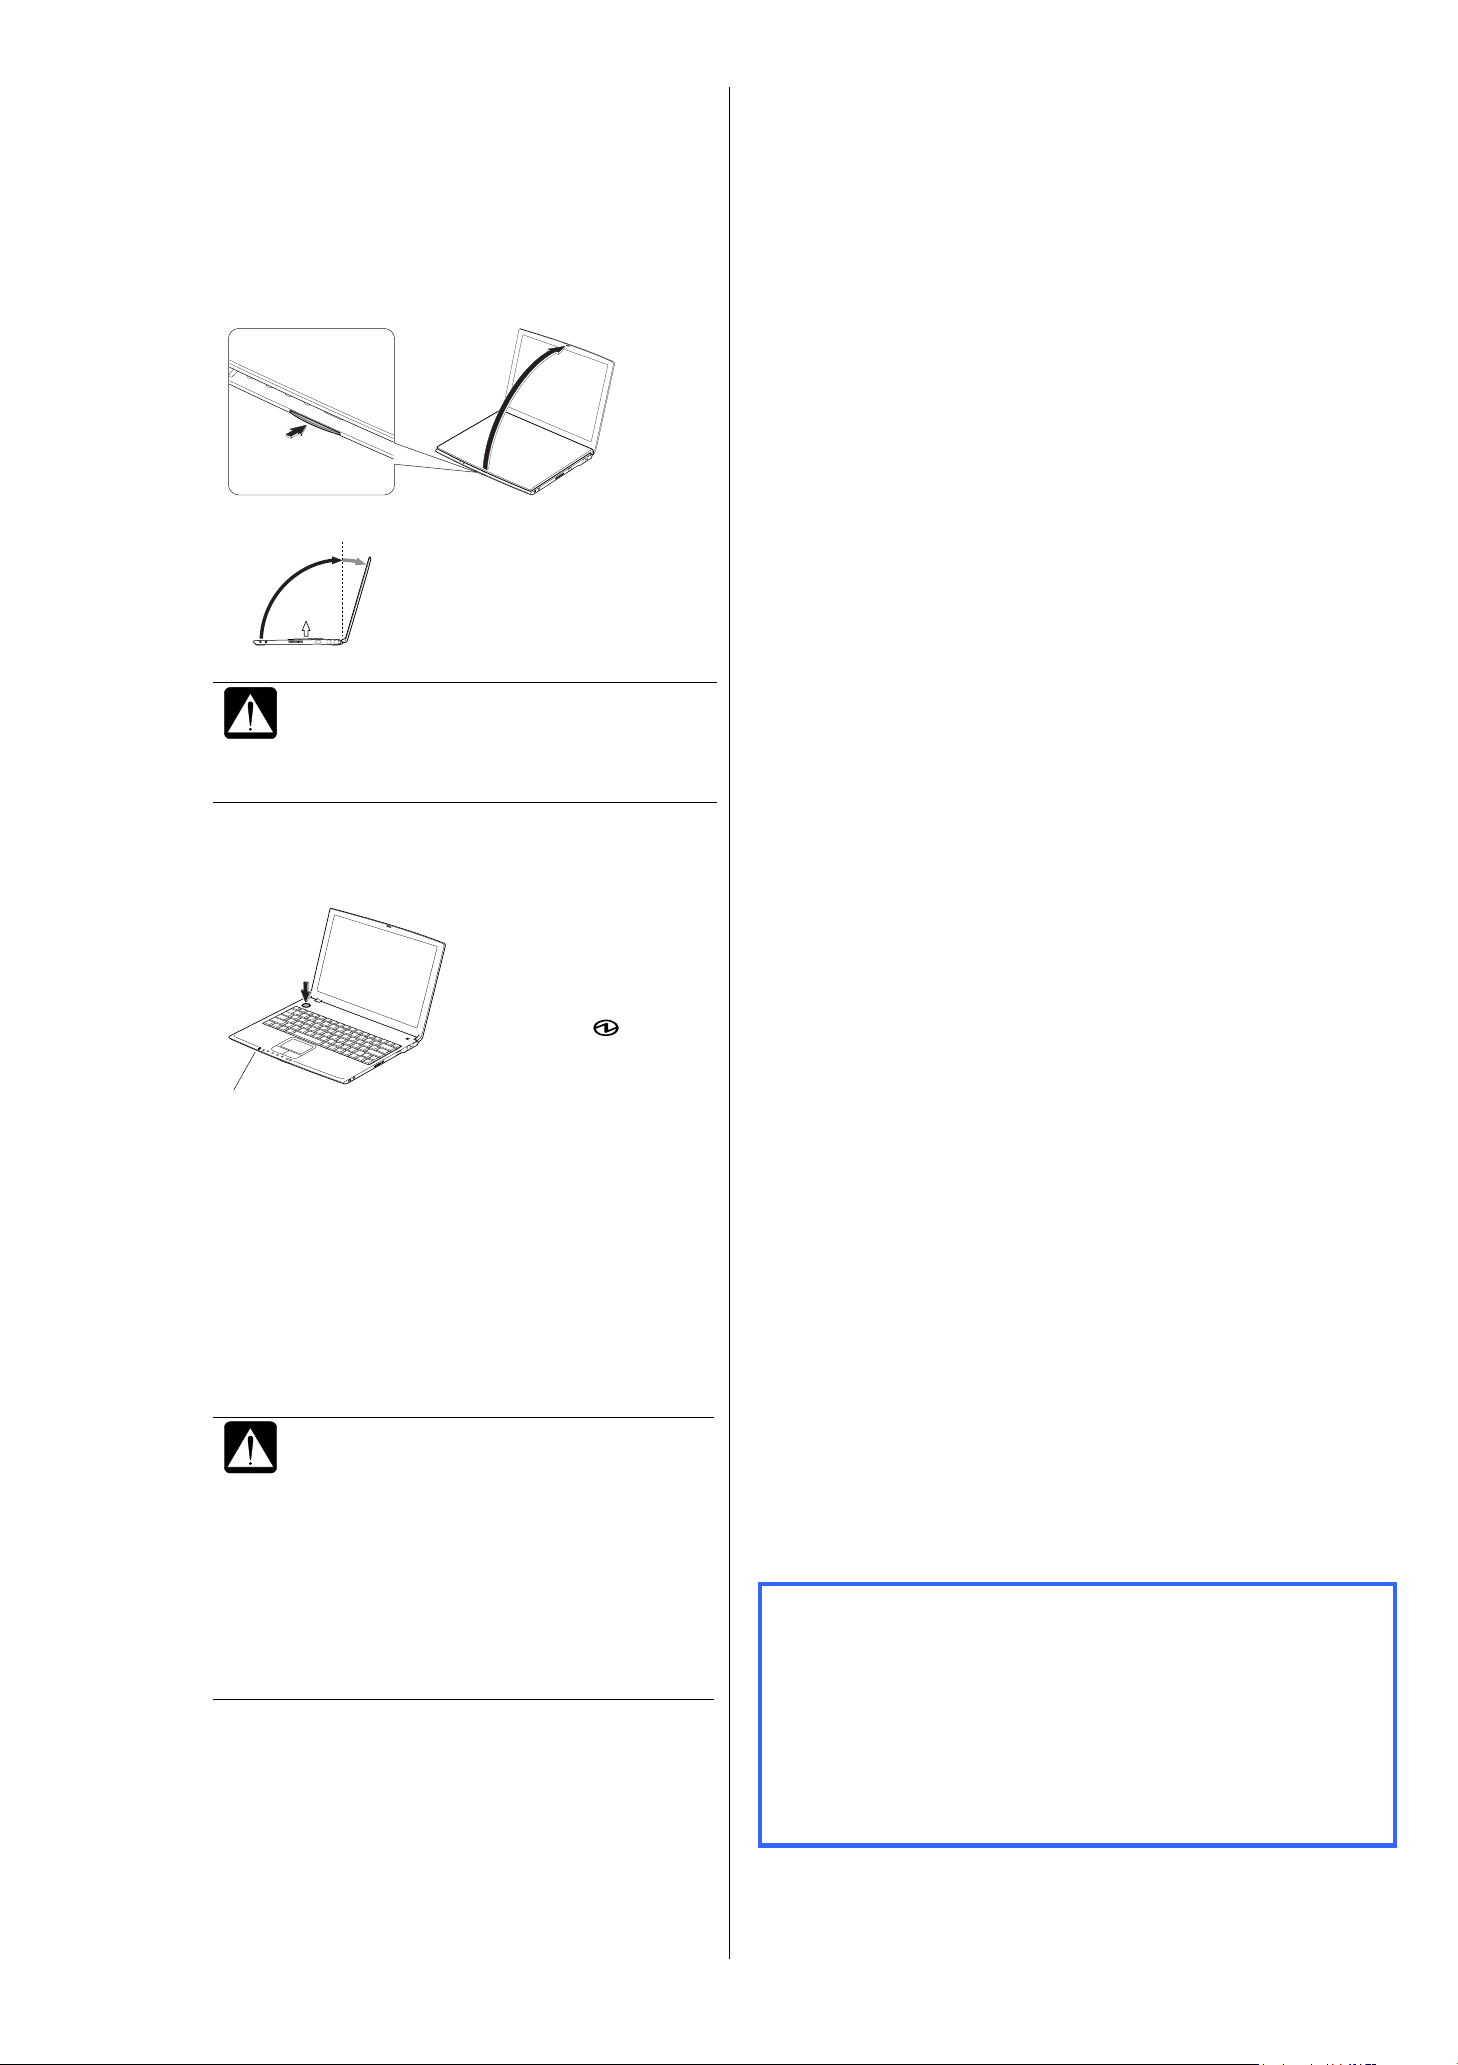
4. Open the display cover and turn on the
computer.
(If you selected Windows 2000)
3. Accept the license agreement; then, click Next.
4. Type your name and organization; then, click Next.
1. Press the display cover lock button until the
display cover releases, and raise the cover.
2. Tilt the cover to more than 90-degrees.
90°
The keyboard of your computer will raise
automatically when you open the display cover.
You need to tilt the cover more than 90-degrees to
raise the keyboard completely. Otherwise the
keyboard or the computer may malfunction.
5. Type your computer’s name and the
administrator’s password; then, click Next.
6. Confirm Typical settings is selected; then, click
Next.
7. Select your network environment; then, click Next.
The system restarts.
8. When you see Network Identification dialog box,
click Next.
9. Select the setting to log on to the computer, and
click Next. (Go to Step12 bellow.)
(If you selected Windows XP Professional)
3. Select your location, language, and keyboard type;
then, click Next.
4. Select the time zone where you will use the
computer;then, click Next.
5. Accept the license agreement; then, click Next.
6. Type your computer’s name; then, click Next.
3. Press the power button to turn on your computer.
Power Indicator
5. Setup Windows.
After completing a self test to detect any problems,
Windows Setup Wizard starts. For the detail, refer to
Windows Quick Start Guide.
1. Select an Operating System.
This product has a dual-install of both
Windows(R) XP Professional and
Windows(R) 2000 Professional. You are
required to observe the following:
(1) You must make a one-time selection between
Windows(R) XP Professional and Windows(R)
2000 Professional.
(2) After such selection has been made, if the
rejected product is then desired, you will need to
acquire and pay for such product as a separate
transaction.
2. Confirm the selection, the system start installing
Windows. Follow the instruction on the screen.
When you turn on the
computer, the power
indicator (
green.
7. Type your administrator’s password; then, click
Next.
8. Select your network environment; then, click Next.
9. Set Internet connection status; then, click Next.
10. Register your computer on the Web; then, click
Next.
) turns on
11. Type a user name who will use the computer; then,
click Next. You can add other names except User1
after you finish the Windows setup.
12. Click Finish. The system restarts.
13. Double-click README FIRST(for U.K. users)
icon on the desktop and follow the instructions in
it. (UK users only)
When the setup finishes, set your date and time.
Double-click the time appearing on the bottomright of the screen to open Date/Time Properties
(Windows 2000) or Date and Time Properties
(Windows XP Professional) dialog box. Confirm
Time Zone is correctly selected, and set date and
time.
Now your PC-UM series personal computer
is ready!
Enjoy your comfortable computing.
For more information, please refer to the
operation manual or Windows Quick Start
Guide.
 Loading...