

Page 1
Getting Started With Your
SHARP PERSONAL COMPUTER
THANK YOU FOR PURCHASING THE SHARP PERSONAL COMPUTER. WE HOPE YOU
WILL ENJOY COMFORTABLE COMPUTING, BUT BEFORE STARTING TO USE YOUR
COMPUTER, PLEASE FOLLOW THE INSTRUCTIONS BELOW.
Open the carton box and check that the following items are included:
1
AC Power Cord AC Adapter Battery Pack Modem Cable
Core for LAN Cable
Parallel Cable Adapter
Weight Saver
* Carefully inspect each component to make sure nothing is missing or damaged. If any of these
items is missing or damaged, notify your dealer immediately. Be sure to save the shipping
materials and carton in case you need to ship or store the computer in the future.
* Attach the core to your LAN cable to insure compliance with requirements of EMC regulations
for computing equipment.
* Some other brochures or supplements may also be contained.
Recovery CD-ROMs Pack
Windows XP
Quick Start Guide
Operation Manual
NOTEBOOK COMPUTER
NOTEBOOK COMPUTER
PC-GP2 Series
PC-XXXSeries
OPERATION MANUAL
OPERATION MANUAL
Supplement Book
Supplement for PC-GPXXXX
Specifications
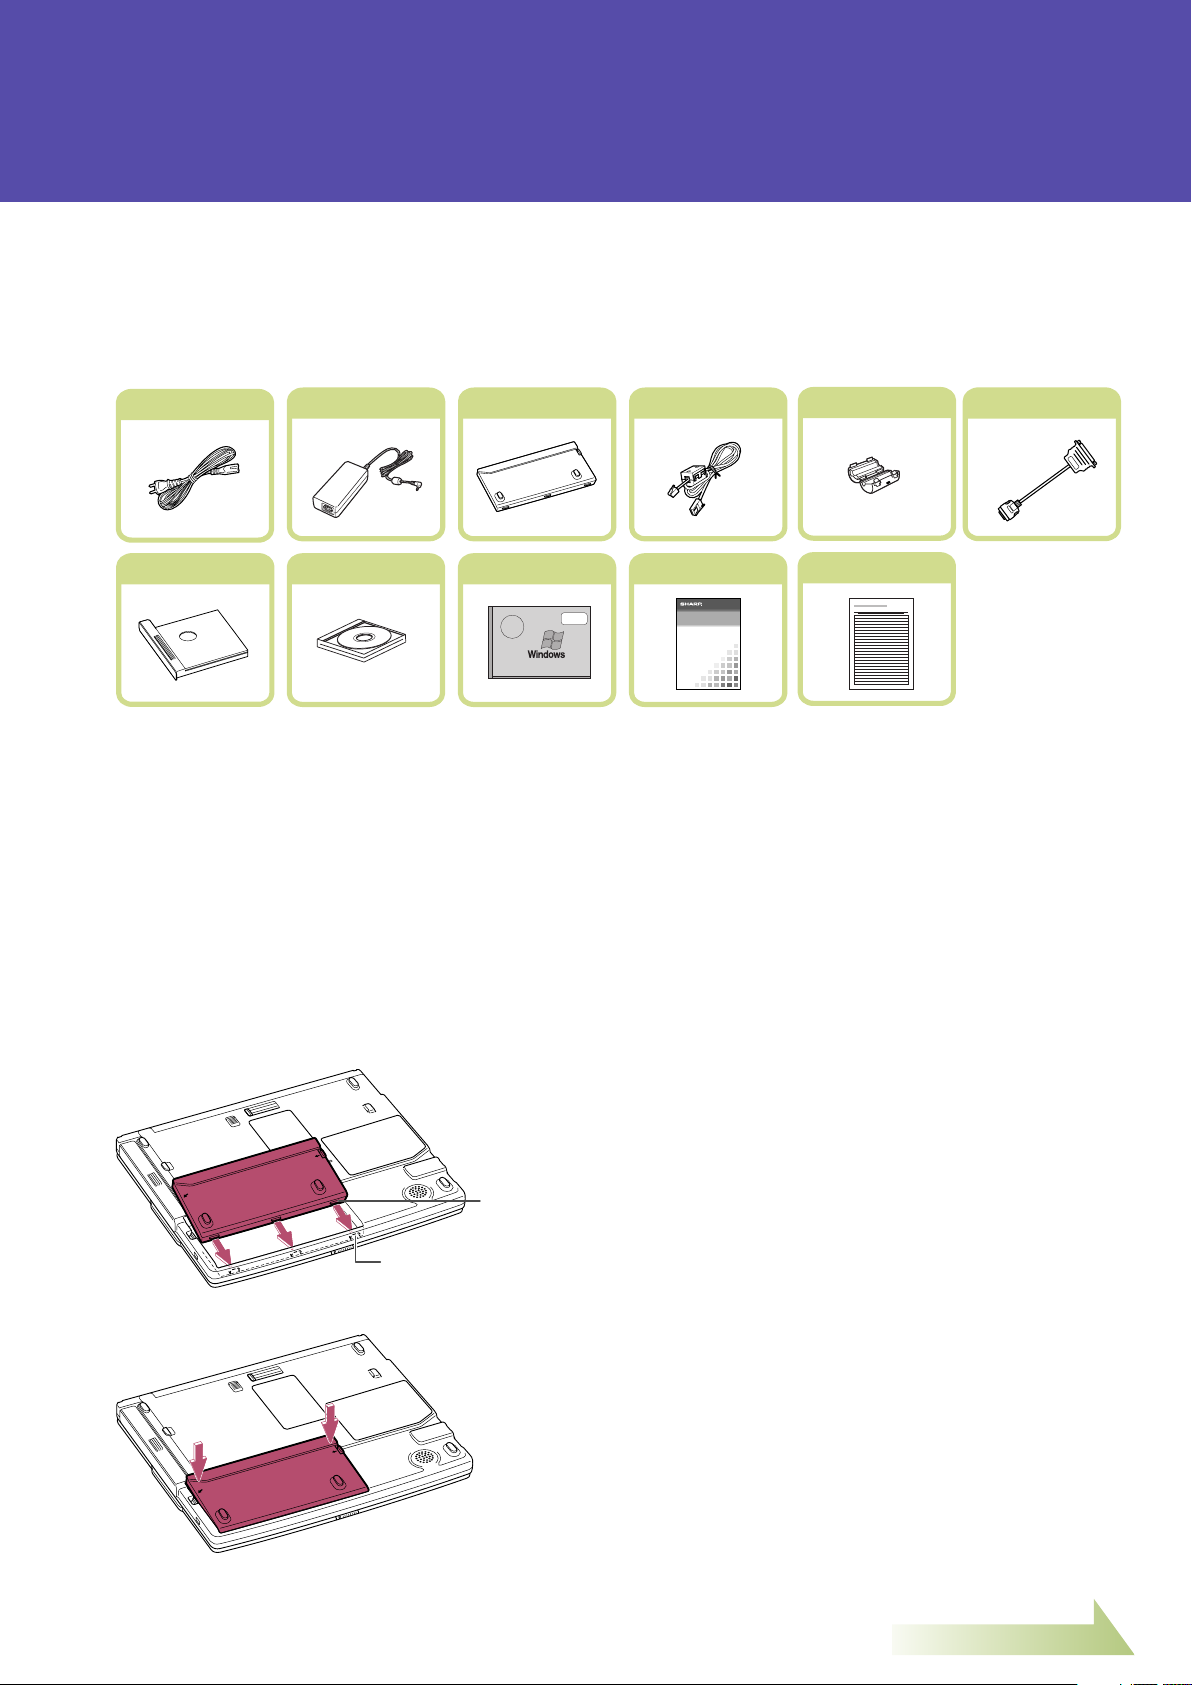
Install the battery pack included with your computer.
2
1. Place the computer upside down.
2. Insert the battery pack into the computer by matching the projected parts of the battery
to the notched parts on the computer.
Projected Part
Notched Part
3. Push the battery pack into the computer until you hear the clicking sound.
TINSE3462ACZZ
Go to the next page
Page 2
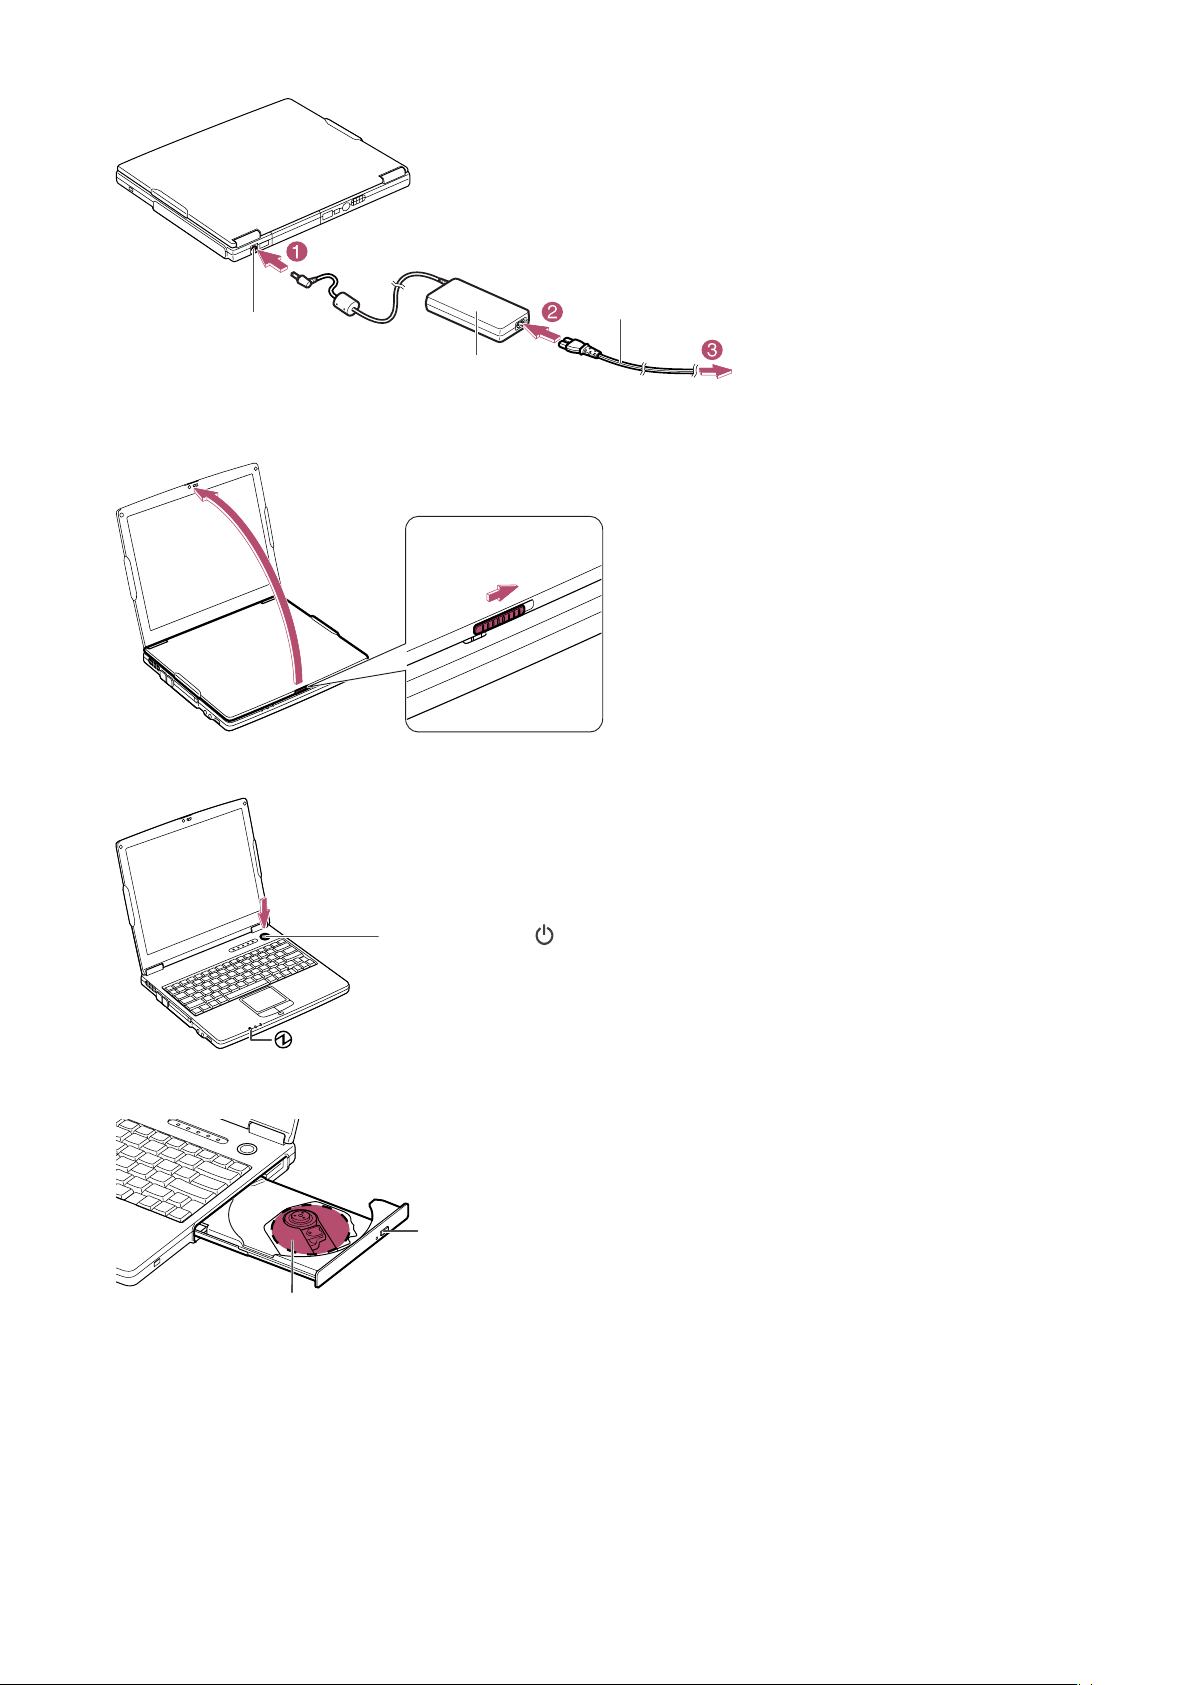
Connect the AC adapter to the computer.
3
AC Adapter Jack
AC Adapter
Open the display cover and set it to a comfortable viewing position.
AC Power Cord
To Wall
Outlet
4
B
A
Press the power button to turn on the computer.
5
Power Button( )
Power Indicator
Remove the optical drive protection sheet.
6
Eject Button
Protection Sheet
Press the eject button to draw out the tray; then, remove the sheet.
Page 3

Setup Windows operating system by following the instructions on the screen.
7
1. Click
Next
on
Welcome to Microsoft
6. Type your administrator’s password;
Windows
2. Select your location, language and
keyboard; then, click
3. Select your time zone; then, click
dialog box.
Next
.
Next
then, click
7. Select your network environment; then,
click
Next
.
8. Click
could not be chosen
.
Skip
Next
.
on
An Internet connection
dialog box. You will
4. Accept the license agreement; then, click
Next
.
5. Name your computer if you will be
connecting to a LAN; then click
Next
. If
be able to set up your internet connection
once you have completed Windows
setup.
9. Select
register with Microsoft later.
No.....
and click
Next
. You can
you want to skip, click
Skip
.
Go to the next page
Page 4

10.Enter a user name in the
Your name field
;
11.Click
Finish
to complete the Windows
then click
additional users, we recommend doing
it after completing setup.
Activate the integrated antennas for wireless LAN communication.
Next
. If you wish to add
setup.
After a few minutes delay, Windows XP
will start. Double-click the time appearing
at the bottom right of your screen, and set
the correct time and date.
8
To enable the wireless antennas in your comuter, press Fn+F1 keys. When the antenna
indicator is green, the antennas are enabled. Refer to your operation maual and to the
manual of your access point or router for assistance with setting up your wireless network.
Antenna Indicator
To disable the wireless antennas, press Fn+F1 keys again.
Now you are ready to use your computer. Enjoy comfortable
computing with the SHARP PC-MV Series.
Product Information and Customer Assistance
Call: 1-800-BE-SHARP (237-4277)
Sharp Systems of America
5901 Bolsa Avenue, Huntington Beach, CA 92647
Home Page: http://www.sharpsystems.com
E-mail address: support@sharpsystems.com
 Loading...