

Page 1
MD-E9000H
MD COMPACT COMPONENT
SYSTEM
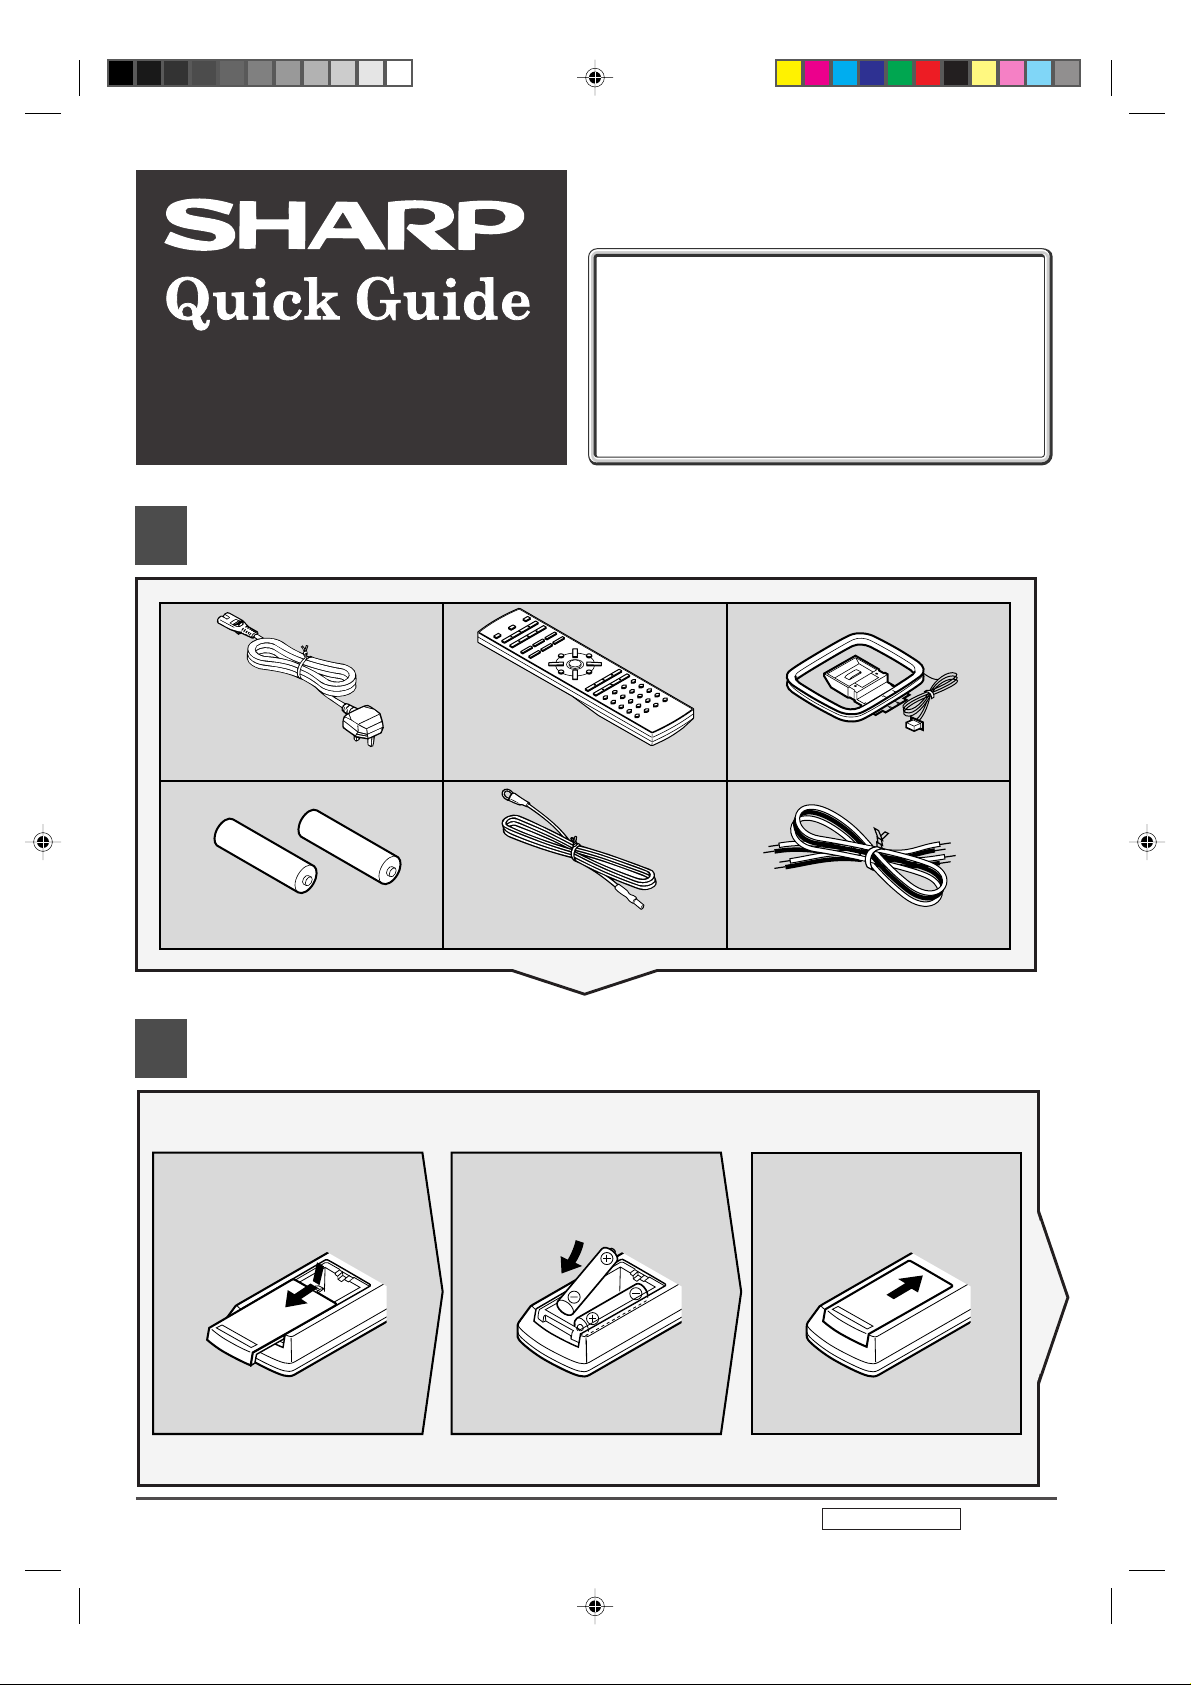
Accessories
1
1
This Quick Guide will help you to correctly
install and operate your system.
If you require any advice or assistance regarding your Sharp product, please visit
our web-site www.sharp.co.uk/support.
Customers without internet access may
telephone 08705 274277 during office
hours (or (01) 676 0648 if telephoning from
Ireland).
AC power lead × 1
“AAA” size battery
(UM-4, R03, HP-16 or similar) × 2
Battery installation of remote control
2
2
Remove the
123
battery cover.
Remote control × 1
FM aerial × 1
Insert the batteries
as shown.
AM loop aerial × 1
Speaker wire × 2
Replace the cover.
Web-site: www.sharp.co.uk/support Help Line: 08705 274277 (office hours)
– 1 –
*MD-E9000H(QG) 2001.4.20, 2:18 AM1
TINSE0376AWZZ A0104.YT
Page 2
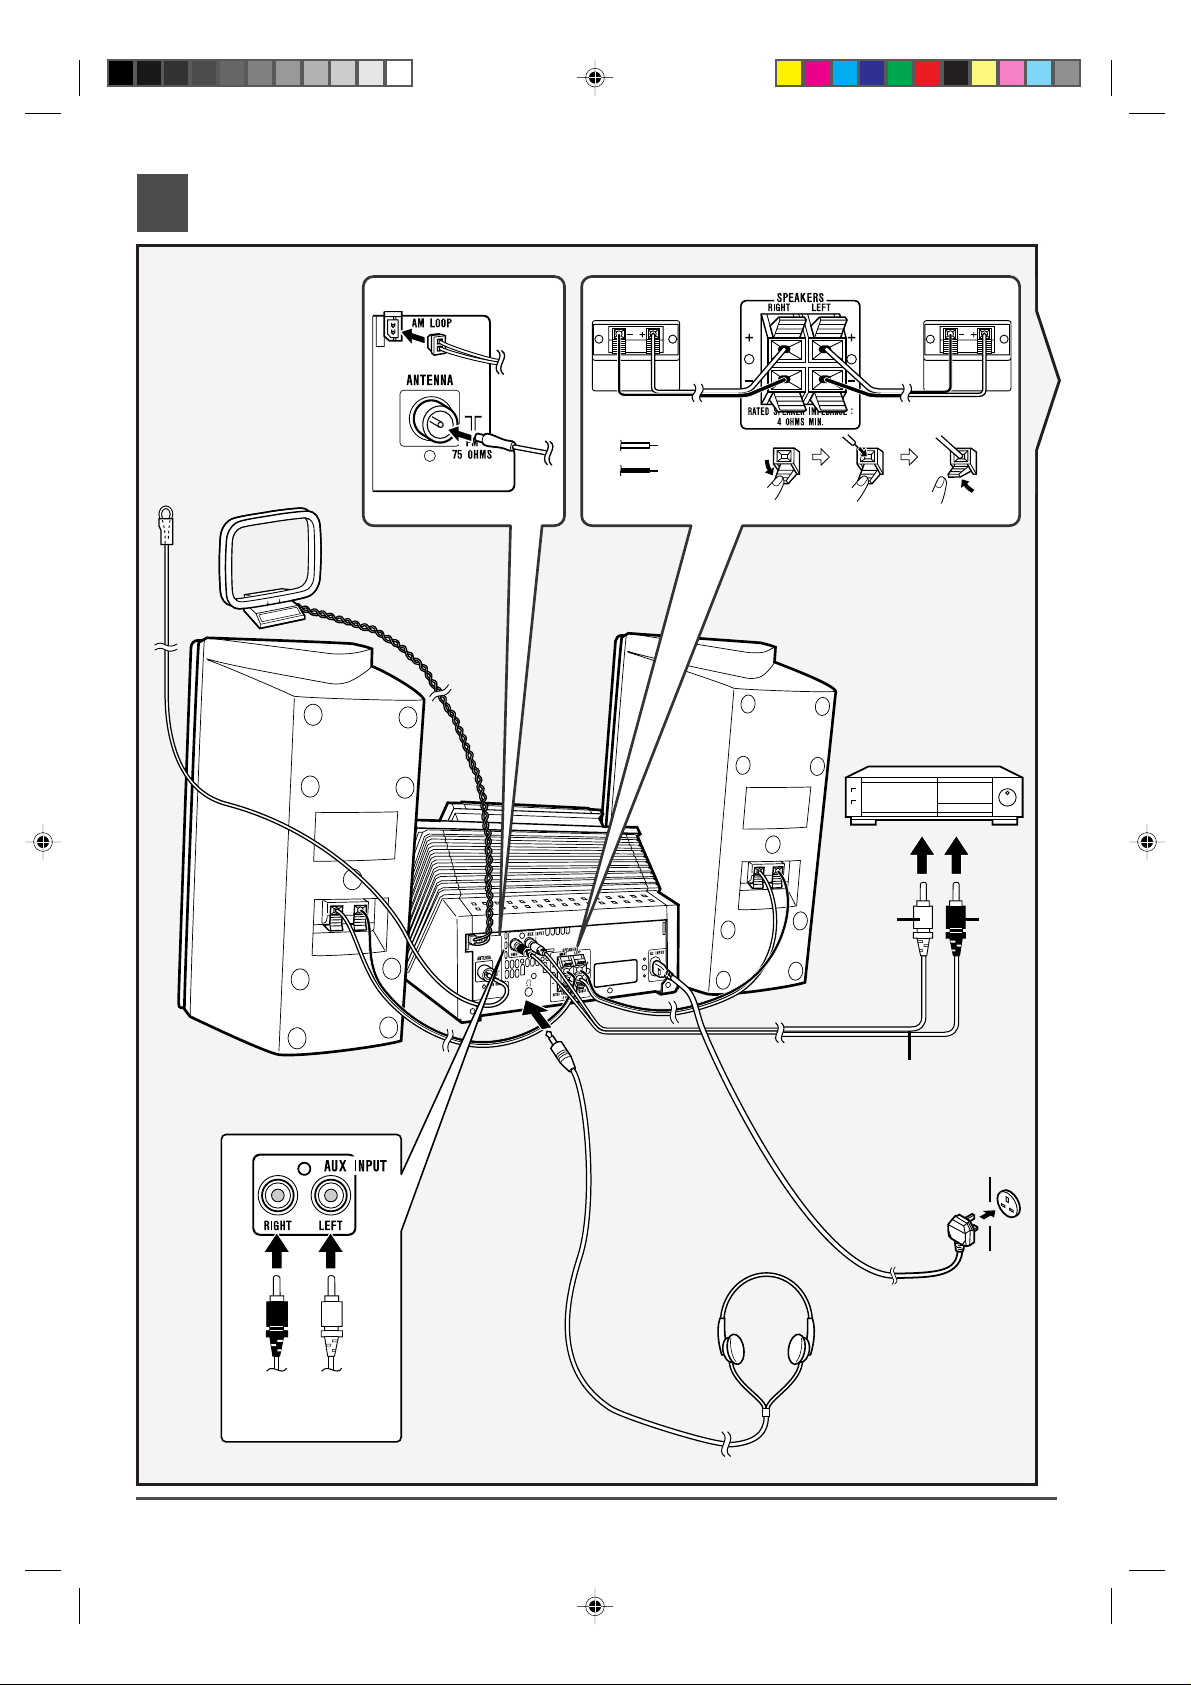
System Connections
3
3
FM
aerial
AM loop aerial
Red
Black
Left speaker
VCR, DVD, etc.
Right speaker
Red White
RedWhite
RCA lead
(not supplied)
Wall socket
(AC 230 V , 50 Hz)
Headphones
Web-site: www.sharp.co.uk/support Help Line: 08705 274277 (office hours)
– 2 –
*MD-E9000H(QG) 2001.4.20, 2:18 AM2
Page 3

Turn on your system
4
4
The first time the unit is plugged, the
unit will enter the demonstration
mode. You will see words scroll.
Listening to a CD
Press the DISPLAY
1
(DEMO) button to cancel the demonstration
mode.
Press the CD ■ button.
1
Press the CD
2
open the CD compartment.
Place a CD on the spindle, label side up.
3
Press the ON/STAND-
2
BY button to turn the
power on.
77
7
77
(OPEN/CLOSE) button to
Listening to a MiniDisc
77
7
Press the CD
4
close the CD compartment.
Press the CD
5
back.
Press the MD ■ button.
1
Load a MiniDisc into the MD compartment,
2
label side up.
Press the MD
3
back.
77
(OPEN/CLOSE) button to
0606
00
06 (
0)
0606
00
button to start play-
0606
00
06 (
0)
0606
00
button to start play-
Web-site: www.sharp.co.uk/support Help Line: 08705 274277 (office hours)
– 3 –
*MD-E9000H(QG) 2001.4.20, 2:18 AM3
Page 4

Listening to the Radio
FM Stereo mode indicator
FM Stereo receiving indicator
■ If trouble occurs
When this product is subjected to strong external interference (mechanical shock, excessive static electricity , abnormal supply voltage due to lightning, etc.) or if
it is operated incorrectly, it may malfunction.
If such a problem occurs, do the following:
1. Set the unit to the stand-by mode and turn the power
on again.
2. If the unit is not restored in step 1, unplug and plug
in the unit, and then turn the power on.
Note:
If neither operation above restores the unit, clear all
the memory by resetting it.
Press the TUNER (BAND) button until “FM”
1
or “ AM” appears on the display.
XX
Press the TUNING (
2
remote control to tune in to the desired station.
Manual tuning:
Press the TUNING button as many times as required to tune in to the desired station.
Auto tuning:
When the TUNING button is pressed for more
than 0.5 seconds, scanning will start automatically and the tuner will stop at the first receivable broadcast station.
To receive an FM stereo transmission:
Press the TUNER (BAND) button to display “ST”.
● “j” will appear when an FM broadcast is in stereo.
WW
X or
W) button on the
XX
WW
■ Clearing all the memory (reset)
1. Press the ON/STAND-BY button to enter the power
stand-by mode.
2. Whilst pressing down the PRESET W button and
the DISPLAY (DEMO) button, press the ON/ST ANDBY button.
After the “RESET” is displayed for about 1 second,
the power will be turned off.
Caution:
This operation will erase all data stored in memory including clock, timer settings, tuner preset, and CD or
MiniDisc programme.
■
Maintenance
● Cleaning the CD pickup lens
Do not touch the laser pickup lens. If fingerprints or
dust accumulate on the pickup, clean it gently with
a dry cotton swab.
Web-site: www.sharp.co.uk/support Help Line: 08705 274277 (office hours)
– 4 –
*MD-E9000H(QG) 2001.4.20, 2:18 AM4
 Loading...