

Page 1
General Inquiries
2012/7/3版
<docomo Information Center>
(Business hours: 24 hours (open all year round))(Business hours: 9:00 a.m. to 8:00 p.m.)
0120-005-250 (toll free)
ɦ Service available in: English, Portuguese, Chinese, Spanish, Korean.
Unavailable from part of IP phones.
ɦ
(Business hours: 9:00 a.m. to 8:00 p.m. (open all year round))
ɡ
From DOCOMO mobile phones
(In Japanese only)
(No prefix) 151 (toll free)
ɦ Unavailable from land-line phones, etc.
ɜ Please confirm the phone number before you dial.
ɜ For Applications or Repairs and After-Sales Service, please contact the above-mentioned information center or the docomo Shop etc. near you on
the NTT DOCOMO website.
NTT DOCOMO websiteȁhttp://www.nttdocomo.co.jp/english/
ɡFrom land-line phones
(In Japanese only)
0120-800-000
Unavailable from part of IP phones.
ɦ
(toll free)
Loss or theft of handset or payment of
cumulative cost overseas
<docomo Information Center>
From DOCOMO mobile phones
International call access code
for the country you stay
* You are charged a call fee to Japan when calling from a land-line phone, etc.
If you use SH-09D, you should dial the number +81-3-6832-6600
ɦ
(to enter “+”, touch “0” for a while).
-81-3-6832-6600
*
(toll free)
From land-line phones
<Universal number>
Universal number
international prefix
* You might be charged a domestic call fee according to the call rate for the
country you stay.
ɦ
For international call access codes for major countries and universal number
international prefix, refer to DOCOMO International Services website.
ɜġIf you lose your handset or have it stolen, immediately take the steps necessary for suspending the use of the handset.
ġ
If the handset you purchased is damaged, bring your handset to a repair counter specified by DOCOMO after returning to
ɜ
Japan.
-8000120-0151
*
ɡFrom DOCOMO mobile phones
(In Japanese only)
(No prefix) 113 (toll free)
Unavailable from land-line phones, etc.
ɦ
Failures encountered overseas
<Network Support and Operation Center>
(available 24 hours a day)(available 24 hours a day)
From DOCOMO mobile phones
International call access code
for the country you stay
* You are charged a call fee to Japan when calling from a land-line phone, etc.
If you use SH-09D, you should dial the number +81-3-6718-1414
ɦ
(to enter “+”, touch “0” for a while).
From land-line phones
<Universal number>
Universal number
international prefix
You might be charged a domestic call fee according to the call rate for the
*
country you stay.
ɦ
For international call access codes for major countries and universal number
international prefix, refer to DOCOMO International Services website.
Repairs
ɡFrom land-line phones
(In Japanese only)
0120-800-000
ɦ Unavailable from part of IP phones.
-81-3-6718-1414
-8005931-8600
(toll free)
*
(toll free)
*
INSTRUCTION MANUAL
SH-09D
’12.6
Don’t forget your mobile phone… or your manners!
When using your mobile phone in a public place, don’t forget to show common courtesy and consideration for
others around you.
Sales:
Manufacturer: SHARP Corporation
’12.6 (1st Edition)
12F TU196
1
Page 2
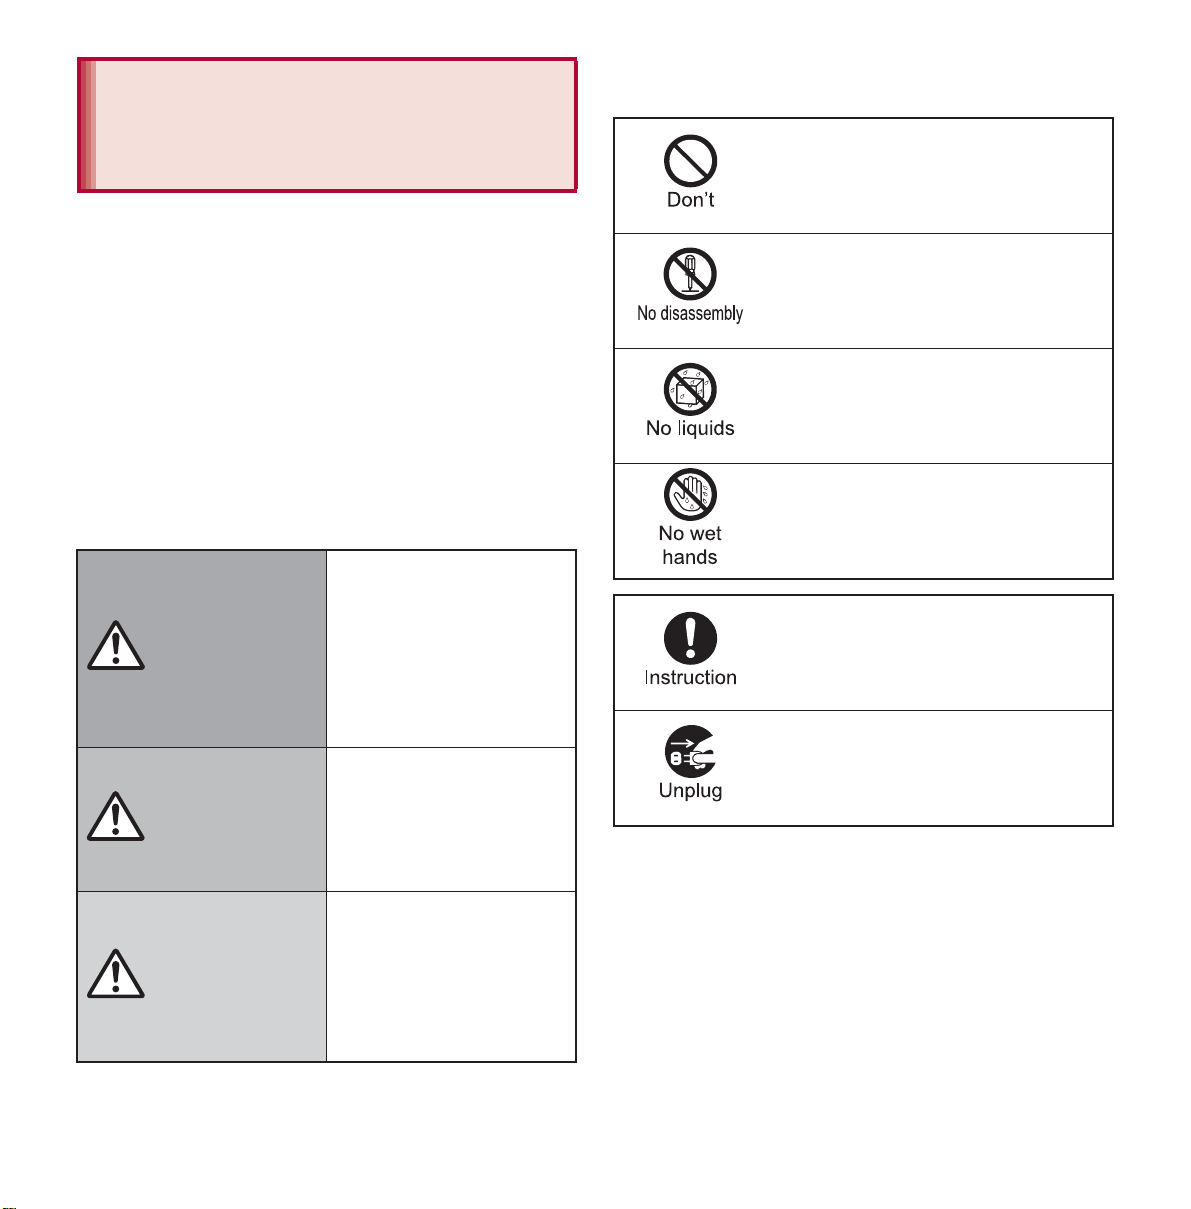
Precautions (ALWAYS
FOLLOW THESE
The following symbols indicate specific
directions.
DIRECTIONS)
Before use, read these “Precautions” carefully
and use your handset properly.
Keep this manual in a safe place for future
reference.
These precautions contain information intended
to prevent bodily injury to the user and to
surrounding people, as well as damage to
property, and must be observed at all times.
The following symbols indicate the different
degrees of injury or damage that may occur if
information provided is not observed and the
handset is used improperly.
This symbol
indicates that “death
or serious bodily
Danger
Warning
injury may directly
and immediately
result from improper
use”.
This symbol
indicates that “death
or serious bodily
injury may result
from improper use”.
Indicates a prohibited action.
Indicates not to disassemble the
device.
Indicates not to use the device
near water or get it wet.
Indicates not to handle the device
with wet hands.
Indicates that instructions
specified are compulsory (must
be followed).
Indicates that the power cord must
be unplugged from the outlet.
Caution
Contents/Precautions
6
This symbol
indicates that “minor
injury and/or
property damage
may result from
improper use”.
Page 3
“Precautions” is explained in the following six
Danger
Warning
sections.
Handling the handset, battery pack, adapters,
wireless charger and docomo mini UIM card
(general) . . . . . . . . . . . . . . . . . . . . . . . . . . . . P. 7
Handling the handset . . . . . . . . . . . . . . . . . . P. 9
Handling battery pack. . . . . . . . . . . . . . . . . P. 11
Handling adapters and wireless charger. . . P. 12
Handling docomo mini UIM card. . . . . . . . . P. 14
Handling near electronic medical equipment
. . . . . . . . . . . . . . . . . . . . . . . . . . . . . . . . . . P. 14
Handling the handset, battery
pack, adapters, wireless
charger and docomo mini UIM
card (general)
Do not use, store or leave the
equipment in locations subject to
high temperatures (near a fire or
heating unit, in a kotatsu, under
direct sunlight, inside a vehicle on a
hot day, etc.).
May cause fires, burns or bodily injury.
Do not place the equipment inside
cooking appliances such as
microwave ovens or pressure
cookers.
May cause fires, burns, bodily injury or electric shock.
Do not get the equipment wet with
water, drinking water, pet urine, etc.
May cause fires, burns, bodily injury or electric shock.
Refer to the following for details on waterproofness.
n“Waterproof/ Dust-proof” on P. 22
Use only the battery packs and
adapters specified by NTT DOCOMO
for use with the handset.
May cause fires, burns, bodily injury or electric shock.
Do not subject the equipment to
strong force or impacts or throw it.
May cause fires, burns, bodily injury or electric shock.
Do not allow conductive materials
(such as metal objects and pencil
lead) to come into contact with the
charger terminal, external connector
terminal or earphone/microphone
terminal. In addition, do not insert
such objects.
May cause fires, burns, bodily injury or electric shock.
Do not cover or wrap the equipment
with bedding etc. when using or
charging.
May cause fires or burns.
Do not attempt to disassemble or
modify the equipment.
May cause fires, burns, bodily injury or electric shock.
Contents/Precautions
7
Page 4
Turn off the handset near
Caution
high-precision electronic devices or
devices that use weak electronic
signals.
May interfere with the op eration of electronic devices.
Take particular care with the following devices
Hearing aids, implanted cardiac pacemakers, implanted
cardioverter-defibrillators or other electronic medical
equipment. Fire alarms, automatic doors, and other
equipment contro lled by electronic signals. If you use
an implanted cardiac pacemaker, implanted
cardioverter-defibrillator or other ele c tronic medical
equipment, cont act the respective manufacturer or
dealer to check whether the operation of the equipment
is affected by signals.
Do not paste metallic objects
(stickers etc. which contain metal)
on the surface of the wireless
charger, back cover of the handset
or battery pack.
May cause fires, burns or bodily injury.
Do not place metallic objects
(straps, clips, etc. which contain
metal) between the wireless charger
and handset or battery pack.
May cause fires, burns or bodily injury.
When charging with the wireless
charger, remove the cover etc. with
which the handset is equipped.
Failure to charge arising from material and thickness of
the cover or foreign objects such as dust caught
between the handset and the cover may cause fires,
burns or bodily injury.
Be sure to turn off the handset and
not to charge t he batt ery in locatio ns
such as gas stations where
flammable gas is generated.
May cause a gas explosion or fire.
To use Osaifu-Keitai in locations such as gas stations,
be sure to turn off the power in advance (If the
Osaifu-Keitai lock setting is activated, disable the lock
before turning off the power).
If you notice anything unusual, such
as an unusual odor, overheating,
discoloration or deformation during
use, charging or storage,
immediately follow the instructions
below.
Unplug the power cord from the
outlet or cigarette lighter socket.
Turn off the handset.
Remove the battery pack from the
handset.
May cause fires, burns, bodily injury or electric shock.
Do not leave the equipment on
unstable surfaces, such as on a
wobbly table or sloped surface.
May fall and cause injury.
Do not store the equipment in
locations that are subject to
humidity, dust or high temperatures.
May cause fires, burns or electric shock.
If being used by a child, have a
guardian teach him/her the proper
handling procedures. In addition,
check that the child is using the
equipment as directed.
May result in bodily injury.
Contents/Precautions
8
Page 5
Keep the equipment out of the reach
Warning
EN60825-1:1994 A1:2002 & A2:2001
CLASS1
LED Product
of young children.
A young child may swallow the equipment or suffer
other bodily injury.
Be very careful when using the
handset connected to adapters
repeatedly or for long periods of
time.
The handset, battery pack or adapters may become
warm if 1Seg etc. is used for a long time while charging.
Touching high temperature areas for a prolonged
period of time may cause skin irritations, itchiness or
low-temperature burns in some people.
Handling the handset
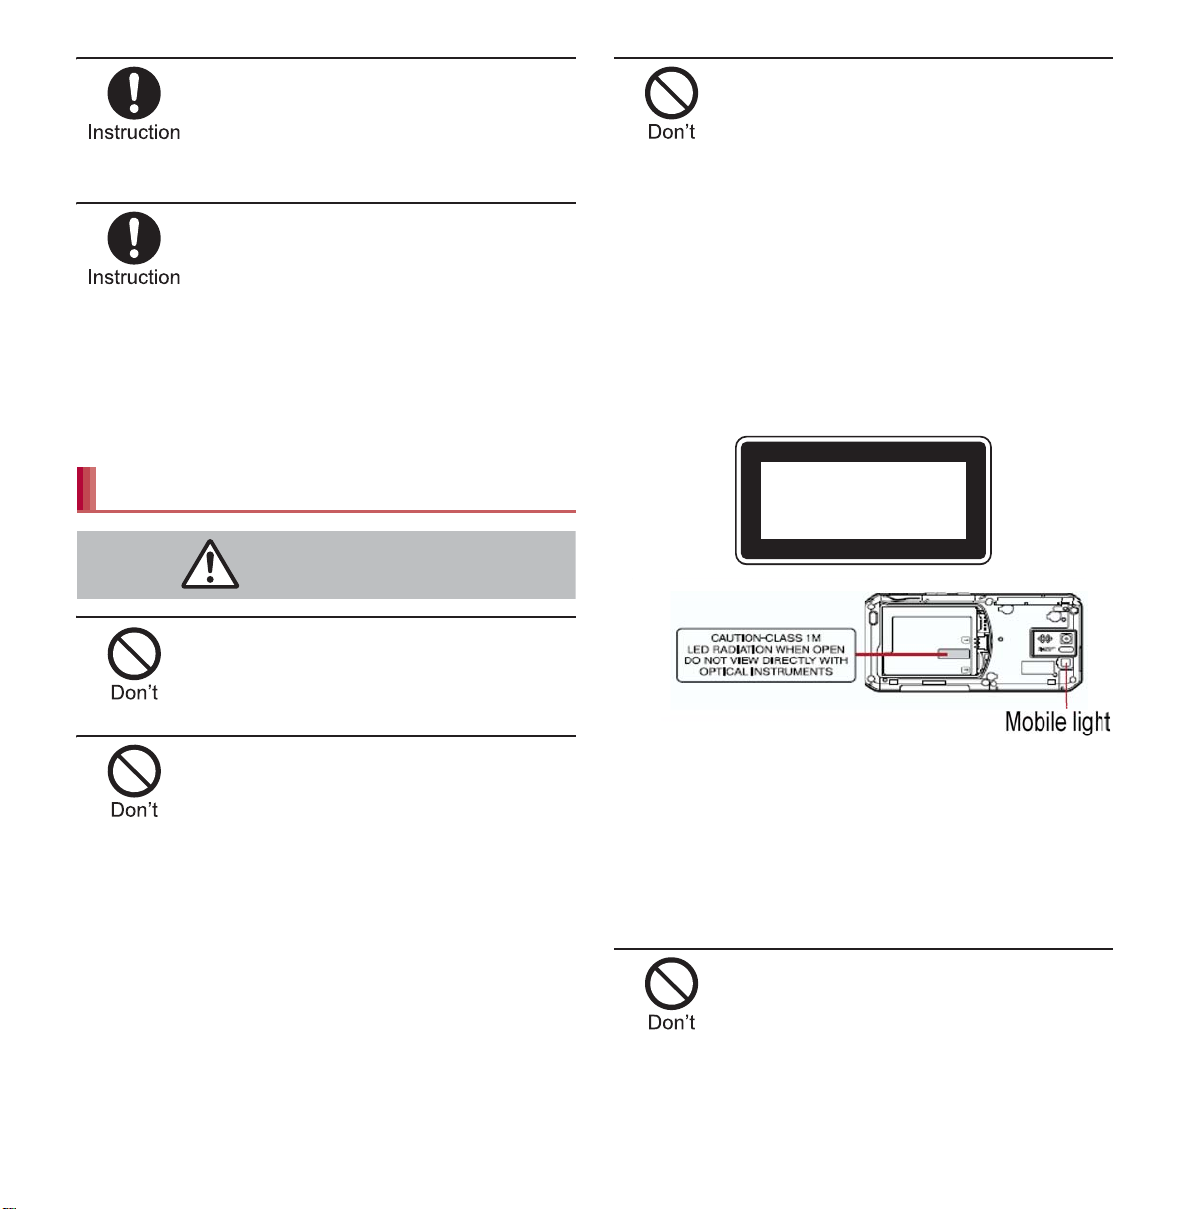
Do not aim the infrared port towards
the eyes.
Do not point the illuminated light
directly at someone’s eyes.
Especially when you shoot still
pictures or moving pictures of
young children, keep 1 m or more
distance from them.
Do not use Mobile light near people’s faces. Eyesight
may be temporarily affected leading to accidents.
Precautions:
The
mobile
light source used for this product may emit
the light over the safety level for eyes when operations
such as undirected adjustments are intent iona lly made .
Therefore, do not disassemble the handset.
Mobile light
May cause eye injury.
Do not aim the infrared port towards
home electric appliances with an
infrared device during infrared
communication.
May interfere with the operation of infrared devices and
cause an accident.
CAUTION:
Use of controls, adjustments or performance of
procedure other than those specified herein may result
in hazardous radiation exposure. As the emission level
from Mobile light LED used in this product is harmful to
the eyes, do not attempt to disassemble the cabinet.
Servicing is limited to qualified servicing station only.
Do not allow water or other liquids,
metal, flammable material or other
foreign objects to enter the docomo
mini UIM card or microSD Card slot
on the handset.
May cause fires, burns, bodily injury or electric shock.
Contents/Precautions
9
Page 6
Do not shine the light at anyone
Caution
m
driving a car or other vehicles.
May prevent a driver from driving safely and cause a
traffic accident.
Turn off the handset in areas where
the use of mobile phones is
prohibited, such as in aircraft or
hospitals.
May interfere with the op eration of electronic devices
and electronic medical equipment.
Follow the instructions given by the respective medical
facilities regarding the use of mobile phones on their
premises.
Actions such as using a mobile phone aboard aircraft
are prohibited an d punishable by law.
However, follow the instructions on use of the handset
given by the airline if the handset can be used aboard
aircraft by setting the handset such as setting it not to
emit radio wave.
Keep the handset away from the ears
during a call in which hands-free is set
or while the ring tone is ringing.
When you attach the earphone/
microphone, etc. to the handset to
play games, music, etc., do not make
the volume too loud.
Excessive high volume may damage your hearing.
Also, it may prevent you from hearing ambient sounds
and cause an accident.
Earphone Signal Level
The maximum output voltage for the music player
function, measured in accordance wi th EN 50332-2, is
50 mV.
V.
If you are using electronic medical
equipment, contact the respective
manufacturer or dealer to check
whether the operation of the
equipment is affected by signals.
May interfere with the operation of electronic medical
equipment etc.
If the display part or camera lens is
damaged, be careful of broken glass
and the exposed inside of the
handset.
The surface of the display is covered by a protective
film while the surface of the camera lens is covered by a
plastic panel so as to minimize the possibility of glass
scattering. However, touching the broken or exposed
parts may cause injury.
Do not swing the handset by its
strap etc.
May hit you or others around you, resulting in bodily injury.
Do not use a damaged handset.
May cause fires, burns, bodily injury or electric shock.
For using a motion sensor and
geomagnetic sensor, check the
safety around, hold the handset and
do not swing them more than
necessary.
May cause injury etc.
If you have a weak heart, take extra
precautions when setting functions
such as the vibrator and ring tone
volume for incoming calls.
May have harmful effects on your heart.
Contents/Precautions
10
Page 7
If the display is broken and the liquid
Danger
crystal then leaks, do not get the
liquid on your skin (face, hands,
etc.).
May result in loss of eyesight and harm to your skin.
If the liquid comes into contact with your eyes or mouth,
immediately rinse your eyes or mouth with clean water
and see a doctor.
If the liquid comes into conta ct with you r skin or clothe s,
immediately wipe it off with alcohol, and wash with
water and soap.
Handling battery pack
Check the type of battery using the information
printed on the battery pack label.
Label Battery type
Li-ion00 Lithium-ion
The surface of the display is covered
with a protective film for ensuring
the security against any damages
caused by the handset being
dropped or receiving a strong
impact etc. Do not remove the film
forcibly or damage it.
Using the equipment with the film removed may
damage the display and cause bodily injury.
If you use the handset in a vehicle,
contact the vehicle manufacturer or
dealer to check whether the
operation of the vehicle is affected
by signals.
May interfere with the operation of electronic equipment
in some vehicle models. In such cases, stop using the
handset.
Use of the handset may cause skin
irritations such as itchiness, rashes
or eczema in some people. If this
occurs, immediately stop using the
handset and seek medical treatment.
For details on materials of each part n“Materia l l ist ”
on P. 15
Look at the display in a well -lit pla ce,
keeping a certain distance from the
screen.
Otherwise, eyesight may be weakened.
Do not touch terminals with metallic
objects such as wires. In addition,
do not carry or store the battery
pack with metallic necklaces etc.
The battery pack may catch fire , exp lode, ov erh eat or lea k.
Check that the battery pack is facing
the correct direction before you
attach it to the handset. If you are
having difficulty fitting the battery
pack to the handset, do not use
excessive pressure to force the
battery into place.
The battery pack may catch fire , exp lode, ov erh eat or lea k.
Do not throw the battery pack into a
fire.
The battery pack may catch fire , exp lode, ov erh eat or lea k.
Do not puncture, hit with a hammer
or step on the battery pack.
The battery pack may catch fire , exp lode, ov erh eat or lea k.
If the battery fluid etc. comes into
contact with your eyes, do not rub
your eyes but immediately rinse
your eyes with clean water. Then
seek prompt medical treatment.
May result in loss of eyesight.
Contents/Precautions
11
Page 8
If any trouble such as a deformation
Warning
Caution
Warning
or scratches caused by dropp ing the
battery pack is found, never use it.
The battery pack may catch fir e, explo de, ove rheat or leak.
If the battery pack leaks or emits an
unusual odor, immediately stop
using it and move it away from any
naked flames or fire.
The battery fluid is flammable and could ignite, causing
a fire or explosion.
Do not allow a pet to bite the battery
pack.
The battery pack may catch fir e, explo de, ove rheat or leak.
Do not dispose of used battery
packs in ordinary garbage.
May cause fires or damage to the environment. Place
tape over the terminals to insulate unnecessary battery
packs, and take them to a docomo Shop, retailer or
institution that handles used batteries in your area.
Do not use or charge a wet battery
pack.
If the battery fluid etc. leaks, do not
get the liquid on your skin (face,
hands, etc.).
May result in loss of eyesight and harm to your skin.
If the liquid comes into contact with your eyes, mouth,
skin or clothes, immediately rinse them with clean
water.
If the liquid etc. comes into contact with your eyes or
mouth, see a doctor immediat ely after rinsin g your eye s
or mouth.
Handling adapters and wireless
charger
Do not use if the cord of the adapter
or of the wireless charger is
damaged.
May cause fires, burns or electric shock.
Never use the AC adapter or the
wireless charger in humid locations
such as a bathroom.
May cause fires, burns or electric shock.
The DC adapter should only be used
in negative grounded vehicles.
Never use it in positive grounded
vehicles.
May cause fires, burns or electric shock.
The battery pack may catch fir e, explo de, ove rheat or leak.
Contents/Precautions
12
Do not touch adapters or the
wireless charger if you hear thunder.
May cause electric shock.
Page 9

The surface of the handset uses the aluminium
material. Note that dent and abrasion are easily
remained as aluminium is a soft material.
Notes about the battery pack
The battery pack is a consumable product.
Though usage time varies with use, change the battery
if the battery level is extremely low even after being
fully charged. Purchase a specified new battery pack.
Charge battery in areas where ambient
temperature is between 5°C and 35°C.
The usage time for a battery pack depends
on the usage and deterioration of battery
pack.
Depending on usage, the battery pack may
swell as it approaches the end of its service
life, but this will not cause problems.
Note the following when the battery pack is
stored.
Storage with the battery pack fully charged
(immediately after charging is completed)
Storage with no battery level (cannot turn the
main body on)
May lower the performance or shorten the life of the
battery pack.
Approximatel y 40% is recommended as the batte r y
level for storag e.
Notes about adapters and the
Adapters or the wireless charger may
become warm during charging but this is not
a malfunction.
Do not use the DC adapter to charge the
battery when the car engine is not running.
May cause the car battery to run down.
When using an outlet with a feature to
prevent the plug from being removed
accidentally, follow the instructions in the
outlet user’s guide.
Do not subject to strong force or impacts.
Also, do not disfigure the charger terminals.
May cause a malfunction.
Do not use the wireless charger with a
blanket etc. covering it.
Connect only the specified devices and
exclusive AC adapter to the wireless charger.
Do not place the handset on the wireless
charger with the adapters or Micro USB
Cable 01 (sold separately) connected to the
handset.
Never place a magnetic card etc. near the
wireless charger.
The stored magnetic data in cash cards, credit
cards, telephone cards, floppy disks, etc. may be
erased.
Never place magnetized items near the
wireless charger.
Putting highly magnetized items closer may cause
an error.
wireless charger
Charge the battery in areas where the
ambient temperature is between 5°C and
35°C.
Do not charge the battery pack in the
following locations.
Areas with high humidity or dust, or in areas
exposed to frequent vibrations
Close to land-line phones, TVs, radios, etc.
Contents/Precautions
18
Notes about docomo mini UIM
card
Do not apply unnecessary force when
inserting/removing the docomo mini UIM card.
Customer is responsible for malfunctions
arising from inserting docomo mini UIM card
into a different IC card reader/writer.
Page 10
Always keep IC area clean.
ӱġ Ӳġ
ӳġ
Ӵġ
Clean only with a soft and dry cloth (such as
the type used for eyeglasses).
Keep a separate memo and note information
stored in the docomo mini UIM card.
DOCOMO shall no t be liable for any loss of content.
To protect the environment, please take any
unneeded docomo mini UIM cards to a
docomo Shop or retailer.
Do not damage, touch haphazardly or
short-circuit the IC.
May cause data loss or a malfunction.
Do not drop or otherwise subject the
docomo mini UIM card to severe impact.
May cause a malfunction.
Never bend the docomo mini UIM card or
place heavy objects on it.
May cause a malfunction.
Do not insert the docomo mini UIM card to
the handset with a label or sticker attached
on the card.
May cause a malfunction.
Notes on using Bluetooth
function
The handset supports the security function
that meets the Bluetooth specification for
security during communication using
Bluetooth functions. However, the security
may not be sufficient depending on the
configuration. Take care of the security while
making communication using Bluetooth
function.
Even if any leak of data or information
occurs while making communication using
Bluetooth function, DOCOMO shall not be
liable for any loss of content.
Radio frequencies
The radio frequencies the Bluetooth function
of the handset uses are as follows.
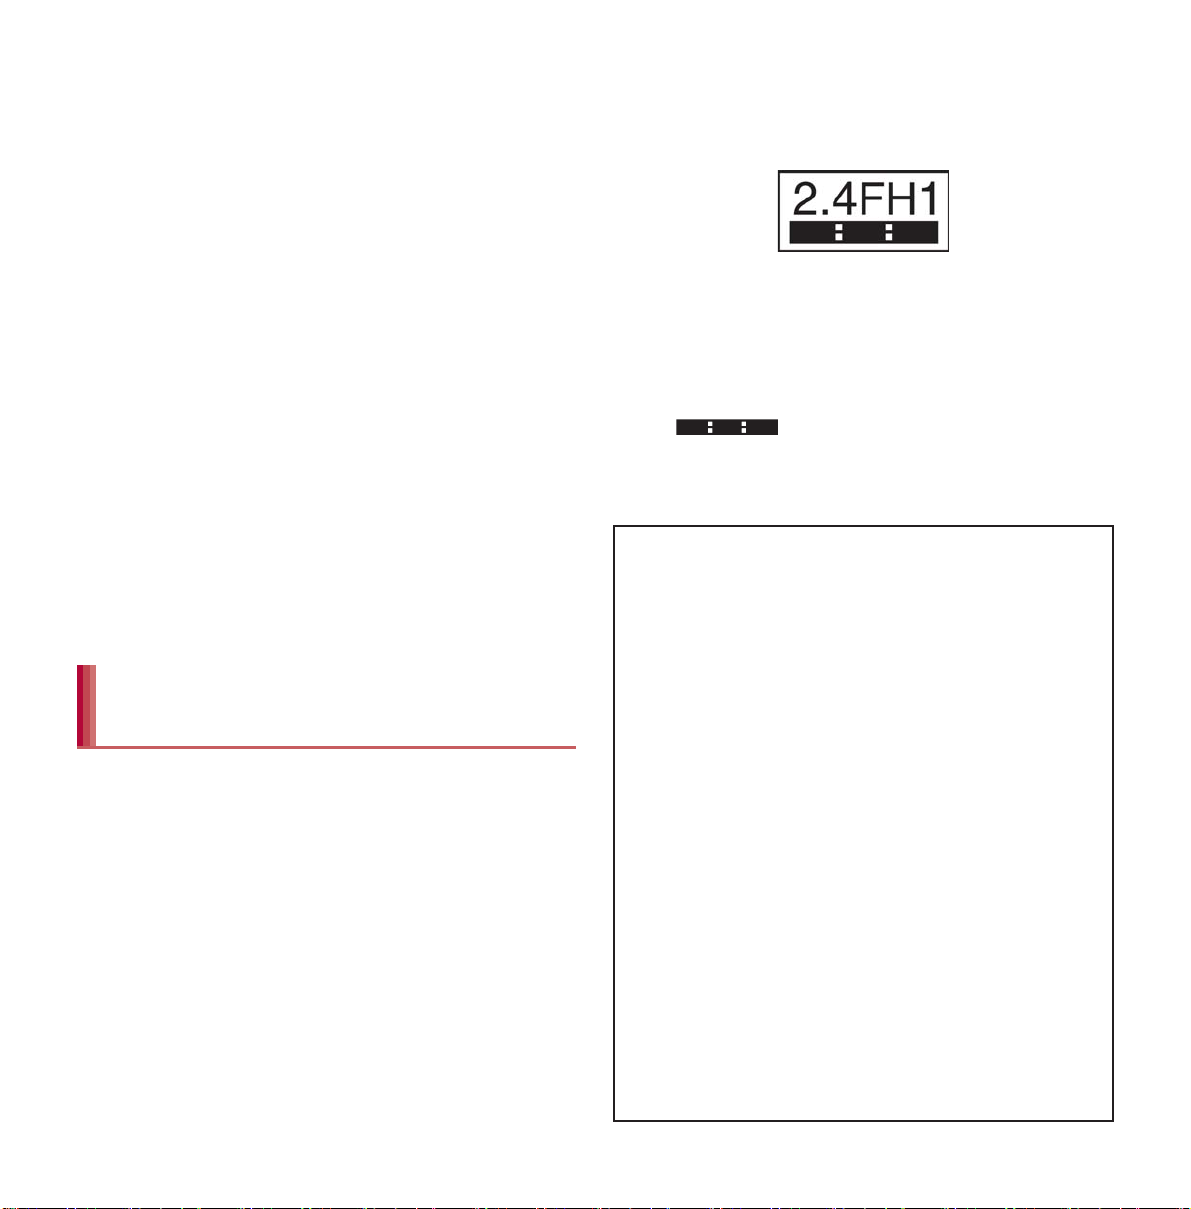
ӱ 2.4: This radio equipment uses the 2.4 GHz
band.
Ӳ FH: The modulation system is the FH-SS syste m.
ӳ 1: The estimated coverage distance is 10 m or
less.
Ӵ : All radio frequencies between 2400
MHz and 2483.5 MHz are used and the
frequencies for mobile object identifiers shall not
be avoided.
Cautions on using Bluetooth devices
Bluetooth operates at radio frequencies
assigned to the in-house radio stations for
a mobile object identifier that have to be
licensed and is used in production lines of
a factory, specific unlicensed low power
radio stations, and amateur radio stations
(hereafter, referred to “another radio
station”) in addition to industrial, scientific,
medical devices or home electric
appliances such as microwave ovens.
1. Before using t he han dset, make s ure tha t
“another radio station” is not operating
nearby.
2. If radio interference bet ween the ha ndset
and “another radio station” occurs,
avoid interference by moving
immediately to another place or “turning
off the power”.
3. Contact the number listed in “General
Inquiries” on the back of this manual for
further details.
Contents/Precautions
19
Page 11
Notes about wireless LAN
ӱġ Ӳġ ӳġ Ӵġ
ӵġ
(WLAN)
Wireless LAN (WLAN) uses radio waves to
communicate information. Therefore, it has
an advantage of freely co nnecting t o the LAN
within the service area. On the other hand, if
security setting is not set, it is possible for a
malicious third party to intercept the
communication contents or hack. It is
recommended to set security setting at your
own risk and judgement.
Wireless LAN
Do not use wireless LAN near magnetic devices
such as electric appliances or AV/OA devices or in
radio waves.
Ʀ Magnetism or radio waves may increase no ises or
disable communications (especially when using a
microwave oven).
Ʀ When used near TV, radio, etc., reception
interference may occur or channels on the TV
screen may be disturbed.
Ʀ If there are multiple wi reless LAN access points
nearby and the same channel is used, search may
not work correctly.
Radio frequencies
The radio frequencies the WLAN-installed
devices use are indicated on the battery
storage section of the main body of the
handset. The followings are the descriptions:
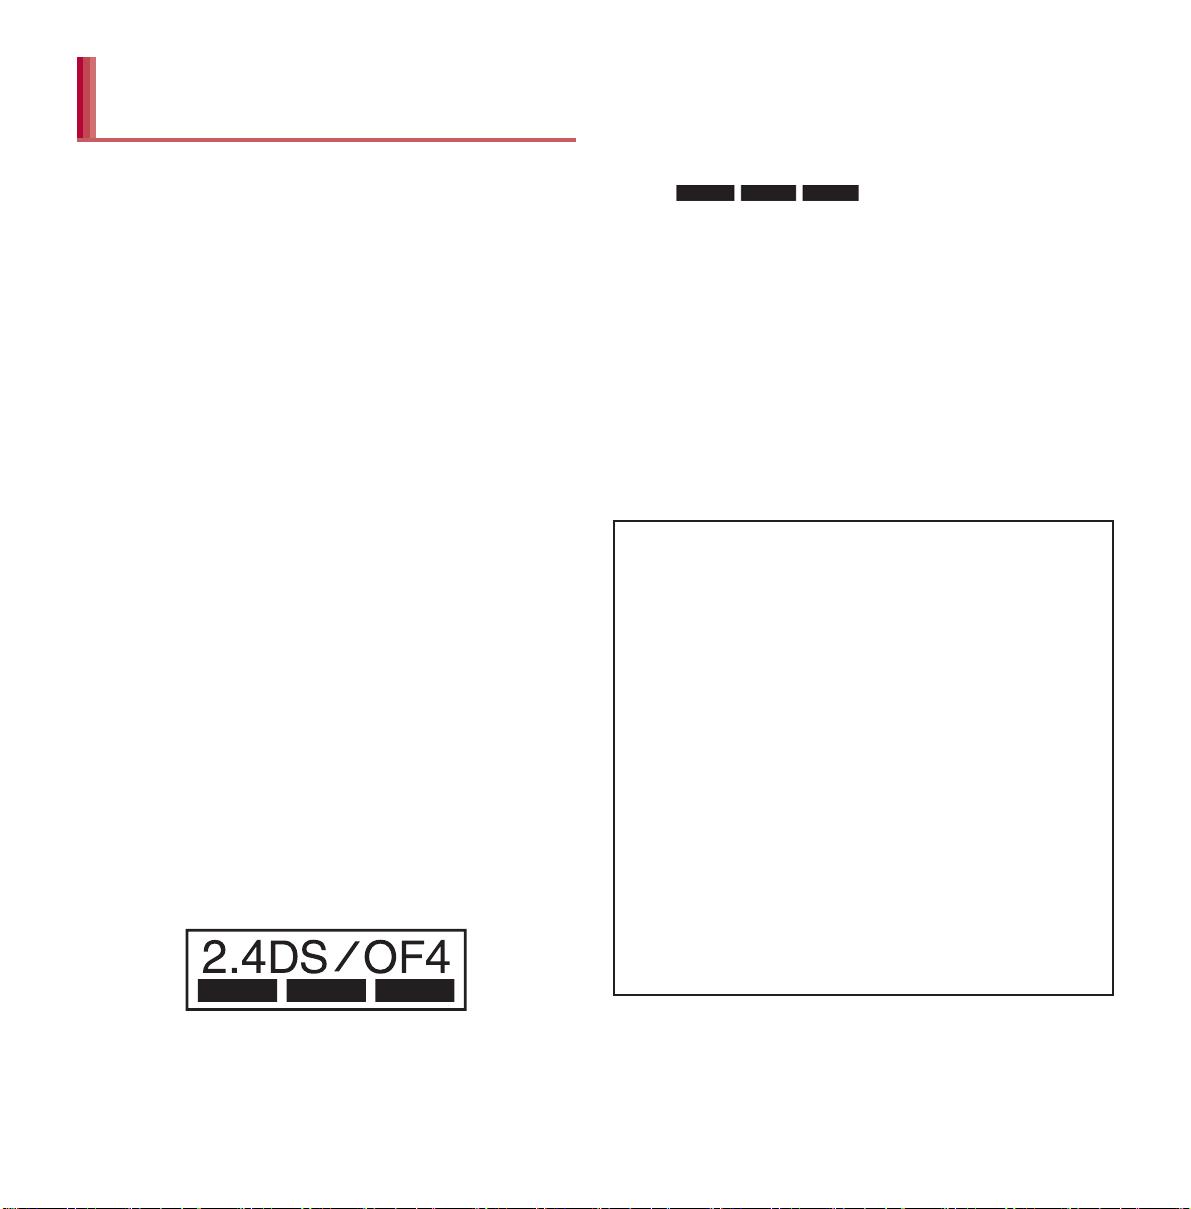
Ӳ DS: The modulation system is the DS-SS
system.
ӳ OF: The modulation system is the OFDM system.
Ӵ 4: The estimated coverage distance is 40 m or
less.
ӵ : All radio frequencies
between 2400 MHz and 2483.5 MHz are used
and the frequencies for mobile object ide ntifiers
shall be avoided.
Available channels for the handset’s wireless LAN
are between 1 to 13. No te that ot her chan nel acce ss
points cannot be connected.
Available channels vary depending on the countr y.
For use in an aircraft, contact the airline beforehand.
There are restrictions on the use of wireless LAN in
some countries or regions such as France. If you
intend to use wireless LAN overseas, check the local
laws and regulations beforehand.
Cautions on using 2.4 GHz devices
WLAN-installed devices operate at radio
frequencies assigned to the in-house radio
stations for a mobile object identifier (radio
stations requiring a license) used in
production lines of a factory, specific
unlicensed low power radio stations (radio
stations requiring no license), and amateur
radio stations (radio stations requiring a
license) in addition to industrial, scientific,
medical devices or home electric
appliances such as microwave ovens.
1. Before using this device, make sure that
the in-house radio stations for a mobile
object identifier, specific unlicensed low
power radio stations and amateur radio
stations are not operating nearby.
ӱ 2.4: This radio equipment uses the 2400 MHz
20
band.
Contents/Precautions
Page 12

2. If the device causes harmful radio
interference to the in-house radio
stations for a mobile object identifier,
immediately change the radio frequency
or stop use, and contact the number
listed in “General Inquiries” on the back
of this manual for crosstalk avoidance,
etc. (e.g. partition setup).
3. If the device causes radio interference to
specific unlicensed low power radio
stations for a mobile object identifier or
amateur radio stations, contact the
number listed in “General Inquiries” on
the back of this manual for further
details.
FeliCa reader/writer
The FeliCa reader/writer function in the
handset uses weak radio waves in the
handling of which does not require a license
of radio station.
The frequency in use is the 13.56 MHz band.
When another reader/writer is being used
nearby, keep enough distance from it. Make
sure that there is no radio station using the
same frequency band in the nearby area.
FM transmitter
The FM transmitter function in the handset
uses weak radio waves requiring no licenses
for radio stations.
It uses 77.4 to 85.0 MHz frequency band. To
avoid adversely affecting surrounding FM
radio users, do not set the same frequency
band as an FM broadcasting station in your
area for using.
Caution
Never use the handset that is modified. Using
a modified device violates the Radio Law.
The handset has acquired the certification of
conformity with technical regulations for the
specified radio stati on based on the Radio Law, and
the “Technical Conformity Mark ” is printed on the
model nameplate of the handset as a proof. If the
screws of handset are removed and a modification is
given to the inside, the certification of conformity
with technical regulations will become invalid. Never
use the handset without the valid certification. Doing
so violates the Radio Law.
Be careful when using the handset while
driving a motor vehicle.
Using a mobile phone in hand while driving is
regarded as a punishable act.
However, the punishment has no application in
some cases such as when rescuing sick and injured
people or maintaining public safety.
Use the FeliCa reader/writer function only in
Japan.
The FeliCa reader/writer function in the hand set
conforms to the domestic radio wave standards.
Using the function overseas may result in
punishment.
Use the FM transmitter only in Japan.
The FM transmitter in the handset is compliant with
radio wave standards and is authorized for use only
in Japan. Using the function overseas may result in
punishment.
Never change the basic software improperly.
This may be regarded as a conversion of software
and repairs may be refused.
Be careful not t o connec t the h andset to a PC
using Micro USB Cable 01 nor to connect the
handset to a TV with HDMI terminal using a
commercially available MHL
where the use of mobile phones is
prohibited.
Power may turn on automatically.
™
cable in areas
Contents/Precautions
21
Page 13
Removing microSD Card
With recycle
mark side up
Connector
terminal
Tab
e
event excessive force on it and remove t
d.
Remove the back cover (nP. 23)
1
Gently push the microSD Card
2
towards inside (1)
: Push the microSD Card until it clicks. It will
eject towards you. Pulling it forcibly may
damage the handset or the microSD Card.
Remove the microSD Card (2)
3
: Remove the microSD Card by slowly pulling
it straight out.
Attach the back cover (nP. 23)
4
Attach the battery pack
2
: With the recycle mark side turned up, place
the connector terminal of the handset to that
of the battery pack and attach the battery
pack.
Attach the back cover (nP. 23)
3
Removing battery pack
Remove the back cover (nP. 23)
1
Remove the battery pack
2
: The battery pack has a tab that makes it
easy to remove. Hook a finger on the tab to
prevent excessive force on it and remove the
attery pack upwar
battery pack upward.
Battery pack
Use the Battery Pack SH37 exclusive to the
handset.
For attaching or removing the battery pack, turn
off the power, position the back facing upwards,
and hold the handset securely with your both
hands.
Attaching batt ery pack
Remove the back cover (nP. 23)
1
Before Using the Handset
32
Attach the back cover (nP. 23)
3
Using unnecessary force when attaching or
removing the battery pack may damage the
connector terminal for the ba ttery pack ( charger
terminal) on the handset.
Page 14

Charging
The battery pack is not fully charged at the time
of purchase. Be sure to charge the battery
before use.
It is recommended that the accompanying
wireless charger be used for charging to prevent
water from seeping or dust from getting in
caused by forgetting to close the external
connector terminal cover (nP. 35).
FOMA Charger microUSB Adapter SH01/FOMA
charging microUSB adapter T01 (sold
separately) is required to charge with FOMA AC
Adapter 01/02 (sold separately) or FOMA DC
Adapter 01/02 (sold separately).
Cautions while charging
Do not charge for a long time with the power left
on. If the handset is left on after charging is
complete, the battery pack charge decreases.
In that case, the AC or DC adapter (sold
separately) or the wireless charger charges the
battery again. However, depending on the time
when the handset is disconnected from the AC or
DC adapter or the wireless charger, the battery
charge level may be low or the battery may only
be usable for a short time.
If the handset is left for a long time even after the
charging is completed, the battery level may
decrease.
When the battery is empty and the handset is
being charged, the charging illumination may not
illuminate immediately. However, charging is in
progress.
If the battery empty alert is displayed and the
power cannot be turned on, charge the battery
for a while.
While charging, the handset may not turn on
even when the charging illumination is
illuminated in red. Charge longer and try turning
power on again.
Frequently recharging the bat tery when its power
is still remaining enough may shorten the life of
the battery pack. It is recommended to use the
battery to a certain level before recharging.
Estimated charge time and
illumination display
The following figures are estimated times for
charging an empty battery pack with the handset
turned off.
AC Adapter 03 Approx. 220 min
DC Adapter 03 Approx. 230 min
Wireless Charger SH02 Approx. 240 min
The charging illumination illuminates in red while
charging, and it turns off when charging is
completed.
If the power of the handset is off during the use
of the wireless charger, the charging illumination
flashes in red when charging starts. Also, the
charging illumination may flash before charging
finishes.
Check that the battery pack has been properly
attached when the charging illumination flashes
in red during the use of the AC or DC adapter.
The illumination also flashes in red when the
battery pack has reached the end of its service
life.
Before Using the Handset
33
Page 15

If you watch 1Seg etc. while charging for a long
Charging
information
(five LEDs)
Charging area
Charging assist
button
time, the service life of the battery pack may
become shorter than estimated.
AC adapter and DC adapter
Refer to user’s guide of FOMA AC Adapter 01/
02, FOMA AC Adapter 01 for Global use (sold
separately), FOMA DC Adapter 01/02, AC
Adapter 03 (sold separately) or DC Adapter 03
(sold separately).
FOMA AC Adapter 01 covers only 100V AC. FOMA
AC Adapter 02/FOMA AC Adapter 01 for Global
use/AC Adapter 03 co vers from 100 to 240V AC.
The shape of the plug for the AC adapter is for
100V AC (for domestic use). To use the AC
adapter of 100 to 240V AC overseas, a
conversion plug adapter that is compatible with
the voltage of your count ry of stay is required. Do
not use a voltage converter for overseas travel to
charge the battery.
Charging with wireless charger
Part names are as followings.
Ʀ Charging assist button is a button to use when
charging does not start even after a mini
compatible device with small output capacity is
placed on the center of the charging area.
Insert the connector of the
1
exclusive AC adapter into the
wireless charger (1)
: Insert the connector securely.
: Insert only the exclusive AC adapter.
Insert the power plug of the
2
exclusive AC adapter into an outlet
(2)
When you place the handset on the
3
wireless charger, the charging
Compatible devices provided by DOCOMO with
b mark can be charged with the wireless
charger. Read the instruction manuals of the
compatible devices that you are going to use.
Products with b mark conform with
wireless power standard of Wireless
Power Consortium (WPC).
illumination and charging
information illuminate and c harging
starts
: Place the handset slowly with the b mark
side turned down so that b mark of the
wireless charger faces the battery pack.
Before Using the Handset
35
Page 16

When noises interfere on a TV, radio set, etc.
during its use, use the wireless charger after
distancing it as far away from a TV, radio set,
etc. as possible.
When charging, keep the wireless charger at
least 30 cm away from wireless charging
compatible devices other than the handset/
battery pack to charge. Otherwise the handset/
battery pack to charge may not b e detected and
thus may not be charged.
The quality of calls or reception status of 1Seg
etc. may deteriorate while the handset is being
charged.
Do not move the wireless charger and the
handset/battery pack while charging.
Do not let the vibrator activated while charging
the handset. Note that charging may not be
complete or the handset may fall since it moves
due to vibrations.
If you charge the handset with a commercially
available product with b mark, the handset
may not receive calls during charging. Charge
with accompanying Wireless Charger SH02.
Open the external connector
1
terminal cover of the handset and
insert the microUSB plug of a
microUSB cable/DC adapter
horizontally into the external
connector terminal with the USB
mark side turned down
: Check the direction (front or rear) of the
microUSB plug and insert it horizontally.
Charging
illumination
microUSB plug
External connector
terminal
Keep side with the
USB mark down
Insert the USB plug of the
2
microUSB cable horizontally into
Charging with AC adapter/DC
adapter
[Read the user’s guides of FOMA AC
Adapter 01/02 (sold separately), FOMA DC
Adapter 01/02 (sold separately), AC Adapter
03 (sold separately), DC Adapter 03 (sold
separately) and FOMA Charger microUSB
Adapter SH01/FOMA charging microUSB
adapter T01 (sold sepa rat e ly )]
Following operations describe how to charge
with AC Adapter 03 or DC Adapter 03.
the USB connector of an AC
adapter with the USB mark side
facing you (1)
: Check the direction (front or rear) of the USB
plug of the microUSB cable and insert it
horizontally into the AC adapter.
Before Using the Handset
37
Page 17

When inserting the AC adapter
100V AC
outlet
Cigarette
lighter socket
For AC adapter For DC adapter
USB mark
microUSB cable
AC Adapter
03
Power plug
Power plug
USB plug
3
power plug into an outlet (2) or
inserting the DC adapter power
plug into a car cigarette lighter
socket, the charging illumination
illuminates and charging starts
Do not forcibly insert or remove. May cause
damage to the external connector terminal, the
microUSB plug and the USB plug.
Pull the adapter out of the outlet or cigarette
lighter socket if it will not be used for a long
time.
Do not forcibly pull the external connector
terminal cover. May damage the cover.
Do not place objects near the handset when
charging. May damage the handset.
When charging is complete, the
4
charging illumination turns off
: When charging is complete, remove the
microUSB plug horizontally from the external
connector terminal.
Before Using the Handset
38
When using a DC adapter
The DC adapter should only be used in
negative grounded vehicles (12 and 24V DC).
Do not use with the car engine shut off. May
drain the car battery.
The DC adapter fuse is a consumable product.
For replacement, purchase a new fuse at a
local vehicle supply shop.
Refer to the user’s guide of FOMA DC Adapter
01/02 and DC Adapter 03 for details.
Page 18

Charging with Micro USB Cable
01
When the handset is turned on, you can charge
the handset by connecting the handset to a PC
with Micro USB Cable 01 (sold separately).
Install the USB driver to the PC in advance. If the
USB driver has not been installed on the P C, you
cannot charge the battery by connecting the
handset to the PC via Fast transfer mode.
Ʀ For details on installing USB driver, refer to
“Manual for USB Driver Installation” in PDF
format in the following site.
(http://k-tai.sharp.co.jp/support/d/sh-09d/ (in
Japanese only)
For details on connecting to a PC nP. 112
Turning power ON/OFF
Turning power ON
Sleep mode
The screen is off and the sleep mode is activated
when H is pressed or the handset is not in use for a
set length of time.
Press H in the sleep mode to deactivate the sleep
mode.
Touch panel lock
When the power is turned on or the sleep mode is
deactivated, the touch panel is locked.
Touch [J] to unlock.
H (for at least 2 seconds)
1
: When you turn the power on for the first t ime,
the initial setting screen is displayed. Each
setting item can also be set from menus
(nP. 43).
: If the initial sett ing scree n for doc omo servi ce
is displayed, operate by following the
instructions on the screen.
Turning power OFF
H (for at least 1 second)/[Power
1
off]/[OK]
Operations in touch panel unlock screen
To set/disable the manner mode: y (for at least
1 second)
To turn on the mobile light: x (for at least 1
second)
Ʀ Press any of the keys or touch [J] to turn it off.
To activate the camera: [K]
The mobile light will automatically turn off
approximately 30 seconds after it turns on.
The status panel is displayed w hen Screen lock
is set to [Slide or Touch].
Before Using the Handset
39
Page 19

Basic operation
Operation of touch panel
You can operate by touching the touch panel
(display) directly with your finger.
Operations differ depending on the function and
screen in use.
Cautions when using the touch panel
The touch panel is designed to be lightly
touched with your finger. Do not forcefully
press with your finger or press with a pointed
object (fingernail, ballpoint pen, pin, etc.).
In the following cases, the touch panel may
not work even if you touch it. May cause a
malfunction.
Operation with a gloved finger
Operation with a fingernail
Operation with foreign objects placed on
the operation pad
Operation on the touch panel on which a
protective sheet or a sticker is put
Operation while the touch panel is wet
Operation with fingers wet with sweat or
water
Operations may be interrupted if you touch
other than a confirmation screen or the status
bar while the confirmation screen etc. is
displayed.
Touch
Touch a key or an item displayed on the screen to
select or set it.
Put your finger on the touch pane l
1
and put it off
Touch for a while
When you touch the screen for a while, a menu
may appear depending on the function and screen
in use.
Keep your finger on the touch panel
1
Slide/Drag
Slide your finger up/down while a menu is
displayed etc. to scroll the screen or slide (drag) an
icon, widget, etc. to move it to the desired position
while keeping touching it.
In addition, when you touch a menu or item by
mistake, slide your finger away from the menu or
item to cancel the selection.
Keep your finger on t he touch pa nel
1
and slide it
Before Using the Handset
40
Page 20

Flick
Set item list
Flick your finger to the left/right in the home screen
etc. to switch pages.
Move your finger like sweeping the
1
touch panel
Pinch out/Pinch in
Pinch out/Pinch in while displaying an image etc. to
zoom in/out.
Put two fingers on the touch panel
1
and slide them with putting a
distance between two fingers apart
(pinch out)/closer (pinch in)
Operation while using function
Navigation keys
Use the navigation keys displayed at the bottom of
the screen to perform the basic operations.
1 {: Back key
Returns to the previous screen.
2 |: Home key
Displays the main page of the home screen.
3 z: Menu key
Displays available functions (menus).
4 }: Recent Apps key
Displays the history of recently used
applications.
Retrieving menu
When you touch [z] or touch the screen for a
while, functions (menus) available in that screen
appear.
Example: Home screen
Before Using the Handset
41
Page 21

୭
mopera U
Wi-Fi settings
mopera U is an ISP owned by NTT DOCOMO. If
you subscribe to mopera U, you can use
Internet with simple setting. mopera U is a paid
service that requires subscription.
Setting mopera U
In the home screen, [R]/
1
[Settings]/[Network settings]/
[Mobile networks]/[Access Point
Names]/[mopera U]/[mopera U
] (mopera U settings)
mopera U ୭ (mopera U settings) is an
access point for mopera U settings. When you
use the access point for mopera U settings,
packet communication charges are not
incurred. Note that you can connect to only the
initial setting screen or the change setting
screen. For details on mopera U settings, refer
to the mopera U website.
If you use Wi-Fi function of the handset, you
can use mail or Internet by connecting to your
home, corporate network or access points of
public wireless LAN service.
The radio interference with Bluetooth
devices
Wireless LANs (IEEE 802.11b/g/n) use the
same frequency band (2.4 GHz) as Bluetooth
devices. Therefore, using the wireless LAN
device near a Bluetooth device may cause
radio interference, lowering of communication
speed, noise or connection failure. In this
case, turn off the Bluetooth device or keep the
handset and the wireless LAN device at least
approximately 10 m away from the Bluetooth
device.
Packet communication is also available while
Wi-Fi function is enabled. Wi-Fi connection is
prioritized while Wi-Fi connection is set, but the
connection will be automatically switched to that
of LTE/3G/GPRS network once Wi-Fi con nection
is terminated. Note that packet communication
charges will be incurred in such cases.
Refer to the manual of your wireless LAN base
unit when using the access point at home etc.
Operate access point registration near the
access point.
In the home screen, [R]/
1
[Settings]/[Wi-Fi]
Slide [OFF] to the right
2
Select an access point/[Connect]
3
Before Using the Handset
45
Page 22

: If you select an acces s point not protected by
security, it is automatically connected.
: If you select an access point protected by
security, enter the password (security key).
: WPS compatible access points can be easily
registered. Select an item in Setup and
register an access point.
: To register access points manually: [ADD
NETWORK]/enter the network SSID/set
security/[Save]
: Alternatively, select [AOSS] to connect to an
access point. Follow the instructions on the
screen and operate after this step.
When you select an access point an d connect to
it with a wrong password (security key), [Avoided
poor Internet connection] or [Connected
(Limited)] is displayed. Confirm the password
(security key). When [Avoided poor Internet
connection] or [Connected (Limited)] is
displayed after entering the correct password
(security key), you may not have acquired the
correct IP address. Connect to the access point
again after confirming signal status.
The registration process using WPS takes a
few minutes. After c ompletio n of the registrat ion
of the access point, check that the proper
connection to the access point is acquired.
As for the manual registration of an access
point, this function supports WEP, WPA/WPA2
PSK, 802.1xEAP as the security setting.
Detailed settings
In the home screen, [R]/
1
[Settings]/[Wi-Fi]/[z]/
[Advanced]
Select an item
2
Network notification: Set wh ether t o display a
notification icon when an open network is
detected.
Ʀ Enable the Wi-Fi function before setting it.
Wi-Fi sleep policy: Set when to switch the
Wi-Fi function to the sleep mode.
MAC address: Confirm the MAC address.
IP address: Confirm the IP address.
Disconnecting
In the home screen, [R]/
1
[Settings]/[Wi-Fi]
Select the connected access
2
point/[Forget]
: Disconnect with the password retained.
Wi-Fi tethering
Tethering function that connects Wi-Fi
compatible devices to the Internet by using the
handset as a Wi-Fi access point is available.
You can connect to up to five Wi-Fi compatible
devices simultaneously.
In the home screen, [R]/
1
[Settings]/[Network settings]/
[Tethering]
Select an item
2
Wi-Fi tethering: Enable the Wi-Fi tethering.
Ʀ Check the details of the precautions before
use.
Configure Wi-Fi hotspot: Set the Wi-Fi
tethering settings such as network SSID and
security.
Help: Display Help information.
Before Using the Handset
46
Page 23

[Configure Wi-Fi hotspot]
At the time of purchase, Network SSID is set to
[SH-D_AP] and Security is set to [WPA2
PSK] while Password is set randomly. Change
the settings if necessary.
Setting up Google account etc.
In the home screen, [R]/
1
[Settings]/[Accounts & sync]/
[ADD ACCOUNT]
Setting up mail account
In the home screen, [R]/[Email]
1
: Only when an account is not set, the account
setting screen appears.
Enter mail address and password/
2
[Next]
: Provider information is preset for some mail
accounts, and a receiving mail server and a
sending mail server are automatically set.
: When you use an account whose provider
information is not preset, it is necessary to
set a receiving mail server and a sending
mail server manually. For details on those
settings, contact the Internet service prov ider
you use.
Set an account/[Next]
3
Enter an account name and your
4
name/[Next]
The account which is registered first is
automatically given priority to normal use.
When registering multiple accounts, you can
set an account as prioritized one by enabling
[Send email from this account by default.] at the
time of the registration.
When the account type is Exchange, entering
“¥UsernameDomain” in the
“Domain¥Username” area is required to set a
receiving mail server manually depending on
the provider to use. Con tact the ad ministrato r of
the server for details.
Select the account type
2
Set up an account
3
When activating the application that requires an
account without setting the account, the
account setup screen appears.
Keep a separate memo of the set account and
password.
Deleting your account
In the home screen, [R]/
1
[Settings]/[Accounts & sync]
Select an account/[z]/[Remove
2
account]/[Remove account]
Retrieving your Google account
password
If you forget your Google account password,
retrieve it.
In the home screen, [R]/
1
[Browser]
Enter “(http://www.google.com/) ” in
2
the URL entry field/[Go]/
[more]/[Sign In]/[Can’t access
your account?]/follow the
instructions on the screen
Before Using the Handset
47
Page 24

Call
Making a call
In the home screen, [R]/
1
[Phone]/[Dial]
Enter a phone number
2
: Always enter the city code, even when it is a
local number.
: You can set to notify/not to notify the other
party of your phone number for each call by
adding “186”/“184” to the head of the phone
number.
3 Outgoing/Incoming call history
4 Favorites
Display the contacts set to [Favorites] by
groups.
5 Dial
Display the dial screen.
6 Add to phonebook
7 Koe-no-Takuhaibin
For details of Koe-no-Takuhaibin, refer to
the DOCOMO website.
8 Phonebook
Display the phonebook.
[0]
3
[End] to end the call
4
Entering touch-tone signals
In the home screen, [R]/
1
[Phone]/[Dial]
68
1 Call
Make a call. Also, if there is an outgoing
call history, touch to enter the latest
outgoing call history when the phone
number has not been entered.
2 Delete
Delete an entered number.
Call
Enter a phone n umber/[z]/[Add
2
wait]
Enter a number to send/[0]
3
[Yes] during the call
4
Emergency call
Emergency calls Phone number
Police 110
Fire and ambulance 119
Marine emergency 118
Page 25

The handset supports “Location notification of
emergency call”.
When dialing an emergency number such as
110, 119, and 118, the information of your
location (location information) is automatically
notified to the agency that received the
emergency call (e.g. the police station).
Depending on your location and the reception
status of the signal, the agency that received
the emergency call may not be able to confirm
the exact location.
If you are not sending your caller ID by calling
with “184” added or other means, your location
information and phone number are not notified.
However, if the agency that received the
emergency call considers your location
information and phone number necessary for
important purposes, such as life saving, the
agency can retrieve them regardless of your
settings.
In addition, the area/timing to introduce
“Location notification of emergency call”
depends on the state of preparation in each
agency that receives emergency calls.
In Japan, you cannot make a call to the
emergency number (110, 119 or 118) when a
docomo mini UIM card is not inserted, from the
PIN code entry screen, while the PIN code is
locked or from the PUK (PIN Unlock Key) entry
screen.
When calling 110, 119, and 118 from your
handset, the police or fire stations may return
your call for verification purposes. State that
you are calling from a mobile phone, and give
your phone number and exact present location.
Remain stationary to ensure that the call is not
disconnected while you are on the line, and
keep the handset turned on to receive calls for
approximately 10 minutes afterwards.
Depending on the region, calls to the police or
fire station of the local area may not be made.
International call (WORLD
CALL)
WORLD CALL is an international calling service
available from DOCOMO handset in Japan.
WORLD CALL is registered when FOMA
services are registered (excluding users who
did not apply for WORLD CALL).
You can call to approximately 240 countries and
regions worldwide. Calling to a land-line phone
and mobile phone overseas is available.
For information on available countries and
network operators, refer to “Mobile Phone User’s
Guide [International Services]” or the DOCOMO
International Services website.
Commission and monthly usage fees are free.
Contact “General Inquiries” on the back of this
manual for details on WORLD CALL.
To make an international call through a company
other than DOCOMO, contact the respective
companies for instructions.
The caller ID may not be notified or displayed
correctly depending on overseas network
operators. In this case, making a call with
incoming call history is not available.
Call
69
Page 26

[Calling Method]
Incoming
illumination
n.
When calling to a land-line phone: 010/
country code/area code (city code)/the other
party’s phone number/[0]
When calling to a mobile phone: 010/country
code/the other party’s phone number/[0]
Ʀ For the other parties’ phone numbers and area
codes (city codes) that begin with “0”, omit the
“0” when entering (except some countries or
regions such as Italy).
Ʀ Alternatively, enter “0 09130-010” as usual or “+”
instead of “010”.
Receiving a call
When a call is received, the ring
1
tone sounds and the incoming
[End] to end the call
3
Quick responses
When a call is received, the ring
1
tone sounds and the incoming
illumination flashes
[z]/[Quick responses]
2
Select a response
3
Placing a call on hold
When a call is received, the ring
1
tone sounds and the incoming
illumination flashes
[z]/[On hold]
2
70
illumination flashes
: If you press x/y during an incoming call, you
can stop the ring tone, vibrator or flash of the
incoming illumination.
Receive the call
2
Call
eive the cal
: Operate after touching [Activate].
erate after touching [Activate].
1 Reject
You can reject the incoming call.
2 Accept
You can receive the call.
Answering by answering memo
When a call is received, the ring
1
tone sounds and the incoming
illumination flashes
[z]/[Absence Memo]
2
Playing an answering memo
In the home screen, [R]/
1
[Settings]/[Call]
[Call/Ans Memo]/[Answering
2
Memo List]/select an answering
memo
Answering with Stereo Headset with
Microphone
You can receive a call with Stereo Headset with
Microphone (sample).
Page 27

Infrared communication
Approx. 20 cm
or less
Infrared port
15°
15°
Using infrared communication
Use infrared communication to send and
receive data to and from other handsets which
also support infrared communication.
Send and receive phonebooks, sp-mode mails,
profiles, business cards, memos, schedules,
bookmarks, ToruCa, data shot by camera, data
in Gallery, data recorded with the voice recorder,
etc.
The handset infrared communication function
complies with IrMC™ 1.1 standard. However,
depending on the data, some data may not be
sent or received even when the other party’s
handset complies with IrMC™ 1.1 standard.
To enter docomo application password or
passcode and to enter authentication code are
required for sending and receiving all data items.
The authentication code is a password exclusive
to infrared communication. Before starting data
communication, the sender and receiver must
enter the same user-specified four-digit code.
When using infrared communication
Face the infrared ports of the receiver’s and sender’s
handsets with each other and set the distance
between them to approximately 20 cm or less as
shown.
While doing infrared communication, keep the infrared
ports facing each other and do not move them.
Infrared communication may not function properly in
areas of direct sunlight, directly under fluorescent
lights or near other equipment using infrared signals.
If either of the infrared ports is dirty, infrared
commun ic a tio n will become difficult. Take c a re not to
scratch the ports, and wipe off any dirt with a soft cloth.
Sending and receiving by infrared
When sending data, you can also operate from
each function (menu).
In the home screen, [R]/[Send/
1
receive by infrared]
Select an item
2
Single: Receive single data.
Multiple: Receive all data.
Single: Select data and send.
Multiple: Send all data by selecting an
application.
: Perform the operation for receiving and
sending at the same time.
: After the operation for receiving, the handset
waits to receive data. Infrared
communication automatically begins when
data is sent from sender’s handset within
approximately 30 seconds.
Note that if you select [Delete all before
registration] when receiving all data, all data
registered to the target function are deleted.
File Management
105
Page 28

Receiving all data is not avai lable depe nding on
When using iC communication
the data type.
When available space in the save destination
becomes insufficient, the data being received to
that point are saved and receiving ends.
iC communication
Using iC communication
You can send and receive data with other
handsets equipped with iC communication
function.
Make initial setting of Osaifu-Keitai in advance
(nP. 121).
In the following cases, you cannot perform iC
communication.
During Airplane mode
During Osaifu-Keitai lock
In the following cases, data may not be sent via
iC communication.
During a call During charging
During earphone/microphone connection
During USB connection
™
During MHL
sp-mode mails, business cards, memos,
schedules and ToruCa cannot be sent by iC
communication. For details on other data that
can be sent and received, refer to “Infrared
communication” (nP. 105).
connection
When using iC communication
mark
Use while placing the a mark of receiver’s
handset on that of sender’s handset as shown.
Do not move the handset until sending and
receiving of data is completed.
There may be some cases in which data are
poorly sent and received or the screen is off by
positioning the handset near depending on the
other party’s hands et. In that case , put a distan ce
between the a marks apart/closer or move
them up/down or to the left/right.
Sending and receiving by iC
To enter authentication code is required for
sending and receiving all data items. The
authentication code is a password exclusive to
iC communication. Before starting data
communication, the sender and receiver must
enter the same user- specifie d four-d igit co de. In
addition, to enter passcode may be required for
sending all data items.
106
File Management
Page 29

Sending data
Example: Still picture
In the home screen, [R]/[SH
1
tool]/[Recommendation]/
[Contents manager]
Touch a still picture for a while/
2
[Share]/[Send by IC]
[Ok]
3
Place the a mark on that of the
4
other party’s handset
Receiving data
Place the a mark on that of the
1
other party’s handset
[Accept]
2
Drag the status bar down/select
3
received data
Bluetooth function
You can connect the handset to Bluetooth
devices wirelessly.
Wireless communications with all the Bluetooth
devices are not completely guaranteed.
Supported version and supported
profiles
Supported version
Bluetooth Specification Ver.3.0+EDR
Supported profiles*2 (Supported services)
HSP: Headset Profile
HFP: Hands Free Profile
A2DP: Advanced Audio Distribution Profile
AVRCP: Audio/Video Remote Control Profile
HID: Human Interface Device Profile
OPP: Object Push Profile
SPP: Serial Port Profile
PBAP: Phone Book Access Profile
PAN: Personal Area Networking Profile
HDP: Health Device Profile
*1 The handset and all Bluetoo th funct ion-inst alled
devices have ensured that they conform to the
Bluetooth specification according to the rules
that the Bluetooth SIG defines, and are all
authenticated. However, operating methods
might differ or data might not be exchanged
even when they are connected wirelessly,
depending on the features or specifications of
connected devices.
*2 Standardizes the communication procedures of
Bluetooth device per feature of a device.
*3 Connect a commercially available Bluetooth
compatible headset to the handset to talk
wirelessly.
*3
*4
*7
*8
*11
*1
*5
*5
*6
*9
*10
File Management
107
Page 30

*4 Connect a commercially available Bluetooth
compatible hands-free device such as a car
navigation system to the handset to talk during
hands-free operation using the car navigation
system etc.
*5 Connect a commercially available Bluetooth
compatible audio device to the handset to play
music, audio of 1Seg, etc. wirelessly. Also,
remote control operation may be available from
Bluetooth devices. However, compatible
devices are limited depending on the data type.
*6 Operate the handset from a commercially
available input device compatible with
Bluetooth such as a keyboard and mouse by
connecting one to the handset via Bluetooth.
*7 Connect a Bluetooth device to the handset with
the file transfer service to send and receive
data between them.
*8 Set the virtual connection with a serial cable
and interconnect between devices.
*9 Transfer phonebook data in the system
memory to a Bluetooth device. Data is not
displayed correctly on the other party’s device
depending on the contents of the transferred
phonebook data.
*10 Join a PC network etc. and share the Internet
connection.
*11 Communicate data with a commercially
available health appliance compatible with
Bluetooth such as a weighing machine.
Refer to the manual for the Bluetooth device as
well.
You may not hear sounds such as 1Seg with
Bluetooth devices which are not compatible
with SCMS-T.
Precautions for handling the Bluetooth
device
Note the following when usin g the Blue too th de vice .
Note the following to make good connection.
Keep the distance between the handset
and another Bluetooth device within
approximately 10 m with no obstructions in
sight. The distance that can make
connection may be shorter when there are
obstructions between them or depending
on the conditions of the surroundings (such
as walls or furniture) and the structure of a
building. Especially when there is a wall or
floor of reinforced concrete between them,
they may be unable to connect with each
other. Note the above mentioned distance
is not guaranteed.
Move the handset and another Bluetooth
device as far away as possible from home
electric appliances, AV devices, OA
devices, etc. before connection. The
Bluetooth device is liable to be adversely
affected by a microwave oven, so move it
as far away as possible from the microwave
oven while using it. Otherwise, normal
connection cannot be performed when
other electric devices are powered on or
Bluetooth devices may cause noises or
reception failure on a TV or radio set.
Move the Bluetooth d evice to a place wh ere
connection is possible when there is a
broadcast station or radio near the
Bluetooth device and the handset cannot
be connected to the device. Strong radio
waves may prevent connection between
Bluetooth devices.
108
File Management
Page 31

Wireless connection is available with
Bluetooth device put in a bag or pocket.
However, lowering of communicat ion speed
or noise may result when you are in
between the Bluetooth device and the
handset.
Electromagnetic signals from the Bluetooth
device may affect the operation of electronic
medical equipment etc. As some cases may
result in accident, turn off the handset and
other Bluetooth devices in the following place.
On trains On airplanes In hospitals
Nearby automatic doors or fire alarms
In places such as gas stations where
flammable gas is generated
The radio interference with Wi-Fi
compatible devices
The Bluetooth devices use the same
frequency band (2.4 GHz) as wireless LANs
(IEEE 802.11b/g/n). Therefore, using the
Bluetooth device near a wireless LAN device
may cause the radio interference, lowering of
communication speed, noise or connection
failure. In this case, turn off the wireless LAN
device or keep the handset and the Bluetooth
device at least approximately 10 m away from
the wireless LAN.
Bluetooth
To register/connect a Bluetooth device, the
Bluetooth passkey may need to be entered.
Before starting the registration, decide the 1- to
16-digit number. Enter the same number on the
handset and the other party’s Bluetooth device.
Set the other party’s Bluetooth device to the
registration stand-by status in advance.
In the home screen, [R]/
1
[Settings]/[Bluetooth]
Slide [OFF] to the right
2
Select a Bluetooth device/[Pair]
3
: Entering the Bluetooth passkey may be
necessary depending on the other party’s
Bluetooth device. Also, some Bluetooth
devices may start connecting after
completing registration.
: To display/hide the handset’s name on the
other party’s Bluetooth device: [SH-D]
Ʀ The handset name is automatically hidden
when the period of time set for Visibility
timeout has passed.
: To search for Bluetooth devices: [SEARCH
FOR DEVICES]
: Touch [B] of a paired Bluetooth device to
change the name and the connection type of
the other party’s Bluetooth device.
If you fail to connect, connection may become
available after re-registration of Bluetooth
devices.
File Management
109
Page 32

When the Bluetooth function is enabled, the
handset is set to receive a registration request/
connection request from other Bluetooth
devices. Perform the setting for displaying the
handset’s information on the other party’s
Bluetooth device in advance to allow the
handset to be searched for by other Bluetooth
devices.
While in connection stand-by, even if a
connection request from a Bluetooth device is
received, connection may not be made
depending on the signal status etc.
For details on the ope rations of the other party ’s
Bluetooth device, refer to the manuals of the
Bluetooth device to be used.
When receiving registration request
from Bluetooth device or connection
request from unregiste red Bluetooth
device
Registration request/Connection
1
request from Bluetooth device
Drag the status bar down/[Pairing
2
request]/[Pair]
: When the confirmation screen about the
settings on pairing appears, select [Pair].
: Entering the Bluetooth passkey may be
necessary depending on the other party’s
Bluetooth device.
: The confirmation screen for connection may
be displayed.
Disabling registration of Bluetooth
device
In the Bluetooth screen, [B] of the
1
Bluetooth device to unregister/
[Unpair]
Disabling connection of Bluetooth
device
In the Bluetooth screen, select the
1
Bluetooth device to disconnect/
[OK]
Setting Bluetooth
Set after enabling Bluetooth function.
In the Bluetooth screen, [z]
1
Select an item
2
Rename phone: Change the handset’s
name.
Visibility timeout: Set the time to be displ ayed
on the other party’s Bluetooth device.
aptX: Set whether to use aptX
Handsfree setting: Set whether to always
have voices emitted from the connected
Bluetooth compatible hands-free device
during a voice call.
Show received files: Display the history of
data received via Bluetooth connection.
®
.
110
File Management
Page 33

౷ͺίς
Sending and receiving by
Bluetooth
Sending data
Example: Still picture
In the home screen, [R]/[SH
1
tool]/[Recommendation]/
[Contents manager]
Touch a still picture for a while/
2
[Share]/[Bluetooth]
: Set the receiver’s Bluetooth device to receive
data.
Select a Bluetooth device to
3
connect to
Receiving data
Send data from the sender’s
1
Bluetooth device
Drag the status bar down/select
2
data to receive/[Accept]
Drag the status bar down/select
3
the received data
Note that if you select [Delete all before
registration] at receiving all data, all data
registered to the target function are deleted.
Some data cannot be received all.
When available space in the save destination
becomes insufficient, the data being received to
that point are saved and receiving ends.
FM transmitter
Transmit 1Seg audio, music data, sounds from
Navigation and
FM radio waves and receive and play the data
via FM radio, FM tuner mounted on a car, etc.
In the home screen, [R]/
1
[Settings]/[FM transmitter]
Slide [OFF] to the right
2
Select an item
3
Frequency setting: Set the frequency of the
FM radio waves.
Auto OFF setting: Set when to automatically
disable the FM transmitter when 1Seg audio,
music, etc. is not played.
Set the frequency on the receiver
4
Play music etc.
5
FM transmitter is not available when the
handset is in the following cases. If the handset
enters into one of the following cases when the
FM transmitter is enabled, the FM transmitter
will be disabled automatically.
During Airplane mode
During Bluetooth connection
During international roaming
When the handset has been out of the
service area since you turned the power on
Receivers may not emit sounds in the following
cases even when the FM transmitter is
enabled.
During charging
During USB connection
During earphone connection
™
During MHL
connection
(Map appli), etc. via
File Management
111
Page 34

Receivers do not emit sounds in the following
cases even when the FM transmitter is
enabled.
During a call
During an incoming call
Adjust the volume on the handset or the
receiver when it is emitting sounds via the FM
transmitter. Also, when you terminate the FM
transmitter function, make sure that the volume
of the handset and the receiver are not too loud
before the termination.
: For details on the mode of USB connection
nP. 100
Keep side
with the
characters
down
Micro USB Cable 01
Open external
connector
terminal cover
External device
connection
Connecting the handset and
PC
Insert the handset side connector
1
of Micro USB Cable 01 (sold
separately) horizontally into the
external connector terminal on the
handset (1)
Insert the PC side connector of
2
Micro USB Cable 01 horizontally
into the USB connector on the PC
(2)
Use a USB cable Micro USB Cable 01. USB
cables for PC are not available, since the
connector shape is different.
Using a USB HUB may prevent the equipment
from working normally.
Do not remove Micro USB Cable 01 while
exchanging data with PC. Data may be damaged.
Windows XP, Windo ws Vista and Wi ndows 7 all
of which are Ja panese ver sion a re avai lable O S
of PCs for the connection.
microSD reader/writer
You can use a microSD Card inserted into the
handset as external memory for a PC.
Insert a microSD Card and set the mode of USB
connection to [Card reader mode] in advance
(nP. 100).
When using a microSDXC Card, refer to
Transferring data (nP. 113). When a message
indicating to format the microSDXC Card is
displayed, do not format it.
data
112
File Management
Page 35

Connect the handset to a PC via
1
Micro USB Cable 01
: The USB mass storage screen appears. If
the screen does not appear, drag the status
bar down and select [USB connected].
[Turn on USB storage]
2
: When the confirmation screen is displayed,
check the content and select [OK].
Use as a microSD reader/writer
3
Perform secure hardware removal
4
on the PC after use
[Turn off USB storage]
5
Disconnect Micro USB Cable 01
6
from the handset
While using as a microSD reader/writer,
microSD Card cannot be used by other
applications. In ad dition, microSD Card may not
be used as a microSD reader/writer while it is
used by other applications.
Transferring data
Transfer data from a PC to the handset memory
or a microSD Card.
Set the mode of USB connection (nP. 100) to
[MTP mode] in advance. When using a PC not
compatible with MTP, set the mode to [PTP
mode].
Connect the handset to a PC via
1
Micro USB Cable 01
: When the MediaJet installation screen is
displayed, select [Skip].
Transfer data
2
Remove Micro USB Cable 01 from
3
the handset after use
Using MediaJet
Install MediaJet on a PC to transfer music data/
videos/still pictures on the handset and the PC.
Installing MediaJet
Set the mode of USB connection to [MTP mode]
and enable MediaJet install in advance
(nP. 100). Also, connect a PC to the Internet in
advance.
Connect the handset to a PC via
1
Micro USB Cable 01
[Install]
2
: The installation will start on the PC. Follow
the instructions on the screen and operate
after this step.
To install MediaJet from a PC, refer to the
following site.
(http://mediaJet.nero.com)
Transferring data by USB connection
Set the mode of USB connection (nP. 100) to
[MTP mode] in advance. When using a PC not
compatible with MTP, set the mode to [PTP
mode].
Activate MediaJet on a PC
1
Connect the handset to the PC via
2
Micro USB Cable 01
: When the MediaJet installation screen is
displayed, select [Skip].
Use MediaJet
3
File Management
nce
113
Page 36

Perform device removal by
ΟΨͼΑ୪শু൲എ
൳ܢ
൳ܢίΏοϋ
and e
e
4
MediaJet after use
us
Install MediaJet (nP. 113) and enable the
Wi-Fi function in advance (nP. 45).
dvance
Disconnect Micro USB Cable 01
5
from the handset
Transferring data by Wi-Fi function
Enable the Wi-Fi function in advance (nP. 45).
Activate MediaJet on a PC
1
In the home screen, [R]/
2
[Settings]/[MediaJet]/[PC
Sync]/[OFF]
: PC Sync is switched to ON and connection
with the PC is made.
Use MediaJet
3
Perform device removal by
4
MediaJet after use
In the home screen, [R]/
5
[Settings]/[MediaJet]/[PC
Sync]/[ON]
: PC Sync is switched to OFF and connection
with the PC is canceled.
Automatic connection/
transference while charging
If a PC and the handset are connected to the
same Wi-Fi access point, you can connect the
handset with the PC via Wi-Fi just by charging
the handset. Also, if you make settings on the
PC side in advanc e, you can also transfe r music
data/videos/still pictures automatically when
the handset is connected to the PC.
Preparation for automatic connection
while charging
Settings on the handset side
In the home screen, [R]/
1
[Settings]/[MediaJet]/
[Preferences]/[PC Sync
Settings]/[Allowed Wi-Fi network]
Select an access point to be
2
allowed/[OK]
[Wi-Fi Auto Connect in charging
3
mode]
Settings on the PC side
Activate MediaJet on a PC
1
Connect the handset to the PC via
2
Micro USB Cable 01 or the Wi-Fi
function
In the MediaJet screen, select a
3
device/[
] (Automatically sync to my
device when connected)
: To import the data in the handset memory
automatically: [ΟΨͼΑ୪শΟΨͼΑ
ু൲എͼϋεȜΠ] (Automatically import
from device when connected)
[
4
select a playlist/an album to
synchronize/[OK]
] (Sync Options)/
114
File Management
Page 37

Automatic transfer ence while
charging
Prepare for automatic connection while charging
in advance.
Automatic transference is available while
charging with the wireless charger.
Activate MediaJet on a PC
1
Start charging
2
: The handset is connected to MediaJet
automatically and transference starts.
Perform device removal by
3
MediaJet after use
USB host function
The USB host function is installed in the
handset. You can use USB devices such as
mice by connecting a commercially available
USB cable for peripheral device connection to
the external connector terminal.
For details on the USB host function, refer to the
manuals of the USB cable for peripheral device
connection and USB devices.
Connection with all USB devices is not
completely guaranteed. Devices that require an
electric current of higher than 100 mA are
unavailable.
MHL™ connection
You can display the same screen as that of the
handset on the TV by connec ting the ha ndset to
a TV with an HDMI terminal.
Connect a TV to the handset via a commercially
™
available MHL
operation, refer to the manual of a TV.
For details on compatible devices, refer to the
“SH DASH”.
(http://k-tai.sharp.co.jp/support/) (in Japanese
only)
Connect the handset to a TV via an
1
When you watch on a TV, set the screen size of
the TV side to full screen after the MHL
connection is established.
MHL™ connection is not available overseas.
MHL™ connection is not available when the
battery level is insufficient.
MHL™ connection is not available depending
on the application being activated.
During the MHL™ connection, you may not
receive 1Seg. Refrain from watching/recording
1Seg.
If you receive a call during the MHL™
connection, the MHL
disconnected.
You may not be able to sufficiently charge the
battery during the MHL
on the MHL
™
MHL
: If you pull out the MHL™ cable, the MHL™
cable
connection will be terminated.
cable to use. For details on
™
connection is
™
connection depending
™
cable or TV.
™
File Management
115
Page 38

MHL™ cable
Two types of microUSB plug shape are
available.
When connecting an MHL™ cable, insert it
securely. Inserting or removing it forcibly may
damage the external connector terminal or
connector or result in a malfunction.
When removing the plug, hold the plug and
remove it slowly.
Connect the MHL™ cable to the HDMI input
terminal of a TV.
Wireless output is not available during a call,
™
incoming call or the MHL
receive a call during the wireless output, the
wireless output automatically stops.
When Energy saving Wi-Fi is set in Energy
save, you may not be able to connect the
handset to the device to connect to properly.
In this case, disable Energy saving Wi-Fi.
connection. If you
Cooperating with Blu-ray
Disc recorder
Wireless output
You can display the same screen as that of the
handset on the TV by con necting the handset to
a TV with a wireless connection function.
In the home screen, [R]/
1
[Settings]/[Wireless output]
Slide [OFF] to the right
2
Select a device to connect to
3
: The setting screen is displayed depending
on the device to connect to. For details on
the setting content, refer to the manual of a
TV you use.
Wireless output is not available depending on
the application being activated.
Wireless output is terminated during its use
depending on the application being activated.
Wireless output stops automatically when the
battery level becomes insufficient.
Transfer the videos that are recorded on Blu-ray
Disc recorder to a microSD Card and play them.
You cannot transfer the videos to a microSDXC
Card.
Connect Blu-ray Disc recorder to the handset via
Micro USB Cable 01 (sold separately) to transfer
videos. Connect to Blu-ray Disc recorder and set
the mode of USB connection (nP. 100) to
[Card reader mode]. Connection method is the
same as for connecting the handset to PC or
other devices (nP. 112). For details on
transferring videos, refer to the manuals of the
Blu-ray Disc recorder.
Refer to the DOCOMO website for compatible
models.
If you transfer videos, the number of videos
which can be saved on the microSD Card
decreases.
116
File Management
Page 39

၌ဥ΄ͼ
ΡήΛ·
κȜΡ༎
၌
ဥ΄ͼΡήΛ·
κȜΡ༎
Osaifu-Keitai
Osaifu-Keitai is a function which has built-in IC
card and allows you to pay, use as coupons or
collect stamps by simply holding the handset
over the scanning device at stores.
Moreover, you can access sites and web pages
by holding the handset over the scanning
device, and get the latest coupon, deposit
electronic money and check your usage by
using communication. In addition, for your
secure use, you can lock functions of
Osaifu-Keitai when you lost the handset.
For details on Osaifu-Keitai, refer to “
Guide [sp-mode]) (in Japanese only).
ɦTo use Osaifu-Keitai compatible serv ice, settings
are necessary on a website or an application.
The handset malfunctions may cause data
(including electronic money, points, etc.) saved
in the IC card to be lost or changed (Note that as
a rule, you will be asked to delete data when
leaving your handset for repairs etc., since we
cannot keep your handset with such data still
remaining in it). For the service such as a
reissue, restoration, temporary keeping or
transference of the data, contact your provider of
Osaifu-Keitai compatible service. Be sure to use
the Osaifu-Keitai compatible service including a
backup service for important data.
DOCOMO shall not be liable for any loss or
change of data in the IC card or other damages
of Osaifu-Keitai service caused by any reason
such as malfunctions and model changes.
When the handset is stolen or lost, immediately
contact your provider of Osaifu-Keitai compatible
service for handling methods.
(sp
)” (Mobile Phone User’s
iC transfer service
iC transfer service is a service that enables you
to move the data saved in the IC card to new
Osaifu-Keitai from the old one when changing
Osaifu-Keitai such as by changing models or
repairing the handset.
iC transfer service is available at a docomo
Shop near you.
For details on iC transfer service, refer to “
User’s Guide [sp-mode]) (in Japanese only).
(sp
)” (Mobile Phone
Using Osaifu-Keitai
To use Osaifu-Keitai compatible services,
download the Osaifu-Keitai compatible
application from Osaifu-Keitai compatible sites
and make the setting. Some services do not
need to download the Osaifu-Keitai compatible
application.
In the home screen, [R]/
1
[Osaifu-Keitai]
: If the initial se tting is not com pleted, the in itial
setting screen appears.
Select a service
2
You cannot use Osaifu-Keitai in the following
situations. How ever, y ou can pay by h olding the
handset over a scanning device.
In Airplane mode
When you are charging the handset,
connecting Micro USB Cable 01 (sold
separately) to it or connecting an earphone/
microphone to it while the docomo mini UIM
card is not inserted/When the handset has
never received radio wave
Applications
121
Page 40

၌ဥ΄ͼΡ
ήΛ·
κȜΡ༎
Holding over scanning device
1
e
Osaifu-Keitai lock setting
Hold the a mark of the handset over the
scanning device to use as electronic money or
railway tickets, to retrieve ToruCa, etc.
Pay attention to the following points when
holding the a mark over the scanning device.
Do not contact between the handset and the
scanning device
Hold the a mark in parallel with the scanning
device
Slowly hold the a mark over the center of the
scanning device
If the scanning device does not recognize the
built-in IC card, hold the a mark over the
scanning device and move the handset
around
Do not attach a metallic substance on the a
mark side
Hold the a mark over the
1
scanning device
scanning devic
Lock the function of Osaifu-Keitai.
Perform the same operation to disable the lock.
In the home screen, [R]/
1
[Osaifu-Keitai]
[Lock Settings]/[Next]/ente r the
2
passcode/[OK]/[OK]
ToruCa
ToruCa is an electronic card that can be
imported to the handset. You can retrieve it as
store information or a coupon from a scanning
device or sites. Retrieved ToruCa is saved in
the “ToruCa” application and you can display/
search/update it using the application.
For details on ToruCa, refer to “
(sp
Guide [sp-mode]) (in Japanese only).
In the home screen, [R]/[ToruCa]
1
)” (Mobile Phone User’s
122
mark
Confirm that the data is scanned
2
Applications
Packet communication charges may be
incurred for retrieving, displaying or updating
ToruCa.
ToruCa provided for i-mode handsets may not
be retrieved/displayed/updated.
The following functions may not be used
depending on the settings of IP (Information
Provider).
Retrieving from a scanning device
Updating
Sharing ToruCa
Moving or copying to a microSD Card
Displaying a map
Page 41

International Roaming
Data roaming to
g
Available services
overseas
Outline of international
roaming (WORLD WING)
International roaming (WORLD WING) is a
service that enables you to use the same phone
number and mail address of the handset as you
use in Japan in the service area of DOCOMO
affiliated overseas network operators without
changing your p hone nu mber and mail a ddress.
You can use calls and SMS without any
changes in settings.
Available network
The handset is rated as class 4. You can use it in
the 3G network and GSM/GPRS network service
area. In addition, this service is available in
countries and regions supporting 3G 850 MHz/
GSM 850 MHz. Check the available area.
For areas out of Xi area such as overseas,
connect to 3G or GSM/GPRS network.
Refer to the following before using the
handset overseas.
“Mobile Phone User’s Guide [International
Services]”
DOCOMO International Services website
For country codes, international call access
number, universal number international prefix
and information on available countries, regions,
and network operators, refer to “Mobile Phone
User’s Guide [International Services]” or the
DOCOMO International Services website.
Main communication
service
Call AAAB
SMS AAAB
*
Mail
Browser
* Enable Data roaming to use data communication
when roaming (nP. 154).
Some services are not available depending on
*
roamin
the network operator or network.
3G
3G850
AAAB
AAAB
GSM
(GPRS)
LTE
Before use overseas
Check before departure
Check followings in Japan before using the han dset
overseas.
Subscription
Check the status of a subscription for WORLD
WING. For details, contact “General Inquiries” on
the back of this manual.
Charging battery
Use FOMA AC Adapter 01 for Global use (sold
separately), FOMA AC Adapter 02 (sold
separately) or AC Adapter 03 (sold separately)
as an AC adapter for charging while traveling
overseas.
Accompanying Wireless Charger SH02 cannot
be used overseas.
152
International Roaming
Page 42

Charge
Overseas charges (call charges, packet
communication charges) differ from those in
Japan.
Since some applications automatically perform
packet communication, the packet
communication charges may be higher. Contact
the application provider for the operation of each
application.
Set before departure
Network service settings
If you subscribed to network services, network
services such as Voice Mail Service, Call
Forwarding Service and Caller ID Display Request
Service are available from overseas. However,
some network services are not available.
To use network services overseas, setting
Remote operations to “Activate” is required.
Remote operations can be set in your country of
stay.
Some network services that can be set/disabled
etc. may not be availa ble dependi ng on overs eas
network operators.
Check in your country of stay
The handset automatically connects to the
available network operator when you turn the
power on in your country of stay.
Connection
When Network operators (nP. 155) is set to
[Select automatically], the suitable network is
automatically selected.
Overseas packet communication is available with a
fixed amount of charges as an upper limit per day
by connecting to a compatible network operators.
To use this service, subscription to flat-rate packet
communication services in Japan is required. For
details, refer to “Mobile Phone User’s Guide
[International Services]” or the DOCOMO
International Services website.
Viewing the display
[U] is displayed during international roaming.
3G/GSM/HSPA is available.
Connected network operator can be checked in
the status panel.
Date & time
If [Automatic date & time] of D ate & time i s enabled,
the handset receives information on time and time
differences from overseas network operator, then
time and time differences are corrected.
Time and time differences may not be adjusted
correctly depending on overseas network
operator. In such a case, set time zone manually.
The correction timing differs depending on the
network operator.
For details on Date & time nP. 101
International Roaming
153
Page 43

Inquiries
When the handset or the docomo mini UIM card
is lost or stolen overseas, promptly contact
DOCOMO and conduct a procedure for
canceling the use of service from your country of
stay. Refer to the back of this manual for
inquiries. Note that communication/call charges
after the handset or the docomo mini UIM card is
lost or stolen are incurred to the subscriber.
For land-line phone, etc., “International call
access number” of your country of stay or
“Universal number international prefix” is
required.
Select an item
2
Data enabled: Enable data communication.
Data roaming: For details nP. 154
Access Point Names: Set an access point.
Network Mode: For details nP. 154
Network operators: For details nP. 155
Data roaming
Set whether to use data communication when
roaming.
In the home screen, [R]/
1
[Settings]/[Network settings]/
Check after homecoming
The handset automatically connects to the
DOCOMO network after returning to Japan. If it
fails, perform the following settings.
Set Network Mode to [LTE/3G/GSM (Auto)]
(nP. 154).
Set Network operators to [Select automatically]
(nP. 155).
Settings to use overseas
At the time of purchase, the handset is set to
automatically search for and switch to available
networks. When you want to manually switch
networks, set by performing following
operations.
In the home screen, [R]/
1
[Settings]/[Network settings]/
[Mobile networks]
[Mobile networks]/[Data roaming]
Network mode
Set a network to use.
In the home screen, [R]/
1
[Settings]/[Network settings]/
[Mobile networks]/[Network Mode]
Select an item
2
LTE/3G/GSM (Auto): Switch to an available
network automatically.
LTE/3G: Use 3G network.
GSM: Use GSM/GPRS network.
154
International Roaming
Page 44

Network operators
Search for networks and set a network operator
to use.
In the home screen, [R]/
1
[Settings]/[Network settings]/
[Mobile networks]/[Network
operators]
: If the confirmation screen for data
communication is displayed, check the
content and select [OK].
: Search for networks and a list of network
operators is displayed.
“+” (touch “0” for a while)/enter
2
country code, area code (city code)
and the other party’s phone
number/[0]
: Alternatively, enter a phone number/[z]/
[International call]/select a country code to
enter a country code.
Ʀ The first “0” of t he area co de (city code) will
be omitted.
: When the area code (city code) begins with
“0”, omit the “0” when dialing (Include the “0”
when making a call to some countries or
regions such as Italy).
Select a network operator
2
: To search for network operators again:
[Search networks]
: To select a network operator automatically:
[Select automatically]
If you manually set network operators
overseas, set to [Select automatically] after
returning to Japan.
Making/Receiving a call
in your country of stay
Making a call outside your
country of stay (including Japan)
In the home screen, [R]/
1
[Phone]/[Dial]
Even if you notify the caller ID, [Unknown],
[Private number], etc. appears depending on
the network operator, and the caller ID may not
be displayed correctly.
Making a call using
International Dial Assist
When you make a call to other countries from
your country of stay, you can make an
international call with simple operation using
International Dial Assist.
Set International dial assist in advance.
The first “0” of a phone number will be converted
to the country code you set in Country code
automatically.
In the home screen, [R]/
1
[Phone]/[Dial]
Enter a phone number/[0]
2
[Converted number]
3
International Roaming
155
Page 45

Setting of International Dial Assist
In the home screen, [R]/
1
[Settings]/[Call]/[Roaming
settings]/[International dial assist]
Select an item
2
Automatic conversion function: Set whether
to make calls using International Dial Assist.
Country code: Set country code to use when
using International Dial Assist.
International prefix: Set international prefix to
use when using International Dial Assist.
Making a call in your country of
stay
You can make a domestic ca ll in your coun try of
stay in the same way as you do in Japan.
Always enter the area code (city code), even
when the number is in the same area.
Making a call to a WORLD
WING subscriber overseas
Receiving a call
You can receive a call overse as in t he sam e way
as you do in Japan.
When a call is received during international
roaming, the call is forwarded from Japan. Call
charges to Japan are incurred by the caller and
receiving charges by the receiver.
Having calls to your handset
When having calls made to your handset from
Japan, have your phone number entered just as a
domestic call in Japan.
When having calls made to your handset from
countries other than Japan, have the international
call access number and “81” (Japan) added to the
beginning of your phone number with the first “0”
excluded as an international call to Japan
regardless of your country of stay.
International call access number of the country of
the caller-81-90 (or 80)-XXXX-XXXX
When you make a call to a “WORLD WING”
subscriber overseas, the call is made as an
international call to Japan regardless of your
country of stay.
In the home screen, [R]/
1
[Phone]/[Dial]
“+” (touch “0” for a while)/enter
2
country code “81” (Japan), the
other party’s mobile phone number
excluding the first “0”/[0]
156
International Roaming
Page 46

Total shooting time of 1 GB microSD Card
High
Quality
Approx.
8min
Approx.
21 min
Approx.
64 min
Approx.
324 min
FULL HD:
1920×1080
HD:
1280×720
VGA:
640×480
QVGA:
320×240
Normal Fine
Approx.
13 min
Approx.
41 min
Approx.
135 min
Approx.
866 min
Approx.
11 min
Approx.
32 min
Approx.
86 min
Approx.
602 min
Recording time of voice
recorder
Number of
entries
Handset memory
(7.8 GB)*
* Each recording time is up to approximately 6
hours.
Up to 223 Up to approx.
Recording
time
1,338 hr
Specific Absorption Rate
(SAR) of Mobile Phone
This model SH-D mobile phon e complies with
Japanese technical regulations and
international guidelines regarding exposure to
radio waves.
This mobile phone was designed in observance of
Japanese technical regulations regarding exposure
to radio waves (*1) and limits to exposure to radio
waves recommended by a set of equivalent
international guidelines. This set of international
guidelines was set out by the International
Commission on Non-Ionizing Radiation Protection
(ICNIRP), which is in collaboration with the World
Health Organization (WHO), and the permissible
limits include a substantial safety margin designed
to assure the safety of all persons, regardless of
age and health condition.
The technical regulations and international
guidelines set out limits for radio waves as the
Specific Absorption Rate, or SAR, which is the
value of absorbed energy in any 10 grams of tissue
over a 6-minute period. The SAR limit for mobile
phones is 2.0 W/kŨ. The highest SAR value for this
mobile phone when tested for use at the ear is
0. W/kŨ. There may be slight differences
between the SAR levels for each product, but they
all satisfy the limit.
The actual SAR of this mobile phone while
operating can be well below that indicated above.
This is due to automatic changes to the power level
of the device to ensure it only uses the minimum
required to reach the net work. Ther efore in g eneral,
the closer you are to a base station, the lower the
power output of the device.
Appendix/Index
175
Page 47

This mobile phone can be used in positions other
than against your ear. This mobile phone satisfies
the international guidelines when used with a
carrying case or a w earable ac cessory a pproved by
NTT DOCOMO, INC. (*2). In case you are not
using the approved accessory, please use a
product that does not contain any metals, and one
that positions the mobile phone at least 1.5 cm
away from your body.
The World Health Organization has stated that “a
large number of studies have been performed over
the last two decades to assess whether mobile
phones pose a potential health risk. To date, no
adverse health effects have been established as
being caused by mobile phone use.”
Please refer to the WHO website if you would like
more detailed information.
(http://www.who.int/docstore/peh-emf/publications/
facts_press/fact_english.htm)
Please refer to the websites listed below if you
would like more detailed information regarding
SAR.
Ministry of Internal Affairs and Communications
Website:
(http://www.tele.soumu.go.jp/e/sys/ele/index.htm)
Association of Radio Industries and Businesses
Website:
(http://www.arib-emf.org/index02.html) (in Japanese
only)
NTT DOCOMO, INC. Website:
(http://www.nttdocomo.co.jp/english/product/sar/)
SHARP Corporation Website:
(http://www.sharp.co.jp/products/menu/phone/
cellular/sar/index.html) (in Japanese only)
*1 Technical regulations are defined by the
Ministerial Ordinance Related to Radio Law
(Article 14-2 of Radio Equipment Regulations).
*2 Regarding the method of measuring SAR when
using mobile phones in positions other than
against the ear, international standards
(IEC62209-2) were set in March of 2010. On
the other hand, technical regulation is currently
being deliberated on by national council (As of
October, 2011).
European RF Exposure Information
Your mobile device is a radio transmitter and
receiver. It is designed not to exceed the limits for
exposure to radio waves recommended by
international guidelines. These guidelines were
developed by the independent scientific
organization ICNIRP and include safety margins
designed to assure the protection of all persons,
regardless of age and health.
The guidelines use a unit of measurement known
as the Specific Absorption Rate, or SAR. The SAR
limit for mobile devices is 2 W/kŨ and the highest
SAR value for this device when tested at the ear
*
was 0.3 W/kŨ
As SAR is measured utilizing the devices highest
transmitting power the actual SAR of this device
while operating is typically below that indicated
above. This is due to automatic changes to the
power level of the device to ensure it only uses the
minimum level required to reach the network.
.
176
Appendix/Index
Page 48

The World Health Organization has stated that
present scientific information does not indicate the
need for any special precautions for the use of
mobile devices. They note that if you want to
reduce your exposure then you can do so by
limiting the length of calls or using a hands-free
device to keep the mobile phone away from the
head.
* The tests are carried out in accordance with
international guidelines for testing.
Declaration of Conformity
This declaration relates to the handset only.
In some countries/regions, such as France, there are
restrictions on the use of Wi-Fi. If you intend to use Wi-Fi
on the handset abroad, check the local laws and
regulations beforehand.
Hereby, Sharp Telecommunications of Europe Ltd,
declares that this SH-09D is in compliance with the
essential requirements and other relevant provisions
of Directive 1999/5/EC.
A copy of the original declaration of conformity can be
found at the following Internet address:
(http://www.sharp.co.jp/k-tai/) (in Japanese only)
FCC Notice
This device complies with part 15 of the FCC
Rules.
Operation is subject to the following two
conditions:
(1) This device may not cause harmful
interference, and (2) this device must accept any
interference received, including interference that
may cause undesired operation.
Changes or modifications not expressly
approved by the manufacturer responsible for
compliance could void the user’s authority to
operate the equipment.
Information to User
This equipment has been tested and found to
comply with the limits of a Class B digital device,
pursuant to Part 15 of the FCC Rules. These limits
are designed to provide reasonable protection
against harmful interference in a residential
installation. This equipment generates, uses and
can radiate radio frequency energy and, if not
installed and used in accordance with the
instructions, may cause harmful interference to
radio communications.
However, there is no guarantee that interference
will not occur in a particular installation; if this
equipment does cause harmful interfe rence to radio
or television reception, which can be determined by
turning the equipment off and on, the user is
encouraged to try to correct the interference by one
or more of the following measures:
1. Reorient/relocate the receiving antenna.
2. Increase the separation between the equipment
and receiver.
3. Connect the equipment into an outlet on a circuit
different from that to which the receiver is
connected.
4. Consult the dealer or an experienced radio/TV
technician for help.
Appendix/Index
177
Page 49

FCC RF Exposure Information
Your handset is a radio transmitter and receiver.
It is designed and manufactured not to exceed the
emission limits for exp osure to rad io frequ ency (R F)
energy set by the Federal Communications
Commission of the U.S. Government.
The guidelines are based on standards that were
developed by independent scientific organizations
through periodic and thorough evaluation of
scientific studies. The standards include a
substantial safety margin designed to assure the
safety of all persons, regardless of age and health.
The exposure standard for wireless handsets
employs a unit of measurement known as the
Specific Absorption Rate, or SAR. The SAR limit
set by the FCC is 1.6 W/kŨ.
The tests are performed in positions and locations
(e.g., at the ear and worn on the body) as required
by the FCC for each model. The highest SAR value
for this model handset when tested for use at the
ear is 0. W/kŨ and when worn on the body, as
described in this user guide, is 0. W/kŨ.
Body-worn Operation; This device was tested for
typical body-worn operations with the back of the
handset kept 1.0 cm from the body. To maintain
compliance with FCC RF exposure requirements,
use accessories that maintain a 1.0 cm separation
distance between the user’s body and the back of
the handset. The use of belt clips, holsters and
similar accessories should not contain metallic
components in its assembly.
The use of accessories that do not satisfy these
requirements may not comply with FCC RF
exposure requirements, and should be avoided.
The FCC has granted an Equipment Authorization
for this model handset with all reported SAR levels
evaluated as in compliance with the FCC RF
emission guidelines. SAR information on this model
handset is on file with the FCC and can be found
under the Display Grant section of (http://
www.fcc.gov/oet/ea/fccid/) after searching on FCC
ID APYHRO0017.
Additional information on Specific Abso rption Rates
(SAR) can be found on the Cellular
Telecommunications & Internet Association (CTIA)
Website at (http://www.ctia.org/) .
Export Administration
Regulations
The Japan Export Administration Regulations
(“Foreign Exchange and Foreign Trade Act”
and its related laws) will be applied to this
product and its accessories under certain
conditions. The Export Administration
Regulations are also applied. To export or
reexport the handset and its accessories,
conduct all legally required procedures at your
own risk and expense. For details on the
procedures, contact the Ministry of Economy,
Trade and Industry or the US Department of
Commerce.
178
Appendix/Index
Page 50

When you use Flash Player, you shall agree with
following conditions:
(i) a prohibition against distribution and copying,
(ii) a prohibition against modifications and
derivative works,
(iii) a prohibition against decompiling, reverse
engineering, disassembling, and otherwise
reducing the software to a human-perceivable
form,
(iv) a provision indicating ownership of software
by Partner and its suppliers,
(v) a disclaimer of indirect, special, incidental,
punitive, and consequential damages, and
(vi) a disclaimer of all applicable statutory
warranties, to the full extent allowed by law.
Content owners use Microsoft PlayReady™
content access technology to protect their
intellectual property, including copyrighted
content. This device uses PlayReady technology
to access PlayReady-protected content and/or
WMDRM-protected content. If the device fails to
properly enforce restrictions on content usage,
content owners may require Microsoft to revoke
the device’s ability to consume
PlayReady-prote cted con tent. R evocati on sh ould
not affect unprotected content or content
protected by other content access technologies.
Content owners may require you to upgrade
PlayReady to access their content. If you decline
an upgrade, you will not be able to access
content that requires the upgrade.
CP8 PATENT
The abbreviations of operating systems
(Japanese versions) below are used in this
manual.
®
Windows 7 stands for Microsoft
Windows® 7
(Starter, Home Basic, Home Premium,
Professional, Enterprise and Ultimate).
Windows Vista stands for Windows Vista
®
(Home Basic, Home Premium, Business,
Enterprise and Ultimate).
Windows XP indicates the Microsoft
®
Windows
or Microsoft
XP Professional operating system
®
Windows® XP Home Edition
®
operating system.
The Bluetooth word mark and logos are owned
by the Bluetooth SIG, INC. and any use of such
marks by NTT DOCOMO, INC. is under license.
Other trademarks and trade names are those of
their respective owners.
Google, Google logo, Android, Android logo,
Google Play, Google Play logo, Google+,
Google+ logo, Gmail, Gmail logo, Calendar logo,
Google Maps™, Google Maps logo, Google
Talk, Google Talk logo, Google Voice Search™
logo, Picasa™, Picasa logo, YouTube and
YouTube logo are trademarks or registered
trademarks of Google Inc.
Eco Backlight Control uses Assertive Display
technology by Apical Limited.
182
This product contains Audio Enhancement
technology by AM3D.
Appendix/Index
 Loading...