

Page 1
総合お問い合わせ先<ドコモ インフォメーションセンター>
■ドコモの携帯電話からの場合
(局番なしの)151(無料)
※
一般電話などからはご利用いただけません。
受付時間 午前9:00~午後8:00 (年中無休)
●番号をよくご確認の上、お間違いのないようにおかけください。
●
各種手続き、故障・アフターサービスについては、上記お問い合わせ先にご連絡いただくか、ドコモホームページ、iモードサイトにてお近くのドコモショップなどにお問い合わせください。
■一般電話などからの場合
0120-800-000
※ 一部のIP電話からは接続できない場合があ
ります。
■ドコモの携帯電話からの場合
(局番なしの)113(無料)
※
一般電話などからはご利用いただけません。
受付時間 24時間 (年中無休)
iモードサイト ⅰMenu お客様サポート ドコモショップドコモホームページ http://www.nttdocomo.co.jp/
海外での紛失、盗難、精算などについて
<ドコモ インフォメーションセンター>(24時間受付)
ドコモの携帯電話からの場合
滞在国の国際電話
アクセス番号
*一般電話などでかけた場合には、日本向け通話料がかかります。
※SH-02Cからご利用の場合は、+81-3-6832-6600でつながります。
(「+」は「0」ボタンを1秒以上押します。)
-81-3-6832-6600
*
(無料)
一般電話などからの場合
<ユニバーサルナンバー>
ユニバーサルナンバー用
国際識別番号
*滞在国内通話料などがかかる場合があります。
※主要国の国際電話アクセス番号/ユニバーサルナンバー用国際識別番号については、ドコ
モの「国際サービスホームページ」をご覧ください。
●紛失・盗難などにあわれたら、速やかに利用中断手続きをお取りください。
●お客様が購入されたFOMA端末に故障が発生した場合は、ご帰国後にドコモ指定の故障取扱窓口へご持参ください。
-8000120-0151
*
◎公共の場所で携帯電話をご利用の際は、周囲の方への心くばりを忘れずに。
<ネットワークオペレーションセンター>(24時間受付)
ドコモの携帯電話からの場合
滞在国の国際電話
アクセス番号
*一般電話などでかけた場合には、日本向け通話料がかかります。
※SH-02Cからご利用の場合は、+81-3-6718-1414でつながります。
(「+」は「0」ボタンを1秒以上押します。)
一般電話などからの場合
<ユニバーサルナンバー>
ユニバーサルナンバー用
国際識別番号
*滞在国内通話料などがかかる場合があります。
※主要国の国際電話アクセス番号/ユニバーサルナンバー用国際識別番号については、ドコ
モの「国際サービスホームページ」をご覧ください。
故障お問い合わせ先
■一般電話などからの場合
※ 一部のIP電話からは接続できない場合があ
海外での故障について
-81-3-6718-1414
-8005931-8600
0120-800-000
ります。
*
(無料)
*
SH-02C
取扱説明書
SH-02C
取扱説明書
’10.●
環境保全のため、不要になった電池は
NTTドコモまたは代理店、リサイクル
協力店などにお持ちください。
大豆油インキを使用しています。
再生紙を使用しています
’10.●(1版)
TINSJA***AFZZ
10* **.* ** MS***
’10.●
1
Page 2
乳幼児の手の届かない場所に保
警告
ピクチャーライト
管してください。
か
誤って飲み込んだり、けがなどの原因となったり
ん
します。
た
ん
検
索
/
充電しながらiアプリやテレビ電話、ワンセグ視
目
聴などを長時間行うとFOMA端末や電池パック・
次
アダプタの温度が高くなることがあります。
/
温度の高い部分に直接長時間触れるとお客様の
注
体質や体調によっては肌に赤みやかゆみ、かぶれ
意
などが生じたり、低温やけどの原因となる恐れが
事
あります。
FOMA端末をアダプタに接続し
た状態で長時間連続使用される
場合には特にご注意ください。
項
FOMA端末の取り扱いについて
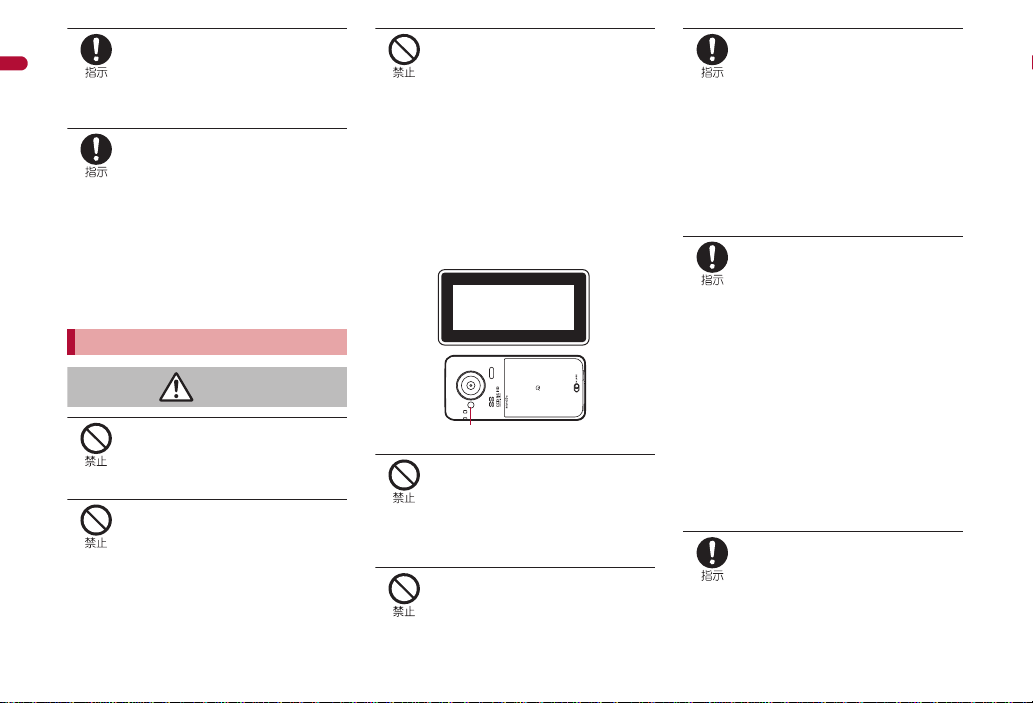
赤外線ポートを目に向けて送信
しないでください。
目に悪影響を及ぼす原因となります。
赤外線通信使用時に、赤外線
ポートを赤外線装置のついた家
電製品などに向けて操作しない
赤外線装置の誤動作により、事故の原因となりま
す。
でください。
ピクチャーライトの発光部を人
の目に近づけて点灯発光させな
いでください。
視力障害の原因となります。また、目がくらんだ
り驚いたりしてけがなどの事故の原因となりま
す。
注意事項:
当製品に使用されているピクチャーライト光源
LEDは、指定されていない調整などの操作を意図
的に行った場合、眼の安全性を超える光量を放出
する可能性がありますので分解しないでくださ
い。
EN60825-1:1994 A1:2002 & A2:2001
クラス 1 LED製品
FOMA端末内のドコモUIMカー
ドやmicroSDカード挿入口に水
などの液体や金属片、燃えやす
いものなどの異物を入れないで
ください。
火災、やけど、けが、感電の原因となります。
自動車などの運転者に向けてラ
イトを点灯しないでください。
航空機内や病院など、使用を禁
止された区域では、FOMA端末
の電源を切ってください。
電子機器や医用電気機器に悪影響を及ぼす原因
となります。また、自動的に電源が入る機能を設
定している場合は、設定を解除してから電源を
切ってください。
医療機関内における使用については各医療機関
の指示に従ってください。
また、航空機内での使用などの禁止行為をした場
合、法令により罰せられます。
ハンズフリーに設定して通話す
る際や、着信音が鳴っていると
きなどは、必ずFOMA端末を耳
から離してください。
また、イヤホンマイクなどを
FOMA端末に装着し、ゲームや
音楽再生をする場合は、適度な
ボリュームに調節してくださ
い。
音量が大きすぎると難聴の原因となります。
また、周囲の音が聞こえにくいと、事故の原因と
なります。
Earphone Signal Level
The maximum output voltage for the music
player function, measured in accordance with
EN 50332-2, is 28.0 mV.
心臓の弱い方は、着信バイブ
レータ(振動)や着信音量の設定
に注意してください。
心臓に悪影響を及ぼす原因となります。
12
運転の妨げとなり、事故の原因となります。
Page 3

Page 4

Page 5

輸出管理規制
本製品及び付属品は、日本輸出管理規制(「外国為替及び外国貿易法」
及びその関連法令)の適用を受ける場合があります。また米国再輸出
規制(Export Administration Regulations)の適用を受けます。本製品
及び付属品を輸出及び再輸出する場合は、お客様の責任及び費用負担
において必要となる手続きをお取りください。詳しい手続きについて
は経済産業省または米国商務省へお問い合わせください。
知的財産権
著作権・肖像権について
お客様が本製品を利用して撮影またはインターネット上のホームページ
からのダウンロードやテレビ、ビデオなどにより取得した文章、画像、音
楽、ソフトウェアなど第三者が著作権を有するコンテンツは、私的使用目
的の複製や引用など著作権法上認められた場合を除き、著作権者に無断
で複製、改変、公衆送信などすることはできません。
実演や興行、展示物などには、私的使用目的であっても撮影または録音を
制限している場合がありますので、ご注意ください。
また、お客様が本製品を利用して本人の同意なしに他人の肖像を撮影し
たり、撮影した他人の肖像を本人の同意なしにインターネット上のホー
ムページに掲載するなどして不特定多数に公開することは、肖像権を侵
害するおそれがありますのでお控えください。
商標について
「FOMA」、「おサイフケータイ」、「トルカ」、「mopera」、「mopera U」、「キャ
ラ電」、「デコメール
「iアプリ」、「iモーション」、「iモード」、「iチャネル」、「DCMX」、
「WORLD WING」、「公共モード」、「WORLD CALL」、「デュアルネットワー
ク」、「セキュリティスキャン」、「メッセージF」、「マルチナンバー」、「おま
かせロック」、「ケータイデータお預かりサービス」、「着もじ」、「iCお
引っこしサービス」、「きせかえツール」、「OFFICEED」、「iエリア」、
「2in1」、「Music&Videoチャネル」、「メロディコール」、「エリアメール」、
「イマドコサーチ」、「イマドコかんたんサーチ」、「マチキャラ」、「iコン
シェル」、「iウィジェット」、「iアプリコール」、「iスケジュール」、
「docomo STYLE series」、「i-mode」ロゴ、「FOMA」ロゴ、「i-αppli」ロゴは
NTTドコモの商標または登録商標です。
本機には、Symbian Foundation Limitedよりライセンス供与されたソフ
トウェアが含まれています。
SymbianはSymbian Foundation Limitedの登録商標です。
キャッチホンは日本電信電話株式会社の登録商標です。
マルチタスク/Multitaskは、日本電気株式会社の登録商標です。
Microsoft
®
は、米国Microsoft Corporationの米国およびその他の国における
Media
商標または登録商標です。
Microsoft Excel、Microsoft Wordは、米国のMicrosoft Corporationの商
品名称です。
QuickTimeは、米国および他の国々で登録された米国Apple Inc.の登録商
標です。
QRコードは株式会社デンソーウェーブの登録商標です。
microSDHCロゴはSD-3C, LLCの商標です。
Powered by JBlend
All rights reserved.
JBlendおよびJBlendに関する商標は、日本およびその他の国に
おける株式会社アプリックスの商標または登録商標です。
「AXISフォント」は株式会社アクシスの登録商標です。
また、「AXIS」フォントはタイププロジェクト株式会社が制作したフォン
トです。
®
」、「デコメ®」、「デコメアニメ®」、「デコメ絵文字®」、
®
、Windows®、Windows Vista®、PowerPoint®、Windows
™
Copyright 2002-2009 Aplix Corporation.
そ
の
他
101
Page 6
この製品では、シャープ株式会社が液晶画面で見やすく、読みやすくなる
よう設計したLCフォントが搭載されています。LCフォント/LCFONTお
よび は、シャープ株式会社の登録商標です。
McAfee
Gガイド、G-GUIDE、Gガイドモバイル、G-GUIDE MOBILE、
Google, モバイルGoogle マップは、Google, Inc.の登録商標です。
IrSimple
「CROSS YOU」は、ソニー株式会社の商標です。
「モバイルSuica」は、東日本旅客鉄道株式会社の登録商標です。
「iアバター」は、株式会社ディーツーコミュニケーションズの登録商標
「アバターメーカー」は、株式会社アクロディアの登録商標です。
bはフェリカネットワークス株式会社の登録商標です。
ドルビーラボラトリーズからの実施権に基づき製造されています。
FlashFX
PhotoSolid
本製品には株式会社モルフォのMorpho Effect Library [PRETTY]を採用
そ
の
本製品は沖電気工業株式会社の顔認識エンジン
他
日本語変換は、オムロンソフトウェア(株)のiWnnを使用しています。
®
、マカフィー®は米国法人McAfee, Inc. またはその関係会社の
米国またはその他の国における登録商標です。
およびGガイド関連ロゴは、米Gemstar-TV Guide
International, Inc. またはその関係会社の日本国内におけ
る商標または登録商標です。
™
、IrSS™またはIrSimpleShot™は、Infrared Data Association®の
商標です。
です。
Dolby、ドルビー及びダブルD記号はドルビーラボラトリーズの商標で
す。
®
(U.S.Patent Office 5,860,082/6,260,156)
Pro™は、米国Datalight, Inc.の商標または登録商標です。
®
、PhotoScouter®、ImageSurf®、StroboPhoto®、TrackSolid®、
®
MovieSolid
登録商標です。
しております。
Morpho Effect Library [PRETTY]は株式会社モルフォの商標です。
FSE(Face Sensing Engine)を使用しています。
FSEおよびFSEロゴは沖電気工業株式会社の商
標です。
iWnn©OMRON SOFTWARE Co., Ltd. 2008-2010 All Rights Reserved.
、Morpho Smart Select™は株式会社モルフォの商標または
SNSF © J-DATA Co., Ltd. © OMRON SOFTWARE Co., Ltd. 2004-2009
All Rights Reserved.
ラクラク瞬漢/瞬英ルーペは株式会社アイエスピーの商標です。
Myきせかえクリエイターは、プライムワークス株式会社の商標です。
「ベールビュー」、「VeilView」、「ベストセレクトフォト」、「見せかけコー
ル」はシャープ株式会社の商標または登録商標です。
その他の社名および商品名は、それぞれ各社の商標または登録商標です。
その他
FeliCaは、ソニー株式会社が開発した非接触ICカードの技術方
式です。FeliCaは、ソニー株式会社の登録商標です。
本製品はMPEG-4 Visual Patent Portfolio Licenseに基づき、下記に該当
するお客様による個人的で且つ非営利目的に基づく使用がライセンス許
諾されております。これ以外の使用については、ライセンス許諾されてお
りません。
MPEG-4ビデオ規格準拠のビデオ(以下「MPEG-4ビデオ」と記載しま
す)を符号化すること。
個人的で且つ営利活動に従事していないお客様が符号化したMPEG-4
ビデオを復号すること。
ライセンス許諾を受けているプロバイダから取得したMPEG-4ビデオ
を復号すること。
その他の用途で使用する場合など詳細については、米国法人MPEG LA,
LLCにお問い合わせください。
本製品はMPEG-4 Systems Patent Portfolio Licenseに基づき、MPEG-4
システム規格準拠の符号化についてライセンス許諾されています。ただ
し、下記に該当する場合は追加のライセンスの取得およびロイヤリティ
の支払いが必要となります。
タイトルベースで課金する物理媒体に符号化データを記録または複
製すること。
永久記録および/または使用のために、符号化データにタイトルベー
スで課金してエンドユーザに配信すること。
追加のライセンスについては、米国法人MPEG LA, LLCより許諾を受け
ることができます。詳細については、米国法人MPEG LA, LLCにお問い合
わせください。
102
Page 7

本製品は、AVCポートフォリオライセンスに基づき、お客様が個人的に、
且つ非商業的な使用のために(i)AVC規格準拠のビデオ(以下「AVCビ
デオ」と記載します)を符号化するライセンス、および/または(ii)
AVCビデオ(個人的で、且つ商業的活動に従事していないお客様により
符号化されたAVCビデオ、および/またはAVCビデオを提供することに
ついてライセンス許諾されているビデオプロバイダーから入手した
AVCビデオに限ります)を復号するライセンスが許諾されております。
その他の使用については、黙示的にも一切のライセンス許諾がされてお
りません。さらに詳しい情報については、MPEG LA, L.L.C.から入手でき
る可能性があります。
HTTP://WWW.MPEGLA.COMをご参照ください。
本製品は、VC-1 Patent Portfolio Licenseに基づき、お客様が個人的に、且
つ非商業的な使用のために(i)VC-1規格準拠のビデオ(以下「VC-1ビデ
オ」と記載します)を符号化するライセンス、および/または(ii)VC-1
ビデオ(個人的で、且つ商業的活動に従事していないお客様により符号化
されたVC-1ビデオ、および/またはVC-1ビデオを提供することについて
ライセンス許諾されているビデオプロバイダーから入手したVC-1ビデ
オに限ります)を復号するライセンスが許諾されております。その他の使
用については、黙示的にも一切のライセンス許諾がされておりません。さ
らに詳しい情報については、MPEG LA, L.L.C.から入手できる可能性があ
ります。
HTTP://WWW.MPEGLA.COMをご参照ください。
本製品はAdobe Systems
IncorporatedのAdobe
および Adobe Reader® Mobileテクノ
ロジーを搭載しています。
Adobe Flash Lite Copyright © 2003-2010 Adobe Systems
Incorporated. All rights reserved.
Adobe Reader Mobile Copyright © 1993-2010 Adobe Systems
Incorporated. All rights reserved.
Adobe、Adobe Reader、Flash、およびFlash Lite はAdobe Systems
Incorporated(アドビシステムズ社)の米国ならびにその他の国における
登録商標または商標です。
®
Flash® Lite
®
本製品は、株式会社ACCESSのNetFront Browser、NetFront Document
Viewer、NetFront Sync Client、NetFront Browser DTV Profile One-seg
Editionを搭載しています。
ACCESS、ACCESSロゴ、NetFrontは日本国、米国、およびその他の国にお
ける株式会社ACCESSの登録商標または商標です。
Copyright © 2010 ACCESS CO., LTD. All rights reserved.
本製品の一部分にIndependent JPEG Groupが開発したモジュールが含
まれています。
本製品はジェスチャーテックの技術を搭載しております。
Copyright © 2006-2009, GestureTek, Inc. All Rights Reserved.
コンテンツ所有者は、WMDRM(Windows Media digital rights
management)技術によって著作権を含む知的財産を保護しています。本
製品は、WMDRMソフトウェアを使用してWMDRM保護コンテンツにア
クセスします。WMDRMソフトウェアがコンテンツを保護できない場
合、保護コンテンツを再生またはコピーするために必要なソフトウェア
のWMDRM機能を無効にするよう、コンテンツ所有者はMicrosoftに要求
することができます。無効にすることで保護コンテンツ以外のコンテン
ツが影響を受けることはありません。保護コンテンツを利用するために
ライセンスをダウンロードする場合、Microsoftがライセンスに無効化リ
ストを含める場合がありますのであらかじめご了承ください。コンテン
ツ所有者はコンテンツへのアクセスに際し、WMDRMのアップグレード
を要求することがあります。アップグレードを拒否した場合、アップグ
レードを必要とするコンテンツへのアクセスはできません。
「CP8 PATENT」
本書では各OS(日本語版)を次のように略して表記しています。
Windows 7は、Microsoft
Premium、Professional、Enterprise、Ultimate)の略です。
Windows Vistaは、Windows Vista
Business、Enterprise、Ultimate)の略です。
Windows XPは、Microsoft
systemまたはMicrosoft
systemの略です。
®
Windows® 7(Starter、Home Basic、Home
®
(Home Basic、Home Premium、
®
Windows® XP Professional operating
®
Windows® XP Home Edition operating
そ
の
他
103
Page 8

本製品内蔵のネット辞典ではBSDライセンスを使用しています。
Copyright © 2002,2003, Stefan Haustein, Oberhausen, Rhld., Germany
All rights reserved
・ Redistribution and use in source and binary forms, with or without
modification, are permitted provided that the following conditions
are met:
・ Redistributions of source code must retain the above copyright
notice, this list of conditions and the following disclaimer.
Redistributions in binary form must reproduce the above
copyright notice, this list of conditions and the following
disclaimer in the documentation and/or other materials provided
with the distribution.
・ Neither the name of the <ORGANIZATION> nor the names of its
contributors may be use d to endorse or promote products derived
from this software without specific prior written permission.
THIS SOFTWARE IS PROVIDED BY THE COPYRIGHT HOLDERS AND
CONTRIBUTORS "AS IS" AND ANY EXPRESS OR IMPLIED
WARRANTIES, INCLUDING, BUT NOT LIMITED TO, THE IMPLIED
WARRANTIES OF MERCHANTABILITY AND FITNESS FOR A
PARTICULAR PURPOSE ARE DISCLAIME D. IN NO EVENT SHALL THE
COPYRIGHT OWNER OR CONTRIBUTORS BE LIABLE FOR ANY
DIRECT, INDIRECT, INCIDENTAL, SPECIAL, EXEMPLARY, OR
CONSEQUENTIAL DAMAGES (INCLUDING, BUT NOT LIMITED TO,
PROCUREMENT OF SUBSTITUTE GOODS OR SERVICES; LOSS OF
USE, DATA, OR PROFITS; OR BUSINESS INTERRUPTION) HOWEVER
CAUSED AND ON ANY THEORY OF LIABILITY, WHETHER IN
CONTRACT, STRICT LIABILITY, OR TORT (INCLUDING NEGLIGENCE
OR OTHERWISE) ARISING IN ANY WAY OUT OF THE USE OF THIS
そ
の
SOFTWARE, EVEN IF ADVISED OF THE POSSIBILITY OF SUCH
DAMAGE.
他
The HMM-Based Speech Synthesis System (HTS)
hts_engine API developed by HTS Working Group
http://hts-engine.sourceforge.net/
Copyright © 2001-2010 Nagoya Institute of Technology
Department of Computer Science
2001-2008 Tokyo Institute of Technology
Interdisciplinary Graduate School of Science and
Engineering
All rights reserved.
Redistribution and use in source and binary forms, with or without
modification, are permitted provided that the following conditions are
met:
・ Redistributions of source code must retain the above copyright
notice, this list of conditions and the following disclaimer.
・ Redistributions in binary form must reproduce the above
copyright notice, this list of conditions and the following
disclaimer in the documentation and/or other materials provided
with the distribution.
・ Neither the name of the HTS working group nor the names of its
contributors ma y be used to endorse or promote products derived
from this software without specific prior written permission.
THIS SOFTWARE IS PROVIDED BY THE COPYRIGHT HOLDERS AND
CONTRIBUTORS "AS IS" AND ANY EXPRESS OR IMPLIED
WARRANTIES, INCLUDING, BUT NOT LIMITED TO, THE IMPLIED
WARRANTIES OF MERCHANTABILITY AND FITNESS FOR A
PARTICUL AR PURPOSE ARE DISCLA IMED. IN NO EVENT SHALL THE
COPYRIGHT OWNER OR CONTRIBUTORS BE LIABLE FOR ANY
DIRECT, INDIRECT, INCIDENTAL, SPECIAL, EXEMPLARY, OR
CONSEQUENTIAL DAMAGES (INCLUDING, BUT NOT LIMITED TO,
PROCUREMENT OF SUBSTITUTE GOODS OR SERVICES; LOSS OF
USE, DATA, OR PROFITS; OR BUSINESS INTERRUPTION) HOWEVER
CAUSED AND ON ANY THEORY OF LIABILITY, WHETHER IN
CONTRACT, STRICT LIABILITY, OR TORT (INCLUDING NEGLIGENCE
OR OTHERWISE) ARISING IN ANY WAY OUT OF THE USE OF THIS
SOFTWARE, EVEN IF ADVISED OF THE POSSIBILITY OF SUCH
DAMAGE.
104
Page 9

Page 10

Attaching battery pack
Slot
Tabs
With a recycle mark
side up
Back cover
Securely push
tab areas down
with both hands
Lever
Perform with the FOMA terminal turned off and closed while holding with your
both hands.
The battery pack is not waterproof/dust-proof.
1 Slide the back cover lever in the direction of the arrow (1) to unlock and
remove the back cover (2)
The FOMA terminal has a slot to remove the back cover. Securely hold the
FOMA terminal as shown in the illustration to prevent excessive force on
the back cover and hook a nail on the slot and remove the back cover
upward.
2 Attach the battery pack
Turn a recycle mark side of the battery pack
up, match tabs and attach the battery pack.
そ
の
他
106
3 Insert the tab of the top of the
back cover into the FOMA
terminal slot (1), insert it in the
direction of the arrow (2) and
securely push down with both
hands (3)
The back of the back cover has
also five tabs to insert the back
cover. Securely push tab areas
down with both hands so that
gaps are not left between the
FOMA terminal and the back
cover.
4 Slide the back cover lever in the
direction of the arrow (4) to lock
Using unnecessary force when attaching or removing the battery pack may
damage the connector terminal for the battery pack (charger terminal) on the
FOMA terminal.
Securely close the back cover. If not closed securely, the back cover may
come off and the battery pack may fall out due to vibration. May damage the
waterproof/dust-proof performance and allow water to seep or dust to get in.
Page 11

Charging
1
2
Connector (Turn the
side with the arrows up)
FOMA AC
Adapter 01/02
100V AC
outlet
Charging LED
3
It is recommended that the accompanying desktop holder be used for charging
to prevent water from seeping or dust from getting in caused by forgetting to
close the external connector terminal cover.
The AC adapter and desktop holder are not waterproof/dust-proof. Never try to
charge the battery pack when the FOMA terminal is wet.
1 Turn the side with the arrows of the AC adapter connector up and insert it
into the connector terminal of the desktop holder (1)
Keep the connector parallel with the desktop holder and securely push all
the way in until it clicks.
2 Insert the AC adapter power plug into an outlet (2)
3 When placing the FOMA terminal in the desktop holder, charge alert is
heard, charging LED illuminates, and charging starts
Place the FOMA terminal in the direction of the arrow until it clicks (3).
4 Charging is complete when charge alert is heard and charging LED turns
off
Hold the desktop holder, flip the FOMA terminal forward and lift it out.
Pull the AC adapter out of the outlet when left unused for a long period of
time.
When charge alert is not heard or when charging LED does not illuminate,
check that the FOMA terminal is placed securely in the desktop holder
(except when terminal is turned off, manner mode is set or charge alert is
[OFF]).
When placing the FOMA terminal in the desktop holder, be careful not to
catch a strap, etc.
そ
の
他
107
Page 12

そ
1 Earpiece
2 Air vent
3 Main display
4 z: MENU/Operation guidance key
5 m: Mail/Operation guidance key
6 s: Start/Hands-free key
7 1 to 9, *, 0 and #: Dial/Character entry keys
8 $: Multi/VeilView key
9 Mouthpiece/Microphone
a Sub camera
b Brightness sensor
c w&t&: Multi-guide key
d C: Camera/TV/Operation guidance key
e i (,): i-mode/Operation guidance key
f c (J): i-Channel/Clear key
g H: Power/End key
h y: MAP/GPS key
i Charger terminal
j Called/Charging LED
k 1Seg antenna
l Sub display
m microSD Card slot
n &: Side key
o Picture Light
p Strap hole
q FOMA antenna
r Main camera
s Speaker
t Infrared port
u Back cover
v b mark
w Back cover lever
x External connector terminal
の
他
108
Part Names and Functions
Page 13

Main icons
Icon display area
Viewing Display
Battery level
bbbb (High b Low)
Signal status
bbb (Strong b Weak)
When [ ] appears, the handset is outside the service area or
in a place with no signal.
Hands-free
GPS
i-mode mail/SMS/Area Mail/Information received
i-αppli
Alarm/Schedule
Ir communication
i-mode
UIM error
Self mode
Music&Video Channel program reservation
3G/GSM
VeilView
USB connection
Record message
Keypad dial lock
Manner mode
Silent/Vibrator
Public mode (Drive mode)
microSD Card
Software update
IC card lock
Music&Video Channel
Personal data lock
1Seg recording
Basic Operations
Turning power on
1 H (for at least 2 seconds)
Press H for at least 2 seconds to turn the power off.
Changing screen display to English
1 In the Normal menu, [本体設定]/[文字表示/入力]/[Select language]/
[English]
Making initial setting
1 [Date and time setting]/set the date and time
2 [Password]/register a terminal security code
3 [Keypad sound]/set the key sound
4 [Text size]/set the font size collectively
5 [Request permit/deny]/set GPS location provision
6 C
そ
の
他
109
Page 14

Checking your own phone number
1 In the Normal menu, [Profile]
Character entry
Switching entry modes
1 In the character entry screen, m
2 Select the entry mode
Entering characters
Ex.) When entering “電話”
1 In the character entry screen, enter “でんわ”
でんわ: 4 (four times)/* (once)/0 (three times)/r&/0 (once)
To enter multiple characters assigned to the same key: Enter a character/
r&/enter a character
2 C
3 t&
Entering pictograms/symbols
1 In the character entry screen, C
To switch between pictogram and Deco-mail pictogram: C
To switch between single- and double-byte symbols: z
2 Select a pict ogram/symbol
Using phrases
1 In the character entry screen, z/[Quote phrase/data]/[Phrase]
2 Select a phrase
Entering emoticons
1 In the character entry screen, z/[Pict/Symbol/Smiley]/[Smiley]
For a mail message: In the character entry screen, z/[Quote phrase/
data]/[Pict/Symbol/Smiley]/[Smiley]
2 Select a category/select an emoticon
そ
1 In the Normal menu, [Setting]/[Sound/Vibration/Manner]/[Ring tone]
の
2 Select an item
他
; [Call ring tone]/select an item
; [Videophone]
; [Mail]/select an item
3 Set each item/C
Changing ring tone
Lock/Security
Changing terminal security code
1 In the Normal menu, [Setting]/[Lock/Security]/[Change security
code]/enter the current terminal security code
2 Enter the new terminal security code
3 Enter the new terminal security code again
4 C
Changing network security code
1 In stand-by, i/[お客様サポート]/[各種設定 (確 認・変 更・利 用 )]/[ネット
ワーク暗証番号変更]
Changing i-mode password
1 In stand-by, i/[English]/[Options]/[Change i-mode Password]
Setting PIN code
1 In the Normal menu, [Setting]/[Lock/Security]/[UIM setting]
2 Select an item
; [Change PIN1 code]/enter the terminal security code/enter the current
PIN1 code/enter the new PIN1 code/ enter the new PIN1 code again/
C
; [Change PIN2 code]/enter the terminal security code/enter the current
PIN2 code/enter the new PIN2 code/ enter the new PIN2 code again/
C
; [PIN1 entry ON/OFF]/[ON]/enter the PIN1 code
Various lock functions
All lock
1 In the Normal menu, [Setting]/[Lock/Security]/[Lock settings]/[All
lock]/enter the terminal security code
Omakase Lock
Omakase Lock is a service to lock the personal data and IC card functions in case
of loss, etc. by only your request to DOCOMO via phone.
Refer to “Mobile Phone User’s Guide [Basic Usage]” for details on Omakase
Lock.
110
Page 15

Set/Release Omakase Lock
s 0120-524-360 Office hours: 24 hours (in Japanese only) (open all year
round)
※ Unavailable from part of IP phones.
※ Omakase Lock can also be set/released from the My docomo website using
PCs.
Self mode
1 In the Normal menu, [Setting]/[Other setting]/[Self mode]/select the
setting/[Yes]
Personal data lock
1 In the Normal menu, [Setting]/[Lock/Security]/[Lock settings]/
[Personal data lock]/enter the terminal security code/select the setting
Keypad dial lock
1 In the Normal menu, [Setting]/[Lock/Security]/[Keypad dial lock]/
enter the terminal security code/select the setting
AutoKeyLock
1 In the Normal menu, [Setting]/[Lock/Security]/[Lock settings]/
[AutoKeyLock]/select the lock type/enter the terminal security code/
set each item/C
IC card lock
1 In stand-by, r& (for at least 1 second)/[Yes]
Side key lock
1 In stand-by, t& (for at least 1 second)/[Side key lock]
Incoming call restriction
Setting the way of dealing with a call with no caller ID
1 In the Normal menu, [Setting]/[Lock/Security]/[Call rejection setting]/
enter the terminal security code
2 Select the reason
3 Set each item/C
Rejecting a call from a caller unset in phonebook
1 In the Normal menu, [TEL function]/[Dial/Receive call setting]/[Reject/
Accept call]
2 [Unregistered caller]/enter the terminal security code/select the
setting
Voice/Videophone Calls
Making a voice/videophone call
1 In stand-by, enter a phone number
2 s (Phone)/C (V.phone)
3 H to end the call
Receiving a voice/videophone call
1 When a call is received, the ring tone sounds and the called LED flashes
2 s
3 H to end the call
Making a call with redials/received calls
1 In stand-by, r& (I) (Redial)/q& (M) (Received calls)
2 Point the cursor to a phone number
3 s (Phone)/i (V.phone)
Overseas use
Making a call outside your country of stay (including Japan)
1 In stand-by, enter “+” (0 for at least 1 second), the country code, area
code (city code) and other party’s phone number
When the area code (city code) begins with “0”, omit the “0” when dialing
(Include “0” when making a call to some countries or regions such as Italy).
2 s (Phone)/C (V.phone)
Making a call in your country of stay
1 In stand-by, enter a phone number
2 s (Phone)/C (V.phone)
Making a call to a WORLD WING subscriber overseas
Even when making a call to the phone in your country of stay, make an
international call to Japan if the call recipient is a WORLD WING subscriber
overseas.
1 In stand-by, enter “+” (0 for at least 1 second), country code “81”
(Japan) and the other party’s mobile phone number excluding the first
“0”
2 s (Phone)/C (V.phone)
そ
の
他
111
Page 16

Mail
Sending i-mode mail
1 In stand-by, m/[Compose message]
2 Select the TO field/select an item
3 Select the SUB field/enter a subject
4 [Message]/enter messages
5 C
Checking new i-mode mail
1 In stand-by, m/[Check new mail/message]
Replying to i-mode mail
1 In the received mail details screen, z/[Reply/Forward]
2 Select the reply method
3 Compose and send a mail
Displaying a mail in Inbox/Outbox/Unsent box
1 In stand-by, m
2 Select a box
3 Select a mail
Phonebook
Adding entries to phonebook
1 In the Normal menu, [TEL function]/[Phonebook]/[Add to Phonebook]/
[UIM operation]
2 Set each item/C
そ
の
他
1 In stand-by, C
2 t&/&
3 t&/&
Camera
Shooting still pictures
Shooting moving pictures
1 In the Normal menu, [CAMERA/TV/MUSIC]/[Camera]/[Movie shooting]
2 t&/&
3 t&/& to end shooting
4 [Save]
Displaying shot still pictures
1 In the Normal menu, [Data box]/[My picture]
2 [Camera] folder/select a still picture
Playing shot moving pictures
1 In the Normal menu, [Data box]/[i-motion/Movie]
2 [Camera] folder/select a moving picture
Watching 1Seg
Performing automatic channel setting
1 In the Normal menu, [CAMERA/TV/MUSIC]/[1Seg]/[Channel setting]
When the confirmation screen appears: [Yes]/[Auto setting]/[Yes]/
proceed to step 3
2 z/[Create]/[Auto setting]/[Yes]
3 Select a prefecture/district
4 [Yes]
Watching 1Seg
1 In the Normal menu, [CAMERA/TV/MUSIC]/[1Seg]/[Activate 1Seg]
Playing recorded videos
1 In the Normal menu, [Data box]/[1Seg]
2 [Video] folder/select a video
Music Playback
Using Music&Video Channel
The Music&Video Channel service is provided in Japanese.
1 In the Normal menu, [CAMERA/TV/MUSIC]/[Music&Video Channel]
2 Select a program
112
Page 17

Using MUSIC Player
1 In the Normal menu, [Data box]/[MUSIC]
2 Select music data
Network Services
Setting Voice Mail Service
Voice Mail Service is a paid option (monthly fees apply) that requires subscription.
1 In the Normal menu, [TEL function]/[Voice mail service]
2 [Activate]/[Yes]/[Yes]/enter the ringing time/[OK]
Setting Call waiting service
Call waiting service is a paid option (monthly fees apply) that requires subscription.
1 In the Normal menu, [TEL function]/[Other network service]/[Call
waiting]
2 [Activate]/[Yes]/[OK]
Setting Call Forwarding Service
Call Forwarding Service is a free option (no monthly fees) that requires
subscription.
1 In the Normal menu, [TEL function]/[Other network service]/[Call
forwarding]
2 [Activate]/[Yes]/[Yes]/enter a phone number/C/[Yes]/enter the
ringing time/[OK]
Osaifu-Keitai
Hold the b mark of the FOMA terminal over the scanning device to use as
electronic money or railway tickets, or retrieve ToruCa.
When the FOMA terminal is stolen or lost, immediately contact your provider of
Osaifu-Keitai compatible service for handling methods.
General Notes
Introduction of options and related devices
Battery Pack SH23 FOMA AC Adapter 01 for Global use
FOMA AC Adapter 01/02 Desktop Holder SH32
Main specifications
Size
Weight $$ g (with battery pack attached)
Continuous
talk time
Continuous
stand-by time
Charge time
* Approximate value
FOMA/3G
GSM Voice call: $$ min
FOMA/3G
GSM
FOMA AC Adapter 01/02 $$ min
FOMA DC Adapter 01/02 $$ min
3G/GSM
setting: 3G
3G/GSM
setting: AUTO
3G/GSM
setting: AUTO
$$ (H) × $$ (W) × $$ (D) mm
($$ at thickest point) (when folded)
Voice call: $$ min
Videophone: $$ min
When mobile: $$ hr
When mobile: $$ hr
At rest: $$ hr
At rest: $$ hr
*
*
*
*
*
*
*
*
*
*
*
そ
の
他
113
Page 18

Page 19

Page 20

Inquiries
General inquiries <docomo Information Center>
(Business hours: 9:00 a.m. to 8:00 p.m.)
s 0120-005-250 (toll free)
※ Service available in: English, Portuguese, Chinese, Spanish, Korean.
※ Unavailable from part of IP phones.
(Business hours: 9:00 a.m. to 8:00 p.m. (open all year round))
From DOCOMO mobile phones
(In Japanese only)
r (No prefix) 151 (toll free)
※ Unavailable from land-line phones, etc.
From land-line phones
(In Japanese only)
s 0120-800-000 (toll free)
※ Unavailable from part of IP phones.
Please confirm the phone number before you dial.
Repairs
(Business hours: 24 hours (open all year round))
From DOCOMO mobile phones
(In Japanese only)
r (No prefix) 113 (toll free)
※ Unavailable from land-line phones, etc.
From land-line phones
(In Japanese only)
s 0120-800-000 (toll free)
※ Unavailable from part of IP phones.
Please confirm the phone number before you dial.
For Applications or Repairs and After-Sales Service, please contact the
そ
の
他
above-mentioned information center or the docomo Shop etc. near you on the
NTT DOCOMO website or the i-mode site.
NTT DOCOMO website: http://www.nttdocomo.co.jp/english/
i-mode site: iMenu/お客様サポート (user support)/ドコモショップ
(docomo Shop) (In Japanese only)
116
Loss or theft of FOMA terminal or payment of
cumulative cost overseas <docomo Information Center>
(available 24 hours a day)
From DOCOMO mobile phones
International call access code for the
country you stay
*
You are charged a call fee to Japan when calling from a land-line phone, etc.
※ If you use SH-02C, you should dial the number +81-3-6832-6600
(to enter “+”, press the “0” key for at least 1 second).
From land-line phones
<Universal number>
Universal number international prefix -8000120-0151
* You might be charged a domestic call fee according to the call rate for the
country you stay.
※ For international call access codes for major countries and universal number
international prefix, refer to DOCOMO International Services website.
-81-3-6832-6600* (toll free)
*
Failures encountered overseas
<Network Support and Operation Center>
(available 24 hours a day)
From DOCOMO mobile phones
International call access code for the
country you stay
* You are charged a call fee to Japan when calling from a land-line phone,
etc.
※ If you use SH-02C, you should dial the number +81-3-6718-1414
(to enter “+”, press the “0” key for at least 1 second).
From land-line phones
<Universal number>
Universal number international prefix -8005931-8600
* You might be charged a domestic call fee according to the call rate for the
country you stay.
※ For international call access codes for major countries and universal number
international prefix, refer to DOCOMO International Services website.
If you lose your FOMA terminal or have it stolen, immediately take the steps
necessary for suspending the use of the FOMA terminal.
If the FOMA terminal you purchased is damaged, bring your FOMA terminal to
a repair counter specified by DOCOMO after returning to Japan.
-81-3-6718-1414* (toll free)
*
 Loading...