

Page 1
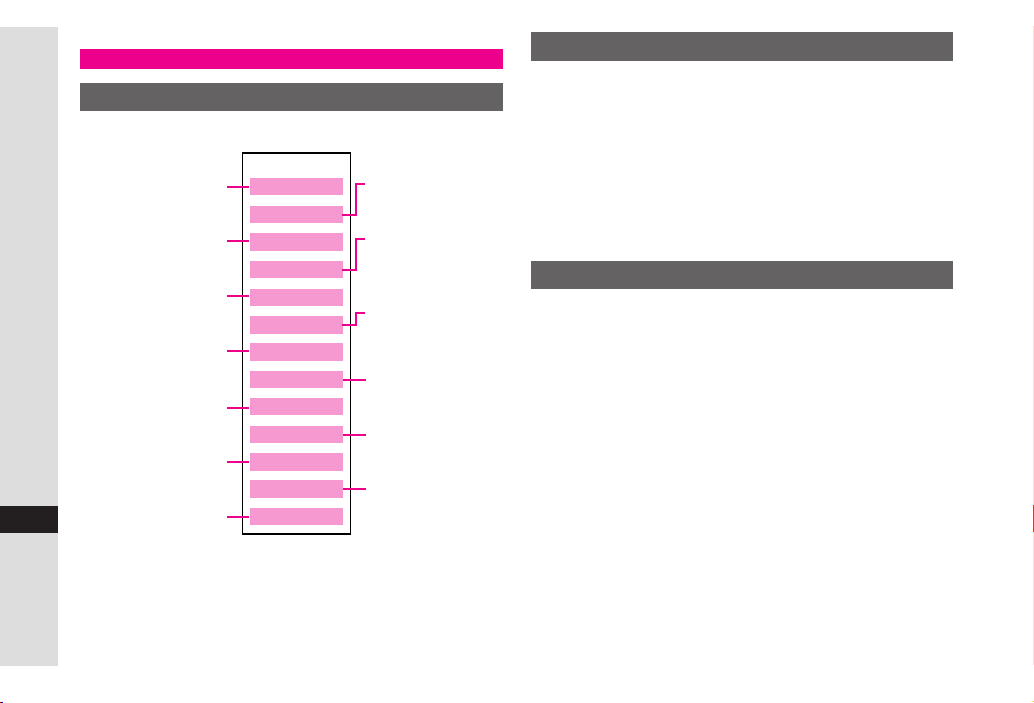
Saving to Phone Book
Save names with phone numbers, mail addresses, etc. to Phone Book.
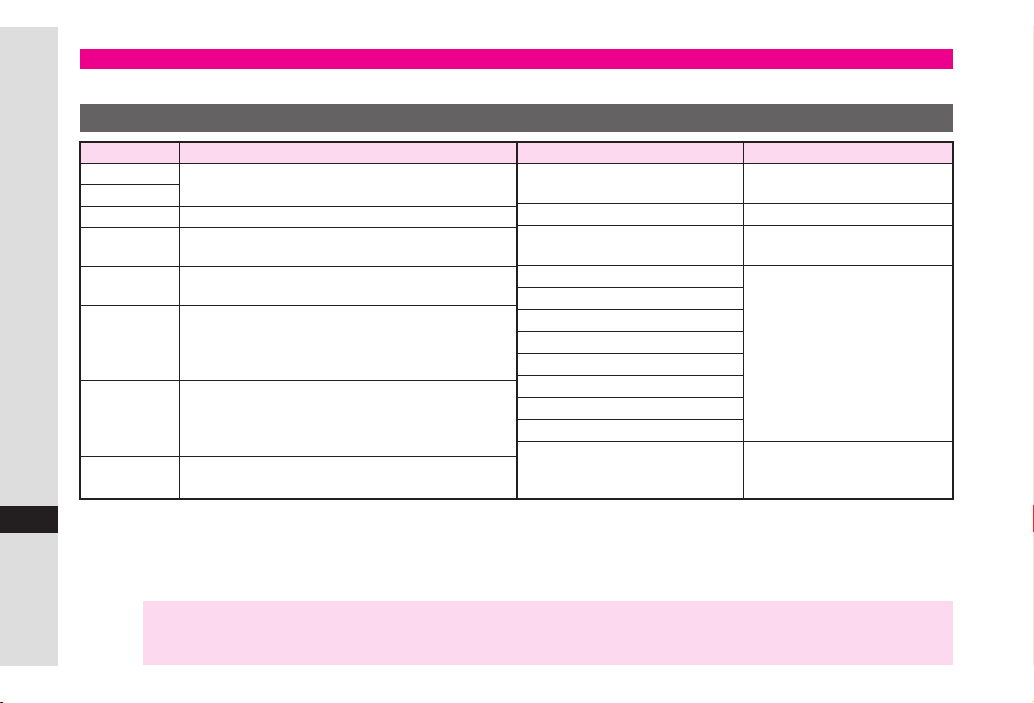
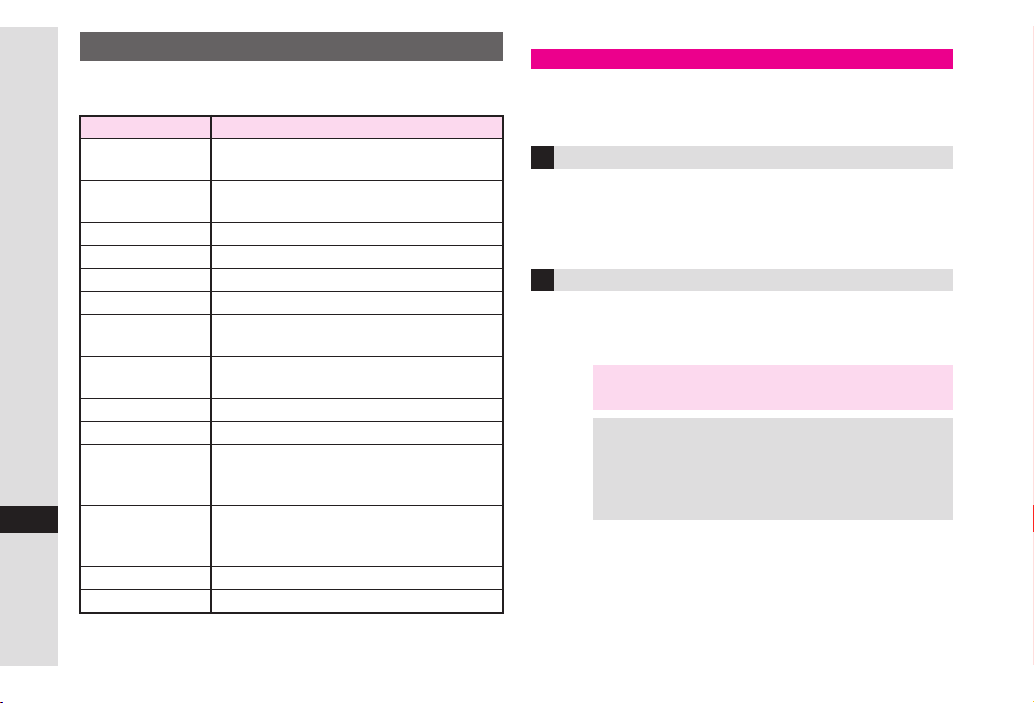
Phone Book Entry Items
Item
Last Name:
First Name:
Reading:
Add Phone
Number:
Add Email
Address:
Abridged English Manual
Category:
Address:
1
Homepage:
1
Not supported on USIM Card.
19
2
Image may not appear while an S! Application is active, etc.
,
Save up to 750 entries in handset Phone Book; USIM Card Phone Book entry limit varies according to card specifications.
Depending on the USIM Card in use, some items may not be supported, and character entry limits or number of Categories may
be lower. Also, the number of phone numbers or mail addresses per entry may be lower.
Note XBack-up Important Information
When battery is exhausted/removed for long periods, Phone Book entries may be lost; handset damage may also affect
handset information recovery. SoftBank is not liable for damages from lost/altered data.
19-28
Enter up to 32 characters. (Select
saving to USIM Card.)
Enter up to 64 characters
Enter up to three numbers on handset/two on
USIM Card (32 digits each)
Enter up to three addresses on handset/one on
USIM Card (128 single-byte alphanumerics each)
Sort entries into 16 Categories (11 on some USIM
Cards). Category names can be changed. Set
ringtone/ringvideo, Mobile Light and Vibration
by Category (handset only).
Enter postal code (20 characters), country
name (32 characters), state/province
(64 characters), city name (64 characters)
and street name/number (64 characters)
Save URLs. Enter up to
1
1,024 bytes.
Description
Name:
when
Item
1
Note:
Birthday:
Picture:
Tone/Video for Voice Call:
Tone/Video for Video Call:
1
1, 2
1
1
Tone/Video for New Message:
Light for Voice Call:
Light for Video Call:
Light for New Message:
Vibration for Incoming Call:
Vibration for New Message:
1
Secret:
1
1
1
1
1
Description
Add personal details. Enter
up to 256 characters.
Enter birth date
Set an image to appear for
incoming calls/mail
1
Set ringtone/ringvideo,
Mobile Light or Vibration by
caller/sender
Restrict access to Phone
Book entries by saving them
as Secret Mode entries
Page 2
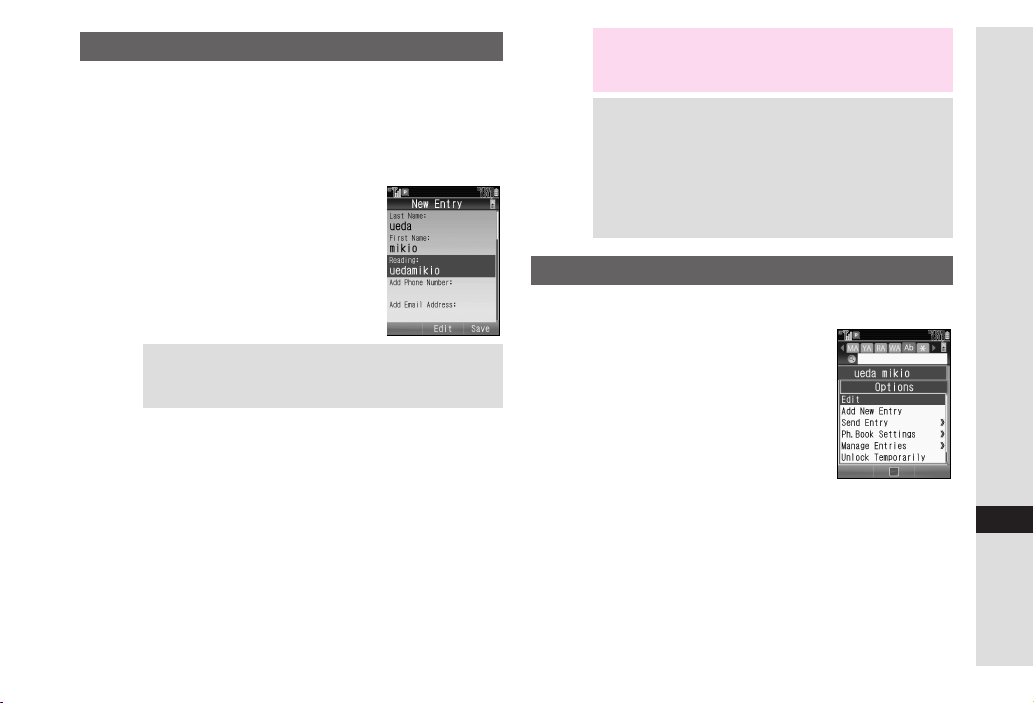
Creating Phone Book Entries
Enter a name, reading, phone number and mail
address.
1
Press %, select
2
Select
Add New Entry
Select
3
4
5
6
Tip X Correcting Reading
7
8
9
00
111100
11
111111
22
111122
33
111133
44
111144
Last Name:
Enter last name and press
Select
First Name:
Enter first name and press
Characters entered for names
appear under
Select
Make corrections and press % .
Select
Add Phone Number:
Enter a phone number and press
Select an icon and press
Select
Add Email Address:
Enter a mail address and press %
Press %
Select an icon and press %
Press A ß
Phone
Reading:
Reading:
and press
and press
and press
%
and press
%
.
and press % .
%
%
%
%
%
and press
and press %
%
%
Note X To save an entry, enter at least one of the following:
a) last name; b) first name; c) phone number; or
d) mail address.
Tip X
Setting Default Storage Media
Press % S Select
Ph.Book Settings
Entry
Press % S Select
or
Ask Each Time
For
Ask Each Time
each new entry.
Phone
Press % S Select
Press % S Select
Phone
,
Press %
, select storage media for
USIM Memory
Save New
Editing Phone Book Entries
1
Press b and select an entry
2
Press B ø
Select
Edit
.
ß
and press %
S
S
S
3
Select an item and press %
4
Edit contents and press %
5
After numbers/mail addresses, select an icon and
press
6
Press A
%
Abridged English Manual
19
S
.
19-29
Page 3
Saving from Received Calls
Select a record (see
1
Received Calls")
2
Press B
press
%
New Entry
3
1
Select
2
Perform Steps 3 - 13 on
Add to Existing Entry
1
Select a Phone Book entry and press
2
Press A
Abridged English Manual
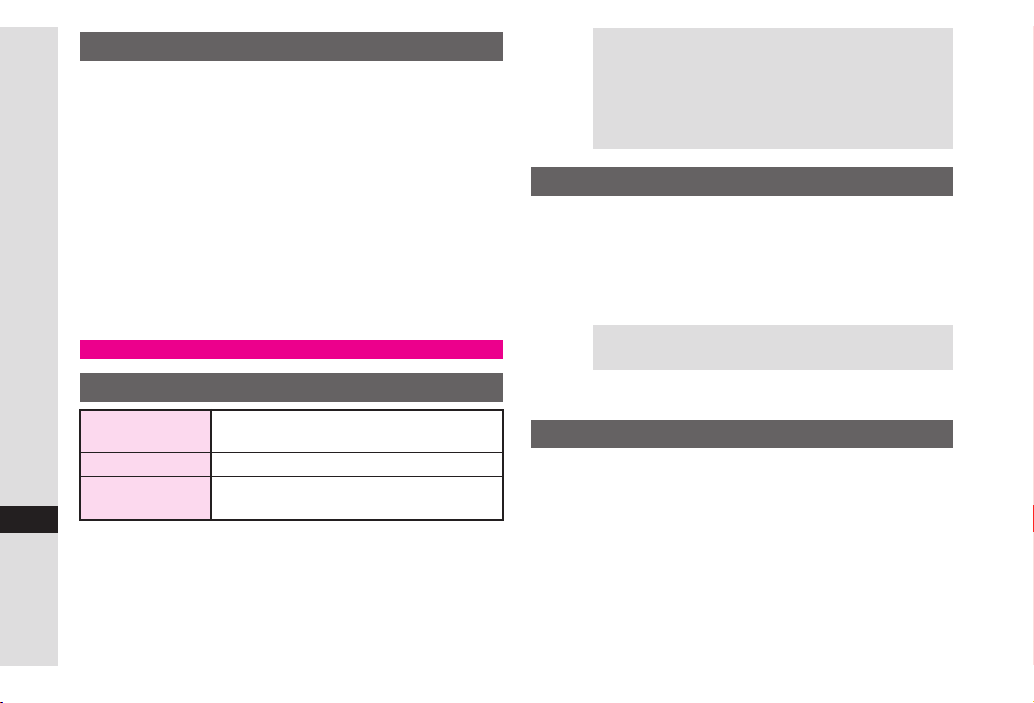
Dialling from Phone Book
Changing Search Method
By Reading
By Category Opens entries in the specified Category
By a-ka-sa-ta-na
19
19-30
Press %, select
1
Select
2
3
4 Select
Ph.Book Settings
Select
Sort Entries
By Reading, By Category
ta-na
and press %
P.19-23
"Calling from
ø
, select
Save Number
As New Entry
ß
Shows entries that start with specified
Reading
Shows entries with Readings that start
with katakana in the specified row
Phone
and press
and press
P.19-29
and press
and press
%
%
%
or
and
%
%
By a-ka-sa-
Tip X Switching Between Handset & USIM Card
Press b S Press B ø S Select
Settings
S Press % SSelect
S Press %
. For
S Press % S Select
Both
, entries in both storage media appear.
Phone, USIM Memory
Ph.Book
Select Phone Book
or
Both
Search by Reading
1 Set search method to
By Reading
2 In Standby, press b
3 Enter reading
4 Select a name and press %
Tip X Multiple Numbers
Use e to select other numbers.
5 Press !
S! Address Book (SAB)
Back up Phone Book via server; refresh SAB or
Phone Book to reflect changes; add to/update SAB
online via PC; restore lost/altered Phone Book entries
via SAB. SAB requires a separate contract. For
details, contact SoftBank Customer Centre, General
Information (see P.19-48) or access the SOFTBANK
MOBILE Corp. Website via PC:
http://www.softbank.jp
Page 4
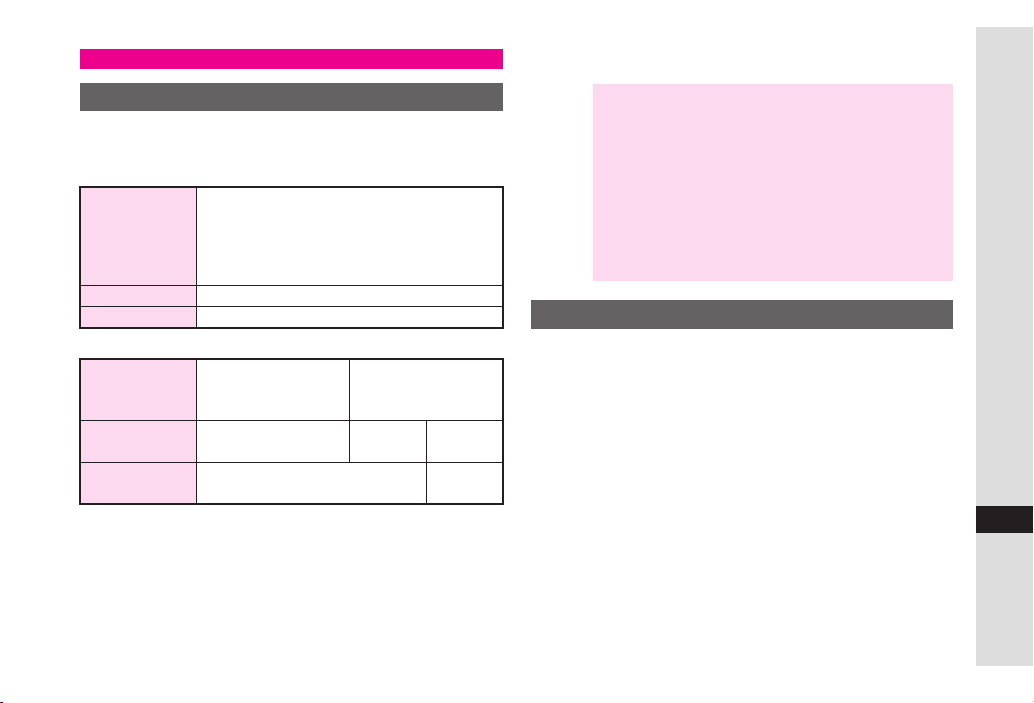
Mobile Camera
Before Using Camera
Select from two different shooting modes. Use Photo
Camera for still images and Video Camera for video.
■
Photo Camera
W 1200 × H 1600 dots
W 960 × H 1280 dots
Image Size
File Format
Save Location
■
Video Camera
Image Size
File Format
Save Location Handset or Memory Card
*MPEG-4 (.3gp) only for W 240 × H 176 dots.
W 176 × H 144 dots
W 128 × H 96 dots
W 480 × H 640 dots
W 240 × H 320 dots
W 120 × H 160 dots
JPEG (.jpg)
Handset or Memory Card
.
H.263 (.3gp)
MPEG-4 or
W 480 × H 640 dots
W 240 × H 320 dots
W 240 × H 176 dots*
MPEG-4
(.3gp)
MPEG-4
(.ASF)
Memory
Card
Camera Shake
Handset movement may blur images; hold handset firmly or
place it on a stable surface and use Self-timer.
Note X Lens Cover
Clean dust/smudges from lens cover (see P.19-13
) with a soft cloth before use.
Mobile Camera
Mobile camera is a precision instrument, however,
some pixels may appear brighter/darker.
Shooting/saving images while handset is hot may
affect the image quality.
Subjecting the lens to direct sunlight will damage
the camera's colour filter.
Capturing Still Images
1
Press % , select
Frame image on Display
2
In Video Camera mode, press A ( # ) to switch to
Photo Camera.
3
Press %
4
Press % to save
Press " to exit
5
p
.
Camera
.
.
and press %
Abridged English Manual
19
19-31
Page 5
Data Folder
Contents
Handset files are organised in folders by file format.
Still Images
Downloaded
Pictograms
Shortcut to
Abridged English Manual
19
S! Applications
Video Images
Downloaded
E-Books, etc.
Downloaded
®
Flash
Other Files (vFiles,
Dictionary Files, etc.)
Files
Data Folder
Pictures
DCIM
My Pictograms
Ring Songs•Tones
S! Appli
Music
Videos
Lifestyle-appli
Books
Custom Screens
Flash
Flash®Ringtones
Other Documents
Large Still Images
on Memory Card
Downloaded
Melodies and other
Sound Files
Downloaded
Chaku-Uta Full
Files
Downloaded
Lifestyle-Appli
Shortcut to
Custom Screens
®
Downloaded
Flash
®
Ringtones
Opening Data Folder
Press %, select
1
2
Select a folder and press
.
To switch between handset and Memory Card, press
B ø
Memory Card
3
Select a file and press
Press $ to return to file list
4
Data Folder
, select
, then press %.
and press
%
Change to Phone
%
%
or
Change to
S! Mail Attachments
Example: Attaching an image from Pictures folder
to S! Mail
1
Press %, select
Select
2
3
4 Select
5 Select
Pictures
Select a file and press
Send
and press %
As Message
Data Folder
and press
B ø
and press %
and press
%
%
®
6 Complete other fields and send S! Mail
(perform from Step 3 on P.19-36)
19-32
Page 6

Network Information
Retrieving Network Information
To use Messaging, Internet and other Networkrelated services, first retrieve Network information.
Handset initiates information retrieval when B, A or
%
is pressed for the first time. If handset is in
Japanese mode, select
change to English mode (see P.19-21 ).
1
Press B , A or %
Choose
2
Handset connects to the Network and retrieves
required information.
Yes
and press %
いいえ
and press % , then
Yahoo! Keitai
Access Yahoo! Keitai Mobile Internet and PC sites.
Yahoo! Keitai
Access compatible Mobile Internet sites via Yahoo!
Keitai Main Menu; download news/info as well as
files for use on handset.
PC Sites
Activate PC Site Browser to view websites designed
for PCs; only document files are downloadable and
browsing PC sites may incur higher charges.
Opening Yahoo! Keitai Menu
1
Press % , select
2
Select
Yahoo! Keitai
Select
3
4
5
6
Note X Yahoo! Keitai Main Menu is subject to change.
English
Highlight a menu item and press %
Repeat Step 4 to open additional links
To exit, press " , choose
Yahoo! Keitai
and press %
and press %
Yes
and press %
and press %
Abridged English Manual
19
19-33
Page 7
Yahoo! Keitai Options Menu
Open a page and press B
functions.
Item
Bookmark
Saved Pages
Copy Text
Reload
Enter URL
Save Items
Abridged English Manual
Convenient
function
Change to
PC Browser
History
Yahoo! Keitai
Setting
Open by
19
New Tab/
Tab Menu
Help
Exit
Save new site links, access saved links
(requires Network connection) or edit list
Save page content; handset opens saved
pages without connecting to the Network
Copy text
Update page content
Enter URL directly to access sites
Save images, sounds, etc. to Data Folder
Send URL via SMS/S! Mail, open
properties, search within site, etc.
Activate PC Site Browser
Previously visited site links
Return to Yahoo! Keitai Main Menu
Set font size, scroll unit, download
parameters; select cookie acceptance;
customise pointer settings, etc.
Open link in new tab; switch/close tabs or
open another via Tab Menu
View a summary of key assignments
Exit Yahoo! Keitai
ø
to use the following
Description
Messaging
Use SoftBank text communication services in Japan
and overseas. Exchange text/multimedia messages
with compatible handsets, PCs and other devices.
SMS
Use this basic messaging service to exchange short
text messages of up to 160 alphanumerics with
SoftBank handsets. This service is the ideal solution
for fast and short text messaging!
S! Mail
Exchange text messages of up to 30,000 characters
with e-mail compatible SoftBank handsets, other
mobiles and PCs, etc. Attach image/sound files.
Note XHandset is incompatible with Greeting, Coordinator,
Relay Mail, Hotline and Polling service messages.
Tip
X
.
An additional contract is required to use S! Mail
and receive e-mail from PCs, etc.
.
The Centre resends undeliverable messages at
regular intervals until delivered. Messages not
received by specified expiry are deleted.
19-34
Page 8

Opening Messages
Press %, select
1
2
Select
Received Msg., Drafts, Templates, Sent
Messages
Select a message and press
3
Messaging
or
Unsent Messages
and press
and press
%
%
Editing Messages
Select a draft, sent or unsent message and press
1
B ø
2
Select
Edit & Send
Edit the message
3
or
Edit
and press
%
%
Customising Handset Address
Change alphanumerics before @ of the default
handset mail address. Customising handset mail
address helps reduce spam.
1
Press %, select
2
Select
Settings
3 Select
4 Select
Note X This procedure may change without prior notice.
Address Setting
Handset connects to the Network.
English
Follow onscreen instructions.
For further information, contact SoftBank Customer
Centre, General Information (see P.19-48).
Messaging
and press
and press %
and press %
and press
%
%
Abridged English Manual
19
19-35
Page 9

Messaging Menu
Press %, select
Messaging menu.
Item Description
Received Msg. List of received messages
Create Message Create and send new message
Retrieve New Msg. Receive newly arrived messages
Drafts List of incomplete/unsent messages
Templates
Sent Messages List of sent messages
Unsent Messages Undelivered/cancelled/failed mail
Abridged English Manual
Server Mail Box
Create New SMS Compose SMS messages
Settings
Memory Status
Messaging
Created or downloaded Arrange Mail
messages
Request Centre message list and then
select messages to retrieve
Customise SMS/S! Mail settings, sort
messages into folders or save
frequently used numbers/addresses to
Speed Mail List to send from Standby
Memory usage of Messaging Folders
(except Templates)
and press % to open
19
Sending Text Messages
Press %, select
1
2
Select
Create Message
S! Mail) or
press
%
Select recipient field and press
3
4
Enter a recipient
Phone Book
1
Select
press
2
Select a recipient and press
.
When multiple items are saved,
select one and press
Contact Groups
1
Select
2
Select a Group and press
.
Press
member is saved.
Sent Mail Records
1 Select a recipient and press %
Speed Mail List
1 Select
2 Select a recipient and press %
Messaging
Create New SMS
Phone Book
%
Select Group
$ to return. Omit this step when only one
Speed Mail List
and press
(for
and
and
%
.
and press
%
and press %
%
%
Mail Composition
%
Window
(S! Mail)
%
19-36
Page 10

Direct Entry
1
Select
Enter Number
press
%
.
Enter Address
2
Enter recipient's SoftBank handset number or
mail address and press
5
Enter subject and press % (S! Mail only)
Select X and press % then enter a message
6
.
For SMS, press % or a key then enter a message.
7
Press
%
8
Attach files (S! Mail only)
Use f to select x and press
Image Files
1
Select
Picture
2
Select a folder and press
3 Select a file and press %
Melody Files
1 Select
2 Select a folder and press %
3 Select a file and press %
Video Files
1 Select
2 Select
3 Select a file and press %
Sound
and press %
Video
and press %
Saved Videos
or
Enter Address
is not available for SMS.
%
%
and press
%
%
and press %
9 When finished, press A S to send
and
Incoming Text Messages
Receiving Messages
Delivery Notice appears and Information window
opens (z appears) for new mail. Press % to open
Received Msg. folder.
Opening Received Text Messages
1 Press %, select
2 Select
Received Msg.
3 Select a message and press %
Retrieving Complete S! Mail Messages
Centre sends initial portion of S! Mail message when:
. The message was sent to multiple recipients
. Files are attached to the message
1 Perform Steps 1 - 2 above
2 Select a message with L and press %
3 Press A m
Messaging
and press %
and press %
Abridged English Manual
19
19-37
Page 11

Replying & Forwarding
Replying to Messages
1
Open a received message (see
2
Press B
3
Select
Replying to SoftBank Handset
4
1
2
Abridged English Manual
19
Replying to E-mail
1
Complete and send message (perform from Step
5
5 or 6 on
Forwarding Messages
Open a received message (see
1
Press B ø
2
3 Select
. To forward SMS, then select
press %.
ø
Reply
or
Reply All
To send as SMS, select
with Hist. (SMS)
To send as S! Mail, select
Reply with Hist. (S!)
Select
Reply (S! Mail)
and press
.
Select
(S!)
%
Reply with Hist. (SMS)
to quote the original message text.
P.19-37
)
Forward
and press %
and press
and press
and press
or
4 Enter a recipient (see P.19-36) and press %
5 Press A S
19-38
P.19-37
)
%
Reply (SMS)
%
Reply (S! Mail)
Reply with Hist. (S!)
or
S! Mail
or
Reply
%
Reply with Hist.
P.19-37
)
or
SMS
and
or
S! Appli
Enjoy a variety of compatible S! Applications.
. Download S! Applications via Yahoo! Keitai.
. Enjoy network gaming or access real-time news/info.
. Set an S! Application that activates in Standby.
S! Appli Menu
Press %, select
S! Appli menu.
Item Description
S! Appli Download, start or delete S! Applications
Settings Adjust S! Application settings
Information Open Java™ and JBlend™ licence information
Downloading S! Applications
1 Press %, select
2 Select
3 Select
4 Open a Mobile Internet site offering
S! Applications
5 Select an S! Application and press %
6 Press %
Downloaded S! Application is automatically saved and
a confirmation appears.
7 Choose
S! Appli
S! Appli
Download
and press %
Yes
and press %
and press % to open
S! Appli
and press %
and press %
Page 12

S! FeliCa (Japanese Only)
Basics
S! FeliCa
services available via FeliCa-compatible SoftBank
handsets. Handset supports S! FeliCa. To use
services such as e-money, e-ticketing and reward
point systems, simply hold handset over a compatible
reader/writer at a shop or restaurant, etc.
■
■
■
■
encompasses a range of IC Card-based
FeliCa
A contactless IC card technology enabling wireless data
transmissions with compatible reader/writer terminals
IC Card
The FeliCa chip embedded in FeliCa-compatible handsets
Holds information required to use S! FeliCa
Lifestyle-Appli
S! Applications required to use S! FeliCa
.
,
.
.
m
.
.
Edy e-money Lifestyle-Appli is preloaded on handset.
Edy is a prepaid e-money service run by bitWallet Inc.
.
Service Usage Outline
Download Lifestyle-Appli
Download Lifestyle-Appli via Mobile Internet site.
Lifestyle-Appli is saved to Lifestyle-appli folder.
V
Complete Registration/Set Up
Activate Lifestyle-Appli, complete registration/customise
settings.
Charge accounts, check balance or payment records, etc.
V
Use Service
To use S! FeliCa at shops, restaurants, and locations, place
logo over reader/writer.
Use e-money/e-tickets to shop/travel; earn reward points.
Note X . Lifestyle-Appli registration and usage vary;
contact the service provider for details.
SoftBank is not liable for damages resulting from
accidental loss/alteration of IC Card data/settings.
Keep service passwords/customer service
contact information, etc. in a separate place.
Abridged English Manual
Note X IC Card data content varies by service and usage
history. Procedures to delete IC Card data vary by
Lifestyle-Appli; contact service providers for details.
19
19-39
Page 13

Starting Lifestyle-Appli
To use S! FeliCa, activate a service Lifestyle-Appli
and complete service registration, setup, charge,
balance check, etc.
Main Menu
Select
1
■
2
Select an application and press %
Lifestyle-Appli starts.
■
Note X Lifestyle-Appli cannot be started during calls or
Abridged English Manual
Tip X Lifestyle-Appli settings and usage patterns resemble
Lifestyle-appli
X
Lifestyle-appli
S
To download a Lifestyle-Appli, select
Press %
To end the Lifestyle-Appli, press " .
.
when another S! Application is active.
those of other S! Applications (see P.19-38 ).
However, Lifestyle-Appli cannot be set as
Screensaver.
and press
.
.
%
19
Download
.
Using S! FeliCa
Follow these steps to conduct a transaction.
Example: making an electronic payment:
Complete registration, setup and charge in advance.
.
Complete transactions without activating a Lifestyle-Appli.
1
Place m logo over reader/writer
.
Place this part
over reader/writer
Confirm scan results on reader/writer display.
If recognition is slow, move handset around slightly.
Note X . Align handset parallel to reader/writer.
Foreign articles can block/hamper recognition.
Tip X . When placed over sensor, handset may display a
message, vibrate or activate mail, Internet or an
S! Application for some services.
Reader/writer will scan FeliCa IC Card even
during calls or Internet transmissions. (It may take
some time.)
19-40
Page 14

When Handset Power is Off
Transactions possible; Lifestyle-Appli does not start
.
■
automatically.
After installing/reinstalling battery, always turn on
handset power to use S! FeliCa.
When Battery is Low
■
S
S! FeliCa is not available. Charge it beforehand.
IC Card Lock
Use this function to restrict access to/prevent
unauthorised use of S! FeliCa on handset.
IC Card Lock is
Main Menu
Choose On and press
1
To cancel, choose
■
S
2
Enter Handset Code and press %
To activate IC Card Lock, choose
3
For more information on S! FeliCa settings, please
Tip X
see the full English manual.
Off
Lifestyle-appli
X
by default.
S
Off
%
IC Card Settings
%
Press %
.
.
.
Yes
and press
IC Card Lock
S! Cast (Japanese Only)
Subscribe to Japanese mobile periodicals that
download to handset automatically overnight.
A separate subscription and registration are required.
Only available within Japan on compatible 3G handsets.
Retrieve Network information (see P.19-33 ) beforehand.
Service Registration & Content Subscription
Press % , select
1
2
Select
CAST
Select
3
Note X Registration and subscription require Mobile
Join/Cancel Service
connects to the Network and service
Handset
registration page opens. Follow onscreen instructions.
Internet use (connection fees apply). Confirm signal
strength beforehand.
Newly Arrived Information
1
Delivery Notice appears and Information window
opens ( E appears) for new information
2
Select
CAST
Follow onscreen instructions.
3
Press " to exit
Entertainment
and press %
and press %
and press %
and press %
Abridged English Manual
19
19-41
Page 15

S! Town (Japanese Only)
S! Town is an online communication application.
Select an avatar to enter this 3D virtual town, where
you can participate in events and meet other users.
.
Usage requires the pre-installed S! Town S! Application.
.
S! Town S! Application cannot be deleted.
.
Network connection is required; may incur high charges.
Using S! Town
When using S! Town for the first time, agree to the
terms of service then complete free user registration.
1
Abridged English Manual
Press %, select
Select
2
S! Town
S! Town starts.
.
For operations, read the instructions on the
application.
Communication
and press
%
and press
S! Loop (Japanese Only)
S! Loop is a communication service.
1
19
Press %, select
2
Select
S! Loop
Handset connects to the Network and S! Loop Main
Menu opens.
.
For operations, read the S! Loop instructions.
Communication
and press
%
and press
%
%
Near Chat (Japanese Only)
Exchange real-time text messages wirelessly with
compatible Bluetooth® devices within ten metres.
.
Because this application employs Bluetooth® wireless
technology transmission/connection fees do not apply.
.
Usage requires the pre-installed Near Chat S! Application.
Note X.
Near Chat range may vary by ambient conditions.
. Near Chat S! Application cannot be deleted.
19-42
Page 16

Software Update
Check for firmware updates and download as required.
Precautions
Before updating software, turn power off to end all
active functions/applications, then restart handset.
.
Choose to begin update or schedule update.
.
Handset is disabled until update is complete. Update
may take up to approximately 30 minutes.
.
Connection fees do not apply to updates (including
checking for updates, downloading and rewriting).
.
Keep handset in a place where signal is strong and stable.
.
Charge battery (l appears) beforehand; a low battery
may cause update to fail.
.
Do not remove battery during update; update may fail.
.
To reduce risk of failure, disconnect USB Cable from
handset beforehand.
Updating Software
Read previous Software Update Precautions (left)
beforehand.
Main Menu
Select
1
press
Confirmation appears.
.
Follow onscreen instructions.
(
A
.
Update may take up to
approximately 30 minutes.
.
Confirmation appears and
Information window opens
(
B
■
%
While confirmation appears, press
completion and cancel Information
window.
Settings
Software Update
Phone Settings (
S
and
%
appears during update.)
appears) for successful update.
X
to acknowledge update
f
)
Software Update
S
Confirmation
Update Complete
Abridged English Manual
19
19-43
Page 17

Note XUpdate failure may disable
Abridged English Manual
handset. Contact SoftBank
Customer Centre, Customer
Assistance (see
While Information window appears,
■
S
,
select
Update Result
Press % again to exit.
S
■
In Standby, press % S Select
Settings
select
Press % S Use f to
Phone Settings
Software Update
Select
Update Result
Press % again to exit.
19
P.19-48
).
Update Result
Press %
S
S
Select
Press % S
Press %
S
Update Failure
,
Update Result
Scheduled Update
Confirmation appears at scheduled
.
.
■
update time. Press % or wait about
ten seconds for update to start.
Update will not start while handset is
in use. When the current operation
ends, confirmation appears. After
ten minutes, scheduled update is
automatically cancelled.
Update automatically cancels
Keypad Lock.
Note X . Handset Phone Book entries, media files, and
.
Confirmation
other content are not affected by firmware
updates, but users should always back-up
important information (note that some files cannot
be copied). SoftBank is not liable for damages
from lost information, etc.
If handset does not return to Standby after update,
turn power off, reinsert battery, then restart
handset.
19-44
Page 18

Function List
Main Menu Sub Menu
Communication
Yahoo! Keitai
Media Player
Messaging
Camera
Data Folder
S! Town
S! Loop
Near chat
Yahoo! Keitai
Bookmarks
Saved Pages
Enter URL
History
Live Monitor
PC Site Browser
Common Settings
Music
Videos
Streaming
Received Msg.
Create Message
Retrieve New Msg.
Drafts
Templates
Sent Messages
Unsent Messages
Server Mail Box
Create New SMS
Settings
Memory Status
Pictures
DCIM
My Pictograms
Ring Songs
S! Appli
Music
Videos
Lifestyle-appli
Books
Custom Screens
®
Flash
®
Flash
Other Documents
Memory Status
−
Tones
Ringtones
Main Menu Sub Menu
Tools 1
Tools 2
Tools
Tools 3
Entertainment
S! Appli
Lifestyle-appli
•
Phone
Calendar
Alarms
Calculator
Tasks
World Clock
Voice Recorder
Document Viewer
Stopwatch
Countdown Timer
Expenses Memo
Text Templates
Barcode
Phone Help
ComicSurfing
E-Book
CAST
S! Appli
Settings
Information
Lifestyle-appli
IC Card Settings
Phone Book List
Add New Entry
Information
Call Log
Play Messages
Call Voicemail
Category Control
My Details
Speed Dial List
Contact Groups
S! Address Book
Ph.Book Settings
Manage Entries
Service Dial No.
Main Menu Sub Menu
Phone
Settings
Connectivity
Settings
Call/Video Call
Network
Settings
Mode Settings
Display
Custom Screens
Sounds & Alerts
Date & Time
言語選択
(Language)
User Dictionary
Ringer Output
Earpiece Volume
Simple Menu
Locks
Software Update
Master Reset
Bluetooth
Infrared/IrSS
Mass Storage
Memory Card
Call Time & Cost
Answer Phone
Voicemail/Divert
Video Call
Show My Number
Missed Calls
Int'l Calling
Disp. Time/Call
Call Barring
Minute Minder
Auto Answer
Call Waiting
Select Network
Select Service
Offline Mode
Retrieve NW Info
Location Info
Network Info
~
Abridged English Manual
19
19-45
Page 19

Specifications
810SH
.
■
Weight
Approximately 117 g
(with battery)
811SH
■
Weight
.
Approximately 117 g
(with battery)
Continuous
Talk Time
Continuous
Standby Time
(handset closed)
Video Call
Continuous
Talk Time
Abridged English Manual
Charging Time
(power off)
Dimensions
(W × H × D)
Maximum Output
Approximately
Approximately
Approximately
Approximately
Approximately
(with Internal Camera in use)
Approximately
(with External Camera in use)
AC Charger: Approximately
In-Car Charger: Approximately
Approximately 49.8 × 100 × 21.3 mm
(handset closed, 21.3 mm at thickest point)
0.25 W (3G)
2.0 W (GSM)
●●
●●
●●
●●
●●
●●
. Values above were calculated with battery installed.
19
Continuous Talk Time is an average measured with a
new, fully charged battery, with stable signals.
Continuous Talk Time may be less than half this value if
signal is weak.
19-46
minutes (3G)
minutes (GSM)
hours (3G)
hours (GSM)
minutes
minutes
●●
●●
minutes
minutes
●●
minutes (3G)
minutes (GSM)
●●
●●
hours (3G)
hours (GSM)
●●
minutes
●●
minutes
●●
Continuous
Talk Time
Continuous
Standby Time
(handset closed)
Video Call
Continuous
Talk Time
Charging Time
(power off)
Dimensions
(W × H × D)
Maximum Output
Approximately
Approximately
Approximately
Approximately
Approximately
(with Internal Camera in use)
Approximately
(with External Camera in use)
AC Charger: Approximately
In-Car Charger: Approximately
Approximately 49.8 × 100 × 21.3 mm
(handset closed, 21.3 mm at thickest point)
0.25 W (3G)
2.0 W (GSM)
. Values above were calculated with battery installed.
Continuous Standby Time is an average measured with a
new, fully charged battery, with handset closed without
calls or operations, in Standby with stable signals.
Standby Time may be less than half this value if handset
is out-of-range/signal is weak. Standby Time may vary
by environment (battery status, ambient temperature,
etc.).
●●
minutes
minutes
●●
Page 20

.
Talk Time/Standby Time decrease with frequent use of
Display/Keypad backlights.
.
Talk Time/Standby Time may decrease when an
S! Application is active.
.
Talk Time/Standby Time decrease with handset use in
poor signal conditions.
.
Display employs precision technology, however, some
pixels may appear brighter/darker.
AC Charger
■
Power Source AC 100V-240V, 50/60 Hz
Power
Consumption
Output
Voltage/Current
Charging
Temperature
Dimensions
(W × H × D)
Cord Length Approximately 1.5 m
12VA
DC 5.2V/650 mA
to 35
℃
℃
5
Approximately 55 × 45 × 22 mm
(without protruding parts, cord)
Battery
■
Voltage 3.7V
Battery Type Lithium-ion
Capacity 810 mAh
Dimensions
(W × H × D)
■
Video Cable
Weight
Cord Length
Approximately 37.8 × 5.8 × 36.9 mm
(without protruding parts)
Approximately
Approximately
●●
●●
g
cm
Abridged English Manual
19
19-47
Page 21

Customer Service
If you have questions about SoftBank handsets or services, please call General Information. For repairs, please
call Customer Assistance.
SoftBank Customer Centres
From a SoftBank handset, dial toll free at 157
for General Information or 113 for Customer Assistance
Call these numbers toll free from landlines.
Subscription Area Service Centre Phone Number
Abridged English Manual
19
19-48
Hokkaido, Aomori, Akita, Iwate, Yamagata, Miyagi, Fukushima, Niigata,
Tokyo, Kanagawa, Chiba, Saitama, Ibaraki, Tochigi, Gunma, Yamanashi,
Nagano, Toyama, Ishikawa, Fukui
Aichi, Gifu, Mie, Shizuoka
Osaka, Hyogo, Kyoto, Nara, Shiga, Wakayama
Hiroshima, Okayama, Yamaguchi, Tottori, Shimane, Tokushima, Kagawa,
Ehime, Kochi, Fukuoka, Saga, Nagasaki, Oita, Kumamoto, Miyazaki,
Kagoshima, Okinawa
SoftBank International Call Centre
From outside Japan, dial +81-3-5351-3491
(International charges will apply to this call.)
General Information
Customer Assistance ƒ 0088-240-113
General Information
Customer Assistance ƒ 0088-241-113
General Information
Customer Assistance ƒ 0088-242-113
General Information
Customer Assistance ƒ 0088-250-113
ƒ 0088-240-157
ƒ 0088-241-157
ƒ 0088-242-157
ƒ 0088-250-157
 Loading...