

Page 1
User manual
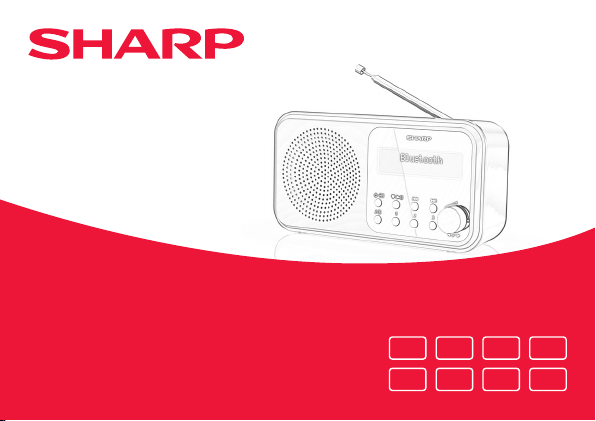
DR-P420 | Tokyo Portable Digital Radio
Product images are for illustration purposes only. Actual product may vary.
ENITDENLES FR
PL RU
Page 2
2
1 2 3 4
Page 3

10 125 11
6 7 8 9
Page 4

4
Important safety
instructions
Please follow all safety instructions
and heed all warnings. Keep this
manual for future reference.
This symbol instructs the user to consult the
user manual for further safety, operation, and
maintenance related information.
DC voltage
Precautions
Child safety
• Always follow basic safety precautions when using
this product, especially when children are present.
Children should be supervised to ensure that they
do not play with the product.
Location
• The product should be installed in a stable location
and ensure the product and its parts are not
overhanging.
Ventilation
• Slots and openings in the cabinet are provided
for ventilation to ensure reliable operation of the
product and to protect it from overheating; these
openings must not be blocked or covered. Ensure
a minimum distance of 5 cm around the product
for sucient ventilation. Never let anyone push
anything into holes, slots or any other openings
in the product’s casing as this could result in an
electric shock.
Heat and operating temperature
• Do not install near any heat sources such as
radiators, heat registers, stoves, or other apparatus
(including ampliers) that produce heat. Avoid
exposure to direct sunlight.
Naked ames
• To prevent the risk of re, keep candles or open
ames away from this product.
Page 5

Water, moisture, and liquid entry
• To prevent the risk of re or electric shock, do not
expose this product to rain, water, or moisture. Do
not place objects lled with liquids on or near this
product.
Storms and lightning
• Storms are dangerous for all electric products. If
the mains or aerial wiring is struck by lightning the
product might get damaged, even if it is turned o.
You should disconnect all cables and connectors
from the product before a storm.
USB cable
• Do not damage the USB charging cable, stretch,
bend or place heavy objects on it.
Damage
• Please inspect the unit for damage after unpacking.
If it is damaged in any way do not operate the unit
and consult your dealer.
Maintenance
• Unplug the power cable from the power source
before cleaning the product. Use a soft and clean
EN
cloth to clean the outside of the unit. Never clean it
with chemicals or detergent.
Service and repair
• This product does not contain any parts that are
serviceable by the user. Exposing the internal parts
inside the device may endanger your life. In case
of a fault, contact the manufacturer or authorised
service department. The manufacturers guarantee
does not extend to faults caused by repairs carried
out by unauthorised third parties.
Batteries
Installation
• Do not use any batteries other than those specied.
Observe the correct polarity when inserting the
batteries. Never use dierent types of batteries
together or mix new and old ones.
Use and maintenance
• Do not expose batteries to high temperatures, e.g.
near re or in direct sunshine. When the product is
not to be used for a long time (more than a month),
Page 6
6
remove the batteries from the product to prevent
them from leaking. If the batteries leak, wipe away
the leakage inside the battery compartment and
replace the batteries with new ones.
Children safety
• Always ensure battery compartment is closed and
secured.
• Batteries are easily swallowed by young children
and can cause severe internal burns and lead to
death. Keep batteries away from children. Seek
immediate medical advice if you believe a battery
has been swallowed.
Environmental condition
• Keep batteries away from low air pressure or high
temperatures as this may result in an explosion or
the leakage of a ammable liquid or gas.
Disposal
• Please dispose of batteries correctly by following
the guidance in this manual (see section “Disposal
of this equipment and batteries”). Do not throw
them into re, do not disassemble them and do not
try to recharge non-rechargeable batteries. They
could leak or explode.
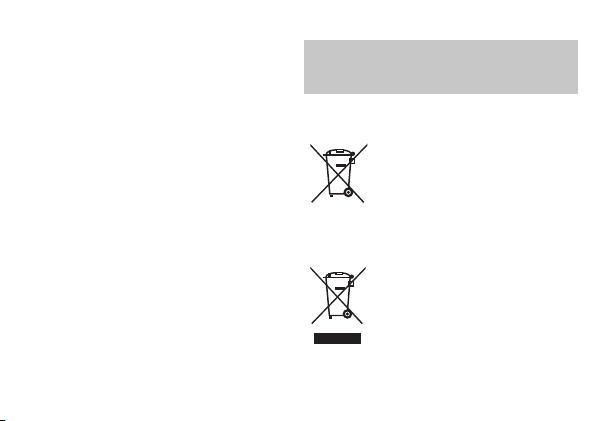
Disposal of this equipment
and batteries
Information for users on collection and disposal of old
equipment and used batteries.
This symbol means that the product
contains batteries covered by European
Directive 2013/56/EU which cannot be
waste. Cd, Hg and Pb underneath the wheelie
bin symbol shows whether the battery contains,
cadmium (Cd), mercury (Hg) or lead (Pb).
disposed of with normal household
This symbol on a product means that the
product is covered by European Directive
2012/19/EU and must not be disposed of
or dumped with your other household
waste.
Page 7

This symbol means that the product is
designed and manufactured so that it
• These symbols on the products, packaging, and/
can be recycled and reused.
or accompanying documents mean that used
electrical and electronic products and batteries
should not be mixed with general household
waste. Household users should contact either the
retailer where they purchased this product, or their
local government oce, for details of where and
how they can take these items for environmentally
safe recycling.
CE and UKCA statement:
• Hereby, Sharp Consumer Electronics Poland sp. z
o.o. declares that this audio device is in compliance
with the essential requirements and other relevant
provisions of RED Directive 2014/53/EU and UK
Radio Equipment Regulations 2017.
EN
• The full CE text and UKCA declaration of conformity
are available at sharpconsumer.eu and then
entering download section of your model and
choosing “CE Statements”.
Page 8
8
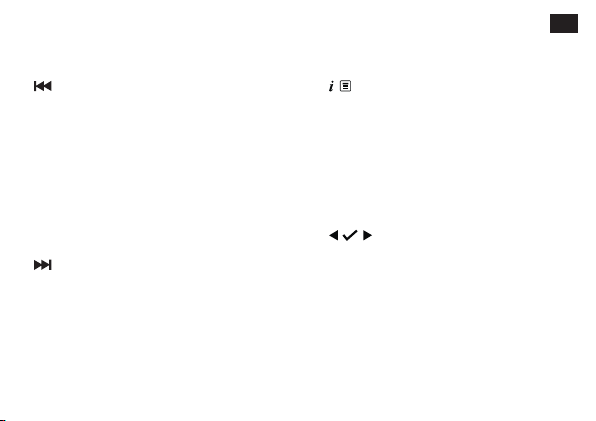
Controls
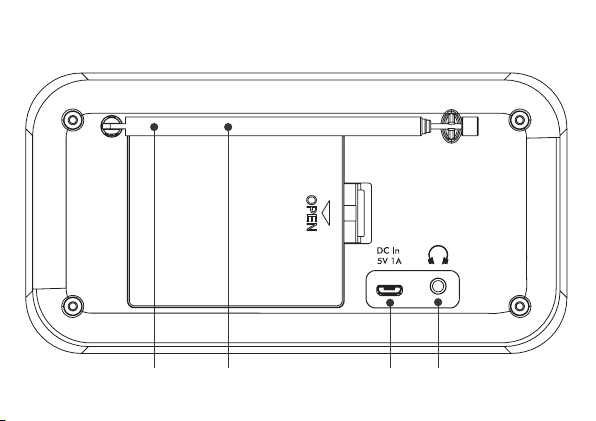
1. Telescopic aerial
2. Battery compar tment
3. Micro USB port
4. Headphone jack
5. Backlit display
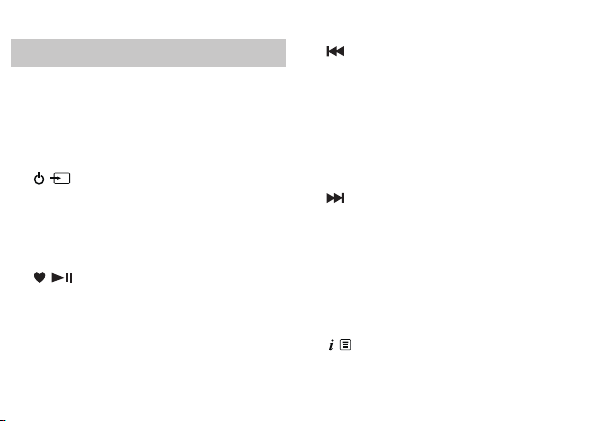
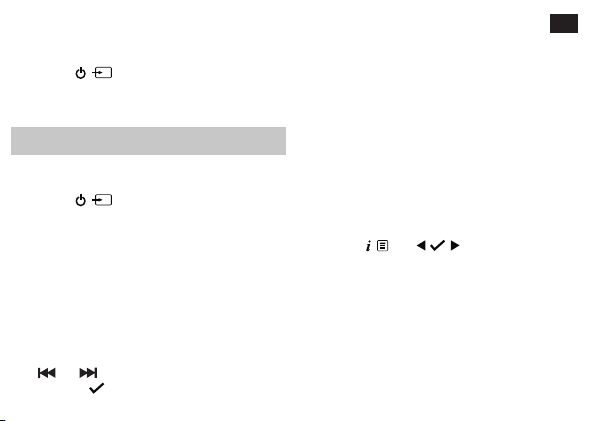
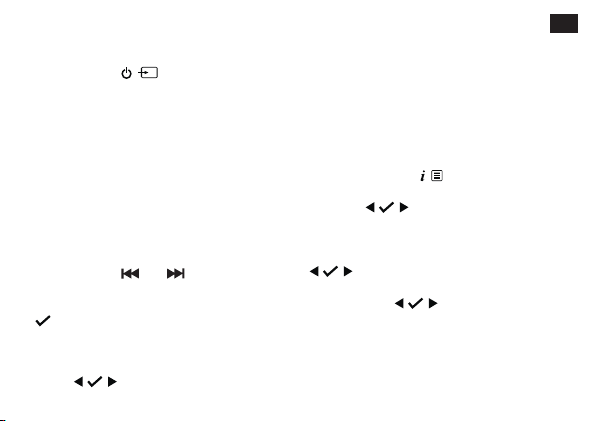
Power/Mode
6.
• When switched o, short press: power on
• When switched on, short press: change mode
• When powered via USB, long press: standby
• When powered via battery, long press: power
o
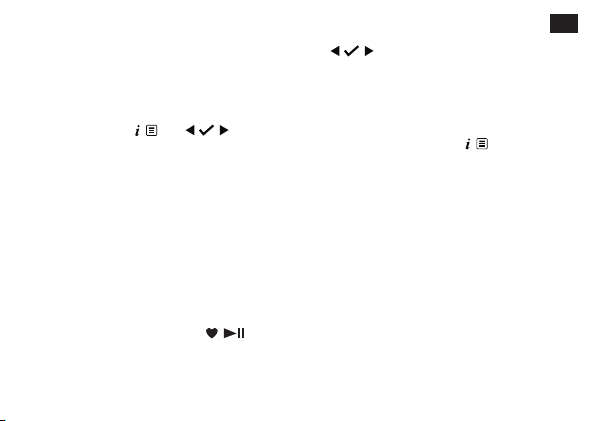
7.
Pre-set/Play/Pause (20 DAB/20 FM)
• Short press: Preset recall
• Long press: Preset store
• In Bluetooth mode:
- Short press to Play/Pause
- Long press to disconnect current device and
scan for new devices
8.
• In DAB mode:
- Short press to move up the DAB Station list
• In FM mode:
- Short press: Move down the frequency band
by 0.05MHz.
- Long press: Scan down the frequency band.
• In Bluetooth mode: Previous track
• In Menu: Move through the menu options
9.
• In DAB mode:
- Short press to move down the DAB Station list
• In FM mode:
- Short press: Move up the frequency band by
0.05MHz.
- Long press: Scan up the frequency band,
• In Bluetooth mode: Next track
• In the Menu: Move through the menu options
10.
Info/Menu
• Short press: Station information
• Long press: Enter the menu options
• When in standby mode: short press to enter the
Page 9

Alarm 1 and 2 On/O settings
11. Memory presets 1, 2 and 3
• Short press: Recall preset 1 (2 or 3)
• Long press: Store preset 1 (2 or 3)
12.
Volume control:
• Rotate: adjust the volume
• Rotate in Menu or Presets: Scroll through the
available menu options or preset locations
• Short press: Select a displayed radio station/
frequency, menu or preset option
• When in standby mode, short press: activates a
10-minute snooze.
Box contents
1 x DR-P420 Tokyo Portable Digital Radio
1 x USB to Micro USB power cable
User documentation
Using your portable DAB+/
FM radio
Telescopic aerial
Fully extend the telescopic aerial (preferably
vertically) before you attempt to tune to a DAB / FM
station. This will ensure that the maximum signal
strength is available when the radio begins to scan.
Extending the aerial also ensures the best possible
sound quality.
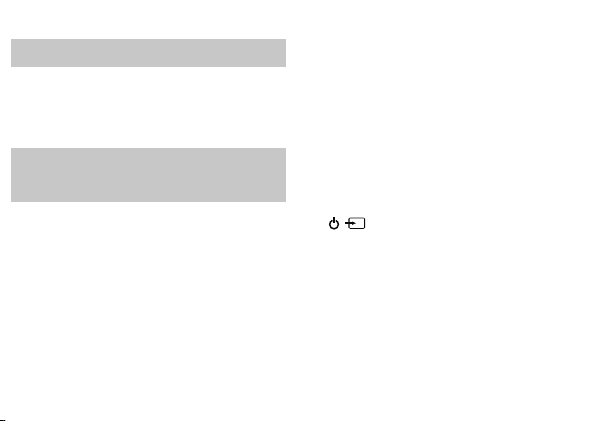
Connection
Connect the USB cable supplied into the Micro
USB port on the back of the radio. Plug the USB-A
(standard) end of the cable into a USB device or
adapter to power the radio. The radio will power on
and display <SHARP sharpconsumer.eu>. It will
then go into standby mode.
Inserting batteries (optional)
Before installing the batteries (not included), please
EN
Page 10

10
ensure the radio is switched o using and
has been unplugged from the USB cable. At the
back of the radio, press in the tab on the battery
compartment cover to remove it.
Insert 4 x 1.5V AA-size (also known as LR-6) batteries,
making sure to note the ‘+’ and ‘-‘ markings and
position the batteries correctly. Replace the battery
cover, making sure that it ‘clicks’ securely shut.
Initial set-up
Short press to switch on the radio. It will begin
an automatic scan for DAB stations. A progress bar
will show the progress of the scan and the number of
stations found. When the scan is complete, your radio
will select the rst available station and begin to play.
By default, stations are listed numerically and then
alphabetically.
Note: The DAB radio station list is stored in the
memory; the next time the radio is switched on, the
station search does not take place.
Short press
stations. To select the station displayed, short press
or to scroll through the available
. There will be a short delay whilst your radio tunes
to your selected station.
Adjusting the volume
Turn clockwise to increase the volume, and
anti-clockwise to decrease the volume.
Time and date
Time and date will be synchronised automatically to
that broadcast by the DAB service in 24-hour format.
To set the time and date manually, turn on the radio.
Long press
Use
Time/Date>. <Set time> is displayed and the
hour digits will ash; use
minutes. <Set date> is displayed and the day will
ash; use
Saved> is shown once the year is conrmed and you
will return to the <Set Time/Date> menu.
Use
auto update settings. Short press to exit the menu.
to enter the menu options.
to select <System> / <Time> / <Set
to set hours and
to set day, month and year. <Time
to change the clock/date format and
Page 11
Change the mode
Short press to change between DAB, FM, and
Bluetooth modes. The display screen will conrm
the mode.
DAB radio mode
Select DAB radio mode
Short press until the screen displays <DAB+>.
The rst time you use the radio or if the station list
is empty, your radio will automatically begin to scan
for DAB radio stations. A progress bar will show the
progress of the scan and the number of stations
found during the scan will also be displayed. If you
were listening to a DAB station when you switched
the radio o, this station will automatically be
selected when you switch the radio back on.
Change DAB stations
Use and to scroll through the available
stations. Press
to select when the station you want
EN
to listen to is displayed. There will be a short delay
whilst your radio tunes to your selected station.
Scanning for DAB stations
With DAB radio, additional stations and services
regularly become available. Carry out a manual scan
periodically to make sure that you have the most
up-to-date station listing stored within the memory
of your radio. If you have moved your radio to a new
location, for e.g., if you go abroad on holiday, then it’s
also a good idea to carry out a manual scan.
In DAB mode:
Long press
select <Full Scan>. The display will change to
<Scanning…>. A progress bar will show the progress
of the scan and the number of stations found.
. Use to scroll and
Prune DAB stations
You can remove the DAB stations in the station list
that cannot be received in your area. These are listed
with a <?> prex.
Page 12

12
In DAB mode:
Long press
<Prune>. <Prune? <No> Yes> is displayed. Use
<?> prex will now no longer be displayed.
. Use to scroll and select
to scroll and select <Yes >. Stations with a
Storing a DAB station preset
Your radio can store up to 20 DAB radio stations as a
preset for instant access to your favourite stations.
Note: Storing DAB radio station presets do not
overwrite FM station presets.
Tune the radio to the DAB radio station that you wish
to preset. Long press
<1:(Empty)>> is displayed. Use
preset location that you would like to store the radio
station to (1-20). Press
conrm <Preset X stored>, where ‘X’ is the number
of the preset (1-20)
Note: If there is already an existing DAB station stored
under a preset, it will be overwritten when you store
the new station.
until <Preset Store
to move to the
to select. The display will
Tune to a DAB preset station
In DAB mode:
To quickly access the radio stations stored under
preset locations 1, 2, or 3, short press 1, 2, or 3 as
appropriate, on the front of your radio. Alternatively,
short press
displayed together with the name or frequency of
the station stored there, or <(Empty)> if no previous
station has been stored. Use
select the preset station that you would like to listen
to (1-20).
. <Preset Recall <1:>> is
to move to and
DAB display information
When listening to a DAB station, you can change the
information that will appear on the display. There are
several dierent types of information that are sent by
the broadcaster. Repeatedly short press
through the dierent information options:
• Dynamic label segment (DLS) - This is scrolling text
information as supplied by the broadcaster. This
could include artist names, song titles, contact
details for the radio station, etc.
to cycle
Page 13

• Signal strength - An empty will appear on the
display to indicate the minimum signal strength
for acceptable listening. The row of solid rectangles
indicates the actual signal strength that you are
receiving.
• Program type (PTY) – e.g., ‘Rock’, ‘Pop’, ‘Talk’ or ‘News’
• Multiplex name - Displays the broadcasting area
and collection of radio stations on this frequency
e.g., BBC National DAB, Digital 1 Network
• Channel and frequency – e.g. 12B 225.648 MHz
(Channel=12B, Frequency=225.648 MHz)
• Signal error - This is displayed as a number between
0-99. To satisfactorily listen to a radio station, the
signal error must be below 30. Adjust the aerial or
relocate your radio to improve reception.
• Signal information - The data rate at which the
signal is being transmitted.
• Power indicator – displays <USB Power> when
powered by USB; displays <Battery XX> where XX
is the battery charge available.
• Time
• Date
EN
Dynamic range control (DRC)
DRC data is not transmitted by all broadcasters. DRC
is used for controlling dierence between the loudest
and quietest sounds. e.g., in a noisy environment,
setting the DRC to maximum makes quiet sounds
comparatively louder, and loud sounds quieter.
There are 3 levels of compression:
• DRC o - no compression. This is the default
setting.
• DRC low - medium compression
• DRC high - maximum compression
In DAB mode, long press
and select <DRC> and then select your preference.
Note: The current DRC setting will have an asterisk (*)
in the display.
. Use to scroll
FM radio mode
To change to FM mode, short press until the
radio displays <FM>. If you were listening to an FM
station when you switched the radio o, this station
Page 14

14
will automatically be selected when you power the
radio back on.
Tune to an FM station
Long press or button to scan up or down the
frequency band. The radio will search for and stop at
the next available station.
Short press
0.05MHz steps.
Note: If the reception is poor, adjust the aerial or
move the radio to another location.
or to ne-tune each frequency in
Change the scan setting
In FM mode:
Long press
Press
There are two dierent options to choose from:
• <Strong stations> The scan will only stop when a
strong signal strength is received, resulting in better audio quality. It is possible that the station you
are scanning for may be missed using this option.
, <Scan setting> will be displayed.
.
• <All stations> The scan will stop at every station it
receives, even if the signal strength is poor.
Use
available.
Note: The current scan setting will have an asterisk (*)
in the display.
to choose and select from the options
Storing an FM station preset
Your radio can store up to 20 FM stations in its preset
memories for instant access to your favourite stations.
Note: Storing FM radio station presets do not
overwrite your DAB station presets.
Tune the radio to the FM radio station that you wish
to preset. Long press
<1:(Empty)>> is displayed. Use
to and select the preset location that you would like
to store the radio station to (1-20). The display will
conrm <Preset X stored>, where ‘X’ is the number
of the preset (1-20).
Note: If there is already an existing FM station stored
under a preset, it will be overwritten when you store
until <Preset Store
to move
Page 15
the new station.
Auto memory store (AMS)
Alternatively, you can use the Auto Memory Store
(AMS) feature to store your FM radio station presets.
In FM mode, long press
to and select <AMS>. Your radio will now scan the
FM frequency band and the stations found will be
automatically stored to the preset locations.
Note: You can manually overwrite your AMS stored
presets by following the steps in ‘Storing an FM
station preset’ above.
. Use to scroll
Tune to an FM preset station
In FM mode:
To quickly access the radio stations stored under
preset locations 1, 2 or 3, short press 1, 2 or 3, as
appropriate. Alternatively, short press
<Preset Recall <1:>> is displayed together with the
name or frequency of the station stored there, or
<(Empty)> if no previous station has been stored.
.
EN
Use
that you would like to listen to (1-20).
to move to and select the preset station
FM display information
When listening to an FM station you can change the
information that appears on the second line of the
display. Repeatedly short press
the dierent information options:
• Radiotext (RT) - This is scrolling text information
as supplied by the broadcaster. This could include
artist names, song titles, contact details for the
radio station, etc.
• Program Type (PTY) – e.g., ‘Rock’, ‘Pop‘, ‘Talk’, or
‘News’
• Station name or frequency – e.g., BBC R4, 93.30MHz
• Power indicator – displays <USB Power> when
powered by USB; displays <Battery XX> where XX
is the battery charge available.
• Time
• Date
to cycle through
Page 16

16
Bluetooth mode
Ensure your radio is in Bluetooth mode by
short pressing
<Bluetooth>. Your radio will begin to search for
Bluetooth devices. Ensure the Bluetooth-enabled
device you are connecting to is discoverable.
Note: If necessary, refer to the instructions for your
device to add or set up Bluetooth.
When found, your radio will be displayed as ‘SHARP
DR-P420’ on your device. Select this to begin pairing.
Once done, <BT connected> will be displayed on
your radio.
Paired devices will connect to the radio when they are
within range (within 10 metres in line of sight). Your
device will remain paired with the radio unless you
decide to disconnect it.
To disconnect from Bluetooth, long press
3 seconds to unpair your current device and search
for new devices.
until the radio displays
for
Wirelessly stream music via Bluetooth
In Bluetooth mode, you can wirelessly stream audio
through the product’s speaker. Use the controls on
your paired Bluetooth device as well as those on your
radio. Controls available:
• Play/ Pause: Short press
• Previous track: Short press
• Next track: Short press
Volume can also be adjusted – either using your radio
and/or your connected device.
Note: If the radio is inactive for 20 minutes, or
no audio signal is being received, the radio will
automatically go into standby (or power o if the
radio is running on batteries).
Page 17

Alarm functionality
Note: The alarm function will only function when the
radio is powered through via USB; it won’t function
when powered through batteries (to preserve the
battery life).
Set an alarm
Note: Check that the radio is displaying the correct
time and date before you set an alarm.
EN
Page 18

18
Full Scan
Manual Tune System
DRC Sleep Alarm
DAB+
Prune Alarm Alarm 1 Setup
System Time Alarm 2 Setup
Scan setting Language
FM
AMS Factory reset
System Software Version
BT System
Time
Duration 1, 5, 15, 30, or 60 minutes
Source Buzzer, DAB, or FM
Frequency Daily, once, weekdays or weekends
Volume level 25%-100%
Alarm On or O
Backlight
Alarm 1 or 2 settings
Hour
Min
Page 19

Note: If the time is not set or has failed to update
from the radio signal, <Time is not set> will be
displayed when you try to set the alarm. The radio will
then prompt you to set the time. An alarm can only
be set after the time has been set.
If you try to set alarm when the unit is powered by
batteries, <Alarm inactive> will be displayed. Alarm
functions are only available with mains power (USB).
Stop, snooze, or switching the alarm
o
To stop the alarm, short press ,<Alarm o>
will be displayed. The alarm symbol will remain in the
display and will sound again at the same time the
next day unless it was set for <Once>.
To snooze the alarm, press
displayed, followed by a 10-minute countdown. Once
the countdown ends, the alarm will sound again. You
can terminate snooze by pressing
will be displayed.
To switch o the alarm, follow the steps for ‘Set an
alarm’ and select <O>.
. <Snooze> will be
. <Alarm o>
EN
Sleep timer
You can set your radio to switch to standby mode
automatically using the sleep timer. You can choose
from <Sleep o>, <15>, <30>, <45>, <60> and
<90> minutes. To do this, long press
to scroll and select <System> / <Sleep>.
Use
<Sleep> will be displayed. In the top right of the
radio display, the number of minutes until your radio
will switch to standby mode will be displayed e.g.,
S90.
to scroll and select your preference.
. Use
Display backlight timeout
To adjust the display backlight timeout, long press
. Use to scroll to and select <System>
/ <Backlight> / <Timeout>. Scroll through the
available backlight timeout options. The current
setting will have an asterisk (*) in the display. Press
to select.
Similarly, use
the backlight brightness for the <Dim level> and
<On level>. There are 3 options available: <High>,
to change the settings for
Page 20

20
<Medium>, and <Low>.
Display language
To change the display language, long press
. Use
<Language>. Use
preferred language. There are 7 options available:
English, French, German, Italian, Spanish, Polish, and
Netherlands. An asterisk (*) will be displayed next to
the current language setting.
to scroll and select <System> /
to scroll and select your
Other information
Software version
To check the software version of your radio, long
press
. Use to scroll and select
<System> / <SW Version>. The software version will
be displayed.
Factory reset
You can reset your radio to restore it to the original
factory settings.
Note: If you reset your radio, your stored presets will
be deleted and any connected Bluetooth device will
be unpaired.
Long press
<System> / <Factory reset>. <Factory Reset? <No>
Yes > will be displayed. Use
select <Ye s>. <Restarting…> will be displayed. After
a few seconds, the display will change to <SHARP
sharpconsumer.eu> and will then go to standby
mode.
. Use to scroll and select
to scroll and
Troubleshooting
If there is no sound or power:
• Adjust the volume.
• Check that the USB cable is connected and that the
radio is not in standby mode.
• If the product is powered using batteries, check if
they need to be replaced. Please use good quality
AA batteries.
Page 21

If the radio reception is poor:
• Make sure that you have fully extended the tele-
scopic aerial (preferably vertically).
• Rescan for radio stations, see sections ‘Scanning
for DAB stations’ and/or ‘Tune to an FM station’ as
appropriate.
• Try moving your radio to another location to see if
the reception improves.
• Check that you do not have other electrical
equipment close to your radio. This may cause
interference.
If you are unable to pair with a Bluetooth device:
• Check that you are in Bluetooth mode.
• Ensure that you are within 10 metres of the radio
for Bluetooth functionality.
• Move the radio and Bluetooth device away from
other Bluetooth devices/electrical equipment.
• If possible, turn o other nearby Bluetooth devices
or disable their Bluetooth functionality.
EN
If the function buttons do not respond:
• Check that the USB cable is connected to the back
of your radio. Short press
batteries, they may need to be replaced.
• Factory reset the device.
Note: All your settings, including the radio station list,
connected Bluetooth devices and any presets will be
deleted when a factory reset is carried out.
. If you are using
Page 22

22
Technical specications
Input DC 5V
Batteries 4 x 1.5V AA size (LR-6) (Optional, not supplied)
Audio output 2 Watts RMS
Power Consumption Active: < 2 W Standby: < 2 mW
DAB frequency range Band III, 174 MHz to 240 MHz
FM frequency range 87.5 MHz to 108 MHz
Bluetooth 2.4 GHz ~ 2.480 GHz
Pairing name SHARP DR-P420
Dimensions (W) x (H) x (D) mm 174 x 90 x 53
Weight approx. 0,39 kg
Page 23
Wichtige
Sicherheitsanweisungen
Bitte befolgen Sie alle
Sicherheitshinweise und beachten
Sie alle Warnungen. Bewahren dieses
Handbuch zum Nachschlagen zu
einem späteren Zeitpunkt auf.
Dieses Symbol verweist den Benutzer darauf,
das Benutzerhandbuch für zusätzliche
Informationen bezüglich Sicherheit, Betrieb
und Wartung zu lesen.
Gleichspannung
Vorsichtsmaßnahmen
Kindersicherheit
• Halten Sie sich während der Nutzung dieses
Produkts immer an die allgemeinen Sicherheitshin-
weise, insbesondere, wenn Kinder in der Nähe sind.
Kinder sollten beaufsichtigt werden, um sicherzu-
stellen, dass sie nicht mit dem Produkt spielen.
Standort
• Das Produkt sollte an einem sicheren Standort
aufgestellt werden. Achten Sie darauf: Das Produkt
und seine Teile dürfen nicht überhängen/über-
stehen.
Belüftung
• Die Schlitze und Ö nungen im Gehäuse dienen
der Belüftung, damit ein zuverlässiger Betrieb des
Geräts gewährleistet ist und es vor Überhitzung
geschützt wird. Diese Ö nungen dürfen nicht blo-
ckiert oder abgedeckt werden. Sorgen Sie für einen
Mindestabstand von 5cm rund um das Produkt,
um eine ausreichende Belüftung sicherzustellen.
Lassen Sie niemals zu, dass jemand– und dies gilt
DE
Page 24

24
ganz besonders für Kinder– etwas in die Löcher,
Spalten oder anderen Ö nungen des Produktgehäuses stopft, da dies zu einem Stromschlag führen
kann.
Wärme und Betriebstemperatur
• Stellen Sie das Produkt nicht in der Nähe von Heiz-
quellen, wie etwa Heizungen, Heizregister, Öfen
oder anderen Apparaten (einschließlich Verstärker)
auf, die Hitze produzieren. Vermeiden Sie direkte
Sonneneinstrahlung.
O ene Flammen
• Halten Sie Kerzen oder o ene Flammen von diesem
Produkt fern, um eine Brandgefahr zu vermeiden.
Eindringen von Wasser, Feuchtigkeit und
Flüssigkeiten
• Dieses Produkt darf weder Regen, Wasser noch
Feuchtigkeit ausgesetzt werden, um das Risiko von
Feuer oder Stromschlägen zu vermeiden. Stellen
Sie keine mit Flüssigkeit gefüllten Objekte auf oder
in die Nähe dieses Produkts.
Gewitter und Blitze
• Gewitter sind für alle elektrischen Produkte gefähr-
lich. Wenn das Strom- oder Antennenkabel vom
Blitz getro en wird, kann das Produkt, auch wenn
es ausgeschaltet ist, beschädigt werden. Bei einem
herannahenden Gewitter sollten Sie alle Kabel und
Stecker des Produkts vom ausstecken.
USB-Kabel
• Das USB-Ladekabel darf nicht beschädigt, gedehnt,
geknickt oder mit schweren Gegenständen belastet
werden.
Schäden
• Bitte überprüfen Sie das Gerät nach dem Auspa-
cken auf Schäden. Ist das Produkt in irgendeiner
Weise beschädigt, bedienen Sie das Gerät nicht–
wenden Sie sich an Ihren Händler.
Wartung
• Trennen Sie vor dem Reinigen des Produkts das
Stromkabel von der Stromquelle. Verwenden Sie
einen weichen und sauberen Lappen, um die
Außen ächen des Geräts zu reinigen. Verwenden
Page 25

Sie beim Reinigen niemals Chemikalien oder
Reinigungsmittel.
Service und Reparatur
• Dieses Produkt enthält keine Teile, die vom Benut-
zer gewartet werden können. Teile aus dem Inne-
ren des Geräts freizulegen kann lebensgefährlich
sein. Setzen Sie sich im Fall eines Defekts mit dem
Hersteller oder der autorisierten Kundenabteilung
in Verbindung. Die Garantie der Hersteller gilt nicht
für Defekte, die durch von nicht autorisierte Dritten
durchgeführte Reparaturen entstehen.
Batterien
Aufstellung
• Verwenden Sie immer nur die angegebenen Bat-
terien. Achten Sie beim Einlegen der Batterien auf
die richtige Polarität. Verwenden Sie niemals unter-
schiedliche Arten von Batterien und vermischen Sie
keine neuen mit alten.
DE
Nutzung und Wartung
• Setzen Sie Batterien keinen hohen Temperatu-
ren aus, z.B. in der Nähe von Feuer oder direkte
Sonneneinstrahlung. Wenn das Produkt für längere
Zeit nicht verwendet wird (länger als einen Monat),
sollten Sie die Batterien aus dem Produkt nehmen,
um ein Auslaufen zu verhindern. Wenn die
Batterien auslaufen, wischen Sie die ausgelaufene
Flüssigkeit im Batteriefach weg und ersetzen die
Batterien durch neue.
Kindersicherheit
• Vergewissern Sie sich immer, dass das Batteriefach
geschlossen und gesichert ist.
• Batterien können von kleinen Kindern leicht
verschluckt werden und dabei schwere innere Verbrennungen verursachen und sogar zum Tod führen. Halten Sie Batterien von Kindern fern. Suchen
Sie sofort einen Arzt auf, wenn Sie der Meinung
sind, dass jemand eine Batterie verschluckt hat.
Umweltbedingungen
• Batterien dürfen keinem niedrigen Luftdruck und
keinen hohen Temperaturen ausgesetzt werden.
Page 26
26
Dies kann zu einer Explosion oder dem Austreten
einer brennbaren Flüssigkeit oder eines ent amm-
baren Gases führen.
Entsorgung
• Entsorgen Sie die Batterien bitte ordnungsgemäß
und befolgen Sie dabei die Anweisungen in diesem
Handbuch (lesen Sie dazu den Abschnitt „Entsor-
gung dieses Geräts und von Batterien“). Werfen Sie
Batterien nicht ins Feuer, bauen Sie sie nicht ausein-
ander und versuchen Sie nicht, nicht wiederauf-
ladbare Batterien aufzuladen. Sie könnten undicht
werden oder explodieren.
Entsorgung dieses Geräts
und von Batterien
Informationen für Benutzer hinsichtlich der
Sammlung und Entsorgung von Altgeräten und
gebrauchten Batterien.
Dieses Symbol bedeutet, dass Batterien
in dem Produkt enthalten sind, die unter
die Europäische Richtlinie2013/56/EU
im normalen Hausmüll entsorgt werden. Cd, Hg und
Pb unter der dem Symbol der Mülltonne auf Rollen
zeigt an, ob die Batterie Cadmium (Cd), Quecksilber
(Hg) oder Blei (Pb) enthält.
werden darf.
fallen, und diese Batterien können nicht
Dieses Symbol auf einem Produkt
bedeutet, dass das Produkt unter die
Europäische Richtlinie2012/19/EU fällt
und nicht zusammen mit dem übrigen
Hausmüll entsorgt oder deponiert
Page 27

Dieses Symbol bedeutet, dass
die Herstellung des Produkts so
wiederverwendet werden kann.
• Diese Symbole auf den Produkten, Verpackungen
Informationen gültig für Deutschland
• Altgeräte sind getrennt zu sammeln und zu
konzipiert ist, dass es recycelt und
und/oder Begleitdokumenten bedeuten, dass
gebrauchte elektrische und elektronische Produkte
und Batterien nicht mit dem allgemeinen Hausmüll
vermischt werden dürfen. Haushaltskunden
sollten sich bezüglich Informationen, wie sie diese
Gegenstände einem umweltverträglichen Recy-
cling zuführen können, entweder an den Händler
wenden, bei dem sie dieses Produkt gekauft haben,
oder an ein lokales Regierungsamt.
entsorgen. Besitzer von Altgeräten tragen damit
zur sicheren Entsorgung bei und helfen, mögliche
umwelt- oder gesundheitsschädlichen Folgen zu
vermeiden.
DE
• Entnehmbare Altbatterien und Altakkumulatoren,
die zerstörungsfrei zu entnehmen sind, sind vor
der Entsorgung zu entfernen und getrennt zu
behandeln.
• Informationen über gescha ene Sammel- bzw.
Rückgabemöglichkeiten sowie die Verp ichtungen
des Handels/der Vertreiber gegenüber Endnutzern
zur kostenfreien Rücknahme von Altgeräten nden
Sie auf der lokalen Website des Herstellers des
Produktes (www.sharpconsumer.eu), oder wenden
Sie sich an den Händler, von dem das Produkt
bezogen wurde.
• Achtung: Die Verantwortung für das Löschen
von personenbezogenen Daten, die sich auf
dem zu entsorgenden Gerät be nden, liegt beim
Endnutzer!
• Das Symbol mit der durchgestrichenen Mülltonne
weist darauf hin, dass Produkte, deren Batterien/
Akkumulatoren und/oder Verpackungen getrennt
vom Hausmüll gesammelt und entsorgt werden
müssen. Der schwarze Balken zeigt an, dass das
Page 28

28
Produkt nach dem 13. August 2005 auf den Markt
gebracht wurde.
CE- und UKCA-Erklärung:
• Sharp Consumer Electronics Poland Sp. z o.o. erklärt
hiermit, dass dieses Audiogerät den wesentlichen
Anforderungen und weiteren entsprechenden
Vorschriften der RED-Verordnung 2014/53/EU und
der britischen Funkgeräteverordnung von 2017
entspricht.
• Der vollständige CE-Text und die UKCA-
Konformitätserklärung stehen unter
sharpconsumer.eu zur Verfügung– ö nen Sie
anschließend den Download-Abschnitt Ihres
Modells und wählen Sie „CE-Erklärungen”.
Steuerelemente
1. Teleskopantenne
2. Batteriefach
3. Micro-USB-Anschluss
4. Kopfhöreranschluss
5. Display mit Hintergrundbeleuchtung
Strom/Modus
6.
• Wenn ausgeschaltet, kurz drücken: einschalten
• Wenn eingeschaltet, kurz drücken: Modus
ändern
• Bei Energieversorgung über USB, lange
drücken: Stand-by
• Bei Energieversorgung über Batterie, lange
drücken: abschalten
7.
Favorit/Wiedergabe/Pause (20 DAB/20
FM)
• Kurz drücken: Favorit abrufen
• Lange drücken: Favorit speichern
• Im Bluetooth-Modus:
- Kurz drücken: Wiedergabe/Pause
Page 29
- Lange drücken: Aktuelles Gerät trennen und
nach neuen Geräten suchen
8.
• Im DAB-Modus:
- Kurz drücken: In der DAB-Senderliste nach
oben bewegen
• Im FM-Modus:
- Kurz drücken: Im Frequenzband um 0,05MHz
nach unten bewegen.
- Lange drücken: Im Frequenzband nach unten
suchen.
• Im Bluetooth-Modus: Vorheriger Track
• Im Menü: Durch die Menüoptionen bewegen
9.
• Im DAB-Modus:
- Kurz drücken, um in der DAB-Senderliste nach
unten zu gelangen.
• Im FM-Modus:
- Kurz drücken: Im Frequenzband um 0,05MHz
nach oben bewegen.
- Lange drücken: Im Frequenzband nach oben
suchen.
• Im Bluetooth-Modus: Nächster Track
• Im Menü: Durch die Menüoptionen bewegen
10.
Info/Menü
• Kurz drücken: Senderinformationen
• Lange drücken: Die Menüoptionen aufrufen
• Im Stand-by-Modus: Kurz drücken, um die
An-/Aus-Einstellungen von Alarm1 und 2
aufzurufen
11. Speicher-Favoriten 1, 2 und 3
• Kurz drücken: Favorit 1 (2 oder 3) aufrufen
• Lange drücken: Favorit 1( 2 und 3) speichern
12.
Lautstärkeregelung:
• Drehen: Lautstärke einstellen
• Im Menü oder den Favoriten drehen: Durch
die verfügbaren Menüoptionen oder
voreingestellten Sender scrollen
• Kurz drücken: Einen angezeigten Radiosender/
eine angezeigte Frequenz, ein Menü oder eine
voreingestellte Option wählen
• Kurz im Stand-by-Modus drücken: ein
10-minütiges Schlummern aktivieren.
DE
Page 30
30
Packungsinhalt
1 x Tragbares Digitalradio Tokio DR-P420
1 x Stromkabel USB auf Micro-USB
Benutzerdokumentation
Verwendung Ihres tragbaren
DAB+/FM-Radios
Teleskopantenne
Ziehen Sie die Teleskopantenne vollständig aus
(möglichst senkrecht) und versuchen Sie dann,
einen DAB/FM-Sender einzustellen. Auf diese Weise
gewährleisten Sie eine maximale Signalstärke, wenn
das Funkgerät mit dem Suchlauf beginnt. Auch ein
Verlängern der Antenne bringt die bestmögliche
Tonqualität.
Verbindung
Verbinden Sie das mitgelieferte USB-Kabel mit
dem Micro-USB-Anschluss auf der Rückseite des
Radios. Stecken Sie das USB-A-Ende (Standard)
des Kabels in ein USB-Gerät oder einen Adapter,
um die Stromversorgung des Radios zu
gewährleisten. Das Radio schaltet sich ein und zeigt
<SHARP sharpconsumer.eu> an. Danach schaltet es
in den Stand-by-Modus.
Batterien einlegen (optional)
Bevor Sie die Batterien (nicht im Lieferumfang
enthalten) einlegen, vergewissern Sie sich bitte
mit
, dass das Radio ausgeschaltet ist, und
achten Sie darauf, dass es vom USB-Kabel getrennt
wurde. Um die Batterien herauszunehmen, drücken
Sie auf der Rückseite des Radios auf die Lasche der
Batteriefachabdeckung.
Legen Sie 4 Batterien x 1,5V der Größe AA (auch als
LR-6 bekannt) ein und vergewissern Sie sich, dass die
Markierungen „+“ und „-“ übereinstimmen sind. Legen
Sie dann die Batterien richtig ein. Bringen Sie die
Batterieabdeckung wieder an. Achten Sie darauf, dass
sie mit einem „Klicken“ richtig schließt.
Page 31
Ersteinrichtung
Drücken Sie kurz auf , um das Radio
einzuschalten. Es sucht automatisch nach
DAB-Sendern. Ein Fortschrittsbalken informiert
Sie über den Fortschritt des Suchlaufs und die
Anzahl der gefundenen Sender. Sobald der
Suchlauf abgeschlossen wurde, wählt Ihr Radio
den ersten verfügbaren Sender aus und spielt ihn.
Standardmäßig werden die Sender numerisch und
anschließend alphabetisch aufgelistet.
Hinweis: Die DAB-Radio-Senderliste wird
abgespeichert. Wenn Sie das Radio das nächste Mal
einschalten, erfolgt keine Sendersuche mehr.
Drücken Sie kurz auf
die verfügbaren Stationen zu scrollen. Um den
angezeigten Sender auszuwählen, drücken Sie kurz
auf
. Nach einer kurzen Verzögerung schaltet Ihr
Radio auf Ihren ausgewählten Sender.
oder , um durch
Einstellen der Lautstärke
Drehen Sie gegen den Uhrzeigersinn, um die
Lautstärke zu erhöhen, und gegen den Uhrzeigersinn,
DE
um die Lautstärke zu verringern.
Uhrzeit und Datum
Die Uhrzeit und das Datum werden automatisch mit
der Uhrzeit des DAB-Senders im 24-Stunden-Format
synchronisiert.
Wenn Sie die Uhrzeit und das Datum manuell
einstellen möchten, schalten Sie das Radio ein.
Drücken Sie lange auf
aufzurufen.
Nutzen Sie
<Zeit/Datum einstellen> auszuwählen. Es wird
<Zeit einstellen> angezeigt und die Stundenzi ern
blinken; stellen Sie die Stunden und Minuten mit
ein. Es wird <Datum einstellen> angezeigt
und der Tag blinkt; stellen Die Sie den Tag, den Monat
und das Jahr mit
gespeichert> angezeigt, sobald Sie das Jahr
bestätigt haben, und Sie kehren zurück zum Menü
<Zeit/Datum einstellen>.
Ändern Sie das Format von Uhrzeit/Datum und die
automatischen Aktualisierungseinstellungen mit
, um die Menüoptionen
, um <System> / <Uhrzeit> /
ein. Es wird <Uhrzeit
Page 32

32
. Drücken Sie kurz auf, um das Menü zu
verlassen.
Den Modus ändern
Drücken Sie kurz auf , um zwischen den Modi
DAB, FM und Bluetooth umzuschalten. Der DisplayBildschirm bestätigt den Modus.
DAB-Radio-Modus
DAB-Radio-Modus auswählen
Drücken Sie kurz auf , bis der Bildschirm
<DAB+> anzeigt. Bei der ersten Benutzung des
Radios oder bei einer leeren Senderliste sucht
Ihr Radio automatisch nach DAB-Radiosendern.
Ein Fortschrittsbalken informiert Sie über den
Fortschritt des Suchlaufs und es wird auch die Anzahl
der gefundenen Sender angezeigt, die während
des Suchlaufs gefunden wurden. Wenn Sie beim
Ausschalten des Radios einen DAB-Sender gehört
haben, wird dieser Sender beim erneuten Einschalten
des Radios automatisch ausgewählt.
DAB-Sender ändern
Scrollen Sie mit und durch die verfügbaren
Sender. Drücken Sie
Sender, den Sie hören möchten, angezeigt wird. Nach
einer kurzen Verzögerung schaltet Ihr Radio auf Ihren
ausgewählten Sender.
zur Auswahl, wenn der
Nach DAB-Sendern suchen
Bei einem DAB-Radio werden regelmäßig zusätzliche
Sender und Dienste zur Verfügung gestellt. Sie sollten
regelmäßig einen manuellen Suchlauf durchführen,
damit Sie immer die aktuellste Senderliste im
Speicher Ihres Radios verfügbar haben. Wenn Sie
Ihr Radio an einem neuen Standort aufgestellt
haben, z.B. im Urlaub, sollten Sie auch eine manuelle
Sendersuche durchführen.
Im DAB-Modus:
Drücken Sie lange auf
und wählen Sie <Vollständiger Suchlauf>. Die
Anzeige ändert sich zu <Suchlauf...…>. Ein
Fortschrittsbalken informiert Sie über den Fortschritt
des Suchlaufs und die Anzahl der gefundenen Sender.
. Scrollen Sie mit
Page 33

DAB-Sender löschen
Sie können die DAB-Sender in der Senderliste
löschen, die bei Ihnen nicht empfangen werden
können. Diese werden mit einem Prä x <?>
aufgelistet.
Im DAB-Modus:
Drücken Sie lange auf
und wählen Sie <Inaktive Sender löschen>.
<Löschen? Es wird <Nein> Ja> angezeigt. Scrollen
Sie mit
einem Prä x <?> werden nicht mehr angezeigt.
. Scrollen Sie mit
und wählen Sie <Ja>. Sender mit
Einen DAB-Sender-Favoriten
abspeichern
Ihr Radio kann bis zu 20 DAB-Radiosender als
Favorit speichern– Sie können also sofort auf Ihre
Lieblingssender zugreifen.
Hinweis: Wenn Sie DAB-Radiosender speichern,
werden keine UKW-Sender-Favoriten überschrieben.
Stellen Sie das Radio auf den DAB-Radiosender ein,
den Sie als Favoriten abspeichern möchten. Drücken
DE
Sie lange auf
angezeigt wird. Bewegen Sie sich mit
dem voreingestellten Speicherort, an dem Sie den
Radiosender speichern möchten (1-20). Drücken
Sie zur Auswahl
gesp.>, wobei „X“ die Nummer des Favoriten ist (1-20)
Hinweis: Wenn unter einem Favoriten schon ein
DAB-Sender abgespeichert wurde, wird dieser beim
Speichern des neuen Senders überschrieben.
, bis <speichern <1:(Leer)>>
zu
. Das Display bestätigt <Progr. X
Zu einem DAB-Sender-Favoriten
wechseln
Im DAB-Modus:
Um die als Favoriten abgespeicherten Radiosender
1, 2 oder 3 schnell aufzurufen, drücken Sie vorne
auf Ihrem Radio entsprechend kurz auf 1, 2 oder
3. Alternativ drücken Sie kurz auf
aufrufen <1:>> wird zusammen mit dem Namen
oder der Frequenz des dort abgespeicherten Senders
angezeigt– oder <(Leer)>, wenn zuvor kein Sender
abgespeichert wurde. Nutzen Sie
. <Progr.
, um sich zu
Page 34

34
dem Favoriten-Sender, den Sie gerne hören möchten,
zu bewegen und wählen Sie ihn aus (1-20).
DAB-Display-Informationen
Wenn Sie einen DAB-Sender hören, können Sie
die auf dem Display erscheinenden Informationen
ändern. Die Sender übertragen verschiedene Arten
von Informationen. Drücken Sie wiederholt
durch die verschiedenen Informationsoptionen zu
blättern:
• Dynamic Label Segment (DLS)– dies sind vom
Sender bereitgestellte Lauftextinformationen. Dazu
gehören beispielsweise Künstlername, Liedtitel,
Kontaktdaten des Radiosenders usw.
• Signalstärke– Auf dem Display erscheint ein leeres
Symbol
; dies zeigt die minimale Signalstärke
für einen akzeptablen Hörgenuss an. Die Reihe
der ausgefüllten Rechtecke zeigt die tatsächlich
empfangene Signalstärke an.
• Programmtyp (PTY )– z.B „Rock“, „Pop“, „Talk“ oder
„Nachrichten“
, um
• Multiplex-Name– zeigt das Sendegebiet und die
Sammlung von Radiosendern auf dieser Frequenz;
z.B., BBC National DAB, Digital 1 Network
• Kanal und Frequenz– z.B. 12B 225.648 MHz
(Kanal=12B, Frequenz=225.648MHz)
• Signalfehler– wird als eine Zahl zwischen 0-99
angezeigt. Damit Sie einen Radiosender zufriedenstellend hören können, muss der Signalfehler unter
30 liegen. Richten Sie die Antenne neu aus oder
stellen Sie Ihr Radio an einen anderen Standort, um
den Empfang zu verbessern.
• Signaldaten– die Datenrate, mit der das Signal
übertragen wird.
• Betriebsanzeige– zeigt <USB-Strom> bei einer
Stromversorgung über USB; zeigt <Batterie XX>
bei einer Stromversorgung mit Batterien, wobei XX
die verfügbare Batterieladung ist.
• Uhrzeit
• Datum
Page 35

Dynamic Range Control (DRC)
DRC-Daten werden nicht von allen Sendern
übertragen. Mit DRC wird die Di erenz zwischen
den lautesten und leisesten Geräuschen gesteuert.
Ein Beispiel: In einer lauten Umgebung macht
das auf maximal eingestellte DRC die leisen Töne
vergleichsweise lauter und laute Töne leiser.
Es gibt 3 Komprimierungsstufen:
• DRC aus– keine Komprimierung. Das ist die Stan-
dardeinstellung.
• DRC tief– mittlere Komprimierung.
• DRC hoch- maximale Komprimierung.
Drücken Sie im DAB-Modus lange auf
Sie mit
anschließend Ihren Favoriten.
Hinweis: Die aktuelle DRC-Einstellung wird mit einem
Sternchen (*) auf dem Display markiert.
und wählen Sie <DRC> und
. Scrollen
DE
FM-Radio-Modus
Um in den FM-Modus zu wechseln, drücken Sie kurz
auf
, bis das Radio <FM> anzeigt. Wenn Sie
beim Ausschalten des Radios einen FM-Sender gehört
haben, wird dieser Sender beim erneuten Einschalten
des Radios automatisch ausgewählt.
Einen FM-Sender einstellen
Drücken Sie lange auf die Taste oder , um im
Frequenzband nach oben oder unten zu suchen. Das
Radio startet den Suchlauf und stoppt beim nächsten
verfügbaren Sender.
Drücken Sie kurz auf
in Schritten von 0,05MHz fein abzustimmen.
Hinweis: Richten Sie die Antenne bei einem
schlechten Empfang neu aus oder stellen Sie das
Radio an einen anderen Standort.
Die Suchlauf-Einstellungen ändern
Im FM-Modus:
Drücken Sie lange auf
oder , um jede Frequenz
und es wird die <FM
Page 36

36
Einstellung> angezeigt. Drücken Sie .
Es stehen zwei verschiedene Optionen zur Auswahl:
• <Starke Sender>– der Suchlauf stoppt nur, wenn
eine starke Signalstärke empfangen wird; dies
ergibt eine bessere Audio-Qualität. Der von Ihnen
gesuchte Sender kann mit dieser Option möglicherweise übersehen werden.
• <Alle Radiosender>– der Suchlauf stoppt bei
jedem empfangenen Sender, auch bei schlechter
Signalstärke.
Benutzen Sie die Taste
wählen Sie aus den zur Verfügung stehenden
Optionen.
Hinweis: Die aktuelle Suchlauf-Einstellung wird mit
einem Sternchen (*) auf dem Display markiert.
zur Auswahl und
Einen FM-Sender-Favoriten
abspeichern
Ihr Radio kann bis zu 20 FM-Sender als Favoriten
abspeichern– Sie können also sofort auf Ihre
Lieblingssender zugreifen.
Hinweis: Wenn Sie FM-Radiosender als Favoriten
abspeichern, werden keine DAB-Sender-Favoriten
überschrieben.
Stellen Sie das Radio auf den FM-Radiosender ein,
den Sie als Favorit abspeichern möchten. Drücken
Sie lange auf
angezeigt wird. Bewegen Sie sich mit
dem Speicherort des Favoriten und wählen Sie
den Speicherort aus, an dem Sie den Radiosender
speichern möchten (1-20). Das Display bestätigt
<Progr. X gesp.>, wobei „X“ die Nummer des
Favoriten ist (1-20).
Hinweis: Wenn unter einem Favoriten schon ein
FM-Sender abgespeichert wurde, wird dieser beim
Speichern des neuen Senders überschrieben.
, bis <speichern <1:(Leer)>>
zu
Page 37

Auto Memory Store (AMS)
Alternativ können Sie die Funktion „Auto Memory
Store (AMS)“ nutzen, um Ihre Favoriten der FMRadiosender abzuspeichern. Drücken Sie im FMModus lange auf
wählen Sie <AMS>. Ihr Radio durchsucht jetzt das
UKW-Frequenzband und speichert die gefundenen
Sender automatisch in den Speicherorten der
Favoriten.
Hinweis: Sie können Ihre Favoriten, die Sie per AMS
gespeichert haben, manuell überschreiben– führen
Sie dazu die oben genannten Schritte unter „Einen
FM-Sender-Favoriten abspeichern“ aus.
. Scrollen Sie mit und
Zu einem FM-Sender-Favoriten
wechseln
Im FM-Modus:
Um die als Favoriten abgespeicherten Radiosender
1, 2 oder 3 schnell aufzurufen, drücken Sie
entsprechend kurz auf 1, 2 oder 3. Alternativ drücken
Sie kurz auf
. <Progr. aufrufen <1:>> wird
DE
zusammen mit dem Namen oder der Frequenz des
dort abgespeicherten Senders angezeigt– oder
<(Leer)>, wenn zuvor kein Sender abgespeichert
wurde. Nutzen Sie
Favoriten-Sender, den Sie gerne hören möchten, zu
bewegen und wählen Sie ihn aus (1-20).
, um sich zu dem
FM-Display-Informationen
Wenn Sie einen FM-Sender hören, können Sie die
in der zweiten Zeile des Displays erscheinenden
Informationen ändern. Drücken Sie wiederholt
, um durch die verschiedenen Informationsoptionen
zu blättern:
• Radiotext (RT)– dies sind vom Sender bereitgestell-
te Lauftextinformationen. Dazu gehören beispielsweise Künstlername, Liedtitel, Kontaktdaten des
Radiosenders usw.
• Programmtyp (PTY )– z.B „Rock“, „Pop“, „Talk“ oder
„Nachrichten“
• Sendername oder Frequenz– z.B. BBC R4,
93,30MHz
Page 38

38
• Betriebsanzeige– zeigt <USB-Strom> bei einer
Stromversorgung über USB; zeigt <Batterie XX>
bei einer Stromversorgung mit Batterien, wobei XX
die verfügbare Batterieladung ist.
• Uhrzeit
• Datum
Bluetooth-Modus
Vergewissern Sie sich, dass sich Ihr Radio im
Bluetooth-Modus be ndet, indem Sie kurz auf
drücken, bis das Radio <Bluetooth> anzeigt.
Ihr Radio sucht nun nach Bluetooth-Geräten.
Vergewissern Sie sich, dass das Bluetooth-fähige
Gerät, mit dem Sie eine Verbindung herstellen
möchten, erkannt werden kann.
Hinweis: Falls nötig, lesen Sie die Anweisungen
für Ihr Gerät, um Bluetooth hinzuzufügen oder
einzurichten.
Wenn Ihr Radio gefunden wurde, wird es auf Ihrem
Gerät als „SHARP DR-P420“ angezeigt. Wählen Sie
es aus, um mit dem Pairen zu beginnen. Sobald
es abgeschlossen ist, wird auf Ihrem Radio <BT
verbunden> angezeigt.
Gekoppelte Geräte verbinden sich mit dem Radio,
wenn sie sich in Reichweite be nden (innerhalb von
10Metern in Sichtweite). Ihr Gerät bleibt mit dem
Radio gekoppelt, außer Sie trennen die Verbindung.
Um die Bluetooth-Verbindung zu trennen, drücken
Sie 3Sekunden lang auf
mit Ihrem aktuellen Gerät zu trennen nach neuen
Geräten zu suchen.
, um die Verbindung
Drahtlos Musik per Bluetooth
streamen
Im Bluetooth-Modus können Sie Audiodaten drahtlos
über den Lautsprecher des Geräts übertragen.
Benutzen Sie die Steuerelemente Ihres gekoppelten
Bluetooth-Geräts und die Ihres Radios. Verfügbare
Steuerelemente:
• Wiedergabe/Pause: Kurz
• Vorheriger Track: Kurz
• Nächster Track: Kurz
drücken
drücken
drücken
Page 39

Die Lautstärke kann ebenfalls eingestellt
werden– entweder über Ihr Radio und/oder Ihr
angeschlossenes Gerät.
Hinweis: Sollte das Radio 20 Minuten lang inaktiv
bleiben oder kein Audiosignal empfangen, schaltet
es es automatisch in den Stand-by-Modus (oder es
schaltet sich aus, wenn es mit Batterien betrieben
wird).
Alarmfunktion
Hinweis: Die Alarmfunktion funktioniert nur, wenn
das Radio über USB mit Strom versorgt wird. Sie
funktioniert nicht bei der Stromversorgung per
Batterie (um die Akkulaufzeit zu erhalten).
Einen Alarm einstellen
Hinweis: Prüfen Sie vor der Einstellung eines Alarms,
ob das Radio die richtige Uhrzeit und das richtige
Datum anzeigt.
DE
Page 40

40
Vollständiger Suchlauf
Manuelle Abstimmung System
DRC Schlaf Wecker
DAB+
Löschen Wecker Einstellung Alarm1
System Uhrzeit Einstellung Alarm2
FM Einstellung Sprache
FM
AMS Werkseinstellung
System Software-Version
BT System
Uhrzeit
Dauer 1, 5, 15, 30 oder 60Minuten
Quelle Buzzer, DAB oder FM
Frequenz Täglich, einmalig, wochentags oder am Wochenende
Lautstärkepegel 25% - 100%
Wecker An oder Aus
Beleuchtung
Einstellung Alarm1 oder2
Stunde
Minute
Page 41

Hinweis: Wurde die Uhrzeit nicht eingestellt oder
nicht durch das Funksignal aktualisiert, wird <Keine
Zeiteinst.> angezeigt, wenn Sie den Alarm einstellen
wollen. Das Radio fordert Sie dann auf, die Uhrzeit
einzustellen. Erst nachdem die Uhrzeit eingestellt
wurde, kann ein Alarm eingestellt werden.
Wenn Sie einen Alarm einstellen wollen, während
das Gerät mit Batterien betrieben wird, wird <Alarm
inaktiv> angezeigt. Die Alarmfunktionen stehen
nur bei einer Verbindung mit dem Stromnetz zur
Verfügung (USB).
Anhalten, Schlummern oder Wecker
aus
Um den Alarm anzuhalten, drücken Sie kurz auf
und es wird <Wecker aus> angezeigt.
Das Alarmsymbol ist weiterhin auf dem Display zu
sehen und der Alarm ertönt am nächsten Tag zur
gleichen Zeit wieder, es sei denn, es wurde <Einmal>
eingestellt.
Um den Alarm auf die Schlummern-Funktion
zu schalten, drücken Sie
. <Schlummern>
DE
wird angezeigt, gefolgt von einem 10-minütigen
Countdown. Sobald der Countdown endet, ertönt
der Alarm erneut. Sie können das Schlummern
beenden, indem Sie
aus> angezeigt.
Um den Alarm auszuschalten, befolgen Sie die
Schritte unter „Einen Alarm einstellen“ und wählen
Sie <Aus>.
drücken. Es wird <Wecker
Sleep-Timer
Sie können Ihr Radio so einstellen, dass es mit dem
Sleep-Timer automatisch in den Stand-by-Modus
schaltet. Sie haben die Auswahl zwischen <Aus>,
<15>, <30>, <45>, <60> und <90>Minuten.
Drücken Sie dazu lange auf
und wählen Sie <System> / <Sleep>.
Scrollen Sie mit
Präferenz. Es wird <Sleep> angezeigt. Oben rechts
auf dem Display des Radios sehen Sie die Anzahl der
Minuten, nach denen Ihr Radio in den Stand-byModus wechselt, z.B. S90.
. Scrollen Sie mit
und wählen Sie Ihre
Page 42

42
Auto-Dimmen der
Hintergrundbeleuchtung des
Displays
Um das Auto-Dimmen der Hintergrundbeleuchtung
des Displays anzupassen, drücken Sie lange
Scrollen Sie mit
/ <Beleuchtung> / <Auto-Dimm>. Scrollen Sie
durch die verfügbaren Auto-Dimm-Optionen für die
Hintergrundbeleuchtung. Die aktuelle Einstellung
wird mit einem Sternchen (*) auf dem Display
markiert. Drücken Sie zur Auswahl
Gleichermaßen nutzen Sie
, um die Einstellungen für die Helligkeit der
Hintergrundbeleuchtung für die <Dimmstufe> und
den <Betrieb> zu ändern. Es stehen dreiOptionen
zur Verfügung: <Hoch>, <Mittel> und <Niedrig>.
und wählen Sie <System>
.
.
Display-Sprache
Um die Display-Sprache zu ändern, drücken Sie
lange auf
wählen Sie <System> / <Sprache>. Scrollen Sie
mit
. Scrollen Sie mit und
und wählen Sie Ihre bevorzugte
Sprache. Es stehen 7Optionen zur Verfügung:
Englisch, Französisch, Deutsch, Italienisch, Spanisch,
Polnisch und Niederländisch. Neben der aktuellen
Spracheinstellung wird ein Sternchen (*) angezeigt.
Weitere Informationen
Software-Version
Um die Softwareversion Ihres Radios zu überprüfen,
drücken Sie lange auf
und wählen Sie <System> / <SW-Version>. Die
Softwareversion wird angezeigt.
Werkseinstellung
Sie können Ihr Radio auf die ursprüngliche
Werkseinstellung zurücksetzen.
Hinweis: Wenn Sie Ihr Radio zurücksetzen, werden
Ihre gespeicherten Favoriten gelöscht und alle
verbundenen Bluetooth-Geräte getrennt.
Drücken Sie lange auf
und wählen Sie <System> / <Werkseinstellung>.
. Scrollen Sie mit
. Scrollen Sie mit
Page 43
<Werkseinstellung? Es wird <Nein> Ja> angezeigt.
Scrollen Sie mit
Es wird <Neustart…> angezeigt Nach wenigen
Sekunden ändert sich das Display zu <SHARP
sharpconsumer.eu> und danach erfolgt ein
Wechseln in den Stand-by-Modus.
und wählen Sie <Ja>.
Problembehandlung
Wenn kein Ton oder Strom vorhanden ist:
• Stellen Sie die Lautstärke ein.
• Vergewissern Sie sich, dass das USB-Kabel
angeschlossen ist und dass sich das Radio nicht im
Stand-by-Modus be ndet.
• Wenn Sie das Produkt mit Batterien betreiben,
sollten Sie überprüfen Sie, ob diese ersetzt werden
müssen. Verwenden Sie bitte AA-Batterien von
hoher Qualität.
DE
Wenn der Radioempfang schlecht ist:
• Vergewissern Sie sich, dass die Teleskopanten-
ne vollständig ausgefahren wurde (am besten
senkrecht).
• Starten Sie einen erneuten Suchlauf nach Radio-
sendern– lesen Sie entsprechend den Abschnitt
„Nach DAB-Sendern scannen“ und/oder „Einen
FM-Sender einstellen“.
• Stellen Sie Ihr Radio versuchsweise an einem
anderen Standort auf, um herauszu nden, ob sich
der Empfang verbessert.
• Vergewissern Sie sich, dass sich keine anderen elek-
trischen Geräte in der Nähe Ihres Radios be nden.
Dies kann zu Interferenzen führen.
Wenn Sie keine Verbindung zu einem BluetoothGerät herstellen können:
• Vergewissern Sie sich, dass Sie sich im Bluetoo-
th-Modus be nden.
• Vergewissern Sie sich, dass Sie sich innerhalb einer
Entfernung von 10 Metern zum Radio be nden,
Page 44

44
damit die Funktionalität der Bluetooth-Verbindung
gewährleistet ist.
• Bewegen Sie das Radio und das Bluetooth-Gerät
von anderen Bluetooth-Geräten/elektrischen
Geräten weg.
• Schalten Sie nach Möglichkeit andere Bluetoo-
th-Geräte in der Nähe aus oder deaktivieren Sie
deren Bluetooth-Funktionalität.
Wenn die Funktionstasten nicht reagieren:
• Überprüfen Sie, ob das USB-Kabel an der Rückseite
Ihres Radios angeschlossen ist. Drücken Sie kurz
. Wenn Sie das Radio mit Batterien betrei-
ben, müssen diese eventuell ausgetauscht werden.
• Setzen Sie das Gerät auf die Werkseinstellung
zurück.
Hinweis: Wenn Sie das Radio auf die
Werkseinstellungen zurücksetzen, werden alle Ihre
Einstellungen gelöscht– dazu gehören auch die Liste
der Radiosender, die verbundenen Bluetooth-Geräte
und alle Favoriten.
Page 45

Technische Daten
Eingang DC 5V
Batterien 4 x 1,5V Größe AA (LR-6) (optional, nicht im
Audio-Ausgang 2 Watt RMS
Stromverbrauch Aktiv: < 2 W Stand-by: < 2mW
DAB-Frequenzbereich Band III, 174MHz bis 240MHz
FM-Frequenzbereich 87,5MHz bis 108MHz
Bluetooth 2,4 GHz ~ 2,480 GHz
Pairing-Name SHARP DR-P420
Abmessungen (B) x (H) x (T)mm 174 x 90 x 53
Gewicht ca. 0,39 kg
Lieferumfang enthalten)
DE
Page 46

46
de la carcasa del producto, ya que podrían dar
lugar a descargas eléctricas.
Calor y temperatura de funcionamiento
• No instale el aparato cerca de ninguna fuente de
calor, como radiadores, salidas de aire caliente,
estufas u otros aparatos (incluidos ampli cadores)
que produzcan calor. Evite la exposición directa
al sol.
Llamas descubiertas
• Para evitar el riesgo de incendio, mantenga las
velas y llamas descubiertas lejos del producto.
Entrada de agua, humedad y líquidos
• Para evitar el riesgo de incendio o de descarga
eléctrica, no exponga este producto a lluvia, agua
ni humedad. No coloque objetos que contengan
líquidos sobre el producto o en sus proximidades.
Tormentas y rayos
• Las tormentas son peligrosas para todos los
productos eléctricos. Si los cables de alimentación
o antena son alcanzados por un rayo, el producto
puede resultar dañado, incluso si no está encendi-
do. Debe desconectar todos los cables y conectores
del producto antes de una tormenta.
Cable USB
• No dañe el cable de carga USB, no lo estire ni doble,
y no coloque objetos pesados sobre él.
Daños
• Inspeccione la unidad tras desembalarla en busca
de posibles daños. Si el producto presenta algún
daño, no lo utilice y consulte a su distribuidor.
Mantenimiento
• Desenchufe el cable de alimentación de la toma de
corriente antes de limpiar el producto. Utilice un
paño suave y limpio para limpiar la parte exterior
de la unidad. No utilice nunca productos químicos
ni detergentes.
Servicio y reparación
• Este producto no contiene ninguna pieza que
pueda ser reparada por el usuario. La exposición de
ciertas partes internas del dispositivo puede poner
en peligro su vida. En caso de avería, póngase en
contacto con el fabricante o el servicio técnico
autorizado. La garantía del fabricante no cubre las
Instrucciones de seguridad
importantes
Siga todas las instrucciones de
seguridad y preste atención a todas
las advertencias. Conserve el manual
para futuras consultas.
Este símbolo indica al usuario que consulte el
manual de instrucciones para cuestiones
relacionadas con la seguridad, el uso y la
información de mantenimiento.
Tensión de CC
Precauciones
Seguridad infantil
• Respete siempre las precauciones básicas de
seguridad cuando utilice este producto, especialmente si hay niños presentes. Los niños deben ser
supervisados para asegurarse de que no juegan
con el producto.
Ubicación
• El producto debe instalarse en una ubicación
estable y asegurarse de que ni la unidad en sí ni sus
componentes sobresalen.
Ventilación
• Los ori cios y las aperturas de la carcasa del
producto se proporcionan para nes de ventilación
con la intención de garantizar un uso able y su
protección contra el sobrecalentamiento; estas
aperturas no deben bloquearse ni taparse. Asegúrese de dejar una distancia mínima de 5cm en
torno al producto para garantizar una ventilación
adecuada. No permita que se introduzcan elementos en los ori cios, ranuras ni en ninguna apertura
Page 47

de la carcasa del producto, ya que podrían dar
lugar a descargas eléctricas.
Calor y temperatura de funcionamiento
• No instale el aparato cerca de ninguna fuente de
calor, como radiadores, salidas de aire caliente,
estufas u otros aparatos (incluidos ampli cadores)
que produzcan calor. Evite la exposición directa
al sol.
Llamas descubiertas
• Para evitar el riesgo de incendio, mantenga las
velas y llamas descubiertas lejos del producto.
Entrada de agua, humedad y líquidos
• Para evitar el riesgo de incendio o de descarga
eléctrica, no exponga este producto a lluvia, agua
ni humedad. No coloque objetos que contengan
líquidos sobre el producto o en sus proximidades.
Tormentas y rayos
• Las tormentas son peligrosas para todos los
productos eléctricos. Si los cables de alimentación
o antena son alcanzados por un rayo, el producto
puede resultar dañado, incluso si no está encendi-
ES
do. Debe desconectar todos los cables y conectores
del producto antes de una tormenta.
Cable USB
• No dañe el cable de carga USB, no lo estire ni doble,
y no coloque objetos pesados sobre él.
Daños
• Inspeccione la unidad tras desembalarla en busca
de posibles daños. Si el producto presenta algún
daño, no lo utilice y consulte a su distribuidor.
Mantenimiento
• Desenchufe el cable de alimentación de la toma de
corriente antes de limpiar el producto. Utilice un
paño suave y limpio para limpiar la parte exterior
de la unidad. No utilice nunca productos químicos
ni detergentes.
Servicio y reparación
• Este producto no contiene ninguna pieza que
pueda ser reparada por el usuario. La exposición de
ciertas partes internas del dispositivo puede poner
en peligro su vida. En caso de avería, póngase en
contacto con el fabricante o el servicio técnico
autorizado. La garantía del fabricante no cubre las
Page 48

48
Eliminación de este equipo y
de las pilas
Información dirigida a los usuarios relativa a la reco-
gida y eliminación de equipos antiguos y pilas usadas.
Este símbolo indica que el producto
contiene pilas previstas en la Directiva
Europea 2013/56/UE que no deben
eliminarse con la basura doméstica nor-
mal. Los signos Cd, Hg y Pb que aparecen debajo del
símbolo de la papelera con ruedas indican que la pila
contiene cadmio (Cd), mercurio (Hg) o plomo (Pb).
Este símbolo indica que el producto está
previsto en la Directiva Europea 2012/19/
UE y que no debe eliminarse con la
basura doméstica normal.
Este símbolo indica que el producto
se ha diseñado y fabricado para poder
reciclarse y reutilizarse.
• Estos símbolos incluidos en los productos, los em-
balajes o los documentos acompañantes indican
que los productos eléctricos y electrónicos y las
pilas no deben mezclarse con la basura doméstica
general. Los usuarios deben ponerse en contacto
con el establecimiento comercial en el que com-
praron el producto o en las o cinas públicas locales
para obtener detalles sobre dónde y cómo puede
reciclar estos artículos de forma respetuosa con el
medio ambiente.
averías resultantes de reparaciones llevadas a cabo
por terceros.
Pilas
Instalación
• No utilice pilas diferentes a las especi cadas. Tenga
Uso y mantenimiento
• No exponga las pilas a altas temperaturas, por
Seguridad infantil
• Asegúrese siempre de que el compartimento de las
en cuenta la polaridad correcta al insertar las pilas.
No combine nunca pilas de diferente tipo, y no
mezcle pilas nuevas y viejas.
ejemplo, no las sitúe cerca del fuego o directamente bajo la luz del sol Si el producto no se va a
utilizar durante un largo periodo de tiempo (más
de un mes), retire las pilas para evitar fugas. Si las
pilas presentan fugas, limpie la parte interior del
compartimento y sustitúyalas por pilas nuevas.
pilas está bien cerrado.
• Los niños pueden tragarse con facilidad las pilas,
que pueden causar graves quemaduras internas y
ocasionar la muerte. Mantenga las pilas lejos del
alcance de los niños. Consulte inmediatamente a
un médico si sospecha de ingestión de una pila.
Condiciones ambientales
• Mantenga alejadas las pilas de condiciones de
baja presión de aire o altas temperaturas, ya que
pueden provocar una explosión o a una fuga de
gas o líquido in amable.
Eliminación
• Elimine de forma correcta las pilas siguiendo la
guía incluida en este manual (consulte la sección
«Eliminación de este equipo y de las pilas»). No las
arroje al fuego, no las desmonte y no intente recargar pilas no recargables, ya que podrían producirse
fugas o explotar.
Page 49

Eliminación de este equipo y
de las pilas
Información dirigida a los usuarios relativa a la recogida y eliminación de equipos antiguos y pilas usadas.
Este símbolo indica que el producto
contiene pilas previstas en la Directiva
Europea 2013/56/UE que no deben
mal. Los signos Cd, Hg y Pb que aparecen debajo del
símbolo de la papelera con ruedas indican que la pila
contiene cadmio (Cd), mercurio (Hg) o plomo (Pb).
eliminarse con la basura doméstica nor-
Este símbolo indica que el producto está
previsto en la Directiva Europea 2012/19/
UE y que no debe eliminarse con la
basura doméstica normal.
Este símbolo indica que el producto
se ha diseñado y fabricado para poder
• Estos símbolos incluidos en los productos, los em-
reciclarse y reutilizarse.
balajes o los documentos acompañantes indican
que los productos eléctricos y electrónicos y las
pilas no deben mezclarse con la basura doméstica
general. Los usuarios deben ponerse en contacto
con el establecimiento comercial en el que compraron el producto o en las o cinas públicas locales
para obtener detalles sobre dónde y cómo puede
reciclar estos artículos de forma respetuosa con el
medio ambiente.
ES
Page 50

50
- Pulse para reproducir o poner en pausa
- Mantenga pulsado para desconectar el dispo-
sitivo actual y buscar nuevos dispositivos
8.
• En modo DAB:
- Pulse para recorrer hacia arriba la lista de
emisoras DAB
• En modo FM:
- Pulse para recorrer hacia abajo la banda de
frecuencias en intervalos de 0,05MHz.
- Mantenga pulsado para buscar hacia abajo en
la banda de frecuencias.
• En modo Bluetooth: pista anterior
• En el menú: recorrer las opciones del menú
9.
• En modo DAB:
- Pulse para desplazarse hacia abajo en la lista
de emisoras DAB.
• En modo FM:
- Pulse para recorrer hacia arriba la banda de
frecuencias en intervalos de 0,05MHz.
- Mantenga pulsado para buscar hacia arriba la
banda de frecuencias.
• En modo Bluetooth: pista siguiente
• En el menú: recorrer las opciones del menú
10.
Información/Menú
• Pulse para obtener información de la emisora
• Mantenga pulsado para entrar en las opciones
de menú
• En modo en espera: pulse para introducir los
ajustes de activación o desactivación de la
alarma 1 y la alarma 2
11. Emisoras almacenadas en memoria 1, 2 y 3
• Pulse para recuperar emisora almacenada en
memoria 1 (2 o 3)
• Mantenga pulsado para almacenar emisora en
memoria 1 (2 o 3)
12. Control de volumen:
• Gire para ajustar el volumen
• Gire para moverse por el menú o las emisoras
almacenadas en memoria: Desplácese a través
de las opciones de menú disponibles o las ubi-
caciones de emisoras almacenadas en memoria
• Pulse para seleccionar una emisora de radio/
Declaración de CE y de CA
del Reino Unido:
• Por la presente, Sharp Consumer Electronics Poland
sp. z o.o. declara que este equipo cumple los requisitos esenciales y otras disposiciones pertinentes
de la Directiva RED 2014/53/UE y los reglamentos
sobre equipos de radio del Reino Unido de 2017.
• El texto completo de la CE y la declaración de
conformidad de la UKCA están disponible en
sharpconsumer.eu. Una vez en la página, entre en
la sección de descarga de su modelo y seleccione
«Declaración CE».
Controles
1. Antena telescópica
2. Compartimento de las pilas
3. Puerto Micro USB
4. Conexión para los auriculares
5. Pantalla retroiluminada
Encender/apagar o Modo
6.
• Si la unidad está apagada, pulse para encender
• Si la unidad está encendida, pulse para cambiar
de modo
• Si la unidad se alimenta a través de USB, mantenga pulsado para entrar en modo de espera
• Si la unidad se alimenta a través de las pilas,
mantenga pulsado para apagar
7.
Reajustar/Reproducir/Poner en pausa (20
DAB/20 FM)
• Pulse para recuperar una emisora en memoria
• Mantenga pulsado para almacenar emisora en
memoria
• En modo Bluetooth:
Page 51

- Pulse para reproducir o poner en pausa
- Mantenga pulsado para desconectar el dispositivo actual y buscar nuevos dispositivos
8.
• En modo DAB:
- Pulse para recorrer hacia arriba la lista de
emisoras DAB
• En modo FM:
- Pulse para recorrer hacia abajo la banda de
frecuencias en intervalos de 0,05MHz.
- Mantenga pulsado para buscar hacia abajo en
la banda de frecuencias.
• En modo Bluetooth: pista anterior
• En el menú: recorrer las opciones del menú
9.
• En modo DAB:
- Pulse para desplazarse hacia abajo en la lista
de emisoras DAB.
• En modo FM:
- Pulse para recorrer hacia arriba la banda de
frecuencias en intervalos de 0,05MHz.
- Mantenga pulsado para buscar hacia arriba la
banda de frecuencias.
• En modo Bluetooth: pista siguiente
• En el menú: recorrer las opciones del menú
10.
Información/Menú
• Pulse para obtener información de la emisora
• Mantenga pulsado para entrar en las opciones
de menú
• En modo en espera: pulse para introducir los
ajustes de activación o desactivación de la
alarma 1 y la alarma 2
11. Emisoras almacenadas en memoria 1, 2 y 3
• Pulse para recuperar emisora almacenada en
memoria 1 (2 o 3)
• Mantenga pulsado para almacenar emisora en
memoria 1 (2 o 3)
12.
Control de volumen:
• Gire para ajustar el volumen
• Gire para moverse por el menú o las emisoras
almacenadas en memoria: Desplácese a través
de las opciones de menú disponibles o las ubicaciones de emisoras almacenadas en memoria
• Pulse para seleccionar una emisora de radio/
ES
Page 52

52
El aparato iniciará una búsqueda automática de
emisoras DAB. Una barra de progreso mostrará
el avance del proceso de búsqueda y el número
de emisoras encontradas. Una vez completada la
búsqueda, la radio seleccionará la primera emisora
disponible y empezará a reproducir. De manera
predeterminada, las emisoras se presentarán
ordenadas numéricamente y, tras ello, por orden
alfabético.
Nota: La lista de emisoras de radio DAB se almacena
en la memoria; la siguiente vez que se encienda la
radio no se llevará a cabo el proceso de búsqueda
de emisoras.
Pulse brevemente o para desplazarse a
través de las emisoras disponibles. Para seleccionar
la emisora, pulse brevemente . Transcurrirá un
breve instante hasta que la radio sintonice la emisora
seleccionada.
Ajuste el volumen
Gire hacia la derecha para aumentar el
volumen y hacia la izquierda para reducirlo.
Hora y fecha
La hora y la fecha se sincronizarán automáticamente
en función de cada emisora mediante el servicio DAB
en un formato de 24horas.
Para ajustar la hora y la fecha manualmente, encienda
la radio. Mantenga pulsado para entrar en las
opciones de menú.
Utilice para seleccionar <Sistema> / <Hora>
/ <Ajustar hora/fecha>. Se mostrará <Ajustar hora>
y los dígitos de la hora parpadearán; utilice
para ajustar la hora y los minutos. Se mostrará <Ajus-
tar fecha> y el día parpadeará; utilice para
establecer el día, el mes y el año. Se mostrará <Hora
guardada> cuando se con rme el año y volverá al
menú <Ajustar hora/fecha>.
Use para cambiar el formato de fecha/
hora y los ajustes de actualización automática. Pulse
brevemente para salir del menú.
Cambio del modo
Pulse brevemente para alternar entre los mo-
dos DAB, FM y Bluetooth. La pantalla de visualización
con rmará el modo.
frecuencia, una opción menú o una emisora
almacenada en memoria
• En modo en espera, pulse para activar una
repetición en 10minutos
Contenido de la caja
Una radio portátil digital DR-P420
Un cable de alimentación USB a Micro USB
Documentación de usuario
Uso de la radio portátil
DAB+/FM
Antena telescópica
Extienda completamente la antena telescópica (preferiblemente de forma vertical) antes de sintonizar
una emisora DAB o FM. De esta forma se asegurará la
máxima intensidad de la señal cuando la radio inicie
el proceso de búsqueda. Extender la antena también
garantiza la mejor calidad de sonido.
Conexión
Conecte el cable USB suministrado al puerto Micro
USB situado en la parte posterior de la radio. Enchufe
el extremo USB-A (estándar) del cable a un dispositivo
USB o adaptador para alimentar la radio. La radio se
encenderá y mostrará <SHARP sharpconsumer.eu>.
A continuación, pasará a modo en espera.
Insertar pilas (opcional)
Antes de instalar las pilas (no suministradas), asegúrese de que la radio está apagada mediante
de que el cable USB se ha desenchufado. En la parte
posterior de la radio, pulse la pestaña del compartimento de las pilas para retirarla.
Inserte cuatro pilas AA de 1,5V (también conocidas
como LR-6), teniendo en cuenta los signos + y - para
colocarlas correctamente. Vuelva a colocar la tapa
de las pilas, asegurándose de que oye un chasquido
al cerrar.
Con guración inicial
Pulse brevemente para encender la radio.
y
Page 53

El aparato iniciará una búsqueda automática de
emisoras DAB. Una barra de progreso mostrará
el avance del proceso de búsqueda y el número
de emisoras encontradas. Una vez completada la
búsqueda, la radio seleccionará la primera emisora
disponible y empezará a reproducir. De manera
predeterminada, las emisoras se presentarán
ordenadas numéricamente y, tras ello, por orden
alfabético.
Nota: La lista de emisoras de radio DAB se almacena
en la memoria; la siguiente vez que se encienda la
radio no se llevará a cabo el proceso de búsqueda
de emisoras.
Pulse brevemente
través de las emisoras disponibles. Para seleccionar
la emisora, pulse brevemente
breve instante hasta que la radio sintonice la emisora
seleccionada.
o para desplazarse a
. Transcurrirá un
Ajuste el volumen
Gire hacia la derecha para aumentar el
volumen y hacia la izquierda para reducirlo.
ES
Hora y fecha
La hora y la fecha se sincronizarán automáticamente
en función de cada emisora mediante el servicio DAB
en un formato de 24horas.
Para ajustar la hora y la fecha manualmente, encienda
la radio. Mantenga pulsado para entrar en las
opciones de menú.
Utilice para seleccionar <Sistema> / <Hora>
/ <Ajustar hora/fecha>. Se mostrará <Ajustar hora>
y los dígitos de la hora parpadearán; utilice
para ajustar la hora y los minutos. Se mostrará <Ajus-
tar fecha> y el día parpadeará; utilice para
establecer el día, el mes y el año. Se mostrará <Hora
guardada> cuando se con rme el año y volverá al
menú <Ajustar hora/fecha>.
Use para cambiar el formato de fecha/
hora y los ajustes de actualización automática. Pulse
brevemente para salir del menú.
Cambio del modo
Pulse brevemente para alternar entre los modos DAB, FM y Bluetooth. La pantalla de visualización
con rmará el modo.
Page 54

54
dejarán de visualizarse.
Almacenar una emisora DAB en
memoria
Su radio puede almacenar hasta 20emisoras de radio
DAB en memoria para permitirle acceder a ellas al
instante.
Nota: El almacenamiento de emisoras de radio
DAB no sobrescribe las emisoras FM guardadas en
memoria.
Sintonice la emisora DAB que desea guardar en me-
moria. Mantenga pulsado
hasta que aparezca
<Programa guardado <1:(Vacío)>>. Utilice
para desplazarse a la ubicación de memoria en la que
le gustaría almacenar la emisora de radio (1-20). Pulse
para seleccionar. La pantalla con rmará con <Pro-
grama X almacenado>, donde X se corresponde al
número de memoria (1-20)
Nota: Si ya se ha almacenado una emisora DAB en
memoria, se sobrescribirá al almacenar la nueva
emisora.
Sintonizar una emisora DAB guarda-
da en memoria
En modo DAB:
Para acceder rápidamente a emisoras de radio
almacenadas en las ubicaciones de memoria 1, 2 o 3,
pulse 1, 2 o 3 según corresponda en la parte frontal
de la radio. También puede pulsar
. Aparecerá
<Memoria prog <1:>> junto con el nombre o la
frecuencia de la emisora almacenada en esa ubica-
ción o <(Vacío)> si no se almacenó ninguna emisora
previamente. Utilice para desplazarse y
seleccionar la emisora guardada en memoria que le
gustaría escuchar (1-20).
Información en la pantalla DAB
Si escucha una emisora DAB, puede cambiar la infor-
mación que se mostrará en la pantalla. Las emisoras
pueden enviar diferentes tipos de información. Pulse
repetidamente
para recorrer las diferentes
opciones de información:
• Segmento de etiqueta dinámica (DLS): se trata de
información de texto en movimiento suministrada
Modo de radio DAB
Seleccionar el modo DAB+
Pulse brevemente hasta que la pantalla
muestre <DAB+>. La primera vez que utilice la radio
o si la lista de emisoras está vacía, la radio empezará
automáticamente a buscar emisoras de radio DAB.
Una barra de progreso mostrará el avance del proceso
de búsqueda y aparecerá el número de emisoras
encontradas. Si estaba escuchando una emisora DAB
cuando apagó la radio, la emisora se seleccionará automáticamente cuando vuelva a encender el aparato.
Cambiar emisoras DAB
Utilice y para desplazarse a través de las
emisoras disponibles. Pulse
cuando se muestre la emisora que desea escuchar.
Transcurrirá un breve instante hasta que la radio
sintonice la emisora seleccionada.
Búsqueda de emisoras DAB
En el entorno de radio DAB, surgen con regularidad
para seleccionar
emisoras y servicios nuevos. Realice una búsqueda
manual periódicamente para asegurarse de que la
memoria de su radio almacena la lista más actualizada de radios. Si se ha llevado su radio a una nueva
ubicación, por ejemplo, si ha viajado al extranjero,
también conviene realizar una búsqueda manual.
En modo DAB:
Mantenga pulsado
desplazarse y seleccione <Búsqueda completa>. La
pantalla cambiará a <Buscando…>. Una barra de
progreso mostrará el avance del proceso de búsqueda y el número de emisoras encontradas.
Eliminar emisoras DAB
Puede eliminar las emisoras DAB de la lista de
emisoras sin recepción en su área. Estas se indican
con un pre jo <?>.
En modo DAB:
Mantenga pulsado
desplazarse y seleccione <Recortar>. <Recortar? Se
mostrará <No> Sí>. Utilice
y seleccione <Sí>. Las emisoras con un pre jo <?>
. Utilice para
. Utilice para
para desplazarse
Page 55

dejarán de visualizarse.
Almacenar una emisora DAB en
memoria
Su radio puede almacenar hasta 20emisoras de radio
DAB en memoria para permitirle acceder a ellas al
instante.
Nota: El almacenamiento de emisoras de radio
DAB no sobrescribe las emisoras FM guardadas en
memoria.
Sintonice la emisora DAB que desea guardar en memoria. Mantenga pulsado
<Programa guardado <1:(Vacío)>>. Utilice
para desplazarse a la ubicación de memoria en la que
le gustaría almacenar la emisora de radio (1-20). Pulse
para seleccionar. La pantalla con rmará con <Pro-
grama X almacenado>, donde X se corresponde al
número de memoria (1-20)
Nota: Si ya se ha almacenado una emisora DAB en
memoria, se sobrescribirá al almacenar la nueva
emisora.
hasta que aparezca
ES
Sintonizar una emisora DAB guardada en memoria
En modo DAB:
Para acceder rápidamente a emisoras de radio
almacenadas en las ubicaciones de memoria 1, 2 o 3,
pulse 1, 2 o 3 según corresponda en la parte frontal
de la radio. También puede pulsar
<Memoria prog <1:>> junto con el nombre o la
frecuencia de la emisora almacenada en esa ubicación o <(Vacío)> si no se almacenó ninguna emisora
previamente. Utilice
seleccionar la emisora guardada en memoria que le
gustaría escuchar (1-20).
para desplazarse y
. Aparecerá
Información en la pantalla DAB
Si escucha una emisora DAB, puede cambiar la información que se mostrará en la pantalla. Las emisoras
pueden enviar diferentes tipos de información. Pulse
repetidamente
opciones de información:
• Segmento de etiqueta dinámica (DLS): se trata de
información de texto en movimiento suministrada
para recorrer las diferentes
Page 56

56
Nota: El ajuste DRC actual incluirá un asterisco (*) en
la pantalla.
Modo de radio FM
Para cambiar al modo FM, pulse hasta que
la radio muestre <FM>. Si estaba escuchando una
emisora FM cuando apagó la radio, la emisora se
seleccionará automáticamente cuando vuelva a
encender el aparato.
Sintonizar una emisora FM
Mantenga pulsado para el botón o para
buscar hacia arriba o hacia abajo en la banda de
frecuencias. La radio buscará y se detendrá en la
siguiente emisora disponible.
Pulse o para ajustar la sintonización de cada
frecuencia en pasos de 0,05MHz.
Nota: Si la recepción no es buena, ajuste la antena o
mueva la radio a otra ubicación.
Cambiar la con guración de
búsqueda
En modo FM:
Mantenga pulsado
; aparecerá <Con gurar
búsqueda> Pulse .
Dispone de dos opciones diferentes entre las que
elegir:
• <Emisoras con buena recepción>: la búsqueda
solo se detendrá cuando se reciba una señal inten-
sa, que permita una buena calidad del audio. Es
posible que la emisora que está buscando se pierda
si utiliza esta opción.
• <Todas las emisoras>: la búsqueda se detendrá
en cualquier emisora que reciba, incluso si la señal
no es buena.
Utilice para escoger y seleccionar las opcio-
nes disponibles.
Nota: El ajuste de búsqueda actual presentará un
asterisco (*) en la pantalla.
por la emisora. La información puede incluir nombres de artistas, títulos de canciones, detalles para
ponerse en contacto con la emisora de radio, etc.
• Intensidad de la señal: aparecerá un
pantalla para indicar la intensidad mínima de la
señal para que el sonido resulte aceptable. Una la
de rectángulos rellenos indica la intensidad de la
señal actual que está recibiendo.
• Tipo de programa (PTY): p.ej., Rock, Pop, Chat o
News
• Nombre multiplex: muestra el área de emisión y el
grupo de emisoras de radio en la frecuencia, p.ej.,
BBC National DAB, Digital 1 Network
• Canal y frecuencia, p.ej. 12B 225.648 MHz (Ca-
nal=12B, Frecuencia=225.648 MHz)
• Error de señal: se indica con un número entre 0 y
99. Para escuchar satisfactoriamente una emisora
de radio, el error de señal debe situarse por debajo
de 30. Ajuste la antena o reubique la radio para
mejorar la recepción.
• Información de la señal: la velocidad de datos a la
que se transmite la señal.
vacío en la
• Indicador de encendido: muestra <Alimentación
del USB> cuando la alimentación se realiza a través
de USB; muestra <Batería XX> donde XX es la
carga de pila disponible.
• Hora
• Fecha
Control de gama dinámica (DRC)
No todas las emisoras transmiten datos DRC. DRC se
utiliza para controlar la diferencia entre los sonidos
más altos y los más bajos, por ejemplo, en un entorno
ruidoso; ajustar la función DRC al máximo acentúa los
sonidos comparativamente bajos y reduce los altos.
Hay tres niveles de compresión:
• DRC apagado: sin compresión Este es el ajuste
predeterminado.
• DRC bajo: compresión media
• DRC alto: compresión máxima
En modo DAB, mantenga pulsado
para desplazarse y seleccionar <DRC>, y
seleccione su preferencia.
. Utilice
Page 57

Nota: El ajuste DRC actual incluirá un asterisco (*) en
la pantalla.
Modo de radio FM
Para cambiar al modo FM, pulse hasta que
la radio muestre <FM>. Si estaba escuchando una
emisora FM cuando apagó la radio, la emisora se
seleccionará automáticamente cuando vuelva a
encender el aparato.
Sintonizar una emisora FM
Mantenga pulsado para el botón o para
buscar hacia arriba o hacia abajo en la banda de
frecuencias. La radio buscará y se detendrá en la
siguiente emisora disponible.
Pulse
o para ajustar la sintonización de cada
frecuencia en pasos de 0,05MHz.
Nota: Si la recepción no es buena, ajuste la antena o
mueva la radio a otra ubicación.
Cambiar la con guración de
búsqueda
En modo FM:
Mantenga pulsado
búsqueda> Pulse
Dispone de dos opciones diferentes entre las que
elegir:
• <Emisoras con buena recepción>: la búsqueda
solo se detendrá cuando se reciba una señal inten-
sa, que permita una buena calidad del audio. Es
posible que la emisora que está buscando se pierda
si utiliza esta opción.
• <Todas las emisoras>: la búsqueda se detendrá
en cualquier emisora que reciba, incluso si la señal
no es buena.
Utilice
nes disponibles.
Nota: El ajuste de búsqueda actual presentará un
asterisco (*) en la pantalla.
; aparecerá <Con gurar
.
para escoger y seleccionar las opcio-
ES
Page 58
58
el nombre o la frecuencia de la emisora almacenada
en esa ubicación o <(Vacío)> si no se almacenó
ninguna emisora previamente. Utilice para
desplazarse y seleccionar la emisora guardada en
memoria que le gustaría escuchar (1-20).
Información en la pantalla FM
Cuando escucha una emisora DAB puede cambiar la
información que se mostrará en la segunda línea de
la pantalla. Pulse repetidamente
para recorrer las
diferentes opciones de información:
• Radiotexto (RT): se trata de información de texto
suministrada por la emisora que se muestra en mo-
vimiento. La información puede incluir nombres de
artistas, títulos de canciones, detalles para ponerse
en contacto con la emisora de radio, etc.
• Tipo de programa (PTY): p.ej., Rock, Pop, Chat o
News
• Nombre de la emisora o frecuencia: p.ej., BBC R4,
93.30MHz
• Indicador de encendido: muestra <Alimentación
del USB> cuando la alimentación se realiza a través
de USB; muestra <Batería XX> donde XX es la
carga de pila disponible.
• Hora
• Fecha
Modo Bluetooth
Asegúrese de que la radio está en modo Bluetooth
pulsando
hasta que la radio muestre <Blue-
tooth>. La radio empezará a buscar dispositivos Blue-
tooth. Asegúrese de que está activada la conexión
al dispositivo habilitado con Bluetooth al que desea
conectarse.
Nota: Si es necesario, consulte las instrucciones de
su dispositivo para añadir o con gurar la función
Bluetooth
Cuando lo encuentre, la radio se mostrará SHARP
DR-P420 en el dispositivo. Seleccione para iniciar el
emparejamiento. Una vez completado el proceso, se
mostrará <BT connected> en la radio.
Los dispositivos emparejados se conectarán a la radio
cuando se encuentre a la distancia adecuada (menos
Almacenar una emisora FM en
memoria
Su radio puede almacenar hasta 20emisoras de FM
como memorias programadas para permitirle acceder
al instante a sus emisoras preferidas.
Nota: El almacenamiento de emisoras de radio FM no
sobrescribe las emisoras DAB guardadas en memoria.
Sintonice la emisora FM que desea guardar en memoria. Mantenga pulsado
<Programa guardado <1:(Vacío)>>. Utilice
para desplazarse a la ubicación de memoria en la
que le gustaría almacenar la emisora de radio (1-20) y
seleccionarla. La pantalla con rmará con <Programa
X almacenado>, donde X se corresponde al número
de programa (1-20).
Nota: Si ya se ha almacenado una emisora FM en
memoria, se sobrescribirá al almacenar la nueva
emisora.
hasta que aparezca
Almacenamiento automático en
memoria (AMS)
También puede utilizar la función de almacenamiento
automático en memoria (AMS) para almacenar las
emisoras de radio FM que desea guardar en memoria.
En modo FM, mantenga pulsado
para desplazarse y seleccione <AMS>. La radio pasará
a buscar las bandas de frecuencia FM y las emisoras
encontradas se almacenarán automáticamente en las
ubicaciones de memoria.
Nota: Puede sobrescribir sus emisoras AMS
almacenadas siguiendo los pasos de la sección
Almacenar una emisora FM en memoria.
Sintonizar una emisora FM
almacenada en memoria
En modo FM:
Para acceder rápidamente a emisoras de radio almacenadas en las ubicaciones de memoria 1, 2 o 3, pulse
1, 2 o 3 según corresponda. También puede pulsar
. Aparecerá <Memoria prog <1:>> junto con
. Utilice
Page 59
el nombre o la frecuencia de la emisora almacenada
en esa ubicación o <(Vacío)> si no se almacenó
ninguna emisora previamente. Utilice
desplazarse y seleccionar la emisora guardada en
memoria que le gustaría escuchar (1-20).
para
Información en la pantalla FM
Cuando escucha una emisora DAB puede cambiar la
información que se mostrará en la segunda línea de
la pantalla. Pulse repetidamente
diferentes opciones de información:
• Radiotexto (RT): se trata de información de texto
suministrada por la emisora que se muestra en movimiento. La información puede incluir nombres de
artistas, títulos de canciones, detalles para ponerse
en contacto con la emisora de radio, etc.
• Tipo de programa (PTY): p.ej., Rock, Pop, Chat o
News
• Nombre de la emisora o frecuencia: p.ej., BBC R4,
93.30MHz
• Indicador de encendido: muestra <Alimentación
del USB> cuando la alimentación se realiza a través
para recorrer las
ES
de USB; muestra <Batería XX> donde XX es la
carga de pila disponible.
• Hora
• Fecha
Modo Bluetooth
Asegúrese de que la radio está en modo Bluetooth
pulsando
tooth>. La radio empezará a buscar dispositivos Bluetooth. Asegúrese de que está activada la conexión
al dispositivo habilitado con Bluetooth al que desea
conectarse.
Nota: Si es necesario, consulte las instrucciones de
su dispositivo para añadir o con gurar la función
Bluetooth
Cuando lo encuentre, la radio se mostrará SHARP
DR-P420 en el dispositivo. Seleccione para iniciar el
emparejamiento. Una vez completado el proceso, se
mostrará <BT connected> en la radio.
Los dispositivos emparejados se conectarán a la radio
cuando se encuentre a la distancia adecuada (menos
hasta que la radio muestre <Blue-
Page 60

60
DAB+
Búsqueda completa
Sintonización manual Sistema
DRC Repetir Alarma
Recortar Alarma Con guración de alarma1
Sistema Hora Con guración de alarma2
Retroiluminación
FM
Con gurar búsqueda Idioma
AMS Restaurar valores por defecto
Sistema Versión de software
BT Sistema
Ajustes de alarma 1 o alarma 2
Hora
Hora
Min
Duración 1, 5, 15, 30 o 60 minutos
Fuente Tono, DAB o FM
Frecuencia Diariamente, una vez, días de la semana y nes de semana.
Nivel de volumen Del 25% al 100%
Alarma Apagada o encendida
de diez metros de línea de visión). El dispositivo
permanecerá emparejado con la radio hasta que
decida desconectarlo.
Mantenga pulsado
para desconectar el dispositivo actual y buscar
nuevos dispositivos.
Música en streaming a través de
Bluetooth
En el modo Bluetooth puede transmitir audio a través
del altavoz del producto. Puede utilizar los controles
de su dispositivo Bluetooth emparejado, además de
los de la radio. Controles disponibles:
• Reproducir/poner en pausa: pulse
• Pista anterior: pulse
• Pista siguiente: pulse
También se puede ajustar el volumen, ya sea usando
la radio o el dispositivo conectado.
Nota: Si la radio permanece inactiva durante
20segundos o no se recibe ninguna señal de audio, el
aparato pasará automáticamente a modo en espera
(o se apagará si no tienen pilas).
durante tres segundos
Funcionalidad de alarma
Nota: La funcionalidad de alarma solo se puede
utilizar cuando la radio se alimenta a través de USB;
no funcionará si se alimenta a través de pilas (para
conservarlas).
Ajustar una alarma
Nota: Compruebe que la radio muestra la hora y la
fecha correctas antes de ajustar una alarma.
Page 61

Búsqueda completa
Sintonización manual Sistema
DRC Repetir Alarma
DAB+
Recortar Alarma Con guración de alarma1
Sistema Hora Con guración de alarma2
Con gurar búsqueda Idioma
FM
AMS Restaurar valores por defecto
Sistema Versión de software
BT Sistema
Hora
Duración 1, 5, 15, 30 o 60 minutos
Fuente Tono, DAB o FM
Frecuencia Diariamente, una vez, días de la semana y nes de semana.
Nivel de volumen Del 25% al 100%
Alarma Apagada o encendida
Retroiluminación
Ajustes de alarma 1 o alarma 2
Hora
Min
ES
Page 62
62
opciones disponibles para el tiempo de espera de la
retroiluminación. El ajuste actual será un asterisco (*)
en la pantalla. Pulse para seleccionar.
De manera similar, utilice para cambiar los
ajustes de brillo de retroiluminación para el <Nivel
atenuado> y <Nivel activo>. Hay tres opciones
disponibles: <Alto>, <Medio> y <Bajo>.
Idioma de la pantalla
Para cambiar el idioma de la pantalla, mantenga
pulsado
. Utilice para desplazarse y se-
leccione <Sistema> / <Idioma>. Utilice para
desplazarse y seleccionar su idioma preferido. Hay
siete opciones disponibles: Inglés, Francés, Alemán,
Italiano, Español, Polaco y Neerlandés. Se mostrará un
asterisco (*) junto al ajuste del idioma actual.
Otra información
Versión de software
Para comprobar la versión de software de la radio,
mantenga pulsado
. Utilice para
desplazarse y seleccione <Sistema> / <Versión de
software>. Se mostrará la versión de software.
Restaurar valores por defecto
Puede restaurar la radio a los ajustes de fábrica
originales.
Nota: Si restablece la radio, las memorias
almacenadas se eliminarán y se anulará cualquier
dispositivo Bluetooth conectado.
Mantenga pulsado
. Utilice para despla-
zarse y seleccione <Sistema> / <Restaurar valores
por defecto>. <Restaurar valores por defecto? Se
mostrará <No> Sí>. Utilice para desplazarse
y seleccione <Sí>. Se mostrará <Reiniciando…>.
Transcurridos unos segundos, la pantalla cambiará
a <SHARP sharpconsumer.eu> y entrará en modo
en espera.
Nota: Si no se establece la hora o no se actualiza a
partir de la señal de la radio, aparecerá <Hora no
ajustada> cuando intente ajustar la alarma. La radio
le pedirá que ajuste la hora. Solo se puede con gurar
una alarma tras ajustar la hora.
Si intenta con gurar la alarma cuando la unidad se
alimenta a través de las pilas, aparecerá <Alarma
inactiva>. Las funciones de alarma solo están
disponibles cuando el aparato está conectado a la
corriente (USB).
Detener, repetir o apagar la alarma
Para detener la alarma, pulse ; aparecerá
<Alarma apagada>. El símbolo de la alarma permanecerá en la pantalla y la alarma volverá a sonar el
siguiente día a menos que se con gure como <Una
vez>.
Para repetir la alarma, pulse
tición> seguido de una cuenta atrás de 10minutos.
Cuando la cuenta atrás nalice, la alarma volverá a
sonar. Puede cancelar la repetición pulsando
mostrará <Alarma apagada>.
. Se mostrará <Repe-
. Se
Para apagar la alarma, siga los pasos para Ajustar una
alarma y seleccione <Apagar>.
Apagado automático
Puede ajustar la radio para que cambie a modo en
espera automáticamente mediante el temporizador
de desconexión automática. Puede elegir entre
<Desactivado>, <15>, <30>, <45>, <60> y <90>
minutos. Para ello, mantenga pulsado
para desplazarse y seleccione <Sistema>
/ <Sleep>. Utilice
seleccione su ajuste preferido. Aparecerá <Sleep>.
En la parte superior derecha de la pantalla de la radio,
se mostrará el número de minutos hasta que la radio
cambie al modo en espera, p.ej., S90.
Tiempo de espera de retroiluminación
Para ajustar el tipo de espera de retroiluminación de
la pantalla, mantenga pulsado
para desplazarse y seleccione <Sistema> / <Retroilu-
minado> / <Tiempo>. Desplácese a través de las
para desplazarse y
. Utilice
. Utilice
Page 63

opciones disponibles para el tiempo de espera de la
retroiluminación. El ajuste actual será un asterisco (*)
en la pantalla. Pulse
De manera similar, utilice
ajustes de brillo de retroiluminación para el <Nivel
atenuado> y <Nivel activo>. Hay tres opciones
disponibles: <Alto>, <Medio> y <Bajo>.
para seleccionar.
para cambiar los
Idioma de la pantalla
Para cambiar el idioma de la pantalla, mantenga
pulsado
leccione <Sistema> / <Idioma>. Utilice
desplazarse y seleccionar su idioma preferido. Hay
siete opciones disponibles: Inglés, Francés, Alemán,
Italiano, Español, Polaco y Neerlandés. Se mostrará un
asterisco (*) junto al ajuste del idioma actual.
. Utilice para desplazarse y se-
para
Otra información
Versión de software
Para comprobar la versión de software de la radio,
mantenga pulsado
. Utilice para
desplazarse y seleccione <Sistema> / <Versión de
software>. Se mostrará la versión de software.
Restaurar valores por defecto
Puede restaurar la radio a los ajustes de fábrica
originales.
Nota: Si restablece la radio, las memorias
almacenadas se eliminarán y se anulará cualquier
dispositivo Bluetooth conectado.
Mantenga pulsado
zarse y seleccione <Sistema> / <Restaurar valores
por defecto>. <Restaurar valores por defecto? Se
mostrará <No> Sí>. Utilice
y seleccione <Sí>. Se mostrará <Reiniciando…>.
Transcurridos unos segundos, la pantalla cambiará
a <SHARP sharpconsumer.eu> y entrará en modo
en espera.
. Utilice para despla-
para desplazarse
ES
Page 64

64
Especi caciones técnicas
Entrada CC 5V
Pilas 4 unidades de tamaño AA de 1,5V (LR-6) (opcional,
no suministras)
Salida de audio RMS de 2vatios
Consumo de energía Activo; < 2 W En espera: < 2 mW
Rango de frecuencias DAB Banda III, de 174MHz a 240MHz
Rango de frecuencias FM De 87,5MHz a 108MHz
Bluetooth 2,4GHz~2,480GHz
Nombre de emparejamiento SHARP DR-P420
Dimensiones (An x Al x Pr en mm): 174 x 90 x 53
Peso aproximado. 0,39 kg
Resolución de problemas
Si no se oye nada o no se enciende:
• Ajuste del volumen.
• Compruebe que el cable USB está conectado y que
la radio no se encuentra en modo en espera.
• Si se utiliza el producto con las pilas, compruebe si
es necesario sustituirlas. Utilice pilas AA de buena
calidad.
Si la recepción de la radio no es buena:
• Asegúrese de que tiene extendida completamente
la antena telescópica (preferiblemente de forma
vertical).
• Busque de nuevo emisoras de radio (consulte la
sección Buscar emisoras DAB o Sintonizar una
emisora FM, según corresponda).
• Intente mover la radio a otra ubicación para com-
probar si mejora la recepción.
• Compruebe que no hay otros equipos eléctricos
cerca de la radio. Si los hay, podrían causar
interferencias
Si no puede emparejar la radio con un dispositivos
Bluetooth:
• Compruebe que se encuentra en modo Bluetooth.
• Asegúrese de que se encuentra a menos de 10me-
tros de la funcionalidad Bluetooth.
• Aleje la radio y el dispositivos Bluetooth de otros
dispositivos Bluetooth o equipos eléctricos.
• Si es posible, apague los dispositivos Bluetooth
cercanos o desactive su funcionalidad Bluetooth.
Si los botones de función no responden:
• Compruebe que el cable USB está conectado a la
parte posterior de la radio. Pulse
usando pilas, puede que necesite reemplazarlas.
• Restablezca el dispositivo a los valores de fábrica.
Nota: Si se restablece la radio a los ajustes de fábrica,
todos los ajustes, incluida la lista de emisoras de
radio, dispositivos Bluetooth conectados y cualquier
emisora almacenada en memoria se eliminarán.
. Si está
Page 65

Especi caciones técnicas
Entrada CC 5V
Pilas 4 unidades de tamaño AA de 1,5V (LR-6) (opcional,
Salida de audio RMS de 2vatios
Consumo de energía Activo; < 2 W En espera: < 2 mW
Rango de frecuencias DAB Banda III, de 174MHz a 240MHz
Rango de frecuencias FM De 87,5MHz a 108MHz
Bluetooth 2,4GHz~2,480GHz
Nombre de emparejamiento SHARP DR-P420
Dimensiones (An x Al x Pr en mm): 174 x 90 x 53
Peso aproximado. 0,39 kg
no suministras)
ES
Page 66

66
des ampli cateurs) produisant de la chaleur. Évitez
l'exposition directe au soleil.
Flammes nues
• Pour éviter tout risque d'incendie, éloignez les
bougies ou les ammes nues de ce produit.
Entrée d'eau, d'humidité et de liquide
• Pour éviter les risques d'incendie ou de choc élec-
trique, n'exposez pas ce produit à la pluie, à l'eau
ou à l'humidité. Ne placez pas d'objets remplis de
liquide sur ou à proximité de ce produit.
Orages et éclairs
• Les orages sont dangereux pour tous les appareils
électriques. Si le secteur ou le câblage aérien
est frappé par la foudre, le produit peut être
endommagé, même s'il était éteint. Vous devez
débrancher tous les câbles et connecteurs du
produit avant un orage.
Câble USB
• N'endommagez pas le câble de recharge USB, ne
l'étirez pas, ne le pliez pas et ne placez pas d'objets
lourds dessus.
Dégâts
• Veuillez inspecter l'appareil après le déballage.
S'il est endommagé de quelque manière que ce
soit, n'utilisez pas l'appareil et consultez votre
revendeur.
Entretien
• Débranchez le câble d'alimentation de la source
de courant avant de nettoyer le produit. Utilisez un
chi on doux et propre pour nettoyer l'extérieur de
l'appareil. Ne nettoyez jamais l'appareil avec des
produits chimiques ou détergents.
Entretien et réparations
• Ce produit ne contient aucune pièce réparable par
l'utilisateur. L'exposition aux pièces internes situées
à l'intérieur de l'appareil peut mettre votre vie en
danger. En cas de défaut, contactez le fabricant ou
le département de service après-vente autorisé.
La garantie du fabricant ne couvre pas les défauts
provoqués par des réparations e ectuées par des
tiers non autorisés.
Consignes de sécurité
importantes
Veuillez suivre toutes les consignes
de sécurité et tenir compte de tous les
avertissements. Gardez ce manuel à
titre de référence.
Ce symbole indique à l'utilisateur de
consulter le manuel d'utilisation pour plus
d'informations sur la sécurité, le
fonctionnement et la maintenance.
Tension continue
Précautions
Sécurité enfant
• Suivez toujours les précautions basiques de sécu-
rité durant l'utilisation de ce produit, particulièrement lorsque des enfants sont présents. Surveillez
les enfants a n de vous assurer qu'ils ne jouent pas
avec le produit.
Emplacement
• Le produit doit être installé dans un endroit stable,
et vous devez vous assurer que le produit et ses
pièces ne sont pas en surplomb.
Ventilation
• Le boîtier dispose de fentes et d'ouvertures pour la
ventilation, pour garantir un fonctionnement able
du produit et protéger celui-ci contre la surchau e.
Ces ouvertures ne doivent pas être bloquées ou
obturées. Assurez une distance minimum de 5cm
autour du produit a n de garantir une ventilation
su sante. Ne laissez jamais une personne faire
rentrer un objet dans les trous, fentes ou toute
autre ouverture du boîtier du produit, cela pouvant
causer une électrocution fatale.
Chaleur et température de fonctionnement
• N'installez pas l'appareil à proximité de sources de
chaleur telles que des radiateurs, des chau ages,
des cuisinières ou d'autres appareils (y compris
Page 67

des ampli cateurs) produisant de la chaleur. Évitez
l'exposition directe au soleil.
Flammes nues
• Pour éviter tout risque d'incendie, éloignez les
bougies ou les ammes nues de ce produit.
Entrée d'eau, d'humidité et de liquide
• Pour éviter les risques d'incendie ou de choc élec-
trique, n'exposez pas ce produit à la pluie, à l'eau
ou à l'humidité. Ne placez pas d'objets remplis de
liquide sur ou à proximité de ce produit.
Orages et éclairs
• Les orages sont dangereux pour tous les appareils
électriques. Si le secteur ou le câblage aérien
est frappé par la foudre, le produit peut être
endommagé, même s'il était éteint. Vous devez
débrancher tous les câbles et connecteurs du
produit avant un orage.
Câble USB
• N'endommagez pas le câble de recharge USB, ne
l'étirez pas, ne le pliez pas et ne placez pas d'objets
lourds dessus.
FR
Dégâts
• Veuillez inspecter l'appareil après le déballage.
S'il est endommagé de quelque manière que ce
soit, n'utilisez pas l'appareil et consultez votre
revendeur.
Entretien
• Débranchez le câble d'alimentation de la source
de courant avant de nettoyer le produit. Utilisez un
chi on doux et propre pour nettoyer l'extérieur de
l'appareil. Ne nettoyez jamais l'appareil avec des
produits chimiques ou détergents.
Entretien et réparations
• Ce produit ne contient aucune pièce réparable par
l'utilisateur. L'exposition aux pièces internes situées
à l'intérieur de l'appareil peut mettre votre vie en
danger. En cas de défaut, contactez le fabricant ou
le département de service après-vente autorisé.
La garantie du fabricant ne couvre pas les défauts
provoqués par des réparations e ectuées par des
tiers non autorisés.
Page 68

68
Ce symbole signi e que le produit
contient des piles couvertes par la
directive européenne 2013/56/UE, qui
ne peuvent pas être jetées avec les
ordures ménagères normales. Les indications Cd, Hg
et Pb sous le symbole de poubelle signi ent que la
pile contient du cadmium (Cd), du mercure (Hg) ou
du plomb (Pb).
Ce symbole sur un produit signi e que
le produit est couvert par la directive
européenne 2012/19/UE et ne doit
pas être jeté avec vos autres déchets
ménagers.
Ce symbole signi e que le produit est
conçu et fabriqué de manière à pouvoir
être recyclé et réutilisé.
• Ces symboles sur les produits, l'emballage et/ou
les documents d'accompagnement signi ent que
les produits électriques et électroniques usagés
ne doivent pas être mélangés avec les ordures
ménagères. Les ménages sont invités à contacter le
magasin où le produit a été acheté, ou les autorités
locales, pour connaître où et comment procéder
au recyclage des composants de façon à respecter
l'environnement.
Déclaration CE et UKCA :
• Par la présente, Sharp Consumer Electronics Poland
sp. z o.o. déclare que cet équipement est conforme
aux exigences essentielles et aux autres disposi-
tions pertinentes de la directive RED 2014/53/UE
et de la réglementation sur l'équipement radio du
Royaume-Uni.
• Le texte complet des déclarations de conformité
CE et UKCA est disponible sur sharpconsumer.
eu et en entrant ensuite dans la section de
téléchargement de votre modèle et en choisissant
«CE Statements».
Piles
Installation
• N'utilisez pas de piles autres que celles spéci ées.
Utilisation et maintenance
• N'exposez pas les piles à des températures élevées,
Sécurité pour les enfants
• Assurez-vous toujours que le compartiment des
• Les piles sont facilement avalées par les jeunes
Observez la polarité correcte en insérant les piles.
N'utilisez jamais ensemble des piles di érentes ou
ne mélangez pas des piles neuves et des usagées.
par exemple près d'un feu ou en plein soleil.
Lorsque vous ne prévoyez pas d'utiliser le produit
pendant une longue période (plus d'un mois),
retirez les piles du produit pour éviter les fuites. Si
les piles fuient, nettoyez les fuites à l'intérieur du
compartiment à piles et remplacez les piles par des
piles neuves.
piles est fermé et sécurisé.
enfants et peuvent provoquer de graves brûlures
internes et entraîner la mort. Gardez les piles hors
de portée des enfants. Consultez immédiatement
un médecin si vous pensez qu'une pile a été avalée.
Conditions environnementales
• Gardez les piles à l'écart des basses pressions
d'air ou des températures élevées, car cela peut
entraîner une explosion ou la fuite d'un liquide ou
d'un gaz in ammable.
Mise au rebut
• Veuillez jeter les piles correctement en suivant les
instructions de ce manuel (voir la section « Mise
au rebut de cet équipement et des piles »). Ne les
jetez pas au feu, ne les démontez pas et n'essayez
pas de recharger des piles non rechargeables. Elles
peuvent fuir ou exploser.
Mise au rebut de cet
équipement et des piles
Informations pour les utilisateurs sur la collecte et
l'élimination des anciens équipements et des piles
usagées.
Page 69

Ce symbole signi e que le produit
contient des piles couvertes par la
directive européenne 2013/56/UE, qui
ordures ménagères normales. Les indications Cd, Hg
et Pb sous le symbole de poubelle signi ent que la
pile contient du cadmium (Cd), du mercure (Hg) ou
du plomb (Pb).
• Ces symboles sur les produits, l'emballage et/ou
ne peuvent pas être jetées avec les
Ce symbole sur un produit signi e que
le produit est couvert par la directive
européenne 2012/19/UE et ne doit
pas être jeté avec vos autres déchets
ménagers.
Ce symbole signi e que le produit est
conçu et fabriqué de manière à pouvoir
être recyclé et réutilisé.
les documents d'accompagnement signi ent que
les produits électriques et électroniques usagés
FR
ne doivent pas être mélangés avec les ordures
ménagères. Les ménages sont invités à contacter le
magasin où le produit a été acheté, ou les autorités
locales, pour connaître où et comment procéder
au recyclage des composants de façon à respecter
l'environnement.
Déclaration CE et UKCA :
• Par la présente, Sharp Consumer Electronics Poland
sp. z o.o. déclare que cet équipement est conforme
aux exigences essentielles et aux autres dispositions pertinentes de la directive RED 2014/53/UE
et de la réglementation sur l'équipement radio du
Royaume-Uni.
• Le texte complet des déclarations de conformité
CE et UKCA est disponible sur sharpconsumer.
eu et en entrant ensuite dans la section de
téléchargement de votre modèle et en choisissant
«CE Statements».
Page 70

70
fréquence
• En mode Bluetooth: Piste suivante
• Dans le menu: Parcourez les options du menu
10.
Infos/Menu
• Pression courte: Informations sur la station
• Longue pression Accéder aux options du menu
• En mode veille: appuyez brièvement pour
accéder aux paramètres marche/arrêt des
alarmes 1 et 2
11. Préréglages mémoire 1, 2 et 3
• Pression courte: Rappeler le préréglage 1 (2
ou 3)
• Longue pression Mémoriser le préréglage 1
(2 ou 3)
12. Contrôle du volume:
• Rotation: Réglez le volume
• Rotation dans le menu ou les préréglages:
Faites dé ler les options de menu disponibles
ou les emplacements prédé nis
• Pression courte: Sélectionnez une station radio/
fréquence a chée, un menu ou une option
prédé nie
• En mode veille, pression courte: activer une
veilleuse de 10 minutes.
Contenu de l'emballage
1 radio numérique portable Tokyo DR-P420
1 câble d'alimentation USB vers le micro USB
Documentation utilisateur
Utilisation de votre radio
portable DAB+/FM
Antenne télescopique
Déployez complètement l'antenne télescopique
(de préférence verticalement) avant d'essayer de
syntoniser une station DAB/FM. Cela garantira que
la puissance maximale du signal est disponible
lorsque la radio commence à chercher. L'extension
de l'antenne garantit également la meilleure qualité
sonore possible.
Commandes
1. Antenne télescopique
2. Compartiment des piles
3. Port micro USB
4. Prise casque
5. Écran retroéclairé
Alimentation/Mode
6.
• Lorsque l'appareil est éteint, pression courte:
mise sous tension
• Lorsque l'appareil est allumé, pression courte:
changer de mode
• Lors de l'alimentation par USB, pression longue:
veille
• Lors de l'alimentation par piles, pression
longue: arrêt
7.
Préréglage/Lecture/Pause (20 DAB/20 FM)
• Pression courte: Rappel mémoire
• Longue pression Mémoire préréglée
• En mode Bluetooth:
- Appuyez brièvement pour lire/mettre en pause
- Appuyez longuement pour déconnecter
l'appareil actuel et rechercher de nouveaux
appareils
8.
• En mode DAB:
- Appuyez brièvement pour remonter la liste
des stations DAB
• En mode FM:
- Pression courte: Descendez dans la bande de
fréquence de 0,05MHz.
- Longue pression: Descendez dans la bande
de fréquence.
• En mode Bluetooth: Piste précédente
• Dans le menu: Parcourez les options du menu
9.
• En mode DAB:
- Appuyez brièvement pour descendre dans la
liste de stations DAB
• En mode FM:
- Pression courte: Montez dans la bande de
fréquence de 0,05MHz.
- Longue pression: Analysez la bande de
Page 71

fréquence
• En mode Bluetooth: Piste suivante
• Dans le menu: Parcourez les options du menu
10.
Infos/Menu
• Pression courte: Informations sur la station
• Longue pression Accéder aux options du menu
• En mode veille: appuyez brièvement pour
accéder aux paramètres marche/arrêt des
alarmes 1 et 2
11. Préréglages mémoire 1, 2 et 3
• Pression courte: Rappeler le préréglage 1 (2
ou 3)
• Longue pression Mémoriser le préréglage 1
(2 ou 3)
12.
Contrôle du volume:
• Rotation: Réglez le volume
• Rotation dans le menu ou les préréglages:
Faites dé ler les options de menu disponibles
ou les emplacements prédé nis
• Pression courte: Sélectionnez une station radio/
fréquence a chée, un menu ou une option
prédé nie
• En mode veille, pression courte: activer une
veilleuse de 10 minutes.
Contenu de l'emballage
1 radio numérique portable Tokyo DR-P420
1 câble d'alimentation USB vers le micro USB
Documentation utilisateur
Utilisation de votre radio
portable DAB+/FM
Antenne télescopique
Déployez complètement l'antenne télescopique
(de préférence verticalement) avant d'essayer de
syntoniser une station DAB/FM. Cela garantira que
la puissance maximale du signal est disponible
lorsque la radio commence à chercher. L'extension
de l'antenne garantit également la meilleure qualité
sonore possible.
FR
Page 72

72
Heure et date
L'heure et la date seront automatiquement
synchronisées avec celles di usées par le service DAB
au format 24 heures.
Pour régler l'heure et la date manuellement, allumez
la radio. Appuyez longuement sur
pour accéder
aux options du menu.
Utilisez pour sélectionner <Système> / <
Heure> / <Régl. heure/date>. <Réglage heure>
s'a che et les chi res des heures clignotent; utilisez
pour régler les heures et les minutes.
<Réglage date> s'a che et le jour clignote ; utilisez
pour régler le jour, le mois et l'année.
<Heure Enregistré> s'a che une fois l'année
con rmée, et vous reviendrez au menu <Régl. heure/
date>.
Utilisez pour modi er le format de
l'horloge/de la date et les paramètres de mise à jour
automatique. Appuyez brièvement pour quitter le
menu.
Changer de mode
Appuyez brièvement sur pour basculer entre
les modes DAB, FM et Bluetooth. L'écran con rmera
le mode.
Mode radio DAB
Sélectionner le radio mode DAB
Appuyez brièvement sur jusqu'à ce que
l'écran a che < DAB+>. La première fois que vous
utilisez la radio ou si la liste des stations est vide, votre
radio commencera automatiquement à rechercher
les stations radio DAB. Une barre de progression
montrera la progression de la recherche, et le
nombre de stations trouvées pendant la recherche
sera également a ché. Si vous écoutiez une station
DAB lorsque vous avez éteint la radio, cette station
sera automatiquement sélectionnée lorsque vous
rallumerez la radio.
Connexion
Connectez le câble USB fourni au port micro USB
à l'arrière de la radio. Branchez l'extrémité USB-A
(standard) du câble à un périphérique ou adaptateur
USB pour alimenter la radio. La radio s'allumera et
a chera <SHARP sharpconsumer.eu>. Elle passera
alors en mode veille.
Insertion des piles (facultatif)
Avant d'installer les piles (non incluses), assurezvous que la radio est éteinte avec
été débranchée du câble USB. À l'arrière de la
radio, appuyez sur la languette du couvercle du
compartiment des piles pour le retirer.
Insérez 4 piles de type AA de 1,5 V (également
appelées LR-6), en vous assurant de noter les repères
«+» et «-» et de positionner les piles correctement.
Replacez le couvercle des piles en vous assurant qu'il
s'enclenche correctement.
Con guration initiale
Appuyez brièvement sur pour allumer la
et a
radio. Elle lancera une recherche automatique des
stations DAB. Une barre de progression a che la
progression de la recherche et le nombre de stations
trouvées. Une fois la recherche terminée, votre
radio sélectionnera la première station disponible
et commencera à la lire. Par défaut, les stations sont
répertoriées par ordre numérique puis alphabétique.
Remarque: La liste des stations radio DAB est
stockée en mémoire ; la prochaine fois que la radio
est allumée, la recherche de stations n'a pas lieu.
Appuyez brièvement sur
les stations disponibles. Pour sélectionner la station
a chée, appuyez brièvement sur
court délai pendant que votre radio syntonise la
station sélectionnée.
Réglage du volume
Tournez dans le sens horaire pour
augmenter le volume et dans le sens antihoraire pour
le diminuer.
ou pour faire dé ler
. Il y aura un
Page 73
Heure et date
L'heure et la date seront automatiquement
synchronisées avec celles di usées par le service DAB
au format 24 heures.
Pour régler l'heure et la date manuellement, allumez
la radio. Appuyez longuement sur
aux options du menu.
Utilisez
Heure> / <Régl. heure/date>. <Réglage heure>
s'a che et les chi res des heures clignotent; utilisez
<Réglage date> s'a che et le jour clignote ; utilisez
<Heure Enregistré> s'a che une fois l'année
con rmée, et vous reviendrez au menu <Régl. heure/
date>.
Utilisez
l'horloge/de la date et les paramètres de mise à jour
automatique. Appuyez brièvement pour quitter le
menu.
pour sélectionner <Système> / <
pour régler les heures et les minutes.
pour régler le jour, le mois et l'année.
pour modi er le format de
pour accéder
FR
Changer de mode
Appuyez brièvement sur pour basculer entre
les modes DAB, FM et Bluetooth. L'écran con rmera
le mode.
Mode radio DAB
Sélectionner le radio mode DAB
Appuyez brièvement sur jusqu'à ce que
l'écran a che < DAB+>. La première fois que vous
utilisez la radio ou si la liste des stations est vide, votre
radio commencera automatiquement à rechercher
les stations radio DAB. Une barre de progression
montrera la progression de la recherche, et le
nombre de stations trouvées pendant la recherche
sera également a ché. Si vous écoutiez une station
DAB lorsque vous avez éteint la radio, cette station
sera automatiquement sélectionnée lorsque vous
rallumerez la radio.
Page 74

74
Réglez votre radio sur la station DAB que vous
souhaitez prérégler. Appuyez longuement sur
jusqu'à ce que <Mémor. prérégl. <1:(Vide)>>
s'a che. Utilisez pour vous déplacer vers
l'emplacement préréglé auquel vous souhaitez
mémoriser la station radio (1-20). Appuyez sur
pour sélectionner. L'écran con rmera <Prérégl. X
mém.sé>, où ' X' est le numéro du préréglage (1-20)
Remarque: S'il y a déjà une station DAB enregistrée
dans un préréglage, elle sera remplacée lorsque vous
enregistrez une nouvelle station.
Régler sur une station radio DAB
prédé nie
En mode DAB:
Pour accéder rapidement aux stations radio
enregistrées sous les emplacements de préréglage
1, 2 ou 3, appuyez sur la touche correspondante (1, 2
ou 3) sur le devant de votre radio. Vous pouvez aussi
appuyer brièvement sur
. <Rappel mémorisé
<1:>> s'a che avec le nom ou la fréquence de la
station qui y est mémorisée, ou <(Vide)> si aucune
station précédente n'a été mémorisée. Utilisez
pour vous déplacer, et sélectionnez la
station préréglée que vous souhaitez écouter (1-20).
Affi chage des données DAB
Lorsque vous écoutez une station DAB, vous pouvez
modi er les informations qui s'a chent à l'écran.
Plusieurs types d'informations sont envoyées par le
di useur. Appuyez brièvement sur
plusieurs
fois pour faire dé ler les di érentes options
d'informations:
• Segment d'étiquette dynamique (DLS) - Il s'agit
d'informations textuelles dé lantes telles que
fournies par le di useur. Cela peut inclure des noms
d'artistes, des titres de chansons, les coordonnées
de la station de radio, etc.
• Intensité du signal - Un vide apparaîtra sur
l'écran pour indiquer la puissance minimale du
signal pour une écoute acceptable. La ligne de
rectangles remplis indique la puissance réelle du
signal que vous recevez.
Changer de station DAB
Utilisez et pour faire dé ler les stations
disponibles. Appuyez sur
la station que vous souhaitez écouter lorsqu'elle
s'a che. Il y aura un court délai pendant que votre
radio syntonise la station sélectionnée.
Recherche de stations DAB
Avec la radio DAB, des stations et des services
supplémentaires deviennent régulièrement
disponibles. E ectuez une recherche manuelle
périodiquement pour vous assurer que vous disposez
de la liste de stations la plus à jour stockée dans la
mémoire de votre radio. Si vous avez déplacé votre
radio vers un nouvel emplacement, par exemple si
vous partez en vacances à l'étranger, il est également
judicieux d'e ectuer une recherche manuelle.
En mode DAB:
Appuyez longuement sur
faire dé ler, et sélectionnez <Recherche totale>.
L'écran passera à <Recherche...>. Une barre de
progression a che la progression de la recherche et
pour sélectionner
. Utilisez pour
le nombre de stations trouvées.
Écrêter des stations DAB
Vous pouvez supprimer de la liste des stations les
stations DAB qui ne peuvent pas être captées dans
votre région. Celles-ci sont indiquées avec un pré xe
<?>.
En mode DAB:
Appuyez longuement sur
faire dé ler, et sélectionnez <Ecrêter>. <Ecrêter?
<Non> Oui> s'a che. Utilisez
dé ler, et sélectionnez <Oui>. Les stations avec un
pré xe <?> ne s'a cheront plus.
Mémorisation d'un préréglage de
station DAB
Votre radio peut stocker jusqu'à 20 stations de
radio DAB en tant que préréglages pour un accès
instantané à vos stations préférées.
Remarque: La mémorisation des préréglages de
station radio DAB ne remplace pas les préréglages
de station FM.
. Utilisez pour
pour faire
Page 75
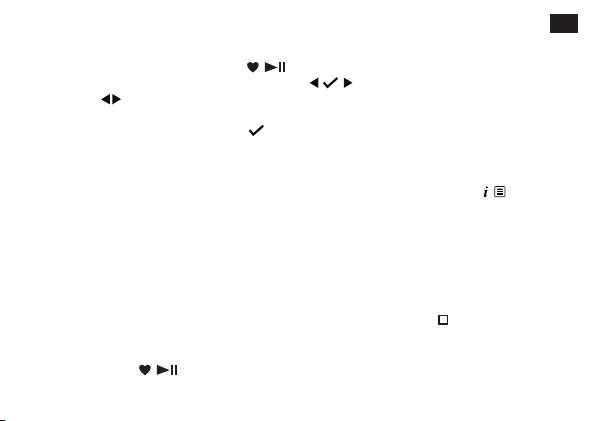
Réglez votre radio sur la station DAB que vous
souhaitez prérégler. Appuyez longuement sur
jusqu'à ce que <Mémor. prérégl. <1:(Vide)>>
s'a che. Utilisez
l'emplacement préréglé auquel vous souhaitez
mémoriser la station radio (1-20). Appuyez sur
pour sélectionner. L'écran con rmera <Prérégl. X
mém.sé>, où ' X' est le numéro du préréglage (1-20)
Remarque: S'il y a déjà une station DAB enregistrée
dans un préréglage, elle sera remplacée lorsque vous
enregistrez une nouvelle station.
pour vous déplacer vers
Régler sur une station radio DAB
prédé nie
En mode DAB:
Pour accéder rapidement aux stations radio
enregistrées sous les emplacements de préréglage
1, 2 ou 3, appuyez sur la touche correspondante (1, 2
ou 3) sur le devant de votre radio. Vous pouvez aussi
appuyer brièvement sur
<1:>> s'a che avec le nom ou la fréquence de la
. <Rappel mémorisé
station qui y est mémorisée, ou <(Vide)> si aucune
station précédente n'a été mémorisée. Utilisez
pour vous déplacer, et sélectionnez la
station préréglée que vous souhaitez écouter (1-20).
Affi chage des données DAB
Lorsque vous écoutez une station DAB, vous pouvez
modi er les informations qui s'a chent à l'écran.
Plusieurs types d'informations sont envoyées par le
di useur. Appuyez brièvement sur
fois pour faire dé ler les di érentes options
d'informations:
• Segment d'étiquette dynamique (DLS) - Il s'agit
d'informations textuelles dé lantes telles que
fournies par le di useur. Cela peut inclure des noms
d'artistes, des titres de chansons, les coordonnées
de la station de radio, etc.
• Intensité du signal - Un
l'écran pour indiquer la puissance minimale du
signal pour une écoute acceptable. La ligne de
rectangles remplis indique la puissance réelle du
signal que vous recevez.
plusieurs
vide apparaîtra sur
FR
Page 76

76
Mode radio FM
Pour passer en mode FM, appuyez brièvement sur
jusqu'à ce que la radio a che <FM >. Si
vous écoutiez une station FM lorsque vous avez
éteint la radio, cette station sera automatiquement
sélectionnée lorsque vous rallumerez la radio.
Syntoniser une station FM
Appuyez longuement sur ou pour parcourir
la bande de fréquence vers le haut ou le bas. La
radio recherchera et s'arrêtera à la prochaine station
disponible.
Appuyez brièvement sur ou pour a ner
chaque fréquence par pas de 0,05MHz.
Remarque: Si la réception est mauvaise, ajustez
l'antenne ou déplacez la radio à un autre endroit.
Modi er le réglage de recherche
En mode FM:
Appuyez longuement sur
, <Régl. recherche>
s'a chera. Appuyez sur .
Vous avez le choix entre deux options :
• <Stations fortes> La recherche ne s'arrêtera qu'à
la réception d'un signal fort, ce qui se traduira par
une meilleure qualité audio. Il est possible que la
station que vous recherchez soit manquée si vous
utilisez cette option.
• <Toutes chaînes> La recherche s'arrêtera à chaque
station trouvée, même si l'intensité du signal est
faible.
Utilisez pour choisir et sélectionner parmi les
options disponibles.
Remarque: Le paramètre de numérisation actuel
aura un astérisque (*) sur l'écran.
Mémorisation d'un préréglage de
station FM
Votre radio peut stocker jusqu'à 20 stations FM en
tant que préréglages pour un accès instantané à vos
stations préférées.
Remarque: La mémorisation des préréglages de
station radio FM ne remplace pas vos préréglages de
• Type de programme (PTY) - par exemple, 'Rock',
'Pop', 'Chroniques' ou 'Informations'
• Nom du multiplex - A che la zone de di usion
et la collection de stations de radio sur cette
fréquence, par exemple, BBC National DAB, Digital
1 Network
• Canal et fréquence – Par exemple 12B 225,648 MHz
(Canal=12B, Fréquence=225,648 MHz)
• Erreur signal - S'a che sous la forme d'un nombre
compris entre 0 et 99. Pour écouter correctement
une station de radio, l'erreur de signal doit être
inférieure à 30. Ajustez l'antenne ou déplacez votre
radio pour améliorer la réception.
• Informations sur le signal - Le débit de données
auquel le signal est transmis.
• Indicateur d'alimentation - a che <Alimentation
USB> lors de l'alimentation par USB ; a che
<Batterie XX> où XX est la charge de batterie
disponible.
• Temps
• Date
Contrôle de plage dynamique (DRC)
Les données DRC ne sont pas transmises par tous
les di useurs. DRC est utilisé pour contrôler la
di érence entre les sons les plus forts et les plus
faibles. Par exemple, dans un environnement bruyant,
régler le DRC au maximum rend les sons faibles
comparativement plus forts et les sons forts plus
silencieux.
Il existe 3 niveaux de compression :
• DRC Désactivé – Pas de compression Il s'agit du
paramètre par défaut.
• DRC bas - Compression moyenne
• DRC haut - Compression maximale
En mode DAB, appuyez longuement sur
pour faire dé ler, et sélectionnez <RDC>,
puis votre préférence.
Remarque: Le réglage actuel de DRC aura un
astérisque (*) sur l'écran.
. Utilisez
Page 77

Mode radio FM
Pour passer en mode FM, appuyez brièvement sur
jusqu'à ce que la radio a che <FM >. Si
vous écoutiez une station FM lorsque vous avez
éteint la radio, cette station sera automatiquement
sélectionnée lorsque vous rallumerez la radio.
Syntoniser une station FM
Appuyez longuement sur ou pour parcourir
la bande de fréquence vers le haut ou le bas. La
radio recherchera et s'arrêtera à la prochaine station
disponible.
Appuyez brièvement sur
chaque fréquence par pas de 0,05MHz.
Remarque: Si la réception est mauvaise, ajustez
l'antenne ou déplacez la radio à un autre endroit.
Modi er le réglage de recherche
En mode FM:
Appuyez longuement sur
s'a chera. Appuyez sur
ou pour a ner
, <Régl. recherche>
.
FR
Vous avez le choix entre deux options :
• <Stations fortes> La recherche ne s'arrêtera qu'à
la réception d'un signal fort, ce qui se traduira par
une meilleure qualité audio. Il est possible que la
station que vous recherchez soit manquée si vous
utilisez cette option.
• <Toutes chaînes> La recherche s'arrêtera à chaque
station trouvée, même si l'intensité du signal est
faible.
Utilisez
options disponibles.
Remarque: Le paramètre de numérisation actuel
aura un astérisque (*) sur l'écran.
pour choisir et sélectionner parmi les
Mémorisation d'un préréglage de
station FM
Votre radio peut stocker jusqu'à 20 stations FM en
tant que préréglages pour un accès instantané à vos
stations préférées.
Remarque: La mémorisation des préréglages de
station radio FM ne remplace pas vos préréglages de
Page 78
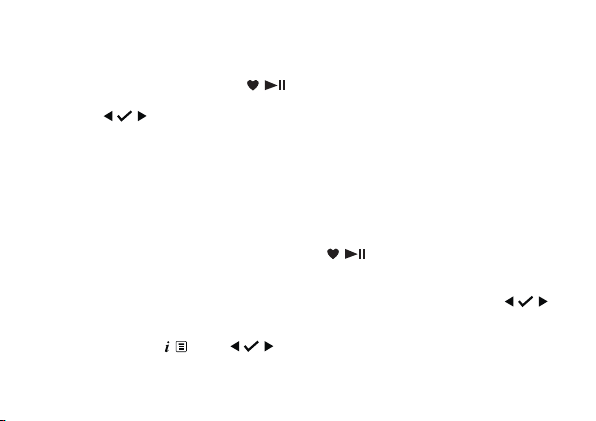
78
Affi chage des données FM
Lorsque vous écoutez une station FM, vous pouvez
modi er les informations qui apparaissent sur la
deuxième ligne de l'écran. Appuyez brièvement sur
plusieurs fois pour faire dé ler les di érentes
options d'informations:
• Radiotexte (RT) - Il s'agit d'informations textuelles
dé lantes telles que fournies par le di useur. Cela
peut inclure des noms d'artistes, des titres de chan-
sons, les coordonnées de la station de radio, etc.
• Type de programme (PTY) - par exemple, 'Rock',
'Pop‘, 'Chroniques' ou 'Informations'
• Nom ou fréquence de la station – Par exemple, BBC
R4, 93,30 MHz
• Indicateur d'alimentation - a che <Alimentation
USB> lors de l'alimentation par USB ; a che
<Batterie XX> où XX est la charge de batterie
disponible.
• Heure
• Date
Mode Bluetooth
Assurez-vous que votre radio est en mode Bluetooth
en appuyant brièvement sur
jusqu'à ce que la
radio a che <Bluetooth>. Votre radio commencera à
rechercher les appareils Bluetooth. Assurez-vous que
l'appareil compatible Bluetooth auquel vous vous
connectez est détectable.
Remarque: Si nécessaire, reportez-vous aux
instructions de votre appareil pour ajouter ou
con gurer Bluetooth.
Une fois trouvée, votre radio s'a chera sous le nom
«SHARP DR-P420» sur votre appareil. Sélectionnez-la
pour commencer l'appariement. Une fois cela fait,
<BT connected> s'a chera sur votre radio.
Les appareils appariés se connecteront à la radio
lorsqu'ils seront à portée (dans un rayon de 10 mètres
sans obstruction). Votre appareil restera apparié
avec la radio à moins que vous ne décidiez de le
déconnecter.
Pour vous déconnecter du Bluetooth, appuyez sur
pendant 3 secondes pour dissocier votre
station DAB.
Réglez votre radio sur la station FM que vous
souhaitez prérégler. Appuyez longuement sur
jusqu'à ce que <Mémor. prérégl. <1:(Vide)>>
s'a che. Utilisez pour vous déplacer, et
sélectionnez l'emplacement préréglé auquel vous
souhaitez mémoriser la station radio (1-20). L'écran
con rmera <Prérégl. X mém.sé>, où ' X' est le
numéro du préréglage (1-20).
Remarque: S'il y a déjà une station FM enregistrée
dans un préréglage, elle sera remplacée lorsque vous
enregistrez une nouvelle station.
Stockage en mémoire automatique
(AMS)
Alternativement, vous pouvez utiliser la fonction
de stockage en mémoire automatique (AMS) pour
stocker vos stations radio FM préréglées. En mode
FM, appuyez longuement sur
pour faire dé ler, et sélectionnez <AMS>. Votre radio
va maintenant parcourir la bande de fréquence FM,
et les stations trouvées seront automatiquement
. Utilisez
stockées dans les emplacements préréglés.
Remarque: Vous pouvez remplacer manuellement
vos préréglages AMS stockés en suivant les étapes
de «Mémorisation d'un préréglage de station FM»
ci-dessus.
Syntoniser une station FM préréglée
En mode FM:
Pour accéder rapidement aux stations radio
enregistrées sous les emplacements de préréglage
1, 2 ou 3, appuyez sur la touche correspondante
(1, 2 ou 3). Vous pouvez aussi appuyer brièvement
sur
. <Rappel mémorisé <1:>> s'a che
avec le nom ou la fréquence de la station qui y
est mémorisée, ou <(Vide)> si aucune station
précédente n'a été mémorisée. Utilisez
vous déplacer, et sélectionnez la station préréglée
que vous souhaitez écouter (1-20).
pour
Page 79

Affi chage des données FM
Lorsque vous écoutez une station FM, vous pouvez
modi er les informations qui apparaissent sur la
deuxième ligne de l'écran. Appuyez brièvement sur
plusieurs fois pour faire dé ler les di érentes
options d'informations:
• Radiotexte (RT) - Il s'agit d'informations textuelles
dé lantes telles que fournies par le di useur. Cela
peut inclure des noms d'artistes, des titres de chansons, les coordonnées de la station de radio, etc.
• Type de programme (PTY) - par exemple, 'Rock',
'Pop‘, 'Chroniques' ou 'Informations'
• Nom ou fréquence de la station – Par exemple, BBC
R4, 93,30 MHz
• Indicateur d'alimentation - a che <Alimentation
USB> lors de l'alimentation par USB ; a che
<Batterie XX> où XX est la charge de batterie
disponible.
• Heure
• Date
FR
Mode Bluetooth
Assurez-vous que votre radio est en mode Bluetooth
en appuyant brièvement sur
radio a che <Bluetooth>. Votre radio commencera à
rechercher les appareils Bluetooth. Assurez-vous que
l'appareil compatible Bluetooth auquel vous vous
connectez est détectable.
Remarque: Si nécessaire, reportez-vous aux
instructions de votre appareil pour ajouter ou
con gurer Bluetooth.
Une fois trouvée, votre radio s'a chera sous le nom
«SHARP DR-P420» sur votre appareil. Sélectionnez-la
pour commencer l'appariement. Une fois cela fait,
<BT connected> s'a chera sur votre radio.
Les appareils appariés se connecteront à la radio
lorsqu'ils seront à portée (dans un rayon de 10 mètres
sans obstruction). Votre appareil restera apparié
avec la radio à moins que vous ne décidiez de le
déconnecter.
Pour vous déconnecter du Bluetooth, appuyez sur
pendant 3 secondes pour dissocier votre
jusqu'à ce que la
Page 80

80
DAB+
Recherche totale
Réglage manuel Système
DRC Mode sommeil Alarme
Ecrêter Alarme Con guration alarme 1
Système Heure Con guration alarme 2
Rétroéclairé
FM
Régl. recherche Langue
AMS Régl. en usine
Système Version du logiciel
BT Système
Paramètres d'alarme 1 ou 2
Heure
Heure
Min
Durée 1, 5, 15, 30 ou 60 minutes
Source Buzzer, DAB ou FM
Fréquence Tous les jours, Une fois, Semaine ou Week end
Niveau de volume 25à 100%
Alarme Marche ou Arrêt
appareil actuel et rechercher de nouveaux appareils.
Di user de la musique sans l via
Bluetooth
En mode Bluetooth, vous pouvez di user de l'audio
sans l via le haut-parleur du produit. Utilisez les
commandes de votre appareil Bluetooth apparié ainsi
que celles de votre radio. Commandes disponibles:
• Lecture/Pause: Pression courte sur
• Piste précédente: Pression courte sur
• Piste suivante: Pression courte sur
Le volume peut également être réglé à l'aide de votre
radio et/ou de votre appareil connecté.
Remarque: Si la radio est inactive pendant
20minutes, ou si aucun signal audio n'est reçu,
la radio se mettra automatiquement en veille (ou
s'éteindra si la radio fonctionne sur piles).
Fonction d'alarme
Remarque: La fonction d'alarme ne fonctionnera
que lorsque la radio est alimentée via USB; elle ne
fonctionnera pas lorsqu'elle est alimentée par des
piles (pour préserver la durée de vie de ces dernières).
Régler une alarme
Remarque: Véri ez que la radio a che l'heure et la
date correctes avant de régler une alarme.
Page 81

Recherche totale
Réglage manuel Système
DRC Mode sommeil Alarme
DAB+
Ecrêter Alarme Con guration alarme 1
Système Heure Con guration alarme 2
Régl. recherche Langue
FM
AMS Régl. en usine
Système Version du logiciel
BT Système
Heure
Durée 1, 5, 15, 30 ou 60 minutes
Source Buzzer, DAB ou FM
Fréquence Tous les jours, Une fois, Semaine ou Week end
Niveau de volume 25à 100%
Alarme Marche ou Arrêt
Rétroéclairé
Paramètres d'alarme 1 ou 2
Heure
Min
FR
Page 82

82
pour faire dé ler, et sélectionnez
<Système> / <Rétroéclairé> / <Temporisation>.
Faites dé ler les options de temporisation du
rétroéclairage disponibles. Le réglage actuel aura
un astérisque (*) sur l'écran. Appuyez sur pour
sélectionner.
De même, utilisez pour modi er les
paramètres de luminosité du rétroéclairage pour
<Niveau attén.> et <Niveau marche>. 3 options
sont disponibles : <Élevé>, <Moyen> et <Bas>.
Langue d'affi chage
Pour changer la langue d'a chage, appuyez
longuement sur
. Utilisez pour faire
dé ler, et sélectionnez <Langue> / <Mode Langue>.
Utilisez pour faire dé ler, et sélectionnez la
langue de votre choix. 7 options sont disponibles :
Anglais, français, allemand, italien, espagnol, polonais
et néerlandais. Un astérisque (*) s'a chera à côté du
paramètre de langue actuel.
Autres informations
Version du logiciel
Pour véri er la version du logiciel de votre radio,
appuyez longuement sur
. Utilisez pour
faire dé ler, et sélectionnez < Version logiciel> /
<Version logiciel>. La version du logiciel s'a che.
Réinitialisation des paramètres
d'usine
Vous pouvez réinitialiser votre radio pour la restaurer
aux paramètres d'usine.
Remarque: Si vous réinitialisez votre radio, vos
préréglages stockés seront supprimés et tout appareil
Bluetooth connecté sera dissocié.
Appuyez longuement sur
. Utilisez pour
faire dé ler, et sélectionnez < Version logiciel> /
<Régl. en usine>. <Régl. en usine? <Non> Oui>
s'a chera. Utilisez pour faire dé ler, et
sélectionnez <Oui>. <Redémarrage…> s'a chera.
Après quelques secondes, l'écran passe à <SHARP
Remarque: Si l'heure n'est pas réglée ou n'a pas
pu être mise à jour à partir du signal radio, <Heure
non réglée> s'a che lorsque vous essayez de régler
l'alarme. La radio vous demandera alors de régler
l'heure. Une alarme ne peut être réglée qu'après le
réglage de l'heure.
Si vous essayez de régler l'alarme alors que l'appareil
est alimenté par des piles, <Alarme inactive>
s'a che. Les fonctions d'alarme ne sont disponibles
qu'avec l'alimentation secteur (USB).
Arrêter, répéter ou désactiver
l'alarme
Pour arrêter l'alarme, appuyez brièvement sur
, <Alarme désactivée> s'a chera. Le
symbole d'alarme restera à l'écran et l'alarme retentira
à nouveau à la même heure le jour suivant, sauf si elle
a été réglée sur <Une fois>.
Pour répéter l'alarme, appuyez sur
s'a che, suivi d'un compte à rebours de 10 minutes.
Une fois le compte à rebours terminé, l'alarme retentit
à nouveau. Vous pouvez mettre n à la répétition en
. <Veilleuse>
appuyant sur
Pour désactiver l'alarme, suivez les étapes de 'Régler
une alarme' et sélectionnez <Arrêt>.
Minuteur de mise en veille
Vous pouvez con gurer votre radio pour qu'elle
passe automatiquement en mode veille à l'aide de la
minuterie de mise en veille. Vous pouvez choisir entre
<Arr.mode sommeil>, <15>, <30>, <45>, <60> et
<90> minutes. Pour ce faire, appuyez longuement
sur
sélectionnez <Système> / <Mode sommeil>. Utilisez
préférence. <Mode sommeil> s'a chera. En haut à
droite de l'écran de la radio, le nombre de minutes
jusqu'à ce que votre radio passe en mode veille
s'a che, par exemple S90.
Temporisation du rétroéclairage de
l'écran
Pour régler la temporisation du rétroéclairage de
l'écran, appuyez longuement sur
. <Réveil désactivé> s'a chera.
. Utilisez pour faire dé ler, et
pour faire dé ler, et sélectionnez votre
. Utilisez
Page 83

pour faire dé ler, et sélectionnez
<Système> / <Rétroéclairé> / <Temporisation>.
Faites dé ler les options de temporisation du
rétroéclairage disponibles. Le réglage actuel aura
un astérisque (*) sur l'écran. Appuyez sur
sélectionner.
De même, utilisez
paramètres de luminosité du rétroéclairage pour
<Niveau attén.> et <Niveau marche>. 3 options
sont disponibles : <Élevé>, <Moyen> et <Bas>.
pour modi er les
pour
Langue d'affi chage
Pour changer la langue d'a chage, appuyez
longuement sur
dé ler, et sélectionnez <Langue> / <Mode Langue>.
Utilisez
langue de votre choix. 7 options sont disponibles :
Anglais, français, allemand, italien, espagnol, polonais
et néerlandais. Un astérisque (*) s'a chera à côté du
paramètre de langue actuel.
. Utilisez pour faire
pour faire dé ler, et sélectionnez la
FR
Autres informations
Version du logiciel
Pour véri er la version du logiciel de votre radio,
appuyez longuement sur
faire dé ler, et sélectionnez < Version logiciel> /
<Version logiciel>. La version du logiciel s'a che.
Réinitialisation des paramètres
d'usine
Vous pouvez réinitialiser votre radio pour la restaurer
aux paramètres d'usine.
Remarque: Si vous réinitialisez votre radio, vos
préréglages stockés seront supprimés et tout appareil
Bluetooth connecté sera dissocié.
Appuyez longuement sur
faire dé ler, et sélectionnez < Version logiciel> /
<Régl. en usine>. <Régl. en usine? <Non> Oui>
s'a chera. Utilisez
sélectionnez <Oui>. <Redémarrage…> s'a chera.
Après quelques secondes, l'écran passe à <SHARP
. Utilisez pour
. Utilisez pour
pour faire dé ler, et
Page 84

84
Spéci cations techniques
Entrée 5V CC
Piles 4 x 1,5 V taille AA (LR-6) (en option, non fournies)
Sortie audio 2 Watts RMS
Consommation électrique Active: < 2 W Veille: < 2 mW
Plage de fréquences DAB: Bande III, 174 à 240 MHz
Plage de fréquences FM 87,5 à 108MH z
Bluetooth 2,4- 2,480GHz
Nom d'appariement SHARP DR-P420
Dimensions (L) x (H) x (P) mm 174 x 90 x 53
Poids approx. 0,39 kg
sharpconsumer.eu> et entre ensuite en mode veille.
Dépannage
S'il n'y a pas de son ou d'alimentation:
• Réglez le volume.
• Véri ez que le câble USB est connecté et que la
radio n'est pas en mode veille.
• Si le produit est alimenté par des piles, véri ez si
elles doivent être remplacées. Utilisez des piles AA
de bonne qualité.
Si la réception radio est mauvaise :
• Assurez-vous que vous avez entièrement étendu
l'antenne télescopique (de préférence verticalement).
• Recherchez à nouveau les stations de radio.
Reportez-vous aux sections «Recherche de stations
DAB» et/ou «Syntoniser une station FM», selon
le cas.
• Essayez de déplacer votre radio à un autre endroit
pour voir si la réception s'améliore.
• Véri ez que vous n'avez pas posé un autre équi-
pement électrique à proximité de votre radio. Cela
peut provoquer des interférences.
Si vous ne parvenez pas à apparier un appareil
Bluetooth:
• Véri ez que vous êtes en mode Bluetooth.
• Assurez-vous que vous êtes à moins de 10 mètres
de la radio pour la fonctionnalité Bluetooth.
• Éloignez la radio et l'appareil Bluetooth des autres
appareils Bluetooth/équipements électriques.
• Si possible, éteignez les autres appareils Bluetooth
à proximité ou désactivez leur fonctionnalité
Bluetooth.
Si les boutons de fonction ne répondent pas :
• Véri ez que le câble USB est connecté à l'arrière
de votre radio. Appuyez brièvement sur
. Si vous utilisez des piles, il se peut qu'elles aient
besoin d'être remplacées.
• Réinitialisez l'appareil aux paramètres d'usine.
Remarque: Tous vos paramètres, y compris la
liste des stations de radio, les appareils Bluetooth
connectés et tous les préréglages seront supprimés
lors d'une réinitialisation aux paramètres d'usine.
Page 85

Spéci cations techniques
Entrée 5V CC
Piles 4 x 1,5 V taille AA (LR-6) (en option, non fournies)
Sortie audio 2 Watts RMS
Consommation électrique Active: < 2 W Veille: < 2 mW
Plage de fréquences DAB: Bande III, 174 à 240 MHz
Plage de fréquences FM 87,5 à 108MH z
Bluetooth 2,4- 2,480GHz
Nom d'appariement SHARP DR-P420
Dimensions (L) x (H) x (P) mm 174 x 90 x 53
Poids approx. 0,39 kg
FR
Page 86

86
Fiamme scoperte
• Per prevenire il rischio di incendio, tenere candele o
amme scoperte lontane da questo prodotto.
Acqua, umidità e in ltrazioni di liquidi
• Per prevenire il rischio di incendio o scossa elettrica,
non esporre questo prodotto a pioggia, acqua o
umidità. Non collocare oggetti pieni di liquidi sopra
o vicino a questo prodotto.
Temporali e fulmini
• I temporali sono pericolosi per i prodotti elettronici.
Se i cavi della rete elettrica o l'antenna vengono
colpiti da un fulmine, il prodotto potrebbe risul-
tarne danneggiato, anche se spento. È opportuno
scollegare tutti i cavi e i connettori che partono dal
prodotto prima di un temporale.
Cavo USB
• Non danneggiare, tirare e piegare il cavo di ricarica
USB o collocarci sopra qualcosa.
Danni
• Controlla che l'unità non abbia riportato danni
dopo aver aperto la confezione. Se è danneggiato
in qualsiasi modo, non utilizzare l'unità e consultare
il rivenditore.
Manutenzione
• Disconnettere il cavo di alimentazione dalla presa
elettrica prima di pulire il prodotto. Usare un panno
morbido e pulito per pulire l’esterno dell’unità. Non
pulire con agenti chimici e detergenti.
Assistenza e riparazione
• Questo prodotto non ha componenti che possano
essere riparate dall'utente. Esporre le parti interne
al dispositivo può comportare un pericolo di vita. In
caso di guasto, contattate il produttore o l'agente
di servizio autorizzato. La garanzia non copre danni
causati da riparazioni e ettuate da terze parti non
autorizzate.
Batterie
Installazione
• Non utilizzare batterie diverse da quelle speci cate.
Rispettare la corretta polarità quando inserite le
batterie. Non usare mai batterie di tipi diversi insie-
me, né mescolare batterie vecchie con nuove.
Importanti istruzioni di
sicurezza
Seguire tutte le istruzioni di
sicurezza e fare attenzione a tutte le
avvertenze. Conservare il manuale
per consultazioni future.
Questo simbolo indica all'utente di
consultare il manuale utente per ulteriori
informazioni relative a sicurezza, utilizzo e
manutenzione.
Tensione DC
Precauzioni
Sicurezza per i bambini
• Seguire sempre le precauzioni di sicurezza basilari
quando si utilizza questo prodotto, specialmente in
presenza di bambini. I bambini dovrebbero essere
supervisionati per assicurarsi che non giochino con
il prodotto.
Posizione
• Il prodotto deve essere installato in un luogo
stabile e bisogna assicurarsi che esso e le sue parti
non siano pendenti.
Areazione
• Le fessure e le aperture nell'involucro sono state
creare per la corretta areazione, in modo da assicurare un funzionamento a dabile del prodotto e
proteggerlo dal surriscaldamento; queste aperture
non devono essere ostruite o coperte. Assicurare
una distanza minima di 5 cm attorno al prodotto
per una ventilazione su ciente. Mai lasciare che
qualcuno inserisca qualcosa nei fori e nelle aperture dell’involucro dell’unità, in quanto ciò potrebbe
risultare in una scossa elettrica.
Calore e temperatura di funzionamento
• Non installarlo vicino a fonti di calore come termo-
sifoni, griglie di ventilazione, stufe o altri apparecchi
(inclusi ampli catori) che generano calore. Evitare
l'esposizione alla luce diretta del sole.
Page 87

Fiamme scoperte
• Per prevenire il rischio di incendio, tenere candele o
amme scoperte lontane da questo prodotto.
Acqua, umidità e in ltrazioni di liquidi
• Per prevenire il rischio di incendio o scossa elettrica,
non esporre questo prodotto a pioggia, acqua o
umidità. Non collocare oggetti pieni di liquidi sopra
o vicino a questo prodotto.
Temporali e fulmini
• I temporali sono pericolosi per i prodotti elettronici.
Se i cavi della rete elettrica o l'antenna vengono
colpiti da un fulmine, il prodotto potrebbe risultarne danneggiato, anche se spento. È opportuno
scollegare tutti i cavi e i connettori che partono dal
prodotto prima di un temporale.
Cavo USB
• Non danneggiare, tirare e piegare il cavo di ricarica
USB o collocarci sopra qualcosa.
Danni
• Controlla che l'unità non abbia riportato danni
dopo aver aperto la confezione. Se è danneggiato
in qualsiasi modo, non utilizzare l'unità e consultare
il rivenditore.
IT
Manutenzione
• Disconnettere il cavo di alimentazione dalla presa
elettrica prima di pulire il prodotto. Usare un panno
morbido e pulito per pulire l’esterno dell’unità. Non
pulire con agenti chimici e detergenti.
Assistenza e riparazione
• Questo prodotto non ha componenti che possano
essere riparate dall'utente. Esporre le parti interne
al dispositivo può comportare un pericolo di vita. In
caso di guasto, contattate il produttore o l'agente
di servizio autorizzato. La garanzia non copre danni
causati da riparazioni e ettuate da terze parti non
autorizzate.
Batterie
Installazione
• Non utilizzare batterie diverse da quelle speci cate.
Rispettare la corretta polarità quando inserite le
batterie. Non usare mai batterie di tipi diversi insieme, né mescolare batterie vecchie con nuove.
Page 88

88
Questo simbolo indica che il prodotto è
coperto dalla Direttiva europea 2012/19/
EU che decreta che non può essere
smaltito o gettato con i normali ri uti
domestici.
Questo simbolo indica che il prodotto
è progettato e fabbricato in modo da
essere riciclato e riutilizzato.
• Questi simboli sul prodotto, sulla confezione e/o
sui documenti che lo accompagnano indicano
che i prodotti elettrici ed elettronici usati e le
batterie usate non vanno mischiate con i ri uti
domestici generici. Gli utenti in contesti domestici
dovrebbero contattare il rivenditore presso cui
hanno acquistato il prodotto oppure un u cio
governativo locale per ricevere dettagli su dove e
come portare questi oggetti per un riciclaggio che
rispetti l'ambiente.
Dichiarazione CE e UKCA:
• Con il presente, Sharp Consumer Electronics Poland
sp. z o.o. dichiara che il televisore LED soddisfa i re-
quisiti essenziali e le altre disposizioni rilevanti della
direttiva RED 2014/53/EU e delle Normative sulle
apparecchiature radio del Regno Unito del 2017.
• Il testo completo CE e la dichiarazione
di conformità UKCA sono disponibili su
sharpconsumer.eu e successivamente accedendo
alla sezione di download del modello, quindi
selezionando “Dichiarazioni CE”.
Utilizzo e manutenzione
• Non esporre le batterie ad alte temperature, ad
Sicurezza per i bambini
• Assicurarsi sempre che lo scompartimento delle
• Le batterie possono essere facilmente ingerite da
Condizioni ambientali
• Tenere le batterie lontano da pressione bassa dell'a-
es. vicino a fuoco o luce diretta del sole. Quando il
prodotto non viene usato per lungo tempo (più di
un mese), rimuovere la batteria per prevenire perdite. In caso di perdite di batterie, ripulire la perdita
all’interno dello scompartimento e rimpiazzare le
batterie vecchie con quelle nuove.
batterie sia chiuso e ben sso.
bambini piccoli e possono provocare gravi ustioni
interne e portare alla morte. Tenere lontano le
batterie dai bambini. Cercare immediatamente una
consulenza medica se si pensa che una batteria sia
stata ingerita.
ria o alte temperature in quanto possono provocare
un'esplosione o la perdita di un liquido o un gas
in ammabile.
Smaltimento
• Smaltire correttamente le batterie seguendo le
istruzioni in questo manuale (consultare la sezione
"Smaltimento dell’apparecchio e delle batterie").
Non gettarle nel fuoco, non smontarle e non cercare di ricaricarle se non sono ricaricabili. Potrebbero
avere perdite o esplodere.
Smaltimento dell’apparecchio e delle batterie
Informazioni per gli utenti su raccolta e smaltimento
di vecchi apparecchi e batterie usate.
Questo simbolo indica che il prodotto
contiene batterie coperte dalla Direttiva
europea 2013/56/EU che decreta che
ri uti domestici. Cd, Hg e Pb sotto il simbolo del
cestino della spazzatura mostra se la batterie
contiene cadmio (Cd), mercurio (Hg) o piombo (Pb).
non può essere smaltito con i normali
Page 89

Questo simbolo indica che il prodotto è
coperto dalla Direttiva europea 2012/19/
EU che decreta che non può essere
smaltito o gettato con i normali ri uti
domestici.
Questo simbolo indica che il prodotto
è progettato e fabbricato in modo da
• Questi simboli sul prodotto, sulla confezione e/o
essere riciclato e riutilizzato.
sui documenti che lo accompagnano indicano
che i prodotti elettrici ed elettronici usati e le
batterie usate non vanno mischiate con i ri uti
domestici generici. Gli utenti in contesti domestici
dovrebbero contattare il rivenditore presso cui
hanno acquistato il prodotto oppure un u cio
governativo locale per ricevere dettagli su dove e
come portare questi oggetti per un riciclaggio che
rispetti l'ambiente.
IT
Dichiarazione CE e UKCA:
• Con il presente, Sharp Consumer Electronics Poland
sp. z o.o. dichiara che il televisore LED soddisfa i requisiti essenziali e le altre disposizioni rilevanti della
direttiva RED 2014/53/EU e delle Normative sulle
apparecchiature radio del Regno Unito del 2017.
• Il testo completo CE e la dichiarazione
di conformità UKCA sono disponibili su
sharpconsumer.eu e successivamente accedendo
alla sezione di download del modello, quindi
selezionando “Dichiarazioni CE”.
Page 90

90
• In modalità Bluetooth: Traccia successiva
• In Menu: Scorrere per le opzioni del menu
10.
Info/Menu
• Pressione breve: Informazioni sulla stazione
• Pressione lunga: Entrare nelle opzioni del menu
• In modalità stand-by: pressione breve per
entrare nelle impostazioni Accendi/Spegni
allarme 1 e 2.
11. Preselezione di memoria 1, 2 e 3
• Pressione breve: Richiama preselezione 1 (2 o 3)
• Pressione lunga: Memorizza preselezione 1
(2 o 3)
12. Controllo del volume:
• Rotazione: regolazione del volume
• Rotazione in Menu o Preselezioni: Scorrere tra le
opzioni del menu disponibili o le preselezioni
• Pressione breve: Selezionare una frequenza/
stazione radio, un menu o un'opzione
preselezione visualizzati
• Pressione breve in modalità stand-by: attivare
un ritardo di 10 minuti.
Contenuto della confezione
1 x Radio digitale portatile Tokyo DR-P420
1 x Cavo di alimentazione USB a Micro USB
Documentazione utente
Usare la radio DAB+/FM
portatile
Antenna telescopica
Estendi completamente l'antenna telescopica
(preferibilmente in verticale) prima di tentare di
sintonizzare una stazione DAB / FM. Ciò assicurerà
che sia disponibile la massima intensità del segnale
quando viene avviata la scansione della radio.
Estendere l'antenna assicura anche la migliore qualità
del suono possibile.
Connessione
Connettere il cavo USB incluso nella porta micro USB
sul lato posteriore della radio. Inserire l'estremità
Controlli
1. Antenna telescopica
2. Scompartimento delle batterie
3. Porta micro USB
4. Ingresso cu e
5. Schermo retroilluminato
Alimentazione/modalità
6.
• Pressione breve da spento: accensione
• Pressione breve da acceso: cambio modalità
• Pressione lunga durante alimentazione tramite
USB: stand-by
• Pressione lunga durante alimentazione tramite
batteria: spegnimento
7.
Preselezione/Riproduci/Pausa (20 DAB/20
FM)
• Pressione breve: Richiamo preselezione
• Pressione lunga: Memorizzazione preselezione
• In modalità Bluetooth:
- Pressione breve per riprodurre o mettere in
pausa
- Pressione lunga per disconnettere l'attuale
dispositivo e scansionare nuovi dispositivi
8.
• In modalità DAB:
- Pressione breve per scorrere in alto nell’elenco
stazioni DAB
• In modalità FM:
- Pressione breve: Scorrere in basso per la banda
di frequenza a intervalli di 0,05 MHz.
- Pressione lunga: Scansionare in basso la banda
di frequenza.
• In modalità Bluetooth: Traccia precedente
• In Menu: Scorrere per le opzioni del menu
9.
• In modalità DAB:
- Premere brevemente per scorrere in basso
nell’elenco delle stazioni DAB.
• In modalità FM:
- Pressione breve: Scorrere in alto per la banda
di frequenza a intervalli di 0,05MHz.
- Pressione lunga: Scansionare in alto la banda
di frequenza.
Page 91

• In modalità Bluetooth: Traccia successiva
• In Menu: Scorrere per le opzioni del menu
Info/Menu
10.
• Pressione breve: Informazioni sulla stazione
• Pressione lunga: Entrare nelle opzioni del menu
• In modalità stand-by: pressione breve per
entrare nelle impostazioni Accendi/Spegni
allarme 1 e 2.
11. Preselezione di memoria 1, 2 e 3
• Pressione breve: Richiama preselezione 1 (2 o 3)
• Pressione lunga: Memorizza preselezione 1
(2 o 3)
12.
Controllo del volume:
• Rotazione: regolazione del volume
• Rotazione in Menu o Preselezioni: Scorrere tra le
opzioni del menu disponibili o le preselezioni
• Pressione breve: Selezionare una frequenza/
stazione radio, un menu o un'opzione
preselezione visualizzati
• Pressione breve in modalità stand-by: attivare
un ritardo di 10 minuti.
IT
Contenuto della confezione
1 x Radio digitale portatile Tokyo DR-P420
1 x Cavo di alimentazione USB a Micro USB
Documentazione utente
Usare la radio DAB+/FM
portatile
Antenna telescopica
Estendi completamente l'antenna telescopica
(preferibilmente in verticale) prima di tentare di
sintonizzare una stazione DAB / FM. Ciò assicurerà
che sia disponibile la massima intensità del segnale
quando viene avviata la scansione della radio.
Estendere l'antenna assicura anche la migliore qualità
del suono possibile.
Connessione
Connettere il cavo USB incluso nella porta micro USB
sul lato posteriore della radio. Inserire l'estremità
Page 92

92
la radio. Tenere premuto a lungo per entrare
nelle opzioni del menu.
Usare per selezionare <Sistema> / <Ora> /
<Impost. ora/data>. <Impost. ora> viene mostrato
e le cifre dell'ora lampeggeranno; usare
per impostare ore e minuti. <Impost. data> viene
mostrato e il giorno lampeggerà; usare per
impostare giorno, mese e anno. <Ora memorizzata>
verrà mostrato una volta che l'anno è stato
confermato; la schermata tornerà quindi al menu
<Impost. ora/data>.
Usare per cambiare il formato orologio/
data e le impostazioni di aggiornamento automatico.
Pressione breve per uscire dal menu.
Cambiare la modalità
Premere brevemente per cambiare la
modalità tra DAB, FM e Bluetooth. Lo schermo del
display confermerà la modalità.
Modalità radio DAB
Selezionare la modalità radio DAB+
Premere brevemente nché lo schermo
non mostra <DAB+>. Al primo utilizzo della radio
o se l'elenco delle stazioni è vuoto, la radio inizierà
automaticamente la scansione delle stazioni radio
DAB. Una barra del progresso mostrerà l'avanzamento
della scansione e il numero di stazioni trovate durante
la scansione. Se si era in ascolto di una stazione DAB
quando la radio è stata spenta, questa stazione sarà
selezionata automaticamente al momento della
riaccensione della radio.
Cambiare stazioni DAB
Usare e per scorrere per le stazioni disponibili.
Premere per selezionare la stazione desiderata nel
momento in cui viene visualizzata. Ci sarà un breve
ritardo mentre la radio si sintonizza alla stazione
selezionata.
USB-A (standard) del cavo in un dispositivo USB o
un adattatore per alimentare la radio. La radio si
accenderà e mostrerà <SHARP sharpconsumer.eu>.
Quindi entrerà in modalità stand-by.
Inserire le batterie (facoltativo)
Prima di installare le batterie (non incluse), assicurarsi
che la radio sia spenta usando
disconnessa da cavo USB. Sul lato posteriore della
radio, premere la linguetta dello scompartimento
delle batterie per rimuoverne il coperchio.
Inserire 4 batterie AA da 1.5V (conosciute anche
come LR-6), assicurandosi di seguire i simboli "+" e
"-" e di posizione correttamente le batterie. Collocare
nuovamente il coperchio dello scompartimento delle
batterie, assicurandosi di sentire uno scatto perché sia
chiuso correttamente.
Con gurazione iniziale
Premere brevemente per accendere la
radio. Inizierà automaticamente a scansionare le
stazioni DAB. Una barra del progresso mostrerà
l'avanzamento della scansione e il numero di stazioni
e che sia stata
trovate. Quando la scansione è completa, la radio
selezionerà la prima stazione disponibile e inizierà la
riproduzione. Per impostazione prede nita, le stazioni
sono elencate numericamente e non alfabeticamente.
Nota: L'elenco delle stazioni radio DAB è salvato nella
memoria; la prossima volta che la radio viene accesa,
non viene e ettuata una ricerca delle stazioni.
Premere brevemente
le stazioni disponibili. Per selezionare la stazione
visualizzata, premere brevemente
breve ritardo mentre la radio si sintonizza alla
stazione selezionata.
Regolare il volume
Ruotare in senso orario per aumentare il
volume e in senso antiorario per diminuire il volume.
Ora e data
Ora e data saranno sincronizzate automaticamente
a quelle trasmesse dal servizio DAB in formato da
24 ore.
Per impostare l'ora e la data manualmente, accendere
o per scorrere per
. Ci sarà un
Page 93
la radio. Tenere premuto a lungo per entrare
nelle opzioni del menu.
Usare
<Impost. ora/data>. <Impost. ora> viene mostrato
e le cifre dell'ora lampeggeranno; usare
per impostare ore e minuti. <Impost. data> viene
mostrato e il giorno lampeggerà; usare
impostare giorno, mese e anno. <Ora memorizzata>
verrà mostrato una volta che l'anno è stato
confermato; la schermata tornerà quindi al menu
<Impost. ora/data>.
Usare
data e le impostazioni di aggiornamento automatico.
Pressione breve per uscire dal menu.
per selezionare <Sistema> / <Ora> /
per
per cambiare il formato orologio/
Cambiare la modalità
Premere brevemente per cambiare la
modalità tra DAB, FM e Bluetooth. Lo schermo del
display confermerà la modalità.
IT
Modalità radio DAB
Selezionare la modalità radio DAB+
Premere brevemente nché lo schermo
non mostra <DAB+>. Al primo utilizzo della radio
o se l'elenco delle stazioni è vuoto, la radio inizierà
automaticamente la scansione delle stazioni radio
DAB. Una barra del progresso mostrerà l'avanzamento
della scansione e il numero di stazioni trovate durante
la scansione. Se si era in ascolto di una stazione DAB
quando la radio è stata spenta, questa stazione sarà
selezionata automaticamente al momento della
riaccensione della radio.
Cambiare stazioni DAB
Usare e per scorrere per le stazioni disponibili.
Premere
per selezionare la stazione desiderata nel
momento in cui viene visualizzata. Ci sarà un breve
ritardo mentre la radio si sintonizza alla stazione
selezionata.
Page 94
94
memor.>, dove "X" indica il numero di preselezioni
(1-20)
Nota: Se è già presente una stazione DAB in una
data preselezione, sarà soprascritta quando viene
memorizzata la nuova stazione
Sintonizzarsi su una stazione DAB
preselezionata
In modalità DAB:
Per accedere rapidamente alle stazioni radio
memorizzate nelle posizioni preselezionate 1, 2 o
3, premere brevemente 1, 2 o 3, come appropriato,
sul lato anteriore della radio. In alternativa, premere
brevemente
. <Visual.preselez. <1:>> viene
mostrato insieme al nome o alla frequenza della
stazione lì memorizzata, oppure <(Vuoto)> se non
è stata memorizzata alcuna stazione precedente.
Usare per scorrere e selezionare la stazione
preselezionata che si vuole ascoltare (1-20).
Informazioni DAB sul display
Quando si ascolta una stazione DAB, è possibile
cambiare le informazioni che appariranno sul display.
Ci sono diversi tipi di informazioni che vengono
inviate dalla stazione radio. Premere brevemente e
ripetutamente
per scorrere tra le diverse opzioni
per le informazioni:
• DLS (Dynamic Label Segment): informazioni di te-
sto a scorrimento fornite dalla stazione. Potrebbero
comprendere nomi degli artisti, titoli delle canzoni,
dettagli di contatto per la stazione radio e altro.
• Signal strength: un simbolo vuoto apparirà sul
display per indicare la potenza minima del segnale
per un ascolto accettabile. La la di rettangoli pieni
indica l'e ettiva potenza del segnale che si riceve.
• Program type (PTY): ad es. "Rock", "Pop", "Diverti-
mento" o "Notizie"
• Nome multiplex: mostra l'area di trasmissione e la
raccolta di stazioni radio su questa frequenza, ad
esempio BBC National DAB, Digital 1 Network.
• Canale e frequenza: ad es. 12B 225.648 MHz (cana-
le=12B, frequenza=225.648 MHz)
• Err. Segnale: viene mostrato come numero compre-
so tra 0 e 99. Per un ascolto soddisfacente di una
Scansionare le stazioni DAB
Con la radio DAB, diventano disponibili regolarmente
ulteriori stazioni e servizi. E ettuare periodicamente
una scansione manuale per assicurarsi di avere
l'elenco delle stazioni più aggiornato memorizzato
nella memoria della radio. Se la radio è stata spostata
in un punto diverso, ad es. in caso di viaggio durante
le vacanze, è una buona idea e ettuare una scansione
manuale.
In modalità DAB:
Pressione prolungata di
scorrere e selezionare <Ricerca completa>. Il display
cambierà e mostrerà <Ricerca…>. Una barra del
progresso mostrerà l'avanzamento della scansione e il
numero di stazioni trovate.
Eliminare stazioni DAB
È possibile rimuovere le stazioni DAB nell'elenco
stazioni che non possono essere ricevute nella
propria area. Queste sono elencate con un pre sso
<?>.
. Usare per
In modalità DAB:
Pressione prolungata di
scorrere e selezionare <Elimina>. <Elimina? Viene
visualizzato <No> Sì>. Usare
selezionare <Sì>. Le stazioni con il pre sso <?> non
saranno più mostrate.
Memorizzare una stazione DAB come
preselezione
È possibile memorizzare no a 20 stazioni radio DAB
come preselezione per un accesso istantaneo alle
proprie stazioni preferite.
Nota: Memorizzando le stazioni radio DAB come
preselezioni non vengono soprascritte le preselezioni
delle stazioni FM.
Sintonizzare la radio alla stazione radio DAB che si
desidera memorizzare come preselezione. Tenere
premuto
preselez. <1: (Vuoto)>>. Usare
alla posizione della preselezione su cui si desidera
memorizzare la stazione radio (1-20). Premere
per selezionare. Il display confermerà <Preselez. X
. Usare per
nché non viene mostrato <Memor.
per scorrere e
per passare
Page 95
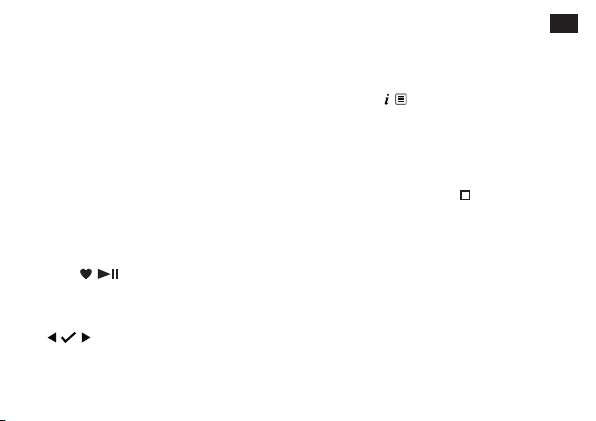
memor.>, dove "X" indica il numero di preselezioni
(1-20)
Nota: Se è già presente una stazione DAB in una
data preselezione, sarà soprascritta quando viene
memorizzata la nuova stazione
Sintonizzarsi su una stazione DAB
preselezionata
In modalità DAB:
Per accedere rapidamente alle stazioni radio
memorizzate nelle posizioni preselezionate 1, 2 o
3, premere brevemente 1, 2 o 3, come appropriato,
sul lato anteriore della radio. In alternativa, premere
brevemente
mostrato insieme al nome o alla frequenza della
stazione lì memorizzata, oppure <(Vuoto)> se non
è stata memorizzata alcuna stazione precedente.
Usare
preselezionata che si vuole ascoltare (1-20).
. <Visual.preselez. <1:>> viene
per scorrere e selezionare la stazione
Informazioni DAB sul display
Quando si ascolta una stazione DAB, è possibile
IT
cambiare le informazioni che appariranno sul display.
Ci sono diversi tipi di informazioni che vengono
inviate dalla stazione radio. Premere brevemente e
ripetutamente
per le informazioni:
• DLS (Dynamic Label Segment): informazioni di te-
sto a scorrimento fornite dalla stazione. Potrebbero
comprendere nomi degli artisti, titoli delle canzoni,
dettagli di contatto per la stazione radio e altro.
• Signal strength: un simbolo
display per indicare la potenza minima del segnale
per un ascolto accettabile. La la di rettangoli pieni
indica l'e ettiva potenza del segnale che si riceve.
• Program type (PTY): ad es. "Rock", "Pop", "Diverti-
mento" o "Notizie"
• Nome multiplex: mostra l'area di trasmissione e la
raccolta di stazioni radio su questa frequenza, ad
esempio BBC National DAB, Digital 1 Network.
• Canale e frequenza: ad es. 12B 225.648 MHz (cana-
le=12B, frequenza=225.648 MHz)
• Err. Segnale: viene mostrato come numero compre-
so tra 0 e 99. Per un ascolto soddisfacente di una
per scorrere tra le diverse opzioni
vuoto apparirà sul
Page 96

96
di 0.05MHz.
Nota: Se la ricezione è scadente, aggiustare l'antenna
o sposta la radio in un'altra posizione.
Modi care le impostazioni di
scansione
In modalità FM:
Tenere premuto
, quindi apparirà <Impostaz. di
ricerca>. Premere .
Ci sono due opzioni diverse tra cui scegliere:
• <Solo stazioni con buona ricezione>: la ricerca
si fermerà solo quando viene ricevuto un segnale
forte, che permette una qualità audio migliore. Uti-
lizzando questa opzione, è possibile che la stazione
che si sta cercando non venga trovata.
• <Tutte le stazioni>: la ricerca si fermerà a ogni
stazione ricevuta, anche se la potenza del segnale
è scarsa.
Usare per scegliere e selezionare tra le
opzioni disponibili.
Nota: L'attuale impostazione di ricerca sarà
contrassegnata da un asterisco (*) sul display.
Memorizzare una stazione FM come
preselezione
È possibile memorizzare no a 20 stazioni FM come
preselezione per un accesso istantaneo alle proprie
stazioni preferite.
Nota: Memorizzando le stazioni FM come
preselezioni non vengono soprascritte le preselezioni
delle stazioni DAB.
Sintonizzare la radio alla stazione radio FM che si
desidera memorizzare come preselezione. Tenere
premuto
nché non viene mostrato <Memor.
preselez. <1:(Vuoto)>>. Usare per passare
alla posizione della preselezione su cui si desidera
memorizzare la stazione radio (1-20) e selezionarla. Il
display confermerà <Preselez. X memor.>, dove "X"
indica il numero di preselezioni (1-20)
Nota: Se è già presente una stazione FM in una
data preselezione, sarà soprascritta quando viene
memorizzata la nuova stazione
stazione radio, questo errore di segnale deve essere
inferiore a 30. Aggiustare l'antenna o spostare la
radio per migliorare la ricezione.
• Informazioni segnale: la velocità di trasmissione alla
quale il segnale viene trasmesso.
• Indicatore potenza: mostra <Alimentazione USB>
quando viene utilizzata l'alimentazione tramite
USB; mostra <Batteria XX> in cui XX è la carica
residua della batteria.
• Ora
• Data
DRC (Dynamic Range Control)
I dati DRC non sono trasmessi da tutte le stazioni. DRC
viene usato per controllare la di erenza tra i suoi più
forti e quelli più deboli. Ad esempio, in un ambiente
rumoroso, impostare il DRC al massimo rende i suoni
deboli relativamente più alti e i suoni forti più bassi.
Ci sono 3 livelli di compressione:
• DRC disattivato: nessuna compressione. Questa è
l'impostazione prede nita.
• DRC basso: compressione media
• DRC alto: compressione massima
In modalità DAB, tenere premuto
per scorrere e selezionare <DRC> e quindi selezionare
le proprie preferenze.
Nota: L'attuale impostazione DRC sarà contrassegnata
da un asterisco (*) sul display.
Modalità radio FM
Per passare alla modalità FM, premere brevemente
nché la radio non mostra <FM>. Se si
era in ascolto di una stazione FM quando la radio
è stata spenta, questa stazione sarà selezionata
automaticamente al momento della riaccensione
della radio.
Sintonizzarsi su una stazione FM
Tenere premuto il pulsante o per cercare su
o giù nella banda di frequenze. La radio cercherà la
prossima stazione disponibile e poi si fermerà.
Premere brevemente
sintonizzazione di ciascuna frequenza a incrementi
o per a nare la
. Usare
Page 97
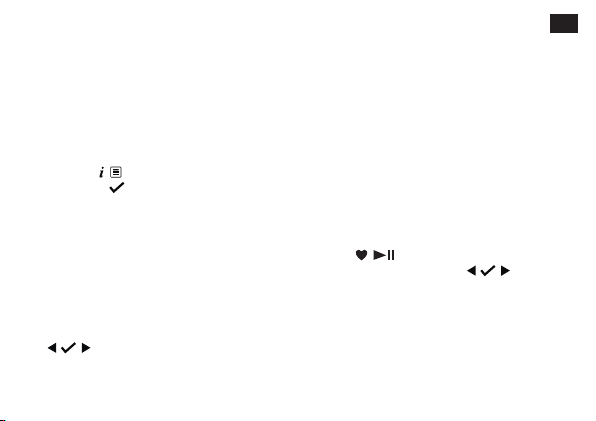
di 0.05MHz.
Nota: Se la ricezione è scadente, aggiustare l'antenna
o sposta la radio in un'altra posizione.
Modi care le impostazioni di
scansione
In modalità FM:
Tenere premuto
ricerca>. Premere
Ci sono due opzioni diverse tra cui scegliere:
• <Solo stazioni con buona ricezione>: la ricerca
si fermerà solo quando viene ricevuto un segnale
forte, che permette una qualità audio migliore. Uti-
lizzando questa opzione, è possibile che la stazione
che si sta cercando non venga trovata.
• <Tutte le stazioni>: la ricerca si fermerà a ogni
stazione ricevuta, anche se la potenza del segnale
è scarsa.
Usare
opzioni disponibili.
Nota: L'attuale impostazione di ricerca sarà
, quindi apparirà <Impostaz. di
.
per scegliere e selezionare tra le
IT
contrassegnata da un asterisco (*) sul display.
Memorizzare una stazione FM come
preselezione
È possibile memorizzare no a 20 stazioni FM come
preselezione per un accesso istantaneo alle proprie
stazioni preferite.
Nota: Memorizzando le stazioni FM come
preselezioni non vengono soprascritte le preselezioni
delle stazioni DAB.
Sintonizzare la radio alla stazione radio FM che si
desidera memorizzare come preselezione. Tenere
premuto
preselez. <1:(Vuoto)>>. Usare
alla posizione della preselezione su cui si desidera
memorizzare la stazione radio (1-20) e selezionarla. Il
display confermerà <Preselez. X memor.>, dove "X"
indica il numero di preselezioni (1-20)
Nota: Se è già presente una stazione FM in una
data preselezione, sarà soprascritta quando viene
memorizzata la nuova stazione
nché non viene mostrato <Memor.
per passare
Page 98

98
quando viene utilizzata l'alimentazione tramite
USB; mostra <Batteria XX> in cui XX è la carica
residua della batteria.
• Ora
• Data
Modalità Bluetooth
Assicurarsi che la radio sia in modalità Bluetooth
premendo brevemente
nché non appare
<Bluetooth>. La radio inizierà la ricerca di dispositivi
Bluetooth. Assicurarsi che i dispositivi abilitati al
Bluetooth a cui si sta tentando di connettersi sia
rilevabile.
Nota: Se necessario, consultare le istruzioni del
proprio dispositivo per aggiungere o impostare il
Bluetooth.
Una volta trovato, la radio apparirà sul dispositivo
come "SHARP DR-P420". Selezionare questa voce per
iniziare l'accoppiamento. Una volta completato, sulla
radio apparirà <BT connected>.
I dispositivi accoppiati si connetteranno alla radio
quando saranno entro il raggio di ricezione (entro
10metri in linea d'aria). Il dispositivo resterà
accoppiato alla radio a meno che non si decida di
disconnetterlo.
Per disconnettere dal Bluetooth, tenere
premuto
per tre secondi per annullare
l'accoppiamento del dispositivo attuale e cercare
nuovi dispositivi.
Trasmettere la musica senza li
tramite Bluetooth
In modalità Bluetooth, è possibile trasmettere l'audio
tramite le casse del prodotto. Usare i controlli sul
dispositivo Bluetooth nonché quelli sulla radio.
Controlli disponibili
• Riproduci / Pausa: Pressione breve
• Traccia precedente: Pressione breve
• Traccia successiva: Pressione breve
Il volume può essere regolato usando la radio oppure
il dispositivo connesso.
AMS (Auto Memory Store)
In alternativa, è possibile usare la funzione AMS
(Auto Memory Store) per memorizzare come
preselezioni le stazioni radio FM. In modalità FM,
tenere premuto
selezionare <AMS>. La radio ora potrà scansionare la
banda di frequenza FM e le stazioni trovate saranno
memorizzate automaticamente nelle posizioni delle
preselezioni.
Nota: È possibile sovrascrivere le preselezioni
memorizzate tramite AMS seguendo le istruzioni
della sezione precedente "Memorizzare una stazione
FM come preselezione".
Sintonizzarsi su una stazione FM
preselezionata
In modalità FM:
Per accedere rapidamente alle stazioni radio
memorizzate nelle posizioni preselezionate 1, 2 o 3,
premere brevemente 1, 2 o 3, come appropriato. In
alternativa, premere brevemente
. Usare per scorrere e
. <Visual.
preselez. <1:>> viene mostrato insieme al nome o
alla frequenza della stazione lì memorizzata, oppure
<(Vuoto)> se non è stata memorizzata alcuna
stazione precedente. Usare
selezionare la stazione preselezionata che si vuole
ascoltare (1-20).
Informazioni FM sul display
Quando si ascolta una stazione FM, è possibile
cambiare le informazioni che appaiono sulla seconda
riga sul display. Premere brevemente e ripetutamente
per scorrere tra le diverse opzioni per le
informazioni:
• Radiotext (RT): informazioni di testo a scorrimento
fornite dalla stazione. Potrebbero comprendere
nomi degli artisti, titoli delle canzoni, dettagli di
contatto per la stazione radio e altro.
• Program type (PTY): ad es. "Rock", "Pop", "Diverti-
mento" o "Notizie"
• Nome stazione o frequenza: ad es. BBC R4,
93,30MHz
• Indicatore potenza: mostra <Alimentazione USB>
per scorrere e
Page 99

quando viene utilizzata l'alimentazione tramite
USB; mostra <Batteria XX> in cui XX è la carica
residua della batteria.
• Ora
• Data
Modalità Bluetooth
Assicurarsi che la radio sia in modalità Bluetooth
premendo brevemente
<Bluetooth>. La radio inizierà la ricerca di dispositivi
Bluetooth. Assicurarsi che i dispositivi abilitati al
Bluetooth a cui si sta tentando di connettersi sia
rilevabile.
Nota: Se necessario, consultare le istruzioni del
proprio dispositivo per aggiungere o impostare il
Bluetooth.
Una volta trovato, la radio apparirà sul dispositivo
come "SHARP DR-P420". Selezionare questa voce per
iniziare l'accoppiamento. Una volta completato, sulla
radio apparirà <BT connected>.
I dispositivi accoppiati si connetteranno alla radio
nché non appare
IT
quando saranno entro il raggio di ricezione (entro
10metri in linea d'aria). Il dispositivo resterà
accoppiato alla radio a meno che non si decida di
disconnetterlo.
Per disconnettere dal Bluetooth, tenere
premuto
l'accoppiamento del dispositivo attuale e cercare
nuovi dispositivi.
per tre secondi per annullare
Trasmettere la musica senza li
tramite Bluetooth
In modalità Bluetooth, è possibile trasmettere l'audio
tramite le casse del prodotto. Usare i controlli sul
dispositivo Bluetooth nonché quelli sulla radio.
Controlli disponibili
• Riproduci / Pausa: Pressione breve
• Traccia precedente: Pressione breve
• Traccia successiva: Pressione breve
Il volume può essere regolato usando la radio oppure
il dispositivo connesso.
Page 100

100
DAB+
Ricerca completa
Sintonizz. manuale Sistema
DRC Sospensione Allarme
Elimina Allarme Con gurazione allarme 1
Sistema Ora Con gurazione allarme 2
Retroilluminazione
FM
Impostaz. di ricerca Lingua
AM Ripristino valori di default
Sistema Versione software
BT Sistema
Impostazioni allarme 1 o 2
Ora
Ore
Min
Durata 1, 5, 15, 30 o 60 minuti
Sorgente Cicalino, DAB o FM
Frequenza Ogni giorno, una volta, giorni feriali o ne settimana.
Livello volume 25%-100%
Allarme Attivo o disattivato
Nota: Se la radio resta inattiva per 20 minuti o non
viene ricevuto alcun segnale audio, la radio entrerà
automaticamente in stand-by (oppure si spegnerà se
la radio è alimentata a batteria).
Funzione allarme
Nota: La funzione allarme funziona solo quando
la radio è alimentata tramite USB: non funzionerà
quando si utilizza l'alimentazione tramite batterie
(per preservare la durata della batteria).
Impostare un allarme
Nota: Controllare che la radio mostri l'ora e la data
corrette prima di impostare un allarme.
 Loading...