

Page 1

User manual
DR-I470 Pro
Stereo Internet Radio
EN PLESDE RUFR IT NL
Product images are for illustration purposes only.
Page 2

Trademarks:
The Bluetooth® word mark and logos are registered trademarks
owned by Bluetooth SIG,. Inc.
The Wi-Fi CERTIFIED Logo is a certi cation mark of the Wi-Fi
Alliance.
The Spotify Software is subject to third party licenses found here:
www.spotify.com/connect/third-party-licenses.
Apple App Store
Google Play Store
Internet
Radio
ALARM WITH
SLEEP TIMER
All logos, product and company names are trademarks™ or registered® trademarks of their respective owners.
Page 3

EN
Important safety instructions
Please, read these safety instructions and respect
the following warnings before the appliance is
operated:
The exclamation point within an equilateral triangle is
intended to alert the user to the presence of important
operating and maintenance (servicing) instructions in the
literature accompanying the appliance.
Use only power supply listed in the user manual.
This symbol means that the product should be disposed of
in an environmentally friendly manner and not with general
household waste.
AC voltage
DC voltage
Class II equipment
For indoor use only
Energy e ciency marking with level VI
Polarity of d.c. power connector
In order to prevent re always
keep candles and other open
ames away from this product.
Warning:
• Always follow basic safety precautions when using this applience,
especially when children are present.
• Children should be supervised to ensure that they do not play with the
appliance.
• Do not damage the power cord, place heavy objects on it, stretch or
bend it. Do not attach extension cables. Damage to the power cord may
cause re or electric shock.
• If the supply cord is damaged, it must be replaced by the manufacturer,
a service agent or similarly qualied persons in order to avoid a hazard.
• Ensure that the unit is plugged into an AC 100-240V 50/60Hz power
outlet. Using higher voltage may cause the unit to malfunction or catch
r e .
• If the power plug does not t into the socket, do not force it.
• Turn o the unit before unplugging it from power source to completely
switch it o .
• Do not disconnect or connect the power cord with wet hands. This may
cause an electric shock.
• If the unit is not going to be used for a long period time, disconnect the
power supply.
• Ensure that the mains plug is always easily accessible.
• This product does not contain any parts that are serviceable by the
user. In case of a fault, contact the manufacturer or authorised service
department. Exposing the internal parts inside the device may endanger
your life. The manufacturers guarantee does not extend to faults caused
by repairs carried out by unauthorised third parties.
• Do not use this product immediately after unpacking. Wait until it warms
up to room temperature before using it.
• Ensure this product is used in moderate climates only (not in tropical/
subtropical climates).
• Place product on a at, stable surface that is not subject to vibrations.
• Ensure the product and its parts is not overhanging the edge of the
supporting furniture.
• To reduce the risk of fire, electric shock or damage to this product, do
not expose it to direct sunlight, dust, rain and moisture. Never expose it
to dripping or splashing and do not place objects filled with liquids on
or near the product.
• Do not place objects lled with liquids, such as vases, on the apparatus.
• Do not install near any heat sources such as radiators, heat registers,
stoves, or other apparatus (including ampli ers) that produce heat.
• Do not place the product where the humidity is high and ventilation is
poor.
• Ensure a minimum distance of 5 cm around the apparatus for su cient
ventilation. Do not block any ventilation openings of this product.
Always ensure that the ventilation openings are not covered with items
such as newspapers, table-cloths, curtains, etc.
• NEVER let anyone, especially children, push anything into holes, slots
or any other openings in the unit’s casing as this could result in a fatal
electric shock.
• Storms are dangerous for all electric appliances. If the mains or aerial
wiring is struck by lightning, the appliance might get damaged, even if it
is turned o . You should disconnect all the cables and connectors of the
appliance before a storm.
Maintenance
• Unplug the power cable from the power source before cleaning the
appliance.
• Use a soft and clean rag to clean the outside of the unit. Never clean it
with chemicals or detergent.
Power Adapter
• To disconnect the unit from the mains supply, unplug the lead from the
mains socket.
• Only use the supplied mains adaptor as failure to do this may result in a
safety risk and/or damage to the unit.
Batteries
• Observe the correct polarity when inserting the
batteries.
• Do not expose batteries to high temperatures and
do not place them on locations where the temperature might increase quickly, e.g. near the re or on
the direct sunshine.
• Do not expose batteries to excessive radiant heat,
do not throw them into the re, do not disassemble
them and do not try to recharge un-rechargeable
batteries. They could leak or explode.
• Never use di erent batteries together or mix new and old ones.
• When the Remote Control is not to be used for a long time (more than a
month), remove the battery from the Remote Control to prevent it from
leaking.
• If the batteries leak, wipe away the leakage inside the battery compart-
ment and replace the batteries with new ones.
• Do not use any batteries other than those specied.
Do not ingest battery, chemical burn hazard
• If the battery is swallowed, it can cause severe internal burns in just
2 hours and lead to death. Keep new and used batteries away from
children. If the battery compartment does not close securely, stop
using the product and keep it away from children. If you think batteries
might have been swallowed or placed inside any part of the body, seek
immediate medical attention.
Cd
Disposal of this equipment and Batteries
• Do not dispose of this product or its batteries as unsorted
municipal waste. Return it to a designated collection point
for the recycling of WEEE in accordance with local law. By
doing so, you will help to conserve resources and protect
the environment.
Page 4

2
• Most of the EU countries regulate the disposal of batteries by law. Con-
tact your retailer or local authorities for more information.
• The shown above appears on electrical and electronical equipment (or
the packaging) to remind users of this.
• Users are requested to use existing return facilities for used equipment
and batteries.
CE and UKCA statement:
• Hereby, Sharp Consumer Electronics Poland sp. z o.o. declares that
this audio device is in compliance with the essential requirements and
other relevant provisions of RED Directive 2014/53/EU and UK Radio
Equipment Regulations 2017.
• The full text of the EU declaration of conformity is available by following
the link www.sharpconsumer.com and then entering download section
of your model and choosing “CE Statements”.
Page 5

EN
What is included in the box:
• 1x Main unit
• 1x Remote control
• 1x Power adaptor
• 1x User Manual
• 1x UK AC plug for power adapter
• 1x EU AC plug for power adapter
Panels & Controls
Front Panel
9
1
3
5
7
1. MODE – Press to change the modes: DAB/DAB+, FM, Internet Radio,
Bluetooth, AUX IN.
It can also can be set with another function by setting from the <Key>
menu in CONFIGURATION: Alarm, Dimmer, Equaliser, Local Radio,
Mode, Preset, Sleep Timer, Timer.
NOTES: The default function for this button is Mode changing.
2. STANDBY – Press this button to turn on the unit or enter standby
mode.
3. MENU – Enter the MENU Setting Interface
4. SLEEP – Press repeatedly to set your desired sleep time.
5. ◄ – When in setting screen, press to go to the previous selection.
When listening to a radio, short press to decrease the frequency in
0.05MHz increments.
6. ► – When in setting screen, press to go to the next selection.When
listening to a radio, short press to increase the frequency in 0.05MHz
increments.
7. DIMMER – Press to set the backlight level.
8. PRESET – When in Internet radio playback, press this button to switch
to the Radio Station/Music sceen.
9. DISPLAY SCREEN – To show the information.
Rear Panel
11
12
10. Volume Knob/ Select Knob/ OK button – When playback, rotate the
knob to adjust the playing volume.When setting the menu, Rotate the
knob to select the options; press down to con rm your selection.
E
D
O
M
U
N
E
M
R
E
M
M
I
D
P
R
E
S
E
T
2
4
6
8
10
13
AUX IN
DC 12V
14
11. FM Antenna – To receive the FM signal.
12. Earphone jack – 3.5mm Earphone jack.
13. AUX IN jack – Connect the 3.5mm audio cable to enjoy the external
audio music.
14. DC Power input – DC 12 V
Remote Control
1
2
3
4
5
6
7
8
9
10
11
12
13
14
1. STANDBY – Press the STANDBY button on remote control to wake up
the unit or switch to the standby mode.
2. SOURCE – Press the SOURCE button to change the playback modes:
DAB/DAB+, FM, AUX IN, Bluetooth, Internet Radio.
Notes: This button can be used as another function by setting from
the <Key> item in the CONFIGURATION: Alarm, Dimmer, Equaliser,
Local Radio, Mode, Preset, Sleep Timer, Timer.
3. MENU – Press the MENU button on the remote control or on the front
panel to enter the menu playback, press the DIRECTION buttons or
rotate the Select Knob to browse the menu: Internet Radio, FM, DAB/
DAB+, Spotify, Information Center, AUX, Bluetooth, Con guration,
Local Radio.
4. UP / 5. OK / 6. LEFT / 7. DOWN / 17. RIGHT – Scroll the UP and DOWN
button or rotate the Select Knob to browse scroll through the choices,
thenpress down the OK button to con rm your selection.
8. VOL- / 18. VOL+ – To adjust the volume, you can press the VOL+ and
VOL- buttons, or rotate the Volume Knob directly.
9. PLAY/PAUSE – Press the PLAY/PAUSE button to pause the playback,
press again to resume.
10. PREVIOUS / 19. NEXT – When playing a music, press the PREVIOUS or
NEXT button to skip to the previous or next track. When listening to a
radio, press the PREVIOUS or NEXT button to skip to the previous or
next favor station.
11. ALARM – Press the ALARM button to view and created the alarm
options.
12. SLEEP – Press the SLEEP button repeatedly to choose your desired
sleep time.
SOURCE
MENU
OK
VOL- VOL+
SLEEP ALARM
EQ
1
2
ABC DEF
5
4
GHI JKL MNO
7
8 9
PQRS TUV WXYZ
WPS DIMMER
0
13. NUMBER/LETTER – When setting the menu, type numbers or letters.
14. WPS – WPS Settings
15. MUTE – Press the MUTE button to mute the sound, press again or
15
INFO
16
17
18
19
FAV
20
21
3
6
22
Page 6

4
press the VOL+/- buttons remote control or rotate the Volume Knob
on the top panel to resume.
16. INFO – Press the INFO button to check the station information.
20. EQ – Press the EQ button repeatedly to choose di erent sound elds:
Normal, Flat, Jazz, Rock, Soundtracks, Classical, Pop, News, My EQ.
21. FAV – Long press the FAV button to save station. Short press the FAV
button to view your favourite stations that have been saved.
22. DIMMER – Press the DIMMER button to select the backlight level
Fitting or replacing the remote control batteries
1. Push the catch on the battery cover in the direction of the embossed
arrow on the rear of the remote.
2. While pushing the catch, open the battery cover.
3. Fit two batteries observing polarity +,- as shown.When replacing the
batteries, use only the same type of battery supplied.
4. Re- t the battery cover and clip it in place.
Starting Up Your Internet Radio
Plug the power adapter into the DC IN Jack. Then “ Welcome” will be
shown on the screen.
Ensure the antenna is extended as far as possible. This will enable you to
get the best signal you can.
After the Welcome screen, if this is the rst time of using your radio, you
will be able to select the language by scrolling with the Select Knob and
con rm your selection by pressing down the OK button.
After language setting, the screen will display “Enable Check Network
when Power On?”. You can choose “YE S” or “ NO” to decide whether the
unit check network when power on or not.
Manual WIFI Set-up
After the above setting, the screen will show ”Would you like to con gure
Network now?”.
• If you select “YES”, your radio will begin to scan for nearby networks to
connect to .After scanning, you need to choose the network you want to
connect .Then type letters/numbers by scrolling with the Select Knob
or pressing the NUMBER/LETTER buttons until the correct digit is displayed and click the RIGHT button to go to the next digit. Once nished,
press down the OK button to con rm.
• If you select “NO” then you can set this up later in con guration settings.
Wireless Network (WPS PBC)
When at the “Would you like to con gure network now?” stage, if you
select “YES(WPS)” your radio will begin to search for WiFi connections.
While this has been selected, you will have 120 seconds to click the WPS
button on your WiFi modem. This will connect your WiFi to your radio
without manually writing in the passcode.
WIFI Connection Complete!
Once your WIFI is completed by manually entering your WIFI password pr
via WPS, you will be taken to the main menu screen and the WIFI signal will
appear in white at the top left. Your internet radio is now set up!
Con guration
Use the LEFT/RIGHT buttons or rotate the Select Knob to choose
<Con guration> on the main menu display screen, press down the OK
button to enter the con guration settings.
Time Display
Set the time display type: Analog or Digital.
Manage my mediaU
Set the function to Enable or Disable.
MediaU QR code is available in Con guration > Manage my mediaU > Enable.
Network
• Wireless Network Con guration
• On the Network settings, you can set up a WIFI connection by
selecting Wireless Network Con guration. The radio will then start
searching for available WIFI connections.
• Find your WIFI connection and select it with OK button. To type
letters/numbers, use the Select Knob or press the LETTER/NUMBER
buttons until the correct digit is displayed. Then press the RIGHT
button to go to the next digit. Press LEFT button if you want to go
back to the previous digit. Once nished, press down the OK button
to con r m.
• Once your WIFI is connected, the main menu screen will show and the
WIFI signal will appear in white at the top left corner.
• Wireless Network (WPS PBC)
• Select this option to search for the WIFI connection. Whilst this has
been selected you will have 120 seconds to click the WPS button on
your WIFI modem. This will connect your WIFI to your radio without
manually writing in the passcode.
• Manual Con guration
• You can manually set the wireless data: DHCP, Enter SSID and Manage.
• Check Network when Power On
• Set it Enable or Disable.
Date & Time
• Set Date and Time
• Manual Setup or Auto Detect
There is the option to manually set the time and date instead of using
auto-detect to set this up. Rotate the Select Knob or press the digit
buttons to input your desired digit of the month. Once you have
got the correct digit, click RIGHT button to go to the day setting.
Continues this process with the year, the hour and the minutes. Once
the manual set up is complete, press down the OK button to enter. To
cancel the format of the date and time, you can alter these settings
under the “Date & Time” function.
• Set Time Format: To set the time format, 12Hour or 24 Hour.
• Set Date Format: YYYY/MM/DD, DD/MM/YYYY, MM/DD/YYYY
Alarm
• Setting Alarm 1/ Alarm 2
• To set an alarm on your radio, go to “Con guration” settings and
scroll through to select “Alarm” or click ALARM button on the remote
directly.
• After entering the Alarm setting screen, select “Alarm 1(Turn Off )” or
“ Alarm 2(Turn Off )” and choose “Turn On” to activate the alarm.
• Select “Repeat” to choose the regularity of your alarm by pressing
down the OK button. You can choose between Everyday, Once or
select individual days for the alarm to sound. Once you have made
your selection, press the LEFT button to go back to the other alarm
settings.
• Select “Time” and turn the Select Knob to highlight the alarm hour.
Once you have found the desired hours, press RIGHT button to
change the minutes.
• Once the minutes are at the correct value, press RIGHT button to
change “AM” or “PM”,then press the OK button to con rm and go
back to alarm settings.
• Now scroll down and select “Sound” by pressing OK button. You can
now choose between Beep, melody, Internet Radio, FM, or DAB/DAB+.
• If you are setting your alarm sound as Internet Radio, FM or DAB/DAB+
then you will now be taken through your preset favourite stations.
Select your chosen alarm station by pressing down the OK button.
• The alarm symbol will show on the main display screen.
• How to cancel your alarm
• To cancel your alarm, select “Alarm” in Con guration settings or with
the ALARM button and select the alarm you wish to turn o .
• Once the alarm is selected, you will have the option to turn o or on.
Highlight the “Turn Off option and press the OK button to con rm.
Page 7

EN
NOTE: Change the alarm volume by going to “ Alarm
Volume” setting in the Alarm setting screen.
• How to turn off your alarm when sounding
When your alarm is sounding, press the ALARM or STANDBY button on
the remote control to stop the alarm . If you have set an alarm to sound
everyday or more than once, the alarm icon will still remain on display
screen.
• How to put your alarm on SNOOZE
When your alarm is sounding, press any button except STANDBY or
ALARM to stop the sound and put into SNOOZE mode. The SNOOZE
function will make the radio sound again after 5 minutes.
NOTE: Stop the SNOOZE alarm by pressing the ALARM or STANDBY button.
• Nap Alarm
• After selecting the “Alarm” option in Con guration settings, or the
ALARM button on the remote control to select the “NAP Alarm(Turn
O ff ) ” .
• Choose how many minutes you would like to have the nap alarm on
with the option of : Turn O , 5 Minutes, 10 Minutes, 20 Minutes, 30
Minutes,60 Minutes, 90 Minutes, 120 Minutes.
• Alarm Volume
• Change the alarm volume by rotating the Volume Knob or the LEFT /
RIGHT buttons to change.
• Once the correct sound volume has been chosen, press the OK button
to con r m.
Timer
• In “Con guration” settings, select the option for “Timer” and a screen
with 00:00 will display.
• To go up in seconds, click the RIGHT button. To go down in seconds,
click the LEFT button. Press and hold the LEFT/RIGHT buttons to move
through the timer quickly.
• Once you have chosen the correct timer amount, con rm it by pressing
the OK button.
Language
Select your chosen language within the list.
Dimmer
• To set the brightness of your radio, go to “Con guration” settings and
select “Dimmer” . You can choose “Power Saving” or “Turn On” mode.
• Select “Power Saving” mode to change one of your brightness levels
with the choice of up to 20 levels. When there is no activity of the radio
for 15 seconds, this lower brightness level will set until a button is clicked
and the “Turn On” setting will activate.
• Select “Turn On” mode to be the brightness for when the radio is active
and in use.
• Alternatively, you can alter two brightness settings by pressing DIMMER
button on the remote control on front panel directly.
Display
Choose the display to be Color or Monochrome.
Power Management
Select this to con gure the radio to go into Standby mode automatically
after a set time of inactivity or if there is no WIFI signal. You can select
5/15/30 minutes to go into Standby mode, or you can select “Turn Off ” to
ignore this function.
Sleep Timer
• To set a sleep timer, go to “Con guration” settings and select “Sleep
Timer”, You can choose Turn Off , 15, 30, 60, 90, 120, 150, 180 minutes.
• Alternatively, you can repeatedly press the SLEEP button on the remote
control to switch between sleep times on the top right of the display
screen. There is an option between 15, 30, 60, 90, 120, 150, 180
minutes.
• Once Sleep Timer has been selected, the timer amount and a sleep
image will show on the top right of the display screen.
Internet Radio
• Set the internet radio: Bu er and Sound Qualit y.
• Buff er: Con gure the bu er time of the music playback: 2/4/8 seconds.
• Sound Quality: Adjust the sound quality as you prefer: High/Low.
Weather
• Set location: Choose and enter your location.
• Temperature Unit: Choose your preferred temperature “Celsius” or
“Fahrenheit”.
• Show on Standby: Choose “O ” or “On” to deactivate or activate the
weather forecast display on the standby screen. When you activate the
weather forecast display , it will display on the Standby screen every 10
seconds.
FM Setup
• Mode: You can set “Mono” or “Stereo” mode.
• Threshold: Select threshold settings (seek threshold/Stereo threshold).
• (Threshold is to set to the auto-switching between mono and stereo mo-
des. When in a week reception place, the system will switch to the mono
mode automatically to reduce the background noise of the station, so
that to be more clearly listening.)
Local Radio Setup
Manually set up your location for Local radio rather than allowing the radio
to Auto Detect.
Key
In this setting interface, you can select “Alarm”, “Dimmer”, “Equaliser”,
“Local Radio”, “Mode”, “Preset”, “Sleep Timer” and “Timer” to con rm
the function of the MODE button on the front panel and the remote
control.
Equaliser
Default EQ is normal. You may change it to Flat, Jazz, Rock, Soundtracks,
Classical, Pop, News or my EQ.
Resume when power on
Turn on the function for the radio to resume when powered on. Instead,
the screen will remain in main menu.
Software Update
Will show here if a software update is available for the radio. If one is
available, please select for the update to initiate.
Reset to Default
Select this option to reset your radio and revert all of the settings and
presets made. Con rm that you would like to reset the unit and its settings
by selecting “YES”.
Internet Radio
Use the LEFT/RIGHT buttons or rotate the Select Knob to choose
<Internet Radio> in the Menu screen, press down the OK button to enter,
and there will be multiple options:
My Favorite: Your favourite stations will be saved here for easy listening.
You can press the FAV button directly to view your favourite stations list.
Radio Station/Music: Select this option to browse internet radio stations
in the categories of : Global Top 20, Genre, Country/Location, Highlight.
Find stations under relevant categories and select
your chosen internet station by pressing the OK button.
Local Radio: The radio is automatically set up to detect your country’s,
Top 10 stations, All stations, plus a variety of genres into categories in
alphabetical order. Select the category that you wish to listen to with the
OK button and continue browsing until your desired station.
Sleep Radio: Choose from multiple relaxation sounds.
History: Browse through recently listened to stations.
Service: Search Radio Station, Add new Radio Station or App.
Page 8

6
• You can use the NUMBER/LETER buttons to search radio station.
• To add a new radio station, use the NUMBER/LETER buttons to highlight
the chosen character and click the RIGHT button to move to the next
character. To go back to the previous character, press the LEFT button to
highlight it. Press down the OK button to search for the internet station.
Save your favorite Internet Radio stations
When you have found your desired station, press and hold the FAV button
to go to the “Add to My Favorite” setting screen. Rotate the Select Dial or
press the UP/DOWN buttons to choose the preset number and press the
OK button to con rm your option.
FM Radio
The range of FM frequency is from 87.5MHz to 108.00 MHz. Extended
the antenna to nd the strongest signal for each station.
Use the LEFT/RIGHT buttons or rotate the Select Dial to choose <FM > on
the Menu screen, then press down the OK button to enter FM screen.
Tuning Station
Press the UP/DOWN buttons on the remote control or on the LEFT/RIGHT
buttons on the front panel to adjust the frequency up or down a step of
0.05MHz.
Long press the LEFT/RIGHT buttons on the remote control to skip to the
previous or next station of the strongest reception. Once a station has
been found, it stops scanning automatically.
Press down the OK button, “Auto Scan” will be shown on the screen. If
you choose“YES”,the radio will begin to search stations from low to high
frequency. And it will save the stations it found automatically.
Store Station
To save your favourite station, you should listen to this station rst, long
press the FAV button on the remote control, then use the UP/DOWN
buttons or rotate the Select Knob to choose the digit you want to save.
Then press down the OK button to con rm the preset.
Recall A Stored Station
1. Press the PREVIOUS/NEXT buttons on the remote control to skip to
the previous or next preset station.
2. Or you can press the FAV button to select the stored station, press the
OK button to listen.
DAB/DAB+
Use the LEFT/RIGHT buttons or rotate the Select Knob to choose <DAB/
DAB+> on the Menu screen, press down the OK button to enter DAB/
DAB+ mode.
On rst time using of DAB on your radio, it will begin scanning for DAB
stations and will show “Scanning” on the display screen. It will display how
many stations have been found as the search continues.
Once all of the available stations have been found, the radio screen will
display the choice of available stations. Using the Select Knob to scroll
through and highlight chosen station. Select the station by pressing down
the OK button.
When you have selected a station, the screen will display a station list and
begin to play.
To choose previous or next station, press the UP or DOWN button to scroll
accordingly.
When on your chosen station, press the INFO button to show the
information on the station. The screen will scroll through information
automatically and display genre, MHZ, song playing, KHz and Kbps.
To go back to the list to scroll through manually, press the LEFT button to
go back to the list.
Pre-setting your favorite DAB/DAB+ stations
When you have found your desired station, hold down the FAV button for
a few seconds to go to the “ Add to My Favorite” screen. Rotate the Select
Knob to choose the preset number and press the OK button to con rm.
Alternatively, when you are on the list screen of DAB stations you are
able to highlight the chosen station and hold down FAV button to follow
guidance above.
To view your preset favourite stations, press the FAV button, and use the
UP or DOWN button to scroll through the preset list.
Information Center
Use the LEFT/RIGHT buttons or rotate the Select Knob to choose
<Information Center> on the Menu screen, press down the OK button to
enter the information Center screen.
Weather Information: To select the weather information for a desired
place, rst selec t the continent by using the Select Knob to scroll and the
OK button to con rm. Following this, then the country, followed by the
town/city.
Once you choose a chosen town/city, the following information will be
displayed: current temperature, weather symbol image, approximate
temperature range for the next 5 days.
Financial Information: Select from a range of stock market index’s from
around the world. Use the
Select Knob to scroll and the OK button to con r m.
System Information: View system version and wireless information and
Spotify version. If wireless information is selected, information such as
WIFI’s signal strength can be found.
Spotify Connect
The product is compatible with Spotify Connect, allowing it to act as
wireless speakers controlled by the Spotify App available for iOS, Android
smart devices, and a desktop client for PCs. To enter Spotify Connect mode,
press the MENU button to enter main menu screen, rotate the Select Knob
to cycle through the item until the Spotify logo is highlighted and brie y
press the Select Knob to select.
NOTES: A Spotify Premium account is required to use Spotify Connect.
NOTES: Ensure the product has the <Keep Network Connected> option
turned On. This will enable Spotify streaming to the unit when in
Sleep or a non-network mode such as DAB/DAB+, FM and Aux In.
When Spotify Connect mode is selected, before a connection with a Spotify
App is established, the message <Waiting for Users> is displayed.
NOTES: It may take up to 10 seconds for album
artwork to be reproduced on the display.
How to use Spotify Connect
Listen out loud with Spotify Connect
1. Connect your Sharp DR-I470 device to your wi network .
2. Open up the Spotify app on your phone, tablet or laptop using the
same wi network.
3. Play a song and select Devices Available.
4. Select your Sharp DR-I470 and start listening.
For more information on how to set up and use Spotify Connect please visit:
www.spotify.com/connect
The Spotify Software is subject to third party licenses found here: https://www.
spotify.com/connect/third-party-licenses
To establish a connection between the Spotify App and the radio, the
devices must be connected to the same WiFi network.
Page 9

To expand the displayed artwork on the unit, press the MENU button in
brie y. Press again to return to the standard display.
NOTES: Once a connection has been established, the Spotify account is
linked to both the App and the unit, allowing DR-I470 to be connected to.
Controlling Spotify from DR-I470, you can change volume, play or pause
the audio, and jump forwards and backwards through your playlist using
the remote control.
Changes made by the remote are re ected on the Spotify Connect App
and the unit.
As long as the Spotify App is connected to the radio on the same network,
and <Keep network connected> has been selected, you can usually power
on the radio when you start playing from the Spotify App.
Aux Operation
AUX-IN
Use the LEFT/RIGHT buttons or rotate the Select Knob to choose <AUX>
on the Menu screen, press down the OK button to enter the AUX mode.
Plug an AUX cable into your radio and connect cable via AUX-IN port on
the back of the radio. Begin playing audio from your device and this should
play on the radio when in AUX mode.
Line Out (Headphone)
On the rear panel of the radio, the Headphone jack allows for listening the
audio from your radio. Begin playing audio from the Internet Radio, AUX or
Bluetooth setting.
Bluetooth
Use the LEFT/RIGHT buttons or rotate the Select Knob to choose
<Bluetooth> on the Menu screen, press down the OK button to enter the
Bluetooth mode.
1. Go to your device settings to connect your device to the radio via
Bluetooth.
2. Select the name “SHARP DR-I470” in the found list from your device.
Once successfully connected, The radio will sound “Connected”, and
“Bluetooth Connected” will appear on the display.
3. Select your chosen audio on your device and play.
4. Now you can enjoy the music in your device.
5. To disconnect between each other, switch to another playback mode,
or turn o the Bluetooth function in your device.
AirMusic Control - SHARP Smart Control
App
Once the user downloads and installs the SHARP Smart Control app on
their mobile device, the app serves for the remote managing of the device.
Please note, the DR-I470 radio and the mobile device with the SHARP
Smart Control app need to be connected to the same network, otherwise
the two devices won’t be able to connect with each other. Open the app
and there will be displayed list of available devices.
Click on the appropriate to connect.
NOTES: the device will automatically adjust language of the DR-I470 radio
to the language set in the mobile device with SHARP Smart Control app.
SHARP Smart Control App QR code is available in: Internet Radio > Service >
App
The app lets user control the device via mobile phone:
Choose appropriate tab to manage the radio.
EN
Press
(change device name, check software updates, scan for other devices or
display more information)
Press
The app will serve as remote control, and the
mobile device with SHARP Smart Control App
will display remote control buttons.
1. Turn o the device
2. OK button
3. Mode button (change the playback mode)
4. Menu button
5. Display favorite stations
6. Key button (same function as the MODE
7. Sleep timer
8. Alarm
9. Dimmer
10. Previous
11. Play/Pause
12. Next
13. Numeric buttons
14. Equalizer settings
15. Mute
16. Volume +
17. Volume -
18. Direction buttons
19. Back to app main menu
Press
a picture to set as a screen saver on the standby display.
Press
record voice message, release to stop recording. The red ashing circle will
be displayed on the upper left corner of the screen of the radio. To play
the voice message, enter any tab in menu recording will be streamed via
radio speaker.
Press
release to stop recording. The recording will be streamed via radio speaker.
Press
stream through the radio.
Press
stations.
icon to display side tab. Select Settings to enter more options
icon enter remote control mode.
button on the device)
to enter standby screen selection setting. Then choose or take
to enter voice message option. Press and hold the to
to enter intercom option. Press and hold to record;
to enter local music directory stored on the mobile device to
to stream one of the rst ve favorite
Page 10

8
Troubleshooting
This product does not contain any parts that are serviceable by the user. In
case of a fault, contact the manufacturer or authorised service department.
Exposing the internal parts inside the device may endanger your life. The
manufacturers guarantee does not extend to faults caused by repairs
carried out by unauthorised third parties.
No Sound
Cause
• Volume not turned up.
Solution
• Adjust the main volume knob.
No sound from Bluetooth connection
Solution
• Check whether external device requires password“0000" to start with.
WiFi not connecting
Solution
• Ensure WIFI mode is selected in settings and the correct passcode is
being entered for the WIFI modem.
Static Sound
Cause
• Signal reception too low.
Solution
• Adjust the antenna or move the unit to a stronger signal location.
Sound is distorted
Cause
• Volume is too high
Solution
• Reduce the volume
Desired station not found
Cause
• Weak signal
Solution
• Use the Manual Tune function.
NO DAB functions
Cause
• No DAB coverage in your area.
• Poor reception
Solution
• Adjust the position of the aerial.
The display is blank.
Cause
• This may occur if the broadcaster changes the label of a service or
removes a label while tuned.
Solution
• The radio will try to retune.
• Perform a scan.
NO Power
Cause
• The adaptor is not connected to the wall outlet.
Solution
• Make sure the adaptor is plugged.
Page 11

Technical speci cation
3,16 kg
Model DR-I470 Pro
Output Power 2 x 7 W (RMS)
Power Consumption (max.) 28 W
Power Consumption (standard) 8 W
Power Consumption Standby <1 W
FM Frequency 87.5-108 MHz
DAB+ Frequency 174.928-239.200 MHz
Bluetooth
Version V5.0
Frequency bands 2402 MHz ~ 2480 MHz
Maximum power transmitted 4 dBm
Power Adapter
Model name FJ-SW1202000N
Input AC 100-240 V ~ 50/60 Hz, 0.6 A Max
EN
Output
Manufacturer
WIFI
Wi connec tion 802.11 b/g/n; STA/AP/AP Client
B1,Xujing chang Industrial Park, Haoye Road, Fuyong 518103 Shenzhen, China
SHENZHEN FU JIA APPLIANCE CO., LTD
DC 12 V
⎓2000 mA
145 mm
354 mm
KG
185 mm
Page 12

10
DE
Wichtige Sicherheitsanweisungen
Bitte lesen Sie sich diese Sicherheitsanweisungen
durch und beachten Sie, bevor Sie das Gerät in
Betrieb nehmen, auf die folgenden Warnhinweise:
Das Dreieckszeichen mit Ausrufungszeichen verweist auf
wichtige Funktions - und Wartungshinweise (Reparatur) in der
dem Gerät beigelegten Bedienungsanleitung.
Benutzen Sie nur die Energieversorgung, die in der
Bedienungsanleitung angegeben ist.
Dieses Symbol bedeutet, dass das Produkt auf
umweltfreundliche Weise und nicht mit dem gewöhnlichen
Haushaltsmüll entsorgt werden sollte.
Wechselspannung
Gleichspannung
Gerät der KlasseII
Nur für den Innenbereich
Energiee zienzkennzeichnung mit Stufe VI
Polarität des Gleichstromsteckers
Halten Sie Kerzen und off enes
Feuer von diesem Produkt fern,
um einen Brand zu vermeiden.
Warnung:
• Halten Sie sich während der Nutzung dieses Geräts immer an die
allgemeinen Sicherheitshinweise, insbesondere, wenn Kinder in der
Nähe sind.
• Kinder sollten beaufsichtigt werden, um sicherzustellen, dass sie nicht
mit dem Gerät spielen.
• Das Stromkabel darf weder beschädigt, noch dürfen schwere Objekte
darauf abgelegt werden, außerdem dürfen Sie es nicht dehnen oder
verbiegen. Schließen Sie keine Verlängerungskabel an. Schäden am
Stromkabel können zu einem Feuer oder Stromschlag führen.
• Das Stromkabel darf weder beschädigt, noch dürfen schwere Objekte
darauf abgelegt werden, außerdem dürfen Sie es nicht dehnen oder
verbiegen. Schließen Sie auch keine Verlängerungskabel an. Schäden am
Stromkabel können zu einem Feuer oder Stromschlag führen.
• Wenn das Stromversorgungskabel beschädigt ist, muss es vom Hersteller, einem Servicetechniker oder einer ähnlich quali zierten Person
ausgetauscht werden, um Gefährdungen zu vermeiden.
• Stellen Sie sicher, dass die Einheit an eine AC 100-240V 50/60Hz Steckdose angeschlossen wird. Eine höhere Spannung kann zu Fehlfunktionen oder sogar zu einem Brand führen.
• Wenn der Netzstecker nicht in die Steckdose passt, dürfen Sie ihn nicht
mit Gewalt einstecken.
• Wenn der Stecker nicht in die Steckdose passt, dürfen Sie keine Gewalt
anwenden, um einen nicht passenden Stecker in die Steckdose zu
drücken.
• Schalten Sie die Einheit aus, bevor Sie sie von der Stromversorgung
trennen, um sie so vollständig abzuschalten.
• Wenn das Gerät längere Zeit nicht benutzt wird, trennen Sie es von der
Stromversorgung.
• Vermeiden Sie es, das Stromkabel mit nassen Händen anzuschließen
oder zu trennen. Dies könnte andernfalls zu einem Stromschlag führen.
• Trennen Sie das Stromkabel, wenn es längere Zeit nicht verwendet wird.
• Stellen Sie sicher, dass der Hauptstecker immer leicht zugänglich ist.
• Dieses Produkt enthält keine Teile, die vom Benutzer gewartet werden
können. Setzen Sie sich im Fall eines Defekts mit dem Hersteller oder
der autorisierten Kundenabteilung in Verbindung. Teile aus dem Inneren
des Geräts freizulegen kann lebensgefährlich sein. Die Garantie der
Hersteller gilt nicht für Defekte, die durch von nicht autorisierte Dritten
durchgeführte Reparaturen entstehen.
• Benutzen Sie dieses Produkt nicht direkt nach dem Auspacken. Warten
Sie, bis es sich auf Zimmertemperatur erwärmt hat, ehe sie es einschalten.
• Stellen Sie sicher, dass dieses Produkt ausschließlich in Umgebungen
mit mildem Klima verwendet wird (kein tropisches oder subtropisches
Klima).
• Stellen Sie das Produkt auf eine ache, stabile Ober äche, die keinen
Erschütterungen ausgesetzt ist.
• Das Produkt und dessen Teile dürfen nicht über die Kante delelte tragen-
den Möbelstücks hinausragen.
• Um das Risiko eines Feuers, Stromschlags oder Schäden an diesem
Produkt zu reduzieren, sollten Sie es nicht direktem Sonnenlicht, Staub,
Regen oder Feuchtigkeit aussetzen. Setzen Sie es niemals tropfendem
oder spritzendem Wasser aus und positionieren Sie keine mit Flüssigkeiten gefüllten Objekte auf oder neben dem Produkt.
• Setzen Sie keine mit Flüssigkeit gefüllten Objekte wie Vasen auf das
Gerät.
• Installieren Sie das Produkt nicht in der Nähe von Heizquellen, wie etwa
Heizungen, Heizregister, Öfen oder anderen Apparaten (einschließlich
Verstärker), die Hitze produzieren.
• Platzieren Sie das Gerät nicht an Orten mit hoher Feuchtigkeit und
mangelhafter Belüftung.
• Sorgen Sie für einen Mindestabstand von 5 cm rund um das Gerät,
um eine ausreichende Belüftung sicherzustellen. Vermeiden Sie es,
Belüftungsö nungen an diesem Produkt zu blockieren. Sorgen Sie
immer dafür, dass die Belüftungsö nungen nicht durch Gegenstände, z.
B. Zeitungen, Tischdecken, Gardinen usw. verdeckt sind.
• Lassen Sie NIEMALS jemanden, ganz besonders nicht Kinder, etwas in
die Löcher, Spalten oder anderen Ö nungen des Gerätegehäuses stopfen, da dies zu einem folgenschweren Stromschlag führen kann.
• Gewitter sind für alle elektrischen Geräte gefährlich. Wenn das Strom-
oder Antennenkabel vom Blitz getro en wird, kann das Gerät, auch
wenn es ausgeschaltet ist, beschädigt werden. Bei einem herannahenden Gewitter sollten Sie alle Kabel und Stecker des Gerätes ausstecken.
• Ein exzessiver Schalldruck von Kopfhörern kann zu einem Hörverlust
führen.
Wartung
• Trennen Sie vor dem Reinigen des Geräts das Stromkabel von der
Stromquelle.
• Verwenden Sie einen weichen und sauberen Lappen, um die Außen-
ächen der Einheit zu reinigen. Verwenden Sie beim Reinigen niemals
Chemikalien oder Reinigungsmittel.
Netzadapter
• Um die Einheit von der Stromversorgung zu trennen, trennen Sie das
Netzkabel von der Steckdose.
• Benutzen Sie nur den mitgelieferten Netzadapter, andernfalls kann es zu
einem Sicherheitsrisiko/einer Beschädigung des Gerätes kommen.
Batterien
• Achten Sie beim Einlegen der Batterien auf die
richtige Polarität.
• Setzen Sie Batterien keinen hohen Temperaturen
aus und legen Sie sie nicht an Stellen ab, wo sich die
Temperatur schnell erhöht, z. B. neben einem Feuer
oder in die direkte Sonneneinstrahlung.
• Setzten Sie Batterien keiner übermäßigen Strah-
lungswärme aus, werfen Sie sie nicht ins Feuer oder
Cd
Page 13

bauen sie auseinander und versuchen Sie nicht, nicht au adbare Batterien aufzuladen. Sie könnten undicht werden oder explodieren.
• Verwenden Sie niemals unterschiedliche Batterien oder vermischen
neue mit alten.
• Wenn Sie die Fernbedienung für längere Zeit nicht verwenden (länger
als einen Monat), sollten Sie die Batterie aus der Fernbedienung nehmen, um ein Auslaufen zu verhindern.
• Wenn die Batterien auslaufen, wischen Sie die ausgelaufene Flüssigkeit
im Batteriefach weg und ersetzen die Batterien durch neue.
• Verwenden Sie immer nur die angegebenen Batterien.
• Batterie nicht verschlucken, Gefahr von chemischen Verbrennungen
• Wenn die Batterie verschluckt wird, kann dies zu schweren inneren
Verbrennungen innerhalb von nur 2 Stunden führen und tödlich sein.
Bewahren Sie neue und gebrauchte Batterien für Kinder unzugänglich
auf. Wenn das Batteriefach nicht fest geschlossen werden kann, sollten
Sie das Gerät nicht weiter verwenden und es für Kinder unzugänglich
aufbewahren. Wenn Sie vermuten, dass Batterien verschluckt oder in
irgendein Körperteil eingeführt wurden, müssen Sie sofort medizinische
Hilfe in Anspruch nehmen.
Entsorgung dieses Geräts und von Batterien
• Entsorgen Sie dieses Produkt oder dessen Batterien
niemals über den normalen Hausmüll. Geben Sie es entsprechend den gesetzlichen Regelungen vor Ort bei dem
für das Recycling von WEEE vorgesehenen Sammelpunkt
ab. Damit helfen Sie, Ressourcen einzusparen und die
Umwelt zu schützen.
• In den meisten EU-Ländern gelten für die Entsorgung von Batterien
besondere Gesetze und Vorschriften. Weitere Informationen erhalten Sie
von Ihrem Händler oder den örtlichen Behörden.
DE
•
Die oben aufgeführten Hinweise sind auf elektrischen und elektronischen Geräten und Batterien (oder der Verpackung) zu nden, um Nutzer
entsprechend zu erinnern. Nutzer werden darum gebeten, für
gebrauchte Geräte und Batterien bestehende Rückgabeeinrichtungen
zu nutzen.
CE- und UKCA-Erklärung:
• Sharp Consumer Electronics Poland Sp. z o.o. erklärt hiermit, dass
dieses Audiogerät den wesentlichen Anforderungen und weiteren
entsprechenden Vorschriften der RED-Verordnung 2014/53/EU und der
britischen Funkgeräteverordnung von 2017 entspricht.
• Der vollständige Text der EU-Konformitätserklärung ist unter folgendem
Link verfügbar: www.sharpconsumer.com, und anschließend ö nen Sie
den Download-Abschnitt Ihres Modells und wählen „CE-Erklärungen”.
Page 14

12
DE
Was be ndet sich im Karton:
• 1x Hauptgerät
• 1x Fernbedienung
• 1x Netzadapter
• 1x Benutzerhandbuch
• 1x Wechselstromstecker für Netzadapter (Vereinigtes Königreich)
• 1x Wechselstromstecker für Netzadapter (Europäische Union)
Panels und Bedienelemente
Vorderseite
9
1
3
5
7
1. MODE – Drücken, um die Modi zu ändern: DAB/DAB+, FM, Internet
Radio, Bluetooth, AUX IN.
Dies kann auch mit einer anderen Funktion durch Einstellung des
<Taste>-Menüs in EINSTELLUNGEN belegt werden: Wecker, Dimmer,
Equalizer, Lokale Station, Mode, Voreinstellung, Sleeptimer, Timer.
HINWEISE: Die Standardfunktion für diese Taste ist Mode-Änderung.
2. STANDBY – Drücken Sie diese Taste, um das Gerät einzuschalten oder
in den Standby-Mode zu wechseln.
3. MENÜ – Drücken Sie diese Taste, um die MENÜ-Einstellungsschnitt-
stelle aufzurufen.
4. SLEEP – Wiederholt drücken, um Ihre gewünschte Schlafzeit einzu-
stellen.
5. ◄ – Im Einstellungsbildschirm drücken, um zur vorherigen Auswahl
zurückzukehren. Beim Radiohören kürz drücken, um die Frequenz in
0,05-MHz-Schritten zu verringern.
6. ► – Im Einstellungsbildschirm drücken, um zur nächsten Auswahl
zu wechseln. Beim Radiohören kürz drücken, um die Frequenz in
0,05-MHz-Schritten zu erhöhen.
7. DIMMER – Drücken, um die Hintergrundbeleuchtung einzustellen.
8. VOREINSTELLUNG– Bei der Internet-Radio-Wiedergabe diese Taste
drücken, um zum Bildschirm Radiosender/Musik zu wechseln.
9. ANZEIGEBILDSCHIRM – Zur Anzeige von Informationen.
Rückseite
11
12
10. Lautstärkeknopf/Auswahlknopf/OK-Taste– Drehen Sie den Knopf
während der Wiedergabe, um die Wiedergabelautstärke einzustellen.
E
D
O
M
U
N
E
M
R
E
M
M
I
D
P
R
E
S
E
T
2
4
6
8
10
13
AUX IN
DC 12V
14
Drehen Sie diesen Knopf bei der Einstellung dieses Menüs, um die Optionen auszuwählen; drücken Sie ihn, um ihre Auswahl zu bestätigen.
11. FM-Antenne– Für den Empfang des FM-Signals.
12. Kopfhöreranschluss – 3-5-mm-Kopfhöreranschluss.
13. AUX-IN-Anschluss– Schließen Sie das 3,5-mm-Kabel an, um externe
Musik zu genießen.
14. DC-Netzeingang – 12V Gleichstrom
Fernbedienung
1
2
3
4
5
6
7
8
9
10
11
12
13
14
1. STANDBY – Drücken Sie die Taste STANDBY auf der Fernbedienung, um
das Gerät aufzuwecken oder in den Standby-Mode zu versetzen.
2. SOURCE – Drücken Sie die SOURCE-Taste, um die Wiedergabemodi zu
ändern: DAB / DAB +, UKW, AUX IN, Bluetooth, Internetradio.
Hinweis: Diese Taste kann als weitere Funktion verwendet werden,
indem Sie in der EINSTELLUNGEN den Punkt <Taste> einstellen:
Wecker, Dimmer, Equalizer, Lokale Station, Mode, Voreinstellung,
Sleeptimer, Timer.
3. MENU (MENÜ) – Drücken Sie die Taste MENU (MENÜ) auf der Fernbedienung
oder der Frontblende, um die Menüwiedergabe aufzurufen; drücken Sie die
Tasten für die entsprechende RICHTUNG oder drehen Sie den Auswahlknopf,
um durch das Menü zu blättern: Internet Radio, FM, DAB/DAB+, Spotify,
Informations-Center, AUX, Bluetooth, Einstellungen, Lokale Station.
4. NACH OBEN / 5. OK / 6.LINKS / 7. NACH UNTEN / 17. RECHTS –
Blättern Sie mit den Tasten NACH OBEN und NACH UNTEN oder
drehen Sie die Auswahltaste, um durch die Auswahlmöglichkeiten zu
blättern; drücken Sie anschließend die OK-Taste, um Ihre Auswahl zu
bestätigen.
8. VOL- / 18. VOL+ – Um die Lautstärke einzustellen, können Sie die Tasten
VOL+ und VOL- drücken oder direkt am Lautstärkeknopf drehen.
9. WIEDERGABE/PAUSE – Drücken Sie die Taste WIEDERGABE/PAUSE, um
die Wiedergabe zu pausieren; drücken Sie diese Taste erneut, um die
Wiedergabe fortzusetzen.
10. ZURÜCK / 19. WEITER – Drücken Sie während der Musikwiedergabe die
Taste ZURÜCK oder WEITER, um zum vorherigen oder nächsten Track
zu schalten. Drücken Sie beim Radiohören die Taste ZURÜCK oder WEI-
TER, um zum vorherigen oder nächsten Sender-Favoriten zu schalten.
11. WECKER – Drücken Sie die Taste WECKER, um die Weckeroptionen
aufzurufen und einzustellen.
SOURCE
MENU
OK
VOL- VOL+
SLEEP ALARM
EQ
1
2
ABC DEF
5
4
GHI JKL MNO
7
8 9
PQRS TUV WXYZ
WPS DIMMER
0
15
INFO
16
17
18
19
FAV
20
21
3
6
22
Page 15

DE
12. SLEEP – Drücken Sie wiederholt die Taste SLEEP, um Ihre bevorzugte
Schlafzeit auszuwählen.
13. ZAHL/BUCHSTABE – Geben Sie bei der Einstellung im Menü Buchsta-
ben oder Zahlen ein.
14. WPS – WPS Einstellungen
15. STUMM – Drücken Sie die Taste MUTE (STUMM), um den Ton stumm
zu schalten; drücken Sie diese Taste erneut oder drücken Sie die Tasten
VOL+/- auf der Fernbedienung oder drehen Sie den Lautstärkeknopf
auf der Oberblende, um weiterzuhören.
16. INFO – Drücken Sie die Taste INFO, um die Senderdaten aufzurufen.
20. EQ – Drücken Sie wiederholt die Taste EQ, um die unterschiedlichen
EQ-Modi auszuwählen: Normal, Mittig, Jazz, Rock, Soundtracks, Klassik,
Pop, Nachrichten, my EQ.
21. FAV – Drücken Sie lange auf die Taste FAV, um den Sender abzuspeichern. Drücken Sie kurz auf die Taste FAV, um sich Ihre abgespeicherten Lieblingssender anzusehen.
22. DIMMER – Drücken Sie die Taste DIMMER, um die Hintergrundbeleuchtung auszuwählen.
Batterien der fernbedienung einlegen oder ersetzen
1. Drücken Sie die Arretierung auf der Batterieabdeckung auf der
Rückseite der Fernbedienung in Richtung des eingeprägten Pfeils.
2. Halten Sie die Arretierung gedrückt und ö nen Sie das Batteriefach.
3. Legen Sie zwei Batterien mit der richtigen Polarität (+/-
) wie angezeigt ein. Verwenden Sie beim Ersetzen der
Batterien nur den gleichen Batterietyp wie mitgeliefert.
4. Setzen Sie die Batterieabdeckung wieder
ein und lassen Sie sie einrasten.
Einrichten Ihres Internet Radios
Stecken Sie das Netzteil in der Gleichstrom-Eingangsbuchse (DCIN) ein.
Anschließend wird auf dem Bildschirm „Welcome“ (Willkommen) angezeigt.
Überprüfen Sie, dass die Antenne möglichst weit ausgezogen ist. Dies
garantiert den bestmöglichen Signalempfang.
Wenn Sie Ihr Radio das erste Mal benutzen, können Sie nach dem Willkommensbildschirm die Sprache wählen, indem Sie mit dem Auswahlknopf
blättern und Ihre Auswahl durch Drücken der TasteOK bestätigen.
Nach der Spracheinstellung zeigt der Bildschirm „Enable Check Network
when Power On?“ (Netzwerk prüfen beim Anschalten aktivieren?). Sie
können „YES (JA)“ oder „NO (NEIN)“ auswählen und entscheiden, ob das
Gerät das Netzwerk beim Anschalten prüft oder nicht.
Manuelle WLAN-Einrichtung
Nach den oben genannten Einstellungen wird „Would you like
to con gure Network now?“ (Möchten Sie das Netzwerk jetzt
kon gurieren?) auf dem Bildschirm angezeigt.
• Wenn Sie „YES (JA)“ auswählen, sucht ihr Radio nach Netzwerken in
der Nähe, um sich damit zu verbinden. Nach dem Scan müssen Sie das
Netzwerk für die Verbindung auswählen. Geben Sie anschließend die
Buchstaben/Zahlen ein, indem Sie mit dem Auswahlknopf blättern
oder die BUCHSTABEN-/ZAHLEN-Tasten drücken, bis die richtige
Auswahl angezeigt wird– drücken Sie dann auf die Taste RECHTS, um
zur nächsten Stelle zu wechseln. Wenn Sie damit fertig sind, drücken Sie
zur Bestätigung die TasteOK.
• Wenn Sie „NO (NEIN)“ auswählen, können Sie dies später in den Kon gu-
rationseinstellungen einstellen.
Funknetz (WPS PBC)
Wenn Sie während „„Would you like to con gure Network now?
(Möchten Sie das Netzwerk jetzt kon gurieren?)“ „YES(WPS) (JA–
WPS)“ wählen, sucht ihr Radio nach WLAN-Verbindungen.
Bei dieser Auswahl haben Sie 120Sekunden Zeit, um die WPS-Taste auf
Ihrem WLAN-Modem zu drücken. Dies verbindet Ihr WLAN mit Ihrem
Radio, ohne manuell den Passcode einzugeben.
WLAN-Verbindung abgeschlossen!
Sobald Ihr WLAN durch die manuelle Eingabe des WLAN-Passworts oder
über WPS eingerichtet ist, werden Sie auf den Hauptmenübildschirm
weitergeleitet und das WLAN-Signal erscheint oben links in Weiß. Ihr
Internet Radio ist jetzt eingerichtet!
Einstellungen
Benutzen Sie die Tasten LINKS/RECHTS oder drehen Sie den
Auswahlknopf, um <Einstellungen> auf dem Hauptmenü-
Anzeigebildschirm auszuwählen; drücken Sie die TasteOK, um die
Einstellungen aufzurufen.
Zeitanzeige
Stellen Sie die Art der Zeitanzeige ein: Analog oder Digital.
My mediaU verwalten
Stellen Sie die Funktion auf Aktivieren oder Deaktivieren.
Der MediaU-QR-Code ist unter Kon guration > Meine Medien verwalten >
Aktivieren verfügbar.
Netzwerk
• Funknetz-Einstellung
• In den Netzwerkeinstellungen können Sie eine WLAN-Verbindung
einrichten, indem Sie „Funknetz-Einstellung“ auswählen. Das Radio
sucht anschließend nach verfügbaren WLAN-Verbindungen.
• Suchen Sie nach Ihrer WLAN-Verbindung und wählen Sie sie mit der
TasteOK aus. Um Buchstaben/Zahlen einzugeben, benutzen Sie den
Auswahlknopf oder drücken Sie die BUCHSTABEN-/ZAHLEN-Tasten,
bis die richtige Stelle angezeigt wird. Drücken Sie anschließend die
Taste RECHTS, um zur nächsten Stelle zu wechseln. Drücken Sie die
Taste LINKS, wenn Sie zur vorherigen Stelle zurückkehren möchten.
Wenn Sie damit fertig sind, drücken Sie zur Bestätigung die TasteOK.
• Sobald Ihr WLAN verbunden ist, wird der Hauptmenübildschirm angezeigt und das WLAN-Signal erscheint oben links in Weiß.
• Funknetz (WPS PBC)
• Wählen Sie diese Option, um nach der WLAN-Verbindung zu suchen.
Bei dieser Auswahl haben Sie 120Sekunden Zeit, um die WPS-Taste
auf Ihrem WLAN-Modem zu drücken. Dies verbindet Ihr WLAN mit
Ihrem Radio, ohne manuell den Passcode einzugeben.
• Manuelle Kon guration
• Sie können die Drahtlosdaten manuell eingeben: DHCP (Dynamic
Host Con guration Protocol), Enter SSID (SSID eingeben) und Manage
(Verwalten).
• Netzwerk prüfen beim Anschalten
• Stellen Sie Aktivieren oder Deaktivieren ein.
Datum&Uhrzeit
• Datum und Zeit einstellen
• Manuelle Einrichtung oder Automatisch erkennen
Es gibt eine Option, um das Datum und die Zeit manuell einzurichten,
anstelle dazu die automatische Erkennung zu nutzen. Drehen Sie am
Auswahlknopf oder drücken Sie die Zi erntasten, um beim Monat
die gewünschte Zi er einzugeben. Sobald Sie die richtige Zi er
eingegeben haben, drücken Sie die Taste RECHTS, um zur Tageseinstellung zu wechseln. Machen Sie weiter mit dem Jahr, der Stunde
und den Minuten. Sobald die manuelle Einstellung abgeschlossen ist,
drücken Sie zur Eingabe die TasteOK. Um das Format für Datum und
Zeit abzubrechen, können Sie diese Einstellungen mit der Funktion
„Datum&Uhrzeit“ ändern.
• Zeitformat einstellen: Zur Einstellung des Uhrzeitformats: 12Stunden
oder 24Stunden.
• Datumsformat einstellen: JJJJ/MM/TT, TT/MM/JJJJ, MM/TT/JJJJ
Wecker
• Wecker1/Wecker2 einstellen
• Um auf Ihrem Radio einen Wecker einzustellen, gehen Sie zu „Einstellungen“ und blättern zur Auswahl von „Wecker“ oder drücken direkt
die Taste WECKER auf der Fernbedienung.
Page 16

14
DE
• Nach dem Aufrufen des Wecker-Einstellungsbildschirms wählen Sie
„Wecker 1(Aus)“ oder „Wecker 2(Aus)“ und wählen „Einschalten“,
um den Wecker zu aktivieren.
• Wählen Sie „Wiederholen“, um die Wiederholung Ihres Weckers auszuwählen– drücken Sie dazu TasteOK. Sie können „Everyday (Täglich)“,
„Once (Einmal)“ oder einzelne Tage für den Weckruf auswählen.
Sobald Sie Ihre Auswahl getätigt haben, drücken Sie die Taste LINKS,
um zu den weiteren Weckereinstellungen zu wechseln.
• Wählen Sie „Uhrzeit“ und drehen Sie den Auswahlknopf, um die
Weckerstunde auszuwählen. Sobald Sie die gewünschten Stunden
gefunden haben, drücken Sie die Taste RECHTS, um zu den Minuten
zu wechseln.
• Sobald Sie den richtigen Wert für die Minuten gefunden haben,
drücken Sie die Taste RECHTS, um „AM (Vormittag)“ oder „PM
(Nachmittag)“ auszuwählen; drücken Sie anschließend die TasteOK,
um Ihre Auswahl zu bestätigen und zurück zu den Weckereinstellungen zu gehen.
• Blättern Sie jetzt nach unten und wählen Sie „Sound“, indem Sie
die TasteOK drücken. Sie können zwischen Beep (Piepston), Melody
(Melodie), Internet Radio, FM oder DAB/DAB+ wählen.
• Wenn Sie Ihren Weckerton als Internet Radio, FM oder DAB/DAB+
einrichten, werden anschließend Ihre bevorzugten Sender angezeigt.
Wählen Sie Ihren bevorzugten Weckersender durch Drücken der
TasteOK.
• Das Weckersymbol wird auf dem Hauptanzeigebildschirm angezeigt.
• Wecker deaktivieren
• Um Ihren Wecker abzubrechen, wählen Sie „Wecker“ in den Einstel-
lungen oder mit der Taste WECKER und wählen den Wecker, den Sie
deaktivieren möchten.
• Sobald der Wecker ausgewählt ist, können Sie ihn aktivieren oder
deaktivieren. Markieren Sie die Option „Aus“ und drücken Sie zur
Bestätigung die TasteOK.
HINWEIS: Ändern Sie die Wecker-Lautstärke unter der Einstellung
„Wecker-Lautstärke“ auf dem Wecker-Einstellungsbildschirm.
• Wecker beim Klingeln deaktivieren
Wenn Ihr Wecker klingelt, drücken Sie die Taste WECKER oder die
Taste STANDBY auf der Fernbedienung, um den Wecker verstummen
zu lassen. Wenn Sie einen Wecker so eingestellt haben, dass er täglich
oder mehr als einmal ertönt, wird das Weckersymbol weiterhin auf dem
Bildschirm angezeigt.
• Wecker auf SNOOZE (SCHLUMMER) stellen
Wenn Ihr Wecker klingelt, drücken Sie eine beliebige Taste außer
STANDBY oder WECKER, um den Wecker verstummen zu lassen und
ihn in den Mode SNOOZE (SCHLUMMER) zu versetzen. Die Funktion
SNOOZE (SCHLUMMER) lässt den Wecker des Radios nach 5Minuten
erneut erklingen.
HINWEIS: Deaktivieren Sie die Funktion SNOOZE (SCHLUMMER) des
Weckers, indem Sie die Taste WECKER oder STANDBY drücken.
• Schlummer-Wecker
• Nach der Auswahl der Option „Wecker“ in den Einstellungen oder
nach Drücken der Taste WECKER auf der Fernbedienung wählen Sie
„Schlummer-Wecker(Aus)“.
• Wählen Sie, für wie viele Minuten der Schlummer-Wecker eingestellt
werden soll– es stehen folgende Optionen zur Verfügung: Aus, 5Minuten, 10Minuten, 20Minuten, 30Minuten, 60Minuten, 90Minuten,
120Minuten.
• Wecker-Lautstärke
• Ändern Sie die Wecker-Lautstärke durch Drehen des Lautstärkeknopfs oder durch Drücken der Tasten LINKS/RECHTS.
• Sobald Sie die gewünschte Wecker-Lautstärke ausgewählt haben,
drücken Sie zur Bestätigung die TasteOK.
Timer
• Unter „Einstellungen“ wählen Sie die Option „Timer“ und es wird ein
Bildschirm mit 00:00 angezeigt.
• Um die Sekunden hochzuschalten, drücken Sie die Taste RECHTS. Um
die Sekunden herunterzuschalten, drücken Sie die Taste LINKS. Drücken
und halten Sie die Tasten LINKS/RECHTS, um schnell durch den Timer
zu blättern.
• Sobald Sie den Timer richtig ausgewählt haben, bestätigen Sie Ihre
Auswahl mit der TasteOK.
Sprache
Wählen Sie Ihre gewünschte Sprache aus der Liste.
Dimmer
• Um die Helligkeit Ihres Radios einzustellen, gehen Sie zu „Einstellungen“ und wählen Sie „Dimmer“. Sie können den Mode „Energiesparmodus“ oder „Einschalten“ auswählen.
• Wählen Sie den Mode „Energiesparmodus“ , um eine Helligkeits-
stufe zu verändern– es stehen 20Stufen zur Auswahl. Wenn es beim
Radio 15Sekunden lang keine Aktivität gibt, wird diese niedrigere
Helligkeitsstufe eingestellt, bis eine Taste gedrückt und die Einstellung
„Einschalten“ aktiviert wird.
• Wählen Sie den Mode „Einschalten“ für die hellste Helligkeit, wenn das
Radio aktiv ist und benutzt wird.
• Sie können auch zwischen zwei Helligkeitseinstellungen umschalten,
indem Sie auf der Fernbedienung oder direkt auf der Frontblende die
Taste DIMMER drücken.
Anzeige
Wählen Sie für die Anzeige Farbe oder Monochrom.
Energieeinstellungen
Wählen Sie diese Option für die Einstellung, ob das Radio automatisch in
den Standby-Mode schalten soll, wenn es nicht benutzt wird oder wenn
kein WLAN-Signal anliegt. Sie können auswählen, dass das Radio nach
5/15/30Minuten in den Standby-Mode schaltet– oder Sie können „Aus“
wählen, um diese Funktion zu ignorieren.
Sleeptimer
• Um einen Sleeptimer einzustellen, gehen Sie zu den „Einstellungen“
und wählen „Sleeptimer“– Sie können wählen: Aus, 15, 30, 60, 90, 120,
150, 180Minuten.
• Sie können auch wiederholt die Taste SLEEP auf der Fernbedienung
drücken, um oben rechts auf dem Anzeigebildschirm zwischen den
Sleep-Zeiten umzuschalten. Die Optionen sind: 15, 30, 60, 90, 120, 150,
180Minuten.
• Sobald der Sleeptimer ausgewählt wurde, wird oben rechts auf dem
Anzeigebildschirm der Timer und ein Sleep-Symbol angezeigt.
Internet Radio
• Einstellen des Internet Radios: Bu er (Zwischenspeicher) und Sound
Quality (Klangqualität).
• Buff er (Zwischenspeicher): Kon gurieren Sie die Zwischenspeicherzeit
der Musikwiedergabe: 2/4/8 Sekunden.
• Sound Quality (Klangqualität): Stellen Sie die Klangqualität nach Ihren
Vorlieben ein: High/Low (Hoch/Niedrig).
Wetter
• Lokale-Einstellung: Wählen Sie Ihren Ort und geben Sie ihn ein.
• Temperatureinheit: Wählen Sie ihre bevorzugte Temperaturanzeige
„Celsius“ oder „Fahrenheit“.
• Anzeige bei Standby: Wählen Sie „Aus“ oder „Ein“, um die Anzeige der
Wettervorhersage auf dem Standby-Bildschirm zu aktivieren oder zu
deaktivieren. Wenn Sie die Anzeige der Wettervorhersage aktivieren,
wird sie alle 10Sekunden auf dem Standby-Bildschirm angezeigt.
FM-Einstellung
• Mode: Sie können den Mode „Mono“ oder „Stereo“ einstellen.
• Emp ndlichkeit: Wählen Sie die Emp ndlichkeitseinstellungen
(Suchlauf-Emp ndlichkeit/Stereo-Emp ndlichkeit).
• (Die Emp ndlichkeit ist für das Auto-Umschalten zwischen den Modi
Mono und Stereo eingestellt. An einem schwachen Empfangsort schaltet
das System automatisch in den Mono-Mode um, um das Hintergrundgeräusch des Senders zu verringern und so den Hörgenuss zu verbessern.)
Lokale-Station-Einstellung
Stellen Sie Ihren Standort manuell für die Lokale Station ein, anstelle beim
Radio die Funktion „Automatisch erkennen“ zu aktivieren.
Taste
In dieser Einstellungsschnittstelle können Sie „Wecker“, „Dimmer“,
„Equalizer“, „Lokale Station“, „Mode“, „Voreinstellung“, „Sleeptimer“
und „Timer“ wählen, um die Funktion der Taste MODE auf der Frontblende
und der Fernbedienung zu bestätigen.
Page 17

DE
Equalizer
EQ Standard ist normal. Sie können ihn zu Mittig, Jazz, Rock, Soundtracks,
Klassik, Pop, Nachrichten oder my EQ ändern.
Fortsetzen der Wiedergabe nach Einschalten
Aktivieren Sie die Funktion für das Radio, wenn es eingeschaltet wird. Der
Bildschirm bleibt stattdessen im Hauptmenü.
Softwareupdate
Wird hier angezeigt, wenn für das Radio ein Update zur Verfügung steht.
Wenn ein Update zur Verfügung steht, wählen Sie es bitte aus, um zu
initialisieren.
Auf Werkseinstellung Zurücksetzen
Wählen Sie diese Option, um Ihr Radio zurückzusetzen und alle
vorgenommenen Einstellungen und Voreinstellungen rückgängig zu
machen. Bestätigen Sie durch die Auswahl von „YES (JA)“, dass Sie das
Gerät und alle Einstellungen zurücksetzen möchten.
Internet Radio
Benutzen Sie die Tasten LINKS/RECHTS oder drehen Sie den
Auswahlknopf, um <Internet Radio> auf dem Menübildschirm
auszuwählen– drücken Sie zum Aufrufen die TasteOK und es erscheinen
verschiedene Optionen:
Meine Favoriten: Hier werden Ihre Lieblingssender zum einfachen
Anhören abgespeichert. Sie können direkt die Taste FAV drücken, um die
Liste Ihrer Lieblingssender anzusehen.
Radiosender/Musik: Wählen Sie diese Option, um die Internet-Radiosender
in folgenden Kategorien durchzublättern: Global Top 20 (Weltweite Top20),
Genre (Genre), Country/Location (Land/Ort), Highlight (Highlight). Suchen
Sie Sender in den entsprechenden Kategorien und wählen Sie
Ihren Lieblingssender, indem Sie die TasteOK drücken.
Lokale Station: Das Radio wird automatisch eingerichtet, um die Sender
Ihres Landes, die Top-10-Sender, Alle Sender und zusätzlich eine Vielzahl
von Genres zu erkennen und alphabetisch in Kategorien zu sortieren.
Wählen Sie mit der TasteOK die Kategorie aus, die Sie anhören möchten,
und blättern Sie bis zu Ihrem gewünschten Sender weiter.
Schlafradio: Wählen Sie aus verschiedenen entspannenden Klängen.
Zuletzt gehörte Sender: Blättern Sie durch die zuletzt angehörten Sender.
Service: Radiosender suchen, neuen Radiosender oder App hinzufügen.
• Mit den ZAHLEN-/BUCHSTABEN-Tasten können Sie nach einem Sender
suchen.
• Um einen neuen Sender hinzuzufügen, benutzen Sie die ZAHLEN-/
BUCHSTABEN-Tasten, um das gewünschte Zeichen zu markieren, und
drücken dann die Taste RECHTS, um zum nächsten Zeichen überzuge-
hen. Um zurück zum letzten Zeichen zu wechseln, drücken Sie die Taste
LINKS, um es auszuwählen. Drücken Sie die TasteOK , um nach dem
Internetsender zu suchen.
Abspeichern Ihrer bevorzugten Internet-Radiosender
Wenn Sie Ihren Lieblingssender gefunden haben, drücken und halten Sie
die Taste FAV, um zum Einstellungsbildschirm
„Add to My Favorite (Zu Meine Favoriten hinzufügen)“ zu wechseln.
Drehen Sie das Auswahlrad oder drücken Sie die Tasten NACH OBEN/
NACH UNTEN, um die Voreinstellungsnummer auszuwählen, und drücken
Sie die TasteOK, um Ihre Auswahl zu bestätigen.
FM-Radio
Der Bereich der FM-Frequenz liegt zwischen 87,5MHz und
108,00MHz. Verlängern Sie die Antenne, um für jeden Sender das
stärkste Signal zu nden.
Benutzen Sie die Tasten LINKS/RECHTS oder drehen Sie den
Auswahlknopf, um <FM> auf dem Menübildschirm auszuwählen; drücken
Sie dann zum Aufrufen des FM-Bildschirms die TasteOK.
Sender einstellen
Drücken Sie die Tasten NACH OBEN/NACH UNTEN auf der Fernbedienung
oder auf der Frontblende (Tasten LINKS/RECHTS), um die Frequenz in
Schritten von jeweils 0,05MHz einzustellen.
Halten Sie die Tasten LINKS/RECHTS auf der Fernbedienung, um zum vorherigen oder nächsten Sender mit dem stärksten Empfang zu schalten. Sobald ein
Sender gefunden wurde, wird der Suchlauf automatisch angehalten.
Drücken Sie die TasteOK– auf dem Bildschirm wird „Auto Scan“
angezeigt. Wenn Sie „YES (JA)“ auswählen, sucht das Radio von der
niedrigsten bis zur höchsten Frequenz nach Sendern. Und die gefundenen
Sender werden automatisch abgespeichert.
Sender speichern
Um Ihren Lieblingssender abzuspeichern, sollten Sie diesen Sender erst
anhören; drücken Sie dann lange auf die Taste FAV auf der Fernbedienung;
benutzen Sie anschließend die Tasten NACH OBEN/NACH UNTEN oder
drehen Sie den Auswahlknopf, um die Stelle auszuwählen, die Sie
abspeichern möchten. Drücken Sie anschließend die TasteOK, um die
Voreinstellung zu bestätigen.
Aufrufen eines gespeicherten Senders
1. Drücken Sie die Tasten ZURÜCK/WEITER auf der Fernbedienung, um
zum vorherigen oder nächsten Sender zu schalten.
2. Sie können auch die Taste FAV drücken, um den gespeicherten Sender
auszuwählen; drücken Sie zum Anhören die TasteOK.
DAB/DAB+
Benutzen Sie die Tasten LINKS/RECHTS oder drehen Sie den
Auswahlknopf, um <DAB/DAB+> auf dem Menübildschirm auszuwählen;
drücken Sie die TasteOK, um den Mode DAB/DAB+ aufzurufen.
Wenn Sie auf Ihrem Radio das erste Mal DAB benutzen, sucht es nach DAB-
Sendern und zeigt „Scanning (Suche läuft)“ auf dem Anzeigebildschirm
an. Während der Suche wird angezeigt, wie viele Sender gefunden wurden.
Sobald alle verfügbaren Sender gefunden wurden, zeigt der Radiobildschirm die Auswahl der verfügbaren Sender an. Blättern Sie mit dem
Auswahlknopf durch die Auswahl und markieren Sie den gewünschten
Sender. Wählen Sie Ihren Sender durch Drücken der TasteOK.
Wenn Sie einen Sender ausgewählt haben, wird er auf dem Bildschirm
angezeigt und die Wiedergabe startet.
Um den letzten oder nächsten Sender auszuwählen, drücken Sie die Taste
NACH OBEN oder NACH UNTEN, um entsprechend zu blättern.
Wenn Ihr gewünschter Sender wiedergegeben wird, drücken Sie die
Taste INFO, um die Informationen dieses Senders anzuzeigen. Auf dem
Bildschirm laufen die Informationen automatisch durch und zeigen Genre,
MHZ, den abgespielten Song, KHz und Kbps.
Um zurück zur Liste zu wechseln und manuell zu blättern, drücken Sie die
Taste LINKS– es wird wieder die Liste angezeigt.
Voreinstellung Ihrer bevorzugten Sender bei DAB/DAB+
Wenn Sie Ihren Lieblingssender gefunden haben, halten Sie die Taste
FAV einige Sekunden lang gedrückt, um zum Bildschirm „Add to My
Favorite (Zu Meine Favoriten hinzufügen)“ zu wechseln. Drehen Sie den
Auswahlknopf, um die Voreinstellungsnummer auszuwählen und drücken
Sie zur Bestätigung die TasteOK.
Sie können auf dem Listenbildschirm der DAB-Sender auch den
gewünschten Sender markieren, die Taste FAV drücken und dann die oben
aufgeführten Punkte befolgen.
Um sich Ihre Lieblingssender anzusehen, drücken Sie die Taste FAV
und blättern mit der Taste NACH OBEN oder NACH UNTEN durch die
Voreinstellungsliste.
Informations-Center
Benutzen Sie die Tasten LINKS/RECHTS oder drehen Sie den
Auswahlknopf, um <Informations-Center> auf dem Menübildschirm
Page 18

16
DE
auszuwählen; drücken Sie die TasteOK, um den Bildschirm InformationsCenter aufzurufen.
Wetter-Information: Um die Wetter-Information für einen gewünschten
Standort auszuwählen, wählen Sie zuerst den Kontinent, indem Sie mit
dem Auswahlknopf blättern, und bestätigen Sie Ihre Auswahl mit der
TasteOK. Anschließend folgt das Land und dann die Stadt.
Sobald Sie eine Stadt ausgewählt haben, werden folgende Informationen
angezeigt: aktuelle Temperatur, Bild des Wettersymbols, ungefährer
Temperaturbereich für die nächsten 5Tage.
Finanz-Information: Wählen Sie aus einer Reihe von Börsenindizes aus
der ganzen Welt. Verwenden Sie den
Auswahlknopf zum Blättern und die TasteOK zum Bestätigen.
Systeminformation: Systemversion, WLAN-Informationen und Spotify-
Version anzeigen. Wenn Drahtlosinformationen ausgewählt sind, können
Informationen wie etwa das WLAN-Signal abgerufen werden.
Spotify Connect
Das Gerät ist mit Spotify Connect kompatibel. Somit kann es als DrahtlosLautsprecher genutzt werden, der von der Spotify App gesteuert wird,
die für iOS- und Android-Smart-Geräte und als Desktop-Client für PCs
verfügbar ist. Um den Spotify-Connect-Modus aufzurufen, drücken Sie
die Taste MENU (MENÜ), um den Hauptmenü-Bildschirm aufzurufen,
drehen den Select Knob (Auswahlknopf), um z wischen den Objekten
umzuschalten, bis das Spotify-Logo hervorgehoben wird, dann drücken Sie
zur Auswahl kurz den Select Knob (Auswahlknopf).
HINWEISE: Für die Nutzung von Spotify Connect ist
ein Spotify-Premium-Konto erforderlich.
HINWEISE: Vergewissern Sie sich, dass auf dem Gerät die Option <Keep
Network Connected> (Netzwerk verbunden halten) aktiviert ist. Dies aktiviert
das Spotify-Streaming auf dem Gerät, wenn es sich im Modus „Sleep“ (Schlaf)
oder einem Nicht-Netzwerk-Modus wie DAB/DAB+, FM und Aux-In be ndet.
Wenn der Modus Spotify Connect ausgewählt ist, ehe eine Verbindung mit
einer Spotify App eingerichtet wird, wird die Nachricht <Waiting for Users>
(Auf Nutzer warten) angezeigt.
HINWEISE: Es kann bis zu 10 Sekunden lang dauern, ehe
das Album-Cover auf der Anzeige angezeigt wird.
Die Nutzung von Spotify Connect
Laut hören mit Spotify Connect
1. Verbinden Sie Ihr Gerät Sharp DR-I470 mit Ihrem WLAN-Netzwerk.
2. Ö nen Sie die Spotify App auf Ihrem Handy, Tablett oder Laptop über
das gleiche WLAN-Netzwerk.
3. Spielen Sie einen Song ab und wählen Sie Devices Available
(Verfügbare Geräte).
4. Wählen Sie Sharp DR-I470 und genießen Sie die Musik.
Weitere Informationen über die Einrichtung und Verwendung von Spotify
Connect nden Sie unter www.spotify.com/connect.
Die Spotify-Software unterliegt den Lizenzen von Drittparteien, die hier
gefunden werden können: https://www.spotify.com/connect/third-partylicenses
Um eine Verbindung zwischen der Spotify App und dem Radio
einzurichten, müssen die Geräte mit dem gleichen WLAN-Netzwerk
verbunden sein.
Um die angezeigte Gra k auf dem Gerät zu vergrößern, drücken Sie kurz
die Taste MENU (MENÜ). Drücken Sie die Taste erneut, um wieder zur
Standardanzeige zurückzukehren.
HINWEISE: Sobald eine Verbindung hergestellt wurde, wird
das Spotify-Konto sowohl mit der App als auch mit dem Gerät
verbunden, sodass der DR-I470 angeschlossen werden kann.
Durch die DR-I470-Steuerung über Spotify können Sie die Lautstärke
ändern, das Audio abspielen oder anhalten und mit der Fernbedienung
vorwärts und rückwärts durch Ihre Playlist springen.
Änderungen durch die Fernbedienung werden in der Spotify Connect App
und am Gerät wiedergeben.
Solange die Spotify App über das gleiche Netzwerk mit dem Radio
verbunden ist und <Keep network connected> (Netzwerk verbunden
halten) ausgewählt wurde, können Sie Ihr Radio normalerweise
einschalten, wenn eine Wiedergabe auf der Spotify App starten.
AUX-Betrieb
AUX-IN
Benutzen Sie die Tasten LINKS/RECHTS oder drehen Sie den
Auswahlknopf, um <AUX> auf dem Menübildschirm auszuwählen;
drücken Sie die TasteOK, um den AUX-Mode aufzurufen.
Stecken Sie ein AUX-Kabel in Ihr Radio; verbinden Sie das Kabel mit dem
AUX-IN-Anschluss an der Rückseite Ihres Radios. Spielen Sie Audio auf Ihrem
Gerät ab; das Audio sollte im AUX-Mode auf dem Radio abgespielt werden.
Line Out (Kopfhörer)
Auf der Rückblende des Radios ermöglicht der Kopfhöreranschluss das
Hören von Audio von Ihrem Radio. Starten Sie die Audio-Wiedergabe über
die Einstellung Internet Radio, AUX oder Bluetooth.
Bluetooth
Benutzen Sie die Tasten LINKS/RECHTS oder drehen Sie den
Auswahlknopf, um <Bluetooth> auf dem Menübildschirm auszuwählen;
drücken Sie die TasteOK, um den Bluetooth-Mode aufzurufen.
1. Rufen Sie Ihre Geräteeinstellungen auf, um Ihr Gerät über Bluetooth
mit dem Radio zu verbinden.
2. Wählen Sie auf Ihrem Gerät den Namen „SHARP DR-I470“ in der Liste
der gefundenen Geräte aus. Nach der erfolgreichen Verbindung zeigt
das Radio „Connected (Verbunden)“ an und auf dem Bildschirm
erscheint „Bluetooth Connected (Bluetooth verbunden)“.
3. Wählen Sie auf Ihrem Gerät das gewünschte Audiosignal und spielen
Sie es ab.
4. Nun können Sie die Musik auf Ihrem Gerät genießen.
5. Um die Geräte zu trennen, schalten Sie in einen anderen Wiedergabe-
Mode oder schalten Sie die Bluetooth-Funktion Ihres Geräts ab.
AirMusic Control - SHARP Smart Control
App
Sobald der Benutzer die SHARP Smart Control App auf sein mobiles
Gerät heruntergeladen und darauf installiert hat, dient die App der
Fernverwaltung des Gerätes. Beachten Sie bitte, dass das DR-I470-Radio
und das mobile Gerät mit der SHARP Smart Control App mit dem
gleichen Netzwerk verbunden sein müssen, ansonsten können sich die
beiden Geräte nicht miteinander verbinden. Ö nen Sie die App und eine
Liste der verfügbaren Geräte wird angezeigt.
Klicken Sie zum Verbinden auf das entsprechende Gerät.
HINWEISE: Das Gerät stellt automatisch die Sprache des
DR-I470-Radios entsprechend den Spracheinstellungen des
mobilen Geräts mit der SHARP Smart Control App ein.
Der MediaU-QR-Code ist unter Kon guration> Meine Medien verwalten>
Aktivieren verfügbar.
Mit der App kann der Nutzer das Gerät über ein mobiles Telefon
steuern:
Wählen Sie den entsprechenden Registerreiter, um das Radio zu verwalten.
Drücken Sie auf das Symbol
anzuzeigen. Wählen Sie Einstellungen, um weitere Optionen einzugeben
(Gerätename ändern, Software-Updates prüfen, nach anderen Geräten
suchen oder weitere Informationen anzeigen).
, um die seitliche Registerkarte
Page 19

DE
Drücken Sie auf das Symbol , um den
Fernbedienungsmodus aufzurufen. Die App
dient als Fernbedienung und das mobile
Gerät mit der SHARP Smart Control App zeigt
Fernbedienungstasten an.
1. Gerät ausschalten
2. OK-Taste
3. Modus-Taste (Wiedergabemodus ändern)
4. Menü-Taste
5. Lieblingssender anzeigen
6. Schlüssel-Taste (gleiche Funktion wie die
Taste MODE (MODUS) auf dem Gerät)
7. Sleeptimer
8. Wecker
9. Dimmer
10. Zurück
11. Wiedergabe/Pause
12. Weiter
13. Zahlentasten
14. Equalizer-Einstellungen
15. Stumm
16. Lautstärke +
17. Lautstärke -
18. Richtungstasten
19. Zurück zum App-Hauptmenü
Drücken Sie
aufzurufen. Wählen Sie dann ein Bild oder nehmen Sie eines auf, um es als
Bildschirmschoner auf dem Stand-by-Bildschirm einzustellen.
Drücken Sie
und halten Sie
Sie los, um die Aufzeichnung zu beenden. Der rote blinkende Kreis
wird in der oberen linken Ecke des Radio-Bildschirms angezeigt. Um
die Sprachnachricht abzuspielen, rufen Sie eine beliebige Registerkarte
im Menü auf – die Aufzeichnung wird über einen Radiolautsprecher
gestreamt.
Drücken Sie
halten Sie
zu beenden. Die Aufzeichnung wird über einen Radiolautsprecher
gestreamt.
Drücken Sie
dem mobilen Gerät gespeichert ist, um es über das Radio zu streamen.
Drücken Sie
Lieblingssender zu streamen.
, um die Auswahleinstellung des Stand-by-Bildschirms
, um die Sprachnachricht-Option aufzurufen. Drücken
, um eine Sprachnachricht aufzunehmen – lassen
, um die Intercom-Option aufzurufen. Drücken und
zum Aufzeichnen – lassen Sie los, um die Aufzeichnung
, um das lokale Musikverzeichnis aufzurufen, das auf
, um einen der ersten fünf
Problembehandlung
Dieses Produkt enthält keine Teile, die vom Benutzer gewartet werden
können. Setzen Sie sich im Fall eines Defekts mit dem Hersteller oder
der autorisierten Kundenabteilung in Verbindung. Teile aus dem Inneren
des Geräts freizulegen kann lebensgefährlich sein. Die Garantie der
Hersteller gilt nicht für Defekte, die durch von nicht autorisierte Dritten
durchgeführte Reparaturen entstehen.
Kein Ton
Ursache
• Lautstärke nicht aufgedreht
Lösung
• Stellen Sie den Lautstärkeregler hoch
Kein Sound über die Bluetooth-Verbindung
Lösung
• Überprüfen Sie, ob das externe Gerät zunächst das Passwort „0000“
benötigt.
WLAN verbindet nicht
Lösung
• Vergewissern Sie sich, dass der WLAN-Mode in den Einstellungen
ausgewählt wurde und Sie für Ihr WLAN-Modem den richtigen Passcode
eingegeben haben.
Statisches Geräusch
Ursache
• Signalempfang zu niedrig.
Lösung
• Richten Sie die Antenne anders aus oder stellen Sie das Gerät an einen
Ort mit einem stärkeren Signal
Ton verzerrt
Ursache
• Lautstärke zu hoch
Lösung
• Verringern Sie die Lautstärke
Gewünschter Sender nicht gefunden
Ursache
• Schwaches Signal
Lösung
• Verwenden Sie die manuelle Suchfunktion
Keine DAB-Funktionen
Ursache
• Kein DAB-Empfang in Ihrer Gegend
• Schlechter Empfang
Lösung
• Ausrichtung der Antenne ändern
Das Display ist leer
Ursache
• Dies kann passieren, wenn der Sender die Benennung eines Services
ändert oder eine Benennung während der Einstellung löscht
Lösung
• Das Radio wird versuchen, sich neu einzustellen
• Führen Sie einen Suchlauf durch.
Kein Strom
Ursache
• Der Adapter ist nicht mit einer Wandsteckdose verbunden
Lösung
• Vergewissern Sie sich, dass der Adapter eingesteckt ist
Page 20

18
Technische Angaben
Modell DR-I470 Pro
Ausgangsstrom 2 x 7 W (RMS)
Stromverbrauch (max.) 28 W
Stromverbrauch (standard) 8 W
Stromverbrauch im Stand-by <1 W
FM-Frequenz 87.5-108 MHz
Frequenz DAB+ 174.928-239.200 MHz
Bluetooth
Version V5.0
Frequenzbänder 2402 MHz ~ 2480 MHz
Maximaler übertragener Strom 4 dBm
Netzadapter
Modellname FJ-SW1202000N
Eingang AC 100-240 V ~ 50/60 Hz, 0.6 A Max
DE
Ausgang
Hersteller
WIFI
WLAN-Verbindung 802.11 b/g/n; STA/AP/AP Client
B1,Xujing chang Industrial Park, Haoye Road, Fuyong 518103 Shenzhen, China
SHENZHEN FU JIA APPLIANCE CO., LTD
DC 12 V
⎓2000 mA
145 mm
354 mm
KG
3,16 kg
185 mm
Page 21

ESES
Instrucciones de seguridad importantes
Lea estas instrucciones de seguridad y respete las
siguientes advertencias antes de utilizar el aparato:
La nalidad de la marca de admiración dentro de un triángulo
equilátero es avisar al usuario de la presencia de instrucciones
importantes de uso y mantenimiento (servicio) en el manual
que acompaña al aparato.
Utilice la fuente de alimentación enumerada en el manual
de usuario.
Este símbolo signi ca que el produc to debe eliminarse de
manera respetuosa con el medio ambiente y no con los
residuos domésticos generales.
Tensión de CA
Tensión de CC
Equipo de clase II
Solo para uso en interiores
Etiquetado de e ciencia energética de nivel VI
Polaridad del conector de corriente continua
Para evitar incendios mantenga
siempre las velas u otras llamas al
descubierto lejos del producto.
Advertencia:
• Respete siempre las precauciones básicas de seguridad cuando utilice
este electrodoméstico, especialmente cuando si hay niños presentes.
• Los niños deben ser supervisados para asegurarse de que no juegan con
el aparato.
• No dañe el cable de alimentación, no coloque objetos pesados encima,
no lo estire ni lo doble. No conecte alargadores. Los daños en el cable de
alimentación pueden ocasionar incendios o descargas eléctricas.
• Si el cable de alimentación presenta algún daño, deberá ser sustituido
por el fabricante, el servicio técnico o personas con una cuali cación
similar para evitar que se produzcan situaciones de peligro.
• Asegúrese de que la unidad está conectada a una toma de corriente
de CA de 100-240 V y 50/60 Hz. El uso de una tensión superior puede
causar el mal funcionamiento de la unidad o incluso presentar riesgo
de incendio.
• Si el enchufe de corriente no entra en la toma, no lo fuerce.
• Apague la unidad antes de desenchufarla de la corriente para desconec-
tarla por completo.
• No conecte ni desconecte el cable de alimentación con las manos moja-
das, ya que podría producirse una descarga eléctrica.
• Desconecte el cable de alimentación si la unidad no se va a utilizar
durante un periodo prolongado de tiempo.
• Si la unidad no se va a usar durante un largo periodo de tiempo, descon-
éctela de la alimentación.
• Asegúrese de que el enchufe de alimentación resulta fácilmente
accesible.
• Este producto no contiene ninguna pieza que pueda ser reparada por
el usuario. En caso de avería, póngase en contacto con el fabricante o el
servicio técnico autorizado. La exposición de ciertas partes internas del
dispositivo puede poner en peligro su vida. La garantía del fabricante
no cubre las averías resultantes de reparaciones llevadas a cabo por
terceros.
• No utilice este producto inmediatamente tras desembalar. Espere a que
se caliente a la temperatura ambiente antes de utilizarlo.
• Asegúrese de utilizar el producto en climas moderados únicamente (no
en climas tropicales o subtropicales).
• Coloque el producto en una super cie plana estable y no expuesta a
vibraciones.
• Asegúrese de que el producto y sus partes no sobresalen de los bordes
del mueble sobre el que se coloca.
• Para reducir el riesgo de incendio, descarga eléctrica o daño en el
producto, no lo exponga directamente a la luz del sol, polvo, lluvia o
humedad. No exponga nunca este producto a gotas o derramamientos y
no coloque objetos llenos de líquido sobre o cerca de este.
• No coloque objetos con líquidos, como jarrones, sobre el aparato.
• No instale el aparato cerca de ninguna fuente de calor, como radiadores,
salidas de aire caliente, estufas u otros aparatos (incluidos ampli cadores) que produzcan calor.
• No coloque el producto en espacios húmedos o con ventilación de cien-
te.
• Asegúrese de dejar una distancia mínima de 5 cm en torno al aparato
para garantizar una ventilación adecuada. No obstruya las aberturas de
ventilación de este producto. Evite siempre la obstrucción de las ranuras
de ventilación con objetos como periódicos, manteles, cortinas, etc.
• No permita que nadie, especialmente los niños, introduzca elementos en
los ori cios, ranuras ni en ninguna apertura de la carcasa de la unidad, ya
que podrían dar lugar a descargas eléctricas mortales.
• Las tormentas son peligrosas para todos los aparatos eléctricos. Si el
cable de alimentación o el cableado de la antena es alcanzado por un
rayo, el aparato puede resultar dañado, incluso si no está encendido.
Debe desconectar todos los cables y conectores del aparato antes de
una tormenta.
• La presión acústica excesiva de los auriculares y los cascos puede causar
la pérdida del sentido auditivo.
Mantenimiento
• Desenchufe el cable de alimentación de la toma de corriente antes de
limpiar la unidad.
• Utilice un paño suave y limpio para limpiar la parte exterior de la unidad.
No utilice nunca productos químicos ni detergentes.
Adaptador de corriente
• Para desconectar la unidad del suministro eléctrico, desenchufe el cable
de la toma de corriente.
• Utilice únicamente el adaptador de red suministrado, de lo contrario
podrían producirse riesgos para la seguridad o daños en la unidad.
Pilas
• Tenga en cuenta la polaridad correcta al insertar
las pilas.
• No exponga las pilas a altas temperaturas y no las
coloque en lugares en los que la temperatura pueda
experimentar cambios bruscos, p. ej., cerca de un fuente de fuego o en contacto directo con la luz solar.
• No exponga las pilas a calor radiante excesivo, no las
arroje al fuego, no las desmonte y no intente recargar pilas no recargables, ya que podrían producirse
fugas o explotar.
• No combine nunca pilas de diferente tipo y no mezcle pilas nuevas y
pilas viejas.
• Si el mando a distancia no se va a utilizar durante un largo periodo de
tiempo (más de un mes), retire la pila para evitar fugas.
• Si las baterías presentan fugas, limpie la parte interior del compartimen-
to y sustitúyalas por pilas nuevas.
• No utilice pilas diferentes a las especi cadas.
No ingiera las pilas, ya que pueden causar quemaduras químicas.
• La ingestión de pilas puede causar quemaduras internas graves en tan
solo 2 horas y producir la muerte. Mantenga las pilas nuevas y usadas
Cd
Page 22

20
lejos de los niños. Si el compartimiento de la pila no se cierra correctamente, deje de usar el producto y manténgalo alejado de los niños.
Si cree que se pueden haber tragado las pilas o introducido en alguna
parte del cuerpo, busque atención médica inmediatamente.
Eliminación de este equipo y las pilas
• No elimine este producto o sus pilas como residuos urba-
nos no clasi cados. Entréguelos en un punto de recogida
designado para el reciclado de aparatos electrónicos
y eléctricos de acuerdo con la ley local. De esta forma,
ayudará a conservar los recursos y a proteger el medio
ambiente.
• La mayor parte de los países de UE regulan la eliminación de las pilas
mediante leyes. Póngase en contacto con su distribuidor y con las autoridades locales para obtener más información.
• El símbolo anterior mostrado en equipos eléctricos y electrónicos (o en
el embalaje) tiene por objeto recordar a los usuarios esta circunstancia.
• Se solicita a los usuarios que utilicen las instalaciones de devolución
existentes para equipos usados.
Declaración de CE y de CA del Reino Unido:
• Por la presente, Sharp Consumer Electronics Poland sp. z o.o. declara que
este equipo cumple los requisitos esenciales y otras disposiciones pertinentes de la Directiva RED 2014/53/UE y los reglamentos sobre equipos
de radio del Reino Unido de 2017.
• El texto completo de la declaración de conformidad de la UE está
disponible en el siguiente enlace www.sharpconsumer.com. Una vez
en la página, entre en la sección de descarga de su modelo y seleccione
«Declaración CE».
Page 23

ESES
Contenido de la caja
• 1x Unidad
• 1x Mando a distancia
• 1x Manual de instrucciones
• 1x Adaptador de corriente
• 1x Adaptador de enchufe de CA para el Reino Unido
• 1x Adaptador de enchufe de CA para la UE
Paneles y controles
Panel frontal
9
1
3
5
7
1. MODE: pulse para cambiar entre los modos DAB/DAB+, FM, Radio por
Internet, Bluetooth, AUX IN.
También se puede con gurar con otra función desde el menú
<Botón> en CONFIGURACIÓN: Alarma, Brillo, Ecualizador, Radio local,
Modo, Preajuste, Apagado automático, Temporizador.
NOTAS: La función predeterminada de este botón es el cambio de modo.
2. STANDBY: pulse este botón para encender la unidad o entrar en el
modo de espera.
3. MENU: Presione este botón para ingresar a la interfaz de
con guración del MENÚ.
4. SLEEP: pulse este botón repetidamente para establecer el tiempo de
apagado automático.
5. ◄: En la pantalla de ajustes, pulse este botón para ir a la selección
anterior. Con la radio encendida, este botón permite reducir la
frecuencia en incrementos de 0,05MHz.
6. ►: En la pantalla de ajustes, pulse este botón para ir a la selección
siguiente. Con la radio encendida, este botón permite aumentar la
frecuencia en incrementos de 0,05MHz.
7. DIMMER: pulse este botón para establecer el nivel de retroiluminación.
8. PRESET: en el modo de reproducción de radio por Internet, pulse este
botón para cambiar a la pantalla Emisora de radio/música.
9. PANTALLA DE VISUALIZACIÓN: Muestra información.
Panel posterior
11
12
E
D
O
M
U
N
E
M
R
E
M
M
I
D
P
R
E
S
E
T
2
4
6
8
10
13
AUX IN
DC 12V
14
10. Control de volumen/control de selección/botón OK: al reproducir,
gire el control para ajustar el volumen. Al ajustar el menú, gire el control para seleccionar las opciones; pulse para con rmar la selección.
11. Antena de FM: permite recibir la señal de FM.
12. Conector de auricular: conector de auricular de 3,5mm.
13. Conector AUX IN: permite conectar el cable de audio de 3,5mm para
disfrutar de música de audio externa.
14. Conexión de corriente continua: CC de 12V
Mando a distancia
1
2
3
4
5
6
7
8
9
10
11
12
13
14
1. STANDBY: pulse el botón STANDBY del mando a distancia para activar
la unidad o cambiar al modo de espera.
2. SOURCE: Presione el botón SOURCE para cambiar los modos de repro-
ducción: DAB / DAB +, FM, AUX IN, Bluetooth, Radio por Internet.
Nota: Este botón se puede usar como otra función con gurando
desde el elemento <Botón> en la CONFIGURACIÓN: Alarma, Atenuador, Ecualizador, Radio local, Modo, Preselección, Temporizador de
apagado, Temporizador.
3. MENU: pulse el botón MENU del mando a distancia o del panel frontal
para acceder al menú de reproducción; pulse los botones de DIRECCIÓN o gire el control de selección para navegar por el menú: Radio
por Internet, FM, DAB/DAB+, Spotify, Centro de información, AUX,
Bluetooth, Con guración, Emisora de radio/música.
4. ARRIBA / 5. OK / 6. IZQUIERDA / 7. ABAJO / 17. DERECHA: desplácese
con los botones ARRIBA y ABAJO o gire el control de selección para
navegar por las opciones. A continuación, pulse el botón OK para
con rmar la selección.
8. VOL- / 18. VOL+: para ajustar el volumen, puede pulsar lo botones
VOL+ y VOL-, o girar directamente el control de volumen.
9. REPRODUCCIÓN/PAUSA: pulse el botón REPRODUCCIÓN/PAUSA para
poner en pausa la reproducción y pulse de nuevo para reanudar.
10. ANTERIOR / 19. SIGUIENTE: al reproducir música, pulse los botones
ANTERIOR o SIGUIENTE para saltar a la canción anterior o a la siguiente. Al escuchar una radio, pulse los botones ANTERIOR o SIGUIENTE
para saltar a la emisora preferida anterior o siguiente.
SOURCE
MENU
OK
VOL- VOL+
SLEEP ALARM
EQ
1
2
ABC DEF
5
4
GHI JKL MNO
7
8 9
PQRS TUV WXYZ
WPS DIMMER
0
11. ALARM: pulse el botón ALARM para ver y crear las opciones de alarma.
15
INFO
16
17
18
19
FAV
20
21
3
6
22
Page 24

22
12. SLEEP: pulse el botón SLEEP repetidamente para seleccionar la hora
de apagado automático.
13. NÚMEROS/LETRAS: introduzca números o letras al ajustar el menú.
14. WPS – WPS Ajustes
15. MUTE: pulse el botón MUTE para silenciar el sonido; vuelva a pulsar o
pulse los botones VOL+/- del mando a distancia o gire el control del
volumen situado en el panel superior para reanudar.
16. INFO: pulse el botón INFO para consultar la información de la emisora.
20. EQ: pulse el botón EQ repetidamente para seleccionar diferentes
modos de sonido: Normal, Neutro, Jazz, Rock, Banda sonora, Clásica,
Pop, Noticias, my EQ.
21. FAV: mantenga pulsado el botón FAV para guardar la emisora. Pulse el
botón FAV para ver las emisoras favoritas que se han guardado.
22. DIMMER: pulse el botón DIMMER para seleccionar el nivel de retroiluminación
Instalación o cambio de las pilas del mando a distancia
1. Presione el cierre de la tapa de las pilas en dirección de la echa en
relieve que aparece en la parte posterior del mando a distancia.
2. Mientras presiona el cierre, abra la tapa de las pilas.
3. Introduzca dos pilas jándose en la polar idad +, tal como se indica. Al
cambiar las pilas, utilice solamente el mismo tipo de pila suministrado.
4. Vuelva a colocar la tapa de las pilas y ciérrela.
Encender la radio de Internet
Enchufe el adaptador de alimentación a la conexión DC IN. A continuación,
aparecerá el mensaje Welcome (Bienvenido) en la pantalla.
Asegúrese de extender la antena todo lo posible para obtener la mejor
señal posible.
Tras la pantalla de bienvenida y si esta es la primera vez que utiliza la
radio, podrá seleccionar el idioma deseado con el control de selección y
con rmar su selección con el botón OK.
Tras ajustar el idioma, la pantalla mostrará ¿Habilitar la función
Comprobar red al encender? Puede seleccionar SÍ o NO para decidir si
desea que la unidad compruebe la red al encenderse.
Con guración WiFi manual
Tras el ajuste anterior, la pantalla mostrará ¿Desea con gurar la red ahora?
• Si selecciona SÍ, la radio empezará a explorar redes cercanas a las que co-
nectarse. Tras la exploración, seleccione la red a la que desea conectarse.
A continuación, introduzca letras o números desplazándose con el con-
trol de selección o pulse los botones de NÚMEROS/LETRAS hasta que
se muestre el dígito correcto y pulse el botón DERECHA para avanzar al
siguiente. Cuando haya terminado, pulse el botón OK para con rmar.
• Si selecciona NO puede con gurar esta función más tarde en los ajustes
de con guración.
Red inalámbrica (WPS PBC)
Cuando se encuentre en la fase ¿Le gustaría con gurar la red ahora?, si
selecciona SÍ (WPS) la radio empezará a buscar conexiones WiFi.
Con esta función seleccionada, tendrá 120 segundos para pulsar el botón
WPS de su módem WiFi. Esta operación conectará la red WiFi a su radio
deseada sin tener que escribir ninguna contraseña.
Conexión WiFi completada
Una vez completada la conexión WiFi mediante la introducción manual
de la contraseña WiFi a través de WPS, será dirigido a la pantalla del
menú principal, donde aparecerá la señal WiFi en color blanco en la parte
superior izquierda. Tras ello la radio por Internet queda con gurada.
Con guración
Utilice los botones IZQUIERDA/DERECHA o gire el control de selección
para escoger <Con guración> en la pantalla del menú principal y pulse el
botón OK para acceder a los ajustes de con guración.
Visualización de la hora
Establezca el tipo de pantalla de hora: Analógica o digital.
Emisora de mediaU
Establezca la función en habilitar o deshabilitar
El código QR de mediaU está disponible en Con guración > Administrar mi
mediaU > Activar.
Red
• Con guración de red inalámbrica
• En los ajustes de red, puede con gurar una conexión WiFi seleccio-
nando Con guración de red inalámbrica. A continuación, la radio
empezará a buscar conexiones WiFi disponibles.
• Busque su conexión WiFi y selecciónela con el botón OK. Para
introducir letras o números, utilice el control de selección o pulse los
botones de LETRAS/NÚMEROS hasta que se muestre el dígito correcto. A continuación, pulse el botón DERECHA para avanzar al siguiente
dígito. Pulse el botón IZQUIERDA si desea retroceder al dígito anterior.
Cuando haya terminado, pulse el botón OK para con rmar.
• Una vez conectado a la WiFi deseada, aparecerá la pantalla del menú
principal y la señal WiFi se mostrará en color blanco en la esquina
superior izquierda.
• Red inalámbrica (WPS PBC)
• Seleccione esta opción para buscar la conexión WiFi. Con esta función
seleccionada, dispondrá de 120 segundos para pulsar el botón WPS
de su módem WiFi. Esta operación conectará la red WiFi deseada a su
radio sin tener que introducir ninguna contraseña.
• Con guración manual
• Puede establecer manualmente los datos inalámbricos: DHCP, introdu-
cir SSID y gestionar.
• Comprobar red al encender
• Establezca esta función en Habilitar o Deshabilitar
Fecha y hora
• Establecer fecha y hora
• Con guración manual o Detección automática
Puede ajustar manualmente la hora y la fecha en lugar de utilizar la
función de detección automática. Gire el control de selección o pulse
los botones de dígitos para introducir el dígito deseado del mes. Una
vez introducido el dígito correcto, pulse en el botón DERECHA para
avanzar al ajuste del día. Continúe este proceso con el año, la hora y
los minutos. Una vez ajustada la hora y la fecha, pulse el botón OK
para introducirlo. Para cancelar el formato de fecha y hora, puede
cambiar estos ajustes en la función Fecha y hora.
• Establecer formato de hora: Permite establecer el formato de la hora
en 12 horas o 24 horas.
• Establecer formato de fecha: AAAA/MM/DD, DD/MM/AAAA, MM/DD/
AAAA
Alarma
• Ajustar la alarma 1 y la alarma 2
• Para con gurar una alarma en la radio, vaya a Con guración y desplá-
cese para seleccionar Alarma o pulse el botón ALARM del mando a
distancia directamente.
• Tras acceder a la pantalla de ajuste Alarma, seleccione Alarma 1
(Desactivar) o Alarma 2 (Desactivar) y seleccione Activar para
activar la alarma.
• Seleccione Repetir para especi car la regularidad de la alarma
pulsando el botón OK. Puede seleccionar Todos los días, Una vez o
escoger días individuales en los que desea que suene la alarma. Tras
completar la selección, pulse el botón IZQUIERDA para volver a otros
ajustes de alarma.
Page 25

ESES
• Seleccione Hora y gire el control de selección para resaltar la hora de
la alarma. Tras seleccionar la hora deseada, pulse el botón DERECHA
para cambiar los minutos.
• Tras establecer los minutos en el valor correcto, pulse el botón DERECHA para cambiar a AM o PM, y pulse el botón OK para con rmar o
volver a los ajustes de alarma.
• A continuación, desplácese hacia abajo y seleccione Sonido pulsando
el botón OK. A continuación, puede seleccionar entre pitido, melodía,
Radio por Internet, FM o DAB/DAB+.
• Si está ajustando la alarma de sonido como Radio por Internet, FM o
DAB/DAB+, se le presentarán sus emisoras favoritas preajustadas. Seleccione la emisora para la alarma seleccionada pulsando el botón OK.
• Se mostrará el símbolo de alarma en la pantalla de visualización
principal.
• Cancelación de una alarma
• Para cancelar una alarma, seleccione Alarma en Con guración o pulse
el botón ALARM del mando a distancia y seleccione la alarma que
desea desactivar.
• Una vez seleccionada la alarma, podrá activarla o desactivarla. Resalte
la opción Desactivar y pulse el botón OK para con rmar.
NO TA: Puede cambiar el volumen de la alarma en el ajuste
Volumen de alarma de la pantalla de ajuste Alarma.
• Apagar alarma cuando suena
Cuando la alarma suena, pulse ALARM o el botón STANDBY del mando
a distancia para detener la alarma. Si ha con gurado la alarma para que
suene todos los días o más de una vez, el icono de alarma se mantendrá
en la pantalla de visualización.
• Posponer la alarma
Cuando la alarma suena, pulse cualquier botón salvo STANDBY o
ALARM para detener el sonido y activar el modo POSPONER. La función
POSPONER encenderá la radio de nuevo transcurridos cinco minutos.
NO TA: Puede detener el modo de alarma POSPONER
pulsando el botón ALARM o el botón STANDBY.
• Alarma de siesta
• Tras seleccionar la opción Alarma en Con guración o el botón ALARM
del mando a distancia, seleccione Alarma de siesta (Desactivar).
• Seleccione cuántos minutos le gustaría tener activa la alarma de siesta
con las siguientes opciones: Desactivar, 5 minutos, 10 minutos, 20minutos, 30 minutos, 60 minutos, 90 minutos y 120 minutos.
• Volumen de alarma
• Puede cambiar el volumen de la alarma girando el control de volu-
men o los botones IZQUIERDA /DERECHA para cambiar.
• Una vez seleccionado el volumen de sonido correcto, pulse el botón
OK para con r mar.
Temporizador
• En Con guración, seleccione Temporizador y en la pantalla aparecerá
00:00.
• Para aumentar los segundos, seleccione el botón DERECHA. Para reducir
los segundos, seleccione el botón IZQUIERDA. Mantenga pulsado los
botones IZQUIERDA/DERECHA para avanzar a través del temporizador
rápidamente.
• Una vez seleccionada el tiempo deseado para el temporizador, pulse el
botón OK.
Idioma
Seleccione su idioma en la lista.
Brillo
• Para establecer el brillo de la radio, vaya a Con guración y seleccione
Brillo. Puede escoger entre Ahorro de energía o Activar.
• Seleccione el modo Ahorro de energía para cambiar a uno de los
niveles de brillo de entre 20 disponibles. Cuando no se utiliza la radio
durante 15 segundos, se activará el nivel de brillo más bajo hasta que se
pulse un botón, momento en el que se activará el ajuste Activar.
• Seleccione el modo Activar para que sea el brillo seleccionado cuando
se use la radio o esté activa.
• Alternativamente, puede escoger entre dos ajustes de brillo pulsando el
botón DIMMER del mando a distancia en el panel frontal directamente.
Pantalla
Seleccione entre las opciones Color o Monocromo.
Administración de la energía
Seleccione esta función para con gurar la radio o entrar en modo de
espera automáticamente tras un tiempo establecido de inactividad o si no
hay señal WiFi. Puede escoger entre 5/15/30 minutos para entrar en modo
de espera o puede seleccionar Desactivar para ignorar esta función.
Apagado automático
• Para ajustar el apagado automático, vaya a Con guración y seleccione
Apagado automático. Puede elegir entre Desactivar, 15, 30, 60, 90,
120, 150 y 180 minutos.
• También puede pulsar repetidamente el botón SLEEP del mando a
distancia para cambiar entre horas de sueño en la parte superior de la
pantalla de visualización. Se puede escoger entre 15, 30, 60, 90, 120,
150 y 180 minutos.
• Una vez seleccionado el modo de apagado automático, se mostrarán el
tiempo del temporizador y una imagen de sueño en la parte superior de
la pantalla de visualización.
Radio por Internet
• Con gure la radio por Internet: Búfer y calidad del sonido.
• Búfer: Con gure el tiempo de búfer de la reproducción de música: 2/4/8
segundos.
• Calidad del sonido: Ajuste la calidad del sonido como pre era: Alta/
baja.
Meteorología
• Establecer ubicación: Seleccione e introduzca su ubicación.
• Unidad de temperatura: Seleccione el modo preferido para visualizar la
temperatura entre Celsius o Fahrenheit.
• Mostrar en modo de espera: Seleccione Activar o Desactivar la visualización de la previsión meteorológica en la pantalla de espera. Si activa la
visualización de la previsión meteorológica, se mostrará en la pantalla de
espera cada 10 segundos.
Con guración de FM
• Modo: Puede establecer el modo Mono o Estéreo.
• Umbral: seleccione los ajustes de sensibilidad (Buscar umbral o Umbral
estéreo).
• (La sensibilidad cambiará automáticamente entre los modos mono y
estéreo. En un lugar con recepción débil, el sistema cambiará al modo
mono automáticamente para reducir el ruido de fondo de la emisora y
permitir que se escuche mejor).
Con guración de radio local
Con gure manualmente la ubicación de la radio local en lugar de que la
radio utilice la función de detección automática.
Botón
En esta interfaz de ajuste, puede seleccionar Alarma, Brillo, Ecualizador,
Radio local, Modo, Preajuste, Apagado automático y Temporizador
para con r mar la función del botón MODE en el panel frontal y el mando
a distancia.
Ecualizador
El equalizador predeterminado es el modo normal. Puede cambiar a los
modos Neutro, Jazz, Rock, Banda sonora, Clásica, Pop, Noticias o my EQ.
Reanudar cuando encendido
Active esta función para que la radio se reanude al encenderse. En su lugar,
la pantalla permanecerá en el menú principal.
Actualizar software
Aquí se mostrará si existe una actualización disponible de software para la
radio. En caso de que exista, seleccione para iniciar la actualización.
Page 26

24
Restablecer valores predeterminados
Seleccione esta opción para restablecer la radio y revertir todos los ajustes
y preajustes con gurados. Con rme si le gustaría restablecer la unidad y
sus ajustes seleccionando SÍ.
Radio por Internet
Utilice los botones IZQUIERDA/DERECHA o gire el control de selección
para escoger <Radio por Internet> en la pantalla de menú y pulse el
botón OK para acceder. Encontrará varias opciones:
Mis favoritos Sus emisoras favoritas se guardarán aquí para escucharlas
fácilmente. Puede pulsar el botón FAV directamente para ver la lista de
emisoras favoritas.
Emisora de radio/música: Seleccione esta opción para desplazase por las
emisoras de radio por Internet organizadas en categorías de: Global Top
20, Genre, Country/Location, Highlight. Busque emisoras en las categorías
relevantes y seleccione
la emisora de Internet deseada pulsando el botón OK.
Radio local: La radio se con gura automáticamente para detectar las
principales 10 emisoras de su país, todas las emisoras o una variedad de
géneros clasi cados en categorías por orden alfabético. Seleccione la
categoría que desea escuchar con el botón OK y continúe explorando
hasta que encuentre la emisora deseada.
Radio para dormir: Seleccione entre varios sonidos de relajación.
Historia: Examine emisoras escuchadas recientemente.
Servicio: Buscar emisora de radio o Agregar nueva emisora de radio o App.
• Puede utilizar los botones de NÚMEROS/LETRAS para buscar la emisora
de radio.
• Para agregar una nueva emisora de radio, utilice los botones de NÚMEROS/LETRAS para resaltar el carácter elegido y pulse el botón DERECHA
para pasar al siguiente. Para volver a un carácter anterior, pulse el botón
IZQUIERDA para resaltarlo. Pulse el botón OK para buscar la emisora
de Internet.
Guarde sus emisoras de radio por Internet favoritas
Cuando haya encontrado la emisora deseada, pulse el botón FAV para
acceder a la pantalla de visualización
Agregar a mis favoritos. Gire el control de selección o pulse los botones
ARRIBA/ABAJO para seleccionar el número de preajuste y pulse el botón
OK para con r mar su opción.
Radio FM
El rango de frecuencia FM oscila entre 87,5MHz y 108,00MHz.
Extienda la antena para captar la señal más intensa de cada emisora
Utilice los botones IZQUIERDA/DERECHA o gire el control de selección
para escoger <FM> en la pantalla de menú y pulse el botón OK para
acceder a la pantalla de FM
Sintonización de emisoras
Pulse los botones ARRIBA/ABAJO del mando a distancia o del panel
frontal para ajustar la frecuencia arriba o abajo en incrementos de
0,05MHz.
Pulse los botones IZQUIERDA/DERECHA del mando a distancia para
saltar a la emisora anterior o siguiente de recepción más intensa. Una vez
encontrada una emisora, la exploración se detendrá automáticamente.
Pulse el botón OK. Al hacerlo, aparecerá en pantalla el mensaje
Exploración automática. Si selecciona SÍ, la radio empezará a buscar
emisoras desde la frecuencia más baja a la más alta y guardará las emisoras
que encuentre automáticamente.
Almacenamiento de emisoras
Para guardar su emisora favorita, debe escucharla, pulsar el botón FAV del
mando a distancia y, a continuación, utilizar los botones ARRIBA/ABAJO
o girar el control de selección para escoger el dígito que desea guardar.
Acontinuación, pulse el botón OK para con rmar el preajuste.
Recuperación de una emisora almacenada
1. Pulse los botones ANTERIOR/SIGUIENTE del mando a distancia para
saltar a la emisora preajustada anterior o siguiente.
2. También puede pulsar el botón FAV para seleccionar la emisora
almacenada y pulsar OK para escucharla.
DAB/DAB+
Utilice los botones IZQUIERDA/DERECHA o gire el control de selección
para escoger <DAB/DAB+> en la pantalla de menú y pulse el botón OK
para acceder al modo DAB/DAB+.
La primera vez que utilice el modo DAB en la radio, el dispositivo empezará
a explorar emisoras DAB y mostrará Explorando en la pantalla de
visualización. Se mostrará el número de emisoras encontradas a medida
que progresa la búsqueda.
Una vez encontradas todas las emisoras disponibles, aparecerán en la
pantalla. Use el control de selección para desplazarse y resaltar la estación
deseada. Seleccione la emisora pulsando el botón OK.
Cuando haya seleccionado una emisora, la pantalla mostrará su
información e iniciará la reproducción.
Para seleccionar la emisora anterior o posterior, pulse el botón ANTERIOR
o SIGUIENTE según el sentido de desplazamiento deseado.
Cuando se encuentre en la emisora deseada, pulse el botón INFO para
mostrar la información de la emisora. La pantalla mostrará información
automáticamente e indicará el género, MHZ, la canción que se está
reproduciendo, KHz y Kbps.
Para volver a la lista y desplazarse a través de ella manualmente, pulse el
botón IZQUIERDA.
Programación de estaciones DAB/DAB+ favoritas
Cuando haya encontrado su emisora favorita, pulse el botón FAV durante
unos segundos para acceder a la pantalla Agregar a mis favoritos. Gire el
control de selección para seleccionar el número de emisora preajustada y
pulse el botón OK para con rmar.
Alternativamente, cuando se encuentre en la pantalla de lista de emisoras
DAB, puede resaltar la emisora seleccionada y mantener pulsado el botón
FAV para seguir las indicaciones que se muestran por encima.
Para ver las emisoras favoritas preajustadas, pulse el botón FAV y utilice
los botones ARRIBA o ABAJO para desplazarse por la lista de emisoras
preajustadas.
Centro de información
Utilice los botones IZQUIERDA/DERECHA o gire el control de selección
para escoger <Centro de información> en la pantalla del menú y pulse el
botón OK para acceder a la pantalla del Centro de información
Información sobre meteorología: Para seleccionar la información sobre
meteorología de un lugar concreto, escoja primero el continente con
ayuda del control de selección para desplazarse entre las opciones y, a
continuación, pulse el botón OK para con rmar. Tras ello, seleccione el país
y después la ciudad o localidad.
Tras seleccionar la ciudad o localidad, se mostrará la siguiente información:
temperatura actual, imagen con el símbolo de meteorología e intervalo de
temperaturas aproximadas para los siguientes 5 días.
Page 27

ESES
Información nanciera: Seleccione de un conjunto de mercados
bursátiles del mundo. Utilice el
control de selección para desplazarse y pulse el botón OK para con rmar.
Información del sistema: Vea la versión del sistema y la información
de conexión inalámbrica. Si se selecciona la información inalámbrica, se
visualizarán datos como la intensidad de la señal WiFi.
Spotify Connect
El producto es compatible con Spotify Connect, lo que permite utilizarlo
como altavoces inalámbricos controlados por la aplicación Spotify
disponible para iOS, dispositivos inteligentes Android y un cliente de
escritorio para PC. Para activar el modo Spotify Connect, pulse el botón
MENU para abrir la pantalla del menú principal, gire la perilla de selección
para recorrer los elementos hasta que aparezca el logotipo de Spotify y
pulse brevemente la perilla de selección para seleccionar.
NOTA : Se necesita una cuenta de Spotify Premium
para utilizar Spotify Connect.
NOTAS: Asegúrese de que el producto tiene la opción <Keep Network
Connected> (<Mantener la red conectada>) activada. Esto permitirá la
transmisión en ujo de Spotify a la unidad cuando se encuentre en modo de
suspensión o en un modo que no sea de red como DAB/DAB+, FM y Aux In.
Si se selecciona el modo Spotify Connect, antes de que se establezca una
conexión con una aplicación Spotify, se mostrará el mensaje
<Waiting for Users> (<Esperando a usuarios>).
NOTA : La reproducción de la imagen visual del álbum puede
tardar hasta 10 segundos en aparecer en la pantalla.
Cómo usar Spotify Connect
Escuchar en alto Spotify Connect
1. Conecte su dispositivo Sharp DR-I470 a la red Wi-Fi.
2. Abra la aplicación Spotify en su teléfono, tableta o portátil usando la
misma red Wi-Fi.
3. Reproduzca una canción y seleccione Dispositivos disponibles.
4. Seleccione su unidad SHARP DR-I470 y empiece a escuchar.
Si desea obtener más información sobre la con guración y el uso de Spotify
Connect, visite www.spotify.com/connect.
El software Spotify está sujeto a las licencias de terceros que pueden
encontrarse aquí: https://www.spotify.com/connect/third-party-licenses
Para establecer una conexión entre la aplicación de Spotify y la radio, los
dispositivos deben estar conectados a la misma red Wi-Fi.
Para ampliar la imagen mostrada en la unidad, pulse el botón MENU
brevemente. Pulse de nuevo para volver a la pantalla estándar.
NOTAS: Una vez establecida una conexión, la cuenta de Spotify se enlaza a
la aplicación y a la unidad, para permitir la conexión del dispositivo DR-I470.
Controlar Spotify desde el dispositivo DR-I470 le permitirá cambiar el
volumen, reproducir o realizar una pausa de audio, y avanzar y retroceder
en la lista de reproducción con el mando a distancia.
Los cambios realizados en el mando a distancia se re ejan en la aplicación
Spotify Connect y en la unidad.
Mientras la aplicación Spotify esté conectada a la radio en la misma red
y se haya seleccionado <Keep network connected> (<Mantener la red
conectada>), podrá encender la radio al empezar a reproducir desde la
aplicación Spotify.
Funcionamiento de la función AUX
AUX IN
Utilice los botones IZQUIERDA/DERECHA o gire el control de selección
para escoger <AUX> en la pantalla de menú y pulse el botón OK para
acceder al modo AUX.
Enchufe un cable auxiliar a la radio y conéctelo a través del puerto AUX
IN en la parte posterior de la radio. Empiece a reproducir audio desde su
dispositivo y este se escuchará en la radio cuando se encuentre en modo
AUX.
Salida de línea (altavoces)
En el panel posterior de la radio, la conexión de altavoces permite
escuchar el audio desde la radio. Empiece a reproducir audio desde los
modos Radio por Internet, AUX o Bluetooth.
Bluetooth
Utilice los botones IZQUIERDA/DERECHA o gire el control de selección
para escoger <Bluetooth> en la pantalla de menú y pulse el botón OK
para acceder al modo AUX.
1. Vaya a los ajustes de su dispositivo para conectarlo a la radio a través
de Bluetooth.
2. Seleccione el nombre SHARP DR-I470 en la lista de dispositivos
encontrados desde su unidad. Una vez correctamente conectada, la
radio indicará Conectado y aparecerá Conectado a Bluetooth en la
pantalla.
3. Seleccione el audio deseado en su dispositivo y reproduzca.
4. A continuación podrá disfrutar de la música desde la unidad.
5. Para cancelar el emparejamiento, seleccione otro modo de
reproducción o desactive la función Bluetooth de su dispositivo.
AirMusic Control - Aplicación SHARP
Smart Control
Si descarga e instalación la SHARP Smart Control aplicación en un
dispositivo móvil podrá gestionarlo de forma remota. Tenga en cuenta
que la radio DR-I470 y el dispositivo móvil con la aplicación SHARP Smart
Control necesitan estar conectados a la misma red. De lo contrario, los
dos dispositivos no podrán conectarse entre sí. Al abrir la aplicación, se
enumerará la lista de dispositivos disponibles.
Haga clic en el dispositivo adecuado para conectarse.
NOTA : El dispositivo ajustará automáticamente el idioma
de la radio DR-I470 al idioma establecido en el dispositivo
móvil con la aplicación SHARP Smart Control.
El código QR de la aplicación SHARP Smart Control está disponible en: Radio
por Internet> Servicio> Aplicación
La aplicación permite al usuario controlar el dispositivo a través del
teléfono móvil:
Seleccione la pestaña adecuada para gestionar la radio.
Pulse el icono
(Ajustes) para introducir opciones (cambiar el nombre del dispositivo,
comprobar las actualizaciones de software, escanear otros dispositivos o
mostrar más información)
para mostrar la pestaña lateral. Seleccione Settings
Page 28

26
Pulse el icono para entrar en el modo
de control remoto. La aplicación servirá a
modo de mando a distancia y el dispositivo
móvil con la aplicación SHARP Smart Control
mostrará los botones del mando a distancia.
1. Apagar el dispositivo
2. Botón OK (Aceptar).
3. Botón de modo (cambia el modo de
reproducción)
4. Botón de menú
5. Muestra las cadenas favoritas
6. Botón de tecla (misma función que el
botón MODE [MODO] en el dispositivo)
7. Apagado automático
8. Alarma
9. Brillo
10. Anterior
11. Reproducir/poner en pausa
12. Siguiente
13. Botones numéricos
14. Ajustes del equalizador
15. Silenciar
16. Volumen +
17. Volumen -
18. Botones de dirección
19. Volver al menú principal de la aplicación
Pulse
A continuación, seleccione o tome una fotografía para establecer como
salvapantallas en la pantalla en espera.
Pulse
Aparecerá un círculo parpadeante de color rojo en la esquina superior
izquierda de la pantalla de la radio. Para reproducir el mensaje de voz,
cualquier pestaña introducida en la grabación se transmitirá en ujo a
través del altavoz de la radio.
Pulse
pulsado para grabar y suelte para dejar de grabar. La grabación se
transmitirá en ujo a través del altavoz de la radio.
Pulse
y transmitir en ujo a través de la radio.
Pulse
primeras cinco cadenas favoritas.
para entrar en el ajuste de selección de la pantalla en espera.
para introducir la opción de mensaje. Mantenga pulsado
para registrar el mensaje de voz y suelte para detener la grabación.
para activar el modo de intercomunicación. Mantenga
para acceder al directorio musical local en el dispositivo móvil
para transmitir en ujo una de las
Resolución de problemas
Este producto no contiene ninguna pieza que pueda ser reparada por
el usuario. En caso de avería, póngase en contacto con el fabricante o el
servicio técnico autorizado. La exposición de ciertas partes internas del
dispositivo puede poner en peligro su vida. La garantía del fabricante no
cubre las averías resultantes de reparaciones llevadas a cabo por terceros.
Sin sonido
Causa
• El volumen no está activado.
Solución
• Ajuste el control de volumen principal.
Sin sonido desde la conexión Bluetooth
Solución
• Compruebe si el dispositivo externo requiere la contraseña 0000 para
iniciarse.
La WiFi no se conecta
Solución
• Asegúrese de que está seleccionado el modo WiFi y de que se ha intro-
ducido la contraseña correcta para el módem WiFi.
Sonido estático.
Causa
• Recepción de la señal baja
Solución
• Ajuste la antena o mueva la unidad hacia una ubicación con señal más
intensa.
El sonido se oye distorsionado.
Causa
• El volumen está demasiado alto.
Solución
• Reduzca el volumen.
No se encuentra la emisora deseada.
Causa
• Señal débil.
Solución
• Utilice la función de sintonización manual.
Sin funciones DAB
Causa
• No hay cobertura DAB en la zona.
• Mala recepción.
Solución
• Ajuste el brillo de la pantalla.
La pantalla se muestra en blanco.
Causa
• Esto puede ocurrir si la emisora cambia la etiqueta de un servicio o
elimina una etiqueta al sintonizar.
Solución
• La radio intentará volver a sintonizar.
• Realice una exploración.
El dispositivo no se enciende.
Causa
• El adaptador no está conectado a la toma de la pared.
Solución
• Asegúrese de que el enchufe esté conectado.
Page 29

Especi cación técnica
Modelo DR-I470 Pro
Potencia de salida 2 x 7 W (RMS)
Consumo de electricidad (máx.) 28 W
Consumo de electricidad (estándar) 8 W
Consumo de electricidad en modo en espera <1 W
Frecuencia FM 87.5-108 MHz
Frecuencia DAB+ 174.928-239.200 MHz
Bluetooth
Versión V5.0
Bandas de frecuencia 2402 MHz ~ 2480 MHz
Potencia máxima transmitida 4 dBm
Adaptador de corriente
Nombre del modelo FJ-SW1202000N
Entrada AC 100-240 V ~ 50/60 Hz, 0.6 A Max
ESES
Salida
Fabricante
WIFI
Conexión WiFi 802.11 b/g/n; STA/AP/AP Client
B1,Xujing chang Industrial Park, Haoye Road, Fuyong 518103 Shenzhen, China
SHENZHEN FU JIA APPLIANCE CO., LTD
DC 12 V
⎓2000 mA
145 mm
354 mm
KG
3,16 kg
185 mm
Page 30
28
FR
Importantes consignes de sécurité
Svp, lire ces consignes de sécurité et respecter les
avertissements suivants avant que l'appareil ne soit
actionné :
Le point d'exclamation contenu dans un triangle équilatéral
a pour objet d'appeler l'attention de l'utilisateur sur la
présence dans la documentation accompagnant le produit
d'instructions importantes d'utilisation et d'entretien (de
réparation).
Utilisez uniquement l'alimentation électrique indiquée dans
le mode d'emploi.
Ce symbole signi e que le produit doit être éliminé de
manière écologique et non avec les ordures ménagères.
Tension alternative
Tension continue
Équipement de classe II
Pour une utilisation en intérieur uniquement
Notation d'e cacité énergétique de niveau VI
Polarité de câble d'alimentation de C.C.
A n d’éviter un incendie,
maintenir toujours les bougies
et autres ammes nues
éloignées de ce produit.
Avertissement :
• Suivez toujours les précautions basiques de sécurité durant l'utilisation
de cet appareil, particulièrement lorsque des enfants sont présents.
• Les enfants doivent être supervisés a n de s'assurer qu'ils ne jouent pas
avec l'appareil.
• N'endommagez pas le cordon d'alimentation, n'y placez pas d'objets
lourds, ne l'étirez pas et ne le pliez pas. N'utilisez pas de rallonge
électrique. Tout dommage au cordon d'alimentation peut provoquer un
incendie ou un choc électrique.
• Si le cordon d'alimentation est endommagé, il doit être remplacé par le
fabricant, un agent du service après-vente ou des personnes similairement quali ées a n d'éviter tout risque.
• Assurez-vous que l'appareil est bien branché dans une prise électrique
CA 100-240V 50/60Hz. L'utilisation d'une tension plus élevée peut entraîner un dysfonctionnement de l'appareil ou un incendie.
• Si la che d'alimentation ne rentre pas dans la prise, ne la forcez pas.
• Si votre che élec trique ne rentre pas dans votre prise murale, ne forcez
pas pour la faire rentrer.
• Éteignez l'appareil avant de le débrancher de sa source électrique a n de
complètement le désactiver.
• Ne connectez ou ne déconnectez pas le cordon d'alimentation avec des
mains mouillées. Ceci peut causer une électrocution.
• Si l'appareil ne doit pas être utilisé pendant une longue période, débran-
chez l'alimentation.
• Déconnectez le cordon d'alimentation si l'appareil n'est pas utilisé
pendant une période prolongée.
• Assurez-vous que la prise principale est toujours facilement accessible.
• Ce produit ne contient aucune pièce réparable par l'utilisateur. En cas de
défaut, contactez le fabricant ou le département de service après-vente
autorisé. L'exposition aux pièces internes situées à l'intérieur de l'appareil
peuvent mettre votre vie en danger. La garantie du fabricant ne couvre
pas les défauts provoqués par des réparations e ectuées par des tiers
non autorisés.
• N'utilisez pas ce produit directement après déballage. Attendez qu'il se
réchau e à la température ambiante avant de l'utiliser.
• Assurez-vous que ce produit est utilisé dans des climats modérés uni-
quement (et non tropicaux ou sous-tropicaux).
• Placez le produit sur une surface plane et stable sans vibrations.
• Assurez-vous que le produit ou ses pièces ne dépassent pas du bord du
meuble le supportant.
• Pour réduire les risques d'incendie, d'électrocution ou de dommages
à ce produit, veuillez ne pas l'exposer à la lumière directe du soleil, à la
poussière, à la pluie et à l'humidité. Ne l'exposez jamais aux éclaboussures ou égouttements et ne placez pas d'objets remplis d'eau sur ou près
du produit.
• Ne placez pas d’objets remplis de liquide, comme des vases sur l'appareil.
• N’installez pas l’appareil à proximité de sources de chaleurs telles que
des radiateurs, des chau ages, des cuisinières ou d’autres appareils (y
compris des ampli cateurs) produisant de la chaleur.
• Ne placez pas de produit dans un emplacement à l'humidité élevée et
présentant une mauvaise ventilation.
• Assurez une distance minimum de 5 cm autour de l'appareil a n
d'assurer une ventilation su sante. Ne bloquez pas les entrées de
ventilation de ce produit. Assurez-vous toujours que les ouvertures de
ventilation ne sont pas recouvertes d'articles tels que journaux, nappes
de table, rideaux, etc.
• Ne laissez JAMAIS une personne, et particulièrement un enfant, faire
rentrer un objet dans les trous, fentes ou toute autre ouverture du boitier
de l'appareil, ceci pouvant causer une électrocution fatale.
• Les orages sont dangereux pour tous les appareils électriques. Si le
secteur ou le câblage aérien est frappé par la foudre, l'appareil peut être
endommagé, même s'il était éteint. Vous devez débrancher tous les
câbles et connecteurs de l'appareil avant un orage.
• Un niveau de pression acoustique excessif du casques ou des écouteurs
peut causer une perte auditive.
Entretien
• Débranchez le câble d'alimentation de la source de courant avant de
nettoyer l'appareil.
• Utilisez un chi on doux et propre pour nettoyer l'extérieur de l'appareil.
Ne nettoyez jamais l'appareil avec des produits chimiques ou détergent.
Adaptateur électrique
• Pour déconnecter l'appareil du réseau d'alimentation, débrancher le l
de la prise de courant.
• N'utilisez que l'adaptateur secteur fourni, faute de quoi cela pourrait
entraîner un risque pour la sécurité et / ou endommager l'appareil.
Piles
• Observez la polarité correcte en insérant les piles.
• Ne pas exposer les piles aux températures élevées
et ne pas les placer dans des endroits où la température pourrait augmenter rapidement, par exemple
près d'un feu, ou directement à la lumière solaire.
• Ne pas exposer les piles à la chaleur rayonnan-
te excessive, ne pas les jeter au feu, ne pas les
démonter et ne pas essayer de recharger les piles
non-rechargeables. Elles peuvent fuir ou exploser.
• Ne jamais utiliser ensemble des piles di érentes ou mélanger des piles
neuves et les usagées.
• Lorsque la télécommande n'est pas utilisée pendant une période prolon-
gée (plus d'un mois), retirez la pile de la télécommande pour éviter tout
risque de fuite.
• Si les piles fuient, nettoyez les fuites à l'intérieur du compartiment à piles
et remplacez les piles par des piles neuves.
• N'utilisez pas de piles autres que celles spéci ées.
N'ingérez pas la pile, risque de brûlure chimique
Cd
Page 31

• Si la pile est ingérée, elle peut causer de sévères brûlures internes en
moins de 2 heures voire même la mort. Gardez les piles neuves et
usagées hors de la portée des enfants. Si le compartiment de la pile ne
ferme pas bien, arrêtez d'utiliser le produit et gardez-le hors de la portée
des enfants. Si vous pensez que des piles ont pu être avalées ou placées
à l'intérieur d'une partie quelconque du corps, consultez immédiatement un médecin.
Mise au rebut de cet appareil et des piles
• Ne vous débarrassez pas de ce produit ou des piles avec
les déchets ménagers non triés. Renvoyez-la à un point de
ramassage et de recyclage WEEE (déchets d'équipements
électriques et électroniques) selon la législation en
vigueur. Agir ainsi, aide à conserver les ressources et à
protéger l'environnement.
• La plupart des pays de l'Union Européenne règlent par la loi la mise au
rebut des batteries. Entrer en contact avec le détaillant ou les autorités
locales pour plus d'information.
• La gure ci-dessus apparaît sur les équipements électriques et électron-
iques (ou sur l'emballage) pour rappeler ce fait aux utilisateurs.
• Les utilisateur doivent utiliser les centres de ramassage d'équipements
et de piles existants.
Déclaration CE et UKCA :
• Par la présente, Sharp Consumer Electronics Poland sp. z o.o. déclare
que cet équipement est conforme aux exigences essentielles et aux
autres dispositions pertinentes de la directive RED 2014/53/UE et de la
réglementation sur l'équipement radio du Royaume-Uni.
• Le texte complet de la déclaration de conformité de l'UE est disponible
en suivant le lien www.sharpconsumer.com et en entrant ensuite dans
la section de téléchargement de votre modèle et en choisissant «CE
Statements».
FR
Page 32

30
FR
Ce qui est inclus dans la boîte :
• 1x Unité principale
• 1x Télécommande
• 1x Manuel d'utilisation
• 1x Adaptateur secteur
• 1x Fiche AC (Royaume-Uni) pour adaptateur d'alimentation
• 1x Fiche AC (Union européenne) pour adaptateur d'alimentation
Parties & commandes
Partie avant
9
1
3
5
7
1. MODE – Appuyez pour changer les modes: DAB/DAB+, FM, Internet
Radio, Bluetooth, AUX IN.
On peut également réaliser un réglage avec une autre fonction en
dé nissant le menu <Key> dans CONFIGURATION: Alarme, Variateur,
Égaliseur, Radio locale, Mode, Préréglage, Minuterie de veille, Minuteur.
REMARQUES: La fonction par défaut de ce
bouton est le changement de mode.
2. STANDBY – Appuyez sur cette touche pour allumer l'appareil ou
passer en mode veille.
3. MENU – Appuyez sur cette touche pour accéder à l'interface de
réglage du MENU.
4. SLEEP – Appuyez plusieurs fois pour dé nir le temps de veille
souhaité.
5. ◄– Dans l'écran de réglage, presser pour passer à la sélection pré-
cédente. Lorsque vous écoutez une radio, appuyez brièvement pour
diminuer la fréquence par incréments de 0,05 MHz.
6. ►– Une fois dans l'écran de con guration, appuyez pour aller à la sé-
lection suivante. Lorsque vous écoutez une radio, appuyez brièvement
pour augmenter la fréquence par incréments de 0,05 MHz.
7. DIMMER – Appuyez pour dé nir le niveau de rétro- éclairage.
8. PRESET – En mode de lecture radio Internet, appuyez sur cette touche
pour basculer vers l'écran Radio Station / Music.
9. ÉCRAN D'AFFICHAGE – Pour a cher les informations.
Panneau arrière
11
12
E
D
O
M
U
N
E
M
R
E
M
M
I
D
P
R
E
S
E
T
2
4
6
8
10
13
AUX IN
DC 12V
14
10. Bouton de volume / Bouton de sélection / bouton OK - Lors de la
lecture, tournez le bouton pour régler le volume de lecture. Lors du
réglage du menu, tournez le bouton pour sélectionner les options;
appuyez sur pour con rmer votre sélection.
11. Antenne FM – Pour recevoir le signal FM.
12. Prise d'écouteurs – Prise d'écouteurs 3,5mm.
13. Prise AUX IN - Connectez le câble audio 3,5 mm pour pro ter de la
musique audio externe.
14. Entrée de courant continu– CC 12 V
Télécommande
1
2
3
4
5
6
7
8
9
10
11
12
13
14
1. STANDBY – Appuyez sur le bouton STANDBY sur la télécommande pour
réactiver l’appareil ou passer en mode veille.
2. SOURCE – Appuyez sur la touche SOURCE pour changer les modes de
lecture: DAB / DAB +, FM, AUX IN, Bluetooth, Radio Internet.
Remarque: Ce bouton peut être utilisé comme fonction supplémentaire en sélectionnant l'élément <Bouton> dans CONFIGURATION:
Alarme, Rétro-éclairage, Egaliseur, Radio locale, Mode son, Préréglé,
Minuteur de mise en veille, Minuteur
3. MENU – Appuyez sur le bouton MENU sur la télécommande ou sur
le panneau avant pour accéder à la lecture du menu, appuyez sur
les touches de DIRECTION ou tournez le bouton de sélection pour
parcourir le menu: Radio Internet, FM, DAB/DAB+, Spotify, Centre
d'information, AUX, Bluetooth, Con guration, Radio locale.
4. HAUT / 5. OK / 6. GAUCHE / 7. BAS / 17. DROIT – Faites dé ler les
boutons HAUT et BAS ou tournez le bouton de sélection pour
parcourir les choix, puis appuyez sur le bouton OK pour con rmer
votre sélection.
8. VOL- / 18. VOL+ – Pour régler le volume, vous pouvez appuyer sur les boutons VOL+ et VOL- ou faire pivoter le bouton de volume directement.
9. PLAY/PAUSE – Appuyez sur le bouton PLAY/PAUSE pour interrompre la
lecture, appuyez à nouveau pour reprendre.
10. PRÉCÉDENT / 19. SUIVANT – Lors de la lecture d'une musique,
appuyez sur la touche PRÉCÉDENT ou SUIVANT pour passer à la piste
précédente ou suivante. Lorsque vous écoutez une radio, appuyez sur
SOURCE
MENU
OK
VOL- VOL+
SLEEP ALARM
EQ
1
2
ABC DEF
5
4
GHI JKL MNO
7
8 9
PQRS TUV WXYZ
WPS DIMMER
0
15
INFO
16
17
18
19
FAV
20
21
3
6
22
Page 33

FR
la touche PRÉCÉDENT ou SUIVANT pour passer à la station de service
précédente ou suivante.
11. ALARM – Appuyez sur le bouton ALARM pour a cher et créer les
options de sonnerie.
12. SLEEP – Appuyez sur le bouton SLEEP à plusieurs reprises pour choisir
le temps de sommeil souhaité.
13. NOMBRE / LETTRE – Lors de la con guration du menu, tapez des
chi res ou des lettres.
14. WPS – WPS Réglages
15. MUTE – Appuyez sur le bouton MUTE pour couper le son, appuyez à
nouveau ou appuyez sur les boutons VOL+/- sur la télécommande ou
tournez le bouton de volume sur le panneau supérieur pour reprendre.
16. INFO – Appuyez sur le bouton INFO pour véri er les informations de
la station.
20. EQ – Appuyez sur le bouton EQ à plusieurs reprises pour choisir
di érents champs sonores: Normal, Plat, Jazz, Rock, Bandes sonores,
Classique, Pop, Info, Mon EQ.
21. FAV – Appuyez longuement sur le bouton FAV pour sauvegarder la station. Vous pouvez appuyer brièvement sur la touche FAV pour a cher
votre liste de stations préférées ayant été enregistrées.
22. DIMMER – Appuyez sur le bouton DIMMER pour sélectionner le
niveau de rétro-éclairage
Insérer ou remplacer les piles de la télécommande
1. Appuyez sur le loquet du couvercle des piles dans la direction
de la èche en relief sur la face arrière de la télécommande.
2. Ouvrez le couvercle des piles en poussant le loquet.
3. Placez deux piles en respectant la polarité + -, comme
illustré. Lors du remplacement des piles, utilisez
uniquement le même type que les piles fournies.
4. Replacez le couvercle des piles et xez-le.
Mise en route de votre radio Internet
Branchez l'adaptateur secteur dans la prise d'entrée CC. Alors “Bienvenue
” sera a ché à l'écran.
Assurez-vous que l'antenne soit étendue autant que possible. Cela vous
permettra d'obtenir le meilleur signal possible.
Après l’écran de bienvenue, si vous utilisez votre radio pour la première fois,
vous pourrez sélectionner la langue en faisant dé ler la sélection avec le bou-
ton de sélection, puis con rmez votre choix en appuyant sur le bouton OK .
Après le réglage de la langue, l'écran a chera “Activer la véri cation du
réseau à l'allumage”. Vous pouvez choisir “OUI” ou “ NON” pour décider
si l'appareil doit véri er le réseau lorsqu'il est allumé ou non.
Con guration manuelle du WIFI
Après le réglage ci-dessus, l'écran a chera «Voulez-vous con gurer le
réseau maintenant?».
• Si vous sélectionnez “OUI”, votre radio commencera à rechercher les
réseaux les plus proches auxquels vous connecter. Après la numérisation, vous devez choisir le réseau auquel vous souhaitez vous connecter.
Ensuite, tapez des lettres / chi res en dé lant avec le Bouton de
sélection ou en appuyant sur les touches NUMÉRO / LETTRE jusqu'à
ce que le bon chi re soit a ché et cliquez sur le bouton DROIT pour
accéder au chi re suivant. Une fois terminé, appuyez sur la touche OK
pour con rmer.
• Si vous sélectionnez “NON” alors vous pourrez régler cela plus tard dans
les paramètres de con guration.
Réseau sans l (WPS PBC)
Au stade “Voulez-vous con gurer le réseau maintenant?” , si vous sélection-
nez “OUI (WPS)” votre radio commencera à chercher des connexions WiFi.
Lorsque cette option aura été sélectionnée, vous aurez 120 secondes pour
cliquer sur le bouton WPS sur votre modem WiFi. Cela connectera votre
WiFi à votre radio sans écrire manuellement le mot de passe.
Connexion WIFI complète!
Une fois que votre WIFI est complété en entrant manuellement votre mot
de passe WIFI via WPS, vous serez redirigé vers l'écran du menu principal et
le signal WIFI apparaîtra en blanc en haut à gauche. Votre radio internet est
maintenant installée !
Con guration
Utilisez les boutons GAUCHE/DROITE ou tournez le Bouton de sélection
pour choisir <Con guration> dans l'écran Menu principal, appuyez sur le
boutonOK pour accéder au réglage de la con guration.
Affi chage de l'heure
Dé nissez le type d'a chage de l'heure: Analogique ou numérique.
Gérer mes mediaU
Réglez la fonction sur Activer ou Désactiver.
Le code QR de mediaU est disponible dans Con guration > Gérer mes médiasU
> Activer.
Réseau
• Con guration du réseau sans l
• Sur les paramètres réseau, vous pouvez con gurer une connexion WIFI
en sélectionnant Con guration du réseau sans l. La radio commencera alors à rechercher les connexions WIFI disponibles.
• Trouvez votre connexion WIFI et sélectionnez-la avec le bouton OK
. Pour saisir des lettres / chi res, utilisez le Bouton de sélection ou
appuyez sur les touches LETTRE/CHIFFRE jusqu'à ce que le chi re
correct soit a ché. Appuyez ensuite sur le bouton DROIT pour passer
au chi re suivant. Appuyez sur le bouton GAUCHE si vous voulez
revenir au chi re précédent. Une fois terminé, appuyez sur la touche
OK pour con rmer.
• Une fois votre WIFI connecté, l'écran du menu principal apparaîtra et le
signal WIFI apparaîtra en blanc dans le coin supérieur gauche.
• Réseau sans l (WPS PBC)
• Sélectionnez cette option pour rechercher la connexion WIFI. Pendant
que cette option a été sélectionnée, vous aurez 120 secondes pour
cliquer sur le bouton WPS de votre modem WIFI. Cela connectera votre
WiFi à votre radio sans écrire manuellement le mot de passe.
• Con guration manuelle
• Vous pouvez dé nir manuellement les données sans l: DHCP, entrez
SSID et Gérer.
• Véri ez le réseau lorsque l'appareil est allumé
• Dé nissez Activer ou Désactiver.
Date & heure
• Dé nir la date et l'heure
• Con guration manuelle ou détection automatique
Il y a la possibilité de dé nir manuellement l'heure et la date au lieu
d'utiliser la détection automatique pour les con gurer. Tournez le
Bouton de sélection ou appuyez sur les touches numériques pour
saisir le chi re souhaité s'il s'agit du mois. Une fois que vous avez le
bon chi re, cliquez sur le bouton DROIT pour accéder au réglage du
jour. Continue ce processus avec l'année, l'heure et les minutes. Une
fois la con guration manuelle terminée, appuyez sur la touche OK
pour con rmer. Pour annuler le format de la date et de l'heure, vous
pouvez modi er ces paramètres sous la fonction «Date et heure».
• Dé nir le format de l'heure: Pour dé nir le format de l'heure, 12 heures
ou 24 heures.
• Dé nir le format de date: AAAA/MM/JJ, JJ/MM/AAAA, MM/JJ/AAAA
Sonnerie
• Dé nir la Sonnerie 1/ Sonnerie 2
• Pour dé nir une sonnerie sur votre radio, rendez-vous sur les
paramètres de “Con guration” et faites dé ler pour sélectionner
“Sonnerie” ou cliquez sur le bouton ALARM directement sur la
télécommande.
Page 34

32
FR
• Après avoir accédéà l'écran de réglage de l'a sonnerie, sélectionnez“Sonnerie 1(Désactiver)” ou “ Sonnerie 2(Désactiver)” et choisissez
“Activer” pour activer la sonnerie.
• Sélectionnez «Répéter» pour choisir la régularité de votre alarme
en appuyant sur le bouton OK . Vous pouvez choisir entre Chaque
jour, Une fois ou sélectionner des jours particuliers pour que l'alarme
sonne. Une fois que vous avez fait votre choix, appuyez sur le bouton
GAUCHE pour revenir aux autres paramètres de sonnerie.
• Sélectionnez “Heure” et faites tourner le Bouton de sélectionpour
mettre en évidence l'heure de la sonnerie. Une fois que vous avez
trouvé les heures souhaitées, appuyez sur le boutonDROITpour
changer les minutes.
• Une fois que les minutes sont à la valeur correcte, appuyez sur le
bouton DROIT pour modi er“AM” ou “PM”, appuyez ensuite sur le
bouton OK pour con r mer et revenir aux paramètres de sonnerie.
• Maintenant, faites dé ler vers le bas et sélectionnez “ Son ” en ap-
puyant sur la touche OK . Vous pouvez maintenant choisir entre Beep,
melody, radio Internet, FM ou DAB / DAB +.
• Si vous réglez le son de votre alarme comme Radio Internet, FM ou
DAB / DAB +, vous serez alors amené à parcourir vos stations préférées
préréglées. Sélectionnez la station de sonnerie de votre choix en
appuyant sur le bouton OK .
• Le symbole d'alarme apparaîtra sur l'écran d'a chage principal.
• Comment annuler votre alarme
• Pour annuler votre sonnerie, sélectionnez“Alarm” dans les paramètres
de con guration ou avec le bouton ALARM et sélectionnez la sonnerie que vous souhaitez désactiver.
• Une fois la sonnerie sélectionnée, vous aurez la possibilité de l'éteindre
ou de l'allumer. Mettez en surbrillance l'option “Eteindre“ et appuyez
sur la touche OK pour con r mer.
REMARQUE: Changez le volume de la sonnerie en allant sur les paramètres
du “ Volume de la sonnerie” dans l'écran de réglage des sonneries.
• Comment désactiver votre sonnerie lorsqu'elle retentit
Lorsque votre sonnerie retentit, appuyez sur la touche ALARM ou
STANDBY sur la télécommande pour arrêter l'alarme. Si vous avez dé ni
une alarme pour qu'elle sonne tous les jours ou plus d'une fois, l'icône
d'alarme restera a chée à l'écran.
• Comment mettre votre sonnerie sur SNOOZE
Lorsque votre sonnerie retentit, appuyez sur n'importe quel bouton
saufSTANDBY ou ALARM arrêter le son et passer en mode SNOOZE. La
fonction SNOOZE fera retentir la radio au bout de 5 minutes.
REMARQUE: Arrêtez la sonnerie SNOOZE en appuyant
sur le bouton ALARM ou STANDBY .
• Sonnerie de sieste
• Après avoir sélectionné l'option “Alarm” dans les paramètres de
con guration, ou le bouton ALARM sur la télécommande pour sélectionner “Sonnerie Sieste (Désactiver)”.
• Choisissez le nombre de minutes pendant lesquelles vous souhaitez
pro ter de l’alarme de la sieste avec l’option de: Désactiver, 5minutes, 10 minutes, 20 minutes, 30 minutes, 60 minutes, 90 minutes,
120 minutes.
• Volume d'alarme
• Changer le volume de l'alarme en tournant le Bouton de sélection ou
les boutons GAUCHE/DROITpour e ectuer le changement.
• Une fois le volume sonore choisi, appuyez sur la touche OK pour
con rmer.
Minuterie
• Dans les pararamètres de “Con guration” , sélectionnez l'option “Minu-
terie” et un écran avec 00:00 s'a chera.
• Pour augmenter en secondes, cliquez sur le bouton DROITE. Pour
diminuer en secondes, cliquez sur le bouton GAUCHE. Appuyez sur les
boutons GAUCHE/DROIT et maintenez-les enfoncés pour vous déplacer
rapidement dans la minuterie.
• Une fois que vous avez choisi le nombre correct de minutes, con rmez-le
en appuyant sur la touche OK .
Langue
Sélectionnez la langue choisie dans la liste.
Dimmer (Variateur de lumière)
• Pour régler la luminosité de votre radio, accédez aux paramètres de
“Con guration” et sélectionnez “Dimmer” . Vous pouvez choisir le
mode “Économie d'énergie” ou “Allumé” .
• Sélectionnez le mode “Économie d'énergie” pour changer l'un de vos
niveaux de luminosité avec le choix jusqu'à 20 niveaux. Lorsqu'il n'y a
pas d'activité de la radio pendant 15 secondes, ce niveau de luminosité
plus faible est dé ni jusqu'à ce que vous cliquiez sur un bouton et que le
paramètre “Allumer” s'active.
• Sélectionnez le mode“Allumer” pour qu'il devienne la luminosité active
lorsque la radio est en cours d'usage.
• Vous pouvez également modi er deux paramètres de luminosité en
appuyant directement sur le bouton DIMMER sur la télécommande sur
le panneau avant directement.
Affi chage
Choisissez que l'écran soit Couleur ou Monochrome.
Gestion de l'alimentation électrique
Sélectionnez cette option pour con gurer la radio a n qu'elle passe
automatiquement en mode veille après une durée d'inactivité dé nie ou
en l'absence de signal WIFI. Vous pouvez sélectionner 5/15/30 minutes
pour passer en mode veille, ou vous pouvez sélectionner Eteindre pour
ignorer cette fonction.
Minuteur de mise en veille
• Pour régler un minuteur de mise en veille, rendez-vous sur les paramètres
de “Con guration” et sélectionnez “Minuterie de mise en veille”, Vous
pouvez choisir Eteindre, 15, 30, 60, 90, 120, 150, 180 minutes.
• Vous pouvez également appuyer plusieurs fois sur la touche VEILLE
sur la télécommande pour basculer entre les temps de veille en haut à
droite de l'écran. Il existe une option entre 15, 30, 60, 90, 120, 150, 180
minutes.
• Une fois que la minuterie d'arrêt a été sélectionnée, la quantité de
minutes et une image de veille s'a chent en haut à droite de l'écran.
Radio Internet
• Réglez la radio Internet : Mémoire tampon et Qualité du son:
• Mémoire tampon: Con gurer le temps de la mémoire tampon de la
lecture de la musique : 2 /4 /8 secondes.
• Qualité du son: Ajustez la qualité du son à votre guise : Haut/Bas.
Météo
• Dé nir la localisation: Choisissez et entrez votre localisation.
• Unité de température: Choisissez votre température préférée "Celsius"
ou "Fahrenheit".
• Affi cher en mode veille: Choisissez “O ” ou “On” pour désactiver ou
activer l'a chage des prévisions météo sur l'écran de veille. Lorsque
vous activez l'a chage des prévisions météo, il s'a che sur l'écran de
veille toutes les 10 secondes.
Con guration FM
• Mode: Vous pouvez dé nir le mode «Mono» ou «Stéréo».
• Seuil: Sélectionnez les paramètres de seuil (seuil de recherche / seuil
stéréo).
• (Le seuil doit être réglé sur la commutation automatique entre les modes
mono et stéréo. En une semaine de réception, le système bascule automatiquement en mode mono pour réduire le bruit de fond de la station,
pour une écoute plus dé nie.)
Con guration Radio locale
Con gurez manuellement votre position pour la radio locale plutôt que
d’autoriser la détection automatique de la radio.
Key (Touche)
Dans cette interface de réglage, vous pouvez sélectionner “Alarm”,
“Dimmer”, “Equaliser”, “Local Radio”, “Mode”, “Preset”, “Sleep Timer”
et “Timer” pour con rmer la fonction du bouton MODE sur le panneau
avant et la télécommande.
Page 35

FR
Égaliseur
L'EQ par défaut est normal. Vous pouvez lchanger par Flat, Jazz, Rock,
bande son, Classique, Pop, Infos ou mon EQ.
Reprendre à la mise en route de l'appareil
Activez la fonction pour que la radio reprenne une fois allumée. Par contre,
l'écran restera dans le menu principal.
Mise à jour logicielle
Sera a ché ici si une mise à jour logicielle est disponible pour la radio. S'il
en existe une, veuillez sélectionner la mise à jour à lancer.
Réinitialiser à la valeur par défaut
Sélectionnez cette option pour réinitialiser votre radio et annuler tous
les réglages et préréglages e ectués. Con rmez que vous souhaitez
réinitialiser l’unité et ses paramètres en sélectionnant “OUI”.
Radio Internet
Utilisez les boutons GAUCHE/DROITE ou tournez lebouton de sélection
pour choisir <Radio Internet> dans l'écran Menu, appuyez sur le
boutonOK pour entrer, et vous trouverez plusieurs options:
Mes favoris: Vos stations préférées seront enregistrées ici pour faciliter
l'écoute. Vous pouvez appuyer directement sur la touche FAV pour a cher
votre liste de stations préférées.
Station de radio / musique: Sélectionnez cette option pour parcourir les
stations de radio Internet dans les catégories suivantes: Top 20 mondial,
Genre, Pays/Localisation, À l'honneur. Recherchez des stations dans les
catégories appropriées et sélectionnez votre station internet choisie en
appuyant sur le bouton OK .
Radio locale: La radio est automatiquement con gurée pour détecter
les 10 principales stations de votre pays, toutes les stations, ainsi qu’une
variété de genres en catégories par ordre alphabétique. Sélectionnez la
catégorie que vous souhaitez écouter avec le bouton OK et continuez à
naviguer jusqu'à la station désirée.
Radio Sommeil Choisissez parmi plusieurs sons de relaxation.
Historique: Parcourez les stations récemment écoutées.
Service: Rechercher une station de radio ou Ajouter une nouvelle station
de radio ou App.
• Vous pouvez utiliser les touches NOMBRE / LETTRE pour rechercher une
station de radio.
• Pour ajouter une nouvelle station de radio, utilisez les touches LETTRE/
CHIFFRE pour mettre en surbrillance le caractère choisi et cliquez sur
le bouton DROIT pour passer au caractère suivant. Pour revenir au
caractère précédent, appuyez sur le bouton GAUCHE pour le mettre en
évidence. Appuyez sur la toucheOK pour rechercher la station Internet.
Enregistrez vos stations de radio Internet préférées
Lorsque vous avez trouvé la station souhaitée, maintenez la touche FAVOR
enfoncée pour accéder à l'écran d econ guration “ Ajouter à mes Favoris”
Tournez le cadran de sélection ou appuyez sur les boutons HAUT/BAS
pour choisir le numéro de préréglage et appuyez sur la touche OK pour
con rmer votre option.
Radio FM
La plage de fréquence FM est comprise entre 87,5 MHz et 108,00 MHz.
Allongez l'antenne pour trouver le signal le plus fort pour chaque station.
Utilisez les boutons GAUCHE/DROITE ou tournez lebouton de sélection
pour choisir<FM> dans l'écran Menu, appuyez ensuite sur le bouton OK
pour entrer sur l'écran FM.
Réglage des stations
Appuyez sur les touches HAUT/BAS sur la télécommande ou sur le
panneau avant pour régler la fréquence vers le haut ou vers le bas par
étape de 0,05 MHz.
Appuyez sur les boutons GAUCHE/DROIT sur la télécommande pour
passer à la station précédente ou suivante disposant de la réception la
plus puissante. Une fois qu'une station a été trouvée, le balayage s'arrête
automatiquement.
Appuyez sur la touche OK , “Auto Scan” apparaîtra à l'écran. Si vous
choisissez “OUI”, la radio commencera à rechercher les stations de la
basse à la haute fréquence. Et cela enregistrera les stations trouvées
automatiquement.
Mémoriser des stations
Pour enregistrer votre station préférée, vous devez d'abord écouter cette
station, appuyez longuement sur le bouton FAV sur la télécommande,
utilisez les touches HAUT/BAS ou faites tourner le Bouton de sélection
pour choisir le chi re que vous souhaitez enregistrer. Appuyez ensuite sur
le bouton OK pour con r mer le préréglage.
Rappel d'une station mémorisée
1. Appuyez sur les boutons PRÉCÉDENT/SUIVANT sur la télécommande
pour passer à la station précédente ou suivante présélectionnée.
2. Ou vous pouvez appuyer sur la touche FAV pour sélectionner la
station mémorisée, appuyez sur la touche OK pour écouter.
DAB/DAB+
Utilisez les boutons GAUCHE/DROITE ou tournez le Bouton de sélection
pour choisir <DAB/DAB+> dans l'écran Menu principal, appuyez sur le
bouton OK pour accéder au mode DAB/DAB+.
Lors de la première utilisation de DAB sur votre radio, celle-ci commencera à
rechercher les stations DAB et a chera “Scanning” sur l'écran d'a chage. Le
nombre de stations trouvées s'a chera au fur et à mesure de la recherche.
Une fois que toutes les stations disponibles ont été trouvées, l'écran
radio a che le choix des stations disponibles. Utiliser le Bouton de
sélectionpour faire dé ler et mettre en évidence la station choisie.
Sélectionnez la station en appuyant sur le bouton OK .
Lorsque vous avez sélectionné une station, l'écran a che la station et
commence à émettre.
Pour choisir la station précédente ou suivante, appuyez sur la touche
PRÉCÉDENT ou SUIVANT pour faire dé ler en conséquence
Lorsque vous êtes sur la station choisie, appuyez sur la touche INFO
pour a cher les informations sur la station. L'écran fera dé ler
automatiquement les informations et a chera le genre, MHZ, la lecture
des chansons, KHz et Kbps.
Pour revenir à la liste pour faire dé ler manuellement, appuyez sur le
bouton GAUCHE pour revenir à la liste.
Pré-réglage de vos stations DAB / DAB + préférées
Lorsque vous avez trouvé la station souhaitée, maintenez la touche FAV
enfoncée pendant quelques secondes pour accéder à l'écran “Ajouter à
mes favoris”. Faites tourner le Bouton de sélectionpour choisir le nombre
de préréglages et appuyez sur la touche OK pour con rmer.
Sinon, lorsque vous êtes sur l'écran de liste des stations DAB, vous avez la
possibilité de sélectionner la station choisie et maintenir la touche FAV
pour suivre les indications ci-dessus.
Pour a cher vos stations préférées préréglées, appuyez sur la touche
FAV et utilisez le bouton HAUT ou BAS pour faire dé ler la liste des
préréglages.
Centre d'information
Utilisez les boutons GAUCHE/DROITE ou tournez le Bouton de sélection
pour choisir <Information Center> Sur l'écran du Menu, appuyez sur le
Page 36

34
FR
bouton OK pour accéder à l'écran du centre de documentation.
Informations météorologiques: Pour sélectionner les informations
météo pour l’endroit souhaité, sélectionnez d’abord le continent en
utilisant le Bouton de sélection pour faire dé ler et le bouton OK pour
con rmer. Ensuite, le pays, suivi de la ville.
Une fois la ville choisie, les informations suivantes s’a cheront: la
température du moment, l'image du symbole météo, la plage de
température approximative pour les 5 prochains jours.
Informations nancières: Choisissez parmi un éventail d’indices
boursiers du monde entier. Utiliser le bouton
Bouton de sélectionpour faire dé ler et le bouton OK pour con rmer.
Informations sur le système: A chez la version du système et les
informations de connexion sans l. Si des informations sans l sont
sélectionnées, des informations telles que la puissance du signal WIFI
peuvent être trouvées.
Spotify Connect
Le produit est compatible avec Spotify Connect, ce qui lui permet de
fonctionner comme des haut-parleurs sans l contrôlés par l’application
Spotify disponible pour iOS, les appareils intelligents Android et un client
de bureau pour les PC. Pour passer en mode Spotify Connect, appuyez sur
la touche MENU a n d’accéder à l’écran du menu principal, faites tourner le
bouton de sélection pour parcourir l’élément jusqu’à ce que le logo Spotify
soit mis en évidence et appuyer brièvement sur le bouton de sélection
pour le sélectionner.
REMARQUES: Un compte Spotify Premium est
requis pour utiliser Spotify Connect.
REMARQUES: Assurez-vous que l’option <Maintenir le réseau connecté> soit
activée sur l’appareil. Cela activera le streaming Spotify sur l’appareil en mode
veille ou en mode non réseau tel que DAB / DAB +, FM et entrée auxiliaire.
Lorsque le mode Spotify Connect est sélectionné, avant qu’une connexion
avec une application Spotify ne soit établie, le message <En attentes
d’utilisateur> s’a che.
REMARQUES: La reproduction des illustrations d’album sur
l’écran de visualisation peut prendre jusqu’à 10 secondes.
Comment utiliser Spotify Connect
Écoutez à haut volume avec Spotify Connect
1. Connectez votre appareil Sharp DR-I470 à votre réseau wi .
2. Ouvrez l’application Spotify sur votre téléphone, tablette ou
ordinateur portable en utilisant le même réseau wi
3. Entamez une chanson et sélectionnez Appareils disponibles.
4. Sélectionnez votre Sharp DR-I470 et commencez à écouter.
Pour plus d’informations sur comment paramétrer et utiliser Spotify Connect,
rendez-vous sur www.spotify.com/connect.
Le logiciel Spotify est soumis à des licences tierces qui se trouvent ici : https://
www.spotify.com/connect/third-party-licenses
Pour établir une connexion entre l’application Spotify et la radio, les
appareils doivent être connectés au même réseau WiFi.
Pour agrandir l’illustration a chée sur l’appareil, appuyez brièvement sur la
touche MENU. Appuyez à nouveau pour revenir à l’a chage standard.
REMARQUES: Une fois la connexion établie, le compte Spotify est lié à la
fois à l’application et à l’appareil, ce qui permet de connecter le DR-I470.
En contrôlant Spotify à partir du DR-I470, vous pouvez modi er le volume,
écouter ou mettre le son en pause, et avancer ou reculer dans votre liste de
lecture à l’aide de la télécommande.
Les modi cations appor tées par la télécommande sont répercutées sur
l’application Spotify Connect et sur l’appareil.
Tant que l’application Spotify est connectée à la radio sur le même réseau
et que l’option <Maintenir le réseau connecté> a été sélectionnée, vous
pouvez généralement allumer la radio lorsque vous démarrez la lecture de
l’application Spotify.
Fonction AUX
Entrée AUX (AUX IN)
Utilisez les boutons GAUCHE/DROITE ou tournez le Bouton de sélection
pour choisir <AUX> dans l'écran Menu, appuyez sur le bouton OK pour
accéder au mode AUX.
Branchez un câble AUX dans votre radio et branchez le câble via le port
AUX-IN situé à l'arrière de la radio. Commencez à émettre de l'audio à partir
de votre appareil et cela devrait émettre sur la radio en mode AUX.
Sortie ligne (casque)
Sur le panneau arrière de la radio, la Prise de casque permet d'écouter
l'audio de votre radio. Commencez à lire de l'audio à partir des paramètres
Radio Internet, AUX ou Bluetooth.
Bluetooth
Utilisez les boutons GAUCHE/DROITE ou tournez le Bouton de sélection
pour choisir <Bluetooth> dans l'écran Menu, appuyez sur le bouton OK
pour accéder au mode Bluetooth.
1. Accédez aux paramètres de votre appareil pour connecter votre
appareil à la radio via Bluetooth.
2. Sélectionnez le nom “SHARP DR-I470” dans la liste que l'on peut
trouver à partir de votre appareil. Une fois la connexion établie,
la radio émettra un son “Connecté”, et “Bluetooth Connecté”
apparaîtra à l'écran.
3. Sélectionnez l'audio choisi sur votre appareil et écoutez-le.
4. Vous pouvez maintenant pro ter de la musique de votre appareil.
5. Pour vous déconnecter l'un de l'autre, basculez vers un autre mode de
lecture ou désactivez la fonction Bluetooth sur votre appareil.
AirMusic Control - Application SHARP
Smart Control
Une fois que l’utilisateur a téléchargé et installé l’application SHARP Smart
Control sur son appareil mobile, l’application sert à la gestion à distance
de l’appareil. Veuillez noter que, la radio DR-I470 et l’appareil mobile avec
l’application SHARP Smart Control doivent être connectés au même
réseau, sans quoi les deux appareils ne pourront pas se connecter. Ouvrez
l’application et la liste des appareils disponibles s’a chera.
Cliquez sur l’appareil approprié pour vous connecter.
REMARQUES : l’appareil règlera automatiquement la
langue de la radio DR-I470 sur la langue dé nie sur l’appareil
mobile avec l’application SHARP Smart Control.
Le code QR de SHARP Smart Control App est disponible dans: Internet Radio>
Service> App
L’application permet à l’utilisateur de contrôler l’appareil via son
téléphone portable :
Choisissez l’onglet approprié pour gérer la radio.
Appuyez sur l’icône
Paramètres pour entrer plus d’options (changer le nom du périphérique,
véri er les mises à jour logicielles, rechercher d’autres périphériques ou
a cher plus d’informations).
pour a cher l’onglet latéral. Sélectionnez
Page 37

FR
Appuyez sur l’icône pour saisir le mode
de contrôle à distance. L’application servira de
télécommande et l’appareil mobile doté de
l’application SHARP Smart Control a chera les
boutons de la télécommande.
1. Éteindre l’appareil
2. Touche OK
3. Touche Mode (modi e le mode de lecture)
4. Touche Menu
5. A cher les stations préférées
6. Touche clé (même fonction que la touche
MODE sur l’appareil)
7. Minuteur de mise en veille
8. Sonnerie
9. Dimmer (Variateur de lumière)
10. Précédent
11. Lecture/Pause
12. Suivant
13. Touches numériques
14. Réglages de l’égaliseur
15. 19. Désactiver le son
16. Volume+
17. Volume-
18. Touches directionnelles
19. Retour au menu principal de l’application
Appuyez sur
Ensuite, choisissez ou prenez une photo à dé nir comme économiseur
d’écran sur l’écran de veille.
Appuyez sur
longuement sur
arrêter l’enregistrement. Le cercle clignotant rouge s’a chera dans le coin
supérieur gauche de l’écran de la radio. Pour écouter le message vocal,
entrez n’importe quel onglet du menu d’enregistrement qui sera di usé via
le haut-parleur de la radio.
Appuyez sur
maintenez pour enregistrer; relâchez pour arrêter l’enregistrement.
L’enregistrement sera di usé via le haut-parleur radio.
Appuyez sur
le périphérique mobile a n de le di user via la radio
Appuyez sur
premières stations favorites.
pour saisir le réglage de sélection de l’écran de veille.
pour saisir l’option message vocal. Appuyez
pour enregistrer le message vocal, relâchez pour
pour saisir l’option intercom. Appuyez et
pour accéder au répertoire de musique local stocké sur
pour di user l’une des cinq
Dépannage
Ce produit ne contient aucune pièce réparable par l'utilisateur. En cas de
défaut, contactez le fabricant ou le département de service après-vente
autorisé. L'exposition aux pièces internes situées à l'intérieur de l'appareil
peuvent mettre votre vie en danger. La garantie du fabricant ne couvre
pas les défauts provoqués par des réparations e ectuées par des tiers non
autorisés.
Absence de son
Cause
• Le volume n'est pas activé.
Solution
• Ajustez le bouton de volume principal.
Aucun son à partir de la connexion Bluetooth
Solution
• Véri ez si le périphérique externe requier t le mot de passe «0000» pour
commencer.
Le Wi-Fi ne se connecte pas
Solution
• Assurez-vous que le mode WIFI est sélectionné dans les paramètres et
que le mot de passe correct a été saisi pour le modem WIFI.
Son statique
Cause
• La réception du signal est trop faible.
Solution
• Ajustez l'antenne ou déplacez l'appareil vers un emplacement de signal
plus fort.
Le son est déformé
Cause
• Le volume est trop élevé
Solution
• Réduisez le volume
Station souhaitée introuvable
Cause
• Signal faible
Solution
• Utilisez la fonction de réglage manuel
Pas de fonctions DAB
Cause
• Aucune couverture DAB dans votre secteur.
• Mauvaise réception
Solution
• Ajustez la position de l'antenne.
L'écran est blanc
Cause
• Cela peut se produire si le di useur change l'appellation d'un ser vice ou
supprime une appellation lors de la mise au point.
Solution
• La radio essayera un nouveau réglage.
• Procéder à un balayage
Pas d'alimentation
Cause
• L'adaptateur n'est pas connecté à la prise murale.
Solution
• Assurez-vous que l'adaptateur est branché.
Page 38

36
Spéci cation technique
Modèle DR-I470 Pro
Puissance de sortie 2 x 7 W (RMS)
Consommation électrique (max.) 28 W
Consommation électrique (standard) 8 W
Consommation électrique en veille <1 W
Fréquence FM 87.5-108 MHz
Fréquence DAB+ 174.928-239.200 MHz
Bluetooth
Version V5.0
Bande de fréquences 2402 MHz ~ 2480 MH z
Puissance maximale transmise 4 dBm
Power Adapter
Nom du modèle FJ-SW1202000N
Entrée AC 100-240 V ~ 50/60 Hz, 0.6 A Max
FR
Sortie
Fabricant
WIFI
Connexion WIFI 802.11 b/g/n; STA/AP/AP Client
B1,Xujing chang Industrial Park, Haoye Road, Fuyong 518103 Shenzhen, China
SHENZHEN FU JIA APPLIANCE CO., LTD
DC 12 V
⎓2000 mA
145 mm
354 mm
KG
3,16 kg
185 mm
Page 39

FRIT
Importanti istruzioni di sicurezza
Vi preghiamo di leggere queste istruzioni di
sicurezza e di rispettare le seguenti avvertenze
prima di mettere in funzione l'apparecchio:
Il punto esclamativo in un triangolo equilatero serve ad
avvertire la presenza di importanti istruzioni operative e
di manutenzione nella documentazione che accompagna
l’apparecchio.
Usare esclusivamente gli alimentatori elencati nel manuale
utente
Questo simbolo signi ca che il prodotto deve essere smaltito
in modo rispettoso dell'ambiente, non insieme ai ri uti
domestici.
Tensione AC
Tensione DC
Apparecchiatura di Classe II
Solo per uso interno
Classi cazione di e cienza energetica livello VI
Polarità del connettore di corrente d.c.
Per evitare incendi, tenete
sempre lontane dall’apparecchio
candele e qualunque
altro tipo di amma.
Avvertenza:
• Seguire sempre le precauzioni di sicurezza basilari quando si utilizza
questo apparecchio, specialmente in presenza di bambini.
• I bambini dovrebbero essere supervisionati per assicurarsi che non
giochino con l’apparecchio.
• Non danneggiare il cavo di alimentazione, né riporvi sopra oggetti
pesanti, tirarlo o piegarlo. Inoltre, non utilizzare prolunghe. Danni al cavo
di alimentazione potrebbero causare incendi o shock elettrici
• Non danneggiare il cavo di alimentazione, né riporvi sopra oggetti
pesanti, tirarlo o piegarlo. Inoltre, non utilizzare prolunghe. Danni al cavo
di alimentazione potrebbero causare incendi o shock elettrici.
• Se il cavo di alimentazione è danneggiato, deve essere sostituito dal
produttore, da un agente di servizio o da persone altrettanto quali cate,
in modo da evitare pericoli.
• Assicurarsi che l’unità sia connessa a una presa di corrente CA 100-240V
50/60Hz. Usare un voltaggio superiore può provocare un malfunzionamento dell’unità e persino la formazione di amme.
• Se la spina di alimentazione non entra nello zoccolo, non forzarla.
• Spegnere completamente l’unità prima di disconnetterla
dall’alimentazione.
• Non disconnettere o connettere il cavo di alimentazione con le mani
bagnate. Può provocare uno shock elettrico.
• Se l'unità non verrà usata per un periodo di tempo prolungato, discon-
nettere l'alimentazione di corrente.
• Scollegare il cavo di alimentazione se non viene usato per molto tempo.
• Assicurarsi che la presa di corrente sia sempre facilmente accessibile.
• Questo prodotto non ha componenti che possano essere riparate
dall'utente. In caso di guasto, contattate il produttore o l'agente di servizio autorizzato. Esporre le parti interne al dispositivo può comportare
un pericolo di vita. La garanzia non copre danni causati da riparazioni
e ettuate da terze par ti non autorizzate.
• Non utilizzare questo prodotto immediatamente dopo averlo rimosso
dall’imballaggio. Attendere che si riscaldi no a temperatura ambiente
prima di usarlo.
• Assicurarsi di usare questo prodotto soltanto in un clima temperato (non
in ambienti tropicali o subtropicali).
• Collocare il prodotto su una super cie piana e stabile in modo che non
sia sottoposto a vibrazioni.
• Assicurarsi che il prodotto e le sue parti non pendino dal bordo del
mobilio di supporto.
• Per ridurre il rischio di incendi, shock elettrici o danni al prodotto, non
esporlo direttamente a luce del sole, polvere, pioggia o umidità. Non
esporlo mai a gocciolamenti e schizzi d’acqua e non collocare oggetti
contenenti liquidi sopra o vicino a esso.
• Non collocare oggetti pieni di liquidi, come vasi, sull’apparecchio.
• Non installarlo vicino a fonti di calore come termosifoni, griglie di
ventilazione, stufe o altri apparecchi (inclusi ampli catori) che generano
calore.
• Non collocare il prodotto in punti con elevata umidità e scarsa ventilazio-
ne.
• Assicurare una distanza minima di 5 cm attorno all’apparecchio per una
ventilazione su ciente. Non ostruire le aperture per la ventilazione del
prodotto. Assicurarsi che le aperture per la ventilazione siano sgombere
da oggetti come giornali, tovaglie, tendaggi ecc.
• MAI lasciare che qualcuno, specialmente un bambino, inserisca qualcosa
nei fori e nelle aperture dell’involucro dell’unità, in quanto ciò potrebbe
risultare in uno shock elettrico fatale.
• I temporali sono pericolosi per gli apparecchi elettronici. Se i cavi della
rete elettrica o l'antenna vengono colpiti da un fulmine, l'apparecchio
potrebbe risultarne danneggiato, anche se spento. E' opportuno scollegare tutti i cavi e i connettori dell'apparecchio prima di un temporale.
• Un’eccessiva pressione sonora da cu e o auricolari può causare danni
all’udito.
Manutenzione
• Disconnetti il cavo di alimentazione dalla presa elettrica prima di pulire
l’apparecchio.
• Usare un panno morbido e pulito per pulire l’esterno dell’unità. Non
pulire con agenti chimici e detergenti.
Adattatore di corrente
• Per disconnettere l'unità dall'alimentatore, disconnettere il cavo dalla
presa di corrente.
• Usare solo l'adattatore fornitore perché non fare ciò potrebbe mettere a
rischio la sicurezza e/o danneggiare l'unità.
Batterie
• Rispettare la corretta polarità quando inserite le
batterie.
• Non esporre le batterie ad alte temperature e non
riporle in posti in cui la temperatura possa aumentare velocemente, per esempio vicino a una amma o
alla luce diretta del sole.
• Non esporre le batterie a un eccessivo calore
radiante, non gettarle nel fuoco, non smontarle e
non cercare di ricaricarle se non sono ricaricabili.
Potrebbero avere perdite o esplodere.
• Non usare mai batterie di marche diverse insieme, né mescolare batterie
vecchie con nuove.
• Quando il telecomando non viene usato per lungo tempo (più di un
mese), rimuovere la batteria per prevenire perdite.
• In caso di perdite di batterie, ripulire la perdita all’interno dello scompar-
timento e rimpiazzare le batterie vecchie con quelle nuove.
• Non utilizzare batterie diverse da quelle speci cate.
Non ingerire le batterie: rischio di ustione chimica
Cd
Page 40

38
• Se la batteria viene ingerita, può causare gravi ustioni interne in appena
due ore e portare alla morte. Tenere batterie nuove e vecchie lontane
dai bambini. Se lo scompartimento della batteria non si chiude perfettamente, smettere di usare il prodotto e tenerlo lontano dalla portata dei
bambini. In caso di dubbio di ingerimento di batterie o di inserimento in
qualsiasi parte del corpo, richiedere immediato supporto medico.
Smaltimento dell’apparecchio e delle batterie
• Non smaltire questo prodotto insieme a ri uti non dif-
ferenziati. Riconsegnarlo in un punto di raccolta apposito
per il RAEE (Riciclaggio di Apparecchiature Elettriche ed
Elettroniche). Così facendo, contribuirete alla conservazione delle risorse e alla protezione dell'ambiente.
• La maggior parte dei paesi dell'UE regola lo smaltimento
delle batterie a norma di legge. Contattare il fornitore o le autorità locali
per ulteriori informazioni.
•
I simboli mostrati in alto appaiono su apparecchi elettrici ed elettronici e
batterie (o sulla relativa confezione) come promemoria per gli utenti.
• Gli utenti sono tenuti a utilizzare le strutture adeguate per lo smalti-
mento di apparecchi e batterie.
Dichiarazione CE e UKCA:
• Con il presente, Sharp Consumer Electronics Poland sp. z o.o. dichiara
che il televisore LED soddisfa i requisiti essenziali e le altre disposizioni
rilevanti della direttiva RED 2014/53/EU e delle Normativer sulle apparecchiature radio del Regno Unito del 2017.
• Il testo completo della dichiarazione di conformità UE è disponibile
seguendo il collegamento www.sharpconsumer.com e successivamente
inserendo la sezione di download del tuo modello, quindi selezionando
“Dichiarazioni CE”.
Page 41

ITIT
Cosa è compreso nella confezione
• 1x Unità principale
• 1x Telecomando
• 1x Manuale utente
• 1x Alimentatore
• 1x Spina CA britannica per l’adattatore di corrente.
• 1x Spina CA europea per l’adattatore di corrente.
Pannelli e controlli
Pannello anteriore
9
1
3
5
7
1. MODE – Premi per cambiare le modalità: DAB/DAB+, FM, Internet
Radio, Bluetooth, AUX IN.
Inoltre, è possibile impostare un'altra funzione dal menu <Pulsante>
in CONFIGURAZIONE: Sveglia, Dimmer varialuce, Equaliser, Radio
locale, Modalità, Preset, Temporizzatore di sonno, Timer.
NOTE: La funzione prede nita per questo tasto
è quella di modi ca della modalità.
2. STANDBY – Premi questo pulsante per accendere l'unità o per entrare
in modalità Standby.
3. MENU – Premere questo tasto per accedere all'interfaccia di imposta-
zione MENU.
4. SLEEP – Premi ripetutamente per impostare l'ora dello spegnimento
automatico.
5. ◄ – Nella schermata delle impostazioni, premi per passare alla
selezione precedente. Quando ascolti la radio, premi brevemente per
diminuire la frequenza di 0,05MHz.
6. ► – Nella schermata delle impostazioni, premi per passare alla
selezione successiva. Quando ascolti la radio, premi brevemente per
aumentare la frequenza di 0,05MHz..
7. DIMMER – Premi per regolare il livello della retroilluminazione.
8. PRESET – Quando ascolti la radio su Internet, premere questo pulsan-
te per passare alla schermata Stazione Radio/Musica.
9. DISPLAY SCREEN –Premi per visualizzare le informazioni.
Pannello posteriore
11
12
E
D
O
M
U
N
E
M
R
E
M
M
I
D
P
R
E
S
E
T
2
4
6
8
10
13
AUX IN
DC 12V
14
10. Manopola del volume / Manopola di selezione / pulsante OK –
Durante la riproduzione, ruota la manopola per regolare il volume.
Durante l'impostazione del menu, ruota la manopola per selezionare
le opzioni, poi premi per confermare la selezione.
11. Antenna FM – Serve a ricevere il segnale FM.
12. Ingresso cuffi e – Ingresso jack da 3,5mm per cu e.
13. AUX IN – Connetti un cavo audio da 3,5mm per utilizzare una sorgen-
te audio esterna.
14. DC 12 V – Alimentazione 12 V.
Telecomando
1
2
3
4
5
6
7
8
9
10
11
12
13
14
1. STANDBY – Premi il tasto STANDBYsul telecomando per riattivare
l'unità o per passare alla modalità Standby.
2. SOURCE – Premere il tasto SOURCE per cambiare le modalità di riprodu-
zione: DAB / DAB +, FM, AUX IN, Bluetooth, Radio Internet.
Nota: questo pulsante può essere utilizzato come un'altra funzione
impostando dalla voce <Pulsante> in CONFIGURAZIONE: Sveglia,
Dimmer Varialuce, Equaliser, Radio locale, Modalità , Preset, Temporizzatore di Sonno, Timer
3. MENU – Premi il pulsante MENU sul telecomando o sul pannello
anteriore per accedere al menu, poi premi i pulsanti di DIREZIONE o
ruota la Manopola di selezione per navigare nel menu: Radio Internet,
FM, DAB/DAB+, Spotify, Centro informazioni, AUX, Bluetooth, Con gurazione, Radio locale.
4. SU / 5. OK / 6. SINISTRA / 7. GIÙ / 17. DESTRA – Usa i pulsanti SU e GIÙ
o ruota la Manopola di selezione per scorrere tra le opzioni, poi premi
il pulsante OK per confermare la selezione.
8. VOL- / 18. VOL+ – Per regolare il volume, premi i pulsanti VOL+ e VOL-,
oppure ruota direttamente la manopola del volume.
9. RIPRODUZIONE/PAUSA – Premi il pulsante RIPRODUZIONE/PAUSA
per mettere in pausa o riprendere la riproduzione.
10. INDIETRO / 19. AVANTI – Mentre ascolti la musica, premi il pulsante
INDIETRO o AVANTI per passare alla traccia precedente o successiva.
Mentre ascolti la radio, premi il pulsante INDIETRO o AVANTI per
passare alla stazione precedente o successiva.
11. ALARM – Premi il pulsante ALARM per visualizzare e creare le opzioni
relative alle sveglie.
SOURCE
MENU
OK
VOL- VOL+
SLEEP ALARM
EQ
1
2
ABC DEF
5
4
GHI JKL MNO
7
8 9
PQRS TUV WXYZ
WPS DIMMER
0
15
INFO
16
17
18
19
FAV
20
21
3
6
22
Page 42

40
12. SLEEP – Premi ripetutamente il pulsante SLEEP per impostare l'ora
desiderata per lo spegnimento automatico.
13. NUMERO/LETTERA – Premi per inserire numeri o lettere nelle imposta-
zioni del menu.
14. WPS – WPS Impostazioni
15. MUTO – Premi il pulsante MUTO per mettere in muto; per riattivare
isuoni, premi ancora o premi i pulsanti VOL+/- sul telecomando
oruota la manopola del volume sul pannello superiore.
16. INFO – Premi il pulsante INFO per consultare le informazioni sulla stazione.
20. EQ – Premi ripetutamente il pulsante EQ per scegliere tra diverse
equalizzazioni del suono: Normale, Flat, Jazz, Rock, Colonne sonore,
Classica, Pop, News, My EQ.
21. FAV – Tieni premuto a lungo il pulsante FAV per salvare la stazione. Premi
brevemente il pulsante FAV per visualizzare le stazioni preferite salvate.
22. DIMMER – Premi il pulsante DIMMER per selezionare il livello della
retroilluminazione.
Installazione o sostituzione delle batterie del telecomando
1. Premere il fermo sul coperchio della batteria in direzione della
freccia in rilievo sulla parte posteriore del telecomando.
2. Mentre si preme il fermo, aprire il coperchio della batteria.
3. Inserire due batterie rispettando la polarità +,- come indicato. Quando
si sostituiscono le batterie usare solo lo stesso tipo di batteria fornita.
4. Reinserire il coperchio della batteria e ssarlo al suo posto.
Con gurare la radio Internet
Collega l'alimentatore all'ingresso DC IN. Un messaggio di benvenuto
apparirà sullo schermo.
Assicurati che l'antenna sia estesa il più possibile. Ciò permetterà di
ottenere il miglior segnale possibile.
Dopo la schermata di benvenuto, se è la prima volta che usi questa radio,
sarà possibile selezionare la lingua ruotando la Manopola di selezione e
confermare la selezione premendo il pulsante OK .
Dopo aver impostato la lingua, lo schermo mostrerà “Attivare Controlla
rete all'accensione?”. Puoi scegliere “Sì ” o “No” per decidere se
permettere che l'unità ricerchi la rete quando viene accesa.
Con gurazione Wi-Fi manuale
Dopo l'impostazione precedente, la schermata mostrerà ”Vuoi
con gurare la rete ora?”.
• Selezionando “Sì”, la radio inizia la scansione delle reti vicine. Dopo la
scansione, devi scegliere la rete a cui connetterti. Dopodiché, digita lettere e numeri ruotando la Manopola di selezione o premendo i pulsanti
NUMERO/LETTERA nché non appare la giusta lettera o numero, poi
premi il pulsante DESTRA per passare alla prossima digitazione. Una
volta terminato, premi il pulsante OK per confermare.
• Selezionando “No”, sarà possibile con gurarlo in un secondo momento
tra le impostazioni di con gurazione.
Rete wireless (PBC WPS)
Se alla domanda “Vuoi con gurare la rete ora?”” selezioni “Sì (WPS)”, la
radio comincerà a cercare le connessioni Wi-Fi.
Dopo averlo selezionato, saranno disponibili 120 secondi per premere il
pulsante WPS sul tuo modem Wi-Fi. In questo modo si connetterà il Wi-Fi
alla radio senza dover inserire manualmente la password.
Connessione Wi-Fi completa!
Una volta completata la con gurazione manuale del Wi-Fi digitando manualmente la password o attraverso il WPS, tornerai alla schermata del menu e il
segnale Wi-Fi apparirà in bianco in alto a sinistra. La radio Internet è pronta!
Con gurazione
Usa i pulsanti SINISTRA/DESTRAoppure ruota la Manopola di selezione
per scegliere <Con gurazione> sulla schermata Menu principale, poi
premi il pulsante OK per entrare nelle impostazioni di con gurazione.
Visualizzazione ora
Seleziona il tipo di visualizzazione dell'ora: Analogico o digitale.
Gestione di “my mediaU”
Imposta la funzione su Abilita o Disabilita.
Il codice QR mediaU è disponibile in Con gurazione > Gestisci mediaU >
Abilita.
Rete
• Con gurazione rete wireless
• Nelle impostazioni di Rete, puoi con gurare la connessione Wi-Fi
selezionando Con gurazione rete wireless. La radio quindi inizierà a
cercare le connessioni Wi-Fi disponibili.
• Trova la tua connessione Wi-Fi e selezionala premendo OK. Per digitare
lettere/numeri, usa la Manopola di selezione oppure premi i pulsanti
LETTERA/NUMERO nché non viene mostrato il carattere corretto.
Quindi premi il pulsante DESTRA per passare al carattere successivo.
Premi il pulsante SINISTRA se vuoi tornare al carattere precedente.
Una volta terminato, premi il pulsante OK per confermare.
• Una volta che il Wi-Fi è connesso, verrà mostrata la schermata menu
principale e il segnale Wi-Fi apparirà in bianco nell'angolo in alto a
sinistra.
• Rete wireless (PBC WPS)
• Seleziona questa opzione per cercare la connessione Wi-Fi. Dopo aver-
la selezionata, saranno disponibili 120 secondi per premere il pulsante
WPS sul tuo modem Wi-Fi. In questo modo si connetterà il Wi-Fi alla
radio senza dover inserire manualmente la password.
• Con gurazione manuale
• Puoi impostare manualmente i dati wireless: DHCP, Digita SSID e
Gestisci.
• Controlla rete all'accensione
• Imposta su Abilita o Disabilita.
Data e ora
• Imposta Data e ora
• Con gurazione manuale o Rilevazione automatica
È disponibile l'opzione per impostare manualmente data e ora invece
di utilizzare la rilevazione automatica. Ruota la Manopola di selezio-
ne oppure premi i pulsanti con i numeri per inserire le cifre del mese.
Una volta inserite le cifre giuste, premi il pulsante DESTRA per passare
alle impostazioni relative al giorno. Continua questa procedura per
l'anno, l'ora e i minuti. Una volta completata la con gurazione manuale, premi il pulsante OK per confermare. Per cancellare il formato
di data e ora, puoi modi care queste impostazioni sotto la funzione
“Data e ora”.
• Formato Ora: Imposta il formato in base a cicli di 12 o 24 ore.
• Imposta formato data: AAAA/MM/GG, GG/MM/AAAA, MM/GG/AAAA
Sveglia
• Con gurazione di Sveglia 1/ Sveglia 2
• Per impostare una sveglia sulla radio, vai alle impostazioni “Con gurazione” e scorri no a selezionare “Sveglia” o premi direttamente il
pulsante ALARM sul telecomando.
• Una volta nella schermata delle impostazioni Sveglia, seleziona“Sveglia 1 (Disattiva)” o “Sveglia 2 (Disattiva)” e scegli “Attiva” per
attivare la sveglia.
• Seleziona “Ripeti” per impostare la regolarità della sveglia, poi premi il
pulsante OK. Puoi scegliere di far suonare la sveglia Ogni giorno, Una
volta o singoli giorni speci ci. Una volta selezionata un'opzione, premi
il pulsante SINISTRA per tornare alle impostazioni della sveglia.
Page 43

ITIT
• Seleziona “Ora” e ruota la Manopola di selezione per selezionare
l'ora della sveglia. Una volta trovate le ore desiderate, premi il pulsante
DESTRA per cambiare i minuti.
• Una volta indicati i valori giusti per i minuti, premi il pulsante DESTRA
per cambiare “AM” o “PM”, poi premi OK per confermare e tornare
alle impostazioni della sveglia.
• Ora scorri verso il basso e seleziona “Suono” premendo il pulsante
OK. Ora puoi scegliere tra Bip, Melodia, Radio Internet FM oppure
DAB/DAB+.
• Se imposti il suono della sveglia su Radio Internet, FM o DAB/DAB+, la
schermata ti porterà alle tue stazioni preferite preimpostate. Seleziona
la stazione da usare per la sveglia premendo il pulsante OK.
• Il simbolo della sveglia apparirà sulla schermata principale.
• Come annullare una sveglia
• Per annullare la tua sveglia, seleziona “Sveglia” nelle impostazioni
Con gurazione o tramite il pulsante ALARM e seleziona la sveglia che
vuoi disattivare.
• Una volta selezionata la sveglia, avrai la possibilità di spegnerla o
accenderla. Seleziona l'opzione “Disattiva” e premi il pulsante OKper
confermare.
NO TA: Cambia il volume della sveglia nell'impostazione “Volume
allarme” nella schermata delle impostazioni della sveglia.
• Come spegnere la sveglia mentre sta suonando
Quando la sveglia suona, premi il pulsante ALARM oppure STANDBY
sul telecomando per spegnerla. Se hai impostato la sveglia in modo che
suoni ogni giorno o più di una volta, l'icona della sveglia resterà sullo
schermo.
• Come posticipare la sveglia
Quando la sveglia suona, premi qualsiasi pulsante al di fuori di STANDBY
oppure ALARM per interrompere il suono e passare in modalità Posticipa.
La funziona Posticipa farà suonare nuovamente la sveglia dopo 5 minuti.
NO TA: Termina la funzione POSTICIPA della sveglia
premendo il pulsante ALARM oppure STANDBY.
• Allarme NAP
• Dopo aver selezionato l'opzione “Sveglia” nelle impostazioni
Con gurazione oppure il pulsante ALARM sul telecomando, seleziona
“Allarme NAP (Disattiva)”.
• Scegli tra quanti minuti vuoi che la sveglia suoni: Disattiva, 5 minuti,
10 minuti, 20 minuti, 30 minuti, 60 minuti, 90 minuti, 120 minuti.
• Volume allarme
• Cambia il volume della sveglia ruotando la Manopola del volume
oppure premendo i pulsanti SINISTRA/DESTRA.
• Una volta scelto il volume, premere il pulsante OK per confermare.
Timer
• Nelle impostazioni “Con gurazione”, seleziona l'opzione “Timer” e sul
display apparirà 00:00.
• Per aggiungere secondi, premi il pulsante DESTRA. Per diminuire i
secondi, premi il pulsante SINISTRA. Premi e tieni premuto i pulsanti
SINISTRA/DESTRA per scorrere il timer rapidamente.
• Una volta scelto il timer desiderato, confermalo premendo il pulsante
OK.
Lingua
Seleziona la lingua desiderata all'interno dell'elenco.
Dimmer varialuce
• Per impostare la luminosità della radio, vai nelle impostazioni “Con gurazione” e seleziona “Dimmer”. Puoi scegliere“Risparmio energetico”
o “Attiva”.
• Seleziona la modalità “Risparmio energetico” per impostare il livello
di luminosità con una scelta no a 20 livelli. Quando non viene rilevata
alcuna attività della radio per 15 secondi, il livello di luminosità si
abbasserà nché non verrà premuto un pulsante, riattivando la modalità
“Attiva”.
• Seleziona la modalità “Attiva” perché sia la luminosità per quando la
radio è attiva e in uso.
• In alternativa, puoi impostare due impostazioni di luminosità premendo
il pulsante DIMMER sul telecomando o direttamente sul pannello
anteriore dell'unità.
Display
Scegli le impostazioni relative al colore del display tra Colore o
Monocromatico.
Risparmio energia
Seleziona per con gurare la radio in modo che vada in modalità Standby
automaticamente dopo un determinato periodo di inattività o se non
c'è alcun segnale Wi-Fi. Puoi selezionare 5/15/30 minuti prima di andare
in modalità Standby, oppure puoi selezionare “Disattiva” per ignorare
questa funzione.
Temporizzatore di sonno
• Per impostare un temporizzatore di sonno, vai alle impostazioni “Con-
gurazione” e seleziona “Temporizzatore di sonno”. Puoi scegliere tra
Disattiva, 15, 30, 60, 90, 120, 150, 180 minuti.
• In alternativa, puoi premere ripetutamente il pulsante SLEEP sul teleco-
mando per cambiare la durata visualizzata in alto a destra sul display. Si
può scegliere tra 15, 30, 60, 90, 120, 150, 180 minuti.
• Una volta selezionato Temporizzatore di sonno, in alto a destra sul
display appariranno la durata del timer e un'immagine che rappresenta
il sonno.
Radio Internet
• Impostare la radio Internet: Bu er e Sound Quality.
• Buff er: Con gura la durata del bu er della riproduzione musicale: 2/4/8
secondi.
• Sound Quality: Regola la qualità del suono come preferisci: High (Alta)
/ Low (Bassa).
Meteo
• De nisci località: Scegli e conferma la tua località.
• Unità di misura della temperatura: Scegli la tua unità preferita per la
temperatura tra “Celsius” e “Fahrenheit”.
• Mostra in Standby: Scegli se attivare o disattivare la visualizzazione delle previsioni meteo sullo schermo in Standby. Se attivi la visualizzazione
delle previsioni meteo, queste appariranno sul display in Standby ogni
10 secondi.
Impostazione FM
• Modalità: Puoi scegliere tra la modalità “Mono” o “Stereo”.
• Soglia: Scegli le impostazioni relative alla soglia (Ricerca soglia/Soglia
stereo).
• (La soglia serve a impostare il passaggio automatico tra le modalità
mono e stereo. Quando ti trovi in un luogo con ricezione debole, il sistema passerà automaticamente in modalità mono per ridurre il rumore di
fondo della stazione, in modo da garantire un ascolto più chiaro.)
Con gurazione radio locale
Imposta manualmente la tua località per la radio locale piuttosto che
eseguire il rilevamento automatico.
Pulsante
In questa interfaccia di con gurazione, puoi selezionare “Sveglia”,
“Dimmer varialuce”, “Equaliser”, “Radio locale”, “Modalità”, “Preset”,
“Temporizzatore di sonno” e “Timer” per confermare la funzione del
pulsante MODE sul pannello frontale e sul telecomando.
Equaliser
L'equalizzatore prede nito è Normale. Puoi cambiarlo in Flat, Jazz, Rock,
Colonne sonore, Classica, Pop, News o my EQ.
Riprendere quando acceso
Attiva la funzione che vuoi che la radio riprenda quando viene accesa. La
schermata, invece, resterà nel menu principale.
Aggiornamento software
Qui verrà segnalato se è disponibile un aggiornamento del software per la
radio. Se è disponibile un aggiornamento, selezionalo per avviarlo.
Page 44

42
Ripristina prede niti
Seleziona questa opzione per ripristinare la radio e cancellare tutte le
impostazioni e i preset creati. Conferma che intendi ripristinare l'unità
premendo“Sì”.
Radio Internet
Usa il pulsante SINISTRA/DESTRA o ruota la Manopola di selezione per
selezionare <Radio Internet> nella schermata menu, premi il pulsante OK
per entrare, quindi appariranno diverse opzioni:
I miei preferiti: Le stazioni preferite saranno salvate qui per essere caricate
facilmente. Puoi premere il pulsante FAV per visualizzare l'elenco delle
stazioni preferite.
Stazione Radio/Musica: Seleziona questa opzione per scorrere tra le
stazioni radio Internet nelle seguenti categorie: Top 20 mondiali, Genere,
Paese/località, In evidenza. Individua le stazioni all'interno delle categorie
rilevanti e selezionare le stazioni scelte premendo il pulsante OK.
Radio locale: La radio è impostata in modo da rilevare automaticamente
le 10 stazioni principali o tutte le stazioni del tuo paese, nonché una varietà
di generi in categorie disposte in ordine alfabetico. Seleziona la categoria
che vuoi ascoltare con il pulsante OK e continua a navigare no a trovare la
stazione desiderata.
Sleep Radio: Scegli tra diversi suoni rilassanti.
Cronologia: Scorri tra le stazioni radio ascoltate di recente.
Servizio: Cerca Stazione Radio o Aggiungi Nuova Stazione Radio o App.
• Puoi usare i pulsanti NUMERO/LETTERA per cercare le stazioni radio.
• Per aggiungere una nuova stazione radio, usa i pulsanti NUMERO/LETTERA
per selezionare il carattere scelto e premi il pulsante DESTRA per passare al
prossimo carattere. Per tornare al carattere precedente, premi il pulsante SI-
NISTRA per evidenziarlo. Premi il pulsante OK per cercare la stazione radio.
Salvare le stazioni radio Internet preferite
Quando hai trovato la stazione radio desiderata, premi e tieni premuto il
pulsante FAV per andare alla schermata
“Aggiungi a I Miei Preferiti”. Ruota la Manopola di selezione o premi
ipulsanti SU/GIÙ per scegliere il numero del preset e premi il pulsante OK
per confermare l'opzione.
Radio FM
Richiamare una stazione memorizzata
1. Premi i pulsanti INDIETRO/AVANTIsul telecomando per passare al
preset stazione precedente o successivo.
2. Oppure puoi premere il pulsante FAV per selezionare la stazione
memorizzata, quindi premere OK per ascoltarla.
DAB/DAB+
Usa i pulsanti SINISTRA/DESTRAoppure ruota la Manopola di selezione
per scegliere <DAB/DAB+> sulla schermata Menu, poi premi il pulsante
OK per entrare nella modalità DAB/DAB+.
Al primo utilizzo del DAB sulla radio, inizierà la scansione di stazioni DAB
e apparirà il messaggio Scansione” sul display. Verrà mostrato quante
stazioni sono state trovate man mano che la ricerca continua.
Una volta che tutte le stazioni disponibili sono state trovate, la schermata
della radio mostrerà le stazioni selezionabili. Usa la Manopola di selezione
per scorrere tra le stazioni e selezionare quella desiderata. Seleziona la
stazione premendo il pulsante OK.
Quando hai selezionato una stazione, la schermata mostrerà la stazione ed
essa verrà avviata.
Per scegliere la stazione precedente o successiva, premi il pulsante
INDIETROo AVANTI.
Una volta trovata la stazione desiderata, premi il pulsante INFO per
mostrare le informazioni sulla stazione. La schermata farà scorrere le
informazioni automaticamente, mostrando genere, MHz, titolo della
canzone, KHz e Kbps.
Per tornare all'elenco per scorrere manualmente, premi il pulsante
SINISTRA.
Pre-impostare le stazioni DAB/DAB+ preferite
Una volta trovata la stazione desiderata, tieni premuto il pulsante FAV per
alcuni secondi per passare alla schermata “Aggiungi a I Miei Preferiti”.
Ruota la Manopola di selezione per scegliere il numero del preset e premi
il pulsante OK per confermare.
In alternativa, quando ti trovi nella schermata dell'elenco delle stazioni
DAB, puoi selezionare la stazione scelta e tenere premuto FAV per seguire
la procedura indicata sopra.
Per visualizzare le stazioni preferite preimpostate, premi il pulsante FAV,
poi usa il pulsante SU o GIÙ per scorrere nell'elenco dei preset.
Le frequenze FM vanno da 87.5MHz a 108.00 MHz. Stendi l'antenna
per trovare il segnale più forte per ciascuna stazione.
Usa i pulsanti SINISTRA/DESTRAoppure ruota la Manopola di selezione
per scegliere <FM > sulla schermata Menu, poi premi il pulsante OK per
entrare nella schermata FM.
Sintonizzare le stazioni
Premi i pulsanti SU/GIÙ sul telecomando o sul pannello frontale per regolare
la frequenza, aumentandola o diminuendola di 0.05 MHz alla volta.
Premi i pulsanti SINISTRA/DESTRAsul telecomando per passare alla
stazione precedente o successiva con la ricezione più forte. Una volta
trovata una stazione, la scansione automatica si arresta.
Premi il pulsante OK , “Scansione automatica” apparirà sullo schermo. Se
scegli “Sì”, la radio comincerà a cercare stazioni dalle frequenze basse a
quelle alte. Quindi salverà le stazioni automaticamente.
Memorizzare le stazioni
Per salvare la tua stazione preferita, sintonizzati prima su di essa, poi tieni
premuto a lungo FAV sul telecomando, dopodiché usa i pulsanti SU/GIÙ o
ruota la Manopola di selezione per scegliere il numero che vuoi salvare.
Quindi, premi il pulsante OK per confermare il preset.
Centro informazioni
Usa il pulsante SINISTRA/DESTRA o ruota la manopola di selezione per
selezionare <Centro informazioni> nella schermata Menu, poi premi il
pulsante OK per entrare nella schermata Centro informazioni.
Informazioni meteo: Per selezionare le informazioni meteo per un
posto desiderato, prima seleziona il continente usando la Manopola di
selezione per scorrere e poi il pulsante OK per confermare. Dopodiché,
seleziona prima il paese, poi la città.
Una volta selezionata la città, verranno mostrate le seguenti informazioni:
temperatura attuale, simbolo meteo, intervallo temperatura
approssimativo per i prossimi 5 giorni.
Informazioni nanziarie: Seleziona da una gamma di indici di borsa da
tutto il mondo. Usate la
Manopola di selezione per scorrere e poi il pulsante OK per confermare.
Informazioni sul sistema: Visualizza la versione del sistema e le
informazioni sulla connessione wireless. Se sono selezionate le
informazioni sul wireless, puoi vedere informazioni, ad esempio, sulla forza
del segnale Wi-Fi.
Page 45

ITIT
Spotify Connect
Questo prodotto è compatibile con Spotify Connect, permettendolo di
funzionare da altoparlanti wireless controllati dall'app Spotify disponibile
per dispositivi smart iOS e Android e da un client desktop per PC. Per
entrare in modalità Spotify Connect, premi il pulsante MENU per aprire
la schermata del menu principale, ruota la manopola di selezione per
scorrere tra le diverse voci no a quando il logo Spotify viene evidenziato,
quindi premi brevemente la manopola di selezione per selezionare.
NOTE: Un account Spotify Premium è necessario per usare Spotify Connect.
NOTE: Assicurati che il prodotto abbia l'opzione <Keep Network
Connected> attivata. In questo modo, lo streaming di Spotify
sarà attivo sull'unità quando è in modalità Sleep o in modalità
non connessa alla rete come DAB/DAB+, FM e Aux In.
Quando la modalità Spotify Connect è selezionata, prima che venga
stabilita una connessione con un'app Spotify, apparirà
il messaggio <Waiting for Users>.
NOTE: Potrebbero volerci no a 10 secondi perché la
copertina dell'album venga mostrata sul display.
Come usare Spotify Connect
Ascolta a tutto volume con Spotify Connect
1. Connetti il tuo Sharp DR-I470 alla tua rete Wi-Fi.
2. Avvia l'app Spotify sul tuo telefono, tablet o laptop usando la stessa
rete Wi-Fi.
3. Riproduci una canzone e selezionare Dispositivi disponibili.
4. Seleziona Sharp DR-I470 e inizia ad ascoltare la musica.
• Per maggiori informazioni su come impostare e usare Spotify Connect visita
www.spotify.com/connect
• Il software Spotify è soggetto a licenze di terze parti disponibili qui: https://
www.spotify.com/connect/third-party-licenses
Per stabilire una connessione tra l'app Spotify e la radio, i dispositivi
devono essere connessi alla stessa rete Wi-Fi.
Per espandere le illustrazioni mostrate sull'unità, premi brevemente il
pulsante MENU. Premilo di nuovo per tornare alla schermata normale.
NOTE: Una volta che è stata stabilita una connessione, l'account Spotify viene
connesso sia all'app che all'unità, permettendo la connessione al DR-I470.
Controllando Spotify dal DR-I470, puoi cambiare il volume, avviare o
mettere in pausa l'audio, e andare avanti e indietro nella tua playlist
usando il telecomando.
I cambiamenti e ettuati dal telecomando si ri ettono sull'app Spotify
Connect e sull'unità.
Finché l'app Spotify è connessa alla radio sulla stessa rete e <Keep network
connected> è stato selezionato, solitamente puoi accendere la radio
avviando la riproduzione sull'app Spotify.
Bluetooth
Usa i pulsanti SINISTRA/DESTRAoppure ruota la Manopola di selezione
per scegliere <Bluetooth> sulla schermata Menu, poi premi il pulsante OK
per entrare nella modalità Bluetooth.
1. Vai alle impostazioni del tuo dispositivo per connetterlo alla radio via
Bluetooth.
2. Seleziona il nome “SHARP DR-I470” nell'elenco trovato sul tuo
dispositivo. Una volta connessa, la radio emetterà un segnale per
comunicare che è “Connessa”, e il messaggio “Bluetooth connesso”
apparirà sul display.
3. Seleziona l'audio desiderato sul dispositivo e riproducilo.
4. Ora è possibile ascoltare musica dal tuo dispositivo.
5. Per disconnettere i due dispositivi, passa a un'altra modalità di
riproduzione oppure spegni la funzione Bluetooth nel tuo dispositivo.
AirMusic Control - App SHARP Smart
Control
Una volta che l'utente scarica e installa l'app SHARP Smart Control sul
proprio dispositivo mobile, l'app funziona da telecomando del dispositivo.
Nota che la radio DR-I470 e il dispositivo mobile con l'app SHARP Smart
Control devono essere connessi alla stessa rete, altrimenti i due dispositivi
non riusciranno a collegarsi a vicenda. Apri l'app e vedrai un elenco di
dispositivi disponibili.
Fai click su quello appropriato per connetterlo.
NOTA : il dispositivo imposterà automaticamente la lingua della radio DR-I470
sulla stessa impostata nel dispositivo mobile con l'app SHARP Smart Control.
Il codice QR di SHARP Smart Control App è disponibile in: Internet Radio>
Servizio> App
L'app permette di controllare il dispositivo tramite il cellulare:
Scegli la scheda appropriata per gestire la radio.
Premi l'icona
Impostazioni per inserire altre informazioni (per cambiare il nome del
dispositivo, controllare gli aggiornamenti del software, e ettuare la
scansione di altri dispositivi o per visualizzare altre informazioni).
per mostrare la scheda laterale. Seleziona
Funzionamento AUX
AUX IN
Usa i pulsanti SINISTRA/DESTRAoppure ruota la Manopola di selezione
per scegliere <AUX> sulla schermata Menu, poi premi il pulsante OK per
entrare nella modalità AUX.
Connetti il cavo AUX alla radio, usando l'ingresso AUX IN sul retro. Inizia
la riproduzione dell'audio dal tuo dispositivo e questo dovrà sentirsi sulla
radio in modalità AUX.
Uscita linea (Cuffi e)
Sul pannello posteriore della radio, il jack C u ffi e ti permette di ascoltare
l'audio dalla radio attraverso le cu e. Inizia ad ascoltare audio da Radio
Internet, AUX o Bluetooth.
Page 46

44
Premi l'icona per attivare la
modalità telecomando. L'app funzionerà da
telecomando e il dispositivo mobile con l'app
SHARP Smart Control mostrerà pulsanti da
telecomando.
1. Spegnere il dispositivo
2. Pulsante OK
3. Pulsante modalità (cambia la modalità di
riproduzione)
4. Pulsante menu
5. Mostra le stazioni preferite
6. Pulsante Key (stessa funzione del pulsante
MODE sul dispositivo)
7. Timer Sleep
8. Sveglia
9. Dimmer varialuce
10. Precedente
11. Riproduci / Pausa
12. Successivo
13. Pulsanti numerici
14. Impostazioni equalizzatore
15. Muto
16. Volume +
17. Volume -
18. Pulsanti direzionali
19. Torna al menu principale dell'app
Premi
standby. Poi scegli o scatta una immagine da impostare come screen saver
sulla schermata di standby.
Premi
premuto
registrazione. Il cerchio rosso lampeggiante apparirà sull'angolo superiore
sinistro dello schermo della radio. Per riprodurre il messaggio vocale,
accedi a una scheda qualsiasi nel menu e la registrazione sarà trasmessa
attraverso l'altoparlante della radio.
Premi
sarà trasmessa attraverso l'altoparlante della radio.
Premi
sul dispositivo mobile per riprodurla tramite la radio.
Premi
prime quattro stazioni preferite.
per entrare nelle impostazioni di selezione della schermata di
per accedere all'opzione dei messaggi vocali. Premi e tieni
per registrare il messaggio vocale, lascia per terminare la
per accedere all'opzione interfono. Premi e tieni premuto
per registrare; lascia per terminare la registrazione. La registrazione
per accedere alla directory locale della musica memorizzata
per riprodurre in streaming una delle
Risoluzione dei problemi
Questo prodotto non ha componenti che possano essere riparate
dall'utente. In caso di guasto, contattate il produttore o l'agente di
servizio autorizzato. Esporre le parti interne al dispositivo può comportare
un pericolo di vita. La garanzia non copre danni causati da riparazioni
e ettuate da terze par ti non autorizzate.
Audio assente
Causa
• Volume non acceso.
Soluzione
• Regolare la manopola del volume principale.
Nessun suono dalla connessione Bluetooth
Soluzione
• Controlla se il dispositivo esterno richiede la password “0000” per iniziare.
Il Wi-Fi non si connette
Soluzione
• Assicurati che la modalità Wi-Fi sia selezionata nelle impostazioni e che la
password corretta per il modem sia stata inserita.
Suono statico
Causa
• Ricezione del segnale troppo bassa.
Soluzione
• Regolare l'antenna o spostare l'unità in un punto dove il segnale è più
forte.
Il suono è distorto
Causa
• Il volume è troppo alto
Soluzione
• Abbassare il volume
Stazione desiderata non trovata
Causa
• Segnale debole
Soluzione
• Usare la funzione di sintonizzazione manuale
Funzioni DAB assenti
Causa
• DAB non coperto nella tua area.
• Scarsa ricezione
Soluzione
• Regola la posizione dell'antenna.
Il display è vuoto.
Causa
• Ciò può veri carsi se l'emittente modi ca l'etichetta di un servizio o
rimuove un'etichetta mentre è sintonizzata.
Soluzione
• La radio cercherà di risintonizzarsi.
• Eseguire una scansione.
Alimentazione assente
Causa
• L'adattatore non è connesso alla presa su parete.
Soluzione
• Accertarsi che l'adattatore sia connesso.
Page 47

Speci che tecniche
3,16 kg
Modello DR-I470 Pro
Corrente in uscita 2 x 7 W (RMS)
Consumo energetico (max.) 28 W
Consumo energetico (standard) 8 W
Standby Consumo energetico <1 W
Frequenza FM 87.5-108 MHz
Frequenza DAB+ 174.928-239.200 MHz
Bluetooth
Versione V5.0
Bande di frequenza 2402 MHz ~ 2480 MHz
Potenza massima trasmessa 4 dBm
Adattatore di corrente
Nome modello FJ-SW1202000N
Input AC 100-240 V ~ 50/60 Hz, 0.6 A Max
ITIT
Output
Produttore
WIFI
Connessioni Wi-Fi 802.11 b/g/n; STA/AP/AP Client
B1,Xujing chang Industrial Park, Haoye Road, Fuyong 518103 Shenzhen, China
SHENZHEN FU JIA APPLIANCE CO., LTD
DC 12 V
⎓2000 mA
145 mm
354 mm
KG
185 mm
Page 48

46
NL
Belangrijke veiligheidsinstructies
Lees deze veiligheidsinstructies en let op de
volgende waarschuwingen voordat het apparaat in
gebruik wordt genomen:
Het uitroepteken in een gelijkzijdige driehoek is bedoeld
om de gebruiker te waarschuwen voor de aanwezigheid
van belangrijke bedienings- en onderhoudsinstructies in de
documentatie bij het apparaat.
Gebruik alleen de stroomvoorziening die in de
gebruikershandleiding is vermeld
Dit symbool betekent dat het product op een
milieuvriendelijke manier weggegooid dient te worden en
niet met huisvuil.
AC voltage
DC voltage
Apparatuur van klasse II
Uitsluitend voor gebruik binnenshuis
Energie-e ciëntieklasse niveau VI
Polariteit van DC-voedingsstekker
Om vuur te voorkomen houdt
altijd kaarsen en ander open
vuur verwijderd van dit product.
Warning:
• Neem bij het gebruik van dit apparaat altijd de basisvoorzorgsmaatrege-
len in acht, vooral als er kinderen aanwezig zijn.
• Kinderen dienen onder toezicht te staan om er zeker van te zijn dat ze
niet met het apparaat spelen.
• Beschadig het netsnoer niet, plaats er geen zware voorwerpen op en
trek het niet uit en buig het niet. Sluit ook geen verlengkabels aan.
Schade aan het netsnoer kan brand of elektrische schokken veroorzaken.
• Indien het voedingssnoer beschadigd is, moet deze worden vervangen
door de fabrikant, een onderhoudsdealer of gelijkwaardig gekwali ceerde personen om gevaar te voorkomen.
• Zorg ervoor dat het apparaat op een stopcontact van AC 100-240 V
50/60 Hz is aangesloten. Het gebruik van een hogere spanning kan
storingen of zelfs brandgevaar veroorzaken.
• Als de stekker niet in uw stopcontact past, moet u de stekker niet met
geweld in een stopcontact duwen.
• Schakel het apparaat uit voordat u dit loskoppelt van de stroombron om
het volledig uit te schakelen.
• Het netsnoer niet met natte handen loskoppelen of aansluiten. Dit kan
een elektrische schok veroorzaken.
• Als het apparaat langere tijd niet wordt gebruikt, dan dient u de stroom-
voorziening uit te schakelen.
• Zorg ervoor dat de netstekker altijd goed bereikbaar is.
• Dit product bevat geen onderdelen die door de gebruiker kunnen
worden gerepareerd. Neem in het geval van een defect contact op met
de fabrikant of een geautoriseerde onderhoudsafdeling. Het blootleggen van de interne onderdelen in het apparaat kan uw leven in gevaar
brengen. Onder de fabrieksgarantie vallen geen fouten door reparaties
uitgevoerd door ongeautoriseerde derden.
• Gebruik dit product niet onmiddellijk na het uitpakken. Wacht tot het
apparaat tot kamertemperatuur opwarmt alvorens u het gebruikt.
• Zorg ervoor dat dit product alleen in gematigde klimaten (niet in tropische/subtropische klimaten) wordt gebruikt.
• Plaats het product op een vlakke, stabiele ondergrond die niet onderhevig is aan trillingen.
• Zorg ervoor dat het product niet over de rand hangt van het ondersteunende meubilair.
• Om het risico op elektrische schokken of schade aan dit product te
beperken, mag u het product niet blootstellen aan direct zonlicht, stof,
regen en vocht. Stel het product nooit bloot aan druipende of spattende
vloeisto en en plaats geen met vloeistof gevulde voorwerpen op of in
de buurt van het product.
• Plaats geen met vloeisto en gevulde voorwerpen, zoals vazen, op het
apparaat.
• Installeer het apparaat niet in de buurt van warmtebronnen zoals radiatoren, verwarmingsroosters, fornuizen of andere apparaten (inclusief
versterkers) die warmte produceren.
• Plaats het product niet op een plaats waar de luchtvochtigheid hoog is
en de ventilatie slecht.
• Zorg voor een minimale afstand van 5 cm rondom het apparaat voor
voldoende ventilatie. Blokkeer de ventilatieopeningen van dit product
niet. Zorg er altijd voor dat de ventilatieopeningen niet bedekt worden
door items zoals kranten, tafelkleden, gordijnen, etc.
• Laat NOOIT iemand, vooral kinderen, iets in gaten, sleuven of andere
openingen in de behuizing van het apparaat duwen, omdat dit een
dodelijke elektrische schok kan veroorzaken.
• Storm is gevaarlijk voor alle elektrische apparaten. Indien de voeding of
antenne door bliksem wordt geraakt kan het apparaat beschadigd raken,
zelfs wanneer dit is uitgeschakeld. U moet alle kabels en aansluitingen
verwijderen van het apparaat voor een storm.
Maintenance
• Trek de stekker uit het stopcontact voordat u het apparaat schoonmaakt.
• Gebruik een zachte en schone doek om de buitenkant van het apparaat
schoon te maken. Reinig het apparaat nooit met chemicaliën of reinigingsmiddel.
Vermogensadapter
• Trek de kabel uit het stopcontact om het apparaat van het stroomnet
los te koppelen.
• Gebruik uitsluitend de meegeleverde adapter. Als u dit niet doet, kan dit
leiden tot veiligheidsrisico's en/of schade aan het apparaat.
Batterijen
• Gebruik de juiste polariteit tijdens het plaatsen van
de batterijen.
• Stel de batterijen niet bloot aan hoge temperaturen
en plaats deze niet op plaatsen waar de temperatuur snel kan oplopen, bijv. naast het vuur of in direct
zonlicht.
• Stel de batterijen niet bloot aan stralende hitte, gooi
deze niet in het vuur, haal deze niet uit elkaar en
probeer niet onoplaadbare batterijen op te laden.
Deze kunnen lekken of ontplo en.
• Gebruik nooit verschillende batterijen of meng nooit nieuwe en oude
batterijen.
• Verwijdert u batterij uit de afstandsbediening om lekkage te voorkomen,
als de afstandsbediening langere tijd (langer dan een maand) niet
gebruikt wordt,
• Als de batterijen lekken, veegt u de gelekte vloeistof in het batterijvak
weg en vervangt u de batterijen door nieuwe.
• Gebruik geen andere batterijen dan de gespeci ceerde batterijen.
Slik de batterij niet in, gevaar voor chemische brandwonden
• Als de batterij wordt ingeslikt, kan dit binnen 2 uur ernstige inwendige
brandwonden veroorzaken en tot de dood leiden. Houd nieuwe en
gebruikte batterijen uit de buurt van kinderen. Als het batterijvakje niet
goed sluit, gebruik het product dan niet meer en houd het uit de buurt
Cd
Page 49

van kinderen. Als u denkt dat batterijen zijn ingeslikt of in een deel van
het lichaam zijn geplaatst, dient u onmiddellijk een arts te raadplegen.
Verwijdering van deze apparatuur en batterijen
• Verwijder dit product en de batterijen ervan niet als onge-
sorteerd huisafval. Breng het afval terug naar een inzamelpunt voor recycling van AEEA in overeenstemming met
de lokale wetgeving. Door dit te doen helpt u het behoud
van grondsto en en beschermt u het milieu.
• In de meeste Europese landen is de verwijdering van
batterijen gereguleerd. Neem contact op met uw verkoper of plaatselijk
autoriteiten voor meer informatie.
• Het bovenstaande staat op elektrische en elektronische apparatuur en
batterijen (of de verpakking) om de gebruikers hieraan te herinneren. Als
er "Hg" of "Pb" onder het symbool staat, dan betekent dit dat de batterij
sporen van respectievelijk kwik (Hg) of lood (Pb) bevat.
• Gebruikers worden verzocht gebruik te maken van bestaande retourfaci-
liteiten voor gebruikte apparatuur en batterijen.
CE- en UKCA-verklaring:
• Hierbij verklaart Sharp Consumer Electronics Poland sp. Z o.o. dat dit
audioapparaat voldoet aan de essentiële vereisten en andere relevante
bepalingen van de RED richtlijn 2014/53/EU en de Britse voorschriften
voor radioapparatuur uit 2017.
• De volledige tekst van de EU-conformiteitsverklaring is beschikbaar via
de link www.sharpconsumer.com. Ga vervolgens naar de downloadsectie van uw model en selecteer “CE Statements” (CE-verklaringen).
NL
Page 50

48
NL
Inhoud van de doos:
• 1× Hoofdapparaat
• 1× Afstandsbediening
• 1× Vermogensadapter
• 1× Gebruikershandleiding
• 1× UK AC-stekker voor voedingsadapter
• 1× EU AC-stekker voor voedingsadapter
Panelen & bediening
Frontpaneel
9
1
3
5
7
1. MODE – Druk hierop om de modi te wijzigen: DAB/DAB+, FM, Inter-
netradio, Bluetooth, AUX IN.
U kunt ook een andere functie instellen op deze knop. Stel dit in
vanuit het menu-item <Key> in het menu CONFIGURATION: Alarm,
Dimmer, Equaliser, Local Radio, Mode, Preset, Sleep Timer, Timer.
OPMERKINGEN: De standaardfunctie voor deze knop is Moduswijziging.
2. STANDBY – Druk op deze knop om het apparaat in te schakelen of om
over te schakelen naar de stand-bymodus.
3. MENU – Naar de MENU-instellingsinterface
4. SLEEP – Druk herhaaldelijk op deze knop om de gewenste slaaptijd
in te stellen.
5. ◄ – Druk in het instellingsscherm op deze knop om naar de vorige
selectie te gaan. Als u naar de radio luister, druk dan kort op deze knop
om de frequentie in stappen van 0,05 MHz te verlagen.
6. ► – Druk in het instellingsscherm op deze knop om naar de volgende
selectie te gaan. Als u naar een radio luistert, druk dan kort op deze
knop om de frequentie te verhogen in stappen van 0,05 MHz.
7. DIMMER – Druk op deze knop het niveau van de achtergrondverlich-
ting in te stellen.
8. PRESET – Druk tijdens het luisteren naar internetradio op deze knop
om over te schakelen naar het scherm Radiozender/Muziek.
9. DISPLAY SCREEN – Druk op deze knop om de informatie te tonen.
Achterpaneel
11
12
10. Volumeknop/selectieknop/OK-knop - Draai tijdens het afspelen
aan de knop om het afspeelvolume aan te passen. Draai tijdens het
E
D
O
M
U
N
E
M
R
E
M
M
I
D
P
R
E
S
E
T
2
4
6
8
10
13
AUX IN
DC 12V
14
instellen van het menu aan de knop om de opties te selecteren; druk
op de knop om uw keuze te bevestigen.
11. FM-antenne – Om het FM-signaal te ontvangen.
12. Oortelefoonaansluiting - 3,5 mm oortelefoonaansluiting.
13. AUX IN-aansluiting – Sluit de 3,5 mm audiokabel aan om via een
extern apparaat van muziek te genieten.
14. DC-stroomingang – DC 12 V
Afstandsbediening
1
2
3
4
5
6
7
8
9
10
11
12
13
14
1. STANDBY – Druk op de knop STANDBY op de afstandsbediening om
het apparaat uit de slaapmodus te halen of om dit in de stand-bymodus te zetten.
2. SOURCE – Druk op de knop SOURCE om de afspeelmodi te wijzigen:
DAB/DAB+, FM, AUX IN, Bluetooth, Internetradio.
Opmerkingen: Deze knop kan als andere functie gebruikt worden.
Stel dit in vanuit het menu-item <Key> in het menu CONFIGURATIE:
Alarm, dimmer, equalizer, lokale radio, modus, voorinstelling, wekker,
timer.
3. MENU – Druk op de knop MENU op de afstandsbediening of op het
frontpaneel om het afspeelmenu te openen. Druk op de RICHTINGS-
knoppen of draai aan de Selectieknop om door het menu te bladeren:
Internet Radio, FM, DAB/DAB+, Spotify, Information Center, AUX,
Bluetooth, Con guration, Local Radio.
4. OMHOOG / 5. OK / 6. LINKS / 7. OMLAAG / 17. RECHTS – Scroll met de
knop OMHOOG en OMLAAG of draai aan de Selectieknop om door
de keuzes te scrollen. Druk vervolgens op de knop OK om uw selectie
te bevestigen.
8. VOL- / 18. VOL+ – Druk op de knoppen VOL+ en VOL- of draai aan de
volumeknop om het volume aan te passen.
9. PLAY/PAUSE – Druk op de knop PLAY/PAUSE om het afspelen te pauzeren. Druk nogmaals op de knop om het afspelen te hervatten.
10. PREVIOUS / 19. NEXT – Druk tijdens het afspelen van muziek op de
knop PREVIOUS of NEXT om naar het volgende of vorige nummer te
gaan. Als u naar de radio luistert, dan drukt u op de knop PREVIOUS
of NEXT om naar de vorige of volgende radiozender te gaan.
11. ALARM – Druk op de knop ALARM de alarmopties te bekijken en in
te stellen.
12. SLEEP – Druk herhaaldelijk op de knop SLEEP om de gewenste
slaaptijd te kiezen.
SOURCE
MENU
OK
VOL- VOL+
SLEEP ALARM
EQ
1
2
ABC DEF
5
4
GHI JKL MNO
7
8 9
PQRS TUV WXYZ
WPS DIMMER
0
15
INFO
16
17
18
19
FAV
20
21
3
6
22
Page 51

NL
13. NUMMER/LETTER – Als u het menu instelt, typ dan nummer of letters.
14. WPS – WPS-instellingen
15. MUTE – Druk op de knop MUTE om het geluid te dempen. Druk nog-
maals op deze knop, op de knoppen VOL+/- op de afstandsbediening
of draai aan de volumeknop op het bovenpaneel om het geluid weer
in te schakelen.
16. INFO – Druk op de knop INFO om informatie over de radiozender te
bekijken.
20. EQ – Druk herhaaldelijk op de knop EQ om verschillende geluidsweer-
gaves te kiezen: Normal, Flat, Jazz, Rock, Soundtracks, Classical, Pop,
News, My EQ.
21. FAV – Houd de knop FAV lang ingedrukt om de radiozender op te
slaan. Houd de knop FAV kor t ingedrukt om uw favoriete radiozenders
die u hebt opgeslagen te bekijken.
22. DIMMER – Druk op de knop DIMMER om het niveau van de achtergrondverlichting in te stellen
De batterijen van de afstandsbediening plaatsen of
vervangen
1. Schuif de vergrendeling op het batterijdeksel in de richting van de pijl
op de achterkant van de afstandsbediening.
2. Open het batterijdeksel terwijl u op de vergrendeling drukt.
3. Plaats twee batterijen en let daarbij op de polariteit "+" en "-" zoals
afgebeeld. Gebruik bij het vervangen van de batterijen uitsluitend
batterijen van hetzelfde type als de meegeleverde batterijen.
4. Plaats het batterijklepje weer terug en klik dit op zijn plaats.
Uw internetradio opstarten
Steek de stroomadapter in de DC IN-aansluiting. Dan verschijnt de melding
"Welcome" op het scherm.
Zorg ervoor dat de antenne zo ver mogelijk is uitgeschoven. Hierdoor
ontvang u het best mogelijke signaal.
Als dit de eerste keer is dat u uw radio gebruikt, dan kunt u na het
welkomstscherm de taal selecteren door te scrollen met de Selectieknop.
Bevestig uw keuze door op de knop OK te drukken.
Nadat u de taal hebt ingesteld, verschijnt de melding "Enable Check
Network when Power On?" op het scherm. U kunt “YE S” of “ NO” kiezen
om te beslissen of het apparaat het netwerk al dan niet moet controleren
als u het inschakelt.
Handmatige wi -instelling
Na de bovenstaande instelling verschijnt de melding "Would you like to
con gure Netwerok now?" op het scherm.
• Als u "YES" selecteert, dan begint de radio te scannen naar netwerken
in de buurt waarmee u verbinding kunt maken. Na het scannen moet u
het netwerk kiezen waarmee u verbinding wilt maken. Voer vervolgens
letters/cijfers door te scrollen met de Selectieknop of door op de
knoppen NUMMER/LETTER te drukken, totdat het juiste cijfer wordt
weergegeven. Klik op de knop RECHTSom naar het volgende cijfer te
gaan. Zodra u klaar bent, drukt u op de knop OK om te bevestigen.
• Als u “NO” selecteert, dan kunt u dit later instellingen in de con guratie-
-instellingen.
Draadloos netwerk (WPS PBC)
Als u in het stadium “Would you like to con gure network now?”
“YES(WPS)” selecteert, dan begint uw radio te zoeken naar wi -
verbindingen.
Terwijl dit is geselecteerd, hebt u 120 seconden om op de knop WPS-knop
op uw wi -modem te drukken. Hiermee verbindt u de radio met uw wi netwerk zonder dat u handmatig het wachtwoord hoeft in te voeren.
Wi -verbinding compleet!
Zodra u de wi -verbinding succesvol tot stand hebt gebracht door uw
wi -wachtwoord via WPS in te voeren, komt u op het hoofdmenuscherm
en verschijnt het wi -signaal linksboven in het wit. Uw internetradio is nu
ingesteld!
Con guratie
Gebruik de knoppen LINKS/RECHTS of draai aan de Selectieknop om
<Con guration> te kiezen in het hoofdmenuscherm. Druk op de knop OK
om de con guratie-instellingen te openen.
Tijdsweergave
Stel het type tijdweergave in: analoog of digitaal.
Mijn mediaU beheren
Stel de functie in op Inschakelen of Uitschakelen.
De MediaU QR-code is beschikbaar in Con guratie > Beheer mijn mediaU >
Inschakelen
Netwerk
• Het draadloze netwerk con gureren
• In de netwerkinstellingen kunt u een wi -verbinding instellen door
"Draadloos netwerk con gureren" te selecteren. De radio beginnen te
zoeken naar beschikbare wi -verbindingen.
• Zoek uw wi -verbinding en selec teer deze met knop OK. Om letters/
cijfers te typen, gebruikt u de Selectieknop of drukt u op de knoppen
LETTER/NUMMER totdat het juiste cijfer wordt weergegeven. Druk
vervolgens op de knop RECHTS om naar het volgende cijfer te gaan.
Druk op de knop LINKS als u terug wilt gaan naar het vorige cijfer.
Zodra u klaar bent, drukt u op de knop OK om te bevestigen.
• Zodra uw wi -verbinding tot stand is gebracht, wordt het hoofdmenuscherm geopend en verschijnt het WIFI-signaal in het wit in de
linkerbovenhoek.
• Draadloos netwerk (WPS PBC)
• Selecteer deze optie om naar een wi -verbinding te zoeken. Terwijl dit
is geselecteerd, hebt u 120 seconden om op de knop WPS-knop op uw
wi -modem te drukken. Hiermee verbindt u de radio met uw wi -netwerk zonder dat u handmatig het wachtwoord hoeft in te voeren.
• Handmatige con guratie
• U kunt de draadloze gegevens handmatig instellen: DHCP, SSID
invoeren en Beheren.
• Netwerk controleren bij inschakelen
• Stel dit in op Inschakelen of Uitschakelen.
Datum & tijd
• Datum en tijd instellen
• Handmatig instellen of automatisch detecteren
U hebt de mogelijkheid om de tijd en datum handmatig in te stellen,
in plaats van de datum en tijd automatisch te detecteren. Draai aan de
Selectieknop of druk op de cijferknoppen om het gewenste cijfer van
de maand in te voeren. Zodra u het juiste cijfer hebt, klikt u op knop
RECHTS om naar de daginstelling te gaan. Zet dit proces voort met
het jaartal, het uur en de minuten. Zodra de handmatige instelling
voltooid is, drukt u op de knop OK om alles in te voeren. Om het
formaat van de datum en de tijd te annuleren, kunt u deze instellingen
wijzigen onder de functie "Datum & Tijd".
• Tijdsformaat instellen: Om het tijdsformaat in te stellen, 12-uursof
24-uurs.
• Datumformaat instellen: JJJJ/MM/DD, DD/MM/JJJJ, MM/DD/JJJJ
Wekker
• Wekker 1/wekker 2 instellen
• Om een alarm op uw radio in te stellen, gaat u naar "Con guration"-
-instellingen. Scroll door en selecteer "Alarm" of klik op knop ALARM
op de afstandsbediening.
• Nadat u het instelscherm voor het alarm hebt geopend, selecteert u
"Alarm 1 (Turn Off )" of “Alarm 2 (Turn Off )". Kies dan "Turn On" om
de wekker in te stellen.
• Selecteer “Repeat” om in stellen met welke regelmaat de wekker moet
afgaan. Klik op de knop OK. U kunt kiezen tussen Everyday, Once of u
selecteert afzonderlijke dagen waarop de wekker moet afgaan. Zodra
u een selectie hebt gemaakt, drukt u op de knop LINKS om terug te
gaan naar de andere wekkerinstellingen.
• Selecteer “Time” en draai aan de Selectieknop om de uren te selecteren. Zodra u het gewenst uur hebt gevonden, drukt u op de knop
RECHTS om de minuten in te stellen.
• Zodar u de minuten juist hebt ingesteld, drukt op op de knop RECHTS
om “AM” of “PM” in te stellen. Druk vervolgens ter bevestiging op de
knop OK en ga terug naar de wekkerinstellingen.
Page 52

50
NL
• Scroll dan omlaag en selecteer het “Sound” door op de knop OK
te drukken. U hebt dan de keuze uit een pieptoon, een melodietje,
Internetradio, FM of DAB/DAB+.
• Als u de wekker instelt op Internetradio, FM of DAB/DAB+, dan wordt
u nu door uw vooraf ingestelde favoriete zenders geleid. Selecteer
de gewenste radiozender waarmee u gewekt wil worden door op de
knop OK te drukken.
• Het wekkersymbool verschijnt op het hoofdscherm.
• De wekker annuleren
• Om de wekker te annuleren, selecteert u “Alarm” in de con guratie -
-instellingen of u selecteert dit met de knop ALARM. Kies vervolgens
welke wekker u wilt annuleren.
• Zodra de wekker is geselecteerd, hebt u de mogelijkheid om deze in
of uit te schakelen. Markeer de optie "Turn Off " en druk op de knop
OK om te bevestigen.
OPMERKING: Wijzig het wekkervolume via de instelling
“Alarm Volume” in het scherm wekkerinstellingen.
• De wekker uitschakelen als deze afgaat
Als de wekker afgaat, dan drukt u op de knop ALARM of STAND-BY
op de afstandsbediening om de wekker uit te zetten. Als u een wekker
hebt ingesteld om elke dag of meer dan eens af te gaan, dan blijft het
wekkersymbool op het scherm staan.
• De wekker SNOOZEN
Als de wekker afgaat, dan kunt u op elke willekeurige knop met uitzondering van de knoppen STAND-BY of ALARM drukken om het geluid in
te zetten en om de wekker in de SNOOZE-modus te zetten. De SNOOZE-
-functie laat het radiogeluid na 5 minuten opnieuw afgaan.
OPMERKING: Annuleer het SNOOZEN door op de
knop ALARM of STANDBY te drukken.
• Dutjeswekker
• Nadat u de optie "Alarm" hebt geselecteerd in de con guratie-instel-
lingen of nadat u op de knop ALARM op de afstandsbediening hebt
gedrukt, selecteert u "NAP Alarm (Turn Off )".
• Kies hoeveel minuten u de dutjeswekker wilt laten afgaan. U hebt
de volgende opties: Turn O , 5 minuten, 10 minuten, 20 minuten, 30
minuten, 60 minuten, 90 minuten, 120 minuten.
• Wekkervolume
• Wijzig het wekkervolume door te draaien aan de Volumeknop of door
op de knoppen LINKS /RECHTS te drukken.
• Zodra u het juiste volume hebt gekozen, drukt u op de knop OK om
te bevestigen.
Timer
• In de "Con guration"-instellingen selecteert u de optie "Timer" . Er
verschijnt een scherm met 00:00.
• Om het aantal seconden te verhogen, drukt u op de knop RECHTS. Om
het aantal seconden te verlagen, drukt u op de knop LINKS. Houd de
knoppen LINKS/RECHTS ingedrukt om sneller door de timer te gaan.
• Zodra u de juiste timerinstelling hebt gekozen, bevestigt u dit door op
de knop OK te drukken.
Taal
Selecteer de gewenste taal in de lijst.
Dimmer
• Om de helderheid van uw radio in te stellen, gaat u naar de “Con guration”-instellingen en selecteert u “Dimmer” . U kunt kiezen uit de modi
“Power Saving” of “Turn On”.
• Selecteer de modus “Power Saving” om de helderheidsniveaus te
wijzigen. U hebt hierbij de keuze uit maximaal 20 niveaus. Als er gedurende 15 seconden geen activiteit is op de radio, dan wordt dit lagere
helderheidsniveau ingesteld totdat u op een knop drukt en de instelling
"Turn On" wordt geactiveerd.
• Selecteer de modus “Turn On” als helderheidsniveau als de radio actief
en in gebruik is.
• U kunt ook twee helderheidsinstellingen wijzigen door op knop DIMMER op de afstandsbediening of op het voorpaneel te drukken.
Display
Kies voor de weergave van het display Color of Monochrome.
Energiebeheer
Selecteer dit om de radio zo in te stellen dat deze automatisch in
stand-bymodus gaat na een ingestelde tijd van inactiviteit of als er geen
wi -signaal is. U kunt selecteren dat de radio na 5/15/30 minuten naar de
stand-bymodus overschakelt. U kunt ook “Turn Off ” selecteren om deze
functie te negeren.
Slaaptimer
• Om een slaaptimer in te stellen, gaat u naar de “Con guration”-instel-
lingen en selecteer “Sleep Timer”. U kunt kiezen uit Turn Off , 15, 30, 60,
90, 120, 150, 180 minuten.
• U kunt ook herhaaldelijk op de knop SLEEP op de afstandsbediening
drukken om tussen de slaaptijden rechtsboven in het display te schakelen. U hebt de keuze uit 15, 30, 60, 90, 120, 150 en 180 minuten.
• Zodra u de slaaptimer hebt geselecteerd, verschijnen de tijd en een
slaapsymbool rechtsboven in het display.
Internetradio
• Stel de internetradio in: Bbu er en geluidskwaliteit.
• Buff er: Con gureer de bu ertijd van de muziekweergave: 2/4/8
seconden.
• Geluidskwaliteit: pas de geluidskwaliteit naar wens aan: Hoog/laag.
Weer
• Set location: Kies en voer uw locatie in.
• Temperature Unit: Kies de temperatuureenheid "Celsius" of "Fahren-
heit".
• Show on Standby: Kies "O " of "On" om de weergave van de weersvoorspelling op het stand-byscherm in of uit te schakelen. Als u de weersvoorspellingsweergave activeert, dan wordt deze om de 10 seconden op
het standby-scherm getoond.
FM-instelling
• Mode: U kunt de modus "Mono" of "Stereo" instellen.
• Threshold: Selecteer drempelinstellingen (zoekdrempel/stereodrem-
pel).
• (De drempel is om in te stellen op de automatische omschakeling tussen
mono- en stereomodus. Als u zich op een plaats met zwakke ontvangst
bevindt, dan schakelt het systeem automatisch over op de monomodus om de achtergrondrujis van de zender te verminderen, voor een
duidelijkere luisterervaring)
Lokale radio installeren
Stel uw locatie handmatig in voor de lokale radio in plaats van de radio
automatisch zenders te laten detecteren.
Key
In deze instellingsinterface hebt u de keuze uit "Alarm", "Dimmer",
"Equaliser", "Local Radio", "Mode", "Preset", "Sleep Timer" en
"Timer" om de functie van de knop MODUS op het voorpaneel en de
afstandsbediening te bevestigen.
Equalizer
De standaard EQ is normaal. U kunt deze wijzigen in Normal, Flat, Jazz,
Rock, Soundtracks, Classical, Pop, News, My EQ.
Resume when power on
Activeer deze functie om de radioweergave te hervatten als u het apparaat
ingeschakelt. In plaats daarvan blijft het scherm in het hoofdmenu.
Software-update
Als er een software-update beschikbaar is voor de radio, dan verschijnt
deze hier. Als er een updsate beschikbaar is, selecteert u deze om de
update te starten.
Resetten naar standaard
Selecteer deze optie om uw radio te resetten en alle uitgevoerde
instellingen en voorkeurszenders te resetten. Bevestig dat u het apparaat
en zijn instellingen wilt resetten door "JA" te selec teren.
Internetradio
Gebruik de knoppen LINKS/RECHTS of draai aan de Selectieknop om
<Internet Radio> te kiezen in het menuscherm. Druk op de knop OK om
dit te openen. Dan hebt u de keuze uit meerdere opties:
My Favorite: Uw favoriete zenders worden hier opgeslagen zodat u deze
gemakkelijk kunt beluisteren. Druk op de knop FAV om uw lijst met
favoriete zenders te bekijken.
Page 53

NL
Radio Station/Music: Selecteer deze optie om te bladeren door
internetradiozenders in de volgende categorieën: Top 20 wereldwijd,
genre, land/locatie, highlights. Zoek zenders in de relevante categorieën
en selecteer
de gewenste internetradiozender door op de knop OK te drukken.
Local Radio: De radio is automatisch ingesteld om de zenders van uw
land, top 10-zenders, alle zenders, plus een verscheidenheid aan genres in
categorieën in alfabetische volgorde te detecteren. Selecteer de categorie
die u wilt beluisteren met de knop OK en blader verder tot de gewenste
zender.
Sleep Radio: Kies uit meerdere ontspanningsgeluiden.
History: Blader door recent beluisterde radiozenders.
Service: Zoek een radiostation, voeg een nieuw radiostation toe of app.
• Gebruik de knoppen NUMMER/LETTER om een radiozender te zoeken.
• Om een nieuwe radiozender toe te voegen, gebruikt u de knoppen
NUMMER/LETER om het gekozen karakater te markeren. Klik op de
knop RECHTS om naar het volgende karakter te gaan. Om terug te gaan
naar het vorige karakter, drukt u op de knop LINKS om dit te markeren.
Druk op de knop OK om naar de internetzender te zoeken.
Uw favoriete internetradiozenders opslaan
Als u de gewenste zender heeft gevonden, dan houdt u de knop FAV
ingedrukt om naar het instelscherm "Add to My Favorite" te gaan. Draai
aan de Selectieknop of druk op de knoppen OMHOOG/OMLAAG om
het voorkeuzenummer te kiezen en druk op de knop OK om uw optie te
bevestigen.
FM-radio
Het bereik van de FM-frequentie is van 87,5 MHz tot 108,00 MHz.
Schuif de antenne uit om het sterkste signaal voor elke zender te
vinden.
Gebruik de knoppen LINKS/RECHTS of draai aan de Selectieknop om
<FM> te kiezen in het hoofdmenuscherm. Druk op de knop OK om het
FM-scherm te openen.
Op een radiozender afstemmen
Druk op de knoppen OMHOOG/OMLAAG op de afstandsbediening of
op de knoppen LINKS/RECHTS op het frontpaneel om de frequentie in
stappen van 0,05MHz te verhogen of te verlagen.
Houd de knoppen LINKS/RECHTS op de afstandsbediening lang ingedrukt
om door te gaan naar de volgende of vorige zender met de sterkste
ontvangst. Zodra een radiostation gevonden is, stopt de radio automatisch
met scannen.
Druk op de knop OK . De melding “Auto Scan” verschijnt op het scherm.
Als u “YES” kiest, dan begint de radio naar radiozenders te zoeken van een
lage naar een hoge frequentie. Het apapraat slaat de gevonden zenders
automatisch op.
Een radiozender opslaan
Om uw favoriete zender op te slaan, moet u eerst naar deze zender
luisteren en lang op de knop FAV op de afstandsbediening drukken.
Gebruik vervolgens de knoppen OMHOOG/OMLAAG of draai aan de
Selectieknop om het cijfer te kiezen waaronder u de zender wilt opslaan.
Druk vervolgens op de knop OK om de voorinstelling te bevestigen.
Een vooringesteld radiostation oproepen
1. Druk op de knoppen PREVIOUS/NEXT op de afstandsbediening om
naar de vorige of volgende vooringestelde radiozender te gaan.
2. U kunt ook op de knop FAV drukken om de opgeslagen zender te
selecteren. Druk op de knop OK om naar de zender te luisteren.
DAB/DAB+
Gebruik de knoppen LINKS/RECHTS of draai aan de Selectieknop om <
DAB/ DAB+> te kiezen in het menuscherm. Druk op de knop OK om de
modus DAB/DAB+ te openen.
Als u de modus DAB voor het eerst op uw radio gebruikt, dan begint
de radio met het scannen naar DAB-zenders en verschijnt de melding
"Scanning" op het scherm. Het apparaat toont hoeveel zenders er zijn
gevonden terwijl het scannen doorgaat.
Zodra alle beschikbare zenders gevonden zijn, toont het radioscherm de
beschikbare zenders. Gebruik de Selectieknop om door de zenders te
bladeren en de zender van uw keuze te markeren. Selecteer de zender
door op de knop OK te drukken.
Als u een radiostation hebt geselecteerd, dan wordt op het scherm een
radiostationlijst getoond en wordt het huidige radiostation afgespeeld.
Om de vorige of volgende zender te kiezen, drukt u op de knop OMHOOG
of OMLAAG om door de lijst te scrollen.
Als de gewenste zender geselecteerd is, dan drukt u op de knop INFO
om de informatie over die radiozender te tonen. Het scherm bladert
automatisch door de informatie en toont het genre, MHZ, het afgespeelde
nummer, KHz en Kbps.
Om terug te gaan naar de lijst om hier handmatig door te bladeren, drukt u
op de knop LINKS om terug te gaan naar de lijst.
Een voorinstelling maken van uw favoriete DAB/DAB+ zenders
Als u de gewenste zender heeft gevonden, dan houdt u de knop
FAV gedurende enkele seconden ingedrukt om naar het scherm
"Add to My Favorite" te gaan. Draai aan de Selectieknop om het
voorinstellingsnummer te kiezen en druk op de knop OK om dit te
bevestigen.
U kunt in het scherm met de lijst DAB-zenders ook de gewenste zender
selecteren en vervolgens de knop FAV ingedrukt houden zoals hierboven
beschreven.
Om uw vooringestelde favoriete zenders te bekijken, drukt u op de knop
FAV . Gebruik de knop OMHOOGof OMLAAG om door de voorkeurslijst
te scrollen.
Information Center
Gebruik de knoppen LINKS/RECHTS of draai aan de Selectieknop om
<Information Center> te kiezen in het menuscherm. Druk op de knop OK
om hhet scherm Informatiecentrum te openen.
Weather Information: Om de weersinformatie voor een gewenste plaats
te selecteren, selecteert u eerst het continent door met de Selectieknop
te scrollen. Druk op de knop OK om de selectie te bevestigen. Hierna
selecteert u het land, gevolgd door de stad.
Zodra u een stad kiest, verschijnt de volgende informatie: de huidige
temperatuur, het weersymbool en de temperatuursverwachtingen voor de
komende 5 dagen.
Financial Information: Kies uit een reeks beursindexen van over de hele
wereld. Gebruik de
Selectieknop om te scrollen en druk op de knop OK om te bevestigen.
System Information: Bekijk de systeemversie, draadloze informatie en de
Spotify-versie. Als draadloze informatie is geselecteerd, dan kan informatie
zoals de wi -signaalsterkte worden gevonden.
Page 54

52
NL
Spotify Connect
Dit apparaat is compatibel met Spotify Connect. Hierdoor kan het product
fungeren als draadloze luidsprekers aangestuurd door de Spotify-app die
beschikbaar is voor iOS, Android smart devices en een desktopclient voor
PC's. Om de Spotify Connect-modus te openen, drukt u op de MENU-knop
om het hoofdmenuscherm te openen. Draai vervolgens aan de Keuzeknop
om door het item te bladeren totdat het Spotify-logo wordt gemarkeerd.
Druk dan kortstondig op de Keuzeknop om te selecteren.
OPMERKINGEN: Er is een Spotify Premium-account
vereist om Spotify Connect te gebruiken.
OPMERKINGEN: Zorg ervoor dat de optie <Keep Network
Connected> ingeschakeld is. Dit maakt het mogelijk om Spotify
te streamen via het apparaat, als dit in de slaapmodus of
netwerkloze modus, zoals DAB/DAB , FM en Aux In staat.
Als de modus Spotify Connect is geselecteerd voordat een verbinding met
een Spotify-app tot stand wordt gebracht, dan wordt de melding <Waiting
for Users> getoond.
OPMERKINGEN: Het kan tot 10 seconden duren voordat de
albumillustraties op het scherm worden weergegeven.
Spotify Connect gebruiken
Luister lekker hard naar muziek metSpotifyConnect
1. VerbinduwSharp DR-I470metuwwi -netwerk
2. Opende Spotify-appopuwtelefoon,tabletoflaptopdie
hetzelfdewi -netwerk gebruiken
3. Speel een nummer af enselecteer"Beschikbare apparaten".
4. SelecteeruwSharp DR-I470enu kunt muziek luisteren.
Meer informatie over de installatie en het gebruik van Spotify Connect vindt u
op www.spotify.com/connect.
De Spotify-software is onderworpen aan licenties van derden die u hier kunt
vinden:
https://www.spotify.com/connect/third-party-licenses
Om een verbinding tussen de Spotify-app en de radio tot stand te
brengen, moeten de apparaten verbonden zijn met hetzelfde wi -netwerk.
Om de weergegeven albumillustraties beter te bekijken op het apparaat,
drukt u kort op de MENU-knop. Druk nogmaals op deze knop om terug te
keren naar de standaardweergave.
OPMERKINGEN: Zodra een verbinding tot stand is gebracht, wordt
de Spotify-account gekoppeld aan zowel de app als het apparaat,
zodat er verbinding gemaakt kan worden met de DR-I470.
Als u Spotify vanaf de DR-I470 bedient, dan kunt u het volume wijzigen,
audio afspelen of pauzeren en met de afstandsbediening vooruit en
achteruit door uw afspeellijst gaan.
Wijzigingen die via de afstandsbediening worden uitgevoerd, worden
overgenomen in de Spotify Connect-app en op het apparaat.
Zolang de Spotify-app verbonden is met de radio op hetzelfde netwerk
en <Keep network connected>is geselecteerd, kunt u de radio normaal
gesproken inschakelen als u muziek afspeelt vanuit de Spotify-app.
Bediening AUX
AUX-IN
Gebruik de knoppen LINKS/RECHTS of draai aan de Selectieknop om <
AUX> te kiezen in het menuscherm. Druk op de knop OK om de modus
AUX te openen.
Sluit een AUX-kabel aan via de AUX-IN-poort op de achterkant van de
radio. Speel audio van uw apparaat af. Deze audio zou nu te horen moeten
zijn via de AUX-modus.
Lijnuitgang (hoofdtelefoon)
Op het achterpaneel van de radio bevindt zich de
Hoofdtelefoonaansluiting om via uw radio audio te beluisteren. Speel
audio af vanuit de instelling Internet Radio, AUX of Bluetooth.
Bluetooth
Gebruik de knoppen LINKS/RECHTS of draai aan de Selectieknop om
< Bluetooth> te kiezen in het menuscherm. Druk op de knop OK om de
modus Bluetooth te openen.
1. Ga naar de instellingen van uw apparaat om dit via Bluetooth met de
radio te verbinden.
2. Selecteer de naam "SHARP DR-I470" in de Bluetooth-lijst van uw
apparaat. Zodra de verbinding tot stand is gebracht, klinkt via de
radio de melding "Connected". De melding "Bluetooth Connected"
verschijnt op het display.
3. Selecteer de gewenste audio op uw apparaat en speel dit af.
4. U kunt nu muziek afspelen via uw apparaat.
5. Om de verbinding te verbreken, schakelt u over naar een andere
afspeelmodus of schakelt u de Bluetooth-functie van uw apparaat uit.
AirMusic Control - SHARP Smart
Control-app
Zodra de gebruiker de SHARP Smart Control-app downloadt en installeert
op zijn mobiele apparaat, kan hij/zij de app gebruiken om het apparaat
aan te sturen. Let op: de DR-I470-radio en het mobiele apparaat met de
SHARP Smart Control-app moeten met hetzelfde netwerk verbonden
zijn, anders kan er geen verbinding tussen de twee apparaten tot stand
wordne gebracht. Open de app en er verschijnt een lijst met beschikbare
apparaten.
Klik op het betre ende apparaat om hier verbinding mee tot stand te
brengen.
OPMERKINGEN: het apparaat wijzigt automatisch de taal
van de DR-I470 radio in de taal die met de SHARP Smart
Control-app is ingesteld op het mobiele apparaat.
De QR-code van de SHARP Smart Control-app is beschikbaar op de volgende
locatie: Internet Radio > Service > App
Met de app kan de gebruiker het apparaat via de mobiele telefoon
bedienen:
kies het juiste tabblad om de radio te bedienen.
Druk op het icoon
Instellingen om meer opties in te voeren (apparaatnaam wijzigen,
controleren of er software-updates zijn, scannen nop andere apparaten of
meer informatie weergeven)
om het zijtabblad weer te geven. Selecteer
Page 55

NL
Druk op het icoon voor de
afstandsbedieningsmodus. De app doet dienst
als afstandsbediening en het mobiele apparaat
met de SHARP Smart Control-app geeft de
knoppen op de afstandsbediening weer.
1. Het apparaat uitschakelen
2. OK-knop
3. Modusknop (de afspeelmodus wijzigen)
4. Menu-knop
5. Favoriete radiostations tonen
6. Toetsknop (dezelfde functie als de
MODUSknop op het apparaat)
7. Slaaptimer
8. Wekker
9. Dimmer
10. Vorige
11. Afspelen/pauzeren:
12. Volgende
13. Nummerknoppen
14. Equalizerinstellingen
15. Dempen
16. Volume +
17. Volume -
18. Richtingsknoppen
19. Terug naar het hoofdmenu van de app
Druk op
vervolgens een foto of maak een foto om deze als screensaver in te stellen
op het stand-byscherm.
Druk op
ingedrukt om een spraakbericht op te nemen, laat de knop los om de
opname te stoppen. De rode knipperende cirkel wordt weergegeven in de
linkerbovenhoek van het scherm van de radio. Om het spraakbericht af te
spelen, gaat u naar een willekeurig tabblad in het menu. De opname wordt
via de radioluidspreker gestreamd.
Druk op
ingedrukt om op te nemen, laat de knop los om de opname te stoppen. De
opname wordt gestreamd via de radioluidspreker.
Druk op
gaan om de muziek via de radio te streamen.
Druk op
radiostations te streamen.
om de stand-by schermkeuze-instelling te openen. Kies
om de optie spraakbericht te openen. Houd de
om de intercomoptie te openen. Houd de
om naar de lokale muziekmap op het mobiele apparaat te
om een van de eerste vijf favoriete
Probleemoplossing
Dit product bevat geen onderdelen die door de gebruiker kunnen
worden gerepareerd. Neem in het geval van een defect contact op met de
fabrikant of een geautoriseerde onderhoudsafdeling. Het blootleggen van
de interne onderdelen in het apparaat kan uw leven in gevaar brengen.
Onder de fabrieksgarantie vallen geen fouten door reparaties uitgevoerd
door ongeautoriseerde derden.
Geen geluid
Oorzaak
• Het volume is niet opengedraaid.
Oplossing
• Pas het volume aan met de volumeknop.
Geen geluid via de Bluetooth-verbinding
Oplossing
• Controleer eerst of u op het externe apparaat het wachtwoord "0000" in
moet voeren.
Geen verbinding met wi
Oplossing
• Zorg ervoor dat de wi -modus is geselecteerd in de instellingen en dat u
het juiste wachtwoord invoert voor het wi -modem.
Statisch geluid
Oorzaak
• Slechte signaalontvangst.
Oplossing
• Pas de antenne aan of verplaats het apparaat naar een locatie met een
sterker signaal.
Geluid is vervormd
Oorzaak
• Volume is te hoog
Oplossing
• Verlaag het volume
Gewenste radiostation niet gevonden
Oorzaak
• Zwak signaal
Oplossing
• Gebruik de handmatige afstemfunctie.
Geen DAB-functies
Oorzaak
• Er is geen DAB-ontvangst in uw regio.
• Slechte ontvangst
Oplossing
• Pas de positie van de antenne aan
Het display is leeg.
Oorzaak
• Dit kan gebeuren als de omroep het label van een dienst wijzigt of een
label verwijdert terwijl op de zender is afgestemd.
Oplossing
• De radio probeert opnieuw op het radiostation af te stemmen.
• Voer een scan uit.
GEEN stroom
Oorzaak
• De adapter is niet ingestoken in een stopcontact.
Oplossing
• Zorg dat de adapter ingestoken is
Page 56

54
3,16 kg
Technische speci caties
Model DR-I470 Pro
Uitgangsvermogen 2 × 7 W (RMS)
Energieverbruik (max.) 28 W
Energieverbruik (standaard) 8 W
Energieverbruik stand-bymodus <1 W
FM-frequentie 87.5 - 108 MHz
DAB+-frequentie 174.928 - 239.200 MHz
Bluetooth
Versie V5.0
Frequentiebanden 2402 MHz ~ 2480 MHz
Maximaal overgedragen vermogen 4 dBm
Vermogensadapter
Modelnaam FJ-SW1202000N
Ingang AC 100-240 V ~ 50/60 Hz, 0,6A max.
NL
Uitgang
Fabrikant
WIFI
Wi -verbinding 802.11 b/g/n; STA/AP/AP Client
B1,Xujing chang Industrial Park, Haoye Road, Fuyong 518103 Shenzhen, China
SHENZHEN FU JIA APPLIANCE CO., LTD
DC 12 V
⎓2000 mA
145 mm
354 mm
KG
185 mm
Page 57

NLPL
Ważne środki ostrożności
Proszę zapoznać się zniniejszymi instrukcjami
bezpieczeństwa iwziąć pod uwagę poniższe
ostrzeżenia zanim urządzenie zostanie
uruchomione:
Wykrzyknik wewnątrz trójkąta równobocznego powiadamia
użytkownika o ważnych wskazaniach dotyczących obsługi
i konserwacji (serwisowania) zawartych w instrukcji obsługi
urządzenia.
Należy korzystać wyłącznie z zasilacza opisanego w instrukcji
obsługi.
Ten symbol oznacza, że produkt należy usuwać w sposób
przyjazny dla środowiska, a nie z innymi odpadkami
gospodarczymi.
napięcie zmienne
napięcie stałe
urządzenie klasy II
Tylko do użytku w pomieszczeniach
Efektywność energetyczna na poziomie VI
Biegunowość zasilacza prądu stałego
Żeby zapobiec pożarowi,
zawsze trzymaj świece i inne
źródła otwartego ognia z
daleka od urządzenia.
Ostrzeżenie:
• Zawsze zachowuj podstawowe środki ostrożności podczas korzystania z
urządzenia, zwłaszcza w obecności dzieci.
• Nadzoruj dzieci, by nie bawiły się urządzeniem.
• Należy chronić przewód zasilający przed uszkodzeniem, nie umieszczać
na nim ciężkich przedmiotów, rozciągać go ani zginać. Nie podłączać
urządzenia do przedłużaczy. Uszkodzenie przewodu zasilającego może
spowodować pożar lub porażenie prądem.
• Uważaj, by nie uszkodzić kabla zasilającego: nie stawiaj na nim ciężkich
przedmiotów, nie rozciągaj go ani nie wyginaj. Nie podłączaj urządzenia
do przedłużaczy. Uszkodzenie kabla zasilającego może spowodować
pożar lub porażenie prądem.
• Jeśli przewód zasilający zostanie uszkodzony, należy go wymienić u producenta, w serwisie lub u innej wykwali kowanej osoby, żeby ochronić
się przed zagrożeniem.
• Dopilnuj, by urządzenie zostało podłączone do gniazda zasilania 100240V ~ 50/60Hz. Używanie wyższego napięcia może powodować awarie,
a nawet zapalenie się urządzenia.
• Jeśli wtyczka nie mieści się w gnieździe, nie wolno wciskać jej na siłę.
• Wyłącz urządzenie przed odłączeniem go od prądu, by całkowicie je
wyłączyć.
• Nie odłączaj ani nie podłączaj kabla zasilającego mokrymi rękami. Może
to spowodować porażenie prądem.
• Jeśli urządzenie nie jest używane przez dłuższy czas, należy odłączyć je
od źródła zasilania.
• Dopilnuj, by wtyczka była zawsze łatwo dostępna.
• Niniejszy produkt nie posiada żadnych części, które może naprawiać
użytkownik. W przypadku wystąpienia usterki skontaktuj się z producentem lub autoryzowanym serwisem. Odsłanianie wewnętrznych części
urządzenia może stanowić zagrożenie dla życia. Gwarancja nie obejmuje
usterek wywołanych naprawami wykonywanymi przez nieupoważnione
strony trzecie.
• Nie używaj produktu tuż po rozpakowaniu. Przed użyciem należy
odczekać, aż urządzenie nagrzeje się do temperatury pokojowej.
• Urządzenia można używać tylko w umiarkowanym klimacie (nie w
klimacie zwrotnikowym i podzwrotnikowym).
• Umieść urządzenie na płaskiej, stabilnej powierzchni, która nie jest
narażona na wibracje.
• Dopilnuj, by urządzenie nie wystawało za krawędź mebla, na którym stoi.
• Aby zmniejszyć ryzyko pożaru, porażenia prądem i uszkodzenia pro-
duktu, nie wystawiaj go na bezpośrednie działanie światła słonecznego,
kurzu, deszczu czy wilgoci. Nigdy nie narażaj urządzenia na zamoczenie
lub zachlapanie i nie stawiaj na nim ani w jego pobliżu zbiorników
wypełnionych cieczą.
• Nie stawiaj żadnych przedmiotów ani zbiorników z płynami, takich jak
wazony itp., na urządzeniu.
• Nie umieszczaj urządzenia w pobliżu źródeł ciepła, takich jak grzejniki,
nawiewy, piece czy inne urządzenia (w tym wzmacniacze) emitujące
ciepło.
• Nie umieszczaj produktu tam, gdzie wilgotność jest wysoka, a wentylacja
słaba.
• Dopilnuj, by zostawić 5 cm wolnego miejsca wokół urządzenia dla
zapewnienia odpowiedniej wentylacji. Nie zakrywaj otworów wentylacyjnych urządzenia. Upewnij się, że otwory wentylacyjne nie są zakryte
przedmiotami, takimi jak gazety, ścierki, zasłony itp.
• NIGDY nie pozwalaj nikomu, zwłaszcza dzieciom, wpychać czegokolwiek
w otwory, gniazda i inne szczeliny w obudowie urządzenia: może to
skutkować śmiertelnym porażeniem prądem.
• Burze stanowią niebezpieczeństwo dla wszystkich urządzeń elekt-
rycznych. Jeśli przewód zasilający lub przewody antenowe zostaną
tra one piorunem, urządzenie może zostać uszkodzone, nawet gdy
jest wyłączone. Przed nadejściem burzy należy odłączyć od urządzenia
wszystkie przewody i złącza.
• Słuchanie zbyt głośnych dźwięków przez słuchawki douszne i nauszne
może powodować utratę słuchu.
Konserwacja
• Przed czyszczeniem urządzenia odłącz przewód zasilający od prądu.
• Do czyszczenia zewnętrznej części obudowy użyj miękkiej, czystej
ściereczki. Nigdy nie czyść obudowy chemikaliami ani detergentami.
Zasilacz
• Żeby odłączyć urządzenie od zasilania sieciowego, odłącz przewód
zasilający od gniazdka elektrycznego.
• Korzystaj wyłącznie z zasilacza dostarczonego w zestawie. Użycie innego
zasilacza może spowodować zagrożenie dla bezpieczeństwa i/lub
uszkodzenie urządzenia.
Baterie
• Zachowaj prawidłową polaryzację, gdy montujesz
baterie.
• Nie wystawiaj baterii na działanie wysokich tempe-
ratur i nie umieszczaj ich w miejscach, których temperatura może gwałtownie wzrosnąć, np. w pobliżu
ognia lub w bezpośrednim świetle słonecznym.
• Nie wystawiaj baterii na działanie nadmiernego
ciepła, nie wrzucaj ich do ognia, nie rozmontowuj
i nie próbuj ładować zwykłych baterii. Mogłyby
wyciec lub eksplodować.
• Nigdy nie stosuj jednocześnie różnych baterii i nie łącz baterii nowych
ze starymi.
• Jeśli wiesz, że pilot nie będzie używany przez dłuższy czas (ponad
miesiąc), wyjmij z niego baterie, by nie wyciekły.
• Jeśli baterie wyciekną, wytrzyj komorę baterii i zastąp baterie nowymi.
• Nie używaj innych baterii niż wskazane w instrukcji.
Cd
Page 58

56
• Nie wkładaj baterii do ust - stwarza to ryzyko poparzenia chemicznego.
• Jeśli bateria zostanie połknięta, może spowodować poważne poparzenia
wewnętrzne w zaledwie dwie godziny, czego rezultatem może być
śmierć. Trzymaj nowe i stare baterie poza zasięgiemi dzieci. Jeśli komora
baterii nie zamyka się prawidłowo, przestań używać pilota i trzymaj
go poza zasięgiem dzieci. Jeśli podejrzewasz połknięcie baterii lub
umieszczenie jej wewnątrz jakiejkolwiek części ciała, natychmiast zgłoś
się do lekarza.
Usuwanie produktu i baterii
• Nie wyrzucaj niniejszego urządzenia do niesortowanych
śmieci z gospodarstwa domowego. Oddaj je do wyznaczonego punktu odbioru w celu przetworzenia zgodnie
z przepisami WEEE. W ten sposób oszczędzasz zasoby
naturalne i chronisz środowisko.
• Większość państw UE posiada przepisy regulujące
usuwanie baterii. Więcej informacji możesz uzyskać od sprzedawcy lub
lokalnych władz.
• Powyższy symbol umieszczany jest na urządzeniach elektrycznych i elektronicznych (lub na ich opakowaniach), by przypomnieć użytkownikowi
o tej zasadzie.
• Użytkownicy powinni zgłaszać się do wyznaczonych punktów odbioru
zużytych urządzeń i baterii.
Deklaracja zgodności CE i UKCA:
• Sharp Consumer Electronics Poland sp. z o.o. niniejszym oświadcza, że
opisywane urządzenia audio jest zgodne z zasadniczymi wymaganiami
oraz innymi stosownymi postanowieniami dyrektywy RED 2014/53/UE
ibrytyjskich przepisów dotyczących urządzeń radiowych z 2017 roku.
• Pełny tekst deklaracji zgodności UE jest dostępny pod linkiem
www.sharpconsumer.com, a następnie należy przejść do sekcji
pobierania posiadanego modelu i wybrać „CE Statements” (deklaracja
zgodności CE).
Page 59

PLPL
Zawartość opakowania
• 1x Urządzenie główne
• 1x Pilot zdalnego sterowania
• 1x Instrukcja obsługi
• 1x Zasilacz
• 1x Wtyczka sieciowa do zasilacza w wersji dla Wielkiej Brytanii
• 1x Wtyczka sieciowa do zasilacza w wersji dla krajów UE
Panele i przyciski
Przedni panel
9
1
3
5
7
1. Przycisk MODE – Naciśnij, aby zmienić tryb: DAB/DAB+, FM, Radio
Internetowe, Bluetooth, AUX IN.
Tryb można również ustawić za pomocą innej funkcji, menu <Key>
USTAWIENIA: Budzik, Jasność ekranu, Equalizer, Stacja lokalna, Tryb,
Ulubione stacje, Auto wyłączanie, Minutnik.
UWAGA: Domyślną funkcją tego przycisku jest zmiana trybu.
2. Przycisk STANDBY – Naciśnij, aby włączyć urządzenie lub przełączyć
je do trybu czuwania.
3. Przycisk MENU – Naciśnij, aby wejść do interfejsu ustawień MENU.
4. Przycisk SLEEP – Naciśnij kilkakrotnie, aby ustawić żądany czas
wyłączenia urządzenia.
5. ◄ – W oknie ustawień naciśnij ten przycisk, aby przejść do poprzed-
niego wyboru. Podczas słuchania programu radiowego krótkie naciśnięcie spowoduje zmniejszenie częstotliwości ze skokiem o 0,05 MHz.
6. ► – Naciśnij w oknie ustawień, aby przejść do następnego wyboru.
Podczas słuchania programu radiowego krótkie naciśnięcie spowoduje zwiększenie częstotliwości ze skokiem o0,05MHz.
7. Przycisk DIMMER – Naciśnij, aby ustawić poziom podświetlenia.
8. Przycisk PRESET – Naciśnij podczas odtwarzania z radia internetowe-
go naciśnij, aby przełączyć się do okna stacja radiowa/muzyka.
9. EKRAN – wyświetlanie informacji
Tylny panel
11
12
10. Pokrętło regulacji głośności/pokrętło wyboru/ przycisk OK –
Podczas odtwarzania obróć pokrętło, aby ustawić poziom głośności.
E
D
O
M
U
N
E
M
R
E
M
M
I
D
AUX IN
P
R
E
S
E
T
DC 12V
2
4
6
8
Podczas przeprowadzania ustawień w menu obróć pokrętło, aby
wybrać opcje; naciśnij, aby zatwierdzić wybór.
11. Antena teleskopowa – odbiór sygnału FM
12. Gniazdo słuchawkowe – gniazdo słuchawkowe z wtyczką ø 3,5 mm
13. Gniazdo AUX IN – podłącz kabel audio z wtyczką ø 3,5 mm, aby
odtwarzać nagrania muzyczne z zewnętrznego urządzenia audio.
14. Gniazdo DC12 V – zasilanie prądem stałym 12 V
Pilot zdalnego sterowania
1
2
3
4
5
6
7
8
9
10
11
12
13
14
1. Przycisk STANDBY – Naciśnij przycisk STANDBY na pilocie, aby ponow-
nie aktywować urządzenie lub przełączyć do trybu czuwania.
2. Przycisk SOURCE – Naciśnij przycisk SOURCE, aby zmienić tryby odtwa-
rzania: DAB / DAB +, FM, AUX IN, Bluetooth, Radio internetowe.
Uwaga: Ten przycisk może być użyty jako inna funkcja poprzez
ustawienie pozycji <Przycisk Key> w USTAWIENIA: Budzik, Jasność
ekranu, Equalizer, Stacja lokalna, Tryb, Ulubione stacje, Auto wyłą
czanie, Minutnik
3. Przycisk MENU – Naciśnij przycisk MENU na pilocie lub na przednim
panelu, aby otworzyć menu odtwarzania. Naciśnij przyciski KIE-
RUNKOWE lub obróć pokrętło wyboru, aby przeglądać menu: Radio
internetowe, FM, DAB/DAB+, Spotify, Centrum informacyjne, AUX,
Bluetooth, Ustawienia, Stacja lokalna.
4. Przycisk Góra / 5. Przycisk OK / 6. Przycisk Lewo / 7. Przycisk Dół / 17.
Przycisk Prawo – Naciśnij przycisk UP lub DOWN, albo obróć pokrętło
wyboru, aby przeglądać przewijane opcje, a następnie naciśnij przycisk OK, aby zatwierdzić wybór.
10
8. Przycisk VOL- / 18. Przycisk VOL+ – Naciśnij przycisk VOL+ lub VOL-,
aby wyregulować poziom głośności, albo obróć pokrętło regulacji
głośności.
9. Przycisk PLAY/PAUSE – Naciśnij przycisk PLAY/PAUSE, aby zatrzymać
13
odtwarzanie. Naciśnij ponownie, aby wznowić odtwarzanie.
10. Przycisk Poprzedni / 19. Przycisk następny – Podczas odtwarza-
14
nia muzyki naciśnij przycisk PREVIOUS lub NEXT, aby przejść do
poprzedniego lub następnego utworu. Podczas słuchania programu
radiowego naciśnij przycisk PREVIOUS lub NEXT, aby przejść do
poprzedniej lub następnej stacji radiowej.
11. Przycisk ALARM – Naciśnij przycisk ALARM, aby przeglądać i utworzyć
opcje budzika.
SOURCE
MENU
OK
VOL- VOL+
SLEEP ALARM
EQ
1
2
ABC DEF
5
4
GHI JKL MNO
7
8 9
PQRS TUV WXYZ
WPS DIMMER
0
15
INFO
16
17
18
19
FAV
20
21
3
6
22
Page 60

58
12. Przycisk SLEEP – Naciśnij kilkakrotnie przycisk SLEEP, aby wybrać
żądany czas wyłączenia urządzenia.
13. Przyciski NUMERYCZNE/LITEROWE – Podczas przeprowadzania
ustawień w menu umożliwiają wprowadzanie cyfr lub liter.
14. Przycisk WPS – Ustawienia WPS
15. Przycisk MUTE – Naciśnij przycisk MUTE, aby wyciszyć dźwięk.
Naciśnij ponownie przycisk MUTE, albo naciśnij przyciski VOL+/- na
pilocie lub obróć pokrętło regulacji głośności na panelu górnym, aby
ponownie włączyć dźwięk.
16. Przycisk INFO – Naciśnij przycisk INFO, aby sprawdzić informacje
ostacjach radiowych.
20. Przycisk EQ – Naciśnij kilkakrotnie przycisk EQ, aby wybrać inne pola
dźwięku: Normalny, Flat, Jazz, Rock, Muzyka lmowa, Muzyka klasyczna, Pop, Wiadomości, My EQ.
21. Przycisk FAV – Długie naciśnięcie przycisku FAV spowoduje zapamiętanie stacji radiowej. Krótkie naciśnięcie przycisku FAV umożliwia
wyświetlenie ulubionych stacji radiowych zapisanych w pamięci.
22. Przycisk DIMMER – Naciśnij przycisk DIMMER, aby wybrać poziom
podświetlenia.
Wkładanie lub wymiana baterii w pilocie zdalnego
sterowania
1. Naciśnij zapadkę osłony komory baterii, znajdującej się z
tyłu pilota, w kierunku wytłoczonej na niej strzałki.
2. Wciskając zapadkę, otwórz komorę baterii.
3. Włóż dwie baterie, zachowując pokazaną polaryzację + i -.
Wymieniaj baterie tylko na takie same jak dostarczone w zestawie.
4. Wsuń na miejsce osłonę baterii tak, by usłyszeć kliknięcie.
Uruchomienie radia internetowego
Podłącz kabel zasilacza do gniazda DC IN. Na ekranie wyświetli się napis „ Witaj”.
Upewnij się, że antena jest wysunięta tak daleko, jak to możliwe. Umożliwi
to uzyskanie najlepszego sygnału.
Jeśli po raz pierwszy korzystasz z radia, po wyświetleniu okna powitalnego
możesz wybrać język przewijając dostępne opcje pokrętłem wyboru
izatwierdzić wybór naciskając przycisk OK.
Po ustawieniu języka wyświetli się komunikat „Czy po włączeniu zasilania
uaktywnić sprawdzanie sieci?”. Możesz wybrać „TAK” lub „ NIE”, aby
zdecydować, czy urządzenie sprawdza sieć po włączeniu zasilania, czy nie.
Ręczna kon guracja sieci WI-FI
Po przeprowadzeniu powyższych ustawień wyświetli się komunikat „Czy
chcesz teraz skon gurować sieć?”.
• Jeśli wybierzesz opcję „TAK”, odbiornik radiowy rozpocznie wyszuki-
wanie pobliskich sieci, by się połączyć. Po zakończeniu wyszukiwania
wybierz sieć, z którą chcesz się połączyć. Następnie wprowadź litery/
cyfry obracając pokrętło wyboru lub naciskając prz yciski NUMERYCZ-
NE/LITEROWE, dopóki nie zostanie wyświetlona odpowiednia cyfra.
Następnie naciśnij przycisk RIGHT, aby wprowadzić kolejną cyfrę. Po
zakończeniu naciśnij przycisk OK, aby zatwierdzić.
• Jeśli wybierzesz opcję „NIE”, możesz przeprowadzić powyższe ustawienia
później w menu „Ustawienia”.
Sieć bezprzewodowa (WPS PBC)
Jeśli na etapie „Czy chcesz teraz skon gurować sieć?” wybierzesz „TAK
(WPS)”, odbiornik radiowy rozpocznie wyszukiwanie połączeń Wi-Fi.
Po wyborze opcji pozostaje 120 sekund na naciśnięcie przycisku WPS na
modemie Wi-Fi. Spowoduje to połączenie sieci Wi-Fi z radiem bez ręcznego
wprowadzania hasła.
Połączenie z siecią Wi-Fi nawiązane!
Po nawiązaniu połączenia z siecią Wi-Fi za pomocą ręcznego
wprowadzenia hasła Wi-Fi lub w trybie WPS wyświetli się okno menu
głównego, a symbol sygnału Wi-Fi pojawi się na białym polu w lewym
górnym narożniku. Radio internetowe zostało skon gurowane!
Ustawienia
Użyj przycisków lewo/prawo lub obróć pokrętło wyboru, aby wybrać
<Ustawienia> w menu głównym. Następnie naciśnij przycisk OK, aby
otworzyć menu „Ustawienia”.
Typ zegara
Ustaw typ zegara: Analogowy lub cyfrowy.
Zarządzanie My mediaU
Ustaw funkcję jako aktywną lub nieaktywną.
Kod QR MediaU jest dostępny w Con guration> Manage my mediaU> Enable.
Sieć
• Kon guracja sieci bezprzewodowej
• W ustawieniach sieciowych możesz skon gurować połączenie Wi-Fi
wybierając kon gurację sieci bezprzewodowej. Odbiornik radiowy
rozpocznie wyszukiwanie dostępnych połączeń Wi-Fi.
• Wyszukaj swoje połączenie Wi-Fi i wybierz je naciskając przycisk
OK. Do wprowadzania liter/cyfr wykorzystaj pokrętło wyboru lub
naciskaj przyciski NUMERYCZNE/LITEROWE, dopóki nie wyświetli
się prawidłowy znak. Następnie naciśnij przycisk prawo, aby przejść
do kolejnego znaku. Naciśnij przycisk lewo, jeśli chcesz powrócić
do poprzedniego znaku. Po zakończeniu naciśnij przycisk OK, aby
zatwierdzić.
• Po nawiązaniu połączenia z siecią Wi-Fi wyświetli się okno menu
głównego, a symbol sygnału Wi-Fi pojawi się na białym polu w lewym
górnym narożniku.
• Sieć bezprzewodowa (WPS PBC)
• Wybierz opcje wyszukiwania połączenia Wi-Fi. Po wyborze opcji
pozostaje 120 sekund na naciśnięcie przycisku WPS na modemie
Wi-Fi. Spowoduje to połączenie sieci Wi-Fi z radiem bez ręcznego
wprowadzania hasła.
• Kon guracja ręczna
• Można ręcznie ustawić dane połączenia bezprzewodowego: DHCP,
Enter SSID i zarządzanie.
• Sprawdzanie sieci po włączeniu
• Ustaw funkcję jako aktywną lub nieaktywną.
Data i godzina
• Ustaw datę i godzinę
• Kon guracja ręczna lub Wykryj automatycznie
Istnieje możliwość ręcznego ustawienia daty i godziny zamiast
automatycznego wykrywania. Obróć pokrętło wyboru lub użyj
przycisków numerycznych, aby wprowadzić żądaną cyfrę w danym
miesiącu. Po ustawieniu prawidłowej cyfry naciśnij przycisk prawo,
aby przejść do ustawienia dnia. Kontynuuj procedurę, aby ustawić rok,
godzinę i minuty. Po zakończeniu kon guracji ręcznej naciśnij przycisk
OK, aby wprowadzić ustawienia. Aby anulować format daty i godziny,
możesz zmienić ustawienia funkcji „Data i godzina”.
• Ustaw format czasu: Wybierz 12-godzinny lub 24-godzinny format czasu.
• Ustaw format daty: RRRR/MM/DD, DD/MM/RRRR, MM/DD/RRRR
Budzik
• Ustaw Budzik 1/ Budzik 2
• Aby ustawić budzik w odbiorniku radiowym, przejdź do „Ustawień”
iprzewiń dostępne opcje, aby wybrać „Budzik” lub po prostu naciśnij
przycisk ALARM na pilocie.
• Po wyświetleniu okna ustawień budzika wybierz „Budzik 1 (wyłącz)”
lub „ Alarm 2 (wyłącz)”. Następnie wybierz opcję „Włącz”, aby
uaktywnić budzik.
• Wybierz opcję „Powtórz”, aby ustawić regularność budzika naciskając
przycisk OK. Możesz wybrać opcję codziennie lub raz, albo wybrać
Page 61

PLPL
poszczególne dni, w które włączy się budzik. Po dokonaniu wyboru
naciśnij przycisk lewo, aby powrócić do innych ustawień budzika.
• Wybierz opcję „Godzina” i obróć pokrętło wyboru, aby zaznaczyć
godzinę budzenia. Po ustawieniu żądanej godziny naciśnij przycisk
prawo, aby ustawić minuty.
• Po ustawienie prawidłowej wartości w minut naciśnij przycisk prawo,
aby ustawić opcję „AM” lub „PM”. Następnie naciśnij przycisk OK, aby
zatwierdzić ustawienia i przejść do ustawień budzika.
• Przewiń w dół i wybierz opcję „Dźwięk”, naciskając przycisk OK.
Możesz wybrać między sygnałem dźwiękowym, melodią, radiem
internetowym, FM lub DAB/DAB+.
• Jeśli ustawisz dźwięk budzika jako radio internetowe, FM lub DAB/
DAB+, przejdziesz do swoich zapamiętanych ulubionych stacji.
Wybierz żądaną stację naciskając przycisk OK.
• Symbol budzika pojawi się w oknie głównym.
• Sposób anulowania budzika
• Aby anulować budzik, wybierz opcję „Budzik” w menu „Ustawienia”
lub za pomocą przycisku ALARM. Następnie wybierz budzik, który
chcesz wyłączyć.
• Wybór budzika udostępnia opcję włączenia lub wyłączenia. Zaznacz
opcję „Wyłącz” i naciśnij przycisk OK, aby zatwierdzić.
UWAGA: Aby zmienić poziom głośności budzika, przejdź do
ustawienia „Głośność budzika” w oknie ustawień budzika.
• Sposób wyłączenia dźwięku budzika
Jeśli budzik włączy się, naciśnij przycisk ALARM lub STANDBY na pilocie,
by wyłączyć budzik. Jeśli ustawiłeś codzienne włączenie budzika lub
więcej niż 1 raz w tygodniu, ikona budzika pozostanie wyświetlona na
ekranie.
• Sposób ustawienia budzika w trybie DRZEMKI
Jeśłi włączy się budzik, naciśnij dowolny przycisk z wyjątkiem przycisków
STANDBY i ALARM, aby wyłączyć dźwięk budzika i przełączyć go do
trybu DRZEMKA. W trybie DRZEMKI odbiornik radiowy włączy się
ponownie po 5 minutach.
UWAGA: Budzik w trybie DRZEMKI można wyłączyć
naciskając przycisk ALARM lub STANDBY.
• Czas drzemki
• Po wyborze opcji „Budzik” w menu „Ustawienia” lub przycisku
ALARM na pilocie wybierz opcję „Czas drzemki (wyłącz)”.
• Wybierz czas trwania drzemki w minutach z dostępnych opcji: wyłącz,
5 minut, 10 minut, 20 minut, 30 minut, 60 minut, 90 minut, 120 minut.
• Głośność budzika
• Zmień poziom głośności budzika obracając pokrętło regulacji
głośności lub naciskając przyciski lewo/prawo.
• Po wyborze odpowiedniego poziom głośności naciśnij przycisk OK,
aby zatwierdzić.
Minutnik
• W menu „Ustawienia” wybierz opcje „Minutnika”, a na ekranie wy-
świetli się wskazanie 00:00.
• Aby zwiększyć wskazanie sekund, naciśnij przycisk prawo. Aby zmniejszyć wskazanie sekund, naciśnij przycisk lewo. Naciśnij i prz ytrzymaj
przyciski lewo/prawo, aby szybko ustawić minutnik.
• Po ustawieniu żądanego czasu zatwierdź ustawienie naciskając przycisk OK.
Język
Wybierz żądany język z listy.
Jasność ekranu
• Aby ustawić jasność ekranu odbiornika radiowego, przejdź do menu
„Ustawienia” i wybierz opcję „Jasność ekranu”. Możesz wybrać opcję
„Tryb oszczędnościowy” lub „Wyłącz”.
• Wybierz „Tryb oszczędnościowy”, aby zmienić aktualny poziom jasno-
ści na jeden z 20 dostępnych poziomów. Jeśli odbiornik radiowy będzie
nieaktywny przez 15 sekund, zostanie ustawiony niski poziom jasności
do momentu naciśnięcia przycisku i aktywacji ustawienia „Włącz”.
• Wybierz tryb „Włącz”, aby ustawić jasność, gdy odbiornik radiowy jest
włączony i używany.
• Ewentualnie możesz zmienić ustawienia jasności naciskając przycisk
DIMMER na pilocie lub bezpośrednio na przednim panelu.
Ekran
Wybierz opcję Kolor lub Jednobarwny.
Oszczędzanie energii
Wybierz to ustawienie, aby odbiornik radiowy był automatycznie
przełączany do trybu czuwania po ustawionym czasie bezczynności
lub w przypadku braku sygnału Wi-Fi. Możesz wybrać 5/15/30 minut
oczekiwania na przełączenie do trybu czuwania lub wybrać opcję
„Wyłącz”, aby zignorować funkcję.
Auto wyłączanie
• Żeby ustawić Auto wyłączanie, przejdź do menu „Ustawienia” i wybierz
opcję „Auto wyłączanie”. Możesz wybrać wyłącz, 15, 30, 60, 90, 120,
150, 180 minut.
• Ewentualnie kilkakrotnie naciskając przycisk SLEEP na pilocie możesz
przełączać się między czasami wyłączenia wyświetlonymi w prawym
górnym narożniku ekranu. Dostępne opcje to: 15, 30, 60, 90, 120, 150,
180 minut.
• Po wyborze opcji Auto wyłączanie pojawi się liczba minut i symbol auto-
matycznego wyłączenia w prawym górnym narożniku ekranu.
Radio internetowe
• Ustaw radio internetowe: Pamięć buforowa i jakość emitowanego
dźwięku.
• Pamięć buforowa: Skon guruj czas buforowania odtwarzanej muzyki:
2/4/8 sekund.
• Jakość emitowanego dźwięku: Dostosuj jakość emitowanego dźwięku
zgodnie z upodobaniami: High (wysoka)/Low (niska).
Pogoda
• Ustawienie lokalizacji: Wybierz i wprowadź swoją lokalizację.
• Jednostka temperatury: Wybierz preferowaną skalę temperatury –
„Celsjusza” lub „Fahrenheita”.
• Wyświetlanie w trybie czuwania: Wybierz opcję „Wyłącz” lub „Włącz”,
aby dezaktywować lub uaktywnić wyświetlanie prognozy pogody na
ekranie w trybie czuwania. Po włączeniu wyświetlania prognozy pogody
będzie ona wyświetlana co 10 sekund na ekranie w trybie czuwania.
Ustawienie FM
• Tryb: Możesz ustawić tryb „Mono” lub „Stereo”.
• Próg: Wybierz ustawienia progu (próg wyszukiwania/próg stereo).
• (Próg jest ustawiony na automatyczne przełączanie między trybami
mono i stereo. W przypadku odbioru słabego sygnału system automatycznie przełączy się do trybu mono w celu zmniejszenia szumów tła
stacji, aby poprawić słyszalność.)
Ustawienie radia lokalnego
Ustaw ręcznie swoją lokalizację dla stacji lokalnej zamiast zezwolić
odbiornikowi radiowemu na automatyczne wykrywanie.
Przycisk
W interfejsie ustawień możesz wybrać opcję „Budzik”, „Jasność
ekranu”, „Equalizer”, „Stacja lokalna”, „Tryb”, „Ulubione stacje”, „Auto
wyłączanie” i „Minutnik”, aby zatwierdzić funkcję przycisku MODE na
przednim panelu i pilocie.
Equalizer
Domyślne ustawienie EQ to Normalny. Możesz zmienić na Flat, Jazz, Rock,
Muzyka lmowa, Muzyka klasyczna, Pop, Wiadomości lub My EQ.
Wznów po włączeniu
Włącz funkcję wznowienia po włączeniu odbiornika radiowego. Na ekranie
będzie wyświetlane menu główne.
Aktualizacja oprogramowania
Wyświetla się informacja, czy dostępne są aktualizacje oprogramowania
do odbiornika radiowego. Jeśli jest dostępna, wybierz aktualizację, by
rozpocząć.
Page 62

60
Przywrócenie ustawień fabrycznych
Wybierz opcję, aby zresetować odbiornik radiowy i przywrócić wszystkie
ustawienia fabryczne. Potwierdź, że chcesz zresetować urządzenie i jego
ustawienia wybierając „TAK ”.
Radio internetowe
Użyj przycisków lewo/prawo lub obróć pokrętło wyboru, aby wybrać
woknie menu <Radio internetowe>. Naciśnij przycisk OK, aby otworzyć
menu. Pojawi się wiele opcji:
Ulubione: Twoje ulubione stacje radiowe zostaną tutaj zapamiętane,
aby ułatwić ich słuchanie. Możesz po prostu naciśnąć przycisk FAV, aby
wyświetlić listę ulubionych stacji.
Stacja radiowa/muzyka: Wybierz opcję, aby przeglądać stacje radia
internetowego w kategoriach: Global Top 20, Genre, Country/Location,
Highlight. Wyszukaj stacje w odpowiednich kategoriach i wybierz
żądaną stację internetową naciskając przycisk OK.
Stacja lokalna: Odbiornik radiowy jest automatycznie skon gurowany
wtaki sposób, aby wykrywać 10 najlepszych stacji w Twoim kraju,
wszystkie stacje oraz rozmaite gatunki w kategoriach, w kolejności
alfabetycznej. Wybierz kategorię, której chcesz słuchać naciskając przycisk
OK. Kontynuuj przeglądanie, dopóki nie wyświetli się ulubiona stacja.
Radio do snu: Wybierz spośród wielu dźwięków relaksacyjnych.
Ostatnio słuchana stacja: Przeglądaj ostatnio słuchane stacje.
Usługi: Wyszukaj stacje radiowe lub dodaj nową stację radiową lub App.
• Możesz wykorzystać przyciski NUMERYCZNE/LITEROWE do wyszukiwa-
nia stacji radiowych.
• Aby dodać nową stację radiową, wykorzystaj przyciski NUMERYCZNE/
LITEROWE do zaznaczenia wybranego znaku i naciśnij przycisk prawo,
aby przejść do następnego znaku. Jeśli chcesz powrócić do poprzedniego znaku, naciśnij przycisk lewo, aby go zaznaczyć. Naciśnij przycisk OK,
aby wyszukać stację internetową.
Zapisz w pamięci ulubione stacje radia internetowego
Po wyszukaniu żądanej stacji naciśnij i przytrzymaj przycisk FAV , aby
wyświetlić okno ustawień „Dodaj do ulubionych”. Obróć pokrętło
wyboru lub naciśnij przycisk Góra/dół, aby wybrać zapamiętany numer.
Następnie naciśnij przycisk OK, aby zatwierdzić wybór.
Radio FM
Zakres częstotliwości FM: od 87,5 MHz do 108,00 MHz. Wysuń antenę,
aby wyszukać najsilniejszy sygnał dla poszczególnych stacji radiowych.
Użyj przycisków lewo/prawo lub obróć pokrętło wyboru, aby wybrać <FM
> w oknie menu. Następnie naciśnij przycisk OK, aby otworzyć okno FM.
Strojenie stacji
Naciśnij przycisk góra/dół na pilocie lub przednim panelu, aby ustawić
częstotliwość w górę lub w dół ze skokiem o 0,05 MHz.
Naciśnij przycisk lewo/prawo na pilocie, aby przejść do poprzedniej
lub następnej stacji o najsilniejszym sygnale. Po znalezieniu stacji
wyszukiwanie zostanie zatrzymane automatyczne.
Naciśnij przycisk OK, na ekranie wyświetli się komunikat „Automatyczne
wyszukiwanie”. Jeśli wybierzesz opcję „TAK ”, odbiornik radiowy
rozpocznie wyszukiwanie stacji od niższych do wyższych częstotliwości.
Automatycznie wyszukane stacje zostaną zapamiętane.
Zapamiętanie stacji
Aby zapamiętać ulubioną stację, należy najpierw posłuchać danej stacji i
długo nacisnąć przycisk FAV na pilocie. Następnie użyj pr zycisków góra/
dół lub obróć pokrętło wyboru, aby wybrać numer pod którym chcesz
zapamiętać daną stację radiową. Następnie naciśnij przycisk OK, aby
zatwierdzić ulubioną stację.
Przywołanie zapamiętanej stacji
1. Naciśnij przycisk poprzedni/następny na pilocie, aby przejść do
poprzedniej lub następnej stacji.
2. Albo naciśnij przycisk FAV, aby wybrać zapamiętaną stację,
anastępnie naciśnij przycisk OK, aby jej posłuchać.
DAB/DAB+
Użyj przycisków lewo/prawo lub obróć pokrętło wyboru, aby wybrać
opcję <DAB/DAB+> w oknie menu. Naciśnij przycisk OK, aby przejść do
trybu DAB/DAB+.
Przy pierwszym użyciu radia DAB rozpocznie się wyszukiwanie stacji DAB
i wyświetli się komunikat „Wyszukiwanie” na ekranie. Wyświetli się liczba
wyszukanych stacji.
Po wyszukaniu wszystkich dostępnych stacji na ekranie odbiornika radiowego wyświetli się wybór dostępnych stacji. Za pomocą pokrętła wyboru
przewiń i zaznacz wybraną stację. Wybierz stację naciskając przycisk OK.
Po wyborze stacji na ekranie wyświetli się dana stacja i rozpocznie się
odtwarzanie.
Aby wybrać poprzednią lub następną stację, naciśnij przycisk poprzedni
lub następny, aby odpowiednio przewijać stacje.
Słuchając wybranej stacji naciśnij przycisk INFO, aby wyświetlić informacje
o stacji. Informacje na ekranie będą automatycznie przewijane i wyświetli
się gatunek, MHz, odtwarzany utwór, kHz i KB/s.
Aby powrócić do ręcznego przewijania listy, naciśnij przycisk lewo.
Wstępne ustawienie ulubionych stacji DAB/DAB+
Po wyszukaniu żądanej stacji naciśnij i przytrzymaj przycisk FAV przez kilka
sekund, aby przejść do okna „Dodaj do ulubionych”. Obróć pokrętło
wyboru, aby wybrać zapamiętany numer. Naciśnij przycisk OK, aby
zatwierdzić.
Ewentualnie w oknie listy stacji DAB możesz zaznaczyć wybraną
stację i nacisnąć przycisk FAV, aby postępować zgodnie z powyższymi
wskazówkami.
Żeby wyświetlić zapamiętane ulubione stacje, naciśnij przycisk FAV,
aprzyciskiem góra lub dół przewiń listę zapamiętanych stacji.
Centrum informacyjne
Użyj przycisków lewo/prawo lub obróć pokrętło wyboru, aby wybrać
opcję <Centrum informacyjne> w oknie menu. Naciśnij przycisk OK, aby
przejść do okna centrum informacyjnego.
Informacje o pogodzie: Jeśli chcesz wybrać informacje o pogodzie
wżądanym miejscu, najpierw wybierz kontynent za pomocą pokrętła
wyboru, aby przewinąc dostępne opcje. Następnie naciśnij przycisk OK,
aby zatwierdzić. Następnie wybierz kraj, miejscowość/miasto.
Po wybraniu miejscowości/miasta zostaną wyświetlone poniższe
informacje: bieżąca temperatura, symbol obrazujący pogodę, zakres
przybliżonych temperatur na kolejnych 5 dni.
Informacje nansowe: Wybierz z gamy indeksów giełdowych z całego
świata. Użyj pokrętła wyboru, aby przewinąć dostępne opcje. Następnie
naciśnij przycisk OK, aby zatwierdzić. Informacje o systemie: Wyświetl
wersję systemu i informacje opołączeniu bezprzewodowym. Jeśli
wybierzesz informacje o połączeniu bezprzewodowym, można wyszukać
informacje takie jak siła sygnału Wi-Fi.
Page 63

PLPL
Serwis muzyki cyfrowej Spotify Connect
Produkt jest kompatybilny z serwisem muzyki cyfrowej Spotify Connect,
dzięki czemu może działać jako bezprzewodowe głośniki sterowane
za pomocą aplikacji Spotify dostępnej na urządzeniach mobilnych
z systemem iOS lub Android oraz na komputerach stacjonarnych.
Aby przejść do trybu Spotify Connect, naciśnij przycisk MENU w celu
wyświetlenia okna menu głównego. Obracaj pokrętłem wyboru, aby
przełączać się między elementami, dopóki logo Spotify nie zostanie
podświetlone, a następnie krótko naciśnij pokrętło wyboru, aby wybrać
żądany element.
UWAGA: Aby korzystać z serwisu muzyki c yfrowej Spotify
Connect, wymagane jest konto Spotify Premium.
UWAGA: Upewnij się, że opcja <Keep Network Connected> (utrzymuj
połączenie sieciowe) została włączona w urządzeniu. Umożliwi to
strumieniowanie muzyki z serwisu Spotify do urządzenia w trybie
uśpienia lub nie-sieciowym, np. DAB/DAB+, FM i Aux In.
Po wyborze trybu Spotify Connect, przed ustanowieniem połączenia z
aplikację Spotify wyświetli się
komunikat <Waiting for Users> (oczekiwanie na użytkowników).
UWAGA: Odtworzenie okładki albumu na
wyświetlaczu może potrwać do 10 sekund.
Jak korzystać z funkcji Spotify Connect
Słuchaj muzyki z wykorzystując funkcję Spotify Connect.
1. Podłącz urządzenie SHARP DR-I470 do sieci Wi-Fi.
2. Otwórz aplikację Spotify w swoim telefonie, tablecie lub laptopie
wykorzystując tę samą sieć Wi-Fi.
3. Rozpocznij odtwarzanie utworu i wybierz dostępne urządzenia.
4. Wybierz urządzenie SHARP DR-I470 i rozpocznij słuchanie.
Więcej informacji na temat kon gurowania i korzystania z serwisu Spotify
Connect można znaleźć na stronie www.spotify.com/connect.
Oprogramowanie Spotify jest objęte innymi licencjami, które można znaleźć
tutaj: https://www.spotify.com/connect/third-party-licenses
Aby ustanowić połączenie między urządzeniem z zainstalowaną aplikacją
Spotify i radiem, urządzania muszą zostać podłączone do tej samej sieci
Wi-Fi.
Aby powiększyć wyświetlaną gra kę, należy krótko nacisnąć przycisk
MENU. Naciśnij ponownie, aby powrócić do trybu standardowego
wyświetlania.
UWAGA: Po ustanowieniu połączenia konto Spotify jest połączone
z aplikacją i urządzeniem, umożliwiając połączenie z DR-I470.
Sterując aplikacją Spotify za pomocą DR-I470 można zmienić poziom
głośności, odtwarzać lub wstrzymać odtwarzanie, a także przemieszczać
się między utworami na liście odtwarzania za pomocą pilota.
Zmiany dokonane za pomocą pilota obowiązują w aplikacji Spotify
Connect i urządzeniu.
Dopóki urządzenie z zainstalowaną aplikacją Spotify jest połączone
z radiem w tej samej sieci i została wybrana opcja <Keep network
connected> (utrzymuj połączenie sieciowe), zazwyczaj można włączyć
zasilanie radia przy rozpoczęciu odtwarzania muzyki z aplikacji Spotify.
Tryb AUX
Port AUX-IN
Użyj przycisków lewo/prawo lub obróć pokrętło wyboru, aby wybrać opcję
<AUX> w oknie menu. Naciśnij przycisk OK, aby przejść do trybu AUX.
Podłącz kabel AUX do odbiornika radiowego poprzez port AUX-IN z tyłu
odbiornika radiowego. Rozpocznij odtwarzanie dźwięku ze swojego
urządzenia, który w trybie AUX zostanie odtworzony przez odbiornik radiowy.
Wyjście liniowe (słuchawkowe)
Na tylnym panelu odbiornika radiowego znajduje się gniazdo
słuchawkowe, które umożliwia słuchanie dźwięku poprzez odbiornik
radiowy. Rozpocznij odtwarzanie dźwięku w trybie radia internetowego,
AUX lub Bluetooth.
Bluetooth
Użyj przycisków lewo/prawo lub obróć pokrętło wyboru, aby wybrać
opcję <Bluetooth> w oknie menu. Naciśnij przycisk OK, aby przejść do
trybu Bluetooth.
1. Przejdź do ustawień swojego urządzenia, aby podłączyć je do
odbiornika radiowego poprzez Bluetooth.
2. Wybierz nazwę „SHARP DR-I470” na liście wyszukanych urządzeń.
Po pomyślnym podłączeniu odbiornik radiowy wyemituje komunikat
„Connected” (podłączony), a na ekranie wyświetli się napis
„Bluetooth podłączony”.
3. Wybierz utwór w swoim urządzeniu i odtwarzaj.
4. Teraz możesz cieszyć się muzyką odtwarzaną z urządzenia
zewnętrznego.
5. Aby rozłączyć urządzenia, przełącz się do innego trybu odtwarzania
lub wyłącz funkcję Bluetooth w swoim urządzeniu.
AirMusic Control - Aplikacja SHARP Smart
Control
Pobrana i zainstalowana na urządzeniu mobilnym użytkownika SHARP
Smart Control App aplikacja służy do zdalnego zarządzania opisywanym
urządzeniem. Należy pamiętać, że radio DR-I470 i urządzenie mobilne z
zainstalowaną aplikacją SHARP Smart Control należy podłączyć do tej
samej sieci. W przeciwnym razie oba urządzenia nie będą mogły się ze sobą
połączyć. Po otwarciu aplikacji wyświetli się lista dostępnych urządzeń.
Kliknij na odpowiednie urządzenie, aby się połączyć.
UWAGA: urządzenie automatycznie dostosuje język radia
DR-I470 do języka ustawionego w urządzeniu mobilnym
z zainstalowaną aplikację SHARP Smart Control.
Kod QR aplikacji SHARP Smart Control jest dostępny w: Internet Radio>
Service> App
Aplikacja pozwala użytkownikowi sterować opisywanym urządzeniem
za pomocą telefonu komórkowego:
Wybierz odpowiednią zakładkę, aby zarządzać radiem.
Naciśnij ikonę
(ustawienia), aby wprowadzić więcej opcji (zmień nazwę urządzenia,
sprawdź dostępność aktualizacji oprogramowania, wyszukaj inne
urządzenia lub wyświetl więcej informacji).
, aby wyświetlić zakładkę boczną. Wybierz Settings
Page 64

62
Naciśnij ikonę , aby przejść do trybu
zdalnego sterowania. Aplikacja posłuży jako
pilot zdalnego sterowania, a na urządzeniu
mobilnym z zainstalowaną aplikacją SHARP
Smart Control zostaną wyświetlone przyciski
zdalnego sterowania.
1. Wyłączenie urządzenia
2. Przycisk OK
3. Przycisk MODE (zmiana trybu
odtwarzania)
4. Przycisk MENU
5. Wyświetlanie ulubionych stacji radiowych
6. Przycisk wyboru (taka sama funkcja jak
przycisku MODE na urządzeniu)
7. Wyłącznik czasowy
8. Budzik
9. Jasność ekranu
10. Poprzednia
11. Odtwarzanie/pauza
12. Następna
13. Przyciski numeryczne
14. Ustawienia korektora brzmienia
15. Wyciszenie
16. Zwiększenie poziomu głośności
17. Zmniejszenie poziomu głośności
18. Przyciski kierunkowe
19. Powrót do menu głównego aplikacji
Naciśnij przycisk
czuwania. Następnie wybierz obraz lub wykonaj zdjęcie, które ma być
ustawione jako wygaszacz ekranu w trybie czuwania.
Naciśnij przycisk
Naciśnij i przytrzymaj przycisk
Zwolnij przycisk, aby zatrzymać nagrywanie. Czerwone pulsujące kółko
zostanie wyświetlone w lewym górnym narożniku ekranu radia. Aby
odtworzyć komunikat głosowy, należy otworzyć dowolną zakładkę w
menu; nagranie zostanie odtworzone strumieniowo poprzez głośnik
radiowy.
Naciśnij przycisk
przytrzymaj przycisk , aby nagrać; zwolnij przycisk, aby zatrzymać
nagrywanie. Nagranie zostanie odtworzone strumieniowo poprzez głośnik
radiowy.
Naciśnij przycisk
zapisany w urządzeniu mobilnym w celu odtwarzania strumieniowego
poprzez radio.
Naciśnij przycisk
strumieniowo jedną z 5 pierwszych ulubionych stacji.
, aby przejść do ustawień wyboru okna w trybie
, aby wprowadzić opcję komunikatów głosowych.
, aby nagrać komunikat głosowy.
, aby wprowadzić opcję interkomu. Naciśnij i
, aby wprowadzić lokalny katalog muzyczny
, aby odtwarzać
Rozwiązywanie problemów
Niniejszy produkt nie posiada żadnych części, które może naprawiać
użytkownik. W przypadku wystąpienia usterki skontaktuj się z
producentem lub autoryzowanym serwisem. Odsłanianie wewnętrznych
części urządzenia może stanowić zagrożenie dla życia. Gwarancja
nie obejmuje usterek wywołanych naprawami wykonywanymi przez
nieupoważnione strony trzecie.
Brak dźwięku
Przyczyna
• Dźwięk nie jest włączony.
Rozwiązanie
• Ustawić w odpowiedniej pozycji pokrętło dźwięku.
Brak dźwięku z urządzenia podłączonego poprzez
Bluetooth
Rozwiązanie
• Sprawdź, czy urządzenie zewnętrzne nie wymaga wprowadzenia hasła
„0000" do uruchomienia.
Brak połączenia Wi-Fi
Rozwiązanie
• Upewnij się, że w ustawieniach został wybrany tryb Wi-Fi i wprowadzone
prawidłowe hasło dla modemu Wi-Fi.
Szum
Przyczyna
• Słaby odbiór sygnału.
Rozwiązanie
• Wyregulowaćantenę lub przenieść urządzenie w miejsce, w którym
odbiór sygnału jest lepszy.
Dźwięk jest zniekształcony.
Przyczyna
• Zbyt wysoki poziom głośności.
Rozwiązanie
• Zmniejszyć głośność.
Nie odnaleziono żądanej stacji.
Przyczyna
• Słaby sygnał
Rozwiązanie
• Użyćfunkcji ręcznego dostrajania.
Nie działa DAB
Przyczyna
• Brak obsługi DAB na danym terenie.
• Słaby sygnał
Rozwiązanie
• Wyregulować ustawienie anteny.
Brak danych na wyświetlaczu.
Przyczyna
• Sytuacja ta może wystąpić, kiedy nadawca zmieni oznaczenie usługi lub
usunie oznaczenie w trakcie dostrajania.
Rozwiązanie
• Odbiornik będzie próbował się dostroić.
• Przeprowadzić skanowanie stacji.
Brak zasilania
Przyczyna
• Zasilacz nie jest podłączony do gniazda w ścianie.
Rozwiązanie
• Sprawdzić, czy zasilacz jest podłączony do gniazda.
Page 65

Dane techniczne
Model DR-I470 Pro
Moc wyjściowa 2 x 7 W (RMS)
Pobór energii (maks.) 28 W
Pobór energii (standard) 8 W
Pobór energii w trybie czuwania <1 W
Częstotliwość FM 87.5-108 MHz
DAB+ Częstotliwość 174.928-239.200 MH z
Bluetooth
Wersja V5.0
Pasma częstotliwości 2402 MH z ~ 2480 MHz
Maksymalny poziom przekazywanej mocy 4 dBm
Power Adapter
Nazwa modelu FJ-SW1202000N
Wejście AC 100-240 V ~ 50/60 Hz, 0.6 A Max
PLPL
Wyjście
Producent
WIFI
Połączenie Wi-Fi 802.11 b/g/n; STA/AP/AP Client
B1,Xujing chang Industrial Park, Haoye Road, Fuyong 518103 Shenzhen, China
SHENZHEN FU JIA APPLIANCE CO., LTD
DC 12 V
⎓2000 mA
145 mm
354 mm
KG
3,16 kg
185 mm
Page 66

64
RU
Важные инструкции по технике
безопасности
Следует внимательно прочитать настоящие
правила техники безопасности и соблюдать
следующие меры предосторожности до начала
работы устройства:
Восклицательный знак в равностороннем треугольнике
уведомляет пользователя оважных инструкциях по
эксплуатации и техническому (сервисному) обслуживанию,
которые содержатся в сопроводительной документации
устройства.
Используйте только указанный в руководстве
пользователя источник питания.
Данный символ обозначает, что изделие подлежит
утилизации в соответствии сположениями о защите
окружающей среде и не пригодно для утилизации с
обычным бытовым мусором.
AC Напряжение перем. тока
DC Напряжение пост. тока
Оборудование класса II
Только для использования в помещениях
Обозначение уровня энергоэффективности VI
Полярность силового разъема постоянного тока
Для предотвращения пожара
следует держать свечи и иные
источники открытого огня на
расстоянии от данного продукта.
Предупреждение:
• В процессе использования устройства всегда соблюдайте основные
правила техники безопасности, особенно в присутствии детей.
• Дети должны находиться под надзором, чтобы они не могли играть
с устройством.
• Не допускайте повреждения шнура питания, не ставьте на него
тяжелые предметы, не растягивайте и не скручивайте его. Также
не подсоединяйте к нему удлинительные кабели. Повреждение
шнура питания может привести к возгоранию или поражению
электрическим током.
• Если шнур питания поврежден, его во избежание возникновения
опасных ситуаций должен заменить производитель, сервисный
агент или другие лица аналогичной квалификации.
• Устройство нужно подключить к розетке 100-240В перем. тока,
50/60Гц. Использование более высокого напряжения может
привести к нарушению функционирования устройства и даже
возгоранию.
• Если вилка устройства не подходит к розетке, не применяйте силу,
чтобы вставить ее.
• Прежде чем отключать устройство от источника питания, выключите
его.
• Не подключайте и не отключайте шнур питания мокрыми руками.
Это может привести к поражению электрическим током.
• Отключите шнур питания, если устройство не используется в
течение длительного времени.
• Вы всегда должны иметь свободный доступ к сетевой вилке.
• Данное изделие не содержит компонентов, техническое
обслуживание которых пользователь может осуществлять
самостоятельно. В случае возникновения неисправностей следует
связаться с производителем или представителем авторизованного
сервисного центра. Контакт с некоторыми частями внутри
устройства может представлять опасность для жизни. Гарантия
производителя не распространяется на неисправности, возникшие
вследствие проведения ремонта неуполномоченными третьими
лицами.
• Не используйте устройство сразу после распаковки. Перед
использованием дождитесь, пока температура устройства не
достигнет значения комнатной.
• Данное изделие предназначено для использования только в
условиях умеренного климата (не тропического/субтропического).
• Установите изделие на ровную, устойчивую поверхность, не
подверженную воздействию вибраций.
• Убедитесь в том, что изделие и его компоненты не нависают над
краем мебели, на которую оно установлено.
• Во избежание риски возгорания, поражения электрическим током
или повреждения данного изделия не подвергайте его воздействию
прямых солнечных лучей, пыли, дождя и влаги. Не допускайте
попадания на изделие капель или брызг жидкостей, не ставьте на
изделие или рядом с ним наполненные жидкостью емкости.
• Не ставьте на устройство наполненные жидкостью емкости,
например вазы.
• Ну устанавливайте рядом с ним источники тепла, например
радиаторы, обогреватели, печи или другие устройства (включая
усилители), вырабатывающие тепло.
• Не устанавливайте изделие в местах с повышенным уровнем
влажности и плохой вентиляцией.
• Оставьте вокруг устройства свободный зазор минимум 5 см
для обеспечения надлежащей вентиляции. Не закрывайте
вентиляционные отверстия данного проекта. Убедитесь в том,
что вентиляционные отверстия не закрывают другие предметы,
например газеты, скатерти, шторы и т. д.
• НЕ ПОЗВОЛЯЙТЕ никому, особенно детям, вставлять посторонние
предметы в порты, слоты и прочие отверстия в корпусе устройства,
поскольку это может привести к поражению электрическим током с
летальным исходом.
• Бури представляют опасность для всех электрических устройств.
Удар молнии в сетевой или воздушный провод может привести к
повреждению устройства, даже если оно выключено. Перед грозой
необходимо отключить все кабели и провода.
Техническое обслуживание
• Прежде чем приступать к очистке устройства, отключите шнур
питания от источника энергии.
• Для очистки внешней поверхности устройства используйте мягкую и
чистую салфетку. Никогда не очищайте еще с помощью химических
или моющих средств.
Адаптер питания
• Чтобы отключить устройство от сети питания, извлеките провод из
сетевой розетки.
• Используйте только входящий в комплект адаптер питания,
поскольку невыполнение данного условия может привести
квозникновению угрозы безопасности и/или повреждению
устройства.
Батарейки
• Вставляя батаорейки, обращайте внимание на
полярность.
• Не подвергайте батарейки воздействию высоких
температур и не размещайте их в местах, где
возможно быстрое повышение температуры,
Cd
Page 67

например, вблизи огня или в области воздействия прямых
солнечных лучей.
• Не подвергайте батарейки воздействию чрезмерного лучистого
тепла, не бросайте их в огонь, не разбирайте их и не пытайтесь
повторно зарядить севшие батарейки. Они могут протечь или
взорваться.
• Никогда не используйте разные батарейки или комбинацию старых
и новых батареек.
• Если пульт дистанционного управления не будет использоваться в
течение длительного периода (свыше одного месяца), во избежание
протекания батареек выньте их из пульта.
• Если батарейки протекли, вытрите внутреннюю часть отсека для
батареек и замените их новыми.
• Используйте только указанные батарейки.
Не допускайте проглатывания батареек, опасность химического
ожога
• Проглатывание батареек может привести к возникновению тяжелых
внутренних ожогов уже в течение 2 часов и смерти. Держите
новые и использованные батарейки в недоступном для детей
месте. Если не получается надежно закрыть отсек для батареек,
прекратите использование изделия и держите его в недоступном
для детей месте. В случае возникновения подозрений относительно
проглатывания батареек или попадания их в какую-либо часть
организма немедленно обратитесь к врачу.
Утилизация оборудования и батареек
• Не выбрасывайте данное изделие или батарейки
вместе с несортированными городскими отходами.
Обратитесь на специальный пункт приема отходов
электронного и электрического оборудования для
последующей утилизации в соответствии с местными
законодательными предписаниями. Так вы вносите
свой вклад в сохранение ресурсов и защиту окружающей среды.
• В большинстве стран ЕС утилизация батареек регулируется
законодательными положениями. Для получения более подробной
информации обратитесь к продавцу или местные органы власти.
RU
• Приведенный выше символ наносится на электрическое
и электронное оборудование (или их упаковку) в качестве
напоминания.
• Пользователи обязаны сдавать отработавшее оборудование и
батарейки в существующие пункты возврата.
Заявление о соответствии требованиям для
получения маркировки CE и UKCA:
• Настоящим компания Sharp Consumer Electronics Poland sp. z o.o.
заявляет, что данное аудиоустройство соответствует обязательным
требованиям и прочим важным положениям Директивы ЕС по
радиооборудованию 2014/53/EU и Директивы Великобритании в
отношении радиооборудования от 2017года.
• Для ознакомления с полным текстом Декларации о соответствии
требованиям ЕС перейдите по ссылке www.sharpconsumer.com,
откройте раздел загрузки для вашей модели и выберите документ
«CE Statements».
Page 68

66
RU
Содержимое коробки:
• 1x Основной блок
• 1x Пульт дистанционного управления
• 1x Адаптер питания
• 1x Руководство пользователя
• 1x Разъем AC для адаптера питания (Великобритания)
• 1x Разъем AC для адаптера питания (ЕС)
Панели и элементы управления
Передняя панель
9
1
3
5
7
1. MODE (Режим) – нажмите, чтобы изменить режим: DAB/DAB+, FM,
Интернет-радио, Bluetooth, AUX IN.
При помощи опции <Кнопка> в меню КОНФИГУРАЦИЯ данной
кнопке также можно присвоить другую функцию: Будильник, Подсветка, Эквалайзер, Местные радиостанции, Режим, Предустановка, Таймер выключения, Таймер.
ПРИМЕЧАНИЯ. ПО УМОЛЧАНИЮ ДАННОЙ КНОПКЕ
ПРИСВОЕНА ФУНКЦИЯ ИЗМЕНЕНИЯ РЕЖИМА.
2. STANDBY (Режим ожидания) – нажмите эту кнопку, чтобы вклю-
чить устройство или перейти в режим ожидания.
3. MENU (Меню) – Нажмите эту кнопку, чтобы войти в интерфейс
настройки меню.
4. SLEEP (Сон) – нажмите несколько раз, чтобы установить нужное
время выключения.
5. ◄ – на странице настройки используйте эту кнопку для перехода
к предыдущему выбранному элементу. При прослушивании радио
коротким нажатием этой кнопки можно понижать частоту с шагом
0,05МГц.
6. ► – на странице настройки используйте эту кнопку для перехода
к следующему выбранному элементу. При прослушивании радио
коротким нажатием этой кнопки можно повышать частоту с шагом
0,05МГц.
7. DIMMER (Подсветка) – нажмите, чтобы отрегулировать интенсив-
ность задней подсветки.
8. PRESET (Предустановка) – при прослушивании Интернет-радио
нажмите эту кнопку, чтобы перейти на страницу «Радиостанция/Музыка».
9. ЭКРАН ДИСПЛЕЯ – используется для вывода информации.
E
D
O
M
U
N
E
M
R
E
M
M
I
D
P
R
E
S
E
T
2
4
6
8
Задняя панель
11
12
10. Регулятор громкости / поворотный регулятор / кнопка ОК – в
процессе воспроизведения поворачивайте регулятор, чтобы
настроить уровень громкости. В процессе настройки меню поворачивайте регулятор для выбора опций, нажмите на регулятор,
чтобы подтвердить выбор.
AUX IN
DC 12V
11. FM-антенна – для приема FM-сигнала.
12. Разъем для наушников– разъем для наушников 3,5мм.
13. Входной разъем AUX IN – подключите аудиокабель 3,5мм для
воспроизведения музыки с внешнего источника аудиосигнала.
14. Вход питания DC – 12В пост. тока
Пульт дистанционного управления
1
2
3
4
5
6
7
8
9
10
11
12
13
14
1. РЕЖИМ ОЖИДАНИЯ – нажмите кнопку РЕЖИМ ОЖИДАНИЯ на
пульте ДУ, чтобы «разбудить» устройство или перевести его в
режим ожидания.
2. SOURCE – Нажмите кнопку SOURCE, чтобы изменить режимы вос-
произведения: DAB / DAB +, укв, AUX IN, Bluetooth, интернет-радио.
Примечание: эту кнопку можно использовать в качестве другой
функции, установив ее из пункта <кнопка> в КОНФИГУРАЦИЯ:
Будильник, подсветка, эквалайзер, местные Радиостанция, Режим,
Предустановка, Таймер Выключения, таймер
3. MENU (Меню) – нажмите кнопку MENU на пульте ДУ или на передней
панели, чтобы открыть страницу меню, нажимайте кнопки НАПРАВЛЕНИЯ или поворачивайте регулятор для перехода между пунктами
меню: Интернет-радио, УКВ, DAB/DAB+, Spotify, Информационный
центр, AUX, Bluetooth, Конфигурация, Местные радиостанции.
SOURCE
MENU
OK
VOL- VOL+
SLEEP ALARM
EQ
1
2
ABC DEF
5
4
GHI JKL MNO
7
8 9
PQRS TUV WXYZ
WPS DIMMER
0
15
INFO
16
17
18
19
FAV
20
21
3
6
22
10
13
14
Page 69

RU
4. ВВЕРХ / 5. OK / 6. ВЛЕВО / 7. ВНИЗ / 17. ВПРАВО – используйте
кнопки ВВЕРХ и ВНИЗ или поворотный регулятор для поиска
элементов, а затем нажмите кнопку ОК, чтобы подтвердить выбор.
8. VOL- (Уменьшение громкости) / 18. VOL+ (Увеличение громкости) – чтобы отрегулировать громкость, нажимайте кнопки VOL+
или VOL- или поворачивайте регулятор громкости.
9. ВОСПРОИЗВЕДЕНИЕ/ПАУЗА – нажмите кнопку ВОСПРОИЗВЕДЕНИЕ/ПАУЗА, чтобы остановить воспроизведение, нажмите ее еще
раз, чтобы возобновить его.
10. НАЗАД / 19. ВПЕРЕД – в процессе воспроизведения музыки
используйте кнопку НАЗАД или ВПЕРЕД для перехода к предыдущей или следующей дорожке. При прослушивании радио, нажимайте кнопку НАЗАД или ВПЕРЕД для перехода к предыдущей
или следующей любимой станции.
11. ALARM (Будильник) – нажмите кнопку ALARM, чтобы просмотреть
и настроить опции будильника.
12. SLEEP (Сон) – нажмите кнопку SLEEP несколько раз, чтобы выбрать
нужное время выключения.
13. ЦИФРЫ/БУКВЫ – используйте цифры и буквы для ввода в процессе настройки меню.
14. WPS – WPS Параметры
15. ОТКЛЮЧЕНИЕ ЗВУКА – нажмите кнопку ОТКЛЮЧЕНИЕ ЗВУКА,
чтобы выключить звук, нажмите ее еще раз или нажимайте кнопки
VOL+/- на пульте ДУ или же поворачивайте регулятор громкости
на верхней панели, чтобы снова включить его.
16. INFO (Информация) – нажмите кнопку INFO, чтобы просмотреть
информацию о станции.
20. EQ (Эквалайзер) – нажмите кнопку EQ несколько раз, чтобы
выбрать нужный режим: Нормальный, Плоский, Джаз, Рок, Фонограммы, Классический, Поп, Новости, My EQ.
21. FAV (Избранное) – нажмите и удерживайте кнопку FAV, чтобы сохранить станцию. Нажмите кнопку FAV коротким нажатием, чтобы
просмотреть список сохраненных любимых станций.
22. DIMMER (Подсветка) – нажимайте кнопку DIMMER, чтобы отрегулировать интенсивность задней подсветки
УСТАНОВКА ИЛИ ЗАМЕНА БАТАРЕЕК ПУЛЬТА ДУ
1. Нажмите на фиксатор крышки отсека для батареек на задней
панели пульта ДУ в направлении, указанном рельефной стрелкой.
2. Одновременно с нажатием на фиксатор
откройте крышку отсека для батареек.
3. Вставьте две батарейки, соблюдая полярность +,-, как показано на
рисунке. Используйте для замены только батарейки того же типа.
4. Установите крышку отсека для батареек
на место и зафиксируйте ее.
Запуск Интернет-радио
Подключите адаптер питания к разъему DC IN. На экране появится
надпись «Добро пожаловать».
Убедитесь в том, что антенна выдвинута на максимально возможную
длину. Это обеспечит наилучшее качество сигнала.
При первом использовании после вывода приветствия можно выбрать
язык, воспользовавшись поворотным регулятором для прокрутки и
нажав кнопку OK для подтверждения.
После настройки языка на дисплее появляется надпись «Запустить
проверку сети после включения?». Вы можете выбрать опцию «ДА»
или «НЕТ», чтобы включить или выключить проверку сети при запуске
устройства.
Настройка WIFI вручную
После настройки на экране появляется сообщение «Настроить
конфигурацию сети?».
• Если вы выбираете опцию «ДА», ваш радиоприемник начинает
поиск расположенных поблизости сетей для соединения. После сканирования вы должны выбрать сеть, к которой хотите подключиться.
Введите буквы/цифры, используйте для этого поворотный регуля-
тор или нажимайте кнопки с ЦИФРАМИ/БУКВАМИ, пока на экране
не отобразится нужная цифра, а затем нажмите кнопку ВПРАВО,
чтобы перейти к следующей цифре. По завершении нажмите кнопку
OK для подтверждения.
• Если вы выбираете опцию «НЕТ», вы можете выполнить настройку
позже через меню настройки конфигурации.
Беспроводная сеть (WPS PBC)
Если на этапе «Настроить конфигурацию сети?» вы выбираете опцию
«ДА (WPS)», ваш радиоприемник начинает поиск соединений WiFi.
В процессе выбора у вас будет 120 секунд, чтобы нажать кнопку WPS
на вашем WiFi-модеме. Так можно подключить WiFi к радиоприемнику,
не вписывая пароль вручную.
WIFI-соединение установлено!
После установления WIFI-соединения путем ввода пароля вручную
или посредством WPS откроется страница главного меню, в левом углу
которой будет отображен белый символ WIFI. Настройка Интернетрадио завершена!
Конфигурация
При помощи кнопок ВЛЕВО/ВПРАВО или поворотного регулятора
выберите опцию <Конфигурация> на странице меню, а затем нажмите кнопку OK для перехода на страницу настройки конфигурации.
Отображение времени
Выберите режим отображения времени: аналоговый или цифровой.
Управление my mediaU
Включите или выключите функцию
QR-код MediaU доступен в: Конфигурация > Управление моим mediaU
> Включить.
Сеть
• Конфигурация беспроводной сети
• На странице настроек сети можно настроить параметры WIFI-со-
единения, выбрав опцию «Конфигурация беспроводной сети».
Радиоприемник начнет поиск доступных WIFI-соединений.
• Найдите нужное WIFI-соединение и выберите его, нажав кнопку
OK. Для ввода букв/цифр воспользуйтесь поворотным регулятором или нажимайте кнопки с БУКВАМИ/ЦИФРАМИ, пока на
дисплее не будет отображена нужная цифра. Затем нажмите кнопку ВПРАВО, чтобы перейти к следующей цифре. Нажмите кнопку
ВЛЕВО, чтобы вернуться к предыдущей цифре. По завершении
нажмите кнопку OK для подтверждения.
• После подключения к сети WIFI на дисплее появится страница главного меню с белым символом сигнала WIFI в левом верхнем углу.
• Беспроводная сеть (WPS PBC)
• Выберите эту опцию для поиска WIFI-соединения. В процессе
выбора у вас будет 120 секунд, чтобы нажать кнопку WPS на вашем
WiFi-модеме. Так можно подключить WiFi к радиоприемнику, не
вписывая пароль вручную.
• Настройка вручную
• Вы можете настроить беспроводную передачу данных вручную:
DHCP, ввод SSID и «Управление».
• Проверка сети при включении
• Включите или выключите функцию
Дата и время
• Установить дату и время
• Ручная настройка или Автообнаружение
Вы можете воспользоваться опцией ручной настройки даты и времени вместо функции автообнаружения. При помощи поворотно-
го регулятора или кнопок с цифрами введите нужную цифру для
настройки месяца. Установив соответствующую цифру, нажмите
кнопку ВПРАВО, чтобы перейти к настройке дня. Аналогичным
Page 70

68
RU
образом установите год, часы и минуты. По завершении ручной
настройки нажмите кнопку OK для ввода. Чтобы отменить формат
даты и времени, измените настройки в меню «Дата и время».
• Установить формат времени: Установите 12- или 24-часовой
формат отображения времени.
• Установить формат даты: ГГГГ/ММ/ДД, ДД/ММ/ГГГГ, ММ/ДД/ГГГГ
Будильник
• Настройка будильника 1 / будильника 2
• Чтобы установить будильник на радиоприемнике, перейдите в
меню «Конфигурация» и выберите опцию «Будильник» или
нажмите кнопку ALARM на пульте ДУ.
• Перейдя на страницу настройки будильника, выберите опцию
«Будильник 1 (выключить)» или «Будильник 2 (выключить)» , а
затем опцию «Включить», чтобы включить будильник.
• Выберите опцию «Повторить», чтобы установить периодичность
срабатывания будильника, и нажмите кнопку OK. Вы можете
выбрать опцию «Каждый день», «Один раз» или установить отдельные дни. Сделав выбор, нажмите кнопку ВЛЕВО, чтобы вернуться
к другим настройкам будильника.
• Выберите опцию «Время» и выделите час срабатывания будильника при помощи поворотного регулятора. Установив нужное
время в часах, нажмите кнопку ВПРАВО, чтобы перейти к минутам.
• Установив нужное значение в минутах, нажмите кнопку ВПРАВО,
чтобы выбрать опцию «AM» (время с полуночи до полудня) или
«PM» (время с полудня до полуночи), и нажмите кнопку OK для
подтверждения и возврата к настройкам будильника.
• Прокрутите меню вниз и выберите опцию «Звук», нажав кнопку
OK. Вы можете выбрать зуммерный сигнал, мелодию, Интернет-ра-
дио, FM или DAB/DAB+.
• Если в качестве звука будильника вы выбрали Интернет-радио,
FM или DAB/DAB+, далее откроется список предварительно настроенных любимых станций. Выберите станцию для будильника и
нажмите кнопку OK.
• На главной странице появится символ будильника.
• Как отменить будильник
• Чтобы отменить будильник, выберите опцию «Будильник» в меню
«Конфигурация» или нажмите кнопку ALARM и выберите будильник, который вы хотите выключить.
• Выбрав будильник, вы сможете выключить или включить его. Выделите опцию «Выключить» и нажмите кнопку OK для подтверждения.
ПРИМЕЧАНИЕ: Чтобы изменить громкость будильника, выберите
опцию «Громкость сигнала» на странице настройки будильника.
• Как выключить будильник после срабатывания
Когда звучит будильник, нажмите на пульте ДУ кнопку ALARM или
кнопку РЕЖИМ ОЖИДАНИЯ, чтобы выключить его. Если вы установили будильник на срабатывание каждый день или несколько раз,
символ будильника останется на дисплее.
• Как установить будильник на повтор
Когда звучит будильник, нажмите любую кнопку, кроме кнопок
РЕЖИМ ОЖИДАНИЯ или ALARM, чтобы прервать сигнал или
перевести будильник в режим ПОВТОРА. В режиме ПОВТОРА радио-
приемник снова включится через 5минут.
ПРИМЕЧАНИЕ: Чтобы выключить ПОВТОРНЫЙ СИГНАЛбудильника,
нажмите кнопку ALARM или кнопку РЕЖИМ ОЖИДАНИЯ.
• Отсрочка будильника
• Выбрав опцию «Будильник» в меню «Конфигурация» или нажав
кнопку ALARM на пульте ДУ, выберите опцию «Время отсрочки
будильника (выключить)».
• Установите нужное время отсрочки будильника в минутах: Вы-
ключить, 5 минут, 10 минут, 20 минут, 30 минут, 60 минут, 90 минут,
120 минут.
• Громкость сигнала
• Чтобы изменить громкость сигнала, поворачивайте регулятор
громкости или нажимайте кнопки ВЛЕВО/ВПРАВО.
• Установив нужный уровень громкости, нажмите кнопку OK для
подтверждения.
Таймер
• Выберите в меню «Конфигурация» опцию «Таймер». На экране
появится надпись «00:00».
• Чтобы увеличить количество секунд, нажимайте кнопку ВПРАВО.
Чтобы уменьшить количество секунд, нажимайте кнопку ВЛЕВО.
Нажмите и удерживайте кнопки ВЛЕВО/ВПРАВО для быстрого
изменения времени таймера.
• Установив нужное время, подтвердите его нажатием кнопки OK.
Язык
Выберите нужный язык из списка
Подсветка
• Чтобы настроить интенсивность подсветки радиоприемника, пере-
йдите в меню «Конфигурация» и выберите опцию «Подсветка». Вы
можете выбрать опцию «Энергосбережение» или «Включить».
• Выберите режим «Энергосбережение», чтобы изменить уровень
яркости (до 20 уровней). Если радиоприемник не используется в
течение 15 секунд, уровень яркости понижается до тех пор, пока не
будет нажата кнопка или активирована опция «Включить».
• Выберите режим «Включить», определяющий уровень яркости на
время активной работы или использования радиоприемника.
• Вы также можете изменять обе настройки путем нажатия кнопки
DIMMER на пульте ДУ или передней панели.
Дисплей
Выберите Цветной или Монохромный вариант дисплея.
Управление питанием
Выберите эту опцию для настройки автоматического перехода
радиоприемника в режим ожидания по истечении заданного времени
отсутствия активности или сигнала WIFI. Выберите 5/15/30 минут
для перехода в режим ожидания или опцию «Выключить», чтобы не
использовать эту функцию.
Таймер выключения
• Чтобы настроить таймер выключения, перейдите в меню «Конфигурация» и выберите опцию «Таймер выключения». Вы можете вы-
брать опцию «Выключить» или 15, 30, 60, 90, 120, 150 180 минут.
• Вы также можете несколько раз нажать кнопку SLEEP на пульте ДУ,
чтобы выбрать время выключения, которое отображается в правом
верхнем углу экрана. Вы можете выбрать 15, 30, 60, 90, 120, 150,
180 минут.
• После настройки таймера выключения в правом верхнем углу
дисплея будет отображено время таймера и символ сна.
Интернет-радио
• Настройка Интернет-радио: Буфер и Качество звука.
• Буфер: Установите буферное время воспроизведения музыки: 2/4/8
секунд.
• Качество звука: Настройте качество звука в соответствии со своими
предпочтениями: Высокое/низкое
Погода
• Задайте местоположение: Выберите и введите ваше местополо-
жение
• Температура: Выберите предпочтительные единицы измерения
температуры: «Цельсий» или «Фаренгейт».
• Отображать в режиме ожидания: Выберите опцию «ВЫКЛ» или
«ВКЛ», чтобы выключить или включить функцию вывода прогноза
погоды на дисплей в режиме ожидания. При включении функции вывода прогноза погоды, данные отображаются на дисплее в режиме
ожидания каждые 10 секунд.
Настройка УКВ
• Режим: Вы можете выбрать режим «Моно» или «Стерео»
• Порог: Установите пороговые значения (Порог поиска/Стерео порог).
• (Пороговое значение позволяет настроить функцию автоматиче-
ского переключения между режимами моно и стерео. В области со
слабым сигналом система автоматически перейдет в режим моно
для снижения фоновых шумов станции и повышения четкости звука).
Настройка местных радиостанций
Ручная настройка местоположения для поиска местных радиостанций
вместо использования функции автообнаружения.
Кнопка
На этой странице настройки вы можете выбрать опцию «Будильник»,
«Подсветка», «Эквалайзер», «Местные радиостанции», «Режим»,
Page 71

RU
«Предустановка», «Таймер выключения» и «Таймер» для
подтверждения функции MODE на передней панели и пульте ДУ.
Эквалайзер
По умолчанию эквалайзер работает в нормальном режиме. Вы также
можете выбрать режим «Плоский», «Джаз», «Рок», «Фонограммы»,
«Классический», «Поп», «Новости» или «my EQ».
Возобновление при включении питания
Включите эту функцию для возобновления работы радиоприемника
при включении питания. На экране будет отображена страница
главного меню.
Обновление программы
Здесь отображаются доступные обновления для программного
обеспечения радиоприемника. В случае наличия обновления
выберите опцию для установки.
Восстановить стандартные настройки
Выберите эту опцию, чтобы сбросить все настройки и предварительно
настроенные станции. Подтвердите запрос на сброс настроек
устройства, выбрав опцию «ДА».
Интернет-радио
При помощи кнопок ВЛЕВО/ПРАВО или поворотного регулятора
выберите пункт <Интернет-радио> на странице меню, нажмите OK
для входа. Меню содержит несколько опций.
Избранное: Здесь сохраняются ваши любимые станции для простого
прослушивания. Для перехода к списку любимых станций можно
просто нажать кнопку FAV.
Радиостанция/Музыка: Выберите эту опцию для поиска Интернетрадиостанций по следующим категориям: лучшие 20 по всему миру,
жанр, страна/город, основные. Найдите станции в соответствующей
категории и подтвердите выбор
нужной Интернет-станции нажатием кнопки OK .
Местные радиостанции: Радиоприемник настроен на
автоматический поиск лучших 10 станций в вашей стране, поиск
всех станций, а также поиск по различным жанрам на основании
расположенных в алфавитном порядке категорий. Выберите
соответствующую категорию, нажмите кнопку OK и продолжайте
поиск, пока не найдете нужную станцию.
Радио для сна: Выбирайте различные расслабляющие композиции.
История: Осуществляйте поиск по последним станциям, которые вы
слушали.
Сервис: Поиск радиостанций и добавление новых радиостанций или
приложение.
• Вы можете использовать кнопки с БУКВАМИ/ЦИФРАМИ для поиска
радиостанции.
• Чтобы добавить новую радиостанцию, выделите выбранный символ
при помощи кнопок с БУКВАМИ/ЦИФРАМИ и нажмите кнопку
ВПРАВО для перехода к следующему символу. Чтобы вернуться к
предыдущему символу, выделите его, нажав кнопку ВЛЕВО. Нажмите
кнопку OK для поиска Интернет-станции.
Сохранение любимых Интернет-радиостанций
Обнаружив нужную станцию, нажмите и удерживайте кнопку FAVOR
для перехода на страницу настроек
«Добавить в Избранное». Поворачивайте поворотный регулятор
или нажимайте кнопки ВВЕРХ/ВНИЗ, чтобы выбрать номер
предварительно настроенной станции, и нажмите кнопку OK для
подтверждения.
FM-радио
Диапазон FM-частоты (УКВ) составляет от 87,5МГц до 108,00МГц.
Выдвиньте антенну, чтобы найти самый сильный сигнал для
каждой станции.
При помощи кнопок ВЛЕВО/ВПРАВО или поворотного регулятора
выберите опцию <УКВ> на странице меню, а затем нажмите кнопку OK
для перехода на страницу УКВ.
Настройка станций
Нажимайте кнопки ВВЕРХ/ВНИЗ на пульте ДУ или на передней панели
для повышения или понижения частоты с шагом 0,05МГц.
Используйте кнопки ВЛЕВО/ВПРАВО на пульте ДУ для перехода к
предыдущей или следующей станции с самым сильным сигналом.
После обнаружения станции поиск автоматически прекращается.
Нажмите кнопку OK, на экране появится сообщение «Автоматический
поиск». Если вы выберете «ДА», радиоприемник начнет поиск станций
с низкой до высокой частоты. Найденные станции автоматически
сохраняются.
Сохранение станций
Чтобы сохранить любимую станцию, сначала включите ее, нажмите
и удерживайте кнопку FAV на пульте ДУ, затем при помощи кнопок
ВВЕРХ/ВНИЗ или поворотного регулятора выберите цифру, под
которой вы хотите сохранить станцию. Нажмите кнопку OK для
подтверждения.
Выбор сохраненной станции
1. Нажимайте кнопки НАЗАД/ВПЕРЕД на пульте ДУ для перехода к
предыдущей или следующей предварительно настроенной станции.
2. Или нажмите кнопку FAV, чтобы выбрать сохраненную станцию,
нажмите кнопку OK для воспроизведения.
DAB/DAB+
При помощи кнопок ВЛЕВО/ВПРАВО или поворотного регулятора
выберите опцию <DAB/DAB+> на странице меню, а затем нажмите
кнопку OK для перехода в режим DAB/DAB+.
При первом использовании DAB ваш радиоприемник начнет поиск
станций DAB, а на экране появится сообщение «Поиск». На дисплей
будет выведено количество найденных по мере поиска станций.
После обнаружения всех доступных станций на дисплее
радиоприемника будет отображен список найденных станций. При
помощи поворотного регулятора найдите и выделите нужную
станцию. Выберите станцию нажатием кнопки OK.
Выбранная станция будет отображена на дисплее, а радиоприемник
начнет воспроизведение.
Чтобы выбрать предыдущую или следующую станцию, нажимайте
кнопку НАЗАД или ДАЛЕЕ для соответствующего перехода.
Выделив нужную станцию, нажмите кнопку INFO, чтобы отобразить
информацию о ней. Информация будет автоматически прокручиваться
на дисплее, а на экране будут отображены такие данные, как жанр,
частота в МГц, композиция, которая воспроизводится, частота в кГц и
скорость передачи в кбит/с.
Чтобы вернуться к списку для прокрутки вручную, нажмите на кнопку
ВЛЕВО.
Предварительная настройка любимых станций DAB/DAB+
Обнаружив нужную станцию, нажмите и удерживайте кнопку FAV в
течение нескольких секунд для перехода на страницу «Добавить
в Избранное». При помощи поворотного регулятора выберите
номер предварительно настроенной станции и нажмите OK для
подтверждения.
Кроме того, находясь на странице списка станций DAB, вы можете
выделить нужную станцию, нажать и удерживать кнопку FAV, а затем
выполнить описанные выше действия.
Для просмотра предварительно настроенных любимых станций
нажмите кнопку FAV и воспользуйтесь кнопкой ВВЕРХ или ВНИЗ для
прокрутки списка предустановки.
Page 72

70
RU
Информационный центр
При помощи кнопок ВЛЕВО/ВПРАВО или поворотного регулятора
выберите опцию <Информационный центр> на главной странице и
нажмите OK для перехода на страницу информационного центра.
Информация о погоде: Чтобы просмотреть информацию о погоде
в том или ином регионе, сначала выберите континент при помощи
поворотного регулятора и нажмите кнопку OK. Затем выберите
страну и город.
После этого на экране будет отображена следующая информация:
текущая температура, символ погоды, приблизительный диапазон
погоды на следующие 5дней.
Финансовая информация: Просматривайте индексы фондового
рынка по всему миру. Воспользуйтесь
поворотным регулятором для прокрутки и нажмите OK для
подтверждения.
Системная информация: Просмотр информации о версии системы
и состоянии беспроводного соединения. В качестве информации о
беспроводном соединении выводятся такие данные, как, например,
сила сигнала WIFI.
Spotify Connect
Данное изделие поддерживает технологию Spotify Connect, которая
позволяет использовать устройство в качестве беспроводных
динамиков с управлением посредством приложения Spotify,
доступного для интеллектуальных устройств на iOS и Android и в
виде клиента для ПК. Чтобы войти в режим Spotify Connect, нажмите
кнопку МЕНЮ для перехода к главному меню, поверните поворотный
регулятор, найдите в списке логотип Spotify и коротко нажмите на
поворотный регулятор, чтобы выбрать его.
ПРИМЕЧАНИЯ. Для использования Spotify Connect требуется учетная
запись Spotify Premium.
ПРИМЕЧАНИЯ. Убедитесь в том,что на устройстве включена опция
<Сохранять подключение к сети>. Это обеспечит возможность
потоковой передачи данных Spotify на устройство в режиме сна или
автономном режиме, например DAB/DAB+, FM и Aux In.
При переходе в режим Spotify Connect перед установлением
соединения с приложением Spotify на экране появляется сообщение
<Ожидание пользователей>.
ПРИМЕЧАНИЯ. Через 10 секунд на экране отображается обложка
альбома.
Использование Spotify Connect
Вывод музыки на динамики через Spotify Connect
1. Подключите Sharp DR-I470 к сети Wi-Fi.
2. Откройте приложение Spotify на телефоне, планшете или ноутбуке
в той же сети Wi-Fi.
3. Запустите песню и выберите опцию Доступные устройства.
4. Выберите устройство Sharp DR-I470 и начните прослушивание.
Для получения более детальной информации об установке и
использовании Spotify Connect перейдите по ссылке www.spotify.com/
connect.
Программа Spotify требует сторонней лицензии, которую можно
получить здесь: https://www.spotify.com/connect/third-party-licenses.
Для установления соединения между приложением Spotify и
радиосистемой устройства должны быть подключены к одной сети
WiFi.
Чтобы развернуть на экране устройства выведенное изображение,
коротко нажмите кнопку МЕНЮ. Нажмите кнопку еще раз, чтобы
вернуться к стандартному экрану.
ПРИМЕЧАНИЯ. После установления соединения к приложению и
устройству привязывается учетная запись Spotify, что обеспечивает
возможность подключения DR-I470.
Управляя Spotify с DR-I470, вы можете регулировать громкость,
воспроизводить аудиозаписи или ставить их на паузу или
перемещаться по списку воспроизведения вперед и назад при
помощи пульта ДУ.
Изменения, внесенные с помощью пульта ДУ, отображаются в
приложении Spotify Connect и на устройстве.
Пока внутри одной сети к радиосистеме подключено приложение
Spotify и включена опция <Сохранять подключение к сети>, вы можете
включать радиосистему одновременно с запуском воспроизведения
через приложение Spotify.
Использование AUX
AUX-IN
При помощи кнопок ВЛЕВО/ВПРАВО или поворотного регулятора
выберите опцию <AUX> на странице меню, а затем нажмите кнопку OK
для перехода в режим AUX.
Подключите к радиоприемнику кабель AUX через разъем AUX-IN на
задней панели. Начните воспроизведение с устройства, в режиме AUX
радиоприемник будет проигрывать выбранную композицию.
Линейный аналоговый стереовыход (наушники)
На задней панели радиоприемника имеется разъем для наушников,
который позволяет слушать на нем аудио. Начните воспроизведение аудио
с выбора режима «Интернет-радио», AUX или Bluetooth.
Bluetooth
При помощи кнопок ВЛЕВО/ВПРАВО или поворотного регулятора
выберите опцию <Bluetooth> на странице меню, а затем нажмите
кнопку OK для перехода в режим Bluetooth.
1. Перейдите в настройки своего устройства, чтобы подключить его
к радиоприемнику посредством Bluetooth.
2. Выберите из списка на устройстве «SHARP DR-I470». После
успешного соединения радиоприемник выводит звуковой сигнал
подключения, а на экране появляется сообщение «Соединение
Bluetooth установлено».
3. Выберите на своем устройстве нужную композицию и начните
воспроизведение.
4. Теперь вы можете слушать музыку с вашего устройства.
5. Чтобы разорвать соединение, перейдите в другой режим воспроиз-
ведения или выключите функцию Bluetooth на своем устройстве.
AirMusic Control - Приложение SHARP
Smart Control
Пользователь может скачать и установить на свое мобильное
устройство приложением SHARP Smart Control для удаленного
управления устройством. Обратите внимание, что радиосистема DR-
I470 и мобильное устройство с приложением SHARP Smart Control
должны быть подключены к одной сети, в противном случае будет
невозможно установить соединение между этими двумя устройствами.
Откройте приложение, на дисплей будет выведен список доступных
устройств.
Щелкните по нужному устройству для подключения.
ПРИМЕЧАНИЯ. Устройство автоматически устанавливает на
радиосистеме DR-I470 язык, установленный на мобильном устройстве
с приложением SHARP Smart Control.
QR-код SHARP Smart Control App доступен в: Интернет-радио > Сервис
> Приложение
Page 73

RU
При помощи приложения пользователь может управлять
устройством посредством мобильного телефона:
Выберите нужную вкладку для управления радиосистемой.
Нажмите на значок , чтобы вывести на дисплей боковую
вкладку. Нажмите «Настройки», чтобы получить доступ к расширенным
опциям (изменение имени устройства, проверка обновлений ПО,
поиск других устройств или вывод дополнительной информации).
Нажмите на значок
в режим дистанционного управления.
Приложение будет выполнять функцию
пульта дистанционного управления, а
на дисплее мобильного устройства с
приложением SHARP Smart Control появятся
соответствующие кнопки управления.
1. Выключение устройства
2. Кнопка OK
3. Кнопка «Режим» (изменение режима
воспроизведения)
4. Кнопка меню
5. Отображение любимых станций
6. Переключатель (та же функция, что и у
кнопки РЕЖИМ на устройстве)
7. Таймер выключения
8. Будильник
9. Подсветка
10. Назад
11. Воспроизведение/пауза
12. Далее:
13. Кнопки с цифрами
14. Настройки эквалайзера
15. Выключение звука
16. Громкость +
17. Громкость -
18. Кнопки направления
19. Назад к главному меню приложения
Нажмите
Затем выберите или сделайте фото для сохранения в качестве
экранной заставки в режиме ожидания.
Нажмите
Нажмите и удерживайте , чтобы записать голосовое сообщение,
отпустите, чтобы остановить запись. В верхнем левом углу экрана
радиосистемы появится красный мигающий кружок. Чтобы
прослушать голосовое сообщение, перейдите на любую вкладку меню.
Запись будет воспроизведена через динамик радиосистемы.
Нажмите
удерживайте
запись. Запись будет воспроизведена через динамик радиосистемы.
Нажмите
на мобильном устройстве музыкой для ее воспроизведения через
радиосистему.
Нажмите
первых пяти любимых станций.
, чтобы перейти
для перехода к выбору экрана режима ожидания.
для перехода к опции ввода голосового сообщения.
для перехода к опции внутренней связи. Нажмите и
, чтобы начать запись, отпустите, чтобы остановить
, чтобы войти в локальную папку с сохраненной
, чтобы включить одну из
Поиск и устранение неисправностей
Данное изделие не содержит компонентов, техническое обслуживание
которых пользователь может осуществлять самостоятельно. В случае
возникновения неисправностей следует связаться с производителем
или представителем авторизованного сервисного центра. Контакт
с некоторыми частями внутри устройства может представлять
опасность для жизни. Гарантия производителя не распространяется
на неисправности, возникшие вследствие проведения ремонта
неуполномоченными третьими лицами.
Нет звука
Причина
• Не настроена громкость.
Решение
• Отрегулируйте громкость при помощи основного поворотного
регулятора.
В режиме соединения через Bluetooth отсутствует звук
Решение
• Возможно, на внешнем устройстве нужно ввести пароль «0000»,
чтобы запустить воспроизведение.
WiFi не подключается
Решение
• Убедитесь в том, что в настройках выбран режим WIFI и что введен
правильный пароль для доступа к WIFI-модему.
Статичный звук
Причина
• Слишком слабый сигнал.
Решение
• Отрегулируйте антенну или переместите устройство в место с более
сильным уровнем сигнала.
Искаженный звук
Причина
• Слишком высокий уровень громкости
Решение
• Уменьшите уровень громкости
Нужная станция не найдена
Причина
• Слабый сигнал
Решение
• Воспользуйтесь функцией ручной настройки.
Функции DAB отсутствуют
Причина
• В вашем регионе отсутствует покрытие DAB.
• Плохой прием
Решение
• Отрегулируйте положение антенны.
На дисплее ничего нет.
Причина
• Причиной может быть изменение метки услуги станцией радиовеща-
ния или удаление метки в ходе настройки.
Решение
• Радиоприемник произведет попытку повторной настройки.
• Запустите поиск.
Питание отсутствует
Причина
• Адаптер не подключен к настенной розетке.
Решение
• Убедитесь в том, что адаптер включен в сеть.
Page 74
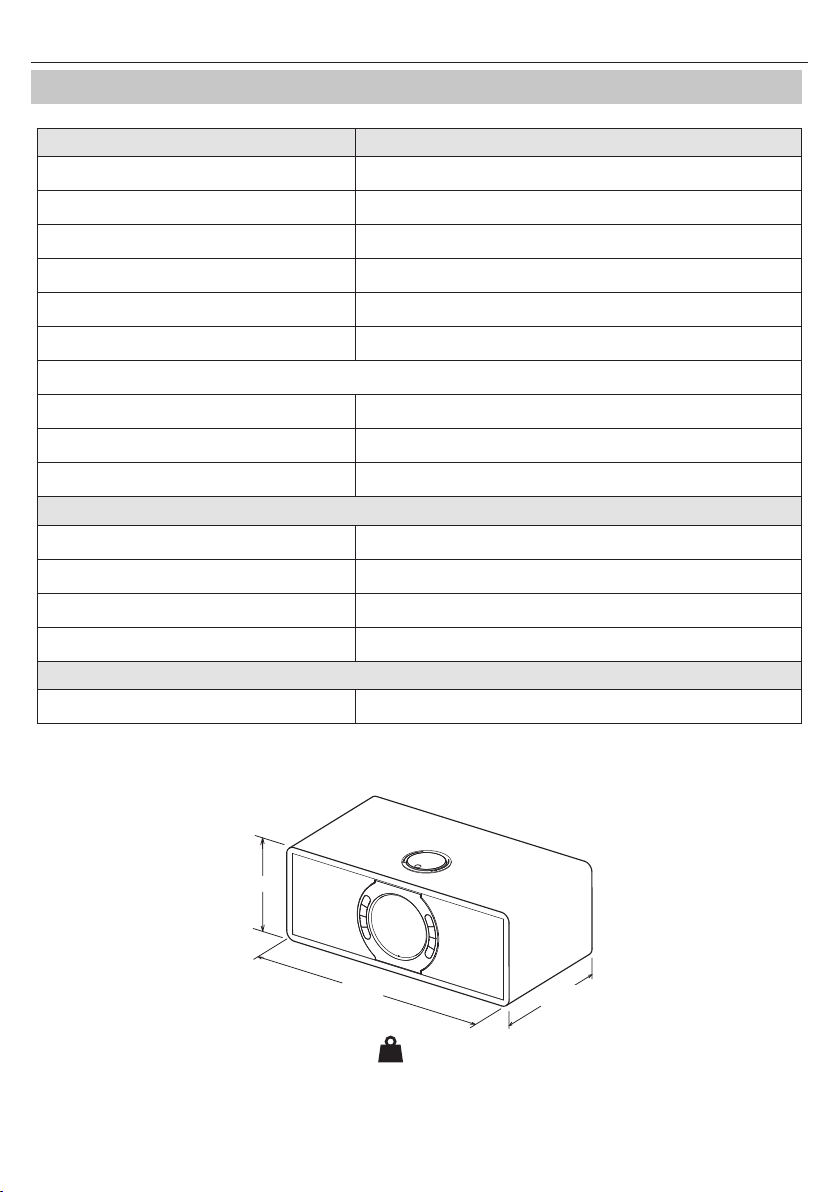
72
3,16 kg
Технические спецификации
Модель DR-I470 Pro
Выходная мощность 2 x 7 Вт (RMS)
Энергопотребление (макс.) 28 Вт
Энергопотребление (стандарт) 8 Вт
Энергопотребление в режиме ожидания <1 Вт
Частота FM 87.5-108 МГц
Частота DAB+ 174.928-239.200 МГц
Bluetooth
Версия V5.0
Частотные диапазоны 2402 МГц ~ 2480 МГц
Максимальная мощность передачи 4 дБм
Силовой адаптер
Название модели FJ-SW1202000N
Вход AC 100-240 В ~ 50/60 Гц, 0.6 A макс.
RU
Выход
Производитель
WIFI
WIFI-соединение 802.11 b/g/n; STA/AP/AP Client
145 mm
мм
B1,Xujing chang Industrial Park, Haoye Road, Fuyong 518103 Shenzhen, China
354 mm
мм
KG
SHENZHEN FU JIA APPLIANCE CO., LTD
кг
DC 12 В
185 mm
⎓2000 мА
мм
Page 75

Page 76

Sharp Consumer Electronics Poland sp. z o.o.
Ostaszewo 57B, 87-148 Łysomice, Poland
Made in China
SAU/MAN/0166
www.sharpconsumer.eu
 Loading...