

Page 1
MINI COMPONENT SYSTEM
I Refer to the operation manual for details.
II
I P.
II
1
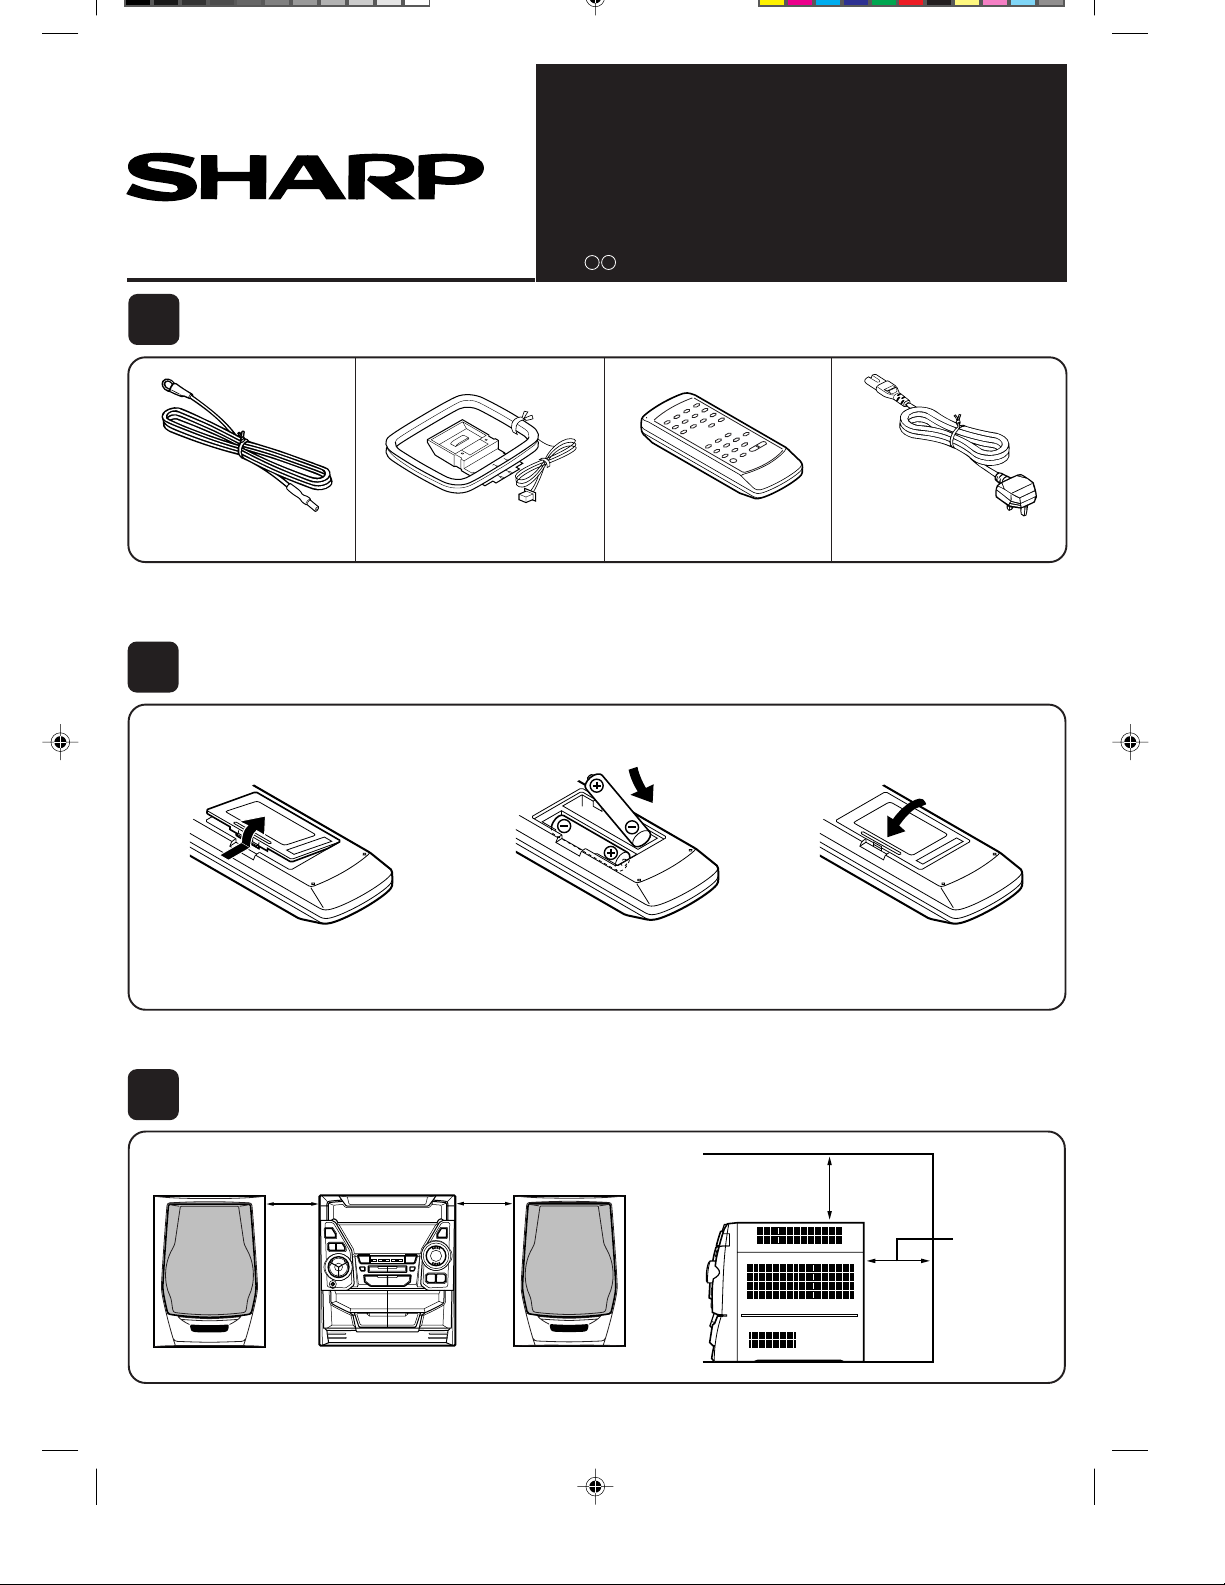
Check the supplied accessories
Quick Guide CD-BA1300H
indicates the reference page in the operation manual.
(P.2)
FM aerial
2
Putting batteries into the remote control
1
Remove the battery cover.
3
Placing the system
× 1
AM loop aerial
2
Insert the batteries.
●
2 "AA" size batteries
(UM/SUM-3, R6, HP-7 or similar)
●
Batteries are not included.
× 1
Remote control
× 1
(P.7)
3
Replace the battery cover .
AC power lead
× 1
10 cm (4")
*Quick1300E.pm6E 00.3.17, 5:21 PM1
10 cm (4")
10 cm (4")
10 cm (4")
1
Page 2
4
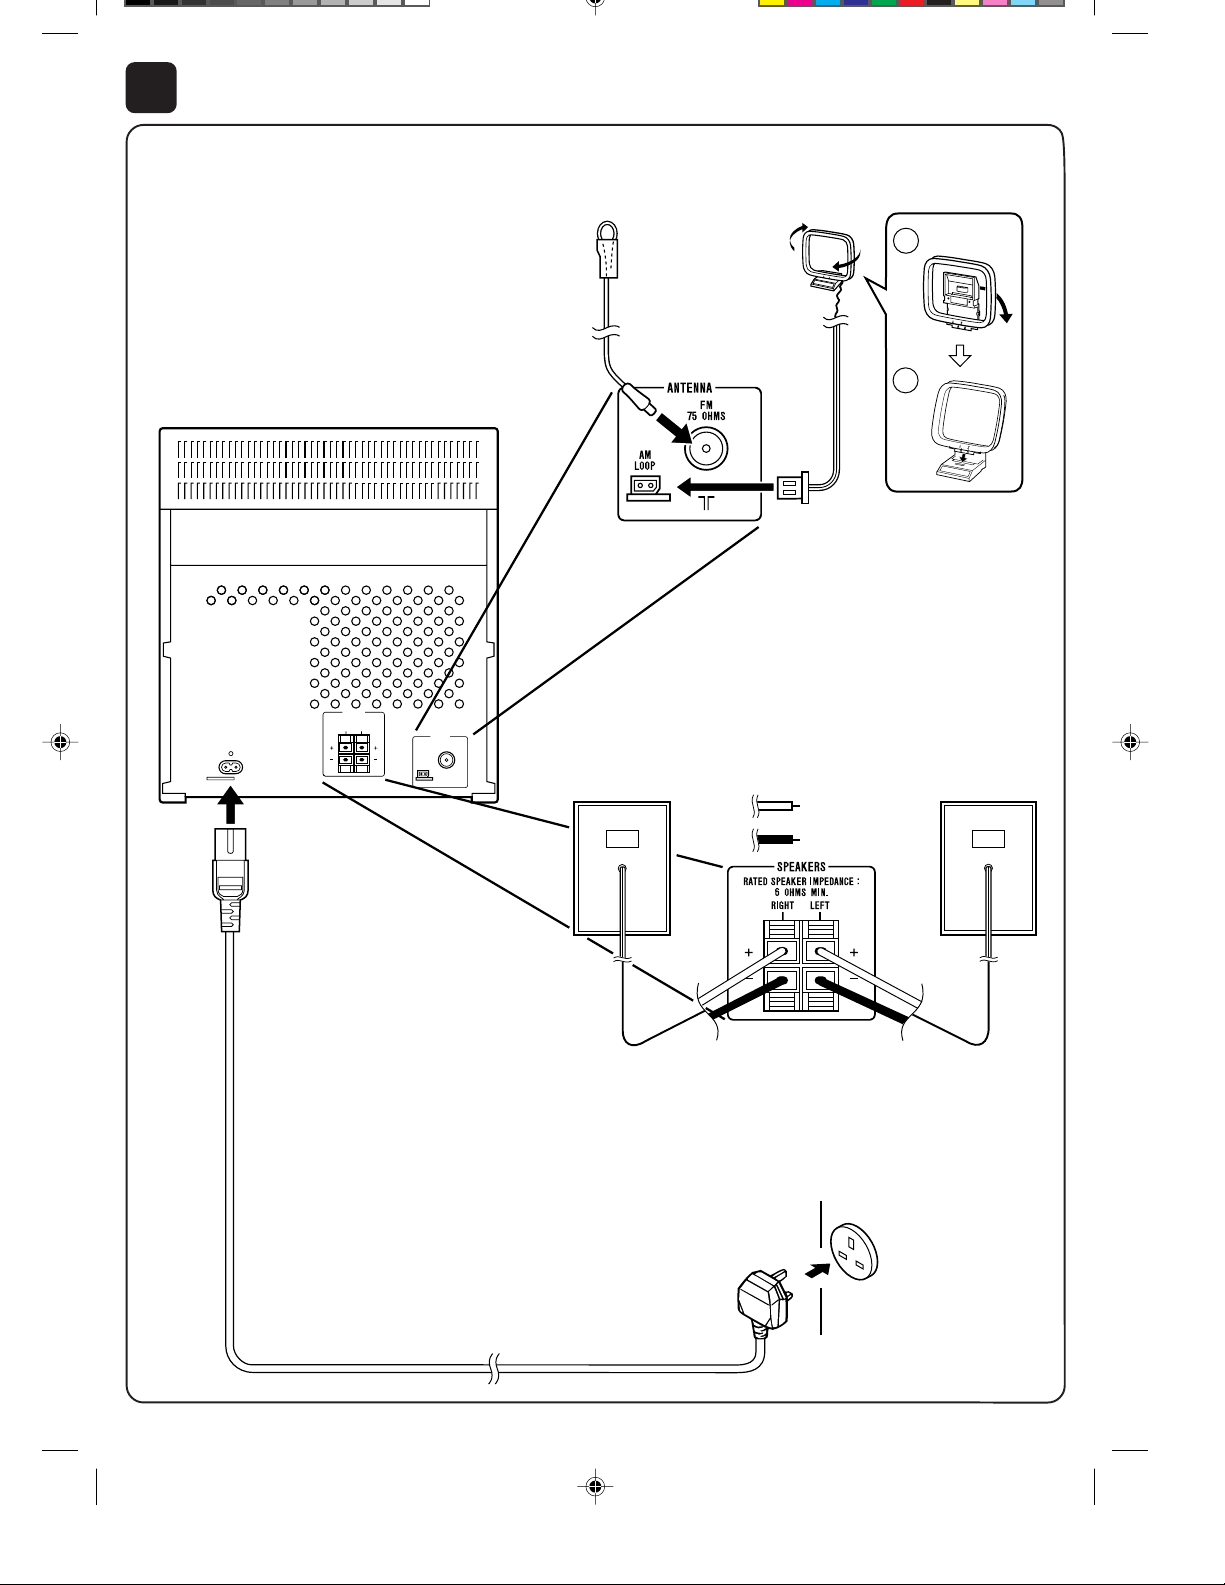
Connections
(P.6-7)
1
Connect the AM and FM aerials.
FM aerial
2
AM loop
aerial
Connect the speaker system.
Right speaker
Red
1
2
Left speaker
Black
3
Connect the AC power lead.
AC 230 V, 50 Hz
*Quick1300E.pm6E 00.3.17, 5:21 PM2
2
Page 3

5
Listening to a CD
4
1
2
5
6
Listening to the radio
5
12 cm (5")
8 cm (3")
(P.10)
8
3,6
7
1
Press the ON/STAND-BY button to turn the power on.
2
Press the CD button.
3
Press the OPEN/CLOSE button to open the disc tray .
4
Place the CD(s) on the disc tray, label side up.
5
When loading a third disc, press the DISC SKIP button
to turn the disc tray, then place the CD in the open position.
6
Press the OPEN/CLOSE button to close the disc tray.
7
Press the button.
8
Adjust the sound volume using the VOLUME buttons.
(P.14-15)
1
2
7
Listening to a tape
1
4
3
3
4
3
6
5
(P.25)
1
Press the ON/STAND-BY button to turn the power on.
2
Press the TUNER (BAND) button to select FM ST, FM
or AM.
3
Press the TUNING/TIME ( or ) button to tune into the desired station.
4
Adjust the sound volume using the VOLUME buttons.
1
Press the ON/STAND-BY button to turn the power on.
2
Open the cassette door by pushing the area marked
"PUSH EJECT".
3
Load the cassette into the TAPE 1 or TAPE 2 cassette
compartment.
●
And then, close the cassette door completely until it is locked.
4
Press the TAPE (1 2) button to select the TAPE 1
or TAPE 2.
5
Press the button to start playback.
PUSH
EJECT
*Quick1300E.pm6E 00.3.17, 5:21 PM3
2
TAPE 1 TAPE 2
6
PUSH
EJECT
2
Adjust the sound volume using the VOLUME buttons.
3
Page 4

8
Recording from CDs
1
3
4
5
(P.26)
1
2
3
4
5
Press the ON/STAND-BY button to turn the power on.
Load a cassette into the TAPE 2 cassette compartment.
Press the CD button and load the desired disc.
Press the REC PAUSE button.
Press the button.
2
PUSH
EJECT
TAPE 2
● Resetting the microcomputer
If this product is subjected to strong external interference
(mechanical shock, excessive static electricity, abnormal
supply voltage due to lightning, etc.) or if it is operated incorrectly, it may malfunction or the display may not func-
1,2
2
2
tion correctly. If such a problem occurs, do the following:
1
Press the ON/STAND-BY button to enter the stand-by
mode.
2
Whilst pressing down the button and the
EQUALIZER/X-BASS/DEMO button, hold down the
ON/STAND-BY button for at least 1 second.
●
"CLEAR AL" will appear.
Caution:
●
The operation explained abov e will erase all data stored
in memory including clock and timer settings, and tuner
and CD presets.
● CD pickup cleaning
Clean the dust or stain on the CD pickup lens
using a commercial cleaning disc (brush type).
TINSE0317AWZZ
*Quick1300E.pm6E 00.3.17, 5:21 PM4
Cleaning disc
4
A0003.HK
 Loading...