

Page 1
7400 GJ
MODEL
14LK22
COLOR TELEVISION
OPERATION MANUAL
CONTENTS
• IMPORTANT INFORMATION ....................... 2
• Supplied Accessories ................................. 2
• IMPORTANT SAFEGUARDS............ 3~ 4
• Before Operating Your Television ............... 5
• Antenna Connections ................................. 6
• Quick Reference Control Operation .......... 7
• EZ SETUP during First Use ........................ 8
• Demo Mode .................................................. 9
• Accessing the MAIN MENU screen
without Remote Control .............................. 9
• Language .................................................... 10
• Sleep Timer ................................... 10 ~ 11
• On Timer ..................................................... 12
• Clock Set .................................................... 13
• Video Adjust ............................................... 14
• Closed Caption .......................................... 15
• Parent Control .............................. 16 ~ 18
View Timer ................................. 16 ~ 18
• Energy Save ............................................... 18
• Set Up ........................................... 19 ~ 22
EZ SETUP ................................................ 19
Channel Setting ........................ 20 ~ 22
Blue Screen ............................................ 22
•
Using the Video and Audio Input Jacks .....
•
Specifications ...............................................
• Before Calling for Service ......................... 25
• Calling for Service ..................................... 25
READ THIS OPERATION MANUAL
COMPLETELY BEFORE OPERATING
THIS PRODUCT.
PAGE
23
24
01-07 14LK22 [E].p65e 29/5/01, 7:52 PM1
1
Page 2
Welcome to the SHARP Family. We are pleased that you are now the owner of a SHARP Color Television
– built for outstanding quality, reliability and performance.
Every SHARP Color Television set is tuned and adjusted for proper color and sound, and has passed
through the most stringent quality control tests at the factory. We have prepared this OPERATION MANUAL
so that you may adjust the picture and color to your personal viewing preference.
We sincerely hope that you receive the greatest satisfaction and enjoyment from your new SHARP Color
Television set for years to come.
Please read these instructions carefully, and keep them handy for your future reference.
IMPORTANT
To aid reporting in case of loss or theft, please record the TV’s
model and serial numbers in the space provided. The numbers
are located at the rear of the TV.
Model No.:
Serial No.:
IMPORTANT INFORMATION
WARNING:
CAUTION: TO REDUCE THE RISK OF
DO NOT REMOVE COVER (OR BACK).
NO USER-SERVICEABLE PARTS INSIDE.
REFER SERVICING TO QUALIFIED SERVICE
TO REDUCE THE RISK OF FIRE OR ELECTRIC SHOCK, DO NOT
EXPOSE THIS APPLIANCE TO WET LOCATIONS.
ELECTRIC SHOCK,
PERSONNEL.
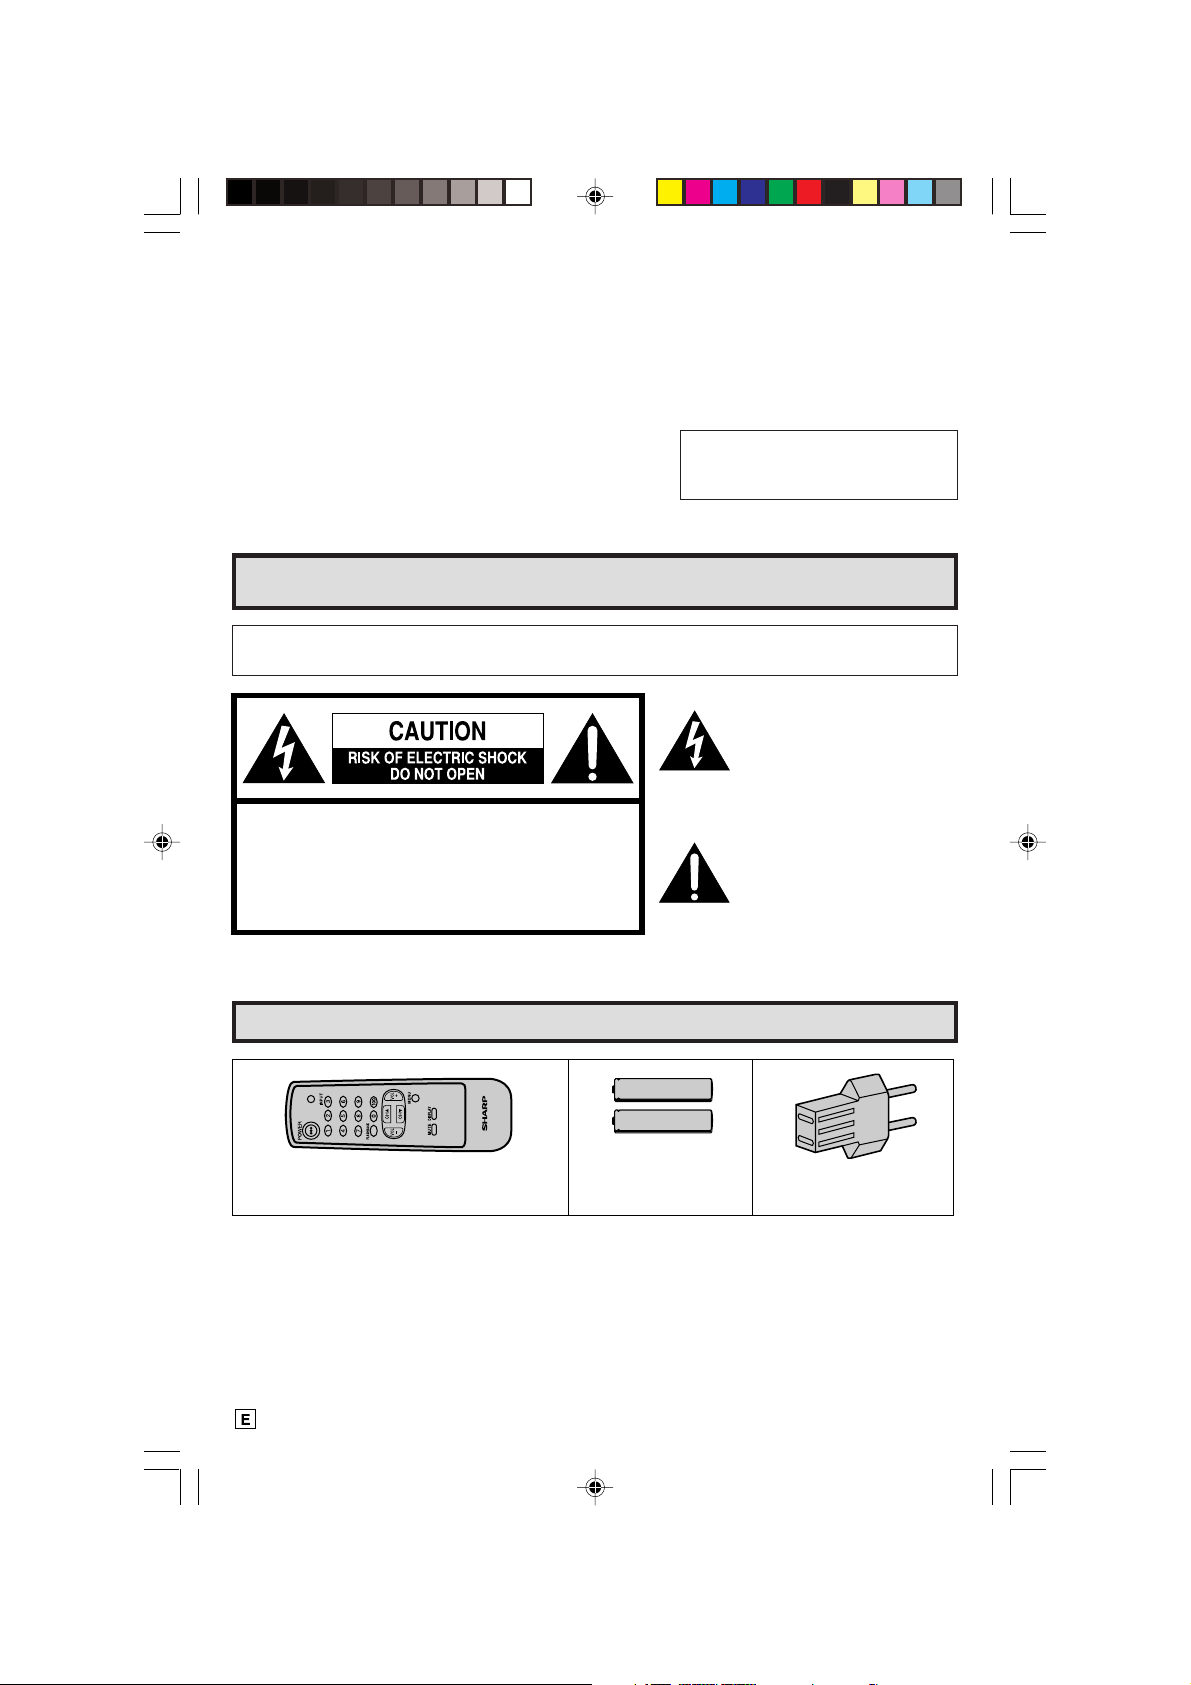
Supplied Accessories
TV
Infrared Remote Control
Part Number : RRMCG1339CESB
Size AA
Dry Batteries
The lightning flash with
arrowhead within a triangle is
intended to tell the user that
parts inside the product are a
risk of electric shock to
persons.
The exclamation point within a
triangle is intended to tell the
user that important operating
and servicing instructions are
in the papers with the
appliance.
AC Plug Adaptor
2
01-07 14LK22 [E].p65e 9/5/01, 6:24 PM2
Page 3
IMPORTANT SAFEGUARDS
CAUTION: Please read all of these instructions before you operate your television and save
these instructions for later use.
Electrical energy can perform many useful functions. This unit has been engineered and manufactured to
assure your personal safety. BUT IMPROPER USE CAN RESULT IN POTENTIAL ELECTRICAL SHOCK
OR FIRE HAZARDS. In order not to defeat the safeguards incorporated in this equipment, observe the
following basic rules for its installation, use and servicing.
1. Unplug this television equipment from the wall outlet before cleaning.
2. Do not use liquid cleaners or aerosol cleaners. Use a damp cloth for cleaning.
3. Do not use attachments not recommended by the television equipment manufacturer as they may
cause hazards.
4. Do not use this television equipment near water — for example, near a bathtub, washbowl, kitchen sink
or laundry tub, in a wet basement, or near a swimming pool, etc.
5. Do not place this equipment on an unstable cart, stand, or table. The television equipment may fall,
causing serious injury to a child or an adult, and serious damage to the equipment.
Use only with a cart or stand recommended by the manufacturer or sold with the
television equipment.
Television equipment and cart combination should be moved with care. Quick stops,
excessive force, and uneven surfaces may cause the equipment and cart combination
to overturn.
6. Wall or shelf mounting should follow the manufacturer’s instructions, and should use a mounting kit
approved by the manufacturer.
7. Slots and openings in the cabinet and the back or bottom are provided for ventilation, and to insure
reliable operation of the television equipment and to protect it from overheating, these openings must
not be blocked or covered. This television equipment should not be placed in a built-in insulation such
as a bookcase unless proper ventilation is provided.
8. The openings should never be covered with a cloth or other material, and the bottom openings should
not be blocked by placing the television equipment on a bed, sofa, rug, or other similar surface. This
television equipment should never be placed near or over a radiator or heat register.
9. This television equipment should be operated only from the type of power source indicated on the
marking label. If you are not sure of the type of power supplied to your home, consult your television
dealer or local power company.
For television equipment designed to operate from battery power, refer to the operating instructions.
10. Do not allow anything to rest on the power cord. Do not locate this television equipment where the cord
will be abused by persons walking on it.
11. Follow all warnings and instructions marked on the television equipment.
12. If an outside antenna is connected to the television equipment, be sure the antenna system is grounded
so as to provide some protection against voltage surges and built-up static charges.
01-07 14LK22 [E].p65e 9/5/01, 6:24 PM3
3
Page 4
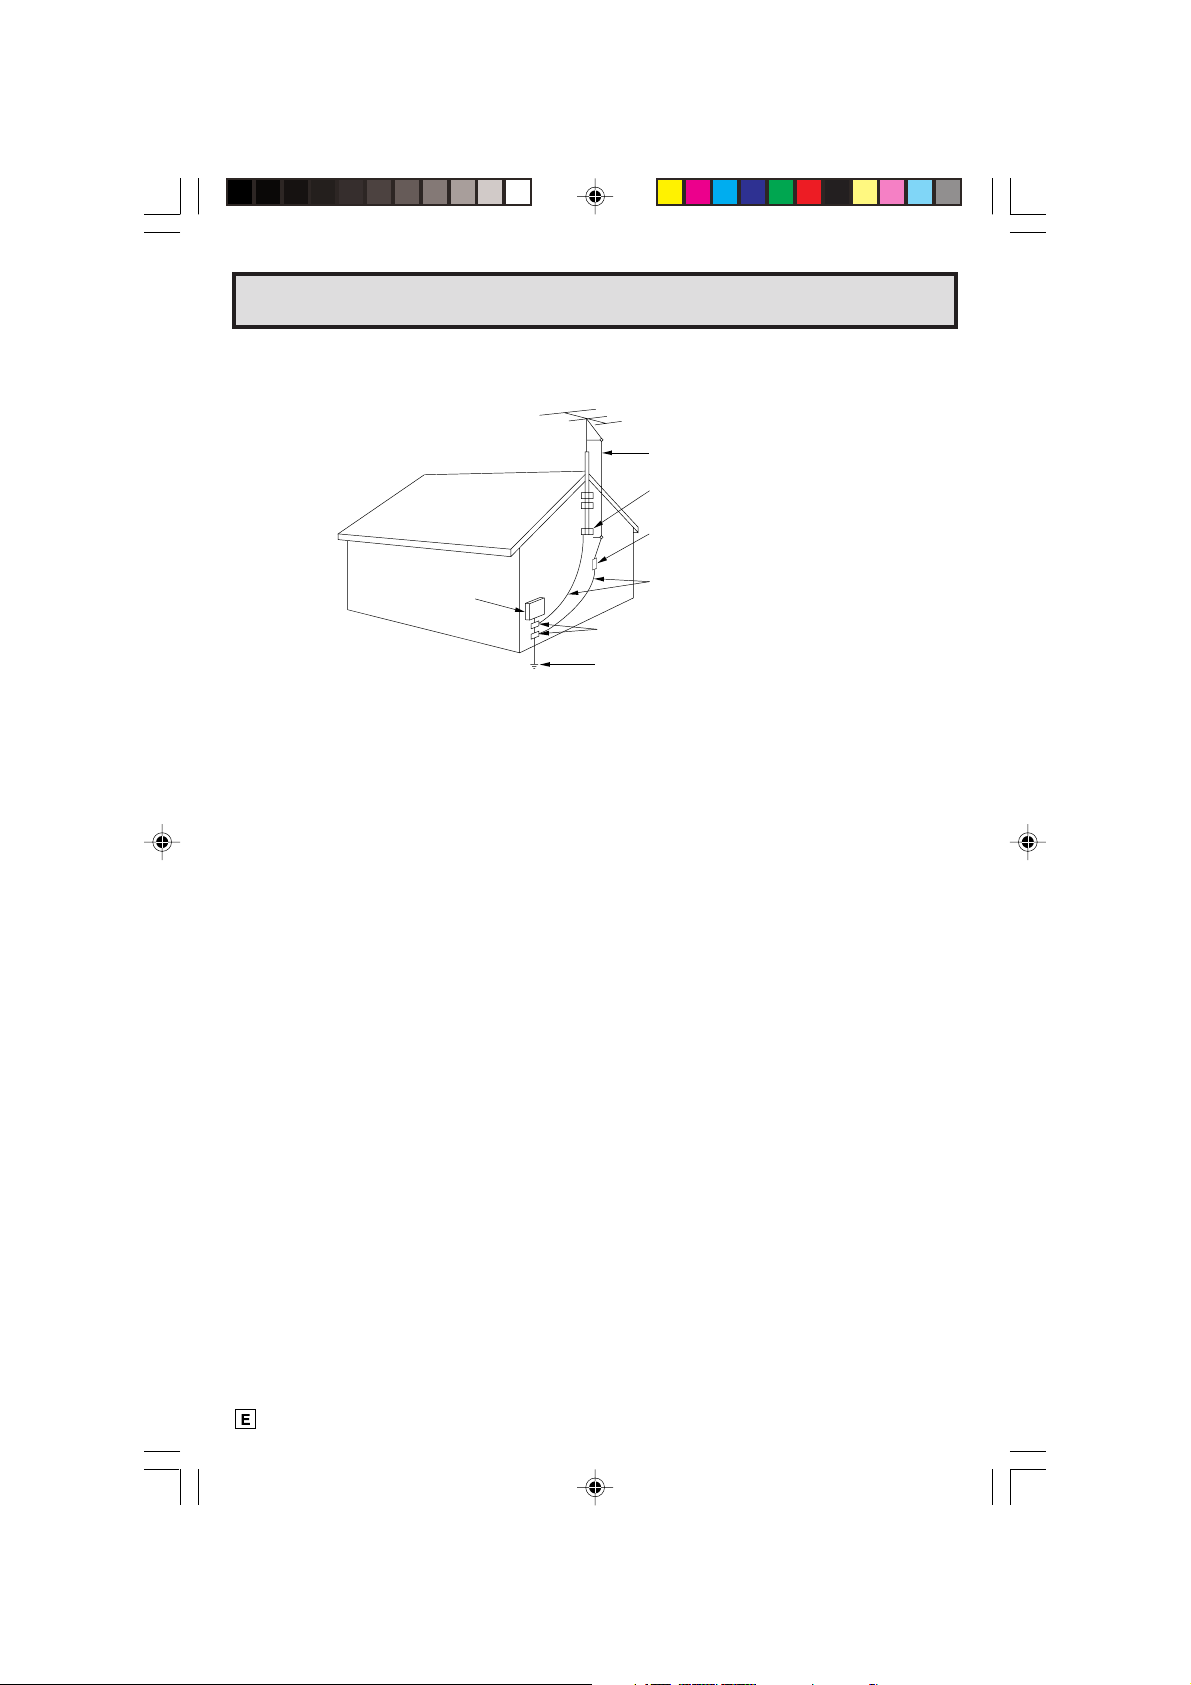
IMPORTANT SAFEGUARDS
EXAMPLE OF ANTENNA GROUNDING
ACCORDING TO NATIONAL ELECTRICAL CODE.
ANTENNA LEAD-IN WIRE
GROUND CLAMP
ANTENNA DISCHARGE UNIT
ELECTRIC
SERVICE
EQUIPMENT
13. For added protection for this television equipment during a lightning storm, or when it is left unattended
and unused for long periods of time, unplug it from the wall outlet and disconnect the antenna. This
will prevent damage to the equipment due to lightning and power-line surges.
14. An outside antenna system should not be located in the vicinity of overhead power lines or other electric
light or power circuits, or where it can fall into such power lines or circuits. When installing an outside
antenna system, extreme care should be taken to keep from touching such power lines or circuits as
contact with them might be fatal.
15. Do not overload wall outlets and extension cords as this can result in fire or electric shock.
GROUNDING CONDUCTORS
GROUND CLAMPS
POWER SERVICE GROUNDING ELECTRODE
SYSTEM
(Continued)
16. Never push objects of any kind into this television equipment through cabinet slots as they may touch
dangerous voltage points or short out parts that could result in a fire or electric shock. Never spill liquid
of any kind on the television equipment.
17. Do not attempt to service this television equipment yourself as opening or removing covers may
expose you to dangerous voltage or other hazards. Refer all servicing to qualified service personnel.
18. Unplug this television equipment from the wall outlet and refer servicing to qualified service personnel
under the following conditions:
A. When the power cord or plug is damaged or frayed.
B. If liquid has been spilled into the television equipment.
C. If the television equipment has been exposed to rain or water.
D. If the television equipment does not operate normally by following the operating instructions. Adjust
only those controls that are covered by the operating instructions as improper adjustment of other
controls may result in damage and will often require extensive work by a qualified technician to
restore the television equipment to normal operation .
E. If the television equipment has been dropped or the cabinet has been damaged.
F. When the television equipment exhibits a distinct change in performance — this indicates a need
for service.
19. Upon completion of any service or repairs to this television equipment, ask the service technician to
perform routine safety checks to determine that the television is in safe operating condition.
20. When replacement parts are required, be sure the service technician has used replacement parts
specified by the manufacturer that have the same characteristics as the original part. Unauthorized
substitutions may result in fire, electric shock, or other hazards.
4
01-07 14LK22 [E].p65e 9/5/01, 6:24 PM4
Page 5
Before Operating Your Television
Location
• For normal operation, your TV should be located in an area of the room where cool adequate ventilation
is provided. Do not place the back of the television set in a place where free airflow will be restricted.
• Any magnetic force may disturb the color picture. Make sure that magnets, electric clocks, toys using
magnets or any other magnetic substance, such as iron are kept well away from the TV set.
Power
Your TV operates on 110-220 Volts, 50/60 Hz (normal household current).
Note:
• If the set will not be used for a long period, such as during a vacation, unplug the set from the wall
outlet to economize power. (If the TV set is plugged in, a slight current still flows, even with the
POWER BUTTON in the OFF position.)
• Lines and other noise may appear in TV broadcast images when an FM tuner or radio is located near
the TV and both radio and TV broadcasts are being received. Should such noise appear, turn off
either the TV or the radio.
• If you are listening to an AM broadcast, turn the TV off. AM broadcast signals may not be received
due to interference from the TV.
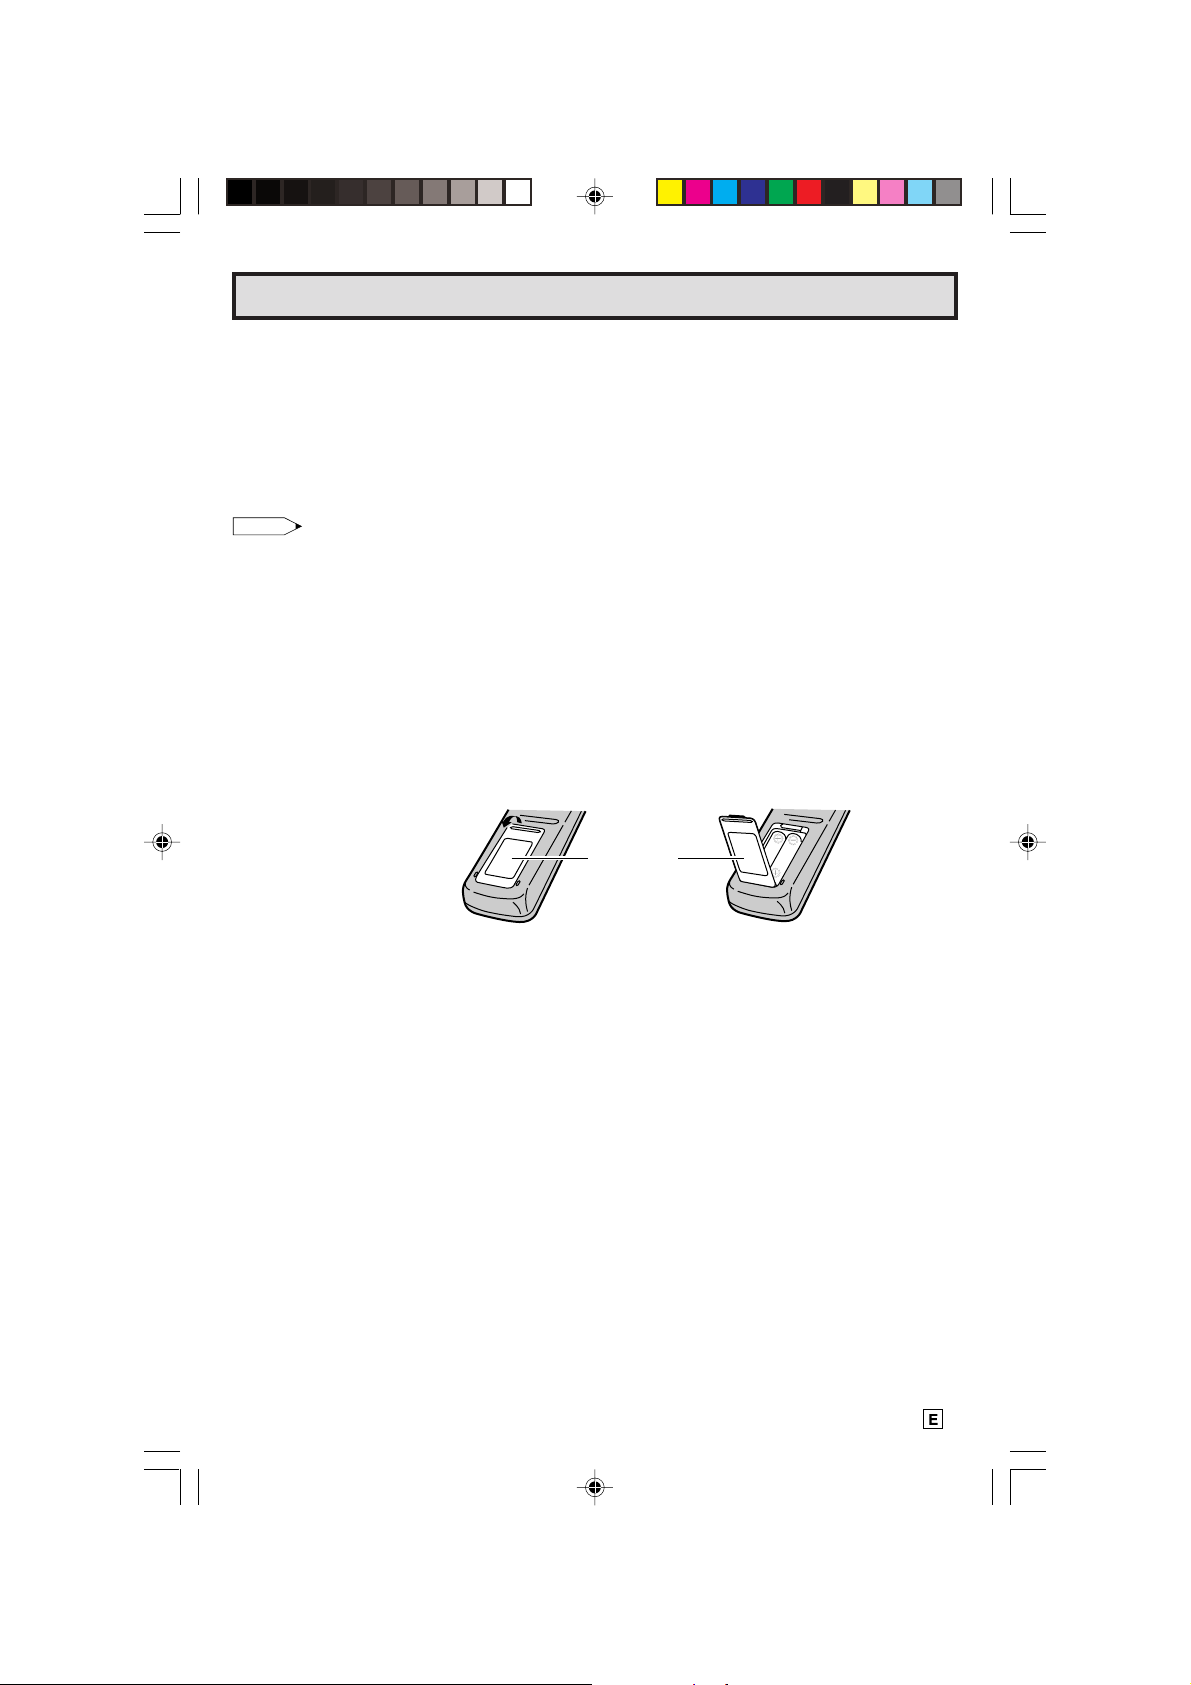
L Before using the television, prepare the Remote Control
To use the remote control, insert batteries first.
Insert the batteries
Pull up
Battery
Cover
• With your thumb nail, pull up the slit as indicated by the arrow to remove the back cover. Insert two
batteries (size “AA”). Be sure to match the battery e/d terminals with the e/d marks inside the
compartment.
01-07 14LK22 [E].p65e 9/5/01, 6:24 PM5
5
Page 6
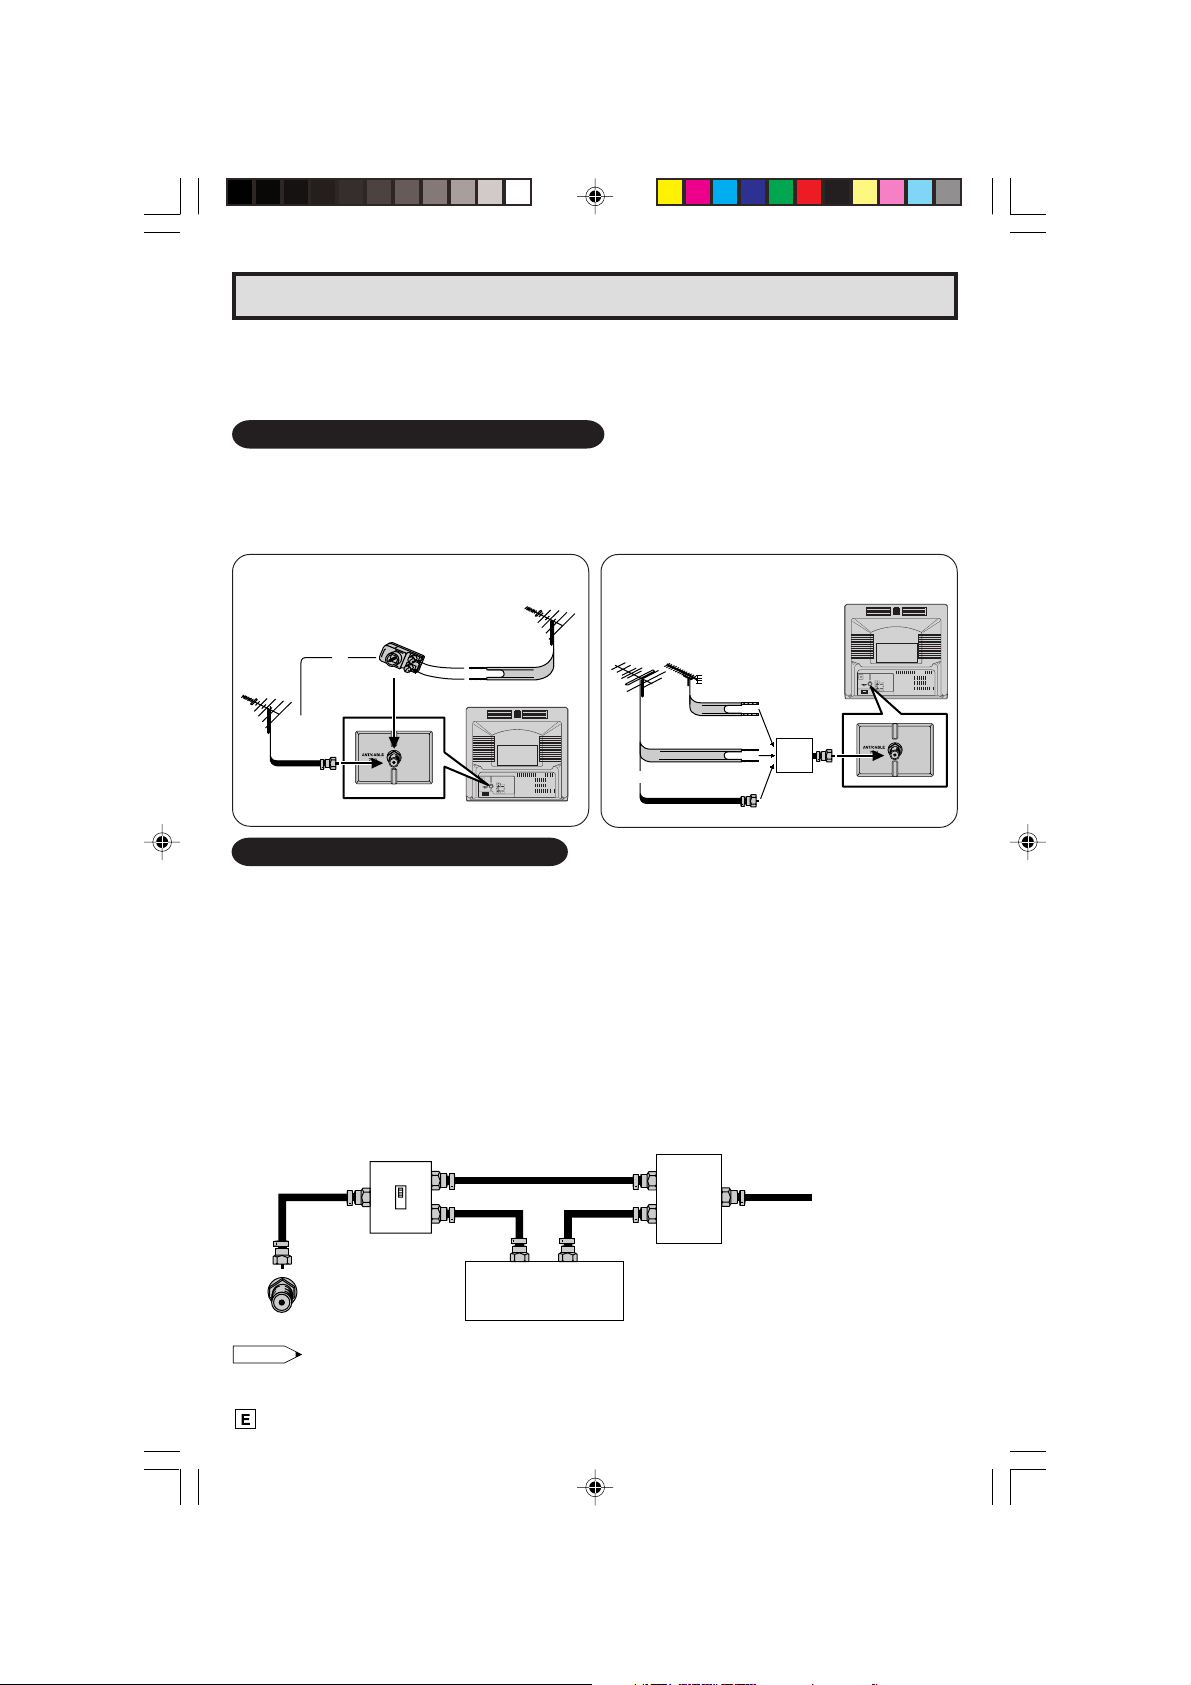
Antenna Connections
Antennas
• The antenna requirements for good color television reception are more important than those for
black & white television reception. For this reason, a good quality outdoor antenna is strongly
recommended.
OUTDOOR ANTENNA CONNECTION
• Use one of the following two diagrams if you connect an outdoor antenna.
A: Using a VHF/UHF combination outdoor antenna.
B: Using separate VHF and/or UHF outdoor antenna.
• Connect an outdoor antenna cable lead-in to the COAXIAL CABLE CONNECTOR on the rear of the
TV set.
A. Combination VHF/UHF Antennas
VHF/UHF ANTENNA
VHF/UHF
ANTENNA
75-ohm
coaxial
cable
or
300/75-ohm
ADAPTOR
(not supplied)
300-ohm
twin-lead
REAR OF TV
B. Separate VHF/UHF Antenna
VHF
ANTENNA
or
UHF
ANTENNA
300-ohm
twin-lead
300-ohm
twin-lead
75-ohm coaxial
cable
COMBINER
(not supplied)
IN OUT
REAR OF TV
CABLE TV (CATV) CONNECTION
• A 75 ohm coaxial cable connector is built into the set for easy hookup. When connecting the 75 ohm
coaxial cable to the set, screw the 75 ohm cable to the COAXIAL CABLE CONNECTOR.
• Some cable TV companies offer “premium pay channels”. Since the signals of these premium pay
channels are scrambled, a cable TV converter/descrambler is generally provided to the subscriber by
the cable TV company. This converter/descrambler is necessary for normal viewing of the scrambled
channels. (Place your TV on channel 3 or 4, typically one of these channels is used. If this is unknown,
consult your cable TV company.) For more specific instructions on installing cable TV, consult your
cable TV company. One possible method of utilizing the converter/descrambler provided by your
cable TV company is explained below.
Please note: RF switch equipped with position A/B (not provided) is required.
“A” position on the RF switch (not supplied) : You can view all unscrambled channels using the TV’s
“B” position on the RF switch (not supplied) : You can view the scrambled channels via the converter/
RF switch (not supplied)
OUTAIN
B
OUT
Cable TV converter/
descrambler
(not supplied)
channel keys.
descrambler using the converter’s channel keys.
Two-set
signal
splitter
Cable TV Line
(not
IN
supplied)
Note:
• Consult your SHARP Dealer or Service Center for the type of splitter, RF switch or combiner that
might be required.
6
01-07 14LK22 [E].p65e 10/5/01, 11:03 AM6
Page 7
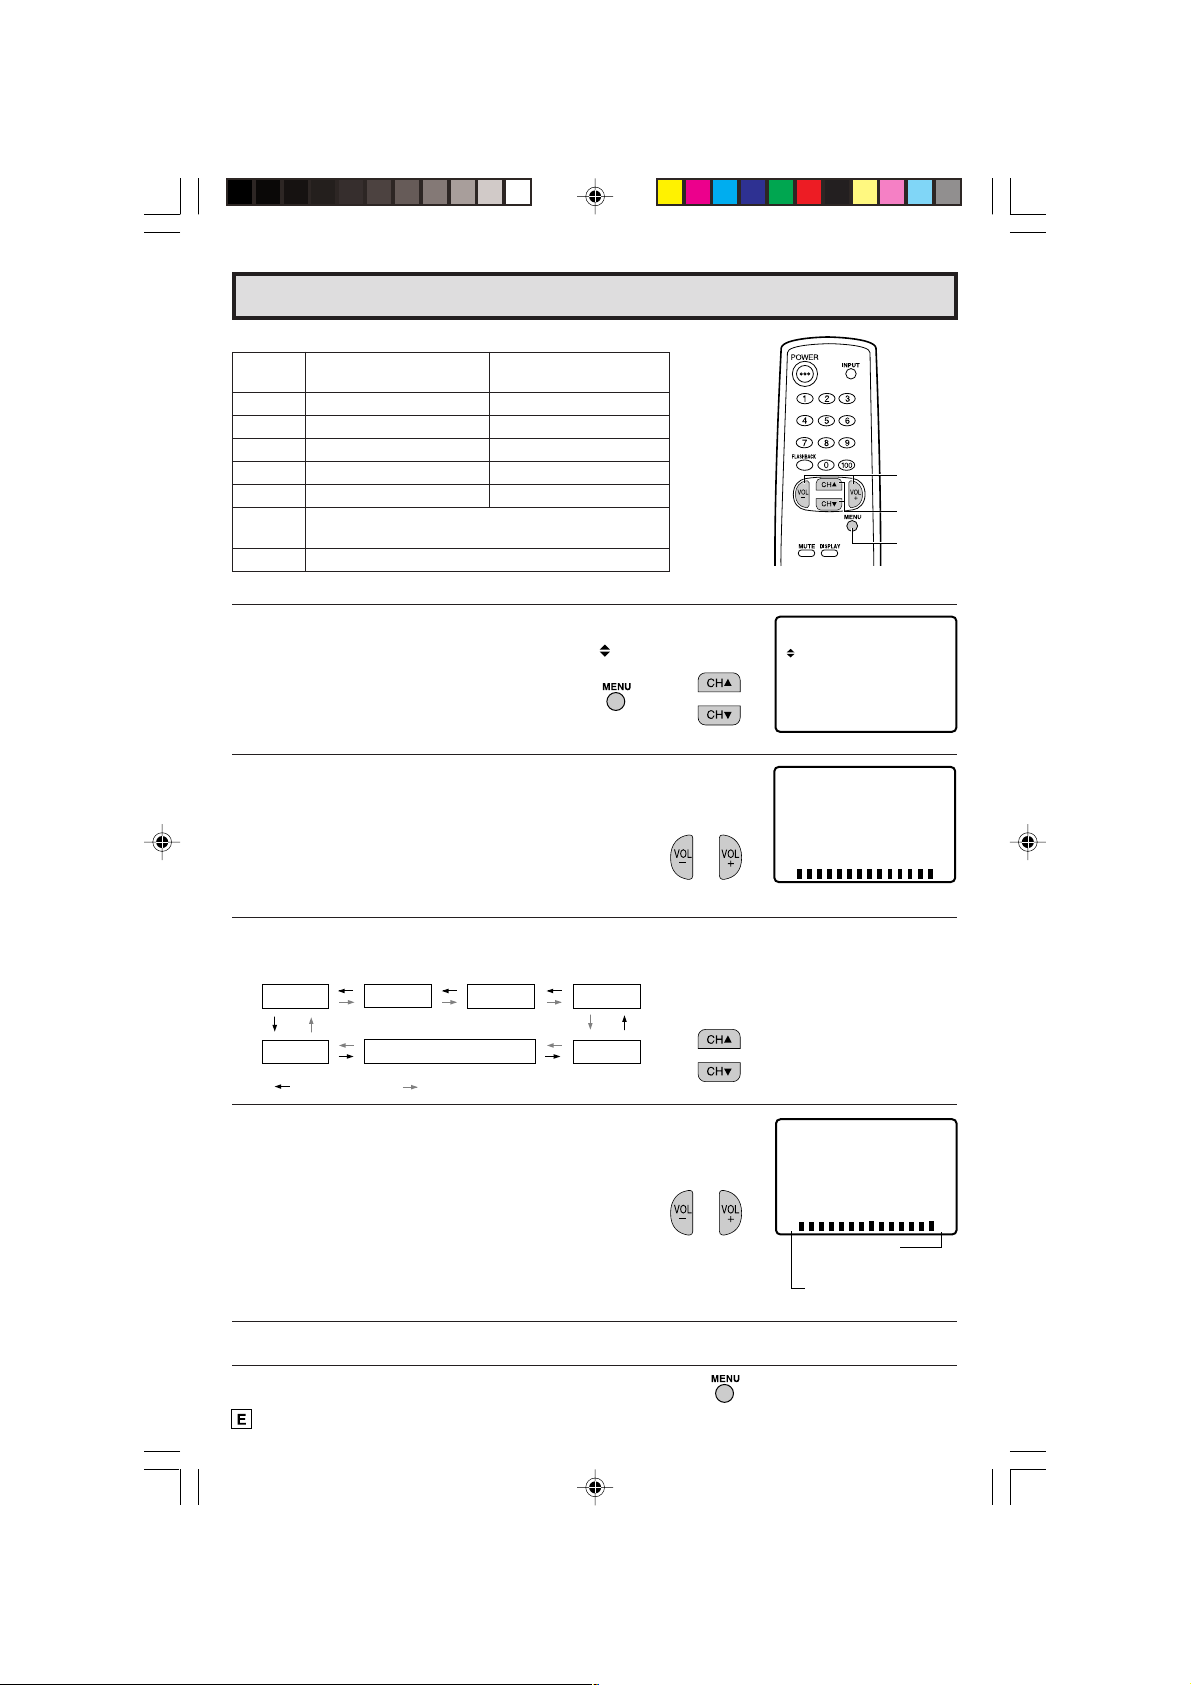
Quick Reference Control Operation
L Location of Controls
Front Panel
POWER
Press → On.
Press again → Off.
ON TIMER indicator
SENSOR AREA FOR
REMOTE CONTROL
Basic Remote Control Functions
POWER
Press → On.
Press again → Off.
REMOTE KEYPAD
Accesses any channel from keypad.
FLASHBACK
Returns to previous channel.
VOLUME UP/DOWN
(+) Increases sound.
(–) Decreases sound.
• In menu mode, changes or selects
the TV adjustments.
MUTE
Press → Mutes sound.
Press again → Restores sound.
• CLOSED CAPTION appears when
sound is muted.
VIDEO/AUDIO TERMINALS
(VIDEO/AUDIO terminals are also
provided on the rear.)
CHANNEL UP/DOWN
(8) Selects next higher channel.
(9) Selects next lower channel.
VOLUME UP/DOWN
(+) Increases sound.
(–) Decreases sound.
MENU
Press ;Accesses MAIN MENU.
Press again ;Exits MAIN MENU.
Infrared Transmitter Window
INPUT
Press → Switch to external video input
mode.
Press again → Switch to TV mode.
See page
CHANNEL UP/DOWN
(8) Selects next higher channel.
(9) Selects next lower channel.
•
• Moves the “ ” mark of the MENU
MENU
Press → Accesses MAIN MENU.
Press again → Exits MAIN MENU.
DISPLAY
Press → Displays receiving channel for
4 seconds.
Press again → Removes display.
• Temporarily displays receiving
TV
IN
23.
See pages 19 ~ 22 for channel
presetting.
screen.
channel when in Closed Caption
mode.
01-07 14LK22 [E].p65e 29/5/01, 4:08 PM7
7
Page 8
EZ SETUP during First Use
L When you turn on the TV for the first time, it will automatically
memorize the broadcast channels.
Please perform the following instructions before pressing the
power button.
(1) Insert the batteries into the remote control. (See page 5)
(2) Connect the antenna cable to the TV set. (See page 6)
(3) Plug in the AC POWER cord to the wall outlet.
1 Press the
POWER
button on the TV set or on the Remote Control
to turn on the TV. The SELECT LANGUAGE mode will be
displayed.
2 Press
CH UP (8)
(ESPAÑOL)”. Then press
or
DOWN (9)
(On the Set)
to select “ENGLISH” or “SPANISH
Menu
to SET LANGUAGE.
(Remote Control)
→
3 Press
4 Press
VOL (+)
VOL (+)
or
(–)
to access EZ SETUP mode.
.
The tuner will automatically search for the
broadcast and cable TV channels. (The CH No.
will automatically increase when it appears.)
If you want to stop the EZ SETUP process once it
VOL (–)
has started, press
and it will be cancelled.
If you want to SET UP again, please refer to page
19 on SET UP.
To cancel EZ SETUP
Press
VOL (–)
.
POWER
VOLUME
(+)/(–)
CHANNEL
UP (8)/
DOWN (9)
MENU
FAVORABIDIOMA LE
ENGL I SH
ESPAÑOL
(SELECT LANGUAGE mode)
LANGUAGSELECT E
ENGL I SH
ESPAÑOL
OR CA BLE .
TSART SETUP?ZE
ANTENNCONNE CT A
YE : VOL+
S
NO :
VOL –
(EZ SETUP mode)
WA I TPLE EAS
AU18TO RGGAMMI NORP
TSOP:
VOL –
5 Once EZ SETUP is completed, the smallest channel number
memorized will be displayed.
Note:
• If EZ SETUP does not memorize all the channels in your region, please refer to page 19 for more
information on manual memorizing the channels using CHANNEL SETTING.
• It may be difficult to PRESET when the broadcast signals are weak, the channel cycle frequency is
incorrect or frequency jamming is occuring around the area. Please refer to pages 19 ~ 22 for
more information on manual memorizing the channels using CHANNEL SETTING.
8
08-09 14LK22 [E].p65e 28/5/01, 10:43 AM8
Page 9
Demo Mode
MENU
button
(On the Set)
or
CHANNEL
UP
DOWN
buttons
88
(
8
)
88
99
(
9
99
• To quickly learn more about the TV set, press and hold for more
than three seconds
the TV set. The TV set will go into DEMO mode and briefly explain
the various features.
• To cancel DEMO mode, again press
DOWN (
Example:
DEMO mode display
99
9
)
99
Siempre
Siempre
MENU
on the TV set.
Mejor,
Sha rp
or both
CH UP (
MENU
88
8
)
and
88
or both
DOWN (
CH UP (
99
9
)
on
99
88
8
)
and
88
Accessing the MAIN MENU screen without Remote Control
• If you misplaced your Remote Control you can still access most
settings via the MAIN MENU screen when you press
both
• Some features of your TV set will not be accessible without the
Remote Control. If you lost your Remote Control, contact a Sharp
Service Center for a replacement.
CH UP (
88
8
88
)
and
DOWN (
99
9
)
on the TV set.
99
MENU
or
(On the Set)
or
/
)
08-09 14LK22 [E].p65e 9/5/01, 6:25 PM9
MENU
button
CHANNEL
88
UP
(
8
88
DOWN
(
buttons
)
/
99
9
)
99
9
Page 10
Language
ENGL I SH
ESPAÑOL
LANGUAGE
L The language for the ON SCREEN DISPLAY can be set to ENGLISH or SPANISH.
L Setting the ON SCREEN DISPLAY Language.
1 Press
2 Press
3 Press
(
8
)
or
4 Press
5 Press
(ESPAÑOL)”.
MENU
to access the MAIN MENU screen.
CH UP (8)
VOL (+)
DOWN (9)
VOL (+)
CH UP (8)
or
DOWN (9)
or
(–)
to access SET UP mode, then press
to move the “ ” mark to “SET UP”.
to move the “ ” mark to “LANGUAGE”.
or
(–)
to access LANGUAGE change mode.
or
DOWN (9)
to select “ENGLISH” or “SPANISH
→
CH UP
TIMER
VIDEO ADJUST
PARENT CON TROL
ENERGY SAVE
SET UP
CAPT IONCLOSED
(MAIN MENU screen)
TIMER
VIDEO ADJUST
PARENT CON TROL
ENERGY SAVE
SET UP
BL E SCREENU
LANGU
AGE
CAPT IONCLOSED
TINGCH S ET
(SET UP mode)
(LANGUAGE change mode)
IDIOMA
ENGL I SH
ESPAÑOL
6 Press
MENU
to exit.
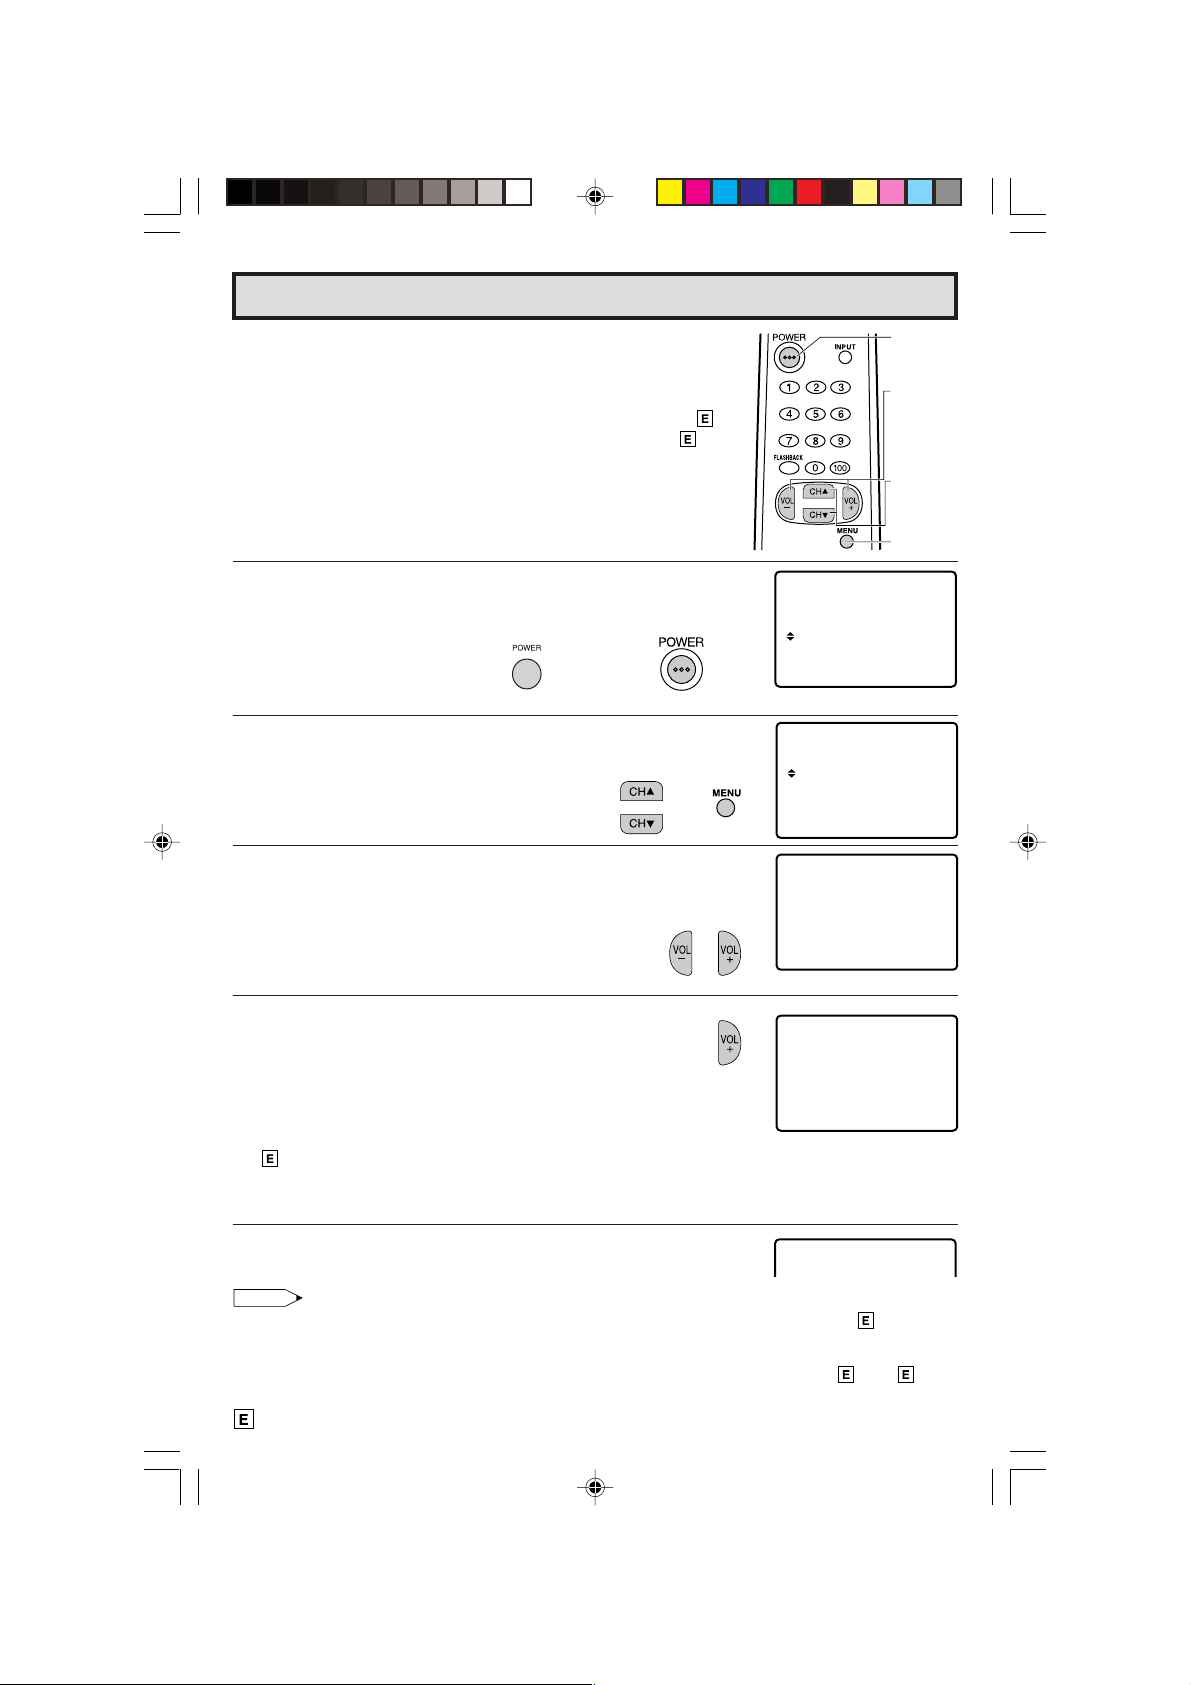
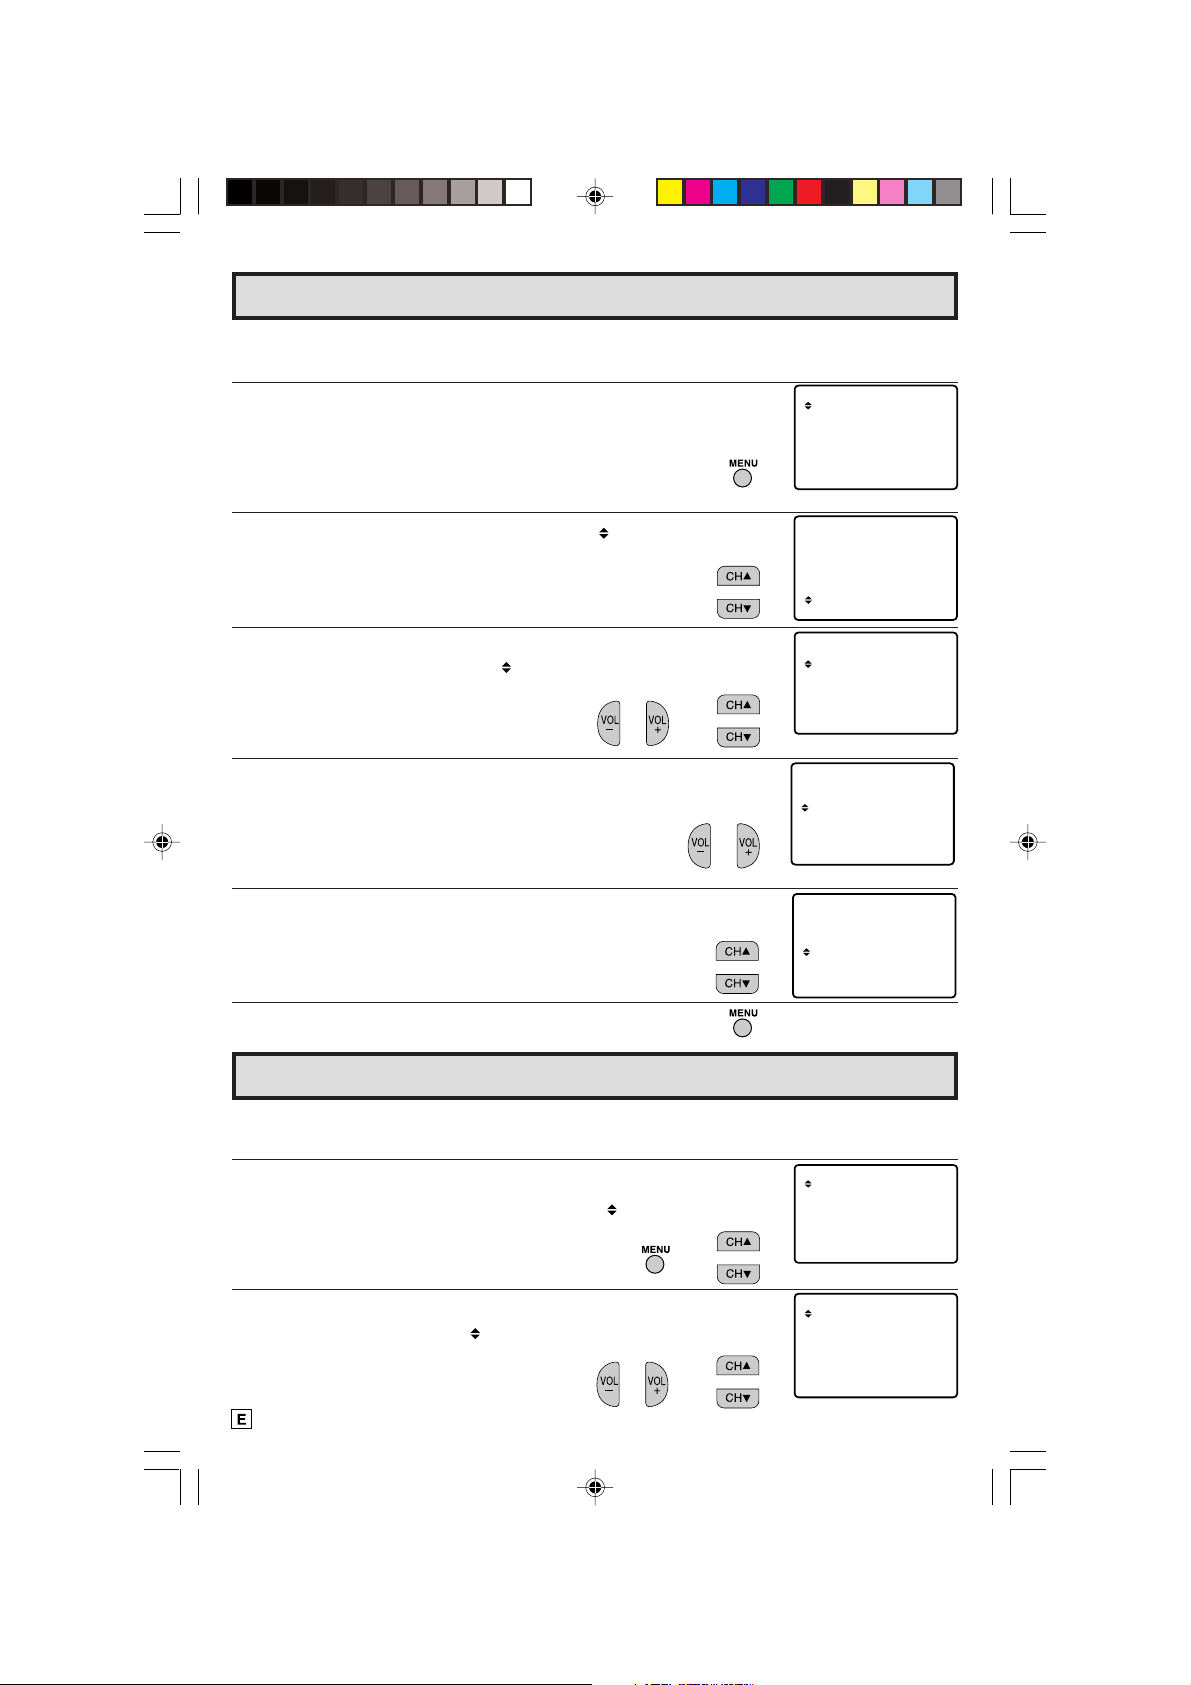
Sleep Timer
L You can preset your television to turn off automatically in increments of 30, 60, 90 or 120
minutes.
1 Press
2 Press
3 Press
10-14 14LK22 [E].p65e 28/5/01, 10:47 AM10
or
DOWN (9)
10
MENU
to access the MAIN MENU screen.
CH UP (8)
VOL (+)
or
DOWN (9)
or
(–)
to access TIMER mode, then press
to move the “ ” mark to “TIMER”.
to move the “ ” mark to “SLEEP TIMER”.
→
CH UP (8)
→
TIMER
VI DEO ADJUST
PARENT CONTROL
ENERGY S AVE
SET UP
CAPT IONCLOSED
(MAIN MENU screen)
SLEEP T IMER
ON T I MER
SETCLOCK
(TIMER select mode)
Page 11
SL EP T IMERE
120 RE AIMN
ON T I MER
ST TUS OFFA
10 00 PM:
:
Sleep Timer (Continued)
4 Press
5 Press
VOL (+)
or
(–)
to set a sleep time of 30, 60, 90 or 120 minutes.
;
--- ↔ 30 ↔ 60 ↔ 90 ↔ 120
MENU
to exit.
'
(TIMER SET mode)
Note:
• To turn off the Sleep Timer, repeat the above SLEEP TIMER steps and select “--- REMAIN”
during step 4.
• While SLEEP TIMER is active, the time remaining will be briefly displayed on-screen at regular
intervals or when the remote’s Display key is pressed.
On Timer
Note:
L Setting the On Time automatically turns on the TV at a preset
time.
1 Press
2 Press
MENU
to access the MAIN MENU screen.
CH UP (8)
or
DOWN (9)
to move the “ ” mark to “TIMER”.
→
TIMER
VIDEO ADJUST
PARENT CON TROL
ENERGY SAVE
SET UP
(MAIN MENU screen)
VOLUME
(+)/(–)
CHANNEL
UP (8)/
DOWN (9)
MENU
CAPT IONCLOSED
3 Press
VOL (+)
DOWN (9)
or
(–)
to access “TIMER”, then press
to move the “ ” mark to “ON TIMER”.
CH UP (8)
or
SLEEP T IMER
ON T I MER
SETCLOCK
→
(TIMER select mode)
4 Press
Press
VOL (+)
or
CH UP (8)
(–)
to access “ON TIMER”.
or
DOWN (9)
to select “ON TIMER”.
→
Note:
• When the timer is not set, CLOCK SET screen appears automatically after the OSD shown
below appears. (CLOCK SET step. 3)
PLEASE
SET UP T I ME
10-14 14LK22 [E].p65e 9/5/01, 6:25 PM11
(ON TIMER SET mode)
11
Page 12
On Timer (Continued)
5 Press
6 Press
7 Press
VOL (+)
or
(–)
CH UP (8)
or
DOWN (9)
.
→
to select the hour-digit and adjust by pressing
12 : 00 AM
..The indicator color changes to red.
12:00AM↔ 1:00AM ↔ 2:00AM ↔ … ↔ 10:00PM ↔ 11:00PM
..
VOL (+)
pressing
or
CH UP (8)
(–)
to select the minute-digit and adjust by
or
DOWN (9)
.
→
10 : 00 PM
. The indicator color changes to red.
00↔ 10 ↔ 20 ↔ 30 ↔ 40 ↔ 50
..
VOL (+)
or
(–)
Press
VOL (+)
CH UP (8)
or
(–)
to complete the TIMER setting.
or
DOWN (9)
to select “STATUS”, and press
to select “ON” or “OFF”.
ON T I MER
10 00 PM:
ST TUS OFFA
ON T I MER
10 30 PM:
ST TUS OFFA
ON T I MER
10 30 PM:
ST TUS ONA
:
:
:
→
ON : ON TIMER becomes activated, and turns on the unit at
the desired time.
(ON TIMER indicator: lights on.)
OFF : ON TIMER turns off.
(ON TIMER indicator: lights off.)
8 Press
Note:
MENU
to exit.
• For safety reasons, the unit automatically turns off for 120 minutes (SLEEP TIMER) after the
unit is turned on by the ON TIMER setting.
(Press any button to cancel SLEEP TIMER.)
12
10-14 14LK22 [E].p65e 9/5/01, 6:25 PM12
Page 13

SET UP
TIMER
VIDEO ADJUST
CAPT IONCLOSED
PARENT CONT ROL
ENERGY SAVE
ON T I MER
SETCLOCK
SLEEP T IMER
Clock Set
SETCLOCK
5:32AM
SETCLOCK
–– : ––
L How to set the time.
1 Press
2 Press
3 Press
4 Press
5 Press
MENU
CH UP (8)
VOL (+)
DOWN (9)
VOL (+)
CH UP (8)
to access the MAIN MENU screen.
or
or
(–)
to access “TIMER”, then press
to move the “ ” mark to “CLOCK SET”.
or
(–)
or
12 : 00 AM
The indicator color changes to red.
12:00AM 1:00AM 2:00AM
11:00PM 10:00PM 9:00PM
DOWN (9)
to move the “ ” mark to “TIMER”.
to access “CLOCK SET”.
DOWN (9)
to set the hour-digit.
→
CH UP (8)
→
(MAIN MENU screen)
or
(TIMER Select mode)
(CLOCK SET mode)
SETCLOCK
5:00AM
6 Press
VOL (+)
pressing
or
CH UP (8)
(–)
to select the minute-digit and adjust by
or
DOWN (9)
.
12 : 00 AM
00 01 02
7 Press
Note:
MENU
The indicator color changes to red.
...
57 58 59
to exit.
→
• The clock settings may become incorrect due to power failure etc.
10-14 14LK22 [E].p65e 9/5/01, 6:25 PM13
13
Page 14
SET UP
VIDEO ADJUST
CAPT IONCLOSED
PARENT CONTROL
ENERGY S AVE
TIMER
ICTUR
E
– +
P
50
Video Adjust
Description of Adjustment Items
Selected VOL UP (+) button VOL DOWN (–) button
item
PICTURE To increase contrast To decrease contrast
TINT To make skin tones greenish To make skin tones purplish
COLOR To increase color intensity To decrease color intensity
BRIGHT To increase brightness To decrease brightness
SHARP To increase sharpness To decrease sharpness
FAVORITE To choose a RED, BLUE or STANDARD COLOR TONE.
COLOR
RESET To return all adjustments to factory preset levels.
VOLUME
(+)/(–)
CHANNEL
UP (8)/
DOWN (9)
MENU
1 Press
2 Press
MENU
to access the MAIN MENU screen.
CH UP (8)
or
ADJUST”.
3 Press
4 Press
VOL (+)
or
CH UP (8)
(–)
or
(Refer to the diagram below.)
PICTURE
RESET
TINT
FAVORITE COLOR
: CH UP (8)
5 Press
VOL (+)
or
(–)
DOWN (9)
to move the “ ” mark to “VIDEO
to access PICTURE adjust mode.
DOWN (9)
to select the desired mode.
COLOR
BRIGHT
SHARP
: CH DOWN (9)
to adjust the setting.
→
(MAIN MENU screen)
(PICTURE adjust mode)
6 Repeat steps 4 to 5 to adjust other settings.
7 Press
10-14 14LK22 [E].p65e 9/5/01, 6:25 PM14
14
MENU
to exit.
50
E
ICTUR
P
– +
VOL UP (+)
increase contrast
VOL DOWN (–)
decrease contrast
Page 15
Closed Caption
TIMER
SET UP
V I DEO AD JUST
CAPT IONCLOSED
PARENT CONTROL
ENERGY S AVE
CAPT IONCLOSED
MOD E : C AP
DATA : CH 1
TION
CAPT IONCLOSED
MOD E : C AP
DATA : CH 1
TION
L HOW TO SET CLOSED CAPTION
• Your TV is equipped with an internal Closed Caption decoder. “Closed
Caption” is a system which allows you to view conversations, narration,
and sound effects in TV programs and home videos as subscript on
your TV screen as shown on the right.
• Not all the programs and videos will offer closed caption. Please look
for the “ ” symbol to ensure that captions will be shown.
• Closed Caption broadcast can be viewed in two modes: CAPTION
and TEXT. For each mode, two channels are available, CH1 and CH2:
The [CAPTION] mode subscripts dialogues and commentaries of TV
dramas and news programs while allowing clear view of the picture.
The [TEXT] mode displays over the picture other various information
(such as TV program schedule, weather forecast, etc.) that is
independent of the TV programs.
VOLUME
(+)/(–)
CHANNEL
UP (8)/
DOWN (9)
MENU
1 Press
2 Press
MENU
CH UP (8)
CAPTION”.
3 Press
4 Press
VOL (+)
CH UP (8)
“MODE” or “DATA”.
5 Press
VOL (+)
MODE :
6 Press
MENU
to access the MAIN MENU screen.
or
or
(–)
or
or
(–)
CAPTION
TEXT
OFF
DOWN (9)
to access “CLOSED CAPTION”.
DOWN (9)
to change the CLOSED CAPTION setting.
to move the “ ” mark to “CLOSED
to move the “ ” mark to either
DATA :
CH 1
CH 2
to exit.
→
(MAIN MENU screen)
(CLOSED CAPTION setting mode)
CAPT IONCLOSED
MOD E : C AP
DATA : CH 1
TION
Note:
• If a broadcast has CLOSED CAPTION and the
mode automatically. Pressing
MUTE
again will return the set to its previous condition.
MUTE
button is pressed, the set enters [CAPTION]
• Closed Caption may malfunction (white blocks, strange characters, etc.) if signal conditions are poor
or if there are problems at the broadcast source. This does not necessarily indicate a problem with
your TV.
• If any button is pressed to call up the ON SCREEN DISPLAY while viewing a CLOSED CAPTION
broadcast, the closed captions will disappear momentarily.
• When viewing in TEXT mode, if no TEXT broadcast is being received, for some programs the screen
may become dark and blank. Should this occur, set the Closed Caption mode to “OFF”.
15-17 14LK22 [E].p65e 9/5/01, 6:26 PM15
15
Page 16
SET UP
V I DEO AD JUST
CAPT IONCLOSED
PARENT CONTROL
ENERGY S AVE
TIMER
TIMER
VIE
W
PARENT CONTROL
VIWTIMER
ST TAUS
E
VI
W
ITIME
:OFF
EGN
––––H
––––H
OFF T I ME
M
M
VEWT
2H
IIMER
00M
OFF
STATU
VEWINGITIME
TIME
––H ––M
S:OFF
– – –
–
NIPUT SECRET No.
Parent Control
L VIEW TIMER
This function allows you to restrict TV viewing time and also allows you to control TV usage.
This function is to prevent your children from watching too much TV.
VIEWING TIME (an accumulative timer: counts only the time
duration acquired while the TV is on.)
• VIEWING TIME can be set from 30M (30 minutes) to 10H00M (10
hours) in 30 minutes intervals.
OFF TIME (Restricts TV watching after the VIEWING TIME reaches
zero.)
• OFF TIME can be set from 30M (30 minutes) to 10H00M (10 hours)
in 30 minutes intervals.
STATUS (ON/OFF setting of VIEW TIMER)
L How to set VIEW TIMER.
1 Press
2 Press
MENU
to access the MAIN MENU screen.
CH UP (8)
or
DOWN (9)
to move the “ ” mark to “PARENT
CONTROL”.
→
VEWT
IIMER
VEWINGITIME
––H
––M
TIME
OFF
––H ––M
STATU
S:OFF
(MAIN MENU screen)
3 Press
VOL (+)
or
(–)
to access “PARENT CONTROL VIEW
TIMER”.
4 Press
5 Press
VOL (+)
or
CH UP (8)
(–)
to access “VIEW TIMER”.
or
DOWN (9)
to select “VIEWING TIME” and
“OFF TIME”. For each selection, press the
the time duration.
6 Press
VOL (+)
CH UP (8)
or
or
(–)
DOWN (9)
to turn ON the “VIEWING TIMER”. (If STATUS is
to select “STATUS”. Press the
OFF, VIEW TIMER will not operate.)
7 Press
MENU
. “INPUT SECRET No.” will be displayed.
VOL (+)
→
→
or
(–)
to set
VEWT
IIMER
VEWINGITIME
2H
00M
TIME
OFF
5H 0 0M
STATU
S:ON
16
15-17 14LK22 [E].p65e 9/5/01, 6:26 PM16
Page 17

– – –
–
NIPUT SECRET No.
IPUT ESNCRETNo .
****
– – –
–
NIPUT SECRET No.
Parent Control (Continued)
8 Enter the 4-digit SECRET No. using the
KEYPAD
9 Press
.
MENU
, and SECRET No. is registered.
REMOTE
→
Example
• To restrict anybody from watching the TV for 5 hours, after watching
the TV for 2 hours, your settings would look like this:
• They can choose to watch the 2 hours of TV however they wish. For
example, they could watch 1 hour of TV, turn TV off for 30 minutes,
then turn TV on and watch the remaining 1 hour on the VIEWING
TIMER.
L
To change the VIEW TIMER settings. (SECRET No. is registered)
1 Repeat “How to set VIEW TIMER” steps and select
“PARENT CONTROL VIEW TIMER” during step
3. Press
will be displayed.
2 Enter the 4-digit SECRET No. using the
KEYPAD
be displayed. Repeat step 5 ~ 6.
Note:
• When you choose the correct SECRET No., the VIEW TIMER access
screen is displayed. If the wrong SECRET No. is chosen, “SECRET
No. IS INCORRECT” is displayed. Input the SECRET No. again in
this case.
VOL (+)
or
(–)
, and “INPUT SECRET No.”
REMOTE
, and the VIEW TIMER access screen will
NI PUT SECRET No .
1
2 3 0
VEWT
IIMER
VEWINGITIME
2H
00M
TIME
OFF
5H 0 0M
STATU
S:ON
S ECRET No . I S
INC
O
RRECT
L To cancel the VIEW TIMER (While the TV set is OFF but the VIEW TIMER is set)
1 Turn on TV; a blue screen message “TIME OVER” will appear. If
you do nothing, the TV will turn off in approximately 30 seconds.
2 Enter the 4-digit SECRET No. using the
KEYPAD
. When you choose the correct SECRET
REMOTE
No., the VIEW TIMER is canceled. If the wrong
SECRET No. is chosen, “SECRET No. IS
INCORRECT” is displayed. Input the SECRET No.
again in this case.
L To cancel the VIEW TIMER setting or change the SECRET No. (When you forget the SECRET
No.)
TMEO
IVER
IPUT ESNCRET
–
–––
TMEOIVER
IPUT ESNCRET
No .
No .
****
1 Repeat “How to set VIEW TIMER” steps and select
“PARENT CONTROL VIEW TIMER” during step
3. Press
will be displayed.
15-17 14LK22 [E].p65e 9/5/01, 6:26 PM17
VOL (+)
or
(–)
, and “INPUT SECRET No.”
17
Page 18

:ON
EN REGY SAVE
SET UP
V IDEO ADJUST
CAPT IONCLOSED
PA REN T CONT ROL
ENERGY S AVE
TIMER
Parent Control (Continued)
2 Press and hold both
VOL (+)
and
CH UP (8)
on the TV set
simultaneously until the VIEW TIMER access screen is displayed.
Now you can cancel the VIEW TIMER settings or change the
SECRET No. while “INPUT SECRET No.” is displayed.
L Notice of Remaining VIEWING TIME
• For every 30 minute interval, the “remaining time” will be displayed
for 4 seconds. For the last 5 minutes, the “remaining time” will be
displayed every minute.
• “0 REMAIN” will be displayed for 10 seconds just before the VIEWING
TIME is completed.
Energy Save
L This feature lets you lower the power consumption of your TV
set which in turn saves you money and minimizes the impact on
the environment. When this feature is turned on, it reduces the
brightness of the TV to a level that consumes approximately 20%
less energy than when the feature is turned off.
The reduction in brightness will be less noticeable under low
room lighting conditions.
1 Press
2 Press
MENU
to access the MAIN MENU screen.
CH UP (8)
“ENERGY SAVE”.
or
DOWN (9)
to move the “ ” mark to
(On the Set)
VOL (+)/
CH UP (8)
VIEWING TIME
0H
VIEWING TIME
05M
0H
VIEWING TIME
0
30M
REMAIN
REMAIN
REMAIN
VOLUME
(+)/(–)
CHANNEL
UP (8)/
DOWN (9)
MENU
3 Press
4 Press
5 Press
VOL (+)
VOL (+)
MENU
or
(–)
to access ENERGY SAVE select mode.
or
(–)
to select “ON”.
to exit.
18
18-22 14LK22 [E].p65e 9/5/01, 6:27 PM18
→
(MAIN MENU screen)
EN REGY SAVE
:OFF
(ENERGY SAVE select mode)
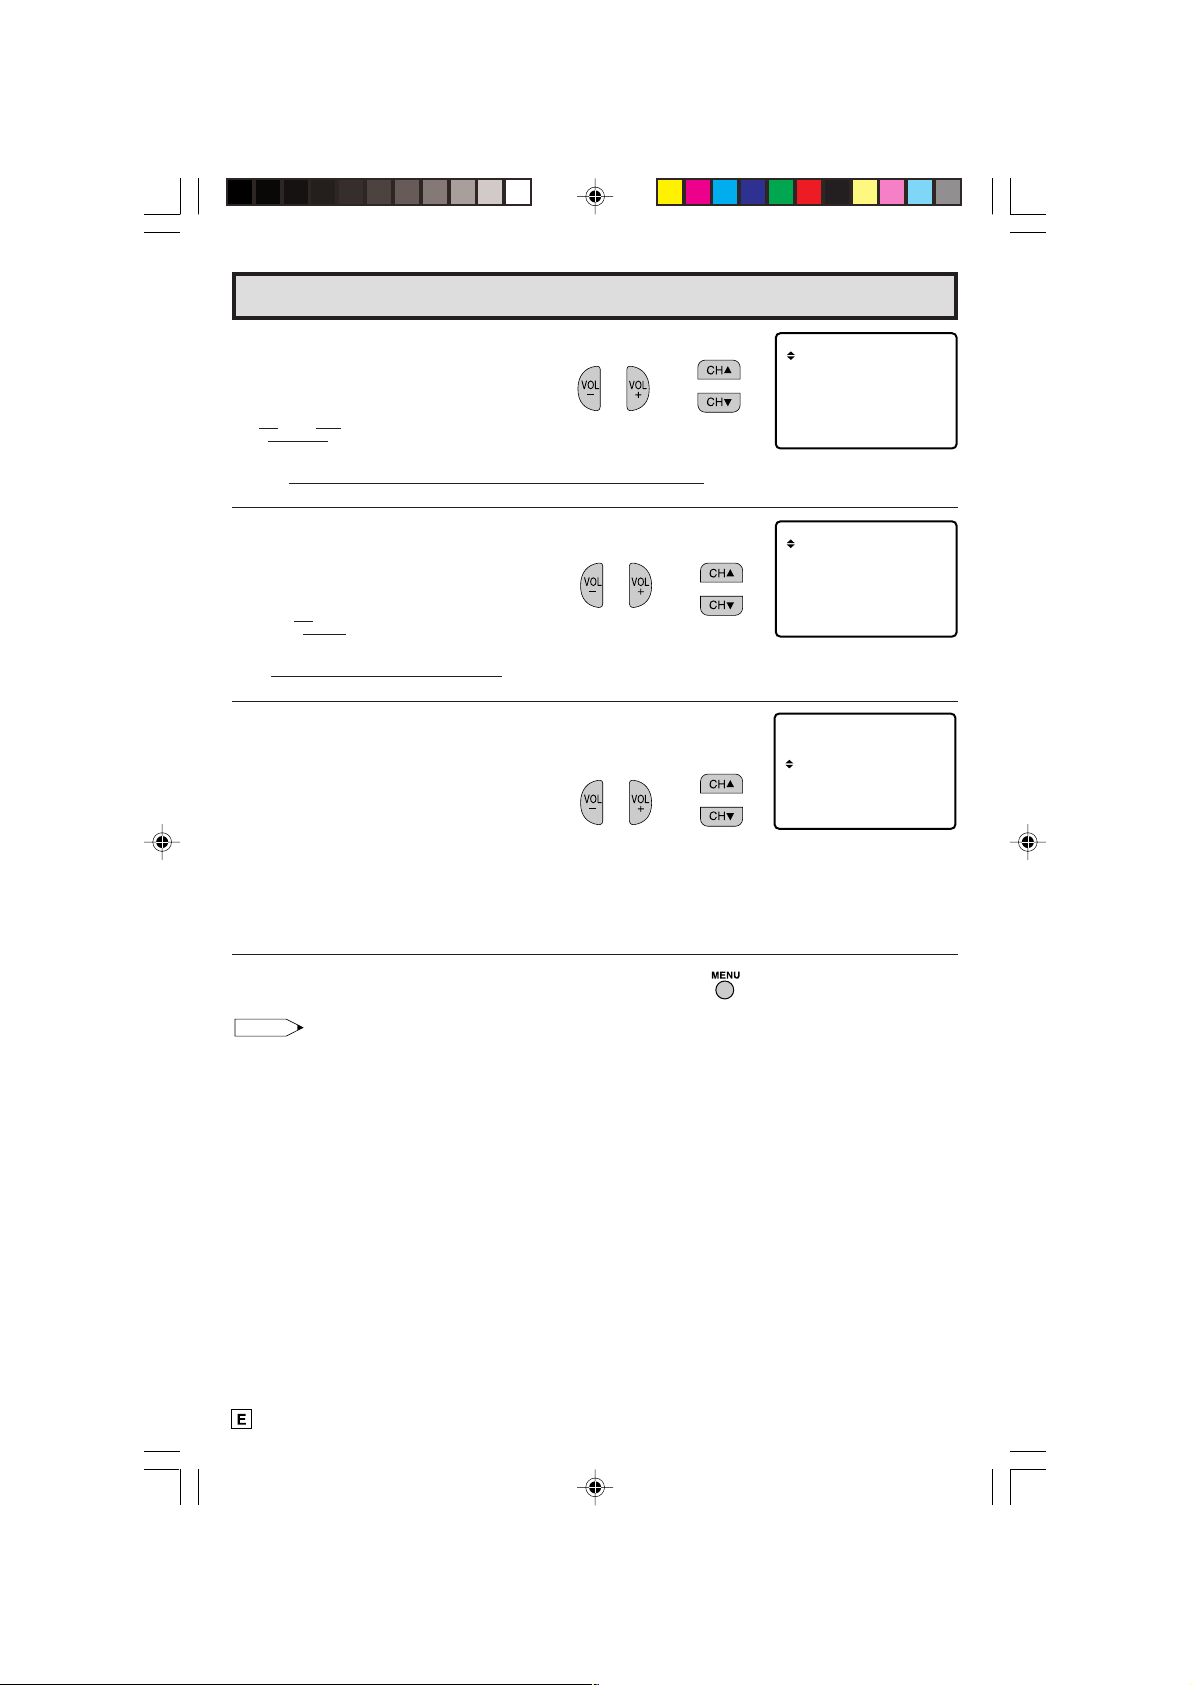
Page 19

SET UP
V I DEO AD JUST
CAPT IONCLOSED
PARENT CONTROL
ENERGY SAVE
TIMER
2
Set Up
L EZ SETUP
By operating the channel preset functions, you can preset your
TV to the desired channels for viewing.
1 Press
2 Press
MENU
to access the MAIN MENU screen.
CH UP (8)
or
DOWN (9)
to move the “ ” mark to “SET
UP”.
→
3 Press
(
8
VOL (+)
)
or
DOWN (9)
or
(–)
to access SET UP mode, then press
to move the “ ” mark to “CH SETTING”.
→
4 Press
VOL (+)
or
(–)
to access CH SETTING mode.
CH UP
REMOTE
KEYPAD
VOLUME
(+)/(–)
CHANNEL
UP (8)/
DOWN (9)
MENU
(MAIN MENU screen)
BL E NSCREEU
LA GUAGEN
CH SE TT I NG
(SET UP mode)
EZ SE PTU
A I /CABLER
CH SE ARCH
CH MEMORY
5 Press
6 Press
VOL (+)
VOL (+)
or
(–)
to access EZ SETUP mode.
.
The tuner will automatically search for the
broadcasting and cable TV channels. (The CH No.
will automatically increase when it appears.)
If you want to stop the EZ SETUP process once it
has started, press
VOL (–)
. Search will be
canceled.
To cancel EZ SETUP
Press
VOL (–)
.
7 Once EZ SETUP is completed, the smallest channel number
memorized will be displayed.
18-22 14LK22 [E].p65e 9/5/01, 6:27 PM19
(CH SETTING mode)
OR CA B LE .
TSART SETUP?ZE
ANTENNCONNE CT A
YE : VOL+
S
NO :
VOL –
(EZ SETUP mode)
WA I TPLE EAS
AU18TO RGGAMMI NORP
TSOP:
VOL –
19
Page 20

SET UP
V I DEO AD JUST
CAPT IONCLOSED
PARENT CONTROL
ENERGY SAVE
TIMER
AI
ABLE STD
R
A I /CABLER
C
ABLE HRCC
ABLE I RCC
Set Up (Continued)
HSEARCH
A I /CABLER
EZ SETUP
C
H MEMORYC
L CHANNEL SETTING
If EZ SETUP does not memorize all the channels in your region, follow the instructions below
to manually memorize the channel.
1 Press
2 Press
UP”.
MENU
to access the MAIN MENU screen.
CH UP (8)
or
DOWN (9)
to move the “ ” mark to “SET
→
(MAIN MENU screen)
3 Press
4 Press
VOL (+)
or
CH UP (8)
SETTING”.
5 Press
6 Press
VOL (+)
or
CH UP (8)
“AIR/CABLE”, then press
mode.
7 Press
CH UP (8)
desired mode.
CABLE STD
AIR
(–)
to access SET UP mode.
or
DOWN (9)
(–)
to access CH SETTING mode.
or
DOWN (9)
or
DOWN (9)
CABLE HRC CABLE IRC
to move the “ ” mark to “CH
to move the “ ” mark to the
VOL (+)
or
(–)
to access AIR/CABLE
to move the “ ” mark to the
→
→
BL E NSCREEU
LA GUAGEN
CH SE TT I NG
(SET UP mode)
EZ SE PTU
A I /CABLER
CH SE ARCH
CH MEMORY
(CH SETTING mode)
(CH SETTING mode)
8 Press
Note:
• Receivable channels of your TV set are:
MENU
to exit.
AIR channels: CABLE channels:
VHF: 2 through 13. 1 (HRC and IRC mode only)
UHF: 14 through 69. 2 through 125 (STD, HRC and IRC)
20
18-22 14LK22 [E].p65e 9/5/01, 6:27 PM20
(AIR/CABLE mode)
Page 21

2
AR +T:
TO –P:
AIR
CH SE ARCH
ST
S
1
Set Up (Continued)
L Saving broadcast TV channels into memory.
1.1 Press
1.2 Press
1.3 Press
1.4 Press
MENU
to access the MAIN MENU
screen, then press
9
)
to move the “ ” mark to “SET UP”.
(
VOL (+)
mode, then press
9
)
to move the “ ” mark to “CH
(
SETTING”.
VOL (+)
SETTING mode.
CH UP (8)
” mark to “CH SEARCH”, then press
the “
VOL (+)
mode.
or
CH UP (8)
or
(–)
to access SET UP
CH UP
or
(– )
or
DOWN (9)
(–)
to access CH SEARCH
or
(
8
)
or
to access CH
DOWN
DOWN
to move
→
→
→
EZ SE PTU
A I /CABLER
CH SE ARCH
CH MEMORY
(CH SETTING mode)
START
2.1 Press
STOP
2.2 Press
2.3 Press
Note:
• If you press
program will start again, and the previously memorized channels will
be lost.
L Adding weak or additional channels or erasing unwanted channels from TV memory.
1.1 Press
1.2 Press
1.3 Press
VOL (+)
through all available channels in your area
and add them into the TV’s memory.
VOL (–)
the current channel and will not add any
higher channels.
MENU
MENU
screen, then press
9
)
to move the “ ” mark to “SET UP”.
(
VOL (+)
mode, then press
9
) to move the “ ” mark to “CH
(
SETTING”.
VOL (+)
SETTING mode, then press
DOWN (9)
MEMORY”.
. The tuner will search
. CH SEARCH will stop at
to exit.
VOL (+)
again while in the CH SEARCH mode, auto-
to access the MAIN MENU
CH UP (8)
or
(–)
to access SET UP
CH UP (8)
or
(– )
to move the “ ” mark to “CH
or
DOWN
or
DOWN
to access CH
CH UP (8)
or
(STOP)
(START)
→
→
→
(CH SEARCH mode)
EZ SE PTU
A I /CABLER
CH SE ARCH
CH MEMORY
(CH SETTING mode)
2.1 Press
2.2 Use
18-22 14LK22 [E].p65e 9/5/01, 6:27 PM21
VOL (+)
MEMORY.
CH UP (8)
KEYPAD
to add or erase.
to select each desired channel
or
or
DOWN (9)
(– )
to access CH
or
REMOTE
or
21
Page 22

SET UP
V I DEO AD JUST
CAPT IONCLOSED
PARENT CONTROL
ENERGY SAVE
TIMER
LA GUAGEN
BL E NSCREEU
CH SE TT I NG
:OFF
BL EUSCREEN
:ON
BL EUSCREEN
Set Up (Continued)
2.3 Press
VOL (+)
to add a channel to the TV’s
memory or press
VOL (–)
to erase a
channel from the TV’s memory.
2.4 Press
MENU
to exit.
VOL (+)
H MEMORY
C
AIR
2
1
D+:
ADTO
(CH MEMORY
unmemorized channel)
To add channel 12 to the
TV memory
VOL (–)
To erase channel 12 from
the TV memory
CH MEMORY
21
AIR
E–:
ESTO AR
(CH MEMORY
memorized channel)
L BLUE SCREEN
Automatically turns the screen blue if a broadcast signal is not received (e.g. when a TV
station closes down). After 15 minutes of non-reception, the TV set turns off.
1 Press
2 Press
MENU
to access the MAIN MENU screen.
CH UP (8)
or
DOWN (9)
to move the “ ” mark to “SET
UP”.
→
(MAIN MENU screen)
3 Press
VOL (+)
or
(–)
to access SET UP mode.
VOLUME
(+)/(–)
CHANNEL
UP (8)/
DOWN (9)
MENU
(SET UP mode)
4 Press
VOL (+)
or
(–)
to access BLUE SCREEN select mode.
(BLUE SCREEN select mode)
5 Press
6 Press
VOL (+)
MENU
or
(–)
to exit.
to select “ON”.
Note:
• Poor reception due to weak signals, or too much noise might activate the BLUE SCREEN function
despite the presence of a broadcast signal. To continue watching TV under these conditions, switch
the BLUE SCREEN “OFF”.
22
18-22 14LK22 [E].p65e 28/5/01, 10:48 AM22
Page 23

Using the Video and Audio Input Jacks
L Connecting video equipment for playback of video material.
• When the television is connected to video equipment as shown below, the material being played
back on the video equipment can be seen on the television screen.
Connecting video device equipped with video output terminals.
CONNECTIONS
VIDEO EQUIPMENT
To VIDEO OUTPUT
CAMCORDER
TV GAME
VCR
FWDREV
DVD
L To watch video material playback.
• Press the Remote’s
INPUT
button to select the VIDEO INPUT mode for the video equipment you
wish to play.
• The external VIDEO INPUT mode will change as follows each time the
AIR
or
CABLE
INPUT
(Rear/Front)
To AUDIO OUTPUT
To AUDIO OUTPUT
To VIDEO OUTPUT
(Front connection
terminals of TV)
(Rear connection
terminals of TV)
INPUT
button is pressed.
• INPUT mode can be selected by pressing either the
TV is set to the highest channel stored in memory, or by pressing the
CH UP (8)
on the TV remote control when the
CH DOWN (9)
when it is set to
the lowest channel.
• The front terminal overrides the rear terminal.
Note:
• When connecting video or audio equipment to the television, be sure that the power is turned off in
order to prevent damage to either the television or the equipment being connected.
• Audio-visual material may consist of copyrighted works which must not be recorded without the
authority of the owner of the copyright. Please refer to relevant laws in your country.
• For detailed information on the connection and use of auxiliary equipment, refer to the instruction
manuals of the equipment being used.
• The connection cords can be obtained from your local video store.
23-26 14LK22 [E].p65e 9/5/01, 6:28 PM23
23
Page 24

Specifications
MODEL 14LK22
Receiving System NTSC
Reception Channels
AIR VHF 2-13 CH
UHF 14-69 CH
CATV 1-125 CH
Channel Tuning 181-Chnnel Reception PLL tuning system
Antenna Input Impedance VHF/UHF 75 ohm Unbalanced
Screen Size 14˝ Diagonally Measured
Terminals Audio/Video input x 2 (Front x 1, Rear x 1)
Sound Output 1.0 W (MAX)
Power Source AC 110-220 V, 50/60 Hz
Power consumption 53 W
Dimensions 141/32˝ (W) x 1211/16˝ (H) x 1421/32˝ (D)
[355.5 mm (W) x 322.0 mm (H) x 372.0 mm (D)]
Weight (approx.) 18.7 lbs (8.5 kg)
• Design and specifications are subject to change without notice.
24
23-26 14LK22 [E].p65e 29/5/01, 4:08 PM24
Page 25

Before Calling for Service
Check these items and see if you can correct the trouble with a slight adjustment of the controls.
QUICK SERVICE
CHECK LIST
PROBLEM
POSSIBLE REMEDY
Try a new channel, if OK, then there
is possible station trouble.
Is TV plugged in? Power at outlet?
Is TV’s POWER button on?
Is antenna connected to terminal on
the back of the set?
If outside antenna is being used,
check for broken wire.
Check for local interference or
external electrical noise.
Turn off with POWER button and then
turn it on after about a minute.
Adjust COLOR control.
Adjust PICTURE control.
Check external Video/Audio products:
look for loose/broken connection
leads. (Refer to page 20)
Check batteries of Remote Control.
Are audio cables connected firmly?
Check the volume level.
Change Closed Caption mode to
“OFF” / Energy Save mode to “OFF”.
Unplug the TV and plug it in again
after 2 minutes.
Calling for Service
No Playback of VCR and Disc
Player
No Picture or Sound from
External Video/Audio Products
Remote Control Doesn’t Work
Bars on Screen
Picture Distorted
Picture Rolls Vertically
No Color
Poor Reception on Some
Channels
Weak Picture
Lines or Streaks in Picture
Ghosts in Picture
Picture Blurred
Sound OK, Picture Poor
Picture OK, Sound Poor
No Picture or Sound
Dark and Blank Picture
External Electrical Noise
XXXXX XX X XX XXXX XXX
X XXXX XX X XXXXXX X XX
X X X XX XX X XX XXXX X XX
XXXXXXXX XX X X X X X XX
XXXXX XX X XX XXXX X XX
XXXX X X X X X XXX XX XX X
X X X XX XX X XX XXXX X XX
XXXXXXX X XX XXXX XX X
XXXXXXXXX XXXX XXX X
XXXXXXX X XXXXXX XXX
XXX XX XX X XX XXXX XX X
X X X XX XX X XX XXXX X X
X X XXXXX X XXXXXXXX X
XXX XX XX X XXXXXX XX X
Interfering with TV’s Operation
Respuestas Inmediatas
23-26 14LK22 [E].p65e 29/5/01, 11:04 AM25
In Mexico:
Sharp Electronics Corporation
Sucursal en Mexico
Col. Ampliación Asturias
México D.F. 06890
Tel. : 57 16 90 00
Internet: www.sharp.com.mx
e-mail: genial@sharp.com.mx
In other Latin American Countries:
Sharp Electronics Corporation
6100 Blue Lagoon Drive Suite 230
Miami, Florida 33126 USA
Tel. : (305) 264-2277
Internet: www.SiempreSharp.com
25
Page 26

26
SHARP CORPORATION
Printed in Mexico
TINS-7400GJZZ
01P06-MMP
23-26 14LK22 [E].p65e 9/5/01, 6:28 PM26
Page 27

7400 GJ
MODELO
14LK22
TELEVISOR A COLOR
MANUAL DE OPERACION
INDICE
• INFORMACIÓN IMPORTANTE .........................
• Accesorios suministrados ..............................
• MEDIDAS DE SEGURIDAD
IMPORTANTES ......................................
• Antes de poner en funcionamiento
su televisor .......................................................
• Conexiones de antenas ...................................
• Referencia rápida de los controles
de operación .....................................................
• PREAJUSTE CANAL al encender el aparato
por primera vez .................................................
• Modo Demo .......................................................
• Acceso a la pantalla de MENU PRINCIPAL
sin el Mando a Distancia..................................
• Idioma ..............................................................
• Temporizador para apagar ...............
• Temporizador para encender ...........
• Ajuste del reloj ................................................
• Ajuste de vídeo ...............................................
• Closed caption ................................................
• Bloqueador ........................................
Limitador ........................................
• Ahorro de Energía ..........................................
• Preparación ........................................
PREAJUSTE CANAL ...................................
Ajuste de canal ..............................
Pantalla Azul ...............................................
• Utilización de las terminales
de entradas audio/vídeo ................................
• Especificaciones ............................................
• Antes de llamar al servicio
de reparaciones ..............................................
• Servicio de Reparaciones ..............................
LEA LA TOTALIDAD DE ESTE MANUAL
DE OPERACIÓN ANTES DE PONER EN
MARCHA EL APARATO.
PAGINA
3~ 4
10 ~ 11
11 ~ 12
16 ~ 18
16 ~ 18
19 ~ 22
20 ~ 22
10
13
14
15
18
19
22
23
24
25
25
2
2
5
6
7
8
9
9
1
01-07 14LK22 [ES].p65e 29/5/01, 7:53 PM1
Page 28

Bienvenido a la familia SHARP. Nos complace que sea Ud. el dueño de un televisor a color SHARP,
diseñado y fabricado con las mejores normas de calidad, confiabilidad y rendimiento. Todos los televisores
a color SHARP han sido sintonizados y ajustados para brindar a Ud. una imagen con un color y un
sonido inmejorables, y han sido sometidos en fábrica a las más estrictas pruebas de control de calidad.
Hemos preparado este MANUAL DE OPERACION para que Ud. pueda ajustar la imagen y el color
según sus preferencias.
Sinceramente esperamos que su televisor a color SHARP le depare grandes satisfacciones y muchas
horas de entretenimiento en los años venideros. Sírvase leer cuidadosamente estas instrucciones y
téngalas a mano para consultarlas cuando sea necesario.
IMPORTANTE
Sirvase anotar los números del modelo y serie del televisor
en el espacio provisto, para ayudar a reportar en caso de
pérdida o robo. Los números están ubicados en la parte
posterior del televisor
Número de Modelo:
Número de Serie:
INFORMACIÓN IMPORTANTE
ADVERTENCIA:
PRECAUCION:
ELECTROCHOQUE, NO QUITE LA CUBIERTA
(NI LA PARTE DE ATRAS), NO INTRODUZCA
PARTES DE SERVICIO POR PARTE DEL
USUARIO. REFIERASE EXCLUSIVAMENTE PARA
SERVICIO AL PERSONAL DE SERVICIO CALIFICADO.
PARA REDUCIR EL RIESGO DE INCENDIO O DESCARGA
ELECTRICA, NO EXPONGA ESTE APARATO A LA HUMEDAD.
PARA REDUCIR EL RIESGO DE
Accesorios suministrados
TV
Control Remoto por Infrarrojos
Número de parte : RRMCG1339CESB
Pilas secas tamaño
“AA” de 1,5 V cc
El relámpago con cabeza de
flecha dentro de un triángulo
indica al usuario que las
partes dentro del producto
representan riesgo de
descarga eléctrica.
El signo de exclamación
dentro de un triángulo trata de
indicar al usuario que las
instrucciones importantes de
operación y servicio se
encuentran en los documentos
con el aparato.
Adaptador de
clavija ca
2
01-07 14LK22 [ES].p65e 15/5/01, 6:29 PM2
Page 29

MEDIDAS DE SEGURIDAD IMPORTANTES
PRECAUCION: Lea por favor todas estas instrucciones antes de poner en funcionamiento
su televisor, y guárdelas para poder utilizarlas en el futuro, si fuese necesario.
La energía eléctrica puede realizar muchas funciones útiles. Este aparato ha sido diseñado y fabricado
para garantizar su seguridad física. Sin embargo, UNA UTILIZACION INAPROPIADA PODRIA SER LA
CAUSA DE DESCARGAS ELECTRICAS O INCENDIOS. Para mantener el buen funcionamiento de este
equipo y evitar problemas, siga las normas básicas indicadas a continuación cuando lo instale, utilice o
repare.
1. Desenchufe el televisor del tomacorriente antes de limpiarlo.
2. No utilice líquidos ni aerosoles de limpieza. Para limpiar el televisor utilice un paño húmedo.
3. No utilice accesorios no recomendalos por el fabricante del televisor, ya que éstos podrían ocasionar
un peligro.
4. No utilice el televisor cerca del agua — por ejemplo, cerca de una bañera, lavabo, fregadero o
lavadora, en un sótano húmedo, cerca de una piscina, etc.
5. No utilice este televisor sobre un carrito, soporte o mesa inestable. El televisor podría caerse causando
serias heridas a niños o adultos, y, por supuesto, el aparato se estropearía.
Ponga el televisor sobre un carrito o soporte recomendado por el fabricante, o
vendido junto con el televisor.
La combinación de carrito y televisor debe moverse con mucho cuidado. Las paradas
rápidas, la fuerza excesiva y las superficies irregulares pueden causar que la
combinación de que la combinación de televisor y carrito se volteen.
6. Cuando instale el televisor en una pared o en una estantería siga las instrucciones del fabricante, y
utilice los aditamentos de montaje aprobado por el fabricante.
7. Las ranuras y aberturas de la caja y del panel posterior o inferior sirven para la ventilación del aparato,
para que éste funcione bien y para evitar que se caliente. Estas aberturas no deben taparse nunca.
Este televisor no debe colorcarse en un lugar cerrado si éste no dispone de la ventilación apropiada.
8. Las aberturas no deben taparse nunca con un paño u otro material; y las aberturas del panel inferior
tampoco deben taparse colocando el televisor sobre una cama, sofá, alfombra u otra superficie similar.
Este televisor no debe ponerse nunca cerca o encima de un radiador u otro aparato que produzca
calor.
9. Este televisor sólo debe funcionar con la fuente de corriente indicada en la etiqueta del fabricante. Si
no está seguro acerca del tipo de corriente de su hogar, póngase en contacto con el concesionario
de quien adquirió el televisor o con la compañía eléctrica local.
En el caso de equipos de televisión diseñados para funcionar con baterías, consulte las instrucciones
de uso.
10. No permita que se apoye nada sobre el cable de alimentación. No ponga este televisor donde el cable
pueda ser deformado por personas que caminen sobre él.
11. Cumpla con todos los avisos e instrucciones marcados en el televisor.
12. Si hay una antena exterior conectada al televisor, asegúrese de que el sistema de antena está
conectado a tierra, para obtener así cierta protección contra la sobretensión y contra las cargas de
electricidad estática acumulada.
01-07 14LK22 [ES].p65e 9/5/01, 6:36 PM3
3
Page 30

MEDIDAS DE SEGURIDAD IMPORTANTES
EJEMPLO DE CONEXION A TIERRA DE UNA
ANTENA SEGUN EL CODIGO ELECTRICO NACIONAL
BAJADA DE ANTENA
ABRAZADERA PARA
PUESTA A TIERRA
UNIDAD DE DESCARGA DE
EQUIPO DE
SERVICIO
ELECTRICO
13. Para proteger aún más este televisor durante tormentas eléctricas o cuando se deje sin atender y sin
utilizar durante largos periodos de tiempo, desenchufe el cable de alimentación del tomacorriente de
la pared y desconecte la antena. Esto evitará que el aparato pueda estropearse debido a los
relámpagos y a la sobretensión en la línea de alimentación.
14. Un sistema de antena exterior no debe ubicarse cerca de líneas de alimentación elevadas, ni cerca
de luces eléctricas o circuitos de alimentación. Tampoco debe ubicarse donde pueda caer sobre tales
líneas o circuitos de alimentación. Cuando instale un sistema de antena exterior, tenga muchísimo
cuidado de no tocar las líneas o circuitos de alimentación porque el contacto podría causar un
accidente mortal.
15. No sobrecargue los tomacorrientes ni los cables de extensión porque esto podría causar un incendio
o descarga eléctrica.
16. No meta nunca ningún objeto en el interior del televisor porque podría tocar piezas con alta tensión
o causar un cortocircuito con otras piezas causando un incendio o descarga eléctrica. No derrame
nunca ningún tipo de líquido sobre el televisor.
17. No trate de reparar el televisor usted mismo porque al abrir o quitar las tapas podría exponerse a una
descarga de tensión u otros peligros. Las reparaciones deben ser realizados por personal de servicio
calificado.
18. Desenchufe este televisor del tomacorriente y solicite el servicio de un técnico calificado cuando se
produzcan las condiciones siguientes:
A. Cuando el cable de alimentación o el enchufe estén estropeados.
B. Cuando haya derramado un líquido sobre el televisor.
C. Si el televisor ha quedado expuesto a la lluvia o el agua.
D. Si el televisor no funciona normalmente siguiendo las instrucciones de operación. Ajuste
solamente los controles indicados en las instrucciones de operación. Un ajuste inadecuado de
otros controles podría estropear el aparato y, entonces, sería necesario acudir a un técnico
calificado para que éste lo repare y lo devuelva a su condición normal.
E. Si el televisor se ha caído o la caja se ha estropeado.
F. Cuando las características del televisor cambien considerablemente será necesario llamar al
servicio de reparaciones.
19. Al finalizar cualquier servicio o reparación de este televisor, pida al técnico de servicio que realice
comprobaciones de seguridad rutinarias para determinar si el televisor puede funcionar sin causar
ningún problema.
20. Cuando sea necesario cambiar piezas, cerciórese de que el técnico de servicio utiliza las piezas de
recambio especificadas por el fabricante, aquellas que tengan las mismas características que las
piezas originales. Las piezas de recambio no autorizadas pueden causar incendios, descargas
eléctricas u otros peligros.
ANTENA
CONDUCTORES DE
PUESTA A TIERRA
ABRAZADERAS PARA PUESTA A TIERRA
SISTEMA DE ELECTRODOS DE PUESTA
A TIERRA DEL SERVICIO ELECTRICO
(Continuación)
4
01-07 14LK22 [ES].p65e 9/5/01, 6:36 PM4
Page 31

Antes de poner en funcionamiento su televisor
Ubicación
• Para que su televisor funcione normalmente, éste debe estar ubicado en una sala que pueda ventilarse
bien. No ponga la parte posterior del televisor en un lugar donde la circulación de aire no sea apropiada.
• Los campos magnéticos pueden alterar el color de la imagen. No acerque a este televisor imanes,
relojes eléctricos, juguetes que utilicen imanes, u otros metales magnéticos como, por ejemplo, el
hierro.
Alimentación
Su televisor funciona con 110-220 V ca, 50/60 Hz y consume 53 W (corriente normal del hogar).
Nota:
• Si no va a utilizar el televisor durante un largo periodo de tiempo, por ejemplo, durante las vacaciones,
desenchúfelo del tomacorrientes para ahorrar energía. (Si el televisor está enchufado al tomacorrientes
se consume un poco de corriente, a pesar de que el interruptor POWER esté desconectado.)
• Cuando se encuentra cerca del televisor un sintonizador de FM o una radio, y estén siendo recibidas
las emisiones de radio o TV al mismo tiempo, pueden aparecer líneas y otros ruidos en las imágenes
de TV. En este caso, desconecte el televisor o la radio.
• Desconecte el televisor cuando escuche emisiones de AM. En caso contrario, las interferencias del
televisor evitarán que puede recibir las señales de AM.
L Prepare el control remoto antes de utilizar el televisor
Para utilizar control remoto no se olvide de introducir primero sus pilas.
Introduzca las pilas
Levantar
Tapa de
las pilas
• Con la uña del dedo pulgar, haga presión sobre la ranura señalada con la flecha para levantar la
cubierta posterior. Inserte dos pilas (tamaño “AA” de 1,5 V cc). Asegúrese de hacer coincidir las
terminales e/d de las pilas con las marcas e/d que hay en el interior del compartimento.
01-07 14LK22 [ES].p65e 9/5/01, 6:36 PM5
5
Page 32

Conexiones de antenas
Antenas
• Las antenas para obtener una buena recepción de televisión en color necesitan ser mejores que las antenas
para la recepción de televisión en blanco y negro. Por esta razón, se recomienda utilizar una antena exterior
de buena calidad.
CONEXION DE ANTENA EXTERIOR
• Para conectar una antena exterior, utilice uno de los dos diagramas mostrados a continuación.
A: Utilizando una combinación de antenas exteriores de VHF y UHF.
B: Utilizando antenas exteriores de VHF y/o UHF separadas.
• Conecte el cable de bajada de antena exterior al conector ANT/CABLE de la parte posterior del
televisor.
A.
Combinación de antenas de VHF/UHF
ANTENA
DE VHF/UHF
Cable de
dos conductores
de 300 ohm
PANEL TRASERO
DEL TELEVISOR
ANTENA
DE VHF/UHF
Cable
coaxial
de 75 ohm
ADAPTADOR DE
300/75 ohm
(no suministrado)
o
CONEXION DE TELEVISION POR CABLE (TV)
• El conector del cable coaxial de 75 ohm está incorporado en el televisor para facilitar la conexión.
Cuando conecte el cable coaxial de 75 ohm al televisor, atomille el cable de 75 ohm al CONECTOR
DE CABLE COAXIAL.
• Algunas compañías de televisión por cable ofrecen “canales de pago de calidad superior”. Como las
señales de estos canales de pago de calidad superior están codificadas, la compañía de televisión
por cable suministra al usuario un convertidor/descodificador de televisión por cable. Este convertidor/
descodificador es absolutamente necesario para poder ver normalmente aquellos canales que estén
codificados. (Ponga el canal de televisión por cable en el canal 3 o 4 de su televisor. Si no conoce
este dato, consulte a su compañía de televisión por cable.) Para obtener instrucciones más detalladas
sobre cómo instalar la televisión por cable, póngase en contacto con su compañía de televisión por
cable. A continuación se explica un método posible para utilizar el convertidor/descodificador
suministrado por su compañía de televisión por cable.
Tenga en cuenta que es necesario utilizar un conmutador de RF (no suministrado) con posición A/B.
Posición “A” en el conmutador de RF (no suministrado) : Podrá ver todos los canales sin codificar
Posición “B” en el conmutador de RF (no suministrado) : Utilizando las teclas de canales del
Conmutador de RF (no suministrado)
OUTAIN
B
SALIDA
Convertidor/descodificador
de televisión por cable
(no suministrado)
Nota:
• Consulte con su concesionario o con el centro de servicios SHARP sobre el tipo de conectar, interruptor
RF o combinador que se requiera.
6
B. Antenas de VHF/UHF separadas
ANTENA
ANTENA
DE VHF
DE UHF
Cable de dos conductores
de 300 ohm
Cable de dos conductores
o
de 300 ohm
Cable coaxial
de 75 ohm
(no suministrado)
utilizando las teclas de canales del
televisor.
convertidor/descodificador podrá ver los
canales codificados.
Divisor de
dos juegos
de señales
(no suministrado)
ENTRADA
COMBINADOR
ENTRADA
Y
SALIDA
Linea de televisión
por cable
PANEL TRASERO
DEL TELEVISOR
01-07 14LK22 [ES].p65e 10/5/01, 11:02 AM6
Page 33

Referencia rápida de los controles de operación
L Ubicación de los Controles
Panel Delantero
TERMINALES DE ENTRADA
IN
VIDEO/AUDIO
(Las terminales VIDEO/AUDIO también se
encuentran en la parte posterior)
ALIMENTACION (POWER)
Pulsar → Enciende (On).
Pulsar nuevamente →
Apagar (Off).
Indicador
de ON TIMER
ZONA DEL SENSOR PARA
EL CONTROL REMOTO
Funciones Basicas Del Control Remoto
ALIMENTACION (POWER)
Pulsar
→
Enciende (On).
→
Pulsar nuevamente
TECLADO A DISTANCIA
(REMOTE KEYPAD)
Acceso a todos los canales desde
el teclado.
RETORNO AL CANAL ANTERIOR
(FLASHBACK)
Vuelve al canal anterior.
AUMENTO/DISMINUCION DEL
VOLUMEN (VOLUME UP/DOWN)
(+) Aumenta el sonido.
(–) Disminuye el sonido.
• En modo de MENU cambia o
selecciona el ajuste del televisor.
SILENCIAMIENTO (MUTE)
Pulsar → Silencia el sonido.
Pulsar nuevamente → Restaura el
sonido.
CLOSED CAPTION aparece auto-
•
máticamente cuando el sonido es
silenciado.
Apagar (Off).
AUMENTO/DISMINUCION DEL VOLUMEN
(+) Aumenta el sonido.
(–) Disminuye el sonido.
MENU
Pulsando → Accede al MENU PRINCIPAL.
Pulsando nuevamente → Sale del MENU PRINCIPAL.
TV
CANAL SUPERIOR (8)/INFERIOR (9)
(8) Selecciona el siguiente canal
superior.
(9) Selecciona el siguiente canal
inferior.
Ventanilla del transmisor de infrarrojos
ENTRADA (INPUT)
Pulsar → Cambìa al modo de entrada
de video externo.
Pulsar nuevamente → Cambìa al modo
de TV.
Consulte la pág.
CANAL SUPERIOR/INFERIOR
(CHANNEL UP/DOWN)
(8) Selecciona el siguiente canal
superior.
(9) Selecciona el siguiente canal
inferior.
• Véanse pág.
preselección de canal.
• En el modo de MENU, mueve la
marca “
MENU (MENU)
Pulsar → Accede al MENU
PRINCIPAL.
Pulsar nuevamente → Sale del MENU
PRINCIPAL.
VISUALIZACION (DISPLAY)
Pulsar → Aparece el canal de
recepción por 4 segundos.
Pulsar nuevamente → Elimina la
visualización.
• En el modo de “Closed Caption” se
muestra el canal de recepción por
un corto tiempo.
23.
19 ~ 22 para
”.
7
01-07 14LK22 [ES].p65e 29/5/01, 4:07 PM7
Page 34

PREAJUSTE CANAL al encender el aparato por primera vez
L Cuando encienda su TV por primera vez, éste memorizará
automáticamente los canales de transmisión.
Le recomendamos que ejecute las siguientes instrucciones antes
de pulsar el botón de encendido.
(1) Introduzca las pilas en el Control Remoto. (Ver pág. 5)
(2) Conecte el cable de la antena al televisor. (Ver pág. 6)
(3) Enchufe el cable de alimentación al tomacorriente.
1 Pulse el botón
POWER
del televisor en el Control Remoto para
encender el aparato. Aparecerá el modo SELECCIONAR IDIOMA.
2 Pulse
CH UP (8)
“ESPAÑOL”. Pulsar luego
o
DOWN (9)
(En el televisor)
para seleccionar “ENGLISH” o
MENU
para ajustar el IDIOMA.
(Control Remoto)
→
3 Pulse
4 Pulse
VOL (+)
o
(–)
para acceder al modo PREAJUSTE CANAL.
VOL (+)
.
El sintonizador buscará automáticamente los canales de
TV de radiodifusión y de TV por cable. (El número de
canal aumentará automáticamente al sintonizar un
canal.)
Si desea parar el proceso de PREAJUSTE CANAL una
vez iniciado, pulse
VOL (–)
y quedará anulado.
Si quiere activar nuevamente PREPARACIÓN, sírvase
consultar la pág.
Para cancelar PREAJUSTE CANAL Pulse
19 sobre PREPARACIÓN.
VOL (–)
.
POWER
VOLUME
(+)/(–)
CHANNEL
UP (8)/
DOWN (9)
MENU
FAVORABIDIOMA LE
ENGL I SH
ESPAÑOL
(Modo SELECCIONAR IDIOMA)
FAVORABIDIOMA LE
ENGL I SH
ESPAÑOL
OCABLE.
I¿ NIC MEMORIRAAI
DE C ELS?ANA
ANTENACONECT E
S:VOL+
I
NO :
VOL –
(Modo PREAJUSTE CANAL)
PORESP EER FA RVO
RGONAMAC IORP
MOATICATUA
18
ARAPR:
VOL –
5 Una vez terminado PREAJUSTE CANAL, se visualizará el número
menor de canal.
Nota:
•
Si PREAJUSTE CANAL no memoriza todos los canales de su región, sírvase consultar la pág. 19
para obtener más información sobre la memorización manual de canales utilizando AJUSTE DE CANAL.
• Pueden presentarse dificultades de AJUSTE PRELIMINAR cuando las señales de transmisión son
débiles, cuando la frecuencia de ciclo del canal es incorrecta o cuando hay saturación de frecuencia
en el área circundante. Sírvase consultar las págs. 19 ~ 22 para más información sobre la
memorización manual de los canales usando AJUSTE DE CANAL.
8
08-09 14LK22 [ES].p65e 28/5/01, 10:52 AM8
2
Page 35

Modo Demo
• Para averiguar rápidamente más cosas sobre el aparato de televisión,
pulse y sostenga durante más de tres segundos
DOWN (9)
donde se explican brevemente las diversas funciones.
• Para cancelar el modo DEMO, vuelva a pulsar
DOWN (9)
Ejemplo:
Representación visual del modo DEMO
en el televisor. El televisor entrará en el modo DEMO
en el televisor.
Siempre
Mejor,
Siempre
Sha rp
MENU
MENU
o CH UP
o CH UP
(8)
(8)
y
y
(En el televisor)
o
Boton
MENU
Botones
CH UP (
DOWN (
88
8
88
99
9
99
Acceso a la pantalla de MENU PRINCIPAL sin el Mando a Distancia
• Aunque haya extraviado su Mando a Distancia, puede acceder
igualmente a la mayor parte de las funciones a través de la
pantalla de MENU PRINCIPAL al pulsar
DOWN (
• Hay algunas funciones del televisor a las que sólo puede
accederse con el Mando a Distancia. En caso de haberlo
extraviado, póngase en contacto con un Centro de Servicio
Técnico de Sharp para que le proporcionen otro.
99
9
)
de su televisor.
99
MENU
o
CH UP (
88
8
)
88
y
(En el televisor)
o
Boton
MENU
Botones
CH UP (
DOWN (
88
8
88
99
9
99
)/
)
)/
)
08-09 14LK22 [ES].p65e 9/5/01, 6:39 PM9
9
Page 36

PREPARAC ION
AJUSTE VIDEO
CAPT IONCLOSED
AHORRO ENERG I A
BLOQUEADOR
TE PORIZAD
O
RM
AUTO NECENDI
DEJRELOAJUSTE
TE P D RORM IM
.
DO
Idioma
L El idioma de la visualización en pantalla de este aparato debe seleccionarse para que sea
Inglés o Español.
L Ajuste del idioma de la visualizacion en pantalla.
1 Pulse
2 Pulse
MENU
CH UP (8)
“PREPARACION”.
3 Pulse
VOL (+)
CH UP (8)
4 Pulse
5 Pulse
VOL (+)
CH UP (8)
“ESPAÑOL”.
para acceder a la pantalla de MENU PRINCIPAL.
o
DOWN (9)
o
(–)
para acceder al modo de PREPARACION, pulse
o
DOWN (9)
para desplazar la marca “ ” a “IDIOMA”.
para desplazar la marca “ ” a
→
o
(–)
para acceder el modo de cambio de IDIOMA.
o
DOWN (9)
para seleccionar “ENGLISH” o
TE PO
M
AJUSTE VIDEO
BLOQUEADOR
AHORRO ENERG I A
PREPARAC ION
RIZA
CAPT IONCLOSED
DO
R
(Pantalla del MENU PRINCIPAL)
PA ATZLLA A LUN
ID MAOI
AJ SUT DE
EC
N
AA
L
(Modo de PREPARACION)
IDIOMA
ENGL I SH
ESPAÑOL
(Modo de cambio de IDIOMA)
IDIOMA
ENGL I SH
ESPAÑOL
6 Pulse
MENU
para salir.
Temporizador para apagar
L Se puede programar el apagado automático del televisor en incrementos de 30, 60, 90 o 120
minutos.
1 Pulse
2 Pulse
3 Pulse
10-14 14LK22 [ES].p65e 28/5/01, 1:29 PM10
MENU
para acceder a la pantalla de MENU PRINCIPAL.
CH UP (8)
“TEMPORIZADOR”.
VOL (+)
o
CH UP (8)
(–)
o
DOWN (9)
DORMIR”.
10
o
DOWN (9)
para desplazar la marca “ ” a
→
para acceder al modo de PREPARACION, pulse
para desplazar la marca “ ” a “TEMP.
→
TE P I RZADOM
OR
AJUSTE VIDEO
BLOQUEADOR
AHORRO ENERG I A
PREPARAC ION
CAPT IONCLOSED
(Pantalla del MENU PRINCIPAL)
(Modo de selección de
temporizador)
Page 37

12 00AM
O
:
:
APAGADOESTAD
AUTO NECENDIDO
AJ SUTE V
DECACLOSE
TEMPO IRZAD
ADO
I
A
R
O
BLOQ
IDEO
U
AHOR
PREPA
RO E
N
N
RAC I
O
PT IO
N
ER
G
R
Temporizador para apagar (Continuación)
4 Pulse
VOL (+)
o
(–)
para ajustar a 30, 60, 90 o 120 minutos la hora
de desconeción para dormir.
;
--- ↔ 30 ↔ 60 ↔ 90 ↔ 120
TE P .DORMI RM
120 QU DAEN
'
(Mode de ajuste del temporizador)
5 Pulse
MENU
para salir.
Nota:
• Para desactivar el Tecla de Desconexión, repita los pasos de TEMP.
DORMIR anteriormente indicados y seleccione “– – – QUEDAN” en el paso 4.
• Mientras el TEMPORIZADOR DE DORMIR está activo, el tiempo que queda aparecerá brevemente
en la pantalla a intervalos regulares o al pulsar el botón Display en el control remoto.
Temporizador para encender
L La programación del temporizador para encendido enciende el
televisor a una hora automáticamente predeterminada.
1 Pulse
2 Pulse
MENU
para acceder a la pantalla de MENU PRINCIPAL.
CH UP (8)
o
DOWN (9)
para desplazar la marca “ ” a
“TEMPORIZADOR”.
→
(Pantalla del MENU PRINCIPAL)
VOLUME
(+)/(–)
CHANNEL
UP (8)/
DOWN (9)
MENU
3 Pulse
VOL (+)
CH UP (8)
o
ENCENDIDO”.
o
(–)
para acceder al modo de PREPARACION, pulse
DOWN (9)
para desplazar la marca “ ” a “AUTO
TEMP . DORM
AUTO ENC
EDEAJUST
END IDO
→
(Modo de selección de
temporizador)
4 Pulse
Nota:
• Cuando el temporizador no está programado, la pantalla AJUSTE DE RELOJ aparece
10-14 14LK22 [ES].p65e 9/5/01, 6:41 PM11
VOL (+)
o
(–)
Pulse
CH UP (8)
para acceder a “AUTO ENCENDIDO”.
o
DOWN (9)
para seleccionar “AUTO
ENCENDIDO”.
→
(Modo de ajuste del
temporizador para encender )
automáticamente después de que aparezca el OSD que se visualiza debajo (AJUSTE DE
RELOJ paso 3).
STAIN LE POR
FAV ROLAHORA
IR
JRELO
11
Page 38

Temporizador para encender (Continuación)
10 30 AM
O
:
:
APAGADOESTAD
AUTO NECENDIDO
5 Pulse
VOL (+)
pulsando
o
(–)
CH UP (8)
para seleccionar el dígito de la hora y ajústelo
o
DOWN (9)
.
AUTO NECENDIDO
10 00 AM
:
:
O
APAGADOESTAD
→
12 : 00 AM
..El color del indicador cambia a rojo.
12:00AM↔ 1:00AM ↔ 2:00AM ↔ … ↔ 10:00PM ↔ 11:00PM
..
6 Pulse
VOL (+)
pulsando
o
(–)
para seleccionar el dígito de minutos y ajústelo
CH UP (8)
o
DOWN (9)
.
→
10 : 00 PM
. El color del indicador cambia a rojo.
00↔ 10 ↔ 20 ↔ 30 ↔ 40 ↔ 50
..
7 Pulse
Pulse
pulse
VOL (+)
o
CH UP (8)
VOL (+)
o
(–)
para completar el ajuste del temporizador.
o
DOWN (9)
(–)
para seleccionar “ENCEN.” o “APAGADO”.
para seleccionar “ESTADO”, y
AUTO NECENDIDO
10 30 PM
:
:
O
ENCEN .ESTAD
→
ON : Se activa AUTO ENCENDIDO, y enciende la unidad a la
hora deseada.
Indicador AUTO ENCENDIDO: se enciende
OFF : Se apaga AUTO ENCENDIDO
Indicador AUTO ENCENDIDO: se apaga.
8 Pulse
MENU
para salir.
Nota:
• Por razones de seguridad, la unidad se apaga automáticamente a los 120 minutos (TEMP.
DORMIR) después de que la unidad se encienda según el ajuste del AUTO ENCENDIDO.
(Pulse cualquier botón para cancelar el TEMP. DORMIR)
12
10-14 14LK22 [ES].p65e 9/5/01, 6:41 PM12
Page 39

Ajuste del reloj
DEEAJUST RELOJ
–– : ––
5:00AM
DEEAJUST R E
L
O
J
L Cómo configurar la hora
1 Pulse
2 Pulse
MENU
para acceder a la pantalla de MENU PRINCIPAL.
CH UP (8)
o
“TEMPORIZADOR”.
3 Pulse
pulse
VOL (+)
o (–) para acceder al “TEMPORIZADOR”, luego
CH UP (8)
o
“AJUSTE DE RELOJ”.
4 Pulse
5 Pulse
VOL (+)
o (–) para acceder a “AJUSTE DE RELOJ”.
CH UP (8)
o
DOWN (9)
12 : 00 AM
El color del indicador cambia a rojo.
12:00AM 1:00AM 2:00AM
11:00PM 10:00PM 9:00PM
DOWN (9)
DOWN (9)
para desplazar la marca “ ” a
→
para desplazar la marca “ ” a
→
para ajustar los dígitos de la hora.
TE PO
M
AJUSTE VI DEO
BLOQUEADOR
AHORRO ENERG I A
PREPARAC I ON
(Pantalla del MENU
PRINCIPAL)
TEMP . DORMI R
AU OTENCENDIDO
(Modo de selección del
(Modo de ajuste de
AJUSTE DE RELOJ)
RIZA
CAPT IONCLOSED
EDE ERLOJAJUST
TIMER)
DO
R
6 Pulse
7 Pulse
Nota:
VOL (+)
o
pulsando
CH UP (8)
12 : 00 AM
El color del indicador cambia a rojo.
00 01 02
MENU
para salir.
(–)
para seleccionar el dígito de minutos y ajústelo
o
DOWN (9)
.
→
...
57 58 59
DEEAJUST R ELOJ
5:32AM
• La configuración de la hora puede desconfigurarse por cortes de luz, etc.
13
10-14 14LK22 [ES].p65e 9/5/01, 6:41 PM13
Page 40

Ajuste de vídeo
PREPARAC I ON
AJUSTE VI DEO
CAPT IONCLOSED
AHORRO ENERGI A
BLOQUEADOR
TE POMIZRDORA
ONT RA
STE
– +
C
50
– +
50
ONT RA
STE
C
Descripción de los puntos de Ajuste
Item Botón VOL UP (+) Botón VOL DOWN (–)
seleccionado
CONTRASTE Para aumentar el contraste Para disminuir el contraste
MATIZ
COLOR Para mayor intensidad del color Para menor intensidad del color
BRILLO Para mayor brillo Para menor brillo
NITIDEZ Para mayor nitidez Para menor nitidez
COLOR Para elegir un TONO DE COLOR ROJO, AZUL o ESTÁNDAR.
FAVORITO
REPOSICION Todos los ajustes retornan al nivel preajustado en la fábrica.
La tonalidad de la piel se torna verdosa La tonalidad de la piel se torna violeta
VOLUME
(+)/(–)
CHANNEL
UP (8)/
DOWN (9)
MENU
1 Pulse
2 Pulse
MENU
para acceder a la pantalla de MENU PRINCIPAL.
CH UP (8)
o
DOWN (9)
para desplazar la marca “ ” a
“AJUSTE VIDEO”.
3 Pulse
4 Pulse
VOL (+)
o
CH UP (8)
(–)
para acceder al modo de ajuste de la IMAGEN.
o
DOWN (9)
para seleccionar el modo deseado.
(Consulte el esquema que figura más abajo.)
CONTRASTE
REPOSICION
5 Pulse
: CH UP (8)
VOL (+)
MATIZ
COLOR FAVORITO
o
(–)
para regular el ajuste.
COLOR
: CH DOWN (9)
→
(Pantalla del MENU PRINCIPAL)
(Modo de ajuste de la IMAGEN)
BRILLO
NITIDEZ
6 Repita las operaciones 4 y 5 para regular otros ajustes.
7 Pulse
10-14 14LK22 [ES].p65e 15/5/01, 6:30 PM14
14
MENU
para salir.
VOL UP (+)
aumenta el contraste
VOL DOWN (–)
disminuir el contraste
Page 41

Closed Caption
CAPT IONCLOSED
MODO : C AP
DATOS : CANAL 1
TION
CAPT IONCLOSED
MODO : C AP
DATOS : CANAL 1
TION
L PARA AJUSTAR EL CLOSED CAPTION
• Su televisor está equipado con un descodificador interno de CLOSED
CAPTION. “Closed Caption” es un sistema que le permite visualizar
conversaciones, narraciones y efectos sonoros en programas de TV y
vídeos domésticos como subtítulos en la pantalla del televisor, tal como
se ilustra a la derecha.
• No todos los programas o vídeos ofrecen el CLOSED CAPTION. Busque
que los mismos lleven el símbolo “ ” para asegurarse de que contengan
tales subtítulos.
• Las transmisiones de televisión con CLOSED CAPTION pueden verse
en dos modos: SUBTITULO y TEXTO. Para cada modo, se dispone de
dos canales, el CANAL1 y el CANAL2:
l modo [SUBTITULO] pone en la parte inferior de la pantalla los subtítulos
de diálogos y comentarios de telenovelas y programas de noticias, al
mismo tiempo que permite ver claramente la imagen.
El modo [TEXTO] despliega sobre la imagen otras diversas informaciones
(tales como programación del canal de TV, boletines meteorológicos, etc.),
que son independientes del programa de TV que se está viendo.
VOLUME
(+)/(–)
CHANNEL
UP (8)/
DOWN (9)
MENU
1 Pulse
2 Pulse
MENU
para acceder a la pantalla de MENU PRINCIPAL.
CH UP (8)
o
“CLOSED CAPTION”.
DOWN (9)
para desplazar la marca “ ” a
→
TE POMRIAZDOR
AJUSTE VI DEO
BLOQUEADOR
AHORRO ENERGI A
PREPARAC I ON
CAPT IONCLOSED
(Pantalla del MENU PRINCIPAL)
3 Pulse
VOL (+)
o
(–)
para acceder “CLOSED CAPTION”.
(Modo de ajuste de CLOSED CAPTION)
4 Pulse
CH UP (8)
o
DOWN (9)
para desplazar la marca “ ” a
“MODO” o “DATOS”.
5 Pulse
6 Pulse
MODO :
VOL (+)
MENU
o
(–)
para variar el ajuste el CLOSED CAPTION.
CAPTION
TEXTO
APAGADO
DATOS :
CANAL 1
CANAL 2
para salir.
CAPT IONCLOSED
MODO : C AP
DATOS : CANAL 1
TION
Nota:
• Si una emisión tiene CLOSED CAPTION y se presiona el botón SILENCIAMIENTO (
entra automáticamente en el modo [CAPTION]. Si se presiona de nuevo el botón SILENCIAMIENTO (
el aparato volverá a su estado anterior.
• Puede ocurrir el malfuncionamiento del CLOSED CAPTION (bloques blancos caracteres extraños, etc.) si
las condiciones de la señal son deficientes o si hay problemas en la fuente de trasmisiones de televisión.
Esto no significa necesariamente que exista algún problema en su televisor.
• Si se presiona cualquier botón para la VISUALIZACION EN LA PANTALLA mientras se está viendo un
programa con CLOSED CAPTION, los textos desaparecerán momentaneamente.
• Cuando se está viendo en el modo TEXTO y no se recibe ninguna trasmisiones de televisión de TEXTO,
en algunos programas la pantalla puede tornarse oscura y vacia. Si ocurre esto, desactive el modo de
CLOSED CAPTION.
MUTE
), el aparato
MUTE
),
15
15-18 14LK22 [ES].p65e 9/5/01, 6:43 PM15
Page 42

PREPARAC I ON
AJUSTE VI DEO
CAPT IONCLOSED
AHORRO ENERGI A
BLOQUEADOR
TE POMRIADORZ
ADOR
LIM
I
T
BLOQUEADOR
– – –
–
NETRE No.SECRETO
Bloqueador
L LIMITADOR
Esta función permite restringir el tiempo para ver la TV y también controlar el uso del televisor.
Esta función tiene como finalidad evitar que los niños vean demasiada televisión.
TIEMPO DE VER (un temporizador acumulativo: cuenta
sólo el tiempo adquirido mientras el TV está encendido.)
•
El TIEMPO DE VER puede ajustarse entre 30M (30 minutos)
y 10H00M (10 horas) a intervalos de 30 minutos.
El HORA DESCONEC. (Limita el tiempo para ver la TV
una vez que el TIEMPO DE VER ha llegado a cero.)
• El HORA DESCONEC. puede ajustarse desde 30M (30
minutos) y 10H00M (10 horas) a intervalos de 30 minutos.
ESTADO (ENCEN./APAGADO, ajuste del LIMITADOR)
L Cómo ajustar el LIMITADOR.
1 Pulse
2 Pulse
MENU
para acceder a la pantalla de MENU PRINCIPAL.
CH UP (8)
o
DOWN (9)
para desplazar la marca “ ” a
“BLOQUEADOR”.
LMIT
IADOR
T EMPOIDEVER
––H
––M
A
DE
HOR
EST
SCO
––H ––M
A
:AP
NEC .
ADO
GAD
O
→
3 Pulse
4 Pulse
5 Pulse
VOL (+)
o
(–)
para acceder “BLOQUEADOR LIMITADOR”.
VOL (+)
o
(–)
para acceder “LIMITADOR”.
CH UP (8)
o
DOWN (9)
para seleccionar “TIEMPO DE
VER” y “HORA DESCONEC.”. Para cada selección, pulse el
VOL (+)
o
(–)
para ajustar la duración del tiempo.
→
6 Pulse
el
VOL (+)
CH UP (8)
o
o
DOWN (9)
(–)
para conectar el “LIMITADOR”. (Si el ESTADO
para seleccionar “ESTADO”. Pulsar
es APAGADO, el LIMITADOR no está operativo.)
→
(Pantalla del MENU PRINCIPAL)
LMIT
IADOR
T EMPOIDEVER
––H
––M
A
HOR
––H ––M
ADO
EST
LMIT
IADOR
T EMPOIDEVER
2H
A
HOR
––H ––M
A
EST
LMIT
IADOR
T EMPOIDEVER
A
HOR
A
EST
SCO
:AP
00M
DE
SCO
:AP
2H
00M
DE
SCO
5H 00M
:EN
NEC . DE
A
GAD
NEC .
ADO
GA
NEC .
CDO
EN
O
DO
.
7 Pulse
MENU
. Aparecerá el “ENTRE No. SECRETO”.
16
15-18 14LK22 [ES].p65e 9/5/01, 6:43 PM16
Page 43

2 3 0
1
NETRE No.SECRETO
LMIT
2H
IADOR
00M
HOR
T EMPOIDEVER
A
SCO
NEC .
EN
.
DE
5H 00M
EST
A
:EN
CDO
– – –
–
NETRE No.SECRETO
RRECT O
ES I NC
O
E LNo. SECERTO
– – –
–
NETRE No.SECRETO
Bloqueador (Continuación)
8 Introduzca el No. SECRETO de 4 dígitos utilizando el
NUMEROS DEL CONTROL REMOTO
9 Pulse
MENU
, y el No. SECRETO quedará
.
LOS
registrado.
→
Ejemplo
• Para impedir que alguien vea TV durante 5 horas, después de ver la
TV durante 2 horas, el ajuste deberá ser como sigue:
• Pueden optar por ver las 2 horas de TV cuando lo deseen. Por
ejemplo, podrían ver una hora de TV, apagar el TV durante 30 minutos,
volver a encenderlo y ver la hora que resta en el LIMITADOR.
L Para modificar los ajustes del LIMITADOR. (El No. SECRETO está
registrado)
1 Repita los pasos de “Cómo ajustar el LIMITADOR”
y seleccione “BLOQUEADOR LIMITADOR” durante
el paso 3. Pulsar
“ENTRE No. SECRETO”.
VOL (+)
o
(–)
y aparecerá la leyenda
2 Introduzca el No. SECRETO de cuatro dígitos
valiéndose para ello del
CONTROL REMOTO
acceso al LIMITADOR. Repita los pasos 5 ~ 6.
Nota:
• Cuando Ud. elige el No. SECRETO correcto, aparece la pantalla de
acceso del LIMITADOR. Si el No. SECRETO no es correcto, aparecerá
la leyenda “EL No. SECRETO ES INCORRECTO”. En ese caso,
introduzca nuevamente el No. SECRETO.
LOS NUMEROS DEL
, y aparecerá la pantalla de
NETRE No.SECRETO
****
L Para cancelar el LIMITADOR (Mientras el TV está APAGADO pero el LIMITADOR está puesto)
1 Encienda el TV; sobre la pantalla aparecerá en azul el mensaje
“TIEMPO ACABADO”. Si Ud. no hace nada, el TV se apagará en un
tiempo aproximado de 30 segundos.
TMPOIACABADO
– –––
2 Introduzca el No. SECRETO de 4 dígitos valiéndose
del
LOS NUMEROS DEL CONTROL REMOTO
Ud. elige el No. SECRETO correcto, el LIMITADOR
. Si
TMPOIACABADO
quedará cancelado. Si el No. SECRETO no es
correcto, aparecerá la leyenda “EL No. SECRETO
ES INCORRECTO”. En ese caso, introduzca
****
nuevamente el No. SECRETO.
L Para cancelar el ajuste del LIMITADOR o cambiar el No. SECRETO (Si Ud. lo ha olvidado)
1 Repita los pasos de “Cómo ajustar el LIMITADOR”
y elija “BLOQUEADOR LIMITADOR” en el paso 3.
Pulse
VOL (+)
o
(–)
No. SECRETO”.
15-18 14LK22 [ES].p65e 9/5/01, 6:43 PM17
, y aparecerá en pantalla “ENTRE
OETREEoNN.SECRET
OETREEoNN.SECRET
17
Page 44

QUEDAN
30M
TIEMPO DE VER
0H
QUEDAN
05M
TIEMPO DE VER
0H
QUEDAN
0
TIEMPO DE VER
PREPARAC I ON
AJUSTE VI DEO
CAPT IONCLOSED
AHORRO ENERGI A
BLOQUEADOR
TE POMRIADZOR .
:APAGADO
AH ROROENERGIA
:ENCEN.
AH ROROENERGIA
Bloqueador (Continuación)
2 Pulse y mantenga pulsados al mismo tiempo
VOL (+)
y
CH UP (8)
en el aparato de TV hasta que aparezca la pantalla de acceso al
LIMITADOR. Ahora puede cancelar los valores del LIMITADOR o
puede cambiar el No. SECRETO mientras aparece el mensaje
“ENTRE No. SECRETO”.
L Aviso del TIEMPO DE VER restante
• A intervalos de 30 minutos aparecerá el “tiempo restante” durante 4
segundos. Durante los 5 últimos minutos, el “tiempo restante”
aparecerá cada minuto.
• Inmediatamente antes de que se termine el TIEMPO DE VER,
aparecerá en pantalla durante 10 segundos “0 QUEDAN”.
Ahorro de Energía
L Esta función permite reducir el consumo de energía del aparato
de TV lo cual se traduce en ahorro de dinero y en una reducción
del impacto ambiental. Cuando se activa la función, reduce el
brillo del aparato a un nivel que consume aproximadamente un
20% menos de energía que cuando está desactivada. La reducción
del brillo se notará menos si la iluminación de la habitación es
baja.
1 Pulse
2 Pulse
MENU
para acceder a la pantalla de MENU PRINCIPAL.
CH UP (8)
o
“AHORRO ENERGIA”.
DOWN (9)
para desplazar la marca “ ” a
→
(En el aparato de TV)
VOL (+)/CH UP (8)
VOLUME
(+)/(–)
CHANNEL
UP (8)/
DOWN (9)
MENU
3 Pulse
VOL (+)
o
(–)
para acceder al modo de selección de
AHORRO ENERGIA.
4 Pulse
5 Pulse
VOL (+)
MENU
o
(–)
para seleccionar “ENCEN.”.
para salir.
18
15-18 14LK22 [ES].p65e 9/5/01, 6:43 PM18
(Pantalla del MENU PRINCIPAL)
(Modo de selección de AHORRO ENERGIA)
Page 45

PREPARAC I ON
AJUSTE VI DEO
CAPT IONCLOSED
AHORRO ENERGI A
BLOQUEADOR
TE POMRIADORZ
ID MAOI
AJ SUT DE
EC
L
AA
N
PA ATZLLA A LUN
AI /CABLEER
PR AEJ TUS
EC
L
AA
N
C
L
AAA
N
CL
AA
N
BUS UQEDA
MEMOR I
Preparación
L PREAJUSTE CANAL
Mediante la función de preajuste de canales, usted podrá
preajustar su televisor para ver los canales deseados.
1 Pulse
2 Pulse
MENU
para acceder a la pantalla de MENU PRINCIPAL.
CH UP (8)
o
DOWN (9)
para desplazar la marca “ ” a
“PREPARACION”.
→
3 Pulse
pulse
VOL (+)
CH UP (8)
o
(–)
para acceder al modo de PREPARACION,
o
“AJUSTE DE CANAL”.
DOWN (9)
para desplazar la marca “ ” a
→
4 Pulse
VOL (+)
o
(–)
para acceder al modo de AJUSTE DE CANAL.
REMOTE
KEYPAD
VOLUME
(+)/(–)
CHANNEL
UP (8)/
DOWN (9)
MENU
(Pantalla del MENU PRINCIPAL)
(Modo de PREPARACION)
5 Pulse
6 Pulse
VOL (+)
VOL (+)
o
(–)
para acceder al modo PREAJUSTE CANAL.
.
El sintonizador buscará automáticamente los canales de
TV de radiodifusión y de TV por cable. (El número de canal
aumentará automáticamente al sintonizar un canal.)
Si quiere parar el proceso PREAJUSTE CANAL una vez
iniciado, pulse
Para cancelar PREAJUSTE CANAL Pulse
VOL (–)
. La búsqueda quedará anulada.
VOL (–)
.
7 Una vez terminado PREAJUSTE CANAL, se visualizará el número
menor de canal.
19-20 14LK22 [ES].p65e 9/5/01, 6:43 PM19
(Modo de AJUSTE DE CANAL)
OCABLE.
I¿ NIC MEMORIRAAI
DE C ELS?ANA
ANTENACON ECT E
S:VOL+
I
NO :
VOL –
(Modo PREAJUSTE CANAL)
PORESP EER FA RVO
RGONAMAC IORP
MOATICATUA
18
ARAPR:
VOL –
19
Page 46

AI
ABLE STD
RE
C
ABLE HRCC
ABLE I RCC
AI /CEABLER
AI /CABLEER
PR AEJ TUS
EC
L
AA
N
C
L
AAA
N
CL
AA
N
BUS UQEDA
MEMOR I
Preparación (Continuación)
L AJUSTE DE CANAL
Si PREAJUSTE CANAL no memoriza todos los canales de su región, siga las instrucciones
que se dan a continuación para memorizar manualmente el canal.
1 Pulse
2 Pulse
MENU
para acceder a la pantalla de MENU PRINCIPAL.
CH UP (8)
“PREPARACION”.
o
DOWN (9)
para desplazar la marca “ ” a
→
TE POMRIADORZ
AJUSTE VI DEO
BLOQUEADOR
AHORRO ENERGI A
PREPARAC I ON
CAPT IONCLOSED
(Pantalla del MENU PRINCIPAL)
3 Pulse
4 Pulse
VOL (+)
o
CH UP (8)
(–)
para acceder al modo de PREPARACION.
o
DOWN (9)
modo de “AJUSTE DE CANAL”.
5 Pulse
6 Pulse
VOL (+)
o
CH UP (8)
(–)
para acceder al modo de AJUSTE DE CANAL.
o
DOWN (9)
modo de “AIRE/CABLE”, pulse
de AIRE/CABLE.
7 Pulse
CH UP (8)
o
DOWN (9)
modo deseado.
AIRE
CABLE STD CABLE HRC CABLE IRC
para desplazar la marca “ ” al
→
para desplazar la marca “ ” al
VOL (+)
o
(–)
para acceder al modo
→
para desplazar la marca “ ” al
PA ATZLLA A LUN
ID MAOI
AJ SUT DE
EC
N
AA
L
(Modo de PREPARACION)
PR AEJ TUS
AI /CABLEER
BUS UQEDA
MEMOR I
EC
N
AA
L
AAA
C
N
CL
AA
N
L
(Modo de AJUSTE DE CANAL)
(Modo de AJUSTE DE CANAL)
(Modo de AIRE/CABLE)
8 Pulse
MENU
para salir.
Nota:
• Los canales que pueden sintonizarse en su televisor son:
Canales de AIRE: Canales de CABLE:
VHF: 2 a 13. 1 (Solamente en el modo HRC y IRC)
UHF: 14 a 69. 2 a 125 (STD, HRC y IRC)
20
19-20 14LK22 [ES].p65e 9/5/01, 6:43 PM20
Page 47

AI /CABLEER
PR AEJ TUS
EC
L
AA
N
C
L
AAA
N
CL
AA
N
BUS UQEDA
MEMOR I
2
CI +AR :
AR –:
AIRE
NII
RAP
1
BUSQUEDA CANA L
Preparación (Continuación)
L Guardar en memoria los canales de TV de radiodifusión.
1.1 Pulse
1.2 Pulse
1.3 Pulse
MENU
de MENU PRINCIPAL, pulse
o
DOWN (9)
“
” a “PREPARACION”.
para acceder a la pantalla
para desplazar la marca
VOL (+)
o
(–)
para acceder al modo
CH UP (8)
de AJUSTE DE CANAL, pulse
8
)
o
DOWN (9)
(
“
” a “AJUSTE DE CANAL”.
VOL (+)
para desplazar la marca
o
(–)
para acceder a la
CH UP
→
→
pantalla de AJUSTE DE CANAL.
1.4 Pulse
CH UP (8)
desplazar la marca “
CANAL”, pulse
VOL (+)
o
DOWN (9)
” a “BUSQUEDA
o
(–)
para
para
→
acceder al modo de BUSQUEDA
CANAL.
INICIO
2.1 Pulse
VOL (+)
. El sintonizador buscará
todos los canales disponibles en su zona
y los incorporará a la memoria del TV.
PARADA
2.2 Pulse
VOL (–)
. BUSQUEDA CANAL se
(PARADA)
detendrá en el canal actual, sin añadir
ningún canal de número superior.
2.3 Pulse
Nota:
• Si vuelve a presionar
la autoprogramación se reiniciará y los canales anteriormente
memorizados se perderán.
MENU
para salir.
VOL (+)
durante el modo de BUSQUEDA CANAL,
(INICIO)
PR AEJ TUS
AI /CABLEER
BUS UQEDA
MEMOR I
(Modo de AJUSTE DE CANAL)
(Pantalla de BUSQUEDA CANAL)
EC
N
AA
L
AAA
C
N
CL
AA
N
L
L Añada canales débiles o adicionales o borre los canales no deseados de la memoria del
televisor.
1.1 Pulse
1.2 Pulse
1.3 Pulse
2.1 Pulse
MENU
de MENU PRINCIPAL, pulse
para acceder a la pantalla
o
DOWN (9)
“
” a “PREPARACION”.
para desplazar la marca
VOL (+)
o
(–)
para acceder al modo
CH UP (8)
de AJUSTE DE CANAL, pulse
(
8
)
o
DOWN (9)
” a “AJUSTE DE CANAL”.
“
VOL (+)
para desplazar la marca
o
(–)
para acceder al modo
de AJUSTE DE CANAL, pulse
(
8
)
o
DOWN (9)
” a “MEMORIA CANAL”.
“
VOL (+)
para desplazar la marca
o
(–)
para seleccionar
CH UP
CH UP
→
→
(Modo de AJUSTE DE CANAL)
→
“MEMORIA CANAL”.
2.2 Utilice
CH UP (8)
o
DOWN (9)
o
LOS
NUMEROS DEL CONTROL REMOTO
para seleccionar los canales que desee
o
incorporar o borrar.
21-22 14LK22 [ES].p65e 9/5/01, 6:44 PM21
21
Page 48

:ENCEN.
PA TNALL AZULA
Preparación (Continuación)
2.3 Pulse
VOL (+)
para añadir un canal a la memoria
de su televisor o presione
VOL (–)
para borrar
un canal de la memoria de su televisor.
2.4 Pulse
EMOR I A
M
AIRE
(MEMORIA CANAL,
canal no memorizado)
MENU
CANAL
21
para salir.
Para añadir el canal 12 a
la memoria del TV
I+:ÑAADRAAPR
Para borrar el canal 12 de
la memoria del TV
VOL (+)
VOL (–)
EMOR I A
M
AIRE
CANAL
21
A–:OBRRRAAPR
(MEMORIA CANAL,
canal memorizado)
L PANTALLA AZUL
Pone la pantalla azul automáticamente si no se recibe una señal de emisión (por ej., cuando
una estación de TV cierra la emisión). Después de 15 minutos sin recibir señales, el TV se
apaga.
1 Pulse
2 Pulse
MENU
para acceder a la pantalla de MENU PRINCIPAL.
CH UP (8)
“PREPARACION”.
o
DOWN (9)
para desplazar la marca “ ” a
→
TE POMRIADORZ
AJUSTE VI DEO
BLOQUEADOR
AHORRO ENERGI A
PREPARAC I ON
CAPT IONCLOSED
(Pantalla del MENU PRINCIPAL)
3 Pulse
VOL (+)
o
(–)
para acceder al modo de PREPARACION.
PA ATZLLA A LUN
ID MAOI
AJ SUT DE
EC
VOLUME
(+)/(–)
CHANNEL
UP (8)/
DOWN (9)
MENU
N
L
AA
(Modo de PREPARACION)
4 Pulse
VOL (+)
o
PANTALLA AZUL.
(–)
para acceder al modo de selección de
PA TNALL AZULA
:APAGADO
(Modo de seleción de PANTALLA AZUL)
5 Pulse
6 Pulse
VOL (+)
MENU
o
(–)
para seleccionar “ENCEN.”.
para salir.
Nota:
• Una recepción deficiente debida a señales débiles, o un exceso de ruido, podrían activar la función
PANTALLA AZUL a pesar de la presencia de una señal de transmisión. Para seguir viendo televisión
en estas circunstancias, ponga PANTALLA AZUL en “APAGADO”.
22
21-22 14LK22 [ES].p65e 28/5/01, 10:54 AM22
Page 49

Utilización de los terminales de entradas audio/vídeo
L Conexión del equipo de vídeo para reproducción.
• Cuando su televisor esté conectado a un equipo de vídeo como se muestra en la ilustración de
abajo, el material que está siendo reproduccido en el vídeo podrá verse en la pantalla del televisor.
Conexión de un dispositivo de vídeo equipado con terminales de salida de vídeo.
CONEXION
EQUIPO DE VIDEO
(Terminales de conexión
delanteros del TV)
A la FUENTE de VIDEO
CAMCORDER
JUEGO TV
VCR
FWDREV
DVD
L Para ver la reproducción del vídeo.
• Pulse el botón
INPUT
(ENTRADA) en el mando a distancia para seleccionar el modo VIDEO INPUT
(ENTRADA DE VIDEO) al cual está conectado el equipo de vídeo con el que desea reproducir.
• EL modo VIDEO INPUT (ENTRADA DE VIDEO) externo cambiará del siguiente modo cada vez que
se pulse el botón
AIRE
o
CABLE
INPUT
(ENTRADA).
ENTRADA
(Trasera/Frente)
A la SALIDA de AUDIO
(Panel trasero de conexión
delanteros del TV)
A la SALIDA de AUDIO
A la FUENTE de VIDEO
• EL modo INPUT puede seleccionarse pulsando o bien
CH UP (8)
en el mando a distancia del TV
cuando el TV está en el canal de número más alto de los almacenados en memoria, o bien pulsando
CH DOWN (9)
cuando está en el canal más bajo.
• La terminal delantera anula la terminal posterior.
Nota:
• Cuando conecte un equipo de vídeo o de audio al televisor, no se olvide de que la alimentación deberá
estar desconectada para evitar estropear el televisor o el equipo que está conectado.
• El material audiovisual puede consistir de obras con derechos de autor que no deben grabarse sin la
autorización del propietario de dichos derechos. Sirvase enterarse de las leyes que rigen en su pais a este
respecto.
• Para obtener una información detallada de la conexión y del uso de equipos auxiliares, consulte el manual
de instrucciones del equipo que vaya a utilizar.
• Los cables de conexión podrá adquirirlos en una tienda de aparatos de vídeo de su localidad.
23-26 14LK22 [ES].p65e 9/5/01, 6:48 PM23
23
Page 50

Especificaciones
MODELO 14LK22
Sistema de recepción NTSC
Canales de recepción
AIR VHF Canales 2 a 13
UHF Canales 14 a 69
CATV Canales 1 a 125
Sintonización de canales Sistema de sintonización PLL de recepción 181
Impedancia de entrada antena VHF/UHF 75 ohm, desbalanceada
Tamaño de la pantalla 14˝ medido en diagonal
Terminales Entrada de audio/video x 2 (frontal x 1, posterior x 1)
Salida de sonido 1.0 W (MAX)
Fuente de alimentación 110-220 V ca, 50/60 Hz
Consumo de energia 53 W
Dimensiones 141/32˝ (AN) x 1211/16˝ (AL) x 1421/32˝ (PRF)
Peso (approx.) 18,7 lbs (8,5 kg)
• Diseño y especificaciones sujetos a cambios sin previo aviso.
canales
[355.5 mm (AN) x 322.0 mm (AL) x 372.0 mm (PRF)]
24
23-26 14LK22 [ES].p65e 29/5/01, 4:10 PM24
Page 51

Antes de llamar al servicio de reparaciones
Compruebe estos puntos para ver si puede corregir el problema Ud. mismo con un leve ajuste de los
controles.
LISTA DE
COMPROBACIONES
DE SERVICIO
RAPIDO
PROBLEMA
POSIBLE SOLUCIÓN
Pruebe con otro canal y si todo está bien, el
problema puede ser de la emisora.
Está conectado el televisor?
Llega electricidad al tomacorrientes?
Está conectado el interruptor del televisor?
Está conectado la antena al terminal del panel
posterior del televisor?
Si utiliza una antena exterior, cerciórese de que el
cable no esté dañado.
Compruebe si hay interferencia local.
Desconecte el interruptor POWER y vuelva a
conectarlo después de transcurrir un minuto.
Ajuste el control de COLOR.
Ajuste el control de MATIZ.
Verifique los productos externos de Video/Audio,
revise si hay fugas de conexiones sueltas o rotas.
Compruebe el estado de las pilas del control
remoto.
Están bien conectados los cables de sonido?
Compruebe el nivel del volumen.
Desactive (OFF) el modo CLOSED CAPTION /
Desactive (OFF) el modo Ahorro de Energía
(Energy Save).
Desenchufe el televisor y vuelva a enchufarlo
despúes de 2 minutos.
El vídeo o el reproductor de discos de
video no reproducen imágenes
El equipo de video/audio externo no
XXXXXXX XXXXX XXX XX
X XXX XXX XX XXX XXX XX
X X XX XXXXX XXX XXX XX
X X XX XXXXXX X X X X X XX
XXXX XXX XX XXX XX X XX
XXXX X X X X X XXX XXXX X
X X XX XXXXX XXX XXX XX
X X XX XXX XX XXX XXX X X
X X XX XXX XX XXX X XX X X
XXXX XXX XX XXX XXX XX
XXX X XXX XX XXX XXX X X
X X XX XXX XX XXX XXX X
X X XX XXX XX XXX XXX X X
XXX XXXX XX XXX XXX X X
Servicio de Reparaciones
produce imágenes ni sonido
El control remoto no funciona
Barras en la Pantalla
Imagen distorsionada
La imagen se desplaza verticalmente
No hay color
Mala recepción de algunos canales
Imagen débil
Franjas en la imagen
Imagen fantasma
Imagen borrosa
Sonido adecuado, imagen mala
Imagen adecuada, sonido malo
No hay imagen ni sonido
Imagen oscura y en blanco
Interferencia de ruido eléctrico externo
con el funcionamento del televisor
Respuestas Inmediatas
23-26 14LK22 [ES].p65e 29/5/01, 11:02 AM25
En México:
Sharp Electronics Corporation
Sucursal en Mexico
Col. Ampliación Asturias
México D.F. 06890
Tel. : 57 16 90 00
Internet: www.sharp.com.mx
e-mail: sec@sharp.com.mx
En otros países latinoamericanos:
Sharp Electronics Corporation
6100 Blue Lagoon Drive Suite 230
Miami, Florida 33126 USA
Tel. : (305) 264-2277
Internet: www.SiempreSharp.com
25
Page 52

26
SHARP CORPORATION
Impreso en México
TINS-7400GJZZ
01P06-MMP
23-26 14LK22 [ES].p65e 9/5/01, 6:48 PM26
 Loading...