

Page 1

TV • VCR COMBINATION
MODEL
13VT-CR10
L OPERATION MANUAL L
HIGH QUALITY
®
A
s an ENERGY STAR
for energy efficiency. ENERGY STAR
P
artner, SHARP has determined that this product meets the ENERGY STAR
®
is a
CONTENTS
IMPORTANT INFORMATION................................................ 2
Supplied Accessories............................................................. 3
Before Operating Your TV/VCR Combination ....................... 3
Antenna Connections............................................................. 4
Description Of Controls.......................................................... 5
Location Of Control’s Buttons (Remote Control).................... 6
Watching A TV Program ........................................................ 7~11
1 POWER
2 VOLUME
3 CHANNEL SELECTION
4 DISPLAY CALL
5 MENU FUNCTIONS
6 TRILINGUAL ON SCREEN DISPLAY
7 EZ SETUP during First Use ......................................... 8
8 WAKE-UP TIMER ........................................................ 8
9 SLEEP TIMER ............................................................. 9
! VIDEO ADJUST........................................................... 9
CLOSED CAPTION ..................................................... 9~10
# PRESETTING THE CHANNELS ................................. 10~11
EZ SETUP ................................................................... 10
CH SETTING ............................................................... 11
Tamper Proof Function .......................................................... 12
Setting The Clock................................................................... 12~13
1 AUTOMATIC CLOCK SETTING.................................. 12
2 MANUAL CLOCK SETTING ........................................ 13
PAGE
U.S.
registered trademark.
Playing A Cassette................................................................. 14~16
ENERGY SAVE
BLUE SCREEN
AUTO REPEAT
S. PICTURE (SUPER PICTURE)
INSERTING A VIDEO CASSETTE
EJECTING THE CASSETTE TAPE
PLAYBACK
AUTOMATIC TRACKING CONTROL SYSTEM
FULLY AUTOMATIC PLAYBACK FUNCTION
STILL PICTURE
VIDEO SEARCH
FAST FORWARD AND REWIND
DPSS (DIGITAL PROGRAM SEARCH SYSTEM)
EZ PLAY
Recording A TV Program ....................................................... 17
RECORDING SPEEDS
CASSETTE ERASE PROTECTION
RECORDING A TV PROGRAM
TAPE COUNTER
Recording With The Timer ..................................................... 18~19
Tape Dubbing ........................................................................ 20
Pre-Service Call Checklist ..................................................... 21
Specifications ......................................................................... 22
Limited Warranty .................................................................... 24
7456 PE
®
guidelines
PAGE
01 13VT-CR10[E].pm65e 15/5/01, 7:23 pm1
Page 2
Welcome to the SHARP Family. We are pleased that you are now the owner of a SHARP TV/VCR Combination – built for
outstanding quality , reliability and performance.
Every SHARP TV/VCR Combination set is properly tuned and adjusted for a proper color picture and sound, and has passed
through the most stringent quality control tests at the factory. We have prepared this OPERATION MANUAL so that you may
adjust the picture and color to your personal viewing preference.
We sincerely hope that you receive the utmost satisfaction and enjoyment from your new SHARP TV/VCR Combination set for
years to come.
Please read these instructions carefully, and keep them handy for your future reference.
IMPORTANT
To aid reporting in case of loss or theft, please record the TV’s model and
serial numbers in the space provided. The numbers are located at the rear of
the TV .
Model No.:
Serial No.:
IMPORT ANT INFORMATION
Energy efficiency is becoming increasingly important to consumers both in the US and in Canada. ENERGY STAR is a US
registered trademark to indicate that a product meets its guidelines for energy efficiency.
WHAT IS ENERGY STAR
TVs and VCRs use energy both when they are on and when they are off. North Americans spend more than $1 billion a year on
energy consumed by TVs and VCRs when they are not in use. The new ENERGY STAR® models will reduce that energy
“leakage” by up to 75 percent. Ultimately, this will mean more than $500 million a year in energy savings for consumers.
The energy savings will help reduce the burning of fossil fuels and the related carbon dioxide pollution that contributes to global
warming. If every North American family replaced their TVs and VCRs with ENERGY STAR® models, it would reduce carbon
dioxide emissions by five million tons every year — equivalent to eliminating the pollution from more than one million cars.
By using ENERGY ST AR® products, you will save money on your electric bills and use less energy. That makes good economic
sense and it’s good for our environment.
®
WARNING:
TO REDUCE THE RISK OF FIRE OR ELECTRIC SHOCK, DO NOT EXPOSE THIS
APPLIANCE TO WET LOCATIONS.
WARNING OF DEW FORMATION
Whenever your TV is moved from a cold to a warm environment, it is important that you plug the unit in, turn the
power on and allow it to sit for about 2 hours before attempting to play a tape.
This period will allow any dew formation to evaporate. Failure to do so may result in tape and/or video head
damage.
After the 2 hours evaporation period, you may witness a “snowy” picture for the first few minutes of VCR operation.
This picture noise will disappear shortly thereafter.
CAUTION:
TO PREVENT ELECTRIC SHOCK, MATCH WIDE BLADE OF PLUG
TO WIDE SLOT, FULLY INSERT.
CAUTION:
DO NOT PLACE THIS PRODUCT ON AN UNSTABLE CART, STAND,
TRIPOD, BRACKET, OR TABLE. THE PRODUCT MAY FALL CAUSING
SERIOUS PERSONAL INJURY AND SERIOUS DAMAGE TO THE
PRODUCT. USE ONLY WITH A CART, STAND, TRIPOD, BRACKET, OR
TABLE RECOMMENDED BY THE MANUFACTURER OR SOLD WITH THE
PRODUCT. FOLLOW THE MANUFACTURER’S INSTRUCTIONS WHEN
INSTALLING THE PRODUCT AND USE MOUNTING ACCESSORIES
RECOMMENDED BY THE MANUFACTURER.
A PRODUCT AND CART COMBINATION SHOULD BE MOVED WITH
CARE. QUICK STOPS, EXCESSIVE FORCE, AND UNEVEN SURFACES
MAY CAUSE THE PRODUCT AND CART COMBINATION TO OVERTURN.
2
02-03 13VT-CR10[E].pm65e 15/5/01, 7:23 pm2
Page 3
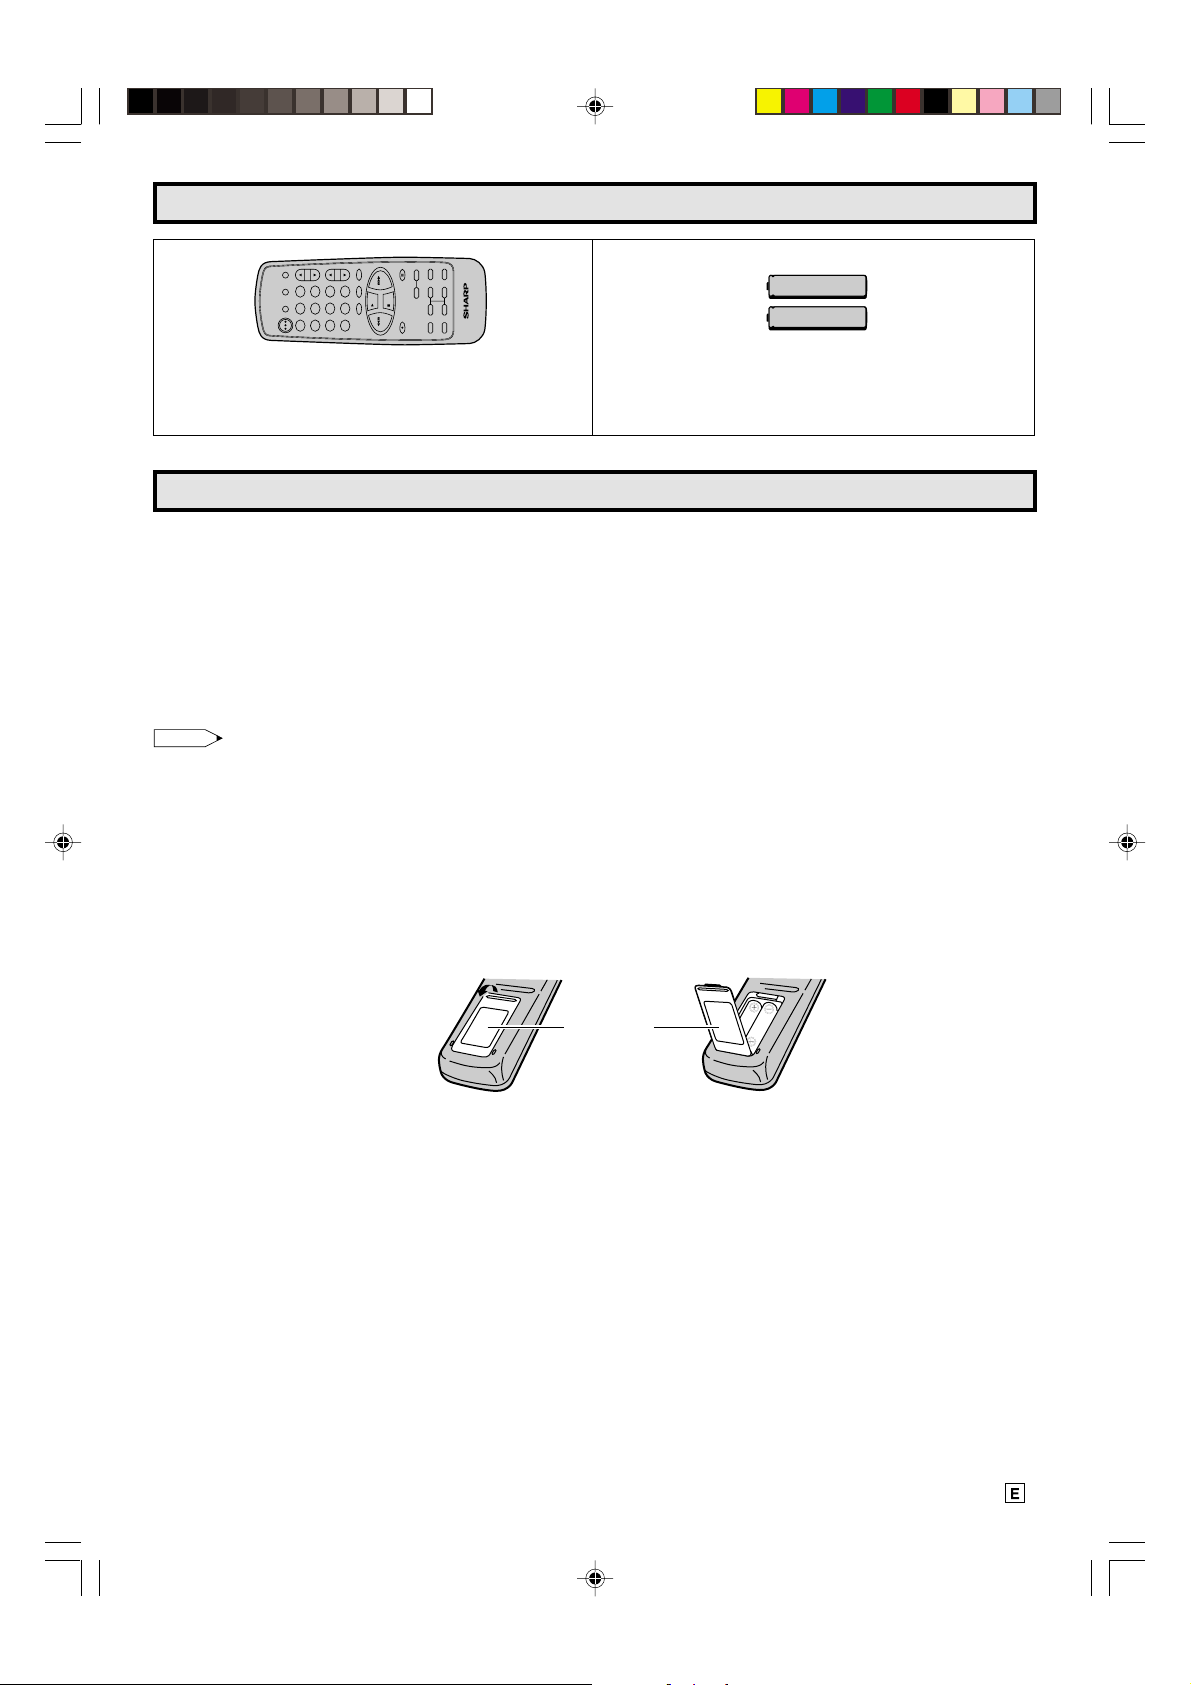
Supplied Accessories
•••
•
TR
d
POWER
e
CH
VOL
100
0
5
•
INPUT DISPLAY MUTE
1 2 3
4 6
7 8 9
FLASHBACK
ed
PROOF
TAMPER
TAPE
SPEED
RESET
COUNTER
PROG
PAUSE/STILL
DPSS
+
PLAY
STOP
–
REW FF
REC
TIMER
ON/OFF
MENU
SET
RETURN
CONFIRM
TV • VCR COMBINATION
Infrared Remote Control/Part Number
RRMCG1330PESA
Size AA
Dry Batteries
Before Operating Y our TV/VCR Combination
Location
• For normal operation, your TV should be located in an area of the room where cool adequate ventilation is provided. Do not
place the back of the television set in a place where free airflow will be restricted.
• Any magnetic force may disturb the color picture. Make sure that magnets, electric clocks, toys using magnets or any other
magnetic substance, such as iron are kept well away from the TV set.
Power
Your TV operates on 120 Volts, 60 Hz (normal household current) and has a polarized plug. If you are unable to insert the
plug fully into the outlet, try reversing the plug. Should it fail to fit, contact an electrician. Do not defeat the safety feature of
the polarized plug.
Note:
• If the set will not be used for a long period, such as during a vacation, unplug the set from the wall outlet to economize power.
(If the TV set is plugged in, a slight current still flows, even with the POWER BUTTON in the OFF position.)
• Lines and other noise may appear in TV broadcast images when an FM tuner or radio is located near the TV and both radio
and TV broadcasts are being received. Should such noise appear, turn off either the TV or the radio.
• If you are listening to an AM broadcast, turn the TV off. AM broadcast signals may not be received due to interference from
the TV .
L Before using the television, prepare the Remote Control
To use the remote control, insert batteries first.
Insert the batteries
Pull up
Battery
Cover
• With your thumb nail, pull up the slit as indicated by the arrow to remove the back cover. Insert two batteries (size “AA”). Be
sure to match the battery e/d terminals with the e/d marks inside the compartment.
02-03 13VT-CR10[E].pm65e 15/5/01, 7:23 pm3
3
Page 4
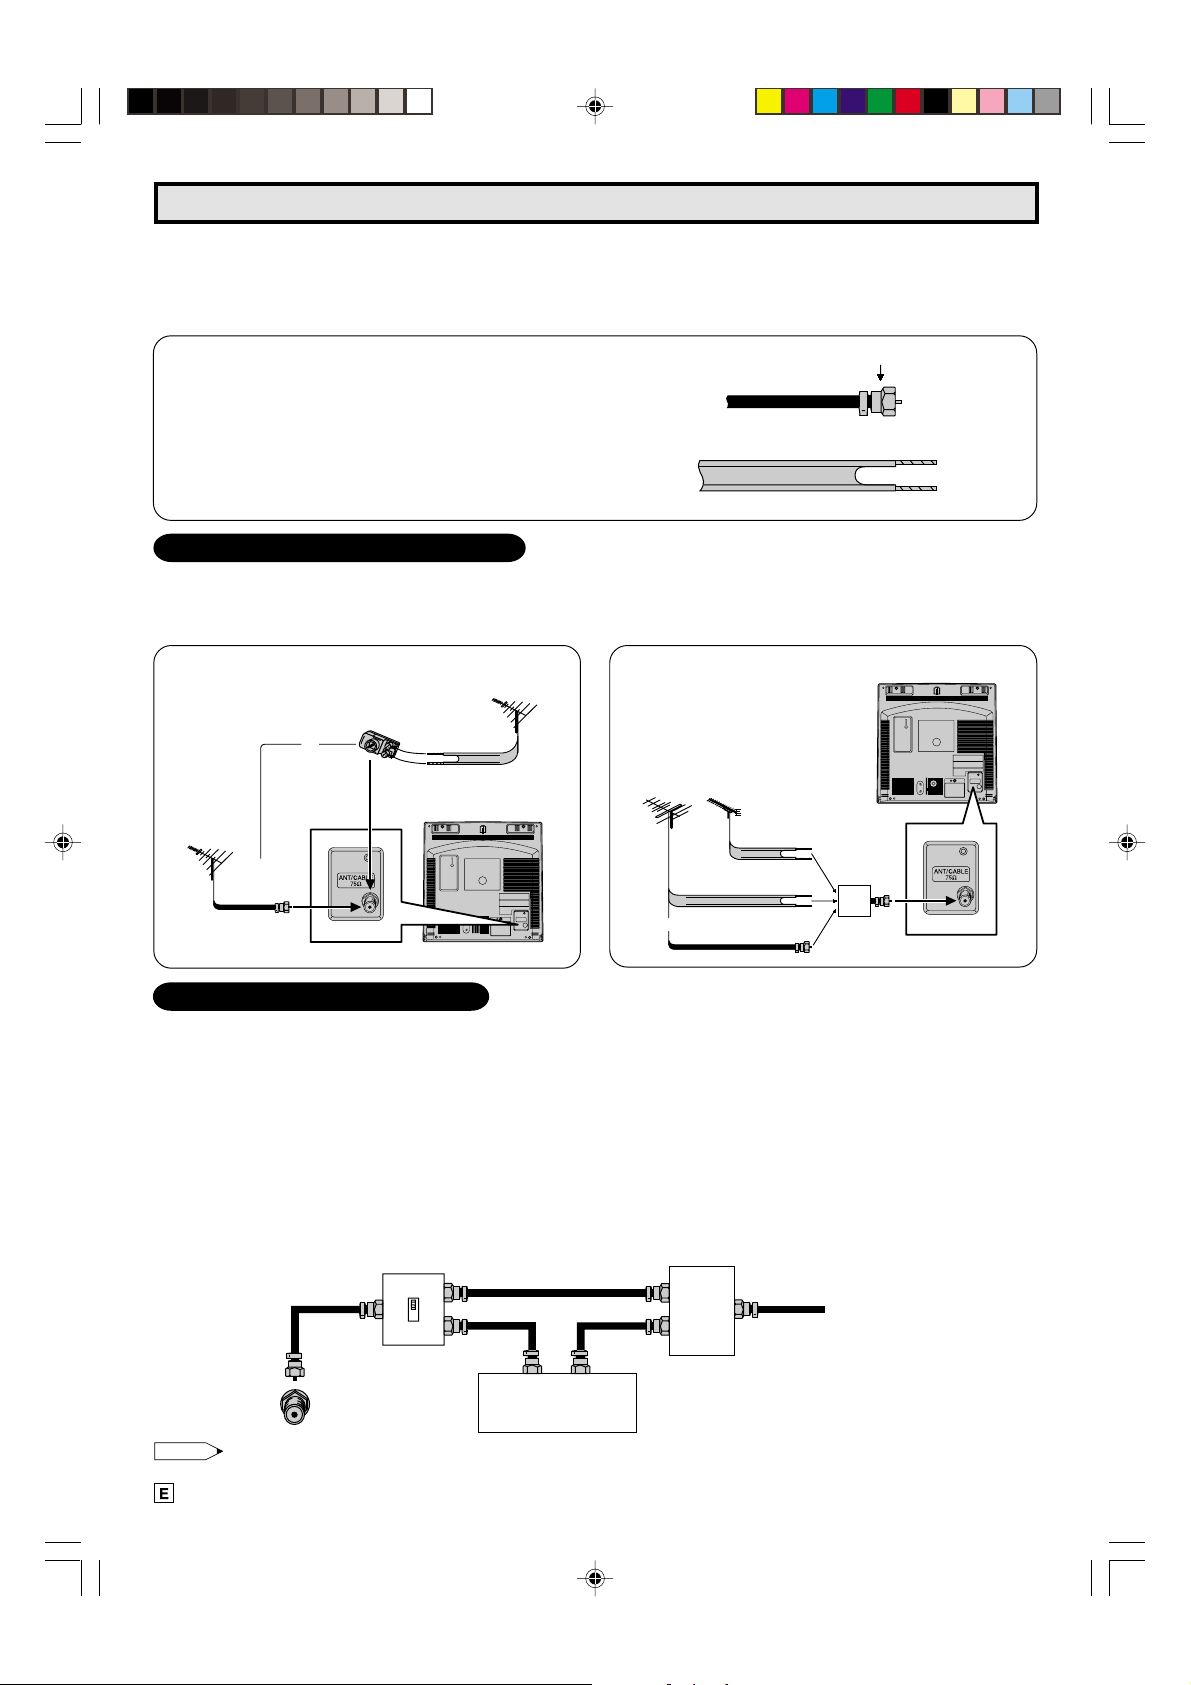
Antenna Connections
Antennas
• The antenna requirements for good color television reception are more important than those for black & white television
reception. For this reason, a good quality outdoor antenna is strongly recommended.
The following is a brief explanation of the type of connections that are provided with the various antenna systems:
1. A 75 ohm system is generally a round cable with F-type
F-type connector
connector that can easily be attached to a terminal
without tools (not supplied).
75-ohm coaxial cable (round)
2. A 300 ohm system is a flat “twin-lead” cable that can be
attached to a 75 ohm terminal through a 300-75 ohm
ADAPTOR (not supplied).
300-ohm twin-lead cable (flat)
OUTDOOR ANTENNA CONNECTION
• Use one of the following two diagrams if you connect an outdoor antenna.
A: Using a VHF/UHF combination outdoor antenna.
B: Using separate VHF and/or UHF outdoor antenna.
• Connect an outdoor antenna cable lead-in to the COAXIAL CABLE CONNECTOR on the rear of the TV set.
A. Combination VHF/UHF Antennas
VHF/UHF ANTENNA
VHF/UHF
ANTENNA
75-ohm
coaxial
cable
300/75-ohm
ADAPTOR
(not supplied)
or
300-ohm
twin-lead
REAR OF TV
B. Separate VHF/UHF Antenna
VHF
ANTENNA
or
UHF
ANTENNA
300-ohm
twin-lead
300-ohm
twin-lead
75-ohm coaxial
cable
COMBINER
(not supplied)
IN OUT
REAR OF TV
CABLE TV (CA TV) CONNECTION
• A 75 ohm coaxial cable connector is built into the set for easy hookup. When connecting the 75 ohm coaxial cable to the set,
screw the 75 ohm cable to the COAXIAL CABLE CONNECTOR.
• Some cable TV companies offer “premium pay channels”. Since the signals of these premium pay channels are scrambled,
a cable TV converter/descrambler is generally provided to the subscriber by the cable TV company . This converter/descrambler
is necessary for normal viewing of the scrambled channels. (Place your TV on channel 3 or 4, typically one of these
channels is used. If this is unknown, consult your cable TV company .) For more specific instructions on installing cable TV,
consult your cable TV company. One possible method of utilizing the converter/descrambler provided by your cable TV
company is explained below.
Please note: RF switch equipped with position A/B (not provided) is required.
“A” position on the RF switch (not supplied) : You can view all unscrambled channels using the TV’s channel keys.
“B” position on the RF switch (not supplied) : You can view the scrambled channels via the converter/descrambler using
the converter’s channel keys.
RF switch (not supplied)
Two-set
OUT
B IN A
OUT
signal
splitter
(not
IN
supplied)
Cable TV Line
Cable TV converter/
descrambler
(not supplied)
Note:
• Consult your SHARP Dealer or Service Center for the type of splitter, RF switch or combiner that might be required.
4
04 13VT-CR10[E].pm65e 15/5/01, 7:23 pm4
Page 5

Description Of Controls
FRONT
POWER button
POWER/
POWER
WAKE-UP
PROGRAM
TAMPER
TIMER
REC
TIMER
PROOF
POWER/
WAKE-UP
TIMER
POWER indicator
REAR
SENSOR AREA FOR REMOTE CONTROL
PROGRAM
TIMER
TAMPER
PROOF
REC
TAMPER PROOF indicator
PROGRAM TIMER indicator
REC indicator
VOLUME
UP/DOWN
buttons
CHANNEL
UP/DOWN
buttons
EZ
REC
PLAY
button
button
REW (Reverse
Video Search)
button
VIDEO/AUDIO
Input Jacks
PLAY
button
STOP/EJECT
button
FF (Forward
Video Search)
button
05-07 13VT-CR10[E].pm65e 16/5/01, 1:36 pm5
ANT/CABLE
TERMINAL
(75 )
5
Page 6

Location Of Control’s Buttons (Remote Control)
–
INPUT
TV/VIDEO Select
POWER ON/OFF
CHANNEL SELECT
FLASHBACK
Returns to previously viewed
channel.
COUNTER RESET
• Used to reset the tape counter.
TAPE SPEED
• Used to select the recording
tape speed.
PLAY
• Used for tape playback.
• Used to cancel the PAUSE/STILL
mode and return to normal
playback operation.
REW
• Used to rewind the tape or to
conduct Reverse Video Search
during playback mode.
REC
• Used to record a program.
, +
TIMER ON/OFF
CONFIRM
• Used to confirm the program
setting.
RETURN
SET
POWER
INPUT DISPLAY MUTE
1 2 3
•
4 5 6
7 8 9
FLASHBACK
0
COUNTER
RESET
PLAY
REW FF
STOP
REC
TIMER
ON/OFF
CONFIRM
–
RETURN
TV • VCR COMBINATION
100
TAPE
SPEED
+
SET
VOL
CH
TAMPER
PROOF
PAUSE/STILL
DPSS
ed
PROG
MENU
Infrared Transmitter Window
DISPLAY
• Used to change the On Screen
Display.
MUTE
Press → Mutes sound.
Press again
→
Restores sound
to previous level.
Press the MUTE button to enter
the CLOSED CAPTION mode
automatically if the signal contains
CC information.
VOLUME UP/DOWN
CHANNEL UP/DOWN
e
•
•
TR
•
•
d
• Used to select the CHANNEL.
• Used to adjust the TRACKING
while playing the tape.
TAMPER PROOF
(TRACKING
e
/ d)
• Used to block changes to current
operating mode.
FF
• Used to fast forward the tape or
to conduct Forward Video Search
during playback mode.
STOP
• Used to stop the tape.
PAUSE/STILL
• Used to temporarily stop the tape
during recording mode.
• Used to display a still picture
during playback mode.
DPSS (e / d)
• Press the (e / d) button to search
for the index signal and begin
playback automatically.
PROGRAM
• Press the button to enter the Timer
Recording mode.
MENU
• Used to select the menu screen.
6
05-07 13VT-CR10[E].pm65e 15/5/01, 7:24 pm6
Page 7
Watching A TV Program
1 POWER
• Press the POWER button to turn on the TV.
(The POWER indicator will be lit in RED.)
Sound will start instantly and picture will appear 5 to 10
seconds later.
• Press the POWER button again to turn off the TV.
(The POWER indicator will be turned off.)
2 VOLUME
• Press the VOL UP (8) button to increase the sound to the
desired level, and then release.
• Press the VOL DOWN (9) button to decrease the sound
level.
L To turn the sound off temporarily
• Press the MUTE button on the Remote Control to turn the
sound off.
“MUTE” will appear on the screen to confirm that this feature is in effect.
• Press the MUTE button again to restore the sound to its
previous level.
3 CHANNEL SELECTION
• The desired channel can be selected instantly by pressing the CHANNEL SELECT buttons (0 ~ 9, 100) on the
Remote Control, or CHANNEL UP (8)/DOWN (9) buttons on the Remote Control or on the TV.
• To select cable channel numbers greater than “ 99 ”. First
press “ 100 ” button on the Remote Control; then the two
other numbers buttons to complete your total channel
number selection.
• The selected channel number will appear on the screen.
Example:
(1) To select channel 2 :
Press the “ 0 ” and “ 2 ” buttons.
To select channel 69 :
Press the “ 6 ” and “ 9 ” buttons.
To select channel 125 (CATV mode only) :
Press the “ 100 ”, “ 2 ” and “ 5 ” buttons.
(2) The memorized channel selection will change in sequence
from the low preset channel to the high preset channel
when the CH UP (8) button is pressed, and vice versa
when the CH DOWN (9) button is pressed after you preset the desired channels into the memory.
Note:
• For channel memory, please refer to page 11.
DISPLAY
Press Once* • Time and Date
• Channel Number
• (Tape Operation Display)
• (Tape Speed Mode — SP, LP, EP)
• (Tape Counter)
After about 3 • Channel Number
seconds • (Tape Operation Display)
• (Tape Speed Mode — SP, LP, EP)
• (Tape Counter)
Press Twice • Cleans Display
Items in ( ) will be displayed when a cassette is loaded in the
VCR.
5 MENU FUNCTIONS
L Calling up the Functions
(1) Press the MENU button on the Remote Control to call the
MENU screen.
(2) Press the + or – button on the Remote Control to select
the desired function mode. Each time that you press the +
or – button, the “ :” mark moves down or up.
(3) Press the SET button on the Remote Control to access
desired function mode.
• To leave the MENU screen, press the MENU button on
the Remote Control.
MENU
TIMER
VIDEO ADJUST
CLOSED CAPTION
FUNCTION
CLOCK
LANGUAGE
CH SETTING
SELECT + / — : SET SET
PREVIOUS RETURN : QUIT MENU
(MENU screen)
6 TRILINGUAL ON SCREEN DISPLAY
L The language for this unit’s ON SCREEN DISPLA Y can
be set to ENGLISH, SPANISH or FRENCH.
L Setting the ON SCREEN DISPLAY Language
(1) Select “LANGUAGE” from
the MENU screen by
pressing + or – button,
then press the SET
button.
MENU
TIMER
VIDEO ADJUST
CLOSED CAPTION
FUNCTION
CLOCK
LANGUAGE
CH SETTING
SELECT + / — : SET SET
PREVIOUS RETURN : QUIT MENU
4 DISPLAY CALL
• Pressing the DISPLAY button on the Remote Control will
change the display on the screen in the following sequence.
Note:
• When CLOSED CAPTION is turned ON, the ON SCREEN
DISPLAY turns off automatically after about 3 seconds.
• For CLOSED CAPTION information, please refer to
pages 9 ~ 10.
05-07 13VT-CR10[E].pm65e 15/5/01, 7:51 pm7
(2) Press the + or – button
to select the language
(English, Spanish or
French) you wish to
display, then press the
SET button.
LANGUAGE
ENGLISH
ESPANOL
FRANCAIS
SELECT + / — : SET SET
PREVIOUS RETURN : QUIT MENU
7
Page 8
Watching A TV Program (Continued)
7 EZ SETUP during First Use
When you turn on the TV for the first time, it will automatically
memorize the broadcast channels.
Please perform the following before pressing the power button.
1) Insert the batteries into the remote control. (See page 3)
2) Connect the antenna cable to the TV set. (See page 4)
3) Plug in the AC POWER cord to the wall outlet.
(1) Press the POWER button
on the TV set or on the
Remote Control to turn on
the TV. The SELECT
LANGUAGE mode will be
displayed.
(2) Press + or – button on the
Remote Control to select
“ENGLISH”, “SPANISH”
(ESPAÑOL) or “FRENCH”
(FRANÇAIS). Then press
+ or – button to SET
LANGUAGE.
(3) Press the SET button on
the Remote Control to
access EZ SETUP mode.
(4) Press the SET button on
the Remote Control.
The tuner will automatically search for the broadcast and cable
TV channels. (The CH No. will automatically increase when it
appears.)
To cancel EZ SETUP, press the SET button on the Remote
Control.
If you want to SETUP again, please refer to page 10 on SETUP .
(5) The “CLOCK SET” screen
will be displayed, then set
the clock same as step (2),
(3) on page 12.
Note:
• If EZ SETUP does not memorize all the channels in your
region, please refer to page 10 for more information on
manual memorizing the channels using CHANNEL
SETTING.
• It may be difficult to use the PRESET function when the
broadcast signals are weak, the channel cycle frequency
is incorrect or frequency jamming is occuring in the area.
Please refer to page 11 for more information on manual
memorizing the channel using CHANNEL SETTING.
SELECT LANGUAGE
ENGLISH
ESPANOL
FRANCAIS
SELECT + / – : SET SET
(SELECT LANGUAGE mode)
SELECT LANGUAGE
ENGLISH
ESPANOL
FRANCAIS
SELECT + / – : SET SET
CONNECT ANTENNA
START EZ SETUP?
OR CABLE.
YES SET
NO MENU
(EZ SETUP mode)
PLEASE WAIT
AUTO PROGRAMMING
AIR 2
STOP SET
CLOCK SET
AUTO CLOCK
EDS CH
MONTH
DAY
YEAR
TIME
SELECT + / – : SET SET
PREVIOUS RETURN : QUIT MENU
ON
AUTO
---
--
----
--:----
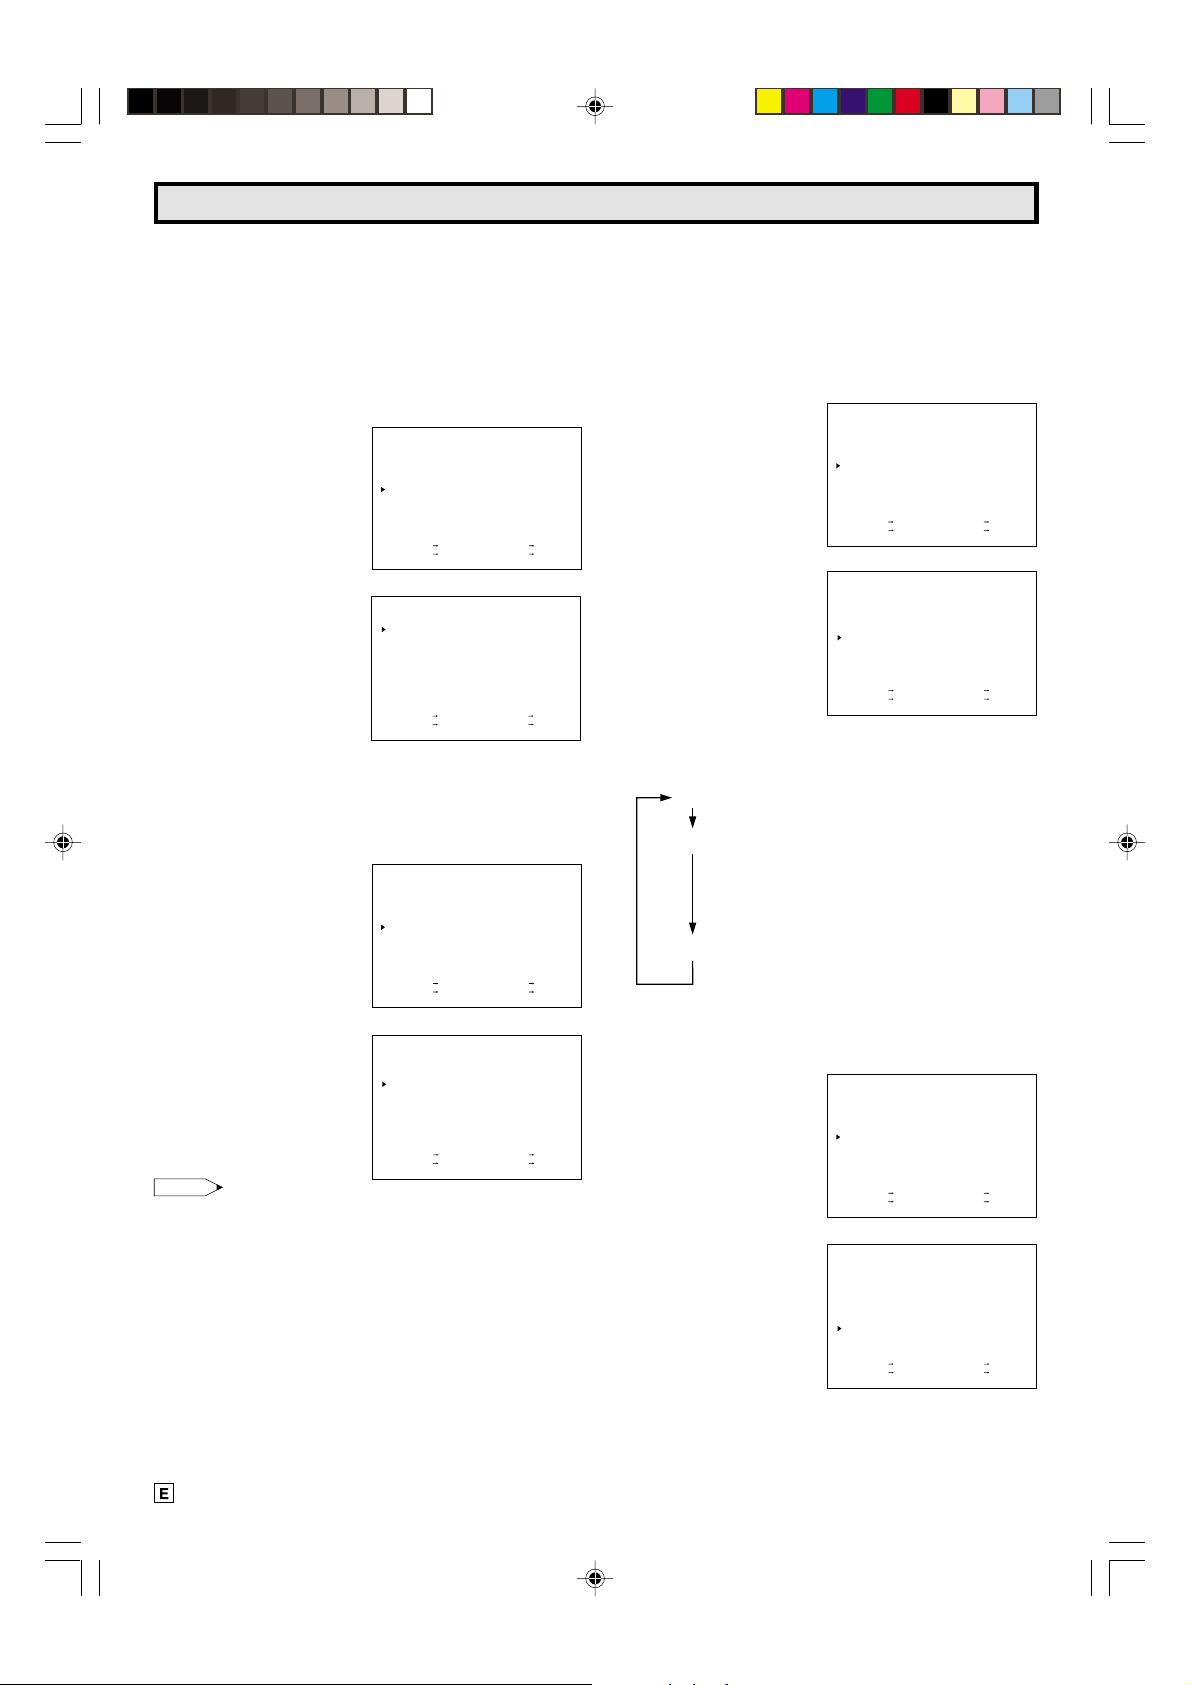
8 WAKE-UP TIMER
L Setting the Wake-up Timer automatically turns on the
TV or VCR at a preset time.
(1) Press the MENU button
on the Remote Control to
call up the MENU screen.
(2) Press the + or – button on
the Remote Control to
select “TIMER”, and press
the SET button. If the
clock is not set, the clock
set menu will appear.
Please set the clock first.
(3) Press the + or – button to
select “WAKE-UP”, and
press the SET button.
(4) Press the Remote’s + or
– button to select the
“hour”, then press the SET
button. The yellow position
will move to the “minute”
portion. Again, press the
Remote’s + or – button to
select the “minute”, then
press the SET button.
(5) Press the + or – button to
select turning on the TV or
VCR.
(6) Press the SET button, then
press the MENU button.
Note:
• To clear the Wake-up Timer setting, select “OFF” in step
(5).
• After the TV and/or VCR is on, and no operation is activated
and none of its functions here been used for 2 hour period,
the power will shut off as a safety feature.
• When you have selected “VIDEO ON” in step (5) and no
cassette is loaded the TV turns on instead of the VCR.
MENU
TIMER
VIDEO ADJUST
CLOSED CAPTION
FUNCTION
CLOCK
LANGUAGE
CH SETTING
SELECT + / — : SET SET
PREVIOUS RETURN : QUIT MENU
MENU
TIMER
VIDEO ADJUST
CLOSED CAPTION
FUNCTION
CLOCK
LANGUAGE
CH SETTING
SELECT + / — : SET SET
PREVIOUS RETURN : QUIT MENU
TIMER
WAKE-UP
SLEEP
SELECT + / — : SET SET
PREVIOUS RETURN : QUIT MENU
TIMER
WAKE-UP
SLEEP
SELECT + / — : SET SET
PREVIOUS RETURN : QUIT MENU
TIMER
WAKE-UP
SLEEP
SELECT + / — : SET SET
PREVIOUS RETURN : QUIT MENU
12:00AM
OFF
OFF
10:00AM SEP.15(FRI)
10:20AM
OFF
OFF
10:00AM SEP.15(FRI)
10:20AM
VIDEO ON
OFF
10:00AM SEP.15(FRI)
The Wake-up Timer indicator
changes from red to orange.
The Wake-up Timer indicator
changes to green in standby
mode.
8
08-11 13VT-CR10[E].pm65e 15/5/01, 7:24 pm8
Page 9
Watching A TV Program (Continued)
PLAY
REW FF
STOP
+/– button
RETURN button
REC
TIMER
ON/OFF
CONFIRM
RETURN
TV • VCR COMBINATION
PAUSE/STILL
DPSS
ed
+
–
PROG
SET
MENU
MENU button
SET button
9 SLEEP TIMER
L Setting the Sleep Timer automatically turns off the
power at a preset time.
(1)
Select “TIMER” from the
MENU screen, and press
the SET button.
If the clock is not set, the
clock set menu will appear,
set the clock first (refer to
page 12)
(2) Press the + or – button to
select “SLEEP”, and press
the SET button.
MENU
TIMER
VIDEO ADJUST
CLOSED CAPTION
FUNCTION
CLOCK
LANGUAGE
CH SETTING
SELECT + / — : SET SET
PREVIOUS RETURN : QUIT MENU
TIMER
WAKE-UP
SLEEP
SELECT + / — : SET SET
PREVIOUS RETURN : QUIT MENU
10:20AM
VIDEO ON
OFF
10:00AM OCT.15(FRI)
(3) Select the desired timer by pressing the + or – button, and
press the SET button. Each time you press the + or –
button, the display changes as follows:
+ button; OFF
30 M. REMAIN
60 M. REMAIN
90 M. REMAIN
120 M. REMAIN
– button; OFF
120 M. REMAIN
90 M. REMAIN
60 M. REMAIN
30 M. REMAIN
Note:
• The Sleep Timer function is cancelled if “OFF” is selected
in the operation step (2).
• The Sleep Timer function is cancelled if you turn the set
off by pressing the POWER ON/OFF button on the Remote
Control or the front panel.
! VIDEO ADJUST
(PICTURE, TINT , COLOR, BRIGHT , SHARP, FAVORITE COLOR)
(1) Select “VIDEO ADJUST”
from the MENU screen
and press the SET button.
MENU
TIMER
VIDEO ADJUST
CLOSED CAPTION
FUNCTION
CLOCK
LANGUAGE
CH SETTING
SELECT + / — : SET SET
PREVIOUS RETURN : QUIT MENU
(2) Press the + or – button
on the Remote Control to
select the item you wish to
adjust, then press the SET
button. (Pressing the + or
– button moves the “ :”
mark.)
(3) Press the + or – button to
adjust the “brightness” to
a favorite picture.
VIDEO ADJUST
PICTURE
TINT
COLOR
BRIGHT
SHARP
F.COLOR
RESET
SELECT + / — : SET SET
PREVIOUS RETURN : QUIT MENU
Example:
Adjusting the “brightness”.
(4) Press the SET button. The
screen will return to the (2)
above.
•
To continue any additional
adjustment, repeat the
steps from (2) to (4) above.
BRIGHT
- +
(5) Press the MENU button
anytime to exit VIDEO
ADJUST.
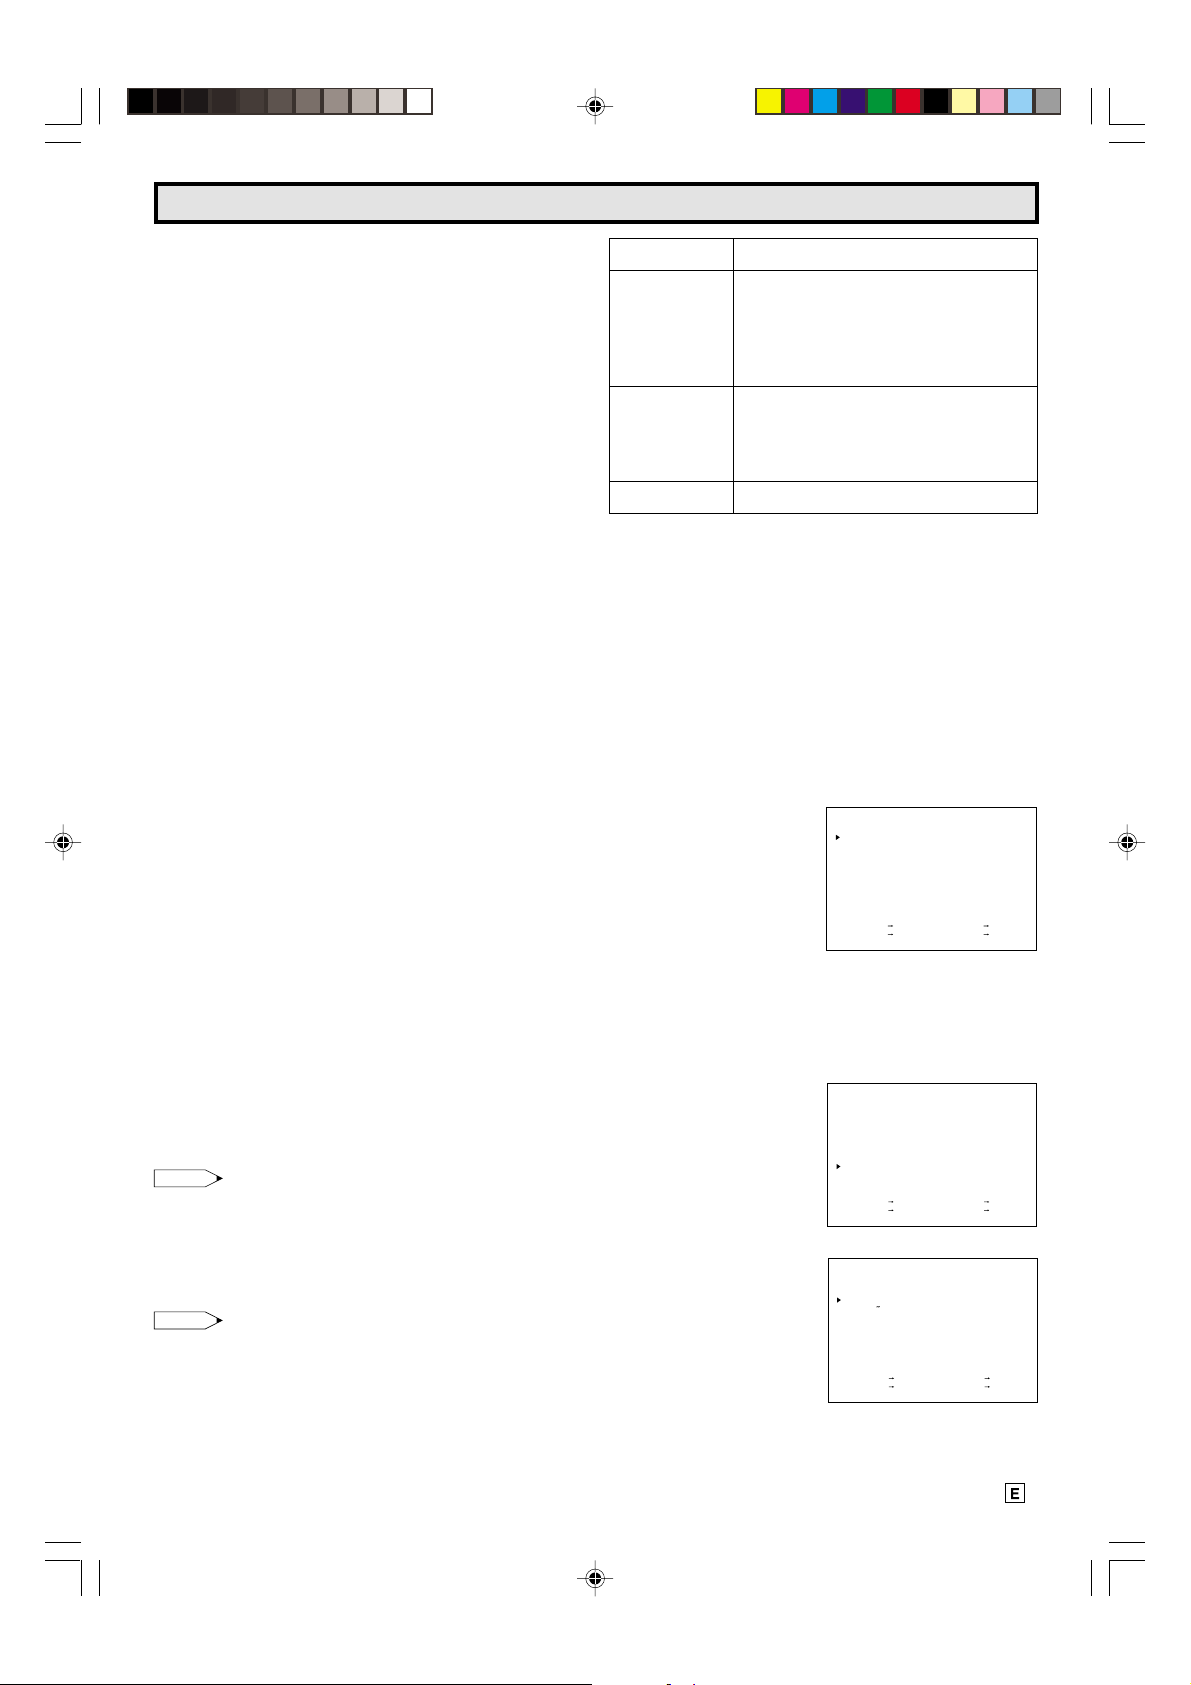
< Description of Adjustment Items >
Selected
Item
PICTURE To increase contrast To decrease contrast
TINT Skin tones become greenish Skin tones become purplish
COLOR For more color intensity For less color intensity
BRIGHT For more brightness For less brightness
SHARP For more sharpness For less sharpness
F . COLOR Warmer picture Cooler picture
(Favorite color)
RESET
+ button – button
(Whites reddish) (Whites bluish)
All Video Adjustments are returned to the factory preset
level.
CLOSED CAPTION
L How to set Closed Caption
• Your TV is equipped with an internal closed caption
decoder. “Closed Caption” is a system which allows you
to view conversations, narration, and sound effects in TV
programs and home videos as subscript on your TV screen
as shown below.
• Not all the programs
and videos will offer
closed caption.
Please look for the
“ ” symbol to
ensure that captions
will be shown.
• Closed Caption broadcast can be viewed in two modes:
CAPTION and TEXT. For each mode, two channels are
available, CH1 and CH2:
The [CAPTION] mode subscripts dialogues and
commentaries of TV dramas and news programs while
allowing clear view of the picture.
The [TEXT] mode displays over the picture other various
information (such as TV program schedule, weather
forecast, etc.) that is independent of the TV programs.
08-11 13VT-CR10[E].pm65e 15/5/01, 7:24 pm9
9
Page 10
Watching A TV Program (Continued)
DPSS
ed
(1) Press the Remote’s
MENU button to access
the MENU screen.
(2) Press + or – button to
move the “ :” mark to
“CLOSED CAPTION”.
(3) Press the SET button.
(4) Press + or – button to
move the “ :” mark to
either “MODE” or “DATA”,
then press the SET
MENU
TIMER
VIDEO ADJUST
CLOSED CAPTION
FUNCTION
CLOCK
LANGUAGE
CH SETTING
SELECT + / — : SET SET
PREVIOUS RETURN : QUIT MENU
MENU
TIMER
VIDEO ADJUST
CLOSED CAPTION
FUNCTION
CLOCK
LANGUAGE
CH SETTING
SELECT + / — : SET SET
PREVIOUS RETURN : QUIT MENU
CLOSED CAPTION
MODE
DATA
SELECT + / — : SET SET
PREVIOUS RETURN : QUIT MENU
CLOSED CAPTION
MODE
DATA
CAPTION
CH2
CAPTION
CH2
button.
SELECT + / — : SET SET
PREVIOUS RETURN : QUIT MENU
(5) Press + or – button to
change the “CLOSED
CAPTION” setting.
MODE :
CAPTION
TEXT
CLOSED CAPTION
MODE
DATA
SELECT + / — : SET SET
PREVIOUS RETURN : QUIT MENU
CAPTION
CH2
OFF
DATA :
CH 1
CH 2
(6) Press the SET button.
(7) Press the MENU button to
exit.
Note:
• When receiving closed caption signals, a white line may
appear in place of the captions. This is due to poor signal
conditions or problems at the broadcast source, and does
not indicate a problem with your TV.
• When viewing in TEXT mode, if no TEXT broadcast is being
received the screen may become dark and blank. Should
this occur, set the Closed Caption mode to “OFF”.
• If a TV program has Closed Caption and the MUTE button
is pressed, the set enters Closed Caption mode automatically. Pressing MUTE again will return the set to its
previous condition.
• If any button is pressed to call up the ON SCREEN
DISPLAY while viewing a CLOSED CAPTION broadcast,
the closed captions will disappear momentarily.
10
+/– button
RETURN button
TIMER
–
ON/OFF
CONFIRM
RETURN
TV • VCR COMBINATION
+
PROG
SET
MENU
MENU button
SET button
# PRESETTING THE CHANNELS
L EZ SETUP
By operating the channel preset functions, you can preset
your TV to the desired channels for viewing.
(1) Press the Remote’s
MENU button to access the
MENU mode.
(2) Press + or – button to
move the “ :” mark to the
“CH SETTING” mode.
(3) Press the SET button on
the Remote Control to
access CH SETTING mode.
(4) Press the + or – button on
the Remote Control to
move the “ : ” to “EZ
SETUP” mode.
(5) Press the SET button on
the Remote Control to
access EZ SETUP mode.
(6)
Press the SET button.
The tuner will automatically
search for the broadcasting
and cable TV channels.
(The CH No. will automatically
increase when it appears.)
T o cancel EZ SETUP . Press
SET button on the Remote
Control.
(7) Once EZ SETUP is
completed, the smallest
channel number memorized will be displayed.
MENU
TIMER
VIDEO ADJUST
CLOSED CAPTION
FUNCTION
CLOCK
LANGUAGE
CH SETTING
SELECT + / — : SET SET
PREVIOUS RETURN : QUIT MENU
CH SETTING
EZ SETUP
AIR/CABLE
CH SEARCH
CH MEMORY
SELECT + / — : SET SET
PREVIOUS RETURN : QUIT MENU
(CH SETTING mode)
CONNECT ANTENNA
START EZ SETUP?
OR CABLE.
YES SET
NO MENU
(EZ SETUP mode)
PLEASE WAIT
AUTO PROGRAMMING
AIR 2
STOP SET
AIR
2
08-11 13VT-CR10[E].pm65e 15/5/01, 7:24 pm10
Page 11

Watching A TV Program (Continued)
L CH SETTING
If EZ SETUP does not memorize all the channels in your
region, follow the instructions below to manually memorize
the channel.
1 Selecting the TV Signal mode.
(1) Select “CH SETTING” in
the MENU screen by
pressing + or – button,
then press the SET button.
(2) Select “AIR/CABLE” from
the CH SETTING screen
by pressing + or – button,
then press the SET button.
(3) Press the + or – button on
the Remote Control to
select the TV signal mode,
then press the SET button.
VHF/UHF antenna
Cable TV
AIR
CABLE STD
CABLE HRC
CABLE IRC
MENU
TIMER
VIDEO ADJUST
CLOSED CAPTION
FUNCTION
CLOCK
LANGUAGE
CH SETTING
SELECT + / — : SET SET
PREVIOUS RETURN : QUIT MENU
CH SETTING
EZ SETUP
AIR/CABLE
CH SEARCH
CH MEMORY
SELECT + / — : SET SET
PREVIOUS RETURN : QUIT MENU
AIR/CABLE
AIR
CABLE STD
CABLE HRC
CABLE IRC
SELECT + / — : SET SET
PREVIOUS RETURN : QUIT MENU
(TV signal mode)
2 Auto-programming broadcast TV channels into memory.
(1) Select “CH SEARCH”
from the CH SETTING
screen by pressing + or –
button, then press the
CH SETTING
EZ SETUP
AIR/CABLE
CH SEARCH
CH MEMORY
SET button.
SELECT + / — : SET SET
PREVIOUS RETURN : QUIT MENU
(2) Press the SET button. The
tuner will automatically
cycle through available
channels in your area and
CH SEARCH
AIR 2
START
preset them into the
memory. If all available
channels are of reasonable
PREVIOUS RETURN : QUIT MENU
START SET
signal strength and you
prefer not to add or erase
any channels from memory,
presetting is completed.
3 Adding weak or additional channels from TV memory.
(1) Select “CH MEMORY”
from the CH SETTING
screen by pressing + or –
button, then press the
SET button.
(2)
Use either the CH UP/DOWN
(
8/9
) buttons or the CHA-
CH MEMORY
AIR 54
ADD
START
SELECT + / — : SET SET
PREVIOUS RETURN : QUIT MENU
NNEL SELECT buttons (0~9,
100) to select the desired
channel. The selected channel number will appear on
the screen.
• If any channel is stored in the memory, the “ADD” is
displayed.
• If any channel is not stored in the memory, the “ERASE” is
displayed.
(3) Use the + or – to select
“ADD”; confirm that the
“ADD” is displayed. If
additional channels are to
be preset, repeat step (2).
CH MEMORY
AIR 54
ADD
START
SELECT + / — : SET SET
PREVIOUS RETURN : QUIT MENU
(4) Press the SET or MENU
key to exit CH MEMORY.
Use the CH UP/DOWN
(8/9) buttons to assure
channel presetting is
correct.
4 Erasing unwanted channels from TV memory.
(1) Select “CH MEMORY”
from the CH SETTING
screen.
(2) Select the channel to be
erased.
CH MEMORY
AIR 54
ERASE
START
(3) Use the + or – to select
“ERASE”; confirm that the
“ERASE” is displayed. If
SELECT + / — : SET SET
PREVIOUS RETURN : QUIT MENU
additional channels are to
be erased, repeat step (2).
(4) Press the SET or MENU
key to exit CH MEMORY.
Use the CH UP/DOWN
(8/9) buttons to assure
channel(s) are erased.
Note:
• Receivable channels of your TV set are:
AIR channels —
VHF; 2 through 13,
UHF; 14 through 69.
CABLE channels —
1 (HRC and IRC mode only)
2 through 125 (STD, HRC, and IRC)
08-11 13VT-CR10[E].pm65e 15/5/01, 7:24 pm11
11
Page 12
Tamper Proof Function
“TV” AUTO 2 3 4 .......... 68 69 AUTO
“CATV-STD” AUTO 2 3 4 .......... 124 125 AUTO
“CATV-HRC”, “CATV-IRC” AUTO 1 2 3 .......... 124 125 AUTO
POWER
POWER button
RETURN button
INPUT DISPLAY MUTE
1 2 3
•
4 5 6
7 8 9
FLASHBACK
0
COUNTER
RESET
PLAY
REW FF
STOP
REC
TIMER
–
ON/OFF
CONFIRM
RETURN
TV • VCR COMBINATION
100
TAPE
SPEED
+
SET
TAMPER
PROOF
PAUSE/STILL
DPSS
VOL
CH
ed
PROG
MENU
e
•
•
TR
•
•
d
CHANNEL
UP/DOWN
buttons
TAMPER
PROOF
button
MENU button
SET button
L Operation Mode Lock
• If the TAMPER PROOF Lock is on during operation of this
product, the current operation mode will not change until
the TAMPER PROOF Lock is released, even if another
operation button is pressed.
L Power-Off Mode Lock
• If the TAMPER PROOF button is pressed to engage the
TAMPER PROOF Lock while the POWER button is set to
off, the power cannot be turned on even if the POWER
button is pressed.
Example: Engaging the Tamper Proof Lock during playback.
1 Press and hold down the TAMPER PROOF button on the
Remote Control for about 3 seconds. The “ TAMPER
PROOF” indicator on the front panel of this product will
flash, and then remain lit to indicate that the lock is
engaged.
2 Regardless of any operation buttons pressed, the current
operation mode will not change.
The TAMPER PROOF Lock can be disengaged by the
following method:
• Press the TAMPER PROOF button on the Remote Control
for about 3 seconds. The “ TAMPER PROOF” indicator
on the front panel of this product will flash, and then go
out to indicate that the lock is disengaged.
Setting The Clock
1 AUTOMATIC CLOCK SETTING
• To set the clock automatically , follow the procedure below:
(1) Press the MENU button on
the Remote Control.
Press the +/– button to
move “ :” mark to
“CLOCK”, then press the
SET button.
(2) The “CLOCK SET”
screen
will be displayed. Press
the +/– button to select
“AUTO CLOCK ON” and
press the SET button.
(3) The “ :” mark will move
to “EDS CH AUTO”. If the
EDS channel in your area
is known, use the +/–
button to select the
channel. Otherwise, select
“AUTO”. Press the SET
button.
(3.1)
Turn off the power.
The clock is set
automatically using EDS
signals while the power is
off.
• If the EDS channel is
selected, it takes only a
few minutes for the clock
to set.
12
MENU
TIMER
VIDEO ADJUST
CLOSED CAPTION
FUNCTION
CLOCK
LANGUAGE
CH SETTING
SELECT + / — : SET SET
PREVIOUS RETURN : QUIT MENU
CLOCK SET
AUTO CLOCK
EDS CH
MONTH
DAY
YEAR
TIME
SELECT + / — : SET SET
PREVIOUS RETURN : QUIT MENU
CLOCK SET
AUTO CLOCK
EDS CH
MONTH
DAY
YEAR
TIME
SELECT + / — : SET SET
PREVIOUS RETURN : QUIT MENU
THE CLOCK IS
AUTOMATICALLY SET WHEN
THE UNIT IS TURNED OFF.
ON
AUTO
---
--
----
--:----
ON
AUTO
---
--
----
--:----
• If “AUTO” is selected for
clock setting, it may take
a few hours to complete
the clock setting as your
TV has to search for the
EDS channel.
(If you want to use the
clock functions immediately, proceed to step (2)
for
MANUAL CLOCK SET-
TING. Please refer to page
13.)
(3.2)
Press the power on.
Once the Auto Clock
setting is completed, the
time is displayed on the
bottom right corner of the
TV screen.
Note:
10:20AM OCT.15
• If you move to other location, try to preset the channels
again (See page 10 for presetting the channels) and set
the clock again following the procedure above.
• If the Auto Clock setting is still not completed even a few
hours after turning off the power, EDS signals may not be
broadcast in your area. In this case, set the clock manually.
(See page 13 for manual clock setting.)
• If the antenna signal is weak, the AUTO CLOCK SETTING
function may not operate.
• The AUTO CLOCK SET will not function if there is no EDS
signal broadcast.
• Select a channel that carries EDS signals with the e or d
button.
AIR
2
12-15 13VT-CR10[E].pm65e 15/5/01, 7:53 pm12
Page 13

Setting The Clock (Continued)
PLAY
REW FF
STOP
+/– button
RETURN button
REC
TIMER
ON/OFF
CONFIRM
RETURN
TV • VCR COMBINATION
PAUSE/STILL
DPSS
ed
+
–
PROG
SET
MENU
MENU button
SET button
2 MANUAL CLOCK SETTING
• If the EDS signal is not available in your area, set the clock
manually:
(1) Press the MENU button
on the Remote Control.
Select “CLOCK” from the
menu, then press the SET
button.
(2) Press the + or – button to
select “AUTO CLOCK
OFF”, then press the SET
button.
Example: Setting the clock to 10:20 a.m. on October 15, 2000.
(3) Press the + or – button to
select the “MONTH”, then
press the SET button. The
“ :” mark will move to the
next item “DAY”.
The month will change as
follows using the + or –
button.
+ button; JAN FEB MAR - - NOV DEC
– button; JAN DEC NOV - - MAR FEB
(4) Press the + or – button to
select the “DAY”, then
press the SET button. The
“ :” mark will move to the
next item “YEAR”.
The day will change as
follows using the + or –
button.
+ button; 1 2 3 - - - 30 31
MENU
TIMER
VIDEO ADJUST
CLOSED CAPTION
FUNCTION
CLOCK
LANGUAGE
CH SETTING
SELECT + / — : SET SET
PREVIOUS RETURN : QUIT MENU
CLOCK SET
AUTO CLOCK
EDS CH
MONTH
DAY
YEAR
TIME
SELECT + / — : SET SET
PREVIOUS RETURN : QUIT MENU
CLOCK SET
AUTO CLOCK
EDS CH
MONTH
DAY
YEAR
TIME
SELECT + / — : SET SET
PREVIOUS RETURN : QUIT MENU
CLOCK SET
AUTO CLOCK
EDS CH
MONTH
DAY
YEAR
TIME
SELECT + / — : SET SET
PREVIOUS RETURN : QUIT MENU
OFF
AUTO
---
--
----
--:----
OFF
AUTO
OCT
--
----
--:----
OFF
AUTO
OCT
15
----
--:----
(5) Press the + or – button to
select the “YEAR”, then
press the SET button. The
“ :” mark will move to the
next item “TIME”.
The year will change as
follows using the + or –
CLOCK SET
AUTO CLOCK
EDS CH
MONTH
DAY
YEAR
TIME
SELECT + / — : SET SET
PREVIOUS RETURN : QUIT MENU
OFF
AUTO
OCT
15
2001
--:----
button.
+ button; 2001 2002 2003 - - - 1999 2000
– button; 2001 2000 1999 - - - 2003 2002
(6) Press the + or – button to
select the “hour”, then
press the SET button. The
yellow position will move
to the “minute” portion.
The hour will change as
follows using the + or –
CLOCK SET
AUTO CLOCK
EDS CH
MONTH
DAY
YEAR
TIME
SELECT + / — : SET SET
PREVIOUS RETURN : QUIT MENU
OFF
AUTO
OCT
15
2001
10:--AM
button.
+ button; 12:- -AM 1:- -AM • • • 10:- -PM 11:- -PM
– button; 12:- -AM 11:- -PM • • • 2:- -AM 1:- -AM
(7) Press the + or – button to
select the “minute”, then
press the SET button.
The minute will change as
follows using the + or –
button.
+ button; 01 02 03 - - - 58 59 00
– button; 01 00 59 - - - 04 03 02
CLOCK SET
AUTO CLOCK
EDS CH
MONTH
DAY
YEAR
TIME
SELECT + / — : SET SET
PREVIOUS RETURN : QUIT MENU
OFF
AUTO
OCT
15
2001
10:20AM
AIR
10:20AM OCT.15
Note:
1. To correct any erroneous data entry made during “clock”
setting work.
(1) Press the RETURN button on the Remote Control to
return to the item you wish to correct.
(2) Press the + or – button to enter the correct data.
(3) To advance operation, press the SET button.
2. If a button is not pressed within 60 seconds during the
setting procedure, the screen will return to its previous
source.
3. If the TV loses power for a short period of time, the clock
will have to be reset.
2
– button; 1 31 30 - - - 3 2
12-15 13VT-CR10[E].pm65e 15/5/01, 7:24 pm13
13
Page 14
Playing A Cassette
L ENERGY SAVE
This feature lets you lower the power consumption of your
TV set which in turn saves you money and minimizes the
impact on the environment. When this feature is turned
on, it reduces the brightness of the TV to a level that
consumes approximately 20% less energy than when the
feature is turned off.
The reduction in brightness will be less noticeable under
low room lighting conditions.
(1) Press the MENU button and
press the + or –button
to select “FUNCTION”
from the MENU screen.
Then press the SET
button.
(2) Press the + or – button to
select “ENERGY SAVE”,
then press the SET button.
(3) Press the + or – button to
the ON position, then
press the SET button.
MENU
TIMER
VIDEO ADJUST
CLOSED CAPTION
FUNCTION
CLOCK
LANGUAGE
CH SETTING
SELECT + / — : SET SET
PREVIOUS RETURN : QUIT MENU
FUNCTION
ENERGY SAVE
ON
BLUE SCREEN
OFF
REPEAT PLAY
OFF
S.PICTURE
OFF
SELECT + / — : SET SET
PREVIOUS RETURN : QUIT MENU
L BLUE SCREEN
This function eliminates monitor noise and mutes sound
during playback of unrecorded positions of a tape or
channels without signals.
(1) Repeat step (1) of the
above “ENERGY SAVE”.
MENU
TIMER
VIDEO ADJUST
CLOSED CAPTION
FUNCTION
CLOCK
LANGUAGE
CH SETTING
SELECT + / — : SET SET
PREVIOUS RETURN : QUIT MENU
L AUTO REPEAT
This feature is used to repeatedly play the same cassette
tape. You can select the function that rewinds and plays
back the tape from the beginning automatically when the
tape reaches the end, or the function that rewinds and
plays back the tape from the beginning automatically when
the recorded portion of the tape ends and the blank portion
begins.
(1) Repeat step (1) of the
above “ENERGY SAVE”.
(2) Press the + or – button
to select “REPEA T PLA Y”,
then press the SET button.
(3) Press the + or – button to
select the REPEAT PLAY
mode you want to use,
then press the SET
button.
To clear the Auto Repeat,
select the OFF position in
above.
------------
OFF
TAPE BLANK
TAPE END
Disengage the “REPEAT PLAY”.
-------
In playback, when the recorded portion
of the tape ends and the blank portion
begins, the tape will automatically
rewind and played back from the
beginning.
--------
In playback, when the tape reaches the
end, it is automatically rewound and
played back from the beginning.
MENU
TIMER
VIDEO ADJUST
CLOSED CAPTION
FUNCTION
CLOCK
LANGUAGE
CH SETTING
SELECT + / — : SET SET
PREVIOUS RETURN : QUIT MENU
FUNCTION
ENERGY SAVE
ON
BLUE SCREEN
ON
REPEAT PLAY
TAPE BLANK
S.PICTURE
OFF
SELECT + / — : SET SET
PREVIOUS RETURN : QUIT MENU
(2)
Press the + or – button
to select “BLUE SCREEN”,
then press the SET button.
(3) Press the + or – button to
the ON position, then
press the SET button.
FUNCTION
ENERGY SAVE
ON
BLUE SCREEN
ON
REPEAT PLAY
OFF
S.PICTURE
OFF
SELECT + / — : SET SET
PREVIOUS RETURN : QUIT MENU
Note:
• BLUE SCREEN does not function during Still Picture and
Video Search.
• BLUE SCREEN does not function during playback of a
tape with noise recorded.
• BLUE SCREEN cannot be recorded.
14
12-15 13VT-CR10[E].pm65e 15/5/01, 7:24 pm14
L S. PICTURE (SUPER PICTURE)
This function obtains a clearer playback screen.
(1) Repeat step (1) of the
above “ENERGY SAVE”.
(2)
Press the + or – button
to select “S. PICTURE”,
then press the SET button.
(3) Press the + or – button to
the ON position, then
press the SET button.
MENU
TIMER
VIDEO ADJUST
CLOSED CAPTION
FUNCTION
CLOCK
LANGUAGE
CH SETTING
SELECT + / — : SET SET
PREVIOUS RETURN : QUIT MENU
FUNCTION
ENERGY SAVE
ON
BLUE SCREEN
ON
REPEAT PLAY
TAPE BLANK
S.PICTURE
ON
SELECT + / — : SET SET
PREVIOUS RETURN : QUIT MENU
Page 15
PLAY
SP
TRACKING
0:00:00 10:20AM OCT.15
Playing A Cassette (Continued)
7 8 9
TAPE SPEED
button
PLAY button
REW button
STOP button
FLASHBACK
0
COUNTER
RESET
REW FF
REC
TIMER
–
ON/OFF
CONFIRM
RETURN
PLAY
STOP
100
TAPE
SPEED
+
SET
PAUSE/STILL
DPSS
TAMPER
PROOF
PROG
MENU
CH
e
•
•
TR
•
•
d
TAMPER
PROOF button
FF button
ed
PAUSE/STILL
button
MENU button
RETURN button SET button
TV • VCR COMBINATION
(On the Set)
PLAY
STOP/EJECT
button
REW (Reverse Video
Search) button
button
FF (Forward Video
Search) button
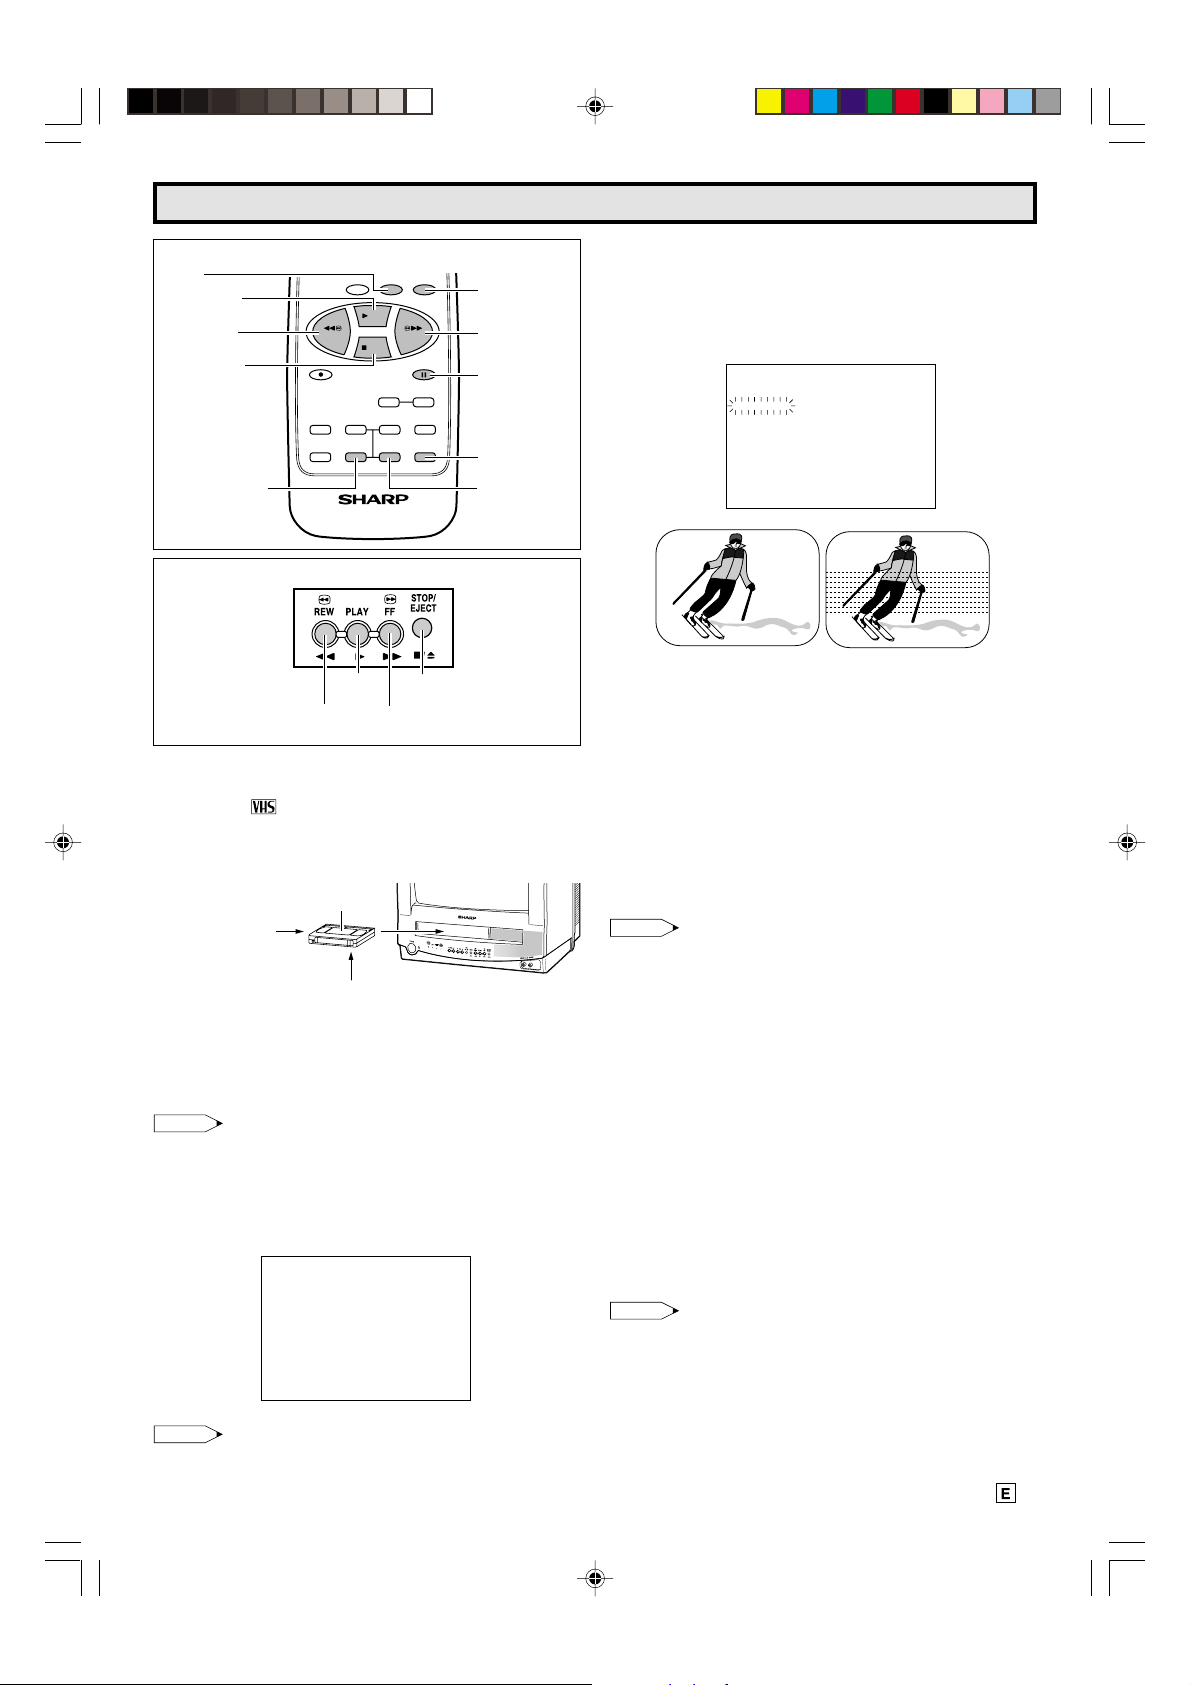
L INSERTING A VIDEO CASSETTE
Gently insert the video cassette into the cassette compartment
(use only video cassettes). The product will turn on
automatically.
If the video cassette is inserted incorrectly, the loading system
will not function.
Do not force the cassette.
Cassette T ape
The label side
should
face
outwards
The reel hub sockets
should face downwards
L EJECTING THE CASSETTE TAPE
• Pressing the STOP/EJECT button on the TV/VCR set ejects
the cassette tape. (When the TV/VCR set is in operation, press
the STOP/EJECT button twice.)
Note:
• If the set is tilted, the cassette may not load or eject properly.
L PLAYBACK
• With a cassette loaded, press the PLA Y button. The on-screen
display will appear showing the tape operation.
• To stop playback, press the STOP button.
PLAY
SP
0:00:00 10:20AM OCT.15
L AUTOMATIC TRACKING CONTROL SYSTEM
• The Automatic Tracking Control System adjusts the tracking
to its optimum setting when playback begins after inserting
the tape. (“TRACKING” will flash on the TV screen during
automatic tracking adjustment.)
(On the TV Screen)
Normal Picture Poor Tracking
• The Automatic Tracking Control System will readjust the
tracking during Playback mode if the recording speed changes
or at the boundary between sections recorded on different
VCRs.
• If noise should remain on the TV screen after the track
adjustment has been completed by the Automatic Tracking
Control System, use the Manual Tracking mode.
• T o adjust Manual T racking, press the TR e or d button on the
Remote Control during Playback mode until the noise is
minimized or eliminated.
• To return to Auto Tracking mode, press both the TR e and d
buttons at the same time.
Note:
• A small mechanical noise may be heard when a cassette is
loaded in the VCR and no tape operation button is pressed.
This is normal. The unit is ready to immediately start playback
when the PLAY button is pressed.
If no key is pressed within 5 minutes, the VCR will return to
the normal Standby mode and the mechanical noise will stop.
• If noise should remain on the TV screen or vertical movement
appears during the Playback mode, Video Search mode or
Still Picture mode even after the Automatic Tracking
adjustment, use the Manual Tracking mode.
L FULL AUTOMATIC PLAYBACK FUNCTION
The Full Automatic Playback Function enables you to enjoy
playback with ease.
• When you insert a cassette with the erasure protection tab
removed, the VCR automatically turns on and plays back the
tape. When the tape reaches its end, the VCR automatically
rewinds the tape and ejects it.
Note:
• If the erasure protection tab is in place, press the PLAY button
after the cassette is loaded.
Note:
• TAPE speed (SP , LP, EP) is selected automatically for proper
playback.
12-15 13VT-CR10[E].pm65e 15/5/01, 7:24 pm15
15
Page 16

Playing A Cassette (Continued)
0:00:00 10:00AM OCT.15
DPSS 3
1:00:00 10:01AM OCT.15
DPSS 2
L STILL PICTURE
(1) Press the PAUSE/STILL button on the Remote Control during
Playback mode. This will freeze the picture on your TV screen.
To avoid damage to the tape, the VCR will resume normal
playback after about 5 minutes of a still picture.
(2) Press the PAUSE/STILL button during still mode for frame
advance.
(3) Press the PLAY button again to resume normal playback.
Note:
• During STILL playback, the picture may be distorted. This does
not indicate a problem with your set.
L VIDEO SEARCH
To quickly locate a desired segment of the tape, use the
following procedure while viewing the picture:
(1) During Playback mode, press the FF button for forward video
search, or the REW button for reverse video search.
By pressing the button, the speed of the Video Search changes
as below:
EP mode : 9 times faster 21 times faster
SP/LP mode : 5 times faster 7 times faster
(2) Press the PLAY button to resume normal playback.
Note:
• During these searches, the picture on the monitor screen
becomes monochrome and some picture noise appears. This
is not a malfunction.
L FAST FORWARD AND REWIND
• To move through the cassette faster, press the STOP button
and press the FF or REW button to fast forward or rewind the
cassette.
Note:
• The picture quality in Still Picture and Video Search is best
with tapes recorded in the EP mode.
For tapes recorded in the SP mode, the picture may be
distorted.
• Sound is muted during Still Picture and Video Search.
•“Non-standard” tapes, i.e. tapes with small hubs and have
less than 60 minutes running time, may not rewind or fast
forward at full speed.
This VCR uses standard video signals. Use only video
cassette tapes that carry the mark.
L DPSS (DIGITAL PROGRAM SEARCH SYSTEM)
With this feature you can quickly locate a desired section of
the tape. The DPSS feature makes use of index signals to
search for a specified tape segment and begin playback
automatically.
Current tape position
Rewind
2
1-1
Fast Forward
3
Index signals
Index Signal
An index signal is automatically recorded on the tape at the
start of recording.
16
(1) Load a tape containing index signals into the VCR.
(2) Select the index number of the desired program using the
DPSS e or d button on the Remote Control. With each press
of the button, the number changes. One of 19 programs can
be selected in either direction (one of up to 38 programs).
(Ex.: Third program after the current one.)
(3) The search starts immediately when you press the DPSS e
or d button. (When a signal is located, the displayed number
decreases.)
(4) When the selected index signal-encoded section is found,
playback begins automatically.
(On the TV Screen)
Note:
• DPSS may not function properly if the index signals are too
close together (within 5 minutes of each other).
• DPSS can be cancelled by pressing the PLAY or ST OP button.
• If the tape reaches its end or is rewound completely before
locating the desired index signal, DPSS is cancelled.
• DPSS may not function for damaged or worn tapes.
• This DPSS function cannot be used with tapes that contain
no index signals.
• The starting point of a program may vary slightly.
• DPSS does not operate during the record, timer stand-by, and
timer recording modes, or when there is no cassette loaded.
• Index signals for DPSS cannot be entered manually.
L EZ PLAY
After recording a program using the program timer, the program
timer will turn off. When you press the EZ PLA Y button on the
unit, the POWER will turn ON automatically and the recorded
tape will be rewound to the starting position and playback will
be automatically start. Press the STOP/EJECT button to stop
playback.
POWER/
WAKE-UP
PROGRAM
TIMER
PROGRAM TIMER
indicator
Note:
• After the program setting, when the VCR starts operating, the
PROGRAM TIMER indicator turns off and the program function
will be disabled.
• This VCR can search backward for up to 19 programs.
• This VCR may not be able to search and start playing back
the program recorded at the beginning of the tape.
• The starting position may not be accurate.
• This function may not work for index recording of less than 5
minutes.
TAMPER
REC
TIMER
PROOF
EZ PLAY
button
STOP/EJECT
button
16-19 13VT-CR10[E].pm65e 15/5/01, 7:25 pm16
Page 17

Recording A TV Program
L RECORDING SPEEDS
Your VCR enables you to select recording tape speed (SP, EP). Although recording time is shorter, SP provides a better picture.
Select the tape speed that best suits your needs.
The table below shows the recording speed and recording time for the three most popular cassettes.
CASSETTE
MODE
T-60
T-120
T-160
SP
(Standard Play)
1 hr.
2 hrs.
2 hrs. & 40 min.
During Playback mode, the VCR automatically senses the recording speed of the video cassette and plays it back correctly.
L CASSETTE ERASE PROTECTION
A cassette has a removable tab to prevent accidental erasure of recorded material. Removing the tab prevents recording. To
record on a video cassette with the tab removed, place adhesive tape over the tab opening.
EP
(Extended Play)
3 hrs.
6 hrs.
8 hrs.
Note:
Erasure Protection Tab
• A small mechanical noise may be heard after a cassette is inserted into the VCR and no tape operation button is pressed. This is
normal. The unit is ready to immediately start recording when the REC button is pressed. If no key is pressed within 5 minutes, the
VCR will return to the normal standby mode and the mechanical noise will stop.
L RECORDING A TV PROGRAM
PROCEDURE
OPERATION BUTTON ON SCREEN DISPLAY
1 Select the desired channel with the CHANNEL
UP/DOWN buttons or the CHANNEL SELECT
buttons (0~9, 100) on the Remote Control.
• 8 or 9 CHANNEL
UP/DOWN buttons
• CHANNEL SELECT
STOP 2
SP AIR
buttons (0~9, 100)
0:00:00 10:20AM OCT.15
2 Make sure the erasure protection tab is intact;
then insert the cassette. Press the TAPE
SPEED button on the Remote Control to set
TAPE
SPEED
The recording speed will change in this sequence:
SP EP
the recording speed (SP or EP).
3 Press the REC button. (If the erasure protection
tab is removed, the cassette will be ejected.)
REC 2
SP AIR
REC
0:00:00 10:20AM OCT.15
• To pause recording, press the PAUSE/STILL button on the Remote Control. To resume recording, press the PAUSE/STILL button
again. (Pause disengages automatically after about 5 minutes to avoid damage to the tape and the VCR, and Stop mode is
engaged.)
Note:
•“PAUSE” will appear on the TV screen if the P AUSE/STILL button is pressed in Stop mode. When it appears, press the STOP button
to disengage the Pause mode or press the REC button to enter the REC-PAUSE mode.
L TAPE COUNTER
The tape counter of your TV/VCR set is a real time counter. It shows the elapsed time during Recording or Playback mode. It is
useful for indexing segments on the tape for future reference. The tape counter can be displayed on the TV screen by pressing the
DISPLAY button. To reset the tape counter, press the COUNTER RESET button.
Note:
• The tape counter number does not change when playing back an unrecorded portion of a tape. If the counter number stops during
fast forward or rewind, that portion of the tape is unrecorded.
16-19 13VT-CR10[E].pm65e 15/5/01, 7:25 pm17
17
Page 18

Recording With The Timer
–
TAPE
TIMER ON/OFF
button
CONFIRM button
RETURN button
+/– button
COUNTER
RESET
REW FF
REC
TIMER
ON/OFF
CONFIRM
RETURN
TV • VCR COMBINATION
TAMPER
SPEED
PROOF
PLAY
STOP
PAUSE/STILL
DPSS
ed
+
–
PROG
SET
MENU
TAPE
SPEED
button
PROG
button
MENU
button
SET
button
RECORDING WITH THE TIMER
The timer has 5 program positions, which allow 5 programs to
be set for automatic recording over a one month period. Each
of the programs can be set to record on a daily or weekly
basis until the tape reaches its end.
Setting The Program Timer
Example:
to 6:30 p.m. every Friday for automatic recording in SP mode.
(1) Load a cassette with the
erasure protection tab in
place.
(2) Press the PROG button
on the Remote Control. (If
the time is not set at this
stage, the On-screen display
will show the CLOCK SET
menu. See page 12.)
When the Clock is not set,
select “AUT O CLOCK OFF”.
Then set the clock manually.
(3) Press the + or – button on
the Remote Control to
select the Program mode
you wish to use, then
press the SET button.
+ button;
button;
(4) Press the + or – button on
the Remote Control to
select the channel number,
then press the SET button.
To set the program in channel 10 from 4:30 p.m.
REC RESERVATION-1
MODE
CH
START
STOP
SPEED
SELECT + / — : SET SET
PREVIOUS RETURN : QUIT MENU
REC RESERVATION-1
MODE
CH
START
STOP
SPEED
SELECT + / — : SET SET
PREVIOUS RETURN : QUIT MENU
OCT.15 OCT.16 ~ NOV.13 NOV.14 DAILY
MON - SAT MON - FRI SAT FRI ~ MON SUN
OCT.15 OCT.16 ~ NOV.13 NOV.14 DAILY
MON - SAT MON - FRI SAT FRI ~ MON SUN
REC RESERVATION-1
MODE
CH
START
STOP
SPEED
SELECT + / — : SET SET
PREVIOUS RETURN : QUIT MENU
OCT.15
12
--:----
--:---SP
10:20AM OCT.15(FRI)
FRI
12
--:----
--:---SP
10:20AM OCT.15(FRI)
FRI
10
--:----
--:---SP
10:20AM OCT.15(FRI)
(5) Press the + or – button on
the Remote Control to
select the starting time
“hour”, then press the SET
button.
(6) Press the + or – button on
the Remote Control to
select the starting time
“minutes”, then press the
SET button.
(7) Press the + or – button on
the Remote Control to
select the stop time
“hour”, then press the SET
button.
(8) Press the + or – button on
the Remote Control to
select the stop time
“minutes”, then press the
SET button.
(9) Press the + or – button on
the Remote Control to
select the “Tape Speed”
(SP or EP), then press the
SET button.
(10)
Press the + or – button on
the Remote Control to
select “COMPLETE”, then
press the SET button. The
REC TIMER is now on
and the Program Timer
indicator will light up.
REC RESERVATION-1
MODE
CH
START
STOP
SPEED
SELECT + / – : SET SET
PREVIOUS RETURN : QUIT MENU
REC RESERVATION-1
MODE
CH
START
STOP
SPEED
SELECT + / — : SET SET
PREVIOUS RETURN : QUIT MENU
REC RESERVATION-1
MODE
CH
START
STOP
SPEED
SELECT + / — : SET SET
PREVIOUS RETURN : QUIT MENU
REC RESERVATION-1
MODE
CH
START
STOP
SPEED
SELECT + / — : SET SET
PREVIOUS RETURN : QUIT MENU
REC RESERVATION-1
MODE
CH
START
STOP
SPEED
SELECT + / — : SET SET
PREVIOUS RETURN : QUIT MENU
REC TIMER PROGRAM
MODE CH START STOP
1 FRI 10 4:30
2
3
4
5
COMPLETE NEXT CHANGE DELETE
SELECT + / — : SET SET
PREVIOUS RETURN : QUIT MENU
FRI
10
4:20PM
--:---SP
10:20AM OCT.15(FRI)
FRI
10
4:30PM
--:---SP
10:20AM OCT.15(FRI)
FRI
10
4:30PM
6:30PM
SP
10:20AM OCT.15(FRI)
FRI
10
4:30PM
6:30PM
SP
10:20AM OCT.15(FRI)
FRI
10
4:30PM
6:30PM
SP
10:20AM OCT.15(FRI)
PM 6:30PM
10:20AM OCT.15(FRI)
• To continue any additional program setting, press the + or
– button on the Remote Control to select the “NEXT” and
press the SET button. Then repeat the steps (3) through
(10) above.
• To make a correction to the current program, press the
Remote’s + or – button to select “CHANGE” and press
the + or – button to select program number, then press
the SET button. Next, repeat steps (3) through (10).
SP
18
16-19 13VT-CR10[E].pm65e 15/5/01, 7:25 pm18
Page 19

Recording With The Timer (Continued)
L To confirm the program content, press the CONFIRM
button on the Remote Control.
REC TIMER PROGRAM
MODE CH START STOP
1 DAILY 82 4:30
2 MON-FRI 123 10:00AM 1
3 15(SAT) 56 11:00AM
4
5
COMPLETE NEXT CHANGE DELETE
SELECT + / — : SET SET
PREVIOUS RETURN : QUIT MENU
10:20AM OCT.15(FRI)
PM 6:00PM
1:30AM EP
1:20PM
L To add to the program content:
(1) Press the CONFIRM
button on the Remote
Control.
(2) Press the + or – button
to select “NEXT”, then
press the SET button.
(3) To add a program, follow
the steps (3) through (10)
REC TIMER PROGRAM
MODE CH START STOP
1 DAILY 82 4:30
2 MON-FRI 123 10:00AM 1
3 15(SAT) 56 11:00AM
4
5
COMPLETE NEXT CHANGE DELETE
SELECT + / — : SET SET
PREVIOUS RETURN : QUIT MENU
10:20AM OCT.15(FRI)
PM 6:00PM
1:30AM EP
1:20PM
of “Setting The Program
Timer”.
L To change the program content:
(1) Press the CONFIRM
button on the Remote
Control.
(2) Press the + or – button
to select “CHANGE”, then
press the SET button.
(3) Press the + or – button
to select the program you
REC TIMER PROGRAM
MODE CH START STOP
1 DAILY 82 4:30
2 MON-FRI 123 10:00AM 1
3 15(SAT) 56 11:00AM
4
5
COMPLETE NEXT CHANGE DELETE
SELECT PROGRAM TO CHANGE
SELECT + / — : SET SET
PREVIOUS RETURN : QUIT MENU
10:20AM OCT.15(FRI)
PM 6:00PM
1:30AM EP
1:20PM
wish to correct, then press
the SET button.
To reset the program,
follow the steps (3)
through (10) of “Setting
The Program Timer”.
L To delete the program content:
(1) Press the CONFIRM
button on the Remote
Control.
(2) Press the + or – button
to select “DELETE”, then
press the SET button.
(3) Press the + or – button
to select the program you
REC TIMER PROGRAM
MODE CH START STOP
1 DAILY 82 4:30
2 MON-FRI 123 10:00AM 1
3 15(SAT) 56 11:00AM
4
5
COMPLETE NEXT CHANGE DELETE
SELECT PROGRAM TO DELETE
SELECT + / — : SET SET
PREVIOUS RETURN : QUIT MENU
10:20AM OCT.15(FRI)
PM 6:00PM
1:30AM EP
1:20PM
wish to delete, then press
the SET button.
(4) Press the CONFIRM
button to return to the
normal screen.
L Notes on the Timer Recording
• To correct any erroneous data entry made during program
timer setting work:
SP
SP
(1) Press the RETURN button on the Remote Control to
return to the item you wish to change.
(2) Press the + or – button on the Remote Control to reset
the data.
(3) To advance operation, press the SET button.
• If the video cassette runs out of tape before recording all
the programs, the VCR will stop, eject the cassette and
shut off automatically.
• If you keep disconnected the power cord, the program
SP
SP
timer will be cancelled.
• If “complete” is selected to enter the TIMER Standby mode
when there is no cassette inserted, the PROGRAM TIMER
indicator flashes for 3 seconds and the message “NO
TAPE” appears indicating that timer recording is not
possible.
• If “complete” is selected to enter the TIMER Standby mode
while a cassette with the erasure protection tab removed
is inserted, the PROGRAM TIMER indicator flashes and
the cassette is ejected.
• To stop timer recording, press the STOP button.
• If no buttons are pressed within 3 minutes while setting a
SP
SP
program, the set automatically returns to the normal
viewing mode.
• A program cannot be set unless all the recording input
data is set.
• During program timer setting (with the Program Timer
indicator ON), the video set remains inoperative. To use
the video set, press the TIMER ON/OFF button on the
Remote Control to turn off the Program Timer indicator.
After use, load the cassette tape into the video set, press
the TIMER ON/OFF button and check that the Program
Timer indicator lights up.
• Be certain that the correct TV signal mode (AIR/CABLE)
is selected before you enter the Timer Standby mode.
Otherwise, the VCR may not record the desired TV
channel.
• If two Pre-Recording Timers overlap, the End Recording
SP
SP
Time of the PROGRAM TIMER 1 will have priority over
the Start Recording Time of the PROGRAM TIMER 2.
Example:
Pre-Recording Timer’s Interval
PROGRAM TIMER 1
PROGRAM TIMER 2
7:00 8:00 8:30 10:00
Start
Recording
Start
Recording
Recording
End
End
Recording
Note:
• During the Program Timer Setting (with the Program Timer
indicator ON), it is impossible to change or delete the
program content. To perform these operations, press the
TIMER ON/OFF button on the Remote Control and turn
off the Program Timer indicator.
16-19 13VT-CR10[E].pm65e 15/5/01, 7:25 pm19
Actual Recording Timer’s Interval
End
Recording
PROGRAM TIMER 1
PROGRAM TIMER 2
7:00 8:30 10:00
Start
Recording
Start
Recording
End
Recording
19
Page 20

Tape Dubbing
Y our TV/VCR COMBINATION can dub (copy) video material from another video device.
The connections are shown below. Begin recording on the TV and playback on the source VCR simultaneously.
Video Connection
FRONT
POWER/
POWER
WAKE-UP
PROGRAM
TAMPER
TIMER
REC
TIMER
PROOF
CAMCORDER
VIDEO IN
FROM VIDEO SOURCE; To VIDEO OUT
FWDREV
VCR TV GAMEDVD
AUDIO IN
To AUDIO OUT
VIDEO EQUIPMENT
1. At the Source VCR
• Insert a pre-recorded tape.
2. At the TV/VCR
• Insert a blank tape.
3. Choose Input Source
• Either pressing of INPUT or CHANNEL UP/DOWN (8/9) buttons on the TV/VCR set or Remote Control can be used to
select the channel.
(Pictures and sounds inputted through VIDEO IN/AUDIO IN can be played back on the INPUT channel.)
4. Play Back the Tape
• Press the PLAY button on the source video equipment.
5. Record (Copy) the T ape
• Press the REC button.
Note:
• When connecting video or audio equipment to the television, be sure that the power is turned off in order to prevent damage
to either the television or the equipment being connected.
• It is the intent of SHARP that this product be used in full compliance with the copyright law of the United States and that prior
permission be obtained from copyright owners whenever necessary.
• For detailed information on the connection and use of auxiliary equipment, refer to the instruction manuals of the equipment
being used.
• The connection cables can be obtained from your local video source.
20
20-22 13VT-CR10[E].pm65e 15/5/01, 7:25 pm20
Page 21

Pre-Service Call Checklist
The following conditions do not always denote trouble. Therefore, perform the checks described below before calling for service.
Problem Suggested Solution
No Power. Make sure the power cord is plugged into the outlet.
Recording is impossible. Cassette erasure protection tab is missing.
Cassette is automatically ejected when either
the REC or TIMER ON/OFF button is pressed.
No color in the TV picture or poor color
reproduction.
Ghosts when receiving broadcast signals. Mountains, large buildings, trees, etc., in the vicinity may degrade the
Spots on the picture when receiving broadcast
signals.
No tape movement. Make sure the Pause/Still mode is not activated.
Snowy picture appears on the TV during
playback.
Cassette cannot be loaded. Make sure there is no other cassette inside.
Timer Recording does not work.
Clock is not set automatically. Clock may not be set automatically in some areas.
External electrical noise interfering with TV’s
operation.
Check the power outlet, fuse or circuit breaker.
Use another tape or place adhesive tape over the tab opening.
Check if a cassette is loaded.
Cassette erasure protection tab is missing.
Use another tape or place adhesive tape over the tab opening.
Make sure the antenna cable is correctly connected.
Refer to “PRESETTING THE CHANNELS”, set the channels correctly.
Check to see if the antenna cable is short circuited.
Refer to “VIDEO ADJUST”, adjust the contrast, color and/or brightness.
received broadcast signal. The picture may be improved by altering the
direction or height of your antenna.
Cars, neon signs, etc., may affect the picture received.
Place the antenna as far away as possible from roads and neon signs.
Make sure the tape has not already reached the beginning or end.
The heads may be contaminated with condensed moisture or the magnetic
coating of the video tape.
(In this case, the heads need to be cleaned. Ask the retailer or a Sharp
approved service center.)
Make sure the cassette is properly positioned and reinsert.
Press the remote’s TIMER ON/OFF button to activate Timer Recording.
(The Set’s TIMER ON/OFF indicator should glow.)
In this case, set the clock manually.
Unplug the TV and plug it in again after 2 minutes.
20-22 13VT-CR10[E].pm65e 16/5/01, 6:34 PM21
21
Page 22

Specifications
MODEL 13VT-CR10
Receiving System NTSC
Reception Channels
AIR VHF 2-13 ch
UHF 14-69 ch
CATV 1-125 ch
Channel Tuning 181-channel Reception PLL tuning system
Antenna Input Impedance VHF/UHF 75 ohm Unbalanced
Screen Size 13˝ Diagonally Measured
Terminals Audio/Video input x 1 (Front x 1)
Sound Output 1.0 W
Power Source AC 120 V, 60 Hz
Power Consumption 65 W
Video Cassette Format VHS NTSC Standard
Video Recording System Rotary Two-Head Helical Scanning
Number of Video Heads 2
Video Signal Standard NTSC Color System
(Playback/Recording)
Tape Width 12.7 mm (1/2 inches)
Tape Speed (SP) 33.35 mm/sec
Recording/Playing Time (SP) 120 minutes max. with T-120 tape
Operating Temperature 5 °C to 40 °C (41 °F to 104 °F)
Dimensions 147/8˝ (W) x 1515/64˝ (H) x 1449/64˝ (D)
Weight (approx.) 26.9 lbs. (12.2 kg)
• Design and specifications are subject to change without notice.
(LP) 16.68 mm/sec (Playback only)
(EP) 11.12 mm/sec
(LP) 240 minutes max. with T-120 tape (Playback only)
(EP) 360 minutes max. with T-120 tape
[378.0 mm (W) x 387.0 mm (H) x 375.0 mm (D)]
22
20-22 13VT-CR10[E].pm65e 15/5/01, 7:25 pm22
Page 23

Notes
23-24 13VT-CR10[E].pm65e 15/5/01, 7:25 pm23
23
Page 24

V ALID IN CANADA ONLY
LIMITED WARRANTY
Consumer Electronics Products
Congratulations on your purchase!
Sharp Electronics of Canada Ltd. (hereinafter called “Sharp”) gives the following express warranty to the first consumer
purchaser for this Sharp brand product, when shipped in its original container and sold or distributed in Canada by Sharp or by
an Authorized Sharp Dealer:
Sharp warrants that this product is free, under normal use and maintenance, from any defects in material and workmanship.
If any such defects should be found in this product within the applicable warranty period, Sharp shall, at its option, repair or
replace the product as specified herein.
This warranty shall not apply to:
(a) Any defects caused or repairs required as a result of abusive operation, negligence, accident, improper installation or
inappropriate use as outlined in the owner’s manual.
(b) Any Sharp product tampered with, modified, adjusted or repaired by any party other than Sharp, Sharp’s Authorized Service
Centres or Sharp’s Authorized Servicing Dealers.
(c) Damage caused or repairs required as a result of the use with items not specified or approved by Sharp, including but not
limited to head cleaning tapes and chemical cleaning agents.
(d) Any replacement of accessories, glassware, consumable or peripheral items required through normal use of the product
including but not limited to earphones, remote controls, AC adapters, batteries, temperature probe, stylus, trays, filters,
belts, ribbons, cables and paper.
(e) Any cosmetic damage to the surface or exterior that has been defaced or caused by normal wear and tear.
(f) Any damage caused by external or environmental conditions, including but no limited to transmission line/power line voltage
or liquid spillage.
(g) Any product received without appropriate model, serial number and CSA/CUL markings.
(h) Any products used for rental or commercial purposes.
(i) Any installation, setup and/or programming charges.
Should this Sharp product fail to operate during the warranty period, warranty service may be obtained upon delivery of the Sharp
product together with proof of purchase and a copy of this LIMITED WARRANTY statement to an Authorized Sharp Service
Centre or an Authorized Sharp Servicing Dealer. In home warranty service may be provided at Sharp’s decretion on any Sharp
television with the screen size of 27” or larger and on any Sharp Over The Range Microwave Oven.
This warranty constitutes the entire express warranty granted by Sharp and no other dealer, service centre or their agent or employee is
authorized to extend, enlarge or transfer this warranty on behalf of Sharp. To the extent the law permits, Sharp disclaims any and all liability
for direct or indirect damages or losses or for any incidental, special or consequential damages or loss of profits resulting from a defect
in material or workmanship relating to the product, including damages for the loss of time or use of this Sharp product or the loss of
information. The purchaser will be responsible for any removal, reinstallation, transportation and insurance costs incurred. Correction of
defects, in the manner and period of time described herein, constitute complete fulfilment of all obligations and responsibilities of Sharp
to the purchaser with respect to the product and shall constitute full satisfaction of all claims, whether based on contract, negligence, strict
liability or otherwise.
Colour Television 1 year (picture tube 1 additional year)
LCD Projector 1 year (bulb 90 days)
LCD TV 1 year
Video Cassette Recorder 1 year
Camcorder 1 year
TV/VCR Combo 1 year (picture tube 1 additional year)
Audio Products 1 year
Microwave Oven 2 years (magnetron 3 additional year for part only)
Vacuum Cleaner 1 year
DVD Player 1 year
WARRANTY PERIODS
To obtain the name and address of the nearest Authorized Sharp Service Centre or Dealer, please contact:
SHARP ELECTRONICS OF CANADA LTD
335 Britannia Road East
Mississauga, Ontario
L4Z 1W9
(905) 568-7140 or 1-(877) SHARP-CC
Web-site : www.sharp.ca
335 BRITANNIA ROAD EAST, MISSISSAUGA, ONTARIO L4Z 1W9
24
23-24 13VT-CR10[E].pm65e 15/5/01, 7:25 pm24
SHARP ELECTRONICS OF CANADA LTD.
SHARP ELECTRONICS OF CANADA LTD.
SHARP CORPORATION
Printed in Malaysia
TINS-7456PEZZ
0107-MSP
Page 25

COMBINÉ TÉLÉ-MAGNÉTOSCOPE
MODÈLE
13V T-CR10
L MODE D’EMPLOI L
HAUTE QUALITÉ
E
n sa qualité de partenaire ENERGY STAR®, SHARP a déterminé que ce produit répond aux prescriptions ENERGY
®
S
TAR
en matière d’utilisation efficace de l’énergie. ENERGY STAR
TABLE DES MATIÈRES
INFORMATIONS IMPORTANTES ........................................ 2
Accessoires fournis ............................................................... 3
Avant d’utiliser votre télé-magnétoscope ............................. 3
Connexions d’antenne .......................................................... 4
Description des commandes ................................................ 5
Emplacement des touches de commande
(Télécommande) ................................................................... 6
Pour regarder une émission télévisée ..................................7~11
1 ALIMENTATION
2 VOLUME
3 SÉLECTION DES CANAUX
4 RAPPEL D’AFFICHAGE
5 FONCTIONS DE MENU
6 MENU TRILINGUE AFFICHÉ SUR ÉCRAN
7 PRÉRÉGL AUTO CANAL au cours de la
première utilisation ....................................................... 8
8 MINUTEUR DE RÉVEIL .............................................. 8
9 MINUTERIE DE MISE HORS TENSION ................... 9
! RÉGLAGE IMAGE ...................................................... 9
SOUS-TITRAGE ......................................................... 9~10
# PRÉRÉGLAGE DES CANAUX ................................... 10~11
PREREGL AUTO CANAL ........................................... 10
RÉGLAGE CANAL ...................................................... 11
Verrouillage de fonctionnement ............................................ 12
Réglage de l’horloge ............................................................. 12~13
1 RÉGLAGE AUTOMATIQUE DE L’HORLOGE ........... 12
2 RÉGLAGE MANUEL DE L’HORLOGE ...................... 13
PAGE
®
est une marque déposée aux Etats-Unis.
Lecture d’une cassette .......................................................... 14~16
ÉCONOMIE D’ÉNERGIE
ÉCRAN BLEU
RÉPÉTITION AUTOMATIQUE
S. IMAGE (SUPER IMAGE)
MISE EN PLACE D’UNE CASSETTE VIDÉO
ÉJECTION DE LA CASSETTE VIDÉO
LECTURE
SYSTÈME DE CONTRÔLE AUTOMATIQUE DE L’ALIGNEMENT
FONCTION DE REPRODUCTION ENTIÈREMENT AUTOMATIQUE
ARRÊT SUR IMAGE
RECHERCHE VIDÉO
AVANCE RAPIDE ET REMBOBINAGE
DPSS (Système digital de recherche d’un programme)
EZ PLAY
Enregistrement d’une émission télévisée ............................. 17
VITESSES D’ENREGISTREMENT
PROTECTION CONTRE L’EFFACEMENT
ENREGISTREMENT D’UNE ÉMISSION TÉLÉVISÉE
COMPTEUR DE BANDE
Enregistrement avec le minuteur .......................................... 18~19
Duplication d’une cassette .................................................... 20
Avant d’appeler un technicien .............................................. 21
Caractéristiques ..................................................................... 22
Garantie limitée ...................................................................... 24
PAGE
7456 PE
01 13VT-CR10[F].pm65e 18/5/01, 1:48 PM1
Page 26

SHARP vous souhaite la bienvenue. Nous sommes très heureux de vous savoir propriétaire d’un combiné télé-magnétoscope
de SHARP — fabriqué pour offrir une qualité, une fiabilité et un rendement remarquables.
Chaque combiné télé-magnétoscope de SHARP a été correctement syntonisé et réglé afin d’assurer une image couleur et un
son parfaits, et a subi à l’usine les tests de contrôle de qualité les plus stricts. Ce MODE D’EMPLOI vous permettra de régler
l’image et la couleur selon vos goûts personnels.
Nous souhaitons sincèrement que ce nouveau combiné télé-magnétoscope de SHARP vous donne entière satisfaction et que
le plaisir durera pendant des années encore.
Veuillez lire attentivement les instructions suivantes et garder cette brochure sous la main pour fins de consultation.
IMPORTANT
Pour faciliter la déclaration en cas de perte ou de vol, noter les numéros de modèle
et de série du téléviseur dans l’espace prévu. Ces numéros sont situés au dos du
téléviseur.
Numéro de modèle :
Numéro de série :
INFORMATIONS IMPORTANTES
L’utilisation efficace de l’énergie revêt une importance croissante pour les consommateurs, tant aux Etats-Unis qu’au Canada.
ENERGY STAR est une marque déposée américaine qui indique qu’un produit respecte les recommandations relatives à
l’utilisation efficace de l’énergie.
QU’EST-CE QU’ENERGY STAR
Les téléviseurs et les magnétoscopes consomment de l’énergie, qu’ils soient allumés ou éteints. La consommation d’énergie
des téléviseurs et des magnétoscopes inutilisés coûte chaque année au nord-américain plus de $1 milliard. Les nouveaux
modèles ENERGY STAR® éliminent jusqu’à 75% de cette “perte” d’énergie. Autrement dit, la note d’électricité des consommateurs
peut être ainsi réduite de plus de $500 millions par an.
Ces économies d’énergie permettront de réduire le gaspillage des sources d’énergie fossiles ainsi que la pollution au dioxyde
de carbone et le réchauffement de la planète qui en découlent. Si chaque famille nord-américaine remplaçait ses téléviseurs et
ses magnétoscopes par des modèles ENERGY STAR®, l’émission de dioxyde de carbone serait réduite de cinq millions de
tonnes chaque année, ce qui équivaudrait à éliminer la pollution engendrée par plus d’un million de voitures.
En utilisant des produits ENERGY STAR®, vous réduisez votre note d’électricité et vous consommez moins d’énergie. Vous
optez ainsi pour une attitude qui est tout à la fois économe et profitable à l’environnement.
AVERTISSEMENT :
AVERTISSEMENT DE FORMATION DE CONDENSATION
Lorsque l’appareil est déplacé d’un endroit froid à un endroit chaud, brancher l’appareil, le mettre sous tension et
attendre environ 2 heures avant de passer une bande.
Ce laps de temps permet à la condensation qui s’est éventuellement formée dans l’appareil de s’évaporer. Si
cette opération n’est pas effectuée, la bande ou les têtes vidéo peuvent être endommagées.
Après les deux heures d’évaporation, l’image peut paraître floue pendant les premières minutes de fonctionnement
du magnétoscope mais ces parasites disparaîtront rapidement par la suite.
®
POUR ÉVITER TOUT RISQUE D’INCENDIE OU D’ÉLECTROCUTION NE
PAS LAISSER CET APPAREIL DANS UN ENDROIT HUMIDE.
ATTENTION :
POUR ÉVITER LES CHOCS ÉLECTRIQUES, INTRODUIRE LA LAME
LA PLUS LARGE DE LA FICHE DANS LA BORNE CORRESPONDANTE DE LA PRISE ET POUSSER JUSQU’AU FOND.
ATTENTION :
NE PAS PLACER CET APPAREIL SUR UNE TABLE, UN CHARIOT, UN
TRÉPIED OU UN SUPPORT QUI N’EST PAS STABLE. L’APPAREIL
POURRAIT TOMBER ET CAUSER DES BLESSURES GRAVES ET DES
DOMMAGES IMPORTANTS. UTILISER SEULEMENT SUR UNE TABLE, UN
CHARIOT, UN TRÉPIED OU UN SUPPORT RECOMMANDÉS PAR LE
FABRICANT OU VENDU AVEC L’APPAREIL. SUIVRE LES INSTRUCTIONS
DU FABRICANT POUR INSTALLER L’APPAREIL ET UTILISER LES
DISPOSITIFS DE MONTAGE RECOMMANDÉS PAR LE FABRICANT.
L’ENSEMBLE APPAREIL/SUPPORT DOIT ÊTRE DÉPLACÉ AVEC SOIN.
DES ARRÊTS BRUSQUES, UNE FORCE EXCESSIVE ET DES SURFACES
INÉGALES PEUVENT ENTRAÎNER LE BASCULEMENT DE L’ENSEMBLE.
2
02-03 13VT-CR10[F].pm65e 18/5/01, 1:50 PM2
Page 27

Accessoires fournis
•••
•
TR
d
POWER
e
CH
VOL
100
0
5
•
INPUT DISPLAY MUTE
1 2 3
4 6
7 8 9
FLASHBACK
ed
PROOF
TAMPER
PAUSE/STILL
DPSS
TAPE
SPEED
PLAY
STOP
RESET
COUNTER
REW FF
REC
MENU
PROG
+
SET
–
RETURN
TV • VCR COMBINATION
TIMER
ON/OFF
CONFIRM
Télécommande à infrarouges
Numéro de pièce : RRMCG1330PESA
Piles sèches de
format AA
Avant d’utiliser votre télé-magnétoscope
Emplacement
• Pour assurer son fonctionnement normal, votre téléviseur doit être placé dans un endroit bien aéré. Ne pas placer le dos du
téléviseur dans un endroit où l’air ne circule pas.
• La qualité de l’image couleur peut se trouver affectée par une force magnétique. S’assurer qu’il ne se trouve pas d’aimants,
d’horloges électriques, de jouets aimantés ou d’autres substances magnétiques, comme du fer, à proximité du téléviseur.
Alimentation
Ce téléviseur fonctionne sur 120 volts, 60 hertz (courant secteur normal) et est doté d’une fiche polarisée. S’il s’avère
impossible d’insérer la fiche à fond dans la prise, inverser la fiche. Si cela est également impossible, prendre contact avec
un électricien. Ne pas tenter de forcer le dispositif de sécurité de cette fiche polarisée.
Remarque :
• Si on prévoit ne pas utiliser l’appareil pendant une période prolongée telle que des vacances, le débrancher afin d’économiser
de l’énergie. (Lorsque le téléviseur est branché, un faible courant continue de circuler, même quand l’interrupteur d’alimentation
POWER se trouve en position d’arrêt (OFF).
• L’image peut se trouver parasitée si un syntoniseur FM ou un récepteur radio est placé à proximité du téléviseur et qu’il est
mis sous tension. Dans ce cas, mettre l’un des deux appareils hors tension.
• Si l’on désire écouter un programme en AM, mettre le téléviseur hors tension. Les interférences qu’il génère lorsqu’il est en
service empêchent la réception des émissions AM.
L Avant de mettre le téléviseur en marche, préparer la télécommande
Introduire les piles avant d’utiliser la télécommande.
Introduire les piles
Soulever
Couvercle
du compartiment
à piles
• Avec l’ongle du pouce, soulever la fente dans le sens indiqué par la flèche afin de retirer le couvercle arrière. Insérer deux
piles crayon (“AA”). Respecter scrupuleusement les polarités des bornes e/d de la pile et les indications e/d situées à
l’intérieur du compartiment.
02-03 13VT-CR10[F].pm65e 18/5/01, 1:50 PM3
3
Page 28

Connexions d’antennes
Antennes
• La réception d’images couleur est plus délicate que celle d’images noir et blanc. II est par conséquent fortement conseillé
d’utiliser une antenne extérieure de bonne qualité.
On trouvera ci-dessous une brève explication des types de connexions réalisées avec les différents systèmes d’antenne:
1. Un système de 75 ohms se caractérise généralement par
un câble rond doté d’un connecteur de type F susceptible
d’être branché sur une borne sans l’aide d’outils particuliers
(non fourni).
Câble coaxial 75 ohms (rond)
2. Un système de 300 ohms est un câble double plat qui
peut être connecté à une borne 75 ohms par l’intermédiaire
d’un adaptateur 300/75 ohms (non fourni).
Câble double 300 ohms (plat)
CONNEXION D’ANTENNE EXTÉRIEURE
• S’inspirer de l’un des deux schémas suivants en cas d’utilisation d’une antenne extérieure.
A : Avec une antenne extérieure combinée VHF/UHF.
B : Avec deux antennes extérieures séparées VHF et/ou UHF.
• Connecter un câble conducteur d’antenne extérieure au connecteur ANT/CABLE situé à l’arrière du téléviseur.
Connecteur de type F
A. Combinaison d’antennes VHF / UHF
ADAPTATEUR
300/75 ohms
ANTENNE
THF (VHF)/UHF
Câble
coaxial
75 ohms
(non fourni)
ou
Câble double
300 ohms
PANNEAU ARRIÈRE
DU TÉLÉVISEUR
ANTENNE
THF (VHF)/UHF
B. Antennes séparées VHF / UHF
ANTENNE
THF (VHF)
ou
ANTENNE
UHF
Câble double
Câble double
Câble coaxial
300 ohms
300 ohms
75 ohms
MULTIPLEXEUR
(non fourni)
ENTRÉE
SORTIE
PANNEAU ARRIÈRE
DU TÉLÉVISEUR
CONNEXION DU CÂBLE COAXIAL (TÉLÉDISTRIBUTION)
• Le connecteur du câble coaxial 75 ohms est intégré à l’appareil pour faciliter le branchement. Lors du branchement du câble
coaxial 75 ohms à l’appareil, visser le câble 75 ohms au connecteur de câble coaxial ANT/CABLE.
• Certaines compagnies de télédistribution proposent des “chaînes payantes”. Les signaux de ces chaînes payantes étant
codés, la compagnie de télédistribution fournit généralement un convertisseur/décodeur à ses abonnés. Ce convertisseur/
décodeur est indispensable pour regarder les chaînes codées. (Il convient de régler le téléviseur sur le canal 3 ou 4. C’est
généralement un de ceux-ci qui est utilisé. En cas d’hésitation, consulter la compagnie de télédistribution.) Pour des
informations plus détaillées sur la manière d’installer le câble TV, consulter la compagnie de télédistribution. Ci-dessous, on
trouvera l’explication d’une des méthodes possibles d’utilisation du convertisseur/décodeur fourni par la compagnie de
télédistribution.
On notera que cette méthode requiert l’utilisation d’un commutateur radiofréquence RF avec positions A et B (non fourni).
Position “A” sur le commutateur RF (non fourni) : Il est possible de visionner tous les canaux non codés au moyen des
touches de canaux du téléviseur.
Position “B” sur le commutateur RF (non fourni) : Il est possible de visionner tous les canaux codés par l’intermédiaire du
Commutateur RF (non fourni)
A
ENTRÉE
SORTIE
B
SORTIE
convertisseur/décodeur au moyen des touches de canaux du décodeur.
Répartiteur
de signal
bidirectionnel
(non fourni)
Ligne de
câblodiffusion
ENTRÉE
Convertisseur/
Décodeur de câblodiffusion
Remarque :
(non fourni)
• Consulter un revendeur ou un Centre de service SHARP pour toute information sur le type de répartiteur, de commutateur
RF ou de multiplexeur requis.
4
04 13VT-CR10[F].pm65e 18/5/01, 1:51 PM4
Page 29

Description des commandes
AVANT
Touche
d’alimentation (POWER)
FENÊTRE DU CAPTEUR
DE SIGNAUX DE LA TÉLÉCOMMANDE
POWER/
WAKE-UP
TIMER
PROGRAM
REC
TIMER
Indicateur de programmateur
(PROGRAM TIMER)
Indicateur d’enregistrement (REC)
Indicateur d’alimentation
(POWER)
ARRIÈRE
TAMPER
PROOF
Indicateur de
verrouillage de
fonctionnement
(TAMPER PROOF)
POWER/
POWER
WAKE-UP
PROGRAM
TAMPER
TIMER
REC
TIMER
PROOF
Touches
d’augmentation/
de réduction du
volume (VOL)
Touches
des canaux
en ordre
croissant/
décroissant
(CH)
EZ
PLAY
button
Prises d’entrée audio/vidéo
(VIDEO/AUDIO IN)
Touche
d’enregistrement
(REC)
Touche de
rembobinage
(Recherche
vidéo arrière)
Touche
de
lecture
(PLAY)
Touche
d’arrêt/éjection
(STOP/EJECT)
Touche d’avance rapide
(Recherche vidéo avant)
05-07 13VT-CR10[F].pm65e 18/5/01, 1:52 PM5
Prise ANT/CABLE
(75 )
5
Page 30

Emplacement des touches de commande (Télécommande)
Location Of Control’s Buttons (Remote Control)
Émetteur infrarouge de signal de la
télécommande
Entrée (INPUT)
Sélection TV/VIDEO
Alimentation marche/arrêt
(POWER)
Sélection des canaux
Retour (FLASHBACK)
Revient au canal regardé
précédemment.
Réinitialisation du compteur
(COUNTER RESET)
• Utilisée pour remettre le
compteur à zéro.
Vitesse de la bande
(TAPE SPEED)
• Utilisée pour sélectionner la
vitesse de la bande.
Lecture (PLAY)
• Utilisée pour procéder à la
lecture de la bande.
• Utilisée pour annuler le mode
de pause/arrêt sur image (PAUSE/
STILL) et revenir au mode de
lecture normale.
Rembobinage (REW)
• Utilisée pour rembobiner la bande
ou pour procéder à une recherche
vidéo arrière en cours de lecture.
Enregistrement (REC)
• Utilisée pour enregistrer un
programme.
–, +
Mise en marche/arrêt de la
minuterie (TIMER ON/OFF)
Confirmation (CONFIRM)
• Utilisée pour confirmer le réglage de la
programmation.
Retour (RETURN)
Réglage (SET)
POWER
INPUT DISPLAY MUTE
1 2 3
•
4 5 6
7 8 9
FLASHBACK
0
COUNTER
RESET
PLAY
REW FF
STOP
REC
TIMER
ON/OFF
CONFIRM
–
RETURN
TV • VCR COMBINATION
100
TAPE
SPEED
+
SET
VOL
CH
TAMPER
PROOF
PAUSE/STILL
DPSS
ed
PROG
MENU
e
•
•
TR
•
•
d
Affichage (DISPLAY)
• Utilisée pour changer l’affichage
sur écran.
Mise en sourdine (MUTE)
Appuyer pour couper le son.
Appuyer de nouveau pour le remettre
au niveau précédent.
Appuyer sur la touche MUTE pour
passer automatiquement en mode
sous-titrage (CLOSED CAPTION) si
le signal contient des informations
de sous-titrage.
Augmentation/réduction du volume
(VOL)
Sélection des canaux en ordre
croissant/décroissant (CH)
(Touches d’alignement
•
Utilisée pour sélectionner le CANAL.
• Utilisée pour régler l’alignement
pendant la lecture d’une bande.
Verrouillage de fonctionnement
(TAMPER PROOF)
• Permet de verrouiller les
modifications sur le mode de
fonctionnement courant.
Avance rapide (FF)
• Utilisée pour avancer rapidement
la bande ou pour procéder à une
recherche vidéo avant rapide en
mode de lecture.
Arrêt (STOP)
• Utilisée pour arrêter la bande.
Pause/Arrêt sur image
(PAUSE/STILL)
•
Utilisée pour arrêter temporairement
la bande en mode d’enregistrement.
•
Utilisée pour afficher une image fixe
en mode de lecture.
DPSS (e / d)
• Appuyer sur la touche (e / d)
pour rechercher un signal d’index
et commencer automatiquement la
lecture.
Programme (PROGRAM)
•
Appuyer sur cette touche pour passer
dans le mode d’enregistrement par
programmateur.
Menu (MENU)
•
Utilisée pour sélectionner un menu
à l’écran.
e
/ d)
6
05-07 13VT-CR10[F].pm65e 18/5/01, 1:52 PM6
Page 31

Pour regarder une émission télévisée
1 ALIMENTATION
• Appuyer sur la touche d’alimentation POWER pour mettre
le téléviseur sous tension.
(Le témoin d’alimentation POWER de couleur ROUGE
s’illumine.)
Le son est audible immédiatement et l’image apparaît 5 à
10 secondes plus tard.
• Appuyer de nouveau sur la touche d’alimentation POWER
pour mettre le téléviseur hors tension.
(Le témoin d’alimentation POWER s’éteint.)
2 VOLUME
• Appuyer sur la touche VOL UP (8) pour augmenter le son
jusqu’au niveau désiré, puis la relâcher.
• Appuyer sur la touche VOL DOWN (9) pour diminuer le
volume.
L Pour interrompre momentanément le son
• Appuyer sur la touche MUTE de la télécommande pour
couper momentanément le son.
“MUTE” apparaît sur l’écran pour confirmer que la fonction
est activée.
• Appuyer une nouvelle fois sur la touche MUTE pour
remettre le son au niveau de volume précédent.
33
3 SÉLECTION DES CANAUX
33
• Le canal désiré peut être sélectionné immédiatement en
appuyant sur les touches de sélection des canaux (de “ 0 ”
à “ 9 ” et “ 100 ”) de la télécommande, ou les touches des
canaux CHANNEL UP (8)/CHANNEL DOWN (9) de la
télécommande ou du téléviseur.
• Pour sélectionner des numéros de canal supérieurs à
“ 99 ”. Appuyer d’abord sur la touche “ 100 ” de la
télécommande; appuyer sur les deux derniers chiffres pour
compléter le numéro du canal désiré.
• Le numéro du canal sélectionné apparaît sur l’écran.
Exemple :
(1) Pour sélectionner le canal 2 :
Appuyer sur les touches “ 0 ” et “ 2 ”.
Pour sélectionner le canal 69 :
Appuyer sur les touches “ 6 ” et “ 9 ”.
Pour sélectionner le canal 125 (le mode de câblovision
seulement) :
Appuyer sur les touches “ 100 ”, “ 2 ” et “ 5 ”.
(2) Si les canaux ont été préréglés, il est possible de sauter
d’un canal inférieur à un canal supérieur en appuyant sur
la touche CH UP (8), et de faire le contraire en appuyant
sur la touche CH DOWN (9).
Remarque :
• Pour la méthode de préréglage des canaux, se reporter à
la page 11.
44
4 RAPPEL D’AFFICHAGE
44
• Des pressions successives sur la touche DISPLAY de la
télécommande permettent de faire apparaître les
informations ci-dessous dans l’ordre suivant.
Remarque :
• Lorsque le mode sous-titrage (CLOSED CAPTION) est
engagé, l’affichage sur l’écran disparaît automatiquement
après environ 3 secondes.
• Pour toute information sur le sous-titrage, se reporter à la
page 9~10.
AFFICHAGE
Appuyer
une fois*
Après 3
secondes
environ
Appuyer
•
Heure et date
•
Numéro de canal
•
(L’affichage d’opération de cassette)
•
(Le mode de vitesse de bande --- SP, LP, EP)
•
(Compteur de bande)
•
Numéro de canal
•
(L’affichage d’opération de cassette)
•
(Le mode de vitesse de bande --- SP, LP, EP)
•
(Compteur de bande)
•
Vide l’affichage
deux fois
Les éléments entre ( ) seront affichés lorsqu’une cassette
est chargée dans le magnétoscope.
55
5 FONCTIONS DE MENU
55
LL
L Appel des fonctions
LL
(1) Appuyer sur la touche MENU de la télécommande pour
appeler l’écran du MENU.
(2) Appuyer sur la touche + ou – de la télécommande pour
sélectionner le mode de fonction désiré. À chaque pression
sur la touche + ou –, le repère “ :” se déplace vers le bas
ou le haut.
(3) Appuyer sur la touche SET de la télécommande pour
accéder au mode de fonction désiré.
• Pour sortir de l’écran du MENU, appuyer sur la touche
MENU de la télécommande.
MENU
MINUTEUR
REGLAGE IMAGE
SOUS-TITRAGE
FONCTION
HORLOGE
LANGUE
REGLAGE CANAL
SELEC. + / – : REGLE SET
REVENIR RETURN : QUITT MENU
(Écran de MENU)
6 MENU TRILINGUE AFFICHÉ SUR ÉCRAN
L L’une des trois langues suivantes : ANGLAIS, ESPA-
GNOL ou FRANÇAIS.
LL
L Sélection de la langue de l’affichage sur écran.
LL
(1)
Sélectionner “LANGUE”
à l’écran MENU en
appuyant sur la touche +
ou –, puis appuyer sur la
touche SET.
(2)
Appuyer sur la touche +
ou – pour sélectionner la
langue (English, Español
ou Français) que vous
souhaitez afficher, puis
appuyer sur la touche
SET.
MENU
TIMER
VIDEO ADJUST
CLOSED CAPTION
FUNCTION
CLOCK
LANGUAGE
CH SETTING
[]
SELECT + / – : SET SET
PREVIOUS RETURN : QUIT MENU
LANGUE
ENGLISH
ESPAÑ OL
FRANCAIS
SELEC. + / – : REGLE SET
REVENIR RETURN : QUITT MENU
[] [[]
[]
[]
[] [[]
[]
]
]
05-07 13VT-CR10[F].pm65e 18/5/01, 1:52 PM7
7
Page 32

Pour regarder une émission télévisée (suite)
7 PRÉRÉGL AUTO CANAL au cours de la
première utilisation
Lorsque le téléviseur est mis sous tension pour la première fois,
il mémorise automatiquement les différents canaux.
Suivre les instructions suivantes avant d’appuyer sur
l’interrupteur d’alimentation.
1) Insérer les piles dans la télécommande. (Voir page 3)
2) Raccorder le câble d’antenne au téléviseur. (Voir page 4)
3) Brancher le cordon d’alimentation sur la prise murale.
(1) Appuyer sur la touche
POWER du téléviseur ou
de la télécommande pour
mettre le téléviseur sous
tension. Le mode SELECT
LANGUAGE s’affiche.
(2) Appuyer sur la touche + ou
– de la télécom
sélectionner
(ANGLAIS),
(ESPAGNOL)
mande pour
“ENGLISH”
“ESPAÑOL”
ou
“FRANCAIS”.
(3) Appuyer sur la touche SET
de la télécommande pour
accéder au mode
PREREGL AUTO CANAL.
(4) Appuyer sur la touche SET
de la télécommande.
Le syntoniseur recherche automatiquement les canaux actifs
tant ceux captés par l’antenne que par le câble. (Le numéro de
canal augmente automatiquement lorsqu’il apparaît.)
Pour annuler PREREGL AUTO CANAL, appuyer sur la touche
SET de la télécommande.
Pour revenir au mode de réglage, se reporter à la page 10.
(5) L’écran “HORLOGE
REGLEE” s’affiche.
Régler l’horloge de la
manière décrite aux
étapes (2) et (3) de la
page 12.
Remarque :
• Si PREREGL AUTO CANAL ne mémorise pas tous les
canaux diffusés dans la région, se reporter à la page 10
pour plus d’informations sur la mémorisation manuelle des
chaînes au moyen de REGLAGE CANAL.
• Il peut être difficile d’effectuer le PREREGLAGE lorsque le
signal est faible, que la fréquence de cycle du canal est
incorrecte, ou encore en présence d’interférences. Se
reporter à la page 11 pour plus d’informations sur la
mémorisation manuelle des canaux à l’aide de REGLAGE
CANAL.
8
SELECT LANGUAGE
ENGLISH
ESPAÑOL
FRANCAIS
SELECT + / – : SET SET
(Mode SELECT LANGUAGE)
CHOISIR LANGUE
ENGLISH
ESPAÑ OL
FRANCAIS
SELEC. + / – : REGLE SET
RACCORD ANTENNE OU CABLE.
LANCER PREREGL AUTO CANAL?
OUI SET
NON MENU
(Mode PREREGL AUTO CANAL)
ATTENDEZ SVP.
AUTO PROGRAMMATION
ANTENNE 2
FIN SET
HORLOGE REGLEE
AUTO HORLOGE
EDS CANAL
MOIS
JOUR
ANNEE
HEURE
SELEC. + / – : REGLE SET
REVENIR RETURN : QUITT MENU
MARCHE
AUTO
---
--
----
--:----
8 MINUTEUR DE RÉVEIL
L Le réglage du minuteur de réveil commande la mise
sous tension automatique du téléviseur ou du
magnétoscope à une heure déterminée.
(1) Appuyer sur la touche
MENU de la télécommande pour afficher
l’écran MENU.
(2) Appuyer sur la touche +
ou – de la télécommande
pour sélectionner
“MINUTEUR” et appuyer
sur la touche SET. Si
l’horloge n’est pas réglée,
son menu de réglage
s’affiche. Commencer
alors par régler l’horloge.
(3) Appuyer sur la touche +
ou – pour sélectionner
“SOUS TENS”, et appuyer
sur la touche SET.
(4) Appuyer sur la touche +
ou – de la télécommande
pour sélectionner les
“heures”, et appuyer sur la
touche SET. La position
jaune se déplace jusqu’à
la partie “minutes”.
Appuyer de nouveau sur
la touche + ou – de la
télécommande pour
sélectionner les “minutes”,
et appuyer sur la touche
SET.
(5) Appuyer sur la touche +
ou – pour sélectionner la
mise sous tension du
téléviseur ou du
magnétoscope.
(6) Appuyer sur la touche
SET, puis sur la touche
MENU.
Remarque :
• Pour effacer le réglage du minuteur de réveil, sélectionner
“ARRET” à l’étape (5).
• Une fois que le téléviseur et/ou le magnétoscope est sous
tension et qu’aucune opération n’est activée ou qu’aucune
de ses fonctions n’a été utilisée pendant 2 heures, il est
automatiquement mis hors tension par mesure de sécurité.
• Si vous avez sélectionné “VIDEO MAR.” à l’étape (5) et si
aucune cassette n’est chargée, le téléviseur s’allume plutôt
que le magnétoscope.
MENU
MINUTEUR
REGLAGE IMAGE
SOUS-TITRAGE
FONCTION
HORLOGE
LANGUE
REGLAGE CANAL
SELEC. + / – : REGLE SET
REVENIR RETURN : QUITT MENU
MENU
MINUTEUR
REGLAGE IMAGE
SOUS-TITRAGE
FONCTION VCR
HORLOGE
LANGUE
REGLAGE CANAL
SELEC. + / – : REGLE SET
REVENIR RETURN : QUITT MENU
MINUTEUR
SOUS TENS.
HORS TENS.
SELEC. + / – : REGLE SET
REVENIR RETURN : QUITT MENU
MINUTEUR
SOUS TENS.
HORS TENS.
SELEC. + / – : REGLE SET
REVENIR RETURN : QUITT MENU
MINUTEUR
SOUS TENS.
HORS TENS.
SELEC. + / – : REGLE SET
REVENIR RETURN : QUITT MENU
12:00 AM
ARRET
ARRET
10:00AM SEP.15 (VEN)
[]
[] [[]
[]
10:20 AM
ARRET
ARRET
10:00AM SEP.15 (VEN)
[]
[] [[]
[]
10:00 AM
VIDEO MAR.
ARRET
10:00AM SEP.15 (VEN)
[]
[] [[]
[]
Le témoin du minuteur de réveil
passe du rouge à l’orange.
Le témoin du minuteur de réveil
passe au vert en mode de veille.
]
]
]
08-11 13VT-CR10[F].pm65e 18/5/01, 1:53 PM8
Page 33

Pour regarder une émission télévisée (suite)
PLAY
REW FF
STOP
+/– button
Touches +/–
Touche
RETURN button
RETURN
REC
TIMER
ON/OFF
CONFIRM
RETURN
TV • VCR COMBINATION
PAUSE/STILL
DPSS
ed
+
–
PROG
SET
MENU
Touche
MENU button
MENU
SET button
Touche
SET
9 MINUTERIE DE MISE HORS TENSION
L Réglage de la minuterie de mise hors tension pour
une mise hors circuit à une heure préréglée.
(1)
Sélectionner “MINUTEUR
l’écran MENU, et appuyer sur
la touche SET.
Si l’horloge n’est pas
réglée, son menu de
réglage s’affiche.
Commencer alors par
régler l’horloge de la
manière indiquée à la
page
(2) Appuyer sur la touche +
12.
ou – pour sélectionner
“HORS TENS.”, et
appuyer sur la touche
SET.
” sur
MENU
MINUTEUR
REGLAGE IMAGE
SOUS-TITRAGE
FONCTION
HORLOGE
LANGUE
REGLAGE CANAL
SELEC. + / – : REGLE SET
REVENIR RETURN : QUITT MENU
MINUTEUR
SOUS TENS.
HORS TENS.
SELEC. + / – : REGLE SET
REVENIR RETURN : QUITT MENU
10:00AM OCT.15(FRI)
10:20AM
VIDEO MAR.
ARRET
(3) Sélectionner le minuteur désiré en appuyant sur la touche
+ ou –, puis appuyer sur la touche SET. Chaque fois que
la touche + ou – est enfoncée, l’affichage change comme
suit :
+ button; OFF
30 M. REMAIN
60 M. REMAIN
90 M. REMAIN
120 M. REMAIN
– button; OFF
120 M. REMAIN
90 M. REMAIN
60 M. REMAIN
30 M. REMAIN
Remarque :
• La fonction de minuteur d’arrêt automatique est annulée
si “ARRET” est sélectionné à l’étape (2).
• La fonction tension sera annulée si l’appareil est mis hors
circuit en utilisant la touche POWER ON/OFF de la
télécommande ou du panneau avant de l’appareil.
! RÉGLAGE IMAGE
(
CONTRASTE, TEINTE, COULEUR, LUMINOSITÉ, NETTETÉ, COULEUR PRÉ-
FÉRÉE
)
(1)
Sélectionner “REGLAGE
IMAGE” à l’écran MENU, et
appuyer sur la touche SET.
MENU
MINUTEUR
REGLAGE IMAGE
SOUS-TITRAGE
FONCTION VCR
HORLOGE
LANGUE
REGLAGE CANAL
SELEC. + / – : REGLE SET
REVENIR RETURN : QUITT MENU
(2) Appuyer sur la touche +
ou – de la télécommande
pour sélectionner
rubrique à régler, puis
appuyer sur la touche
SET. (Des pressions sur la
touche + ou – déplacent
le repère “ :”.)
(3)
Appuyer sur la touche + ou
pour régler “LUMINOSITE”
REGLAGE IMAGE
CONTRASTE
TEINTE
la
COULEUR
LUMINOSITE
NETTETE
COUL PREF
REMISE A ZERO
SELEC. + / – : REGLE SET
REVENIR RETURN : QUITT MENU
Exemple:
–
Réglage de “LUMINOSITE”.
comme désiré.
(4)
Appuyer sur la touche SET.
L’affichage de l’écran
retournera à celui de (2).
•
Pour continuer des réglages
supplémentaires, répéter les
étapes (2) à (4).
(5)
Appuyer sur la touche
LUMINOSITE
- +
MENU à n’importe quel
moment pour sortir du
RÉGLAGE IMAGE.
< Description des rubriques de réglage >
Rubrique Touche + Touche –
sélectionnée
CONTRASTE Pour augmenter le Pour diminuer le
contraste contraste
TEINTE Les tonalités de la peau Les tonalités de la
deviennent verdâtres peau virent au pourpre
COULEUR
Davantage d’intensité Moins d’intensité
de couleur de couleur
LUMINOSITÉ
NETTETÉ
Davantage de luminosité Moins de luminosité
Davantage de netteté Moins de netteté
COUL PREF Image plus chaude Image plus froide
(Couleur préférée)
REMISE À ZÉRO
(Blanc rougeâtre) (Blanc bleuté)
Tous les réglages vidéo sont ramenés au niveau
préréglé en usine.
SOUS-TITRAGE
L Réglage du sous-titrage
• Votre téléviseur est équipé d’un décodeur de sous-titrage
intégré. Ce système permet de visionner des conversations,
des narrations ainsi que les effets sonores des programmes
télévisés et des cassettes vidéo sous forme de soustitrage.
• Les sous-titrages ne sont
pas prévus sur les
programmes télévisés ni les
vidéos. Vérifier si le symbole
“ ” est indiqué pour
s’assurer que les sous-titres
apparaissent.
• Les émissions avec sous-titrage peuvent être regardées
en deux modes: S-TITRES et TEXTE. Deux canaux sont
disponibles pour chaque mode, les canaux CANAL 1 et
CANAL 2:
Le mode [S-TITRES] affiche les dialogues et les
commentaires des feuilletons télévisés et des actualités
tout en permettant de voir clairement l’image.
Le mode [TEXTE] affiche un certain nombre d’informations
sur l’écran, comme par exemple les dates des programmes
télévisés, les prévisions météorologiques, ou autres,
indépendamment des programmes affichés à l’écran.
9
08-11 13VT-CR10[F].pm65e 18/5/01, 1:53 PM9
Page 34

Pour regarder une émission télévisée (suite)
DPSS
ed
(1) Appuyer sur la touche
MENU de la télécommande pour accéder à
l’écran MENU.
(2) Appuyer sur la touche +
ou – pour déplacer
l’indication “ : ” vers
“SOUS-TITRAGE”.
(3) Appuyer sur la touche
SET.
(4) Appuyer sur la touche +
ou – pour déplacer
l’indication “ :” sur
“MODE” ou “DONNÉE”,
puis
appuyer sur la touche SET.
(5) Appuyer sur la touche +
ou – pour modifier le
réglage du mode
TITRAGE
MODE :
“SOUS-
”.
S-TITRES
TEXTE
ARRET
DONNEE :
CA 1
MENU
MINUTEUR
REGLAGE IMAGE
SOUS-TITRAGE
FONCTION
HORLOGE
LANGUE
REGLAGE CANAL
SELEC. + / – : REGLE SET
REVENIR RETURN : QUITT MENU
MENU
MINUTEUR
REGLAGE IMAGE
SOUS-TITRAGE
FONCTION
HORLOGE
LANGUE
REGLAGE CANAL
SELEC. + / – : REGLE SET
REVENIR RETURN : QUITT MENU
SOUS-TITRAGE
MODE
DONNEE
SELEC. + / – : REGLE SET
REVENIR RETURN : QUITT MENU
SOUS-TITRAGE
MODE
DONNEE
SELEC. + / – : REGLE SET
REVENIR RETURN : QUITT MENU
SOUS-TITRAGE
MODE
DONNEE
SELEC. + / – : REGLE SET
REVENIR RETURN : QUITT MENU
S-TITRES
CA 2
S-TITRES
CA 2
S-TITRES
CA 2
+/– button
Touches +/–
Touche
RETURN button
RETURN
TIMER
–
ON/OFF
CONFIRM
RETURN
TV • VCR COMBINATION
+
PROG
SET
MENU
Touche
MENU button
MENU
Touche
SET button
SET
# PRÉRÉGLAGE DES CANAUX
L PREREGL AUTO CANAL
Cette opération vous permet de prérégler le téléviseur sur
les canaux que vous souhaitez regarder.
(1) Appuyer sur la touche
MENU de la télécommande pour accéder à
l’ecran MENU.
(2) Appuyer sur la touche +
ou – pour déplacer
l’indication “ :” jusqu’au
mode “REGLAGE CANAL”.
(3) Appuyer sur la touche
SET de la télécommande
pour accéder au mode
REGLAGE CANAL.
(4) Appuyer sur la touche +
ou – à l’aide de la
télécommande pour
déplacer l’indication “ :”
jusqu’à “PREREGL AUTO
CANAL”.
(5) Appuyer sur la touche
SET de la télécommande
pour accéder au mode
PREREGL AUTO CANAL.
MENU
MINUTEUR
REGLAGE IMAGE
SOUS-TITRAGE
FONCTION
HORLOGE
LANGUE
REGLAGE CANAL
SELEC. + / – : REGLE SET
REVENIR RETURN : QUITT MENU
REGLAGE CANAL
PREREGL AUTO CANAL
ANTENNE/CABLE
RECHERCHE CANAL
MEMOIRE CANAL
SELEC. + / – : REGLE SET
REVENIR RETURN : QUITT MENU
(Mode REGLAGE CANAL)
RACCORD ANTENNE OU CABLE.
LANCER PREREGL AUTO CANAL?
OUI SET
NON MENU
CA 2
(6) Appuyer sur la touche
SET.
(7)
Appuyer sur la touche
MENU pour sortir
.
Remarque :
• Si une ligne blanche apparaît à l’écran pendant la réception
des signaux de sous-titrage, ceci est dû à des signaux faibles
ou à un problème de la station émettrice. Ceci n’indique pas
nécessairement un problème de fonctionnement de l’appareil.
• S’il n’y a pas d’émission TEXTE à recevoir avec l’appareil en
mode TEXTE, l’écran du téléviseur peut devenir sombre et
vide. Dans ce cas-là, régler le mode sous-titrage sur “ARRET”.
• Si un programme de télévision est accompagné d’un soustitrage et que la touche MUTE est enfoncée, le téléviseur passe
automatiquement au mode de sous-titrage. Une seconde
pression sur la touche MUTE ramènera le téléviseur à son
état précédent.
• En cas d’appui sur une sur une touche quelconque pour faire
apparaître l’affichage à l’écran pendant que vous regardez
une émission en mode SOUS-TITRAGE, le sous-titrage
disparaît momentanément.
10
08-11 13VT-CR10[F].pm65e 18/5/01, 1:53 PM10
(6) Appuyer sur la touche
SET. Le syntoniseur
recherche automatiquement les canaux
actifs, tant ceux captés
par l’antenne que par le
câble. (Le numéro de
canal augmente
automatiquement lorsqu’il
apparaît.)
Pour annuler PREREGL
AUTO CANAL, appuyer
sur la touche SET de la
télécommande.
(7) Une fois PREREGL AUTO
CANAL terminée, le plus
petit numéro de canal
mémorisé apparaît sur
l’affichage.
(Mode PREREGL AUTO CANAL)
ATTENDEZ SVP.
AUTO PROGRAMMATION
ANTENNE 2
ARRET SET
2
ANTENNE
TV-PG
Page 35

Pour regarder une émission télévisée (suite)
L RÉGLAGE CANAL
Si PREREGL AUTO CANAL ne mémorise pas tous les
canaux diffusés dans la région, suivre les instructions cidessous pour mémoriser manuellement les canaux voulus.
Sélection du mode de réception des signaux de télévision.
1
(1)
Sélectionner “REGLAGE
CANAL” dans l’écran MENU
en appuyant sur la touche +
ou –, puis appuyer sur la
touche SET.
(2) Sélectionner “ANTENNE/
CABLE” dans
REGLAGE CANAL
l’écran
en
appuyant sur la touche + ou
MENU
MIN.HORS TENS.
REGLAGE IMAGE
SOUS-TITRAGE
FONCTION
HORLOGE
LANGUE
REGLAGE CANAL
SELEC. + / – : REGLE SET
REVENIR RETURN : QUITT MENU
REGLAGE CANAL
PREREGL AUTO CANAL
ANTENNE/CABLE
RECHERCHE CANAL
MEMOIRE CANAL
–, puis appuyer sur la
touche SET.
(3)
Appuyer sur la touche + ou
– de la télécommande pour
sélectionner le mode de
signaux de télévision, puis
appuyer sur la touche SET.
Antenne THF/UHF
Câblovision
n
ANTENNE
CABLE STD
CABLE IRC
CABLE HRC
SELEC. + / – : REGLE SET
REVENIR RETURN : QUITT MENU
ANTENNE/CABLE
ANTENNE
CABLE STD
CABLE HRC
CABLE IRC
SELEC. + / – : REGLE SET
REVENIR RETURN : QUITT MENU
(Mode de signaux de télévision)
2 Programmation automatique des canaux de télévision
en mémoire.
(1)
Sélectionner “RECHERCHE
CANAL” à l’écran
CANAL en ap
touche + ou –,
REGLAGE
puyant sur la
puis appuyer sur
REGLAGE CANAL
PREREGL AUTO CANAL
ANTENNE/CABLE
RECHERCHE CANAL
MEMOIRE CANAL
la touche SET.
SELEC. + / – : REGLE SET
REVENIR RETURN : QUITT MENU
(2)
Appuyer sur la touche SET.
Le syntoniseur s’accorde
automatiquement sur les
RECHERCHE CANAL
ANTENNE 2
fréquences des stations de la
région et les mémorise. Si
tous les signaux reçus sont
de bonne qualité et s’il n’y a
REVENIR RETURN : QUITT MENU
DEBUT SET
aucune raison d’ajouter ou
d’effacer certains canaux, le
préréglage est terminé.
3 Ajout de canaux faibles ou de canaux supplémentaires
à partir de la mémoire du téléviseur.
(1)
Sélectionner “MEMOIRE CANAL” dans l’écran REGLAGE
CANAL
en appuyant sur la
touche + ou –, puis appuyer
MEMOIRE CANAL
ANTENNE 54
AJOUTER
sur la touche SET.
(2)
Utiliser les touches de sélec-
tion des canaux en
sant/décroissant
DOWN (8/9)
ordre crois-
CH
UP/
ou les touches
SELEC. + / – : REGLE SET
REVENIR RETURN : QUITT MENU
de sélection des canaux (0~9,
100) afin de sélectionner le
canal désiré. Le numéro du
canal sélectionné apparaît à
l’écran.
•
Si un canal est mis en mémoire, la commande “AJOUTER” est
affichée.
•
Si aucun canal n’est enregistré en mémoire, la commande
“EFFACER” est affichée.
(3)
Utiliser les touches + ou – pour
sélectionner “AJOUTER” et
vérifier si l’indication
“AJOUTER” est bien affichée.
MEMOIRE CANAL
ANTENNE 54
AJOUTER
Si des canaux supplé-
mentaires doivent être
préréglés, répéter l’opération
(2).
(4)
Appuyer sur la touche SET ou
SELEC. + / – : REGLE SET
REVENIR RETURN : QUITT MENU
MENU pour sortir de
la fonction MEMOIRE CANAL.
Utiliser
les touches CH
DOWN (
8/9) pour
UP/
vérifier que
le préréglage des canaux est
correct.
4 Effacement des canaux inutiles de la mémoire du
téléviseur.
(1) Sélectionner “ MEMOIRE
CANAL” au niveau de l’écran
REGLAGE CANAL.
(2) Sélectionner le canal à effacer.
MEMOIRE CANAL
ANTENNE 54
EFFACER
(3) Utiliser les touches + ou –
pour sélectionner “EFFACER”
et vérifier si l’indication
“EFFACER” est bien
affichée. Si des canaux
supplémentaires doivent être
SELEC. + / – : REGLE SET
REVENIR RETURN : QUITT MENU
effacés, répéter l’opération (2).
(4) Appuyer sur la touche SET ou
MENU pour sortir de la fonction
MEMOIRE CANAL. Utiliser les
touches CH UP/DOWN (8/9)
pour vérifier que les canaux
sont effacés.
Remarque :
• Les canaux pouvant être reçus par le téléviseur sont les
suivants:
Canaux hertziens (ANTENNE) —
THF (VHF); de 2 à 13,
UHF; de 14 à 69.
Canaux par câble (CABLE) —
1 (Modes HRC et IRC uniquement)
2 à 125 (STD, HRC, et IRC)
08-11 13VT-CR10[F].pm65e 18/5/01, 1:53 PM11
11
Page 36

Verrouillage de Fonctionnement
“TV” AUTO 2 3 4 .......... 68 69 AUTO
“CATV-STD” AUTO 2 3 4 .......... 124 125 AUTO
“CATV-HRC”, “CATV-IRC” AUTO 1 2 3 .......... 124 125 AUTO
POWER
Touche
POWER button
POWER
Touche
RETURN button
RETURN
INPUT DISPLAY MUTE
1 2 3
•
4 5 6
7 8 9
FLASHBACK
0
COUNTER
RESET
REW FF
REC
TIMER
–
ON/OFF
CONFIRM
RETURN
TV • VCR COMBINATION
STOP
PLAY
100
TAPE
SPEED
SET
+
VOL
TAMPER
PROOF
PAUSE/STILL
DPSS
PROG
MENU
CH
e
CHANNEL
•
•
TR
Touches
UP/DOWN
•
•
d
CH (8/9)
buttons
Touche
TAMPER
TAMPER
PROOF
PROOF
button
ed
Touche
MENU button
MENU
SET button
Touche
SET
L Verrouillage du mode de fonctionnement
• Si la touche de verrouillage de fonctionnement TAMPER
PROOF est enfoncée pendant l’utilisation de l’appareil, le
mode de fonctionnement courant ne pourra pas être
modifié aussi longtemps que la touche de verrouillage
TAMPER PROOF n’aura pas été libérée, même en cas
d’appui sur une autre touche de fonction.
L Verrouillage de mise hors tension
• Si la touche de verrouillage de fonctionnement TAMPER
PROOF est enfoncée pour activer le verrouillage alors que
l’appareil est hors tension, celui-ci restera hors tension
même en cas d’appui sur l’interrupteur d’alimentation
POWER.
Exemple : Utilisation du verrouillage de fonctionnement
pendant la lecture.
1 Maintenir enfoncée la touche de verrouillage TAMPER
PROOF de la télécommande pendant 3 secondes environ.
L’indicateur du verrouillage “ TAMPER PROOF”
clignote et reste affiché sur le panneau avant pour indiquer
qu’il est engagé.
2 Maintenant, l’appareil continue la lecture de la cassette
vidéo même en cas d’appui de n’importe quelle touche.
Le verrou TAMPER PROOF peut être libéré selon la méthode
suivante :
• Maintenir enfoncée la touche de verrouillage TAMPER
PROOF de la télécommande pendant 3 secondes environ.
L’indicateur du verrouillage “ TAMPER PROOF” du
panneau avant clignote, puis s’éteint pour indiquer que le
verrouillage est libéré.
Réglage de l’horloge
1 RÉGLAGE AUTOMATIQUE DE L’HORLOGE
• Pour régler automatiquement l’horloge, suivre la procédure
ci-dessous:
(1) Appuyer sur la touche MENU
de la télécommande. Appuyer
sur la touche + ou – pour
déplacer l’indication “ :” vers
“HORLOGE”, puis appuyer
sur la touche SET.
(2) L’écran “HORLOGE RÉ-
GLEE” s’affiche. Appuyer sur
la touche + ou – pour sélectionner “AUTO HORLOGE
MARCHE”, puis appuyer sur
la touche SET.
(3) Le repère “ :” se déplace
jusqu’à “EDS CANAL AUTO”.
Si le canal EDS de la région
est connu, le sélectionner à
l’aide de la touche + ou –.
Sinon, sélectionner “AUTO”.
Appuyer sur la touche SET.
(3.1)Mettre le téléviseur hors
tension.
L’horloge est automatiquement réglée au moyen
des signaux EDS lorsque
l’appareil est hors tension.
• Si le canal EDS est
sélectionné, quelques
minutes suffisent au réglage
de l’horloge.
MENU
MINUTEUR
REGLAGE IMAGE
SOUS-TITRAGE
FONCTION
HORLOGE
LANGUE
REGLAGE CANAL
SELEC. + / – : REGLE SET
REVENIR RETURN : QUITT MENU
HORLOGE REGLEE
AUTO HORLOGE
EDS CANAL
MOIS
JOUR
ANNEE
HEURE
SELEC. + / – : REGLE SET
REVENIR RETURN : QUITT MENU
HORLOGE REGLEE
AUTO HORLOGE
EDS CANAL
MOIS
JOUR
ANNEE
HEURE
SELEC. + / – : REGLE SET
REVENIR RETURN : QUITT MENU
L ’HORLOGE EST AUTOMATIQUEMENT
REGLEE LORSQUE L’ APPAREIL
EST MIS HORS TENSION
MARCHE
AUTO
---
--
----
--:----
MARCHE
AUTO
---
--
----
--:----
• Si “AUTO” est sélectionné,
quelques heures peuvent
être nécessaires au réglage
de l’horloge étant donné que
le téléviseur doit rechercher
le canal EDS. (Pour utiliser
immédiatement les fonctions
de l’horloge, exécuter la
procédure jusqu’à l’étape (2)
du RÉGLAGE MANUEL DE
L’HORLOGE. Se reporter à
la page 13.)
(3.2)Appuyer sur la touche
d’alimentation POWER pour
mettre le téléviseur sous
tension.
ANTENNE
Une fois que le réglage
automatique de l’horloge est
terminé, l’heure s’affiche dans
le coin inférieur droit du télé-
10:20 AM OCT.15
viseur.
Remarque :
• En cas de déménagement, essayer de prérégler les canaux de
nouveau (Se reporter à la page 10 pour plus d’informations sur
la sélection des canaux) et régler de nouveau l’horloge en
suivant la méthode ci-dessus.
• Si le réglage automatique de l’horloge n’est toujours pas terminé
quelques heures après avoir mis le téléviseur hors tension, il se
peut que les signaux EDS ne soient pas diffusés dans la région.
Il convient alors de régler manuellement l’horloge. (Se reporter
à la page 13 pour plus d’informations sur le réglage manuel de
l’horloge.)
• Si le signal capté par l’antenne est faible, il se peut que la
fonction de RÉGLAGE AUTOMATIQUE DE L’HORLOGE ne
fonctionne pas.
• La fonction de RÉGLAGE AUTOMATIQUE DE L’HORLOGE ne
fonctionnera pas si aucun signal EDS n’est diffusé.
• Sélectionner, à l’aide de la touche e ou d un canal qui diffuse
des signaux EDS.
2
12
12-15 13VT-CR10[F].pm65e 18/5/01, 1:53 PM12
Page 37

Réglage de l’horloge (suite)
La touche +; 2001 2002 2003 - - - 1999 2000
La touche –; 2001 2000 1999 - - - 2003 2002
PLAY
REW FF
STOP
Touche
+/– button
POWER
Touche
RETURN button
RETURN
REC
TIMER
ON/OFF
CONFIRM
RETURN
TV • VCR COMBINATION
PAUSE/STILL
DPSS
ed
+
–
PROG
SET
MENU
Touche
MENU
MENU button
Touche
SET button
SET
2 RÉGLAGE MANUEL DE L’HORLOGE
• Si le signal EDS n’est pas disponible dans votre région,
régler l’horloge manuellement :
(1) Appuyer sur la touche MENU
de la télécommande.
Sélectionner “HORLOGE”
dans le menu, puis appuyer
sur la touche SET.
(2) Appuyer sur la touche + ou –
pour sélectionner “AUTO
HORLOGE ARRET”, puis
appuyer sur la touche SET.
Exemple :
Réglage de l’horloge sur 10:20 a.m. le 15 octobre 1999.
(3) Appuyer sur la touche + ou –
pour sélectionner le “MOIS”,
puis appuyer sur la touche SET.
Le repère “ :” se déplace
jusqu’à l’élément suivant, à
savoir “JOUR”.
La touche + ou – permet
permuter les mois dans
l’ordre suivant.
La touche +; JAN FEV MAR - - NOV DEC
MENU
MINUTEUR
REGLAGE IMAGE
SOUS-TITRAGE
FONCTION
HORLOGE
LANGUE
REGLAGE CANAL
SELEC. + / – : REGLE SET
REVENIR RETURN : QUITT MENU
HORLOGE REGLEE
AUTO HORLOGE
EDS CANAL
MOIS
JOUR
ANNEE
HEURE
SELEC. + / – : REGLE SET
REVENIR RETURN : QUITT MENU
HORLOGE REGLEE
AUTO HORLOGE
EDS CANAL
MOIS
JOUR
ANNEE
HEURE
de
SELEC. + / – : REGLE SET
REVENIR RETURN : QUITT MENU
ARRET
AUTO
---
--
----
--:----
ARRET
AUTO
OCT
--
----
--:----
(5) Appuyer sur la touche + ou –
pour sélectionner l’ “ANNEE”,
puis appuyer sur la touche SET.
Le repère “ :” se
jusqu’à l’élément
déplace
suivant, à savoir “HEURE”.
La touche + ou – permet
permuter les années dans
HORLOGE REGLEE
AUTO HORLOGE
EDS CANAL
MOIS
JOUR
ANNEE
HEURE
SELEC. + / – : REGLE SET
de
REVENIR RETURN : QUITT MENU
ARRET
AUTO
OCT
15
2001
--:----
l’ordre suivant.
(6) Appuyer sur la touche + ou –
pour sélectionner
l’“HEURE”, puis appuyer sur la
touche
SET. La marque de
couleur jaune se déplace
jusqu’à l’élément des
“minutes”.
La touche + ou – permet
HORLOGE REGLEE
AUTO HORLOGE
EDS CANAL
MOIS
JOUR
ANNEE
HEURE
SELEC. + / – : REGLE SET
REVENIR RETURN : QUITT MENU
de
ARRET
AUTO
OCT
15
2001
10:--AM
permuter les heures dans
l’ordre suivant.
La touche +; 12:- -AM 1:- -AM • • • 10:- -PM 11:- -PM
La touche –; 12:- -AM 11:- -PM • • • 2:- -AM 1:- -AM
(7) Appuyer sur la touche + ou –
pour sélectionner
les
“minutes”, puis appuyer sur la
touche SET.
La touche + ou – permet
permuter les minutes dans
l’ordre suivant.
La touche +; 01 02 03 - - - 58 59 00
La touche –; 01 00 59 - - - 04 03 02
HORLOGE REGLEE
AUTO HORLOGE
EDS CANAL
MOIS
JOUR
ANNEE
de
HEURE
SELEC. + / – : REGLE SET
REVENIR RETURN : QUITT MENU
10:20 AM OCT.15
ARRET
AUTO
OCT
15
2001
10:20AM
ANTENNE
2
La touche –; JAN DEC NOV - - MAR FEV
(4) Appuyer sur la touche + ou –
pour sélectionner le “JOUR”,
puis appuyer sur la touche SET.
Le repère “ :” se
déplace
jusqu’à l’élément suivant, à
savoir “ANNEE”.
La touche + ou – permet
de
permuter les jours dans
l’ordre suivant.
La touche +; 1 2 3 - - - 30 31
La touche –; 1 31 30 - - - 3 2
12-15 13VT-CR10[F].pm65e 18/5/01, 1:53 PM13
HORLOGE REGLEE
AUTO HORLOGE
EDS CANAL
MOIS
JOUR
ANNEE
HEURE
SELEC. + / – : REGLE SET
REVENIR RETURN : QUITT MENU
ARRET
AUTO
OCT
15
----
--:----
Remarque :
1. Pour corriger toute donnée erronée, introduite au cours
du réglage de l’horloge:
(1) Appuyer sur la touche RETURN de la télécommande
pour revenir à l’élément qui doit être corrigé.
(2) Appuyer sur la touche + ou – pour entrer les données
correctes.
(3) Pour avancer l’opération, appuyer sur la touche SET.
2. Si au cours d’un réglage, aucune touche n’est enfoncée
pendant 60 secondes, l’écran revient à la source précé-
dente.
3. Si le téléviseur n’est plus alimenté pendant une courte
période, le réglage de l’horloge doit être recommencé.
13
Page 38

Lecture d’une cassette
L ÉCONOMIE D’ÉNERGIE
Cette fonctionnalité vous permet de réduire la
consommation de votre téléviseur et de réaliser ainsi des
économies tout en protégeant l’environnement. Lorsque
cette fonctionnalité est activée, elle réduit la luminosité du
téléviseur à un niveau qui consomme environ 20%
d’énergie en moins.
La réduction de la luminosité est moins perceptible dans
une pièce plus sombre.
(1) Appuyer sur la touche
MENU et appuyer sur la
touche + ou – pour
sélectionner “FONCTION”
dans l’écran MENU.
Appuyer ensuite sur la
touche SET.
(2) Appuyer sur la touche + ou
– pour sélectionner
“ENCONERGIE”, et
appuyer sur la touche SET.
(3) Appuyer sur la touche +
ou – pour sélectionner la
position MARCHE, et
appuyer sur la touche
MENU
MINUTEUR
REGLAGE IMAGE
SOUS-TITRAGE
FONCTION
HORLOGE
LANGUE
REGLAGE CANAL
SELEC. + / – : REGLE SET
REVENIR RETURN : QUITT MENU
FONCTION
ENCONERGIE
ECRAN BLEU
LECTURE REP
S.PICTURE
SELEC. + / – : REGLE SET
REVENIR RETURN : QUITT MENU
MARCHE
ARRET
ARRET
ARRET
SET.
L ÉCRAN BLEU
Cette fonction élimine les bruits du moniteur et coupe le
son pendant la lecture des parties non enregistrées d’une
bande ou le passage par des canaux dépourvus de signal.
(1) Répéter l’étape (1) de la
section “ÉCONOMIE
D’ÉNERGIE” ci-dessus.
(2) Appuyer sur la touche +
ou – pour sélectionner
“ECRAN BLEU”, et
appuyer sur la touche
SET.
(3) Appuyer sur la touche +
ou – pour sélectionner la
position MARCHE, et
appuyer sur la touche
SET.
Remarque :
• L’ÉCRAN BLEU ne fonctionne pas en mode d’arrêt sur
image et de recherche vidéo.
• L’ÉCRAN BLEU ne fonctionne pas pendant la lecture d’une
bande dont l’enregistrement s’accompagne de bruit.
• L’ÉCRAN BLEU ne peut pas être enregistré.
MENU
MINUTEUR
REGLAGE IMAGE
SOUS-TITRAGE
FONCTION
HORLOGE
LANGUE
REGLAGE CANAL
SELEC. + / – : REGLE SET
REVENIR RETURN : QUITT MENU
FONCTION
ENCONERGIE
ECRAN BLEU
LECTURE REP
S.PICTURE
SELEC. + / – : REGLE SET
REVENIR RETURN : QUITT MENU
MARCHE
MARCHE
ARRET
ARRET
L RÉPÉTITION AUTOMATIQUE
Cette fonction permet de répéter la lecture de la même
cassette. Il y a deux modes de répétition au choix: l’un permet
de rembobiner la cassette à la fin du ruban et de recommencer
automatiquement la lecture depuis le début; l’autre permet de
rembobiner la cassette dès la fin de l’enregistrement sur la
bande puis de recommencer automatiquement depuis le
début.
(1) Répéter l’étape (1) de la
section “ÉCONOMIE
D’ÉNERGIE” ci-dessus.
(2) Appuyer sur la touche +
ou – pour sélect
“LECTURE REP.”,
ionner
puis
appuyer sur la touche
SET.
(3) Appuyer sur la touche +
ou – pour sélectionner le
mode de répétition
souhaité, et appuyer sur
la touche SET.
Pour annuler la répétition
automatique, sélectionner
la position ARRET cidessus.
---------
ARRET
ESPACE VIER
FIN BANDE
Pour mettre la “LECTURE REP.”
hors service.
----
Quand la partie enregistrée de la bande
est finie et celle vierge commence
pendant la lecture, le magnétoscope
rembobine la cassette et recommence
automatiquement la lecture depuis le
début.
------
Quand la cassette est finie pendant la
lecture, le magnétoscope rembobine
la cassette et recommence automatiquement la lecture
L S. IMAGE (SUPER IMAGE)
Cette fonction améliore la netteté de l’écran pendant la
lecture.
(1) Répéter l’étape (1) de la
section “ÉCONOMIE
D’ÉNERGIE” ci-dessus.
(2) Appuyer sur la touche +
ou – pour “S. IMAGE”,
puis appuyer sur la
touche SET.
(3) Appuyer sur la touche +
ou – pour sélectionner la
position MARCHE, et
appuyer sur la touche
SET.
MENU
MINUTEUR
REGLAGE IMAGE
SOUS-TITRAGE
FONCTION
HORLOGE
LANGUE
REGLAGE CANAL
SELEC. + / – : REGLE SET
REVENIR RETURN : QUITT MENU
FONCTION
ENCONERGIE
ECRAN BLEU
LECTURE REP
S.PICTURE
SELEC. + / – : REGLE SET
REVENIR RETURN : QUITT MENU
MENU
MINUTEUR
REGLAGE IMAGE
SOUS-TITRAGE
FONCTION
HORLOGE
LANGUE
REGLAGE CANAL
SELEC. + / – : REGLE SET
REVENIR RETURN : QUITT MENU
FONCTION
ENCONERGIE
ECRAN BLEU
LECTURE REP
S.PICTURE
SELEC. + / – : REGLE SET
REVENIR RETURN : QUITT MENU
MARCHE
MARCHE
ESPACE VIER
ARRET
depuis le
MARCHE
MARCHE
ESPACE VIER
MARCHE
début.
14
12-15 13VT-CR10[F].pm65e 18/5/01, 1:53 PM14
Page 39

SP
0:00:00 10:20AM OCT.15
ALIGNEMENT
PLAY
Lecture d’une cassette (suite)
7 8 9
TAPE SPEED
Touche
button
TAPE SPEED
PLAY button
Touche PLAY
REW button
Touche REW
STOP button
Touche STOP
RETURN button SET button
Touche RETURN
FLASHBACK
0
COUNTER
RESET
REW FF
REC
TIMER
–
ON/OFF
CONFIRM
RETURN
TV • VCR COMBINATION
(Sur l’appareil)
(On the Set)
PLAY
STOP
100
TAPE
SPEED
+
SET
TAMPER
PAUSE/STILL
DPSS
PROOF
CH
ed
PROG
MENU
e
•
•
TR
•
•
d
TAMPER
Touche
PROOF button
TAMPER PROOF
Touche FF
FF button
Touche
PAUSE/STILL
PAUSE/STILL
button
Touche MENU
MENU button
Touche SET
L SYSTÈME DE CONTRÔLE AUTOMATIQUE DE
L’ALIGNEMENT
• Le système de contrôle automatique de l’alignement règle
l’alignement à son niveau optimal dès que la lecture
commence après insertion de la bande. (L’indication
“ALIGNEMENT” se met à clignoter sur l’écran du téléviseur
lorsque le système fonctionne.)
(Sur l’écran TV)
Touche
Touche REW
PLAY
button
PLAY
Touche STOP/EJECT
STOP/EJECT
button
Touche FF
L MISE EN PLACE D’UNE CASSETTE VIDÉO
Introduire une cassette dans le compartiment (n’utiliser
que des cassettes ). L’appareil se met automatiquement
en marche.
Si la cassette n’est pas correctement introduite, le dispositif de chargement ne fonctionne pas.
Ne pas forcer la cassette.
Cassette vidéo
La face portant
l ’étiquette
orientée
vers le haut
Les moyeux de bobine
orientés vers le bas
L ÉJECTION DE LA CASSETTE VIDÉO
• Appuyer sur la touche STOP/EJECT du télé-magnétoscope
pour éjecter la cassette. (Lorsque le télé-magnétoscope
est en mode de marche, appuyer deux fois sur la touche
STOP/EJECT.)
Remarque :
• Si cet appareil est incliné, la cassette peut ne pas se
charger ou s’éjecter correctement.
L LECTURE
• Une cassette étant donc en place, appuyer sur la touche
PLAY. L’affichage à l’écran apparaîtra, indiquant la
fonction bande.
• Appuyer sur la touche STOP pour arrêter la lecture.
PLAY
SP
0:00:00 10:20AM OCT.15
Remarque :
• Le vitesse de bande (SP, LP, EP) est sélectionnée
automatiquement pour une reproduction correcte.
Image normale
Défaut d’alignement
• Le système de contrôle automatique de l’alignement
réajuste l’alignement en cours de lecture lorsque la vitesse
d’enregistrement change ou aux sections de raccordement
des programmes enregistrés sur des magnétoscopes
différents.
• Si l’image reste floue ou déformée sur l’écran du téléviseur,
en dépit du réglage effectué par le système de contrôle
automatique de l’alignement, se mettre en mode
d’alignement manuel.
• Pour régler le suivi manuel, appuyer sur la touche TR e ou
d de la télécommande pendant le mode de lecture jusqu’à
ce que les parasites soient minimisés ou éliminés.
• Pour revenir en mode d’alignement automatique, appuyer
simultanément sur les touches TR e et d.
Remarque :
• Un léger bruit mécanique peut être perceptible lorsqu’une
cassette est introduite dans le magnétoscope. Ce bruit
est normal et signifie uniquement que l’appareil est prêt à
commencer la lecture dès que la touche PLAY est enfoncée.
Si aucune touche n’a été enfoncée dans les 5 minutes qui
suivent, le magnétoscope revient en mode d’attente et le
bruit mécanique cesse.
• Si l’image affichée sur l’écran du téléviseur est floue ou si
des lignes verticales apparaissent en mode de lecture, en
mode de recherche vidéo ou en mode d’arrêt sur image,
utiliser le mode d’alignement manuel.
L FONCTION DE REPRODUCTION
ENTIÈREMENT AUTOMATIQUE
La fonction de reproduction entièrement automatique permet
une reproduction simplifée et facile.
• Lors de l’introduction d’une cassette sur laquelle la languette
de protection contre l’effacement a été ôtée, le magnétoscope
se met automatiquement en fonctionnement et commence la
lecture. Lorsque la fin du ruban est atteinte, le magnétoscope
procède automatiquement au rembobinage du ruban et à
l’éjection de la cassette.
Remarque :
• Si la languette de protection contre l’effacement est en place,
appuyer sur la touche PLAY une fois la cassette introduite.
15
12-15 13VT-CR10[F].pm65e 18/5/01, 1:53 PM15
Page 40

Lecture d’une cassette (suite)
0:00:00 10:00AM OCT.15
DPSS 3
1:00:00 10:01AM OCT.15
DPSS 2
POWER/
WAKE-UP
TIMER
REC
PROGRAM
TIMER
TAMPER
PROOF
L ARRÊT SUR IMAGE
(1) Appuyer sur la touche PAUSE/STILL de la télécommande en
mode de lecture. L’image sur l’écran de télévision sera alors
arrêtée. Pour éviter que le ruban ne soit endommagé, le
magnétoscope reprend la lecture après environ cinq minutes
d’arrêt sur l’image.
(2) Appuyer sur la touche PAUSE/STILL pour avancer d’une
image en mode d’arrêt sur image.
(3) Appuyer de nouveau sur la touche PAUSE/STILL pour
reprendre la lecture normale.
Remarque :
• Il est possible que l’image soit déformée en mode d’arrêt sur
image. Cela n’indique pas que l’appareil soit défectueux.
L RECHERCHE VIDÉO
Pour retrouver rapidement le segment désiré, suivre les
instructions ci-dessous pendant que des images sont
affichées :
(1) Alors que le magnétoscope procède à la lecture de la cassette,
appuyer sur la touche FF pour effectuer une recherche vers
l’avant et sur la touche REW pour effectuer une recherche vers
l’arrière. En appuyant sur la touche, la vitesse de la recherche
vidéo change comme indiqué ci-dessous:
Mode EP : 9 fois plus vite 21 fois plus vite
Mode SP/LP : 5 fois plus vite 7 fois plus vite
(2) Appuyer sur la touche PLAY pour reprendre la lecture normale.
Remarque :
• Pendant ces recherches, l’image du moniteur peut s’afficher
en noir et blanc et des parasites peuvent apparaître. Cela est
tout à fait normal.
L AVANCE RAPIDE ET REMBOBINAGE
• Pour atteindre plus rapidement un point de la bande ou pour
la rembobiner, appuyer sur la touche STOP puis sur la touche
FF ou la touche REW respectivement.
Remarque :
• La qualité de l’image lors d’un arrêt sur image ou d’une recherche vidéo est meilleure si l’enregistrement a été effectué
en mode EP.
Le mode SP peut donner des images de qualité médiocre.
• Le son est coupé pendant l’arrêt sur image ou la recherche
vidéo.
• Un “ruban d’enregistrement non conforme”, c-à-d. Un ruban à
petits moyeux, d’une durée moindre que 60 minutes, peut
afficher une vitesse de rembobinage vers l’avant ou l’arrière
réduite.
Ce magnétoscope utilise les signaux vidéo standard .
Utiliser seulement les cassettes portant le sigle .
(1) Insérer une cassette qui a des signaux d’index dans le
magnétoscope.
(2) Sélectionner le numéro du signal d’index en appuyant sur la
touche DPSS e ou d de la télécommande. Le numéro change
à chaque pression sur la touche. Il est possible de sélectionner
19 programmes (parmi 38 programmes).
(Par exemple, le troisième programme qui suit le programme
en cours.)
(3) La recherche commence immédiatement lorsqu’on appuie
sur la touche DPSS e ou d. (Quand un signal d’index est
localisé, le numéro d’index diminue.)
(4) La lecture commence automatiquement dès qu’est trouvée
la section encodée avec le signal d’index sélectionné.
(Sur l’écran TV)
Remarque :
• La fonction DPSS pourrait ne pas fonctionner correctement si
l’intervalle entre des signaux d’index est insuffisant. (Un
intervalle de plus de 3 minutes est nécessaire.)
• La fonction DPSS est annulée en appuyant sur la touche PLAY
ou STOP.
• La fonction DPSS est annulée si la bande est finie ou
rembobinée complètement avant de localiser le signal d’index
désiré.
• La fonction DPSS ne peut pas fonctionner si la cassette est
endommagée ou usée.
• La fonction DPSS ne peut pas être utilisée avec des cassettes
qui n’ont pas de signal d’index.
• La position du début d’un programme peut varier un peu.
• La fonction DPSS est hors fonction en mode d’enregistrement,
de veille et d’enregistrement par minuteur, ou encore
lorsqu’aucune cassette n’est insérée dans l’appareil.
• Il n’est pas possible d’entrer manuellement les signaux d’index
de la fonction DPSS.
L EZ PLAY
Au terme de l’enregistrement d’un programme par minuteur,
celui-ci s’arrête automatiquement. Appuyer sur la touche EZ
PLAY de l’appareil le remet automatiquement sous tension et
la bande enregistrée est rebobinée jusqu’à la position de
départ, puis la lecture commence automatiquement. Appuyer
sur la touche STOP/EJECT pour arrêter la lecture.
L DPSS (Système digital de recherche d’un
Rembobinage
16
16-19 13VT-CR10[F].pm65e 21/5/01, 6:59 PM16
programme)
Avec cette fonction, la section désirée de la bande peut
être localisée rapidement. Elle permet de rechercher la
partie particulière de la bande et de commencer
automatiquement la lecture.
La position courante de la bande
Rewind
2
1-1
Signal d’index
Un signal d’index est automatiquement enregistré sur la
bande en début d’enregistrement.
Avance
rapide
Fast Forward
3
Signaux
Index signals
d’index
Minuteur
(PROGRAM TIMER)
Touche
EZ PLAY
Remarque :
• Une fois la programmation définie, lorsque le magnétoscope
démarre, le témoin PROGRAM TIMER s’éteint et la fonction
de programmation est désactivée.
• Ce magnétoscope peut rechercher jusqu’à 19 programmes
en amont.
• Il est possible que ce magnétoscope ne puisse pas rechercher
et lancer la lecture d’un programme enregistré au début de la
bande.
• La position de départ n’est pas nécessairement précise.
• Il est possible que cette fonction n’agisse pas si
l’enregistrement de l’index est inférieur à 5 minutes.
Touche d’arrêt/
éjection
(STOP/EJECT)
Page 41

REC 2
SP ANTENNE
0:00:00 10:20AM OCT.15
SP EP
Enregistrement d’une émission télévisée
L VITESSES D’ENREGISTREMENT
Ce magnétoscope vous permet de choisir la vitesse d’enregistrement (SP et EP). En temps normal, la vitesse SP apporte une
meilleure qualité d’image, sa durée d’enregistrement par contre est plus courte. Choisir la vitesse qui convient le mieux aux besoins.
Le tableau ci-dessous indique la vitesse et la durée d’enregistrement pour trois types de cassettes.
CASSETTE
T-60
T-120
T-160
MODE
2 heures et 40 min.
SP
(Lecture standard)
1 heure.
2 heures.
Ce magnétoscope lit une cassette automatiquement à la même vitesse que celle de l’enregistrement.
L PROTECTION CONTRE L’EFFACEMENT
` Les cassettes possèdent une languette détachable pour protéger les enregistrements contre un effacement accidentel. Si la
languette est absente, l’enregistrement est impossible. Si on désire malgré tout employer la cassette pour enregistrer une émission,
recouvrir l’ouverture avec du ruban adhésif.
Languette de protection contre l’effacement
Remarque :
• Un léger bruit mécanique peut se faire entendre lorsqu’une cassette a été introduite dans le magnétoscope et qu’aucune touche de
fonctionnement n’a été enfoncée. Ce bruit est normal et signifie uniquement que l’appareil est prêt à commencer la lecture dès que
la touche REC est enfoncée. Si aucune touche n’a été enfoncée dans les 5 minutes qui suivent, le magnétoscope revient en mode
d’attente et le bruit mécanique cesse.
EP
(Lecture étendue)
3 heures.
6 heures.
8 heures.
L ENREGISTREMENT D’UNE ÉMISSION TÉLÉVISÉE
MARCHE À SUIVRE
OPÉRATION AFFICHAGE À L’ÉCRAN
1 Sélectionner le canal désiré en appuyant sur
les touches CH (8/9) ou les touches de
sélection des canaux (0~9 et 100) de la
télécommande.
2 S’assurer que la languette de protection de la
cassette est intacte, puis insérer la cassette.
Appuyer sur la touche TAPE SPEED de la
TOUCHE
• 8 ou 9
Touches CH (8/9)
• Touches de sélection
des canaux (0~9, 100)
TAPE
SPEED
STOP 2
SP ANTENNE
0:00:00 10:20AM OCT.15
La vitesse d’enregistrement change dans
l’ordre suivant :
télécommande afin de régler la vitesse
d’enregistrement. (SP ou EP)
3 Appuyer sur la touche REC. (Si la cassette n’a
plus de languette de protection, elle est
automatiquement éjectée).
REC
• Pour interrompre l’enregistrement, appuyer sur la touche PAUSE/STILL de la télécommande. Pour reprendre l’enregistrement,
appuyer une nouvelle fois sur cette touche. (La pause est automatiquement libérée après environ 5 minutes afin d’éviter d’endom-
mager la bande et le magnétoscope, et le mode d’arrêt est engagé.)
Remarque :
• L’indication PAUSE apparaît à l’écran de télévision lorsque la touche PAUSE/STILL est enfoncée en mode d’arrêt. Vous pouvez
alors appuyer sur la touche STOP pour sortir du mode de pause ou sur la touche REC pour entrer en mode pause-enregistrement.
L COMPTEUR DE BANDE
Le compteur de bande de votre appareil est un compteur en temps réel. Il indique la durée écoulée pendant l’enregistrement ou
la lecture. Il est utile d’indexer des passages sur la bande pour référence ultérieure. Le compteur peut aussi être affiché à l’écran
du téléviseur en appuyant sur la touche DISPLAY. Pour réinitialiser le compteur, appuyer sur la touche COUNTER RESET.
Remarque :
• Le compteur de bande ne change pas pendant la lecture d’une partie non enregistrée de la bande. Si le compteur s’arrête en cours
d’avance rapide ou de rembobinage, cette partie de la bande est vierge.
17
16-19 13VT-CR10[F].pm65e 21/5/01, 6:59 PM17
Page 42

Enregistrement avec le minuteur
TAPE
Touches +/–
Touche TIMER ON/OFF
TIMER ON/OFF
+/– button
button
CONFIRM button
Touche CONFIRM
Touche RETURN
RETURN button
COUNTER
RESET
REW FF
REC
TIMER
ON/OFF
CONFIRM
RETURN
TV • VCR COMBINATION
TAMPER
SPEED
PROOF
Touche
PLAY
STOP
PAUSE/STILL
DPSS
ed
+
–
PROG
SET
MENU
TAPE
TAPE
SPEED
SPEED
button
PROG
Touche
button
PROG
MENU
Touche
button
MENU
Touche
SET
SET
button
ENREGISTREMENT AVEC LE MINUTEUR
Le minuteur a 5 positions de programmes, et il permet
d’enregistrer jusqu’à 5 programmes différents répartis sur un
mois. Chacun de ces programmes peut être réglé de façon à
être enregistré quoditiennement ou hebdomadairement
jusqu’à la fin de la bande.
Réglage du minuteur
Exemple : Pour programmer l’enregistrement automatique
avec la vitesse SP sur le canal 10 de 4:30 p.m. à 6:30 p.m.
tous les vendredis.
(1)
Insérer une cassette avec la
languette de protect
ion
contre l’effacement en
place.
(2)
Appuyer sur la touche
PROG de la télécommande. (Si l’horloge n’est
pas encore réglé e,
“HORLOGE REGLEE”
apparaît sur l’écran. Se
reporter à la page
12
pour
RESERVATION ENREG-1
MODE
CANAL
DEBUT
FIN
VITESSE
SELEC. + / – : REGLE SET
REVENIR RETURN : QUITT MENU
OCT.15
12
--:----
--:---SP
10:20AM OCT.15 (VEN)
le réglage de l’horloge.)
Quand l’horloge n’est pas
réglée, sélectionner “AUTO
HORLOGE ARRET”.
Régler ensuite l’horloge
manuellement.
(3) Appuyer sur la touche +
ou – de la télécommande
pour sélectionner le mode
de programme
Appuyer ensuite
désiré.
sur la
touche SET.
La touche +;
La touche –;
OCT.15 OCT.16 ~ NOV.13 NOV.14 QUOTID
LUN - SAM LUN - VEN SAM VEN ~ LUN DIM
OCT.15 OCT.16 ~ NOV.13 NOV.14 QUOTID
LUN - SAM LUN - VEN SAM VEN ~ LUN DIM
(4) Appuyer sur la touche +
ou – de la télécommande
pour sélectionner le
numéro du canal, et
appuyer sur la touche
SET.
RESERVATION ENREG-1
MODE
CANAL
DEBUT
FIN
VITESSE
SELEC. + / – : REGLE SET
REVENIR RETURN : QUITT MENU
REC RESERVATION-1
MODE
CH
START
STOP
SPEED
SELECT + / — : SET SET
PREVIOUS RETURN : QUIT MENU
VEN
12
--:----
--:---SP
10:20AM OCT.15 (VEN)
FRI
10
--:----
--:---SP
10:20AM OCT.15(FRI)
(5) Appuyer sur la touche +
ou – de la télécommande
pour sélectionner l’heure
de mise en marche
“DEBUT”, et appuyer sur
la touche SET.
(6) Appuyer sur la touche +
ou – de la télécommande
pour régler les minutes de
mise en marche “DEBUT”,
et appuyer sur la touche
SET.
(7) Appuyer sur la touche +
ou – de la télécomm
ande
pour régler l’heure d’arrêt
“FIN”, et appuyer
sur la
touche SET.
(8) Appuyer sur la touche +
ou – de la télécommande
pour régler les minutes
d’arrêt “FIN”, et appuyer
sur la touche SET.
(9) Appuyer sur la touche +
ou – de la télécommande
pour sélectionner la
vitesse de bande (SP ou
EP), et appuyer sur la
touche SET.
(10)Appuyer sur la touche +
ou – de la télécommande
pour sélectionner
“TERMINÉ”, et appuyer
sur la touche SET. LES
ENREGISTREMENTS
PROGRAMMES sont
RESERVATION ENREG-1
MODE
CANAL
DEBUT
FIN
VITESSE
SELEC. + / – : REGLE SET
REVENIR RETURN : QUITT MENU
RESERVATION ENREG-1
MODE
CANAL
DEBUT
FIN
VITESSE
SELEC. + / – : REGLE SET
REVENIR RETURN : QUITT MENU
RESERVATION ENREG-1
MODE
CANAL
DEBUT
FIN
VITESSE
SELEC. + / – : REGLE SET
REVENIR RETURN : QUITT MENU
RESERVATION ENREG-1
MODE
CANAL
DEBUT
FIN
VITESSE
SELEC. + / – : REGLE SET
REVENIR RETURN : QUITT MENU
RESERVATION ENREG-1
MODE
CANAL
DEBUT
FIN
VITESSE
SELEC. + / – : REGLE SET
REVENIR RETURN : QUITT MENU
ENREGISTREMENTS PROGRAMMES
MODE CA DEBUT FIN
1 VEN 10 4:30
2
3
4
5
TERMINE SUITE CORRIG EFFACE
SELEC. + / – : REGLE SET
REVENIR RETURN : QUITT MENU
VEN
10
4:20PM
--:---SP
10:20AM OCT.15 (VEN)
VEN
10
4:30PM
--:---SP
10:20AM OCT.15 (VEN)
VEN
10
4:30PM
6:30PM
SP
10:20AM OCT.15 (VEN)
VEN
10
4:30PM
6:30PM
SP
10:20AM OCT.15 (VEN)
VEN
10
4:30PM
6:30PM
SP
10:20AM OCT.15 (VEN)
]
PM 6:30PM
10:20AM OCT.15 (VEN)
maintenant activés et le
témoin de programmateur (PROGRAM
TIMER) s’allume.
• Pour faire des entrées suplémentaires, appuyer sur la
touche + ou – de la télécommande pour sélectionner
“SUITE” et appuyer sur la touche SET. Répéter ensuite les
étapes (3) à (10).
• Pour corriger le programme actuel, appuyer sur la touche
+ ou – de la télécommande pour sélectionner “CORRIG”,
puis appuyer sur la touche SET. Répéter ensuite les
étapes (3) à (10).
SP
18
16-19 13VT-CR10[F].pm65e 21/5/01, 6:59 PM18
Page 43

Enregistrement avec le minuteur (suite)
PROGRAM TIMER 1
PROGRAM TIMER 2
7:00 8:00 8:30 10:00
7:00 8:30 10:00
PROGRAM TIMER 1
Start
Recording
Start
Recording
End
Recording
End
Recording
Start
Recording
Start
Recording
End
Recording
End
Recording
PROGRAM TIMER 2
L Pour vérifier des données d’un programme, appuyer
sur la touche CONFIRM de la télécommande.
1 QUOTID 82 4:30
2 LUN-VEN 123 10:00AM
3 15(SAM) 56 11:00AM
4
5
TERMINE SUITE CORRIG EFFACE
SELEC. + / – : REGLE SET
REVENIR RETURN : QUITT MENU
L
Pour ajouter au contenu du programme
(1) Appuyer sur la touche
CONFIRM de la télé-
commande.
(2) Appuyer sur la touche + ou
– de la télécommande pour
sélectionner “SUITE”, puis
appuyer sur la touche SET.
(3)
Pour ajouter un programme,
1 QUOTID 82 4:30
2 LUN-VEN 123 10:00AM
3 15(SAM) 56 11:00AM
4
5
TERMINE SUITE CORRIG EFFACE
SELEC. + / – : REGLE SET
REVENIR RETURN : QUITT MENU
effectuer les opérations (3)
à (10) de “Réglage du
minuteur”.
L Pour changer les données du programme :
(1) Appuyer sur la touche
CONFIRM de la télé-
commande.
(2)
Appuyer sur la touche + ou
– de la télécommande pour
sélectionner “CORRIG”,
puis appuyer sur la touche
SET.
1 QUOTID 82 4:30
2 LUN-VEN 123 10:00AM
3 15(SAM) 56 11:00AM
4
5
TERMINE SUITE CORRIG EFFACE
SELECT PROGRAMME A CORRIGER
SELEC. + / – : REGLE SET
REVENIR RETURN : QUITT MENU
(3) Appuyer sur la touche + ou
– de la télécommande
pour sélectionner le
programme à corriger, puis
appuyer sur la touche SET.
Pour le régler à nouveau,
suivre les étapes (3) à (10)
de “Réglage du minuteur”.
L
Pour effacer les données du programme
(1) Appuyer sur la touche
CONFIRM de la télé-
commande.
(2) Appuyer sur la touche + ou
– de la télécommande pour
sélectionner “EFFACE”,
puis appuyer sur la touche
SET.
1 QUOTID 82 4:30
2 LUN-VEN 123 10:00AM
3 15(SAM) 56 11:00AM
4
5
TERMINE SUITE CORRIG EFFACE
SELECT PROGRAMME A EFFACER
SELEC. + / – : REGLE SET
REVENIR RETURN : QUITT MENU
(3) Appuyer sur la touche + ou
– de la télécommande pour
sélectionner le programme
à effacer, puis appuyer sur
la touche SET.
(4) Appuyer sur la touche
CONFIRM de la télé-
commande pour retourner
à l’écran normal.
Remarque :
• Durant le réglage du minuteur (alors que le témoin PROGRAM
TIMER est allumé), il est impossible de modifier ou de supprimer le contenu du programme. Pour effectuer ces opérations,
appuyer sur la touche TIMER ON/OFF de la télécommande et
éteindre le témoin de minuteur PROGRAM TIMER.
ENREGISTREMENTS PROGRAMMES
MODE CA DEBUT FIN
10:20AM OCT.15 (VEN)
PM 6:00PM
11:30AM
1:20PM
:
ENREGISTREMENTS PROGRAMMES
MODE CA DEBUT FIN
10:20AM OCT.15 (VEN)
ENREGISTREMENTS PROGRAMMES
MODE CA DEBUT FIN
10:20AM OCT.15 (VEN)
PM 6:00PM
11:30AM
1:20PM
PM 6:00PM
11:30AM
1:20PM
:
ENREGISTREMENTS PROGRAMMES
MODE CA DEBUT FIN
10:20AM OCT.15 (VEN)
PM 6:00PM
11:30AM
1:20PM
L Remarques sur l’enregistrement avec le minuteur
• Fausses données entrées pendant la programmation :
(1) Appuyer sur la touche RETURN de la télécommande pour
SP
EP
SP
retourner à la rubrique que vous souhaitez changer.
(2) Appuyer sur la touche + ou – de la télécommande pour
régler la donnée à nouveau.
(3) Pour avancer l’opération, appuyer sur la touche SET.
• Si la cassette vidéo prend fin avant que toutes les emissions
n’aient été enregistrées, le magnétoscope s’arrêtera, éjectera
la cassette et se mettra hors tension.
• Si le cordon d’alimentation demeure débranché, les données
du minuteur seront annulées.
• Si “Terminé” est sélectionné pour passer en mode de veille du
SP
EP
SP
MINUTEUR alors qu’aucune cassette n’est insérée, le témoin
de minuteur PROGRAM TIMER clignote pendant 3 secondes
et le message “NO TAPE” apparaît pour indiquer que l’enre-
gistrement avec le minuteur n’est pas possible.
• Si “Terminé” est sélectionné pour passer en mode de veille du
MINUTEUR alors qu’une cassette non dotée de la languette
de protection contre l’effacement est insérée dans l’appareil,
le témoin de minuteur PROGRAM TIMER clignote et la cassette est éjectée.
• Pour arrêter un enregistrement programmé, appuyer sur la
touche STOP.
• Si on n’appuie sur aucune touche pendant 3 minutes alors
SP
EP
SP
qu’on effectue une programmation, le magnétoscope reprend
son mode de fonctionnement normal.
• Une programmation ne peut pas être complétée à moins qu’on
entre toutes les données de l’enregistrement.
• Le magnétoscope reste hors de fonctionnement, pendant le
réglage du minuteur (avec le témoin de minuteur PROGRAM
TIMER allumé). Pour utiliser le magnétoscope, appuyer sur la
touche TIMER ON/OFF de la télécommande pour éteindre
l’indicateur PROGRAM TIMER. Après utilisation, charger une
cassette dans le magnétoscope, appuyer sur la touche TIMER
ON/OFF et vérifier si le témoin de minuteur PROGRAM TIMER
s’allume.
• Vérifier si le bon mode de réception des signaux de télévìsion
(ANTENNE/CABLE) est sélectionné avant de passer en mode
de veille du minuteur, sinon le magnétoscope ne pourra pas
SP
EP
SP
enregistrer le canal de télévision souhaité.
• Si deux programmes de préenregistrement se chevauchent,
l’heure de fin d’enregistrement du PROGRAMME 1 aura priorité sur l’heure de début d’enregistrement du PROGRAMME
2.
Exemple :
Intervalle du minuteur de préenregistrement
Intervalle du minuteur d’enregistrement effectif
16-19 13VT-CR10[F].pm65e 21/5/01, 6:59 PM19
19
Page 44

Duplication d’une cassette
Votre télé-magnétoscope peut copier des programmes vidéo lus sur un autre magnétoscope.
Le raccordement est illustré ci-dessous. Commencer simultanément l’enregistrement sur le télé-magnétoscope et la lecture
d’un magnétoscope.
Raccordements vidéo
AVANT
POWER/
POWER
WAKE-UP
PROGRAM
TAMPER
TIMER
REC
TIMER
PROOF
CAMÉSCOPE
ENTRÉE VIDÉO
DANS UNE SOURCE VIDÉO; Vers la SORTIE VIDÉO
FWDREV
MAGNÉTOSCOPE JEUXDVD
ENTRÉE AUDIO
Vers la SORTIE AUDIO
APPAREIL VIDÉO
1. Dans la source vidéo
• Insérer la cassette enregistrée.
2. Dans le télé-magnétoscope
• Insérer la cassette vierge.
3. Choisir une source déntrée
• On peut sélectionner le canal en appuyant sur la touche d’entrée INPUT ou sur les touches haut/bas CH (8/9) du télémagnétoscope ou de la télécommande.
(Les images et le son passant par l’entrée audio/vidéo VIDEO IN/AUDIO IN peuvent être lus sur le canal d’entrée INPUT.)
4. Pour la lecture de la cassette
• Appuyer sur la touche PLAY de la télécommande.
5. Pour l’enregistrement (copie)
• Appuyer sur la touche REC.
Remarque :
• Lors du raccordement d’un appareil vidéo ou audio au téléviseur, s’assurer que le téléviseur et l’appareil qui lui est raccordé
sont hors tension. Le contraire risquerait d’endommager l’un ou l’autre des appareils.
• SHARP entend que ce produit soit utilisé en stricte conformité avec les lois de copyright et qu’une autorisation préalable soit
obtenue des détenteurs des droits d’auteur, le cas échéant.
• Pour plus de détails concernant le raccordement et l’utilisation d’appareils auxiliaires, se reporter aux modes d’emploi de
ces appareils.
• Les cordons de raccordement sont disponibles chez un détaillant vidéo.
20
20-22 13VT-CR10[F].pm65e 18/5/01, 1:55 PM20
Page 45

Avant d’appeler un technicien
Les conditions suivantes ne sont pas nécessairement synonymes de panne. Effectuer les vérifications décrites ci-dessous
avant de confier l’appareil à un réparateur.
Problème Solution proposée
• Pas d’alimentation. • Vérifier si le cordon d’alimentation est branché dans la prise.
• Enregistrement impossible. • La languette de protection contre l’effacement a été ôtée.
• La cassette est automatiquement éjectée
quand la touche REC ou TIMER ON/OFF
est enfoncée.
• Absence de couleur en réception télévision, ou
réception pauvre de couleur.
• Fantômes en réception télévision. • La réception TV pourrait être altérée s’il y a des montagnes, hauts
• Taches sur l’image en réception télévision. • Des automobiles, enseignes lumineuses, etc. pourraient affecter la réception
• Le ruban ne défile pas. • Vérifier si le mode Pause/Still(Arrêt) est hors service.
• Apparition de “neige” à la lecture. • Il se peut que l’humidité condensée ou le revêtement magnétique de la
• Impossibilité de charger une cassette. • S’assurer qu’une autre cassette n’est pas déjà chargée.
• L’enregistrement avec le minuteur ne
fonctionne pas.
• L’horloge n’est pas réglée automatiquement. •
• Bruit électrique extérieur interférant avec le
fonctionnement du téléviseur.
• Vérifier la prise, les fusibles et le disjoncteur.
Utiliser une autre cassette ou recouvrir l’ouverture avec du ruban adhésif.
• Vérifier si une cassette est bien chargée.
• La languette de protection contre l’effacement a été ôtée.
Utiliser une autre cassette ou recouvrir l’ouverture avec du ruban adhésif.
• Vérifier si le câble d’antenne est correctement branché.
• Régler les canaux correctement en se reportant à “PRÉRÉGLAGE DES
CANAUX”.
• Vérifier s’il n’y a pas de court-circuit dans le câble d’antenne.
• Se reporter à “REGLAGE VIDEO” et régler le contraste, la couleur et/ou
la luminosité.
bâtiments ou grands arbres à proximité. L’image pourrait s’améliorer si on
ajuste l’antenne.
télévision.
Placer l’antenne le plus loin possible des rues et enseignes lumineuses.
• S’assurer que le ruban n’est ni au début ni à la fin.
cassette vidéo ait contaminé les têtes.
(Si c’est le cas, confier le nettoyage des têtes à votre revendeur ou à un
centre de service Sharp agréé.)
• S’assurer que la cassette est bien orientée et la remettre en place.
• Appuyer sur la touche TIMER ON/OFF de la télécommande pour activer
l’enregistrement avec le minuteur.
(Le témoin de mise en marche/arrêt de la minuterie TIMER ON/OFF de
l’appareil doit normalement s’allumer.)
Dans certaines régions, il n’est pas possible de régler automatiquement l’horloge.
Elle doit alors être réglée manuellement.
• Débrancher le téléviseur et le rebrancher après 2 minutes.
20-22 13VT-CR10[F].pm65e 18/5/01, 1:55 PM21
21
Page 46

Caractéristiques
MODÈLE 13VT-CR10
Système de réception NTSC
Canaux reçus
ANTENNE VHF Canaux 2-13
UHF Canaux 14-69
CÂBLE Canaux 1-125
Syntonisation des chaînes Système de syntonisation PLL pour réception de 181 canaux
Impédance d’entrée de l’antenne VHF/UHF 75 ohms non pondérés
Taille de l’écran 13" en diagonale
Bornes 1 x entrée audio/vidéo (1 x avant)
Sortie son 1,0 W
Source d’alimentation 120 V CA, 60 Hz
Consommation électrique 65 W
Format des cassettes vidéo Norme NTSC VHS
Système d’enregistrement vidéo Balayage hélicoïdal à 2 têtes rotatives
Nombre de têtes vidéo2
Norme des signaux vidéo Système de couleurs NTSC
(lecture/enregistrement)
Largeur de bande 12,7 mm (1/2 pouce)
Vitesse de bande (SP) 33,35 mm/s
Durée d’enregistrement/lecture (SP) 120 minutes max. avec cassette T-120
Température de fonctionnement 5°C à 40°C (41°F à 104°F)
Dimensions 147/8˝ (L) x 1515/64˝ (H) x 1449/64˝ (P)
Poids (approx.) 26,9 lbs. (12,2 kg)
(LP) 16,68 mm/s (lecture seulement)
(EP) 11,12 mm/s
(LP) 240 minutes max. avec cassette T-120 (lecture seulement)
(EP) 360 minutes max. avec cassette T-120
[378,0 mm (L) x 387,0 mm (H) x 375,0 mm (P)]
• Présentation et caractéristiques susceptibles d’être modifiées sans avis préalable.
22
20-22 13VT-CR10[F].pm65e 18/5/01, 1:55 PM22
Page 47

Remarques
23-24 13VT-CR10[F].pm65e 18/5/01, 1:57 PM23
23
Page 48

POUR CANADA SEULEMENT
GARANTIE LIMITÉE
Produits électroniques grand public
Bravo! Vous venez de faire un excellent achat!
Sharp Électronique du Canada Ltée (ci-après nommée “Sharp”) donne la garantie expresse suivante à l’acheteur initial du produit cidessous mentionné de Sharp, si celui-ci est emballé dans son contenant original et s’il est vendu et distribué au Canada par Sharp
ou par un détaillant autorisé Sharp.
Sharp garantit que ledit produit est, s’il est utilisé et entretenu normalement, exempt de défaut de fabrication. Si un défaut de fabrication
est décelé durant la période de garantie stipulée, Sharp s’engage à réparer ou remplacer, selon son choix, le produit spécifié ci-dessous.
La garantie offerte par Sharp ne s’applique pas:
(a) Aux appareils qui ont été l’objet d’un emploi abusif, de négligence, d’un accident, d’une installation inadéquate ou d’une utilisation
non appropriée, tel qu’il est mentionné dans le manuel du propriétaire;
(b) Aux produits Sharp altérés, modifiés, réglés ou réparés ailleurs qu’aux bureaux de Sharp, à un centre agréé de service Sharp ou
à un détaillant autorisé au service Sharp;
(c) Au dommage causé ou réparation requise à la suite de l’utilisation avec des articles non désignés ou approuvés par Sharp, y
compris, mais non limité aux rubans pour nettoyage de tête et les nettoyants chimiques;
(d) Au remplacement des accessoires, des pièces en verre, des articles consommables ou périphériques, devenu nécessaire à la
suite d’une utilisation normale du produit, y compris, mais sans en être limité, les écouteurs, les télécommandes, les adaptateurs
c.a., les piles, la sonde de température, les pointes de lecture, les plateaux, les filtres, les courroies, rubans, papier ou autre;
(e) Aux défauts cosmétiques à la surface ou à l’extérieur de l’appareil, qui sont causés par une usure normale;
(f) Aux dommages causés par des conditions extérieures et relatives à l’environnement, y compris mais non limité à du liquide
répandu, une tension de la ligne électrique ou de transmission trop élevée ou autre;
(g) Aux produits dont le numéro de série et de modèle ou le marquage CSA/CUL, ou les deux, ont été enlevés ou éffacés;
(h) Aux produits de consommation utilisés à des fins de location.
(i) Aux coûts d’installation, configuration et/ou programmation.
Si un défaut de fabrication est décelé dans ce produit Sharp au cours de la période de la garantie, la réparation sous garantie est offerte
à condition que le produit Sharp soit livré accompagné de la preuve d’achat et une copie de cette GARANTIE LIMITÉE à un centre
agréé de service Sharp ou à un détaillant autorisé au service Sharp. La garantie de service à domicile peut être offerte, à la discrétion
de Sharp, sur tous les téléviseurs Sharp dont l’écran est de 27 pouces ou plus et sur les fours à micro-ondes Sharp au-dessus de la
cuisinère.
La garantie ci-dessus constitue la seule garantie expresse accordée par Sharp. Aucun autre détaillant, aucun centre de service, leurs
représentants ou employés, ne sont autorisés à prolonger la durée de la garantie, à fournir des garanties autres ou à transférer cette
garantie au nom de Sharp. Dans la mesure où la loi en vigueur le permet, Sharp décline toute responsabilité des pertes ou les
dommages directs ou indirects, des pertes ou les dommages imprévus et des pertes de profits indirectes résultant d’un défaut de
fabrication du produit, y compris les dommages reliés à la perte de temps ou d’utilisation de ce produit Sharp. L’acheteur doit assumer
les coûts de démontage, de réinstallation, de transport et d’assurance de l’appareil. La réparation des défectuosités, selon la manière
et durant la période ci-haut décrites, constitue l’exécution complète de toutes les obligations et les responsabilitiés de Sharp vis-à-vis
de l’acheteur en ce qui a trait au produit et constituera un acquittement complet pour toute réclamation, qu’elle soit basée sur le contrat,
la négligence, la responsabilité stricte ou autre.
Téléviseur couleur 1 an (tube cathodique 1 an supplémentaire)
Projecteur LCD 1 an (ampoule 90 jours)
Téléviseur LCD 1 an
Magnétoscope 1 an
Caméscope 1 an
Téléviseur/magnétoscope 1 an (tube cathodique 1 an supplémentaire)
Produits audio 1 an
Four à micro-ondes 2 ans (magnétron 3 ans de garantie supplémentaire - pièces seulement)
Aspirateurs 1 an
Lecteur DVD 1 an
PÉRIODES DE GARANTIE
Pour obtenir le nom et l’adresse du Centre de service ou du détaillant autorisé au service Sharp le plus près, veuillez écrire ou téléphoner à:
SHARP ÉLECTRONIQUE DU CANADA LTÉE.
SHARP ÉLECTRONIQUE DU CANADA LTÉE
335 Britannia Road East
Mississauga, Ontario
L4Z 1W9
(905) 568-7140 ou 1-(877) SHARP-CC
Site Web : www.sharp.ca
SHARP ÉLECTRONIQUE DU CANADA LTÉE.
335 BRITANNIA ROAD EAST, MISSISSAUGA, ONTARIO L4Z 1W9
SHARP CORPORATION
24
23-24 13VT-CR10[F].pm65e 22/5/01, 1:37 PM24
Imprimé en Malaisie
TINS-7456PEZZ
0107-MSP
 Loading...