

Shark Pressure Washers STP-231007D, STP-201507D, STP-352007A Operator's Manual

M
STP-231007D 1.109-101.0
STP-201507D 1.109-102.0
STP-352007A 1.109-103.0
STP-231007D 1.109-133.0
STP-352007A 1.109-134.0
o locate your local Shark Commercial Pressure Washer Dealer nearest you,
T
ORDER #
visit www.shark-pw.com
9.801-191.0

CONTENTS
Introduction and Safety Information 3-5
Component Identifi cation 6
Operating Instructions 7-8
Preventative Maintenance and Service 9-11
Exploded Views 12-13
Exploded Views Parts List 14-15
Control Panel Exploded View and Parts List 16
Hose & Spray Gun Assembly and Parts List 17
Downstream Injector Assembly and Parts List 18
UU1 Unloader Exploded View and Parts List 19
Pump Exploded View and Parts List 20-21
Burner Clear Flame Exploded View and Parts List 22-23
Troubleshooting 24
Maintenance Schedule 25
Model Number ______________________________
Serial Number ______________________________
Date of Purchase ____________________________
The model and serial numbers will be found on a decal at tached
to the pressure washer. You should record both serial number and
date of purchase and keep in a safe place for future ref er ence.
2
99
v. 02/14B
INTRODUCTION & IMPORTANT SAFETY INFORMATION
PRESSURE W ASHER
ou for purchasing this Pressure Washer.
We reserve the right to make changes at any time
without incurring any obligation.
Owner/User Responsibility:
The owner and/or user must hav e an understanding of
the manufacturer’ s operating instructions and warnings
before using this pressure washer . W arning information
should be emphasized and understood. If the operator
is not fluent in English, the manufacturer’ s instructions
and warnings shall be read to and discussed with
the operator in the operator’s native language by the
purchaser/owner, making sure that the oper ator comprehends its contents.
Owner and/or user must study and maintain for future
reference the manufacturers’ instructions.
The operator must know how to stop the machine
quickly and understand the operation of all controls.
Never permit anyone to operate the engine without
proper instructions.
SA VE THESE INSTRUCTIONS
This manual should be considered a permanent
part of the machine and should remain with it if
machine is resold.
When ordering parts, please specify model and
serial number . Use onl y identical replacement parts.
This machine is to be used only by trained operators.
IMPORTANT SAFETY
INFORMATION
WARNING: To reduce the risk of
injury, read operating instructions carefully before using.
1. Read the owner's manual
thoroughly. Failure to follow instructions could cause
R R
MANUAL THOROUGHL Y
PRIOR TO USE.
TOR’S
2. Know how to stop the machine and bleed pressure
quickly. Be thoroughly familiar with the controls.
3. Stay alert — watch what you are doing.
4. All installations must comply with local codes.
Contact your electrician, plumber, utility compan y
or the selling distributor for specifi c details. If your
machine is rated 250 volts or less, single phase will
be provided with a ground fault circuit interrupter
(GFCI). If r ated more than 250 volts , or more than
single phase this product should only be connected
to a power supply receptacle protected by a GFCI.
malfunction of the machine
and result in death, serious
bodily injury and/or proper ty
damage.
DANGER: Improper connection of the equipmentgrounding conductor can result in a risk of electrocution. Check with a qualified electrician or
service personnel if you are in doubt as to whether
the outlet is properly grounded. Do not modify the
plug provided with the product - if it will not fi t the
outlet, have a proper outlet installed by a qualifi ed
electrician. Do not use any type of adaptor with
this product
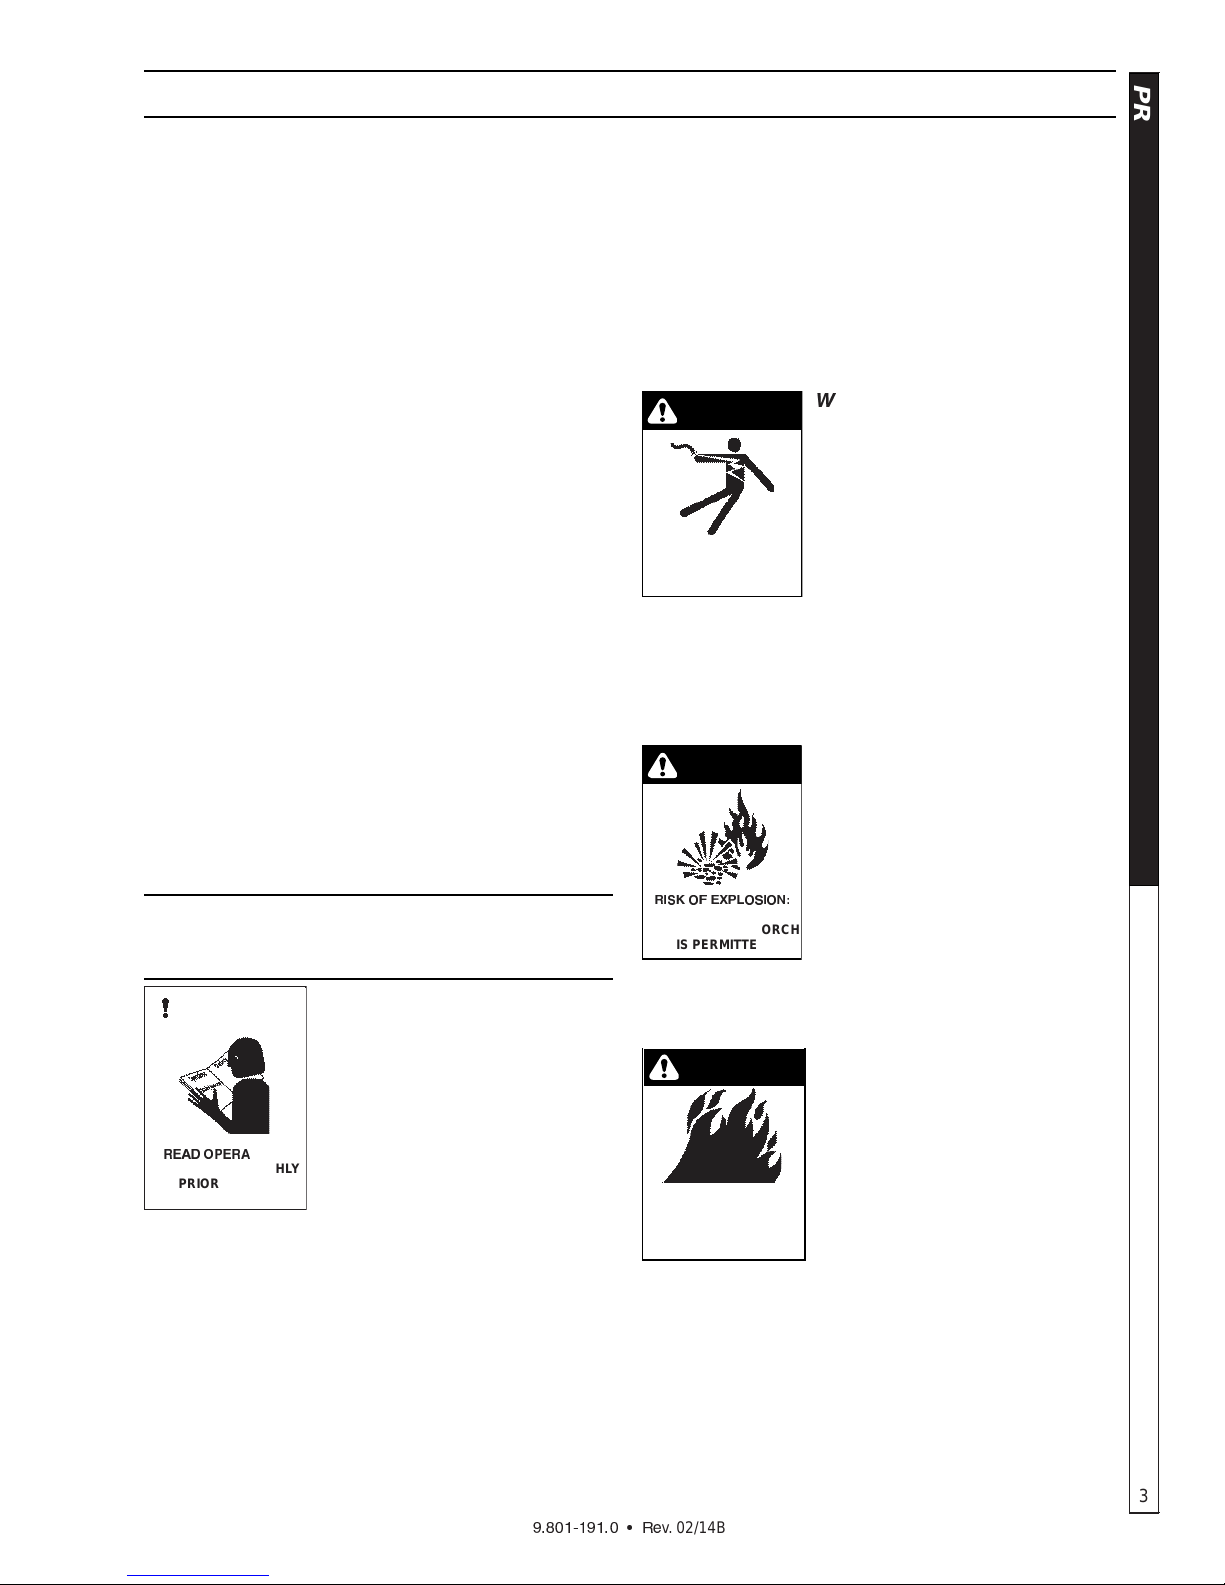
ARNING: Keep wand, hose, and
WARNING
W
water spray away from electric
wiring or fatal electric shock may
result.
5. To protect the operator from
electrical shock, the machine
ATER
K
SPRAY AWAY FROM
ELECTRICAL WIRING.
must be electrically grounded.
It is the responsibility of the
owner to connect this machine
to a UL grounded receptacle of proper voltage and
amperage ratings. Do not spray water on or near
electrical components. Do not touch machine with
wet hands or while standing in water. Always disconnect power before servicing.
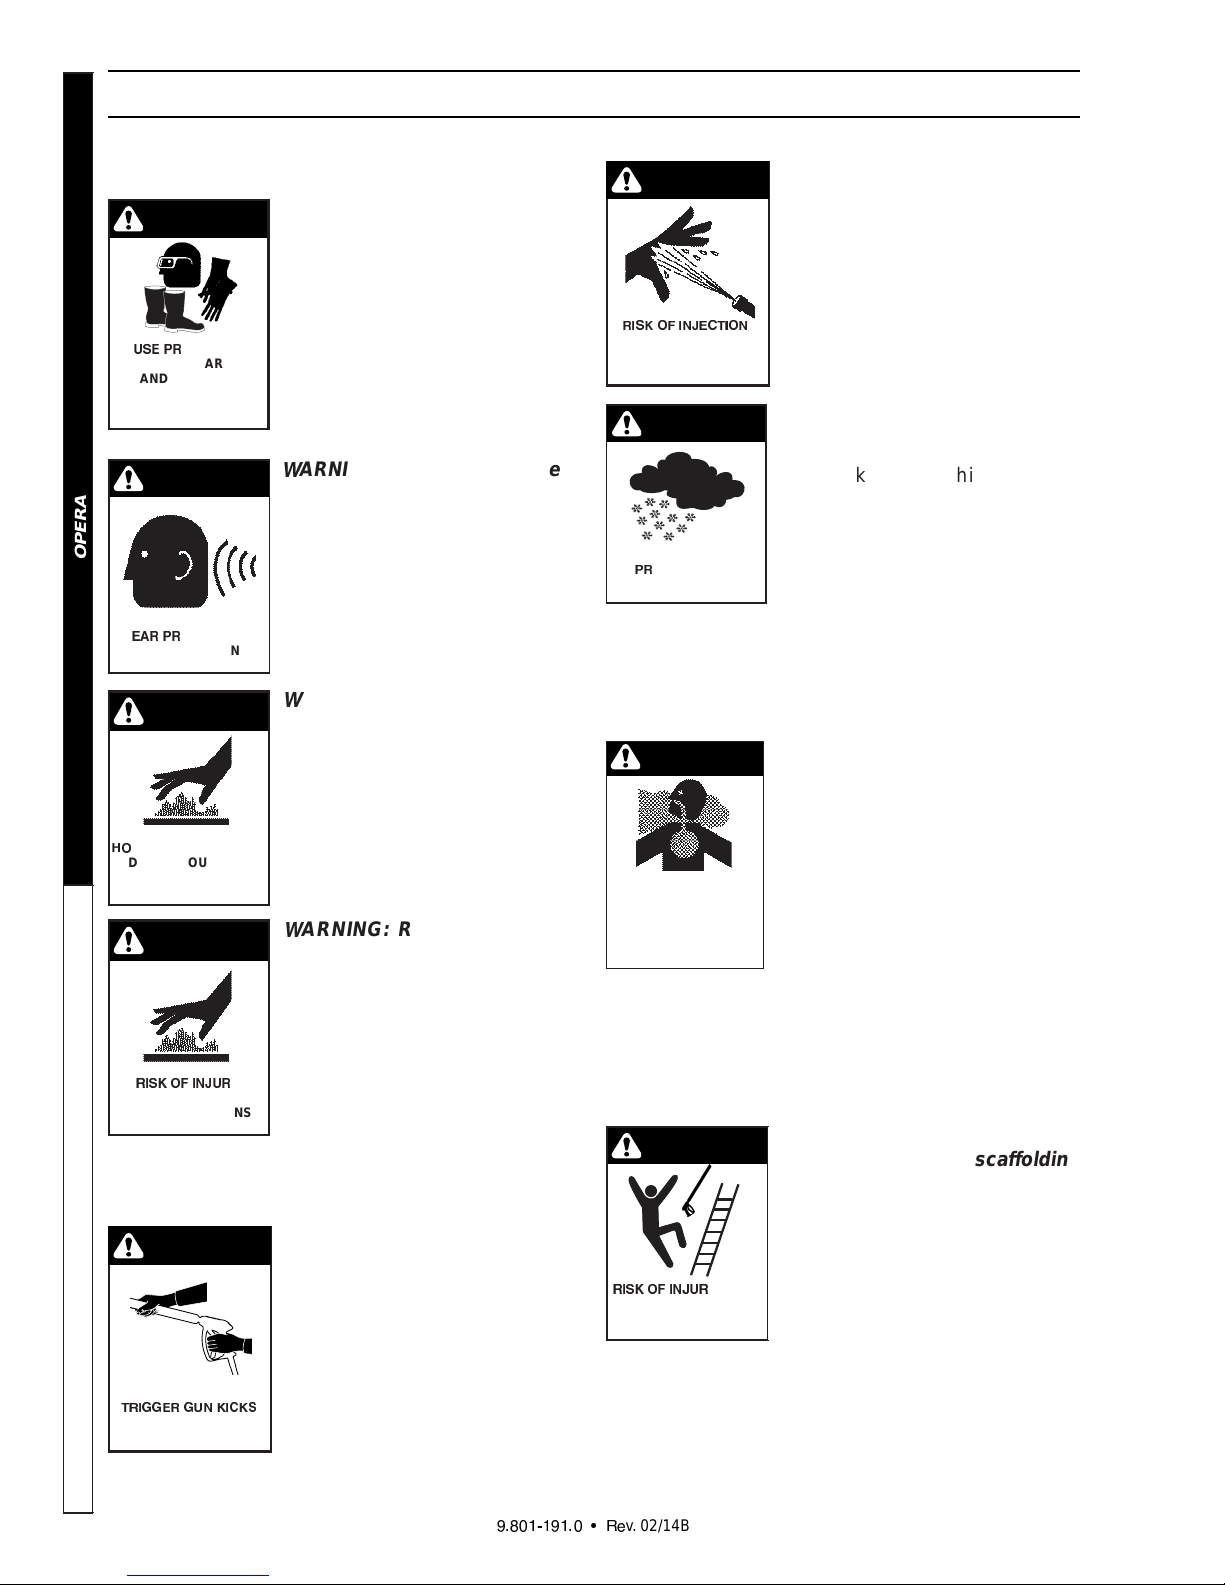
ARNING: Flammable liquids
WARNING
W
can create fumes which can ig-
nite, causing property damage
or severe injury.
WARNING: Risk of explosion
Operate only where open fl ame
!"K#$%"!&'
R
OPERATE ONLY WHERE
OPEN FLAME OR TORCH
IS PERMITTED
or torch is permitted.
6. In oil burning models, use only kerosene, No. 1
home heating fuel, or diesel. If diesel is used, add
a soot remover to every tankful.
ARNING: Risk of fi re — Do not
WARNING
W
add fuel when the product is
operating or still hot.
WARNING: Do not use gasoline
crankcase draining or oil con-
RISK OF FIRE.
DO NOT ADD FUEL
WHEN OPERATING
MACHINE.
taining gasoline, solvents or
alcohol. Doing so will result in
fi re and/or explosion.
7. Oil burning appliances shall be installed only in
locations where combustible dusts and fl ammable
gases or vapors are not present. Do not store or
use gasoline near this machine.
8. Do not allow acids, caustic or abrasive fl uids to pass
through the pump.
9. Never run pump dry or leave spray gun closed
longer than 1-2 minutes.
v. 02/14B
OPERATOR’S MAN U AL
3
IMPORTANT SAFETY INFORMATION
10. Keep operating area clear of all persons.
WARNING
WARNING: High pressure spray
can cause paint chips or other
particles to become airborne
and fl y at high speeds. To avoid
personal injury, eye, hand and
PRESSURE W ASHER
U13 56
AND CLOTHING
WHEN OPERATING
THIS EQUIPMENT.
OTECTIVE
EYE WEAR
foot safety devices must be
worn.
11. Ey e, hand, and foot protection
must be worn when using this
equipment.
ARNING: This machine exceeds
WARNING
7
85 db appropriate ear protection
must be worn.
OPERATOR’S MANUAL
OTECTION
3E6 56
MUST BE WORN
WARNING
ARNING: Hot discharge fl uid.
7
Do not touch or direct discharge
stream at persons.
WARNING: This machine produces hot water and must have
T DISCHARGE FLUID:
H8
DO NOT TOUCH OR
DIRECT DISCHARGE
STREAM AT PERSONS.
WARNING
insulated components attached
to protect the operator.
ARNING: Risk of injury. Hot
7
surfaces can cause burns. Use
only designated gripping areas
of spray gun and wand. Do not
place hands or feet on non-insulated areas of the pressure
washer.
6:1;8< :=>U6
HOT SURFACES
CAN CAUSE BURNS
Y:
12. To reduce the risk of injury,
close supervision is necessary
when a machine is used near children. Do not allow children to operate the pressure washer. This
machine must be attended during operation.
WARNING
ARNING: Grip cleaning wand
7
securely with both hands before
starting. Failure to do this could
result in injury from a whipping
wand.
13. Never make adjustments on
?6:@@36@
BACK - HOLD WITH
U= ;:A;1
BOTH HANDS
machine while in operation.
14. Be certain all quick coupler fi ttings are secured before using
4
pressure washer.
16. Inlet water must be clean fresh water and no hotter
18. Manufacturer will not be liable for any changes
19. The best insurance against an accident is precau-
20. Do not overreach or stand on unstable support.
21. Do not operate this machine when fatigued or under
()*+,-,(,)+ . /0
ARNING: High pressure devel-
WARNING
7
oped by these machines will
cause personal injury or equipment damage. Keep clear of
nozzle. Use caution when operating. Do not direct discharge
6:1;8< :=>3A?:8=
OR SEVERE INJURY
TO PERSONS. KEEP
CLEAR OF NOZZLE.
WARNING
stream at people, or severe injury or death will result.
WARNING: Protect machine fr om
freezing.
15. To keep machine in best
operating conditions, it is
important you protect machine
from freezing. F ailure to protect
OTECT FROM
56
FREEZING
machine from freezing
could cause malfunction of the
machine and result in death,
serious bodily injury, and/or property damage. F ollow storage instructions specifi ed in this manual.
then 90°F.
WARNING
WARNING: Risk of asph yxiation.
Use this product only in a well
ventilated area.
17. Avoid installing machines in
small areas or near exhaust
6:1;8<
ASPHYXIATION: USE
THIS PRODUCT ONLY
IN A WELL
VENTILATED AREA.
fans. Adequate oxygen is
needed for combustion or
dangerous carbon monoxide
will result.
made to our standard machines or any components
not purchased from us.
tion and knowledge of the machine.
WARNING
WARNING: Be extremel y careful
when using a ladder , scaffolding
or any other relatively unstable
location. The cleaning area
should have adequate slopes
and drainage to reduce the pos-
6:1;8< :=>U6
FALLS WHEN USING
Y FROM
LADDER.
sibility of a fall due to slippery
surfaces.
Keep good footing and balance at all times.
the infl uence of alcohol, prescription medications,
or drugs.
v. 02/14B
IMPORTANT SAFETY INFORMATION
PRESSURE W ASHER
w the maintenance instructions
OPQ QP
specifi ed in the manual.
SVXY
ALLATION
Place machine in a convenient location providing ample
support, draining and room for maintenance.
This machine is intended for indoor use. Machine
must be stored indoors when not in use.
Location:
The location should protect the machine from damaging environmental conditions, such as wind, rain, and
freezing.
1. This machine should be run on a level surface
where it is not readily influenced by outside
sources such as strong winds, freezing temperature, rain, etc. It should be located to allow
accessibility for refi lling of fuel, adjustments, and
maintenance. Normal precautions should be
taken by the operator of the machine to prevent
moisture from reaching the electrical controls.
2. It is recommended that a partition be made
between the wash area and the machine to prevent water spra y from coming in contact with the
machine. Excess moisture reaching any electric
components or electrical controls will reduce
machine life and may cause electrical shorts.
3. During installation of the machine, beware of
poorly ventilated locations or areas where exhaust fans may cause an insuffi cient supply of
oxygen. Suffi cient combustion can only be obtained when there is a suffi cient supply of oxygen
available for the amount of fuel being burned. If
it is necessary to install a machine in a poorly
ventilated area, outside fresh air may ha v e to be
piped to the burner and a fan installed to bring
air into the machine.
Avoid small locations or areas near exhaust fans.
OPERATOR’S MAN U AL
BCDFGIGBGCF J LN
5
v. 02/14B

PRESSURE W ASHER
OPERATOR’S MANUAL
Downstream
Detergent
Injector
Wand Holder
Discharge
Nipple
Burner
Chamber
defgehihj klihjkmkdn
Nozzle
ON - OFF
Switch
TION
CAUTION HOT WATER:
Must use insulated spray gun
and wand.
Hour Meter
Adjustable
Thermostat
GFCI
Fresh Water
Faucet
(not included)
Burner Motor
Nozzle
Coupler
Variable Pressure
Insulated Wand
Pump
Control
Handle
Trigger
High Pressure
Outlet Hose
Unloader
Garden Hose
(not included)
Detergent Bucket
(not included)
Detergent
Suction Hose
Insulated
Spray Gun
c
Z[\]^_^Z^[] ` ab
v. 02/14B
xyz{|
TING INSTRUCTIONS
PRESSURE W ASHER
Electrical:
This machine, when installed, must be electrically
grounded in accordance to local codes. Check for
proper power supply using a volt meter.
Placement:
Do not locate near any combustible material. Keep all
flammable material at least 20 feet away.
Allow enough space for servicing the machine.
Local code will require certain distances from floor and
walls. (Two feet away from walls should be adequate.)
Water Source:
The water source for the pressure washer should be
supplied by a minimum 5/8" I.D. garden hose with a
city water pressure of not less than 30 PSI. If the water
supply is inadequate, or if the garden hose is kinked,
the attached pressure washer will run very rough and
the burner will not fire.
Connection:
Connect the wand, nozzle, hose and spra y gun (where
applicable). On pipe thread connections, use teflon tape
to avoid water leaks. (See Component Identification).
Venting:
Adding exhaust vent pipe to your oil fired burner is
not recommended because restricted air flow causes
carbon buildup, which affects the operation, and increases maintenance on the coil. If a stack must be
used, refrain form using 90° bends. If the pipe can not
go straight up then use only 45° bends and go to the
next size pipe. The o verall pipe length must not e xceed
6 feet in length.
5. Insert quick coupler onto discharge nipple and
secure by pushing quick coupler collar forward.
6. Securely attach the desired high pressure nozzle
into wand coupler as described in steps 4 and 5.
7. Connect the power cord into the proper electrical
outlet, then push in the GFCI reset button (Refer
to serial plate for information.)
8. Grip spray gun handle securely and pull trigger.
Then turn variable pressure control handle counterclockwise.
9. Turn switch to pump position. When a steady
stream of water fl ows from the spray gun and wand,
the machine is ready for cold water cleaning by turning the variable pressure control handle clockwise
to raise the pressure.
Brass Soap
Nozzle
High
Pressure
Nozzle
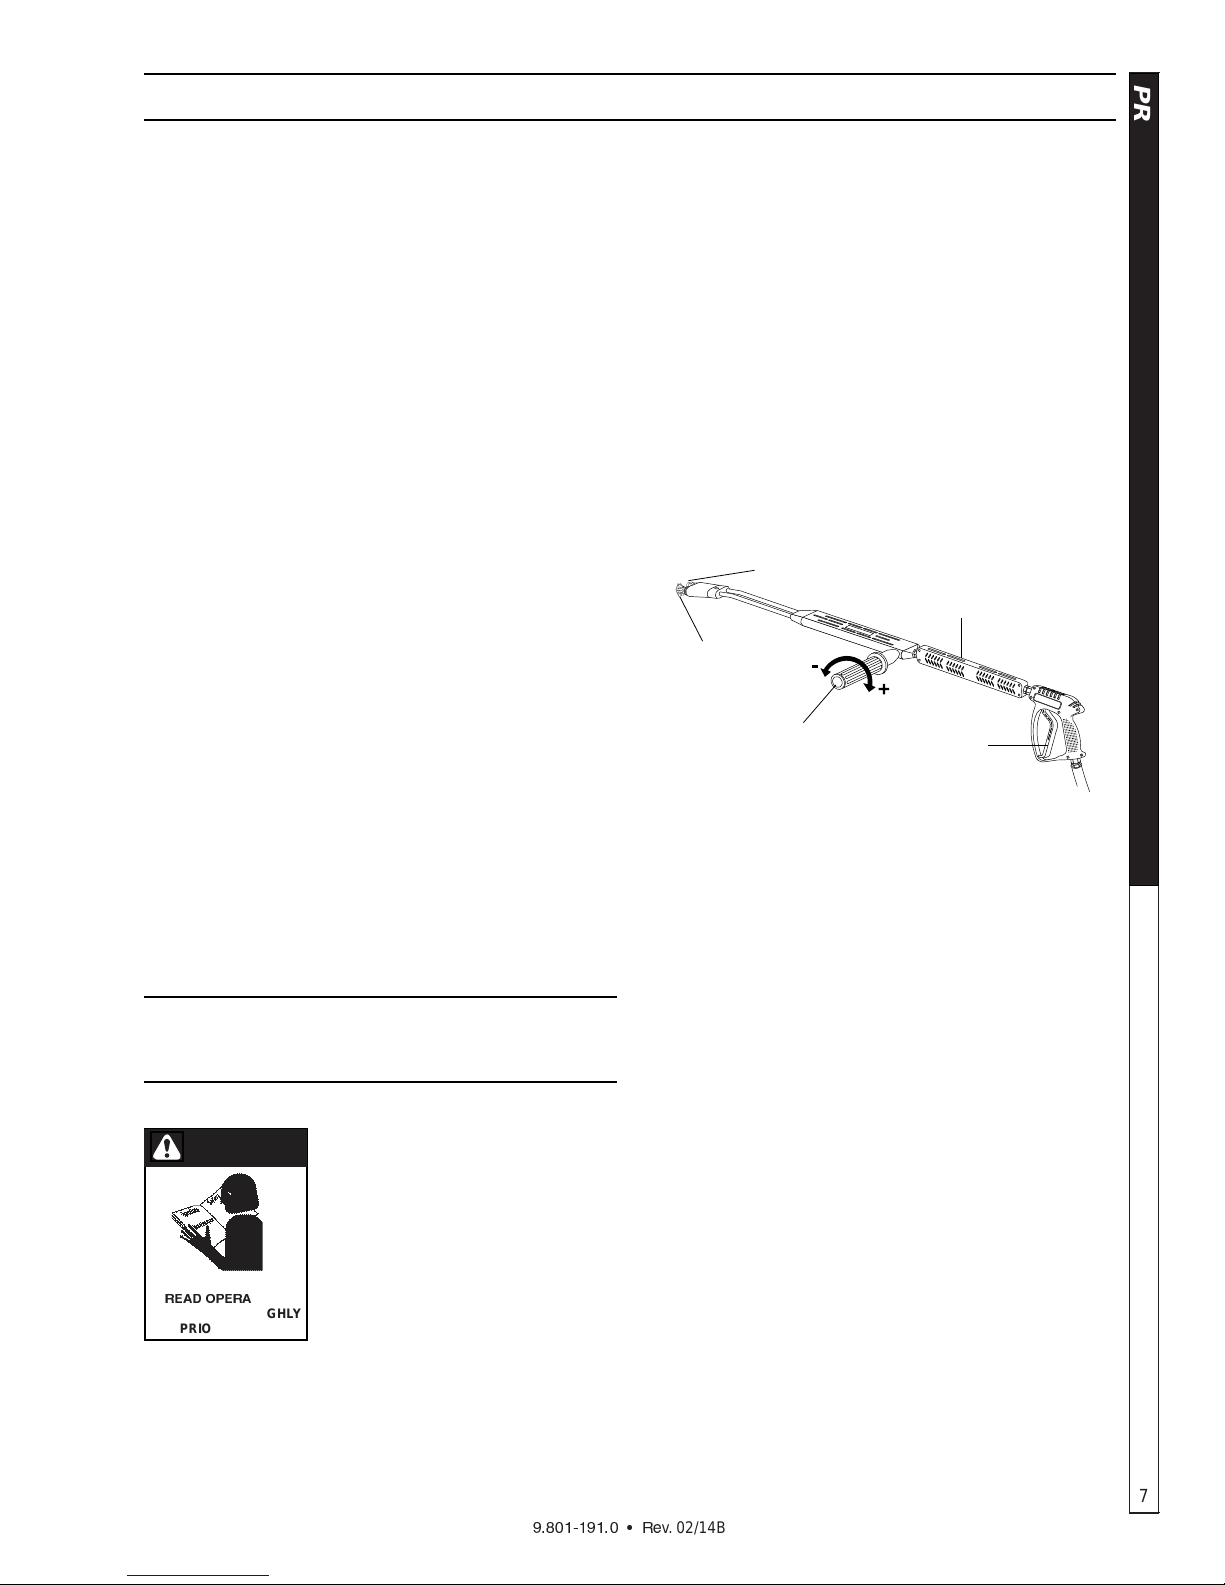
Variable Pressure
Control Handle
Variable Pressure
Wand (VP)
Trigger
Selection of high or low pressure is accompanied by
turning the handle. Note: High pressure nozzle must
be inserted at end of wand to obtain high pressure. To
apply soap read operator's manual.
10. For hot water washing, turn the switch to the burner
position. (The burner will light automatically when
the trigger on the spray gun is pulled.)
OPERATOR’S MAN U AL
STARTING AND OPERATING
INSTRUCTIONS
To Start:
CAUTION
CAUTION
}~ ~}
MANUAL THOROUGHL Y
PRIOR TO USE.
TOR’S
4. Connect high pressure hose to discharge nipple by
sliding quick coupler collar back. (If detergent is to
be applied, insert a detergent injector as shown in
Component Identifi cation).
1. STOP! Read operator's man-
ual before operating. Failure
to read operation and warning instructions may result in
personal injury or property
damage.
2. Connect water supply hose
and turn on water.
3. Check fuel tank and pump oil
levels.
To Stop:
1. If using the detergent injector, place the suction
2. T urn burner switch off and continue spra ying water ,
3. After water has cooled to less than 100°F, turn the
4. Turn garden hose water off. Open the spray gun to
5. Protect from freezing.
opqrstsospr u vw
line in a bucket of water allowing detergent to be
fl ushed from system.
allowing the water to cool.
attached pressure washer off.
relieve remaining pressure.
7
v. 02/14B
OPERATING INSTRUCTIONS
WARNING
CHAUD!
HOW TO USE THE
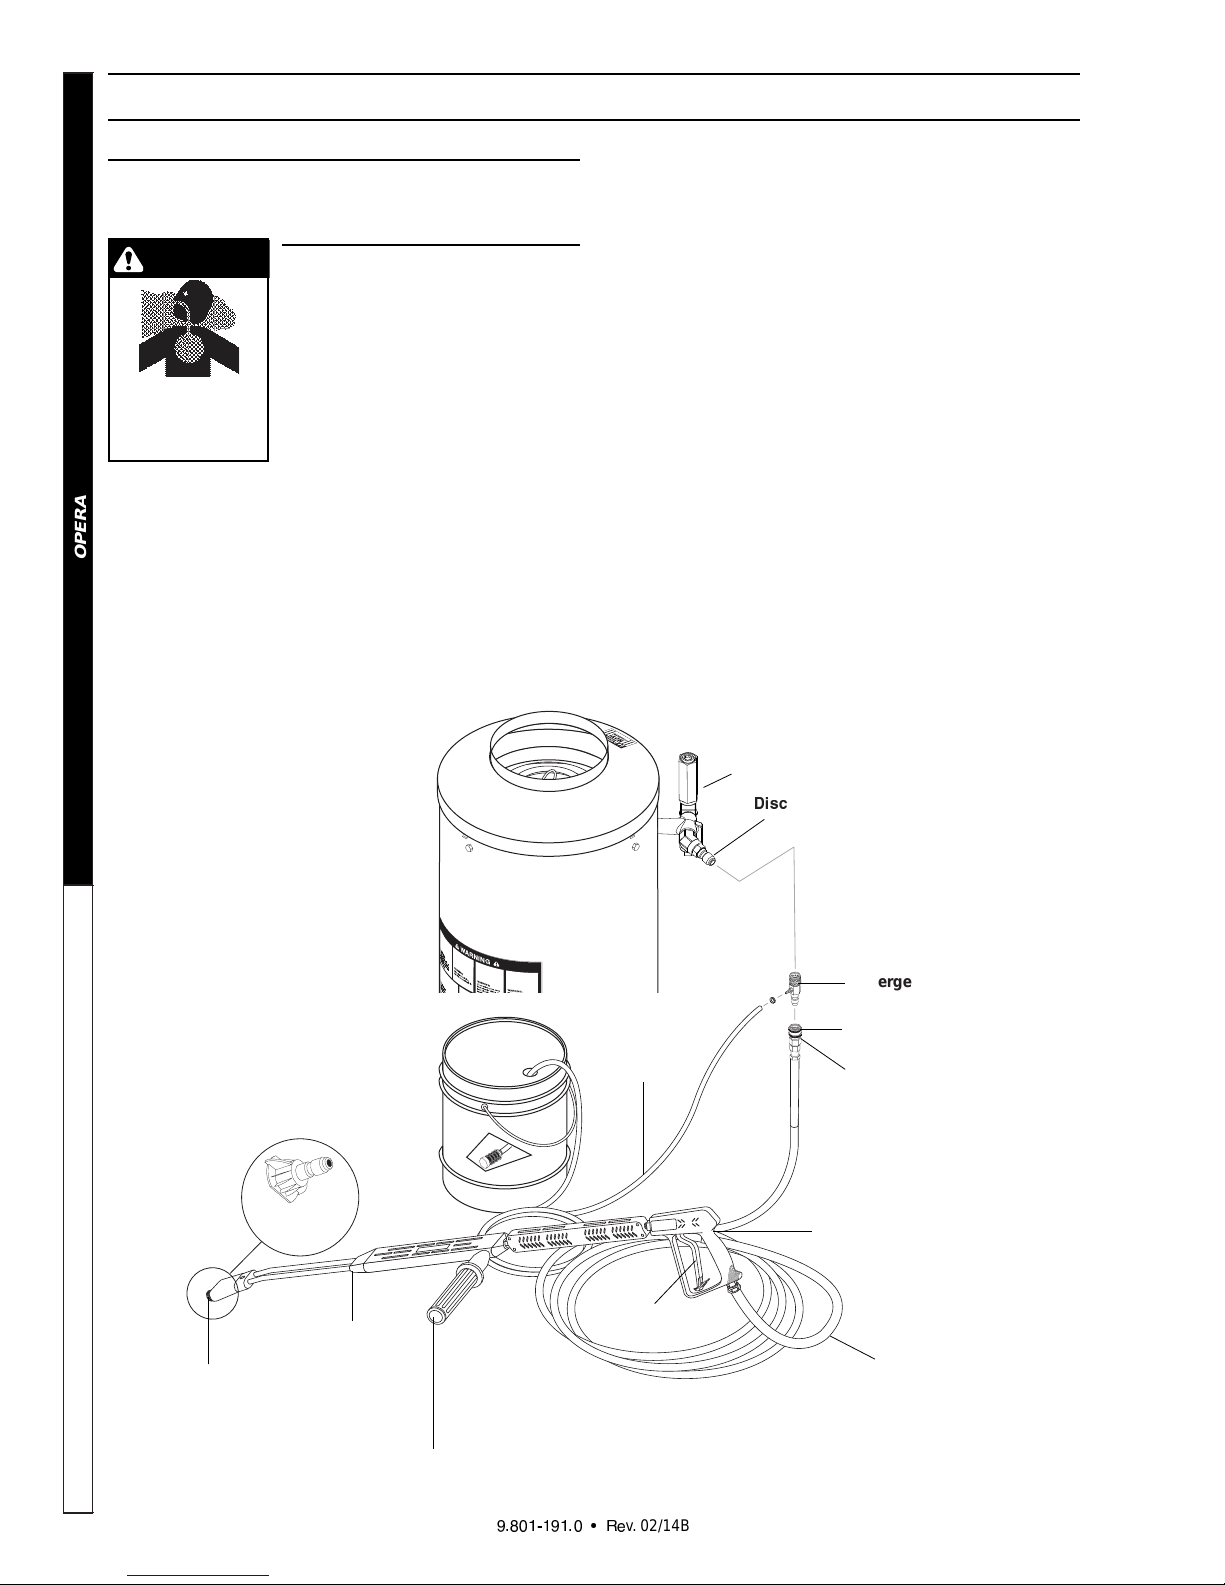
DETERGENT INJECTOR
WARNING: Some detergents
may be harmful if inhaled or ingested causing severe nausea,
PRESSURE W ASHER
SOME DETERGENTS
MAY BE HARMFUL
IF INHALED OR
INGESTED.
1. Pull injector quick coupler collar back and secure on
discharge nipple. Injector valv e body arrow should
point in direction of fl ow.
OPERATOR’S MANUAL
2. Connect high pressure hose to injector nipple securing quick coupler.
3. Start machine as outlined in Operating Instructions.
fainting or poisoning. The harmful elements may cause property
damage or severe injury.
The machine can siphon and
mix detergents with the use of
Shark's detergent injector kit.
4. Place detergent pick-up tube into container of
detergent solution.
5. T urn pressure control handle counterclockwise on
the variable pressure wand. This lowers the pressure by directing the water fl ow through the soap
nozzle and allows the detergent injector to siphon
soap.
6. Open trigger spray gun. Water detergent ratio is
approximately 15 to 1.
7. When you fi nish washing, rinse by simply turning
the variable pressure wand control handle clockwise to increase pressure.
NOTE: The detergent injector will not siphon with
water fl owing through the high pressure nozzle at
the end of the wand.
8. For clean up, place detergent pick-up tube into
container of clear water and follow steps 5 and 8
to prevent detergent deposits from damaging the
injector.
Nozzle Quick
Coupler
Brass Soap
Nozzle
Variable Pressure
Wand (VP)
Relief Valve
harge Nipple
Detergent Injector
Collar
Detergent
Pickup T ube
Trigger
Quick Coupler
Spray Gun
High Pressure
Hose
Variable Pressure
Control Handle
v. 02/14B
 Loading...