

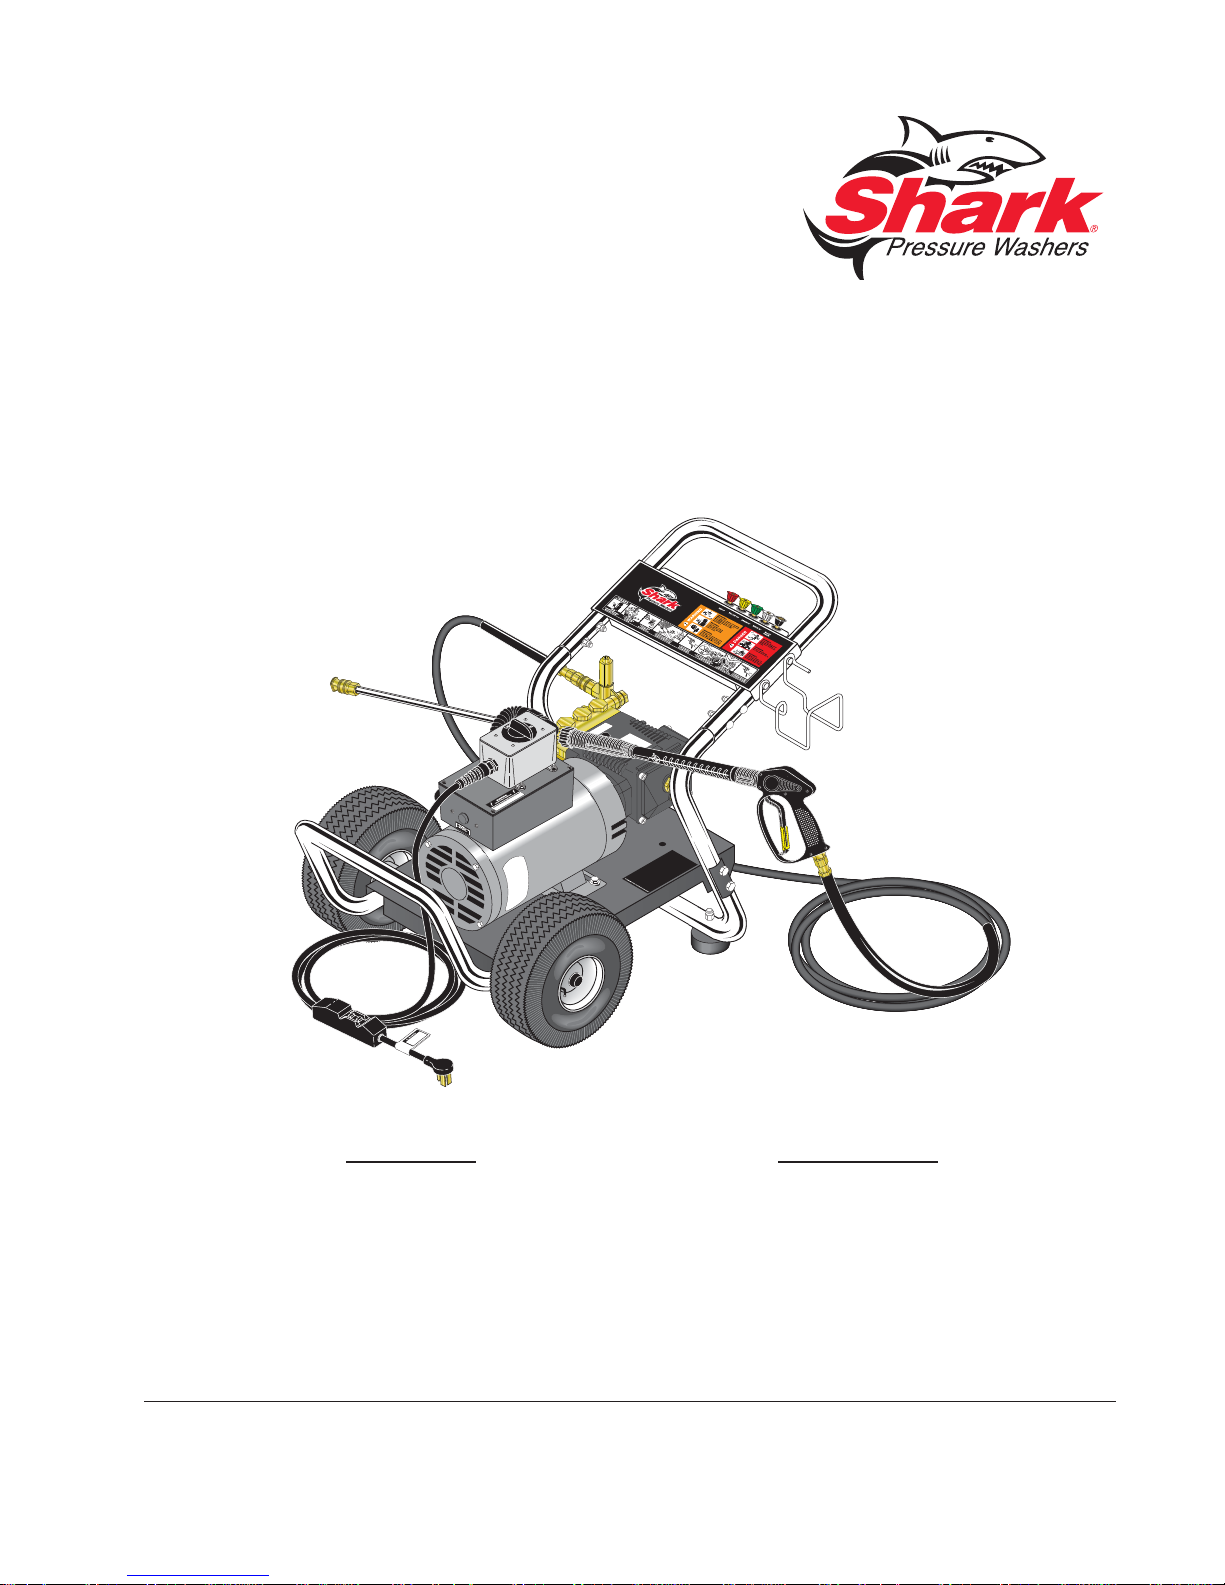
OPERATOR’S MAN U AL
MODEL ORDER #
DE-201007D 1.106-061.0
DE-201507D 1.106-062.0
DE-301007D 1.106-063.0
DE-352007A 1.106-064.0
To locate your local Shark Commercial Pressure Washer Dealer nearest you,
visit www.shark-pw.com
8.919-015.0

CONTENTS
Important Safety Information ................................................................3-4
Component Identifi cation .........................................................................5
Assembly Instructions ..............................................................................6
Operating Instructions..............................................................................7
Applying Detergents & General Cleaning Techniques .............................8
Shut Down and Clean-Up ........................................................................9
Storage ....................................................................................................9
Troubleshooting .....................................................................................10
Preventative Maintenance .....................................................................11
Oil Change Record ................................................................................11
Exploded View .......................................................................................12
Exploded View Parts List ..................................................................13-14
Hose and Spray Gun Assembly .............................................................15
Unloader Exploded View and Parts List .................................................16
Pump Exploded View and Parts List .................................................17-18
Specifi cations .........................................................................................19
Warranty ................................................................................................20
Model Number ______________________________
Serial Number ______________________________
Date of Purchase ____________________________
The model and serial numbers will be found on a decal attached
to the pressure washer. You should record both serial number and
date of purchase and keep in a safe place for future reference.
2
9.800-085.0 • 8.919-015.0 • Rev. 01/11
INTRODUCTION & IMPORTANT SAFETY INFORMATION
PRESSURE W ASHER
Thank you for purchasing this Pressure Washer.
We reserve the right to make changes at any time
without incurring any obligation.
Owner/User Responsibility:
The owner and/or user must hav e an understanding of
the manufacturer’ s operating instructions and warnings
before using this pressure washer . W arning information
should be emphasized and understood. If the operator
is not fl uent in English, the manufacturer’s instructions
and warnings shall be read to and discussed with
the operator in the operator’s native language by the
purchaser/owner, making sure that the operator comprehends its contents.
Owner and/or user must study and maintain for future
reference the manufacturers’ instructions.
The operator must know how to stop the machine
quickly and understand the operation of all controls.
Never permit anyone to operate the engine without
proper instructions.
This manual should be considered a permanent
part of the machine and should remain with it if
machine is resold.
When ordering parts, please specify model and
serial number. Use only identical replacement
parts.
This machine is to be used only by trained operators.
IMPORTANT SAFETY
INFORMATION
WARNING: To reduce the risk of
injury, read operating instructions carefully before using.
1. Read the owner's manual
thoroughly. Failure to follow
instructions could cause mal-
READ OPERATOR’S
MANUAL THOROUGHL Y
PRIOR TO USE.
machine and bleed pressure quickly. Be thoroughly
familiar with the controls.
3. Stay alert — watch what you are doing.
4. All installations must comply with local codes. Contact your electrician, plumber, utility compan y or the
selling distributor for specifi c details. If y our machine
is rated 250 volts or less, single phase will be provided with a ground fault circuit interrupter (GFCI).
If rated more than 250 volts, or more than single
phase this product should only be connected to a
power supply receptacle protected by a GFCI.
function of the machine and
result in death, serious bodily
injury and/or property damage.
2. Know how to stop the
9.800-085.0 • 8.919-015.0 • Rev. 01/11
DANGER: Improper connection of the equipment-grounding conductor can result in a risk
of electrocution. Chec k with a qualifi ed electrician or service personnel if you are in doubt as
to whether the outlet is properly grounded. Do
not modify the plug provided with the product
- if it will not fi t the outlet, have a proper outlet
installed by a qualifi ed electrician. Do not use
any type of adaptor with this product
WARNING
WARNING: Keep wand, hose, and
water spray away from electric
wiring or fatal electric shock may
result.
5. To protect the operator from
electrical shock, the machine
KEEP WA TER
SPRAY AWAY FROM
ELECTRICAL WIRING.
must be electrically grounded.
It is the responsibility of the
owner to connect this machine
to a UL grounded receptacle of proper voltage and
amperage ratings. Do not spray water on or near
electrical components. Do not touch machine with
wet hands or while standing in water. Always disconnect power before servicing.
WARNING
WARNING: Flammable liquids
can create fumes which can ig-
nite, causing property damage
or severe injury.
WARNING: Risk of explosion —
RISK OF EXPLOSION:
DO NOT SPRAY
FLAMMABLE
LIQUIDS.
Do not spray fl ammable liquids.
6. Do not allow acids,
caustic or abrasive fluids to pass through the
pump.
7. Never run pump dry or leave spray gun closed
longer than 1-2 minutes.
8. Keep operating area clear of all persons.
WARNING
WARNING: High pressure spray
can cause paint chips or other
particles to become airborne
and fl y at high speeds. To avoid
personal injury, eye, hand and
foot safety devices must be
USE PROTECTIVE
EYE WEAR
AND CLOTHING
WHEN OPERATING
THIS EQUIPMENT.
worn.
9. Eye, hand, and foot protection must be worn when
using this equipment.
OPERATOR’S MANUAL
3
IMPORTANT SAFETY INFORMATION
WARNING
WARNING: Grip cleaning wand
securely with both hands before
starting. Failure to do this could
result in injury from a whipping
wand.
TRIGGER GUN KICKS
BACK - HOLD WITH
PRESSURE W ASHER
BOTH HANDS
WARNING
WARNING: High pressure developed by these machines will
cause personal injury or equipment damage. Keep clear of
nozzle. Use caution when oper-
OPERATOR’S MANUAL
RISK OF INJECTION
OR SEVERE INJURY
TO PERSONS. KEEP
CLEAR OF NOZZLE.
ating. Do not direct discharge
stream at people, or severe injury or death will result.
10. To reduce the risk of injury, close supervision is
necessary when a machine is used near children.
Do not allow children to operate the pressure
washer. This machine must be attended during
operation.
11. Never make adjustments on machine while in operation.
12. Be certain all quick coupler fi ttings are secured
before using pressure washer.
WARNING
WARNING: Protect machine fr om
freezing.
13. To keep machine in best
operating conditions, it is
important you protect machine
from freezing. F ailure to protect
PROTECT FROM
FREEZING
machine from freezing could
cause malfunction of the
machine and result in death,
serious bodily injury, and/or property damage. F ollow storage instructions specifi ed in this manual.
14. Inlet water must be clean fresh water and no hotter
then 90°F.
15. Manufacturer will not be liable for any changes
made to our standard machines or any components
not purchased from us.
16. The best insurance against an accident is precaution and knowledge of the machine.
WARNING
WARNING: Be extremel y careful
when using a ladder , scaffolding
or any other relatively unstable
location. The cleaning area
should have adequate slopes
and drainage to reduce the pos-
RISK OF INJURY
FROM FALLS WHEN
USING LADDER.
sibility of a fall due to slippery
surfaces.
17. Do not overreach or stand on unstable support.
Keep good footing and balance at all times.
18. Do not operate this machine when fatigued or under
the infl uence of alcohol, prescription medications,
or drugs.
Follow the maintenance instructions
specifi ed in the manual.
4
9.800-085.0 • 8.919-015.0 • Rev. 01/11
Water Supply
(not included)
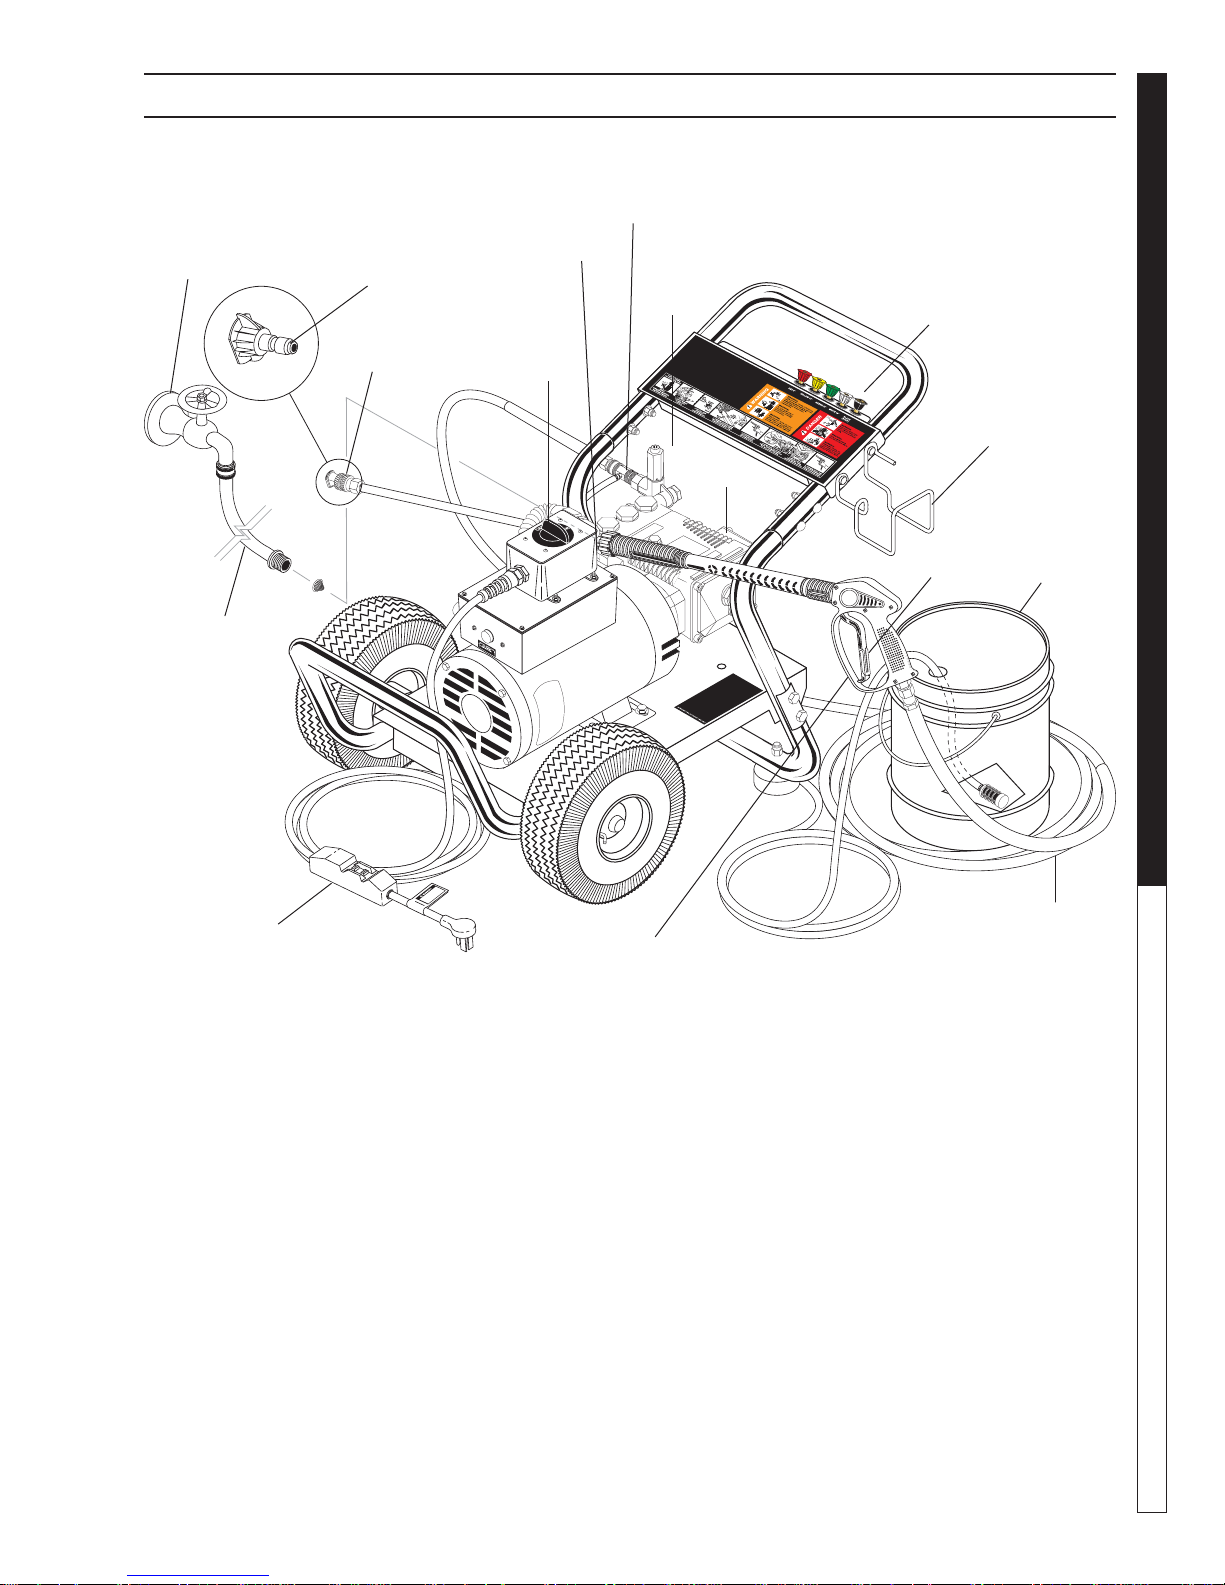
COMPONENT IDENTIFICATION
Detergent
Injector
Pump
Pressure
Nozzle
Quick
Coupler
Protector
Unloader
On/Off
Switch
Pump
Soap
Nozzle
Wand
Hanger
PRESSURE W ASHER
OPERATOR’S MANUAL
Garden Hose
(not included)
GFCI
Pump — Develops high pressure.
Spray Gun — Controls the application of water and
detergent onto cleaning surface with trigger device.
Includes safety latch.
Detergent Injector — Allows you to siphon and mix
detergents when used with a soap nozzle.
Wand — Must be connected to the spray gun.
Unloader — Safety device that relie ves pressure when
spray gun trigger is closed.
Safety
Latch
Spray Gun
and Wand
Detergent
Bucket (not
included)
High Pressure
Hose
High Pressure Hose — Connect one end to water
pump discharge nipple and the other end to spray
gun.
Pump Protector — Cycles fresh cool water through
pump when recirculating water reaches 140°F.
GFCI — Ground fault circuit interrupter trips when
voltage leaks to ground.
Note: If trigger on spray gun is released for more
than 2 minutes, water will leak fr om valve. Warm water will discharge from pump protector onto fl oor.
This system prevents internal pump damage.
5
9.800-085.0 • 8.919-015.0 • Rev. 01/11
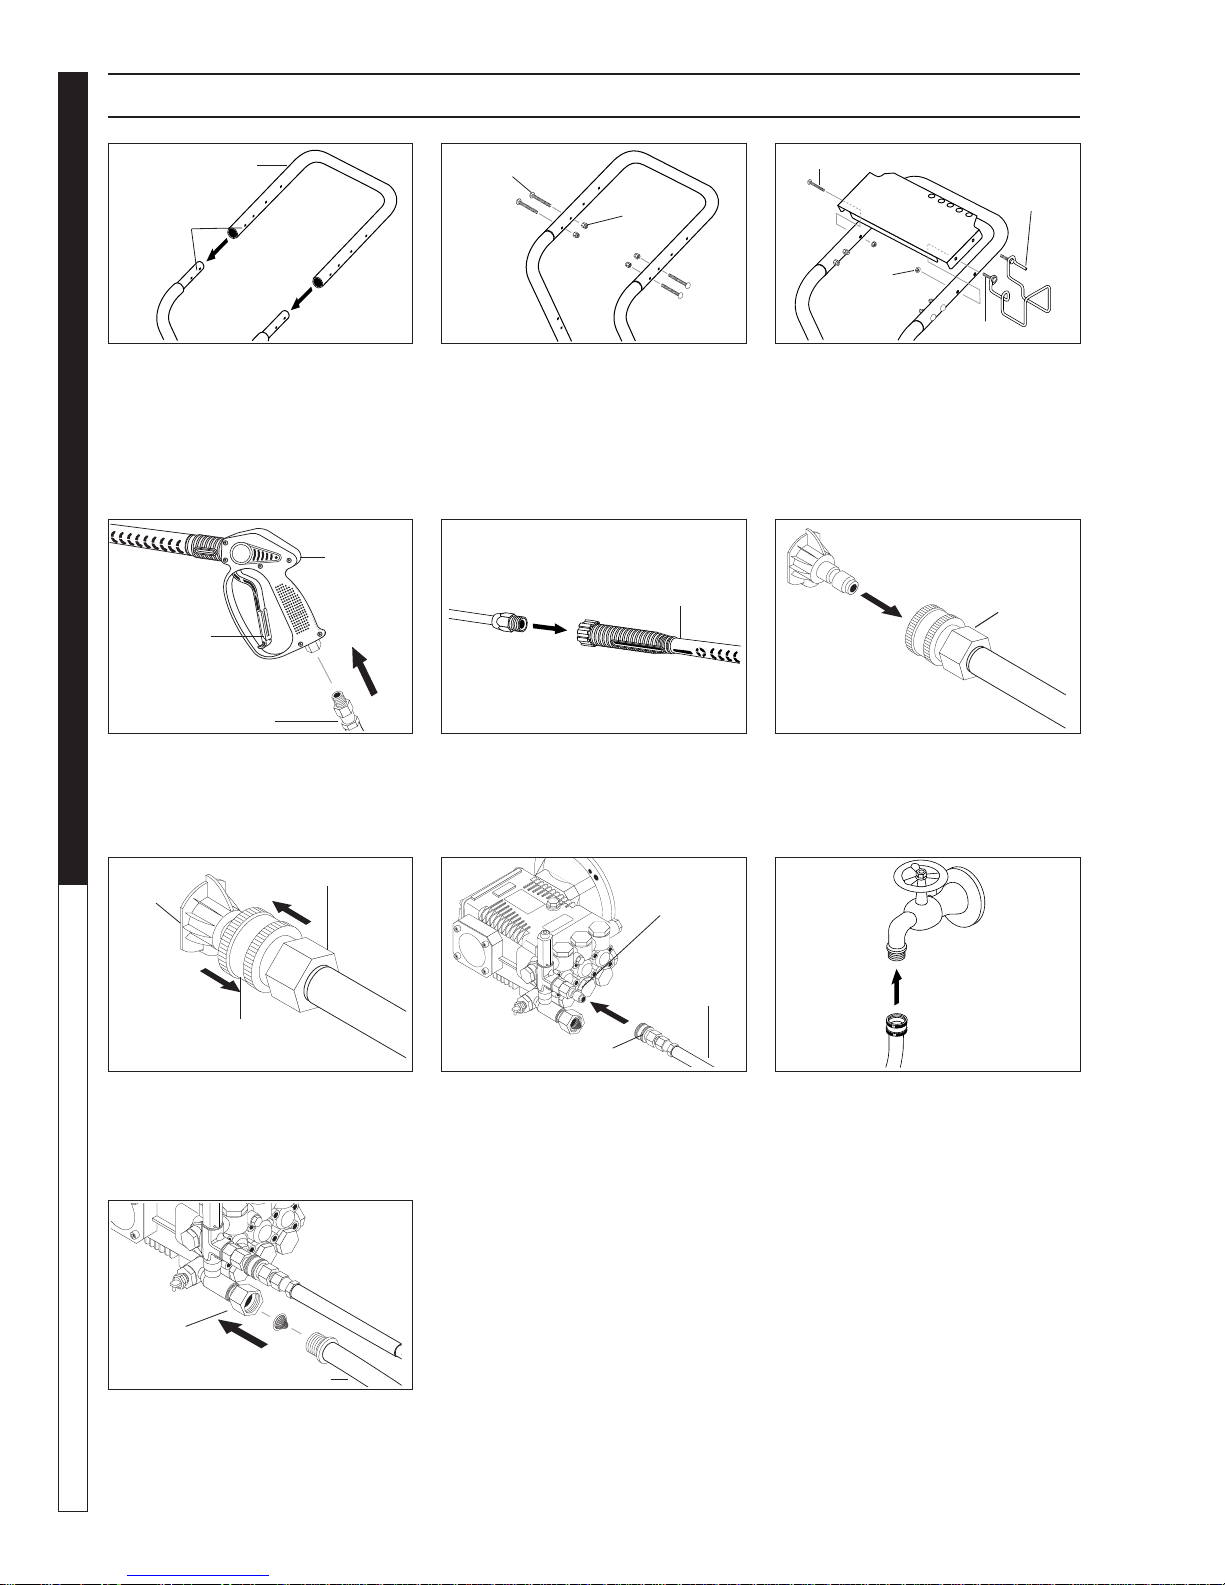
ASSEMBLY INSTRUCTIONS
Handle
Alignment
Holes
Frame
PRESSURE W ASHER
Assy.
STEP 1: Attach handle to the frame
of the pressure washer. Note: I t
may be necessary to move the
handle supports from side to side
in order to align the handle so it will
slide over the frame supports.
OPERATOR’S MANUAL
Safety
Latch
High
Pressure Hose
Spray
Gun
Carriage
Bolt
Nut
STEP 2: Insert the carriage bolt
through the holes from the outside
of the unit and attach a nut from
the inside of the machine. Tighten
nuts.
Spray
Gun/Wand
Nozzle Extension
Bolts
Nut
Hose/Gun
Storage
Bracket
Studs
STEP 3: Attach the spray gun/hose
storage handle, and bracket to
handle. Tighten nuts.
Pressure
Nozzle
Wand
Coupler
STEP 4: Attach the high pressure
hose to the spray gun using tefl on
tape on hose threads.
Pressure
Nozzle
Wand Coupler
Wand
Collar
STEP 7: Release the coupler collar
and push the nozzle until the collar
clicks. Pull the nozzle to mak e sure
it is seated properly.
Pump
Water Inlet
Garden Hose
STEP 10: Connect the garden hose
to pump water inlet. Inspect inlets.
CAUTION: Do not run the pump
without water or pump damage
6
will result.
STEP 5: Attach nozzle extension
to spray gun/wand. Tighten both
by hand.
Pump
Discharge
Nipple
High
Pressure
Hose
Coupler Collar
STEP 8: Connect the high pres-
sure hose to the pump discharge
nipple. Push coupler collar forward
until secure.
9.800-085.0 • 8.919-015.0 • Rev. 01/11
STEP 6: Pull the spring-loaded
collar of the wand coupler back
to insert your choice of pressure
nozzle.
Cold
Water
Source
Garden
Hose
STEP 9: Connect garden hose to
the cold water source.
Garden
Hose
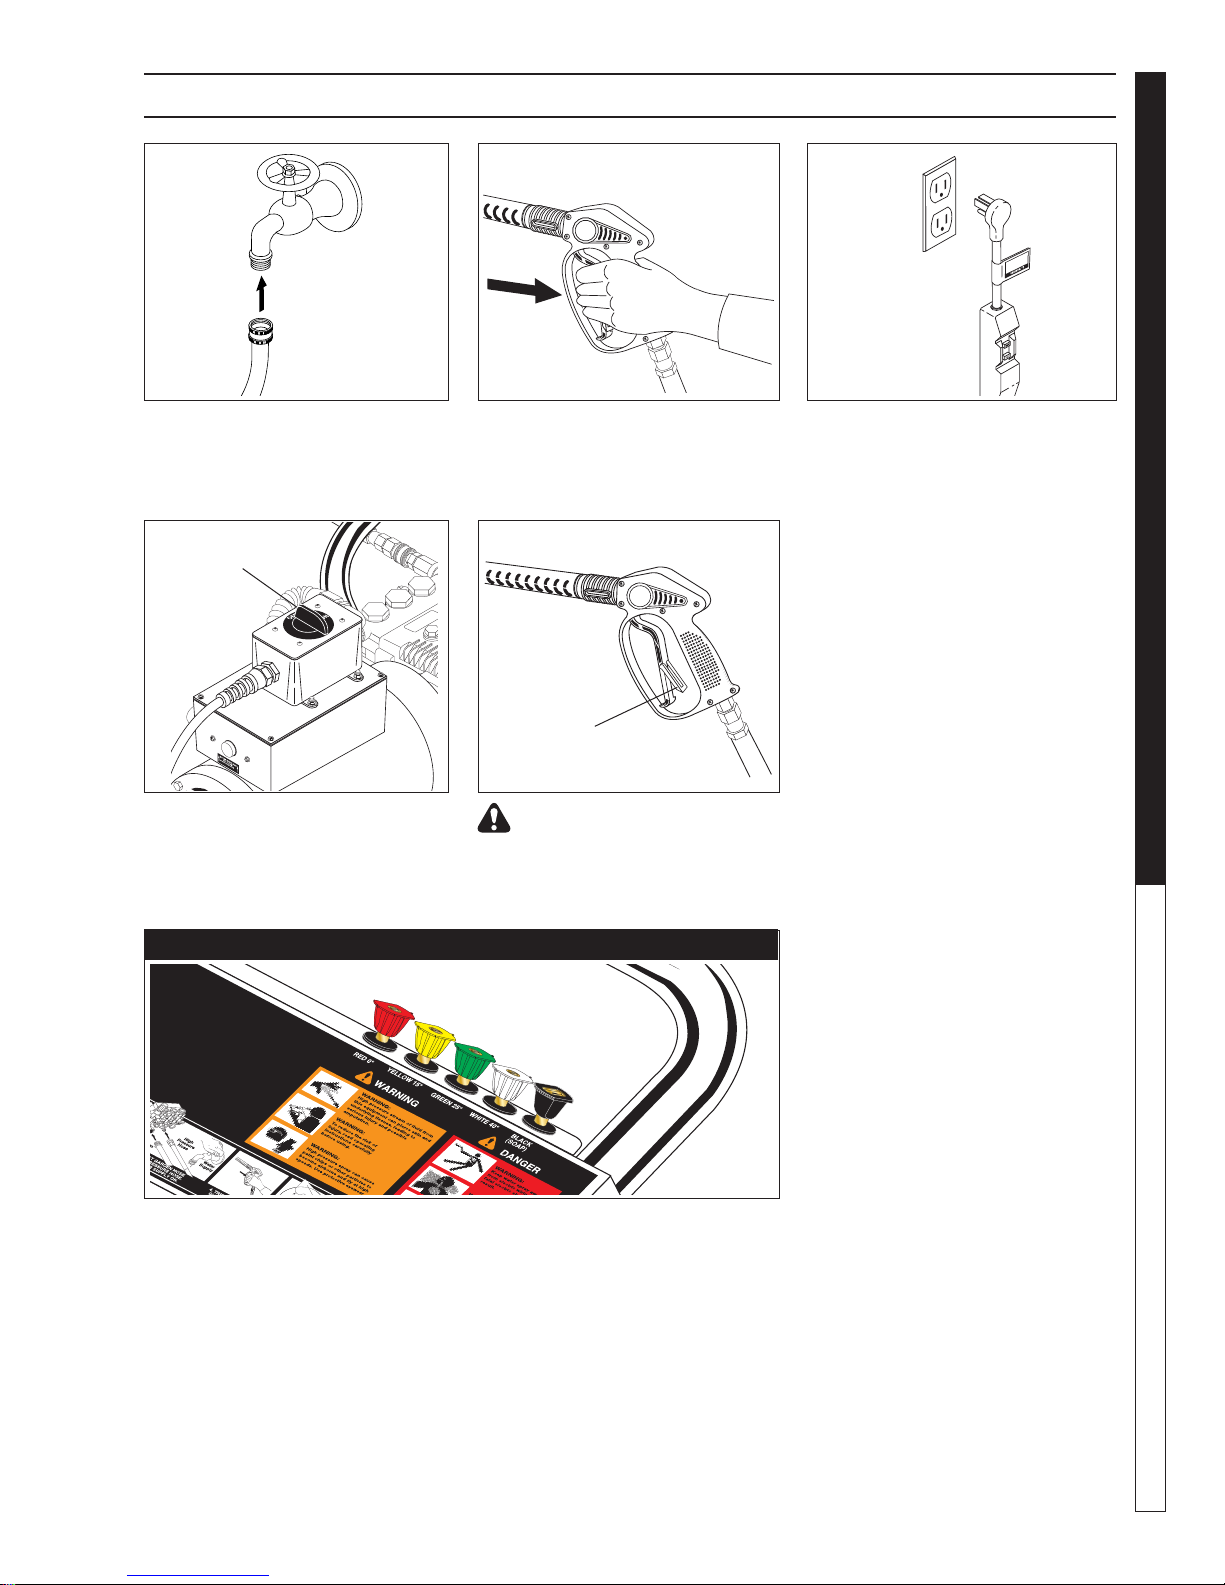
OPERATING INSTRUCTIONS
Cold
Water
Source
PRESSURE W ASHER
OPERATOR’S MANUAL
STEP 1: Connect garden hose
to the cold water source and turn
water on completely. Never use hot
water.
On/Off
Switch
STEP 4: Turn machine on by turning
switch at top of motor.
NOZZLES
STEP 2: Trigger the spray gun to
eliminate trapped air then wait for
a steady fl ow of water to emerge
from the spray nozzle.
Safety
Latch
WARNING! Never replace
nozzles without engaging the
safety latch on the spray gun
trigger.
STEP 3: Connect to appropriate
power supply. Push reset button
on GFCI.
The fi ve color-coded quick connect nozzles provide a wide array of
spray widths from 0° to 40° and are easily accessible when placed in the
convenient rubber nozzle holder, which is provided on the front of the
machine.
NOTE: F or a more gentle rinse, select the white 40° or green 25° nozzle.
To scour the surface, select the yellow 15° or red 0° nozzle. To apply detergent select the black nozzle.
7
9.800-085.0 • 8.919-015.0 • Rev. 01/11
 Loading...