

Page 1
Cordless Hand Vac
9.6 V DC
Model / Modelo / Modèle SV729
USE AND CARE INSTRUCTIONS
INSTRUCCIONES PARA EL USO Y CUIDADO
DIRECTIVES D’USAGE ET D’ENTRETIEN
EURO-PRO Operating LLC
Boston, MA, 02465
Tel: 1 (800) 798-7398
www.sharkclean.com
Copyright © EURO-PRO Operating LLC 2008
Page 2

SAVE THESE INSTRUCTIONS
1
For Household Use Only
1. Do not charge this unit outdoors.
2. Do not use outdoors or on wet surfaces.
3. Do not allow to be used as a toy. Close
attention is necessary when used by or
near children.
4. Use only as described in this manual.
Use only manufacturer's recommended
attachments.
5. Do not use charger if power cord has
been damaged. Do not use cordless
hand vacuum or charger if it has been
dropped, damaged, left outdoors, or
dropped in water. Return it to EURO-
PRO Operating LLC for examination,
repair or adjustment.
6. Do not abuse the charger cord. Never
carry the charger or base by the cord or
yank to disconnect from an outlet;
instead grasp the plug and pull to
disconnect.
7. Keep charger cord away from heated
surfaces.
8. This product includes rechargeable
nickel cadmium batteries. Batteries must
be recycled or disposed of properly. Do
not incinerate batteries or expose to
high temperatures, as they may
explode.
9. Do not handle plug or appliance with wet
hands.
10. Do not put any object into openings. Do
not use with any opening blocked; keep
free of dust, lint, hair and anything that
may reduce air flow.
11. Keep hair, loose clothing, fingers, and all
parts of body away from openings and
moving parts.
12. Do not pick up anything that is burning
or smoking, such as cigarettes,
matches, or hot ashes.
13. Do not attempt to change accessories while
unit is running.
14. Use extra care when cleaning on stairs.
15. Do not use to pick up flammable or
combustible liquids such as gasoline or use
in areas where they may be present.
16. Look on your hand vacuum and follow all
label and marking instructions.
17. Do not use charger with an extension cord.
Plug charger directly into an electrical
outlet. Use charger only in a standard
(120V~, 60Hz) electrical outlet.
18. Do not use the hand vacuum cleaner
without dust cup filter in place.
19. Store the cordless vacuum indoors. Put the
cordless vacuum away after use to prevent
accidents.
20. Leaks from battery cells can occur under
extreme conditions. If the liquid, which is 2035% solution of potassium hydroxide, gets
on the skin - wash immediately with soap
and water or neutralize with a mild acid such
as lemon juice or vinegar. If the liquid
gets into the eyes, flush them immediately
with clean water for a minimum of 10
minutes and seek medical attention.
21. Use only on dry, indoor surfaces.
22. Do not use for any purpose other than
described in this user’s guide.
23. Do not attempt to use the charger with any
other product nor attempt to charge this
product with another charger. Use only the
charger model AD-1530-UL (8) supplied
with this appliance.
24. The appliance must be disconnected from
the supply when removing the battery.
25. "Ni-Cd" battery must be recycled or disposed
of properly.
IMPORTANT SAFEGUARDS
When using an electrical appliance, basic safety precautions should always be
observed, including the following
READ ALL INSTRUCTIONS BEFORE USING YOUR CORDLESS HAND VACUUM.
WARNING:To reduce the risk of fire, electrical shock, or injury:
Rev. 04/03B
Model SV 729
9.6 V DC
1. Dust Cup Container
2. Dust Cup Release Button
3. On/Off Button
4. Dust Cup Filter
5. Charging/Battery capacity
Indicator
6. Main Unit
7. Dusting Brush
8. Charging Adapter
9. Crevice Tool
10.Recharging Stand with
wall mount screws
(included)
11.Charging Jack
Cordless Hand Vac
2
NOTE: Cordless vacuum Model SV729 is shipped with the
batteries uncharged. Charging of the unit for 16-2 0
hours prior to first use is required.
Page 3

OPERATING INSTRUCTIONS
Charging Your Vacuum Cleaner
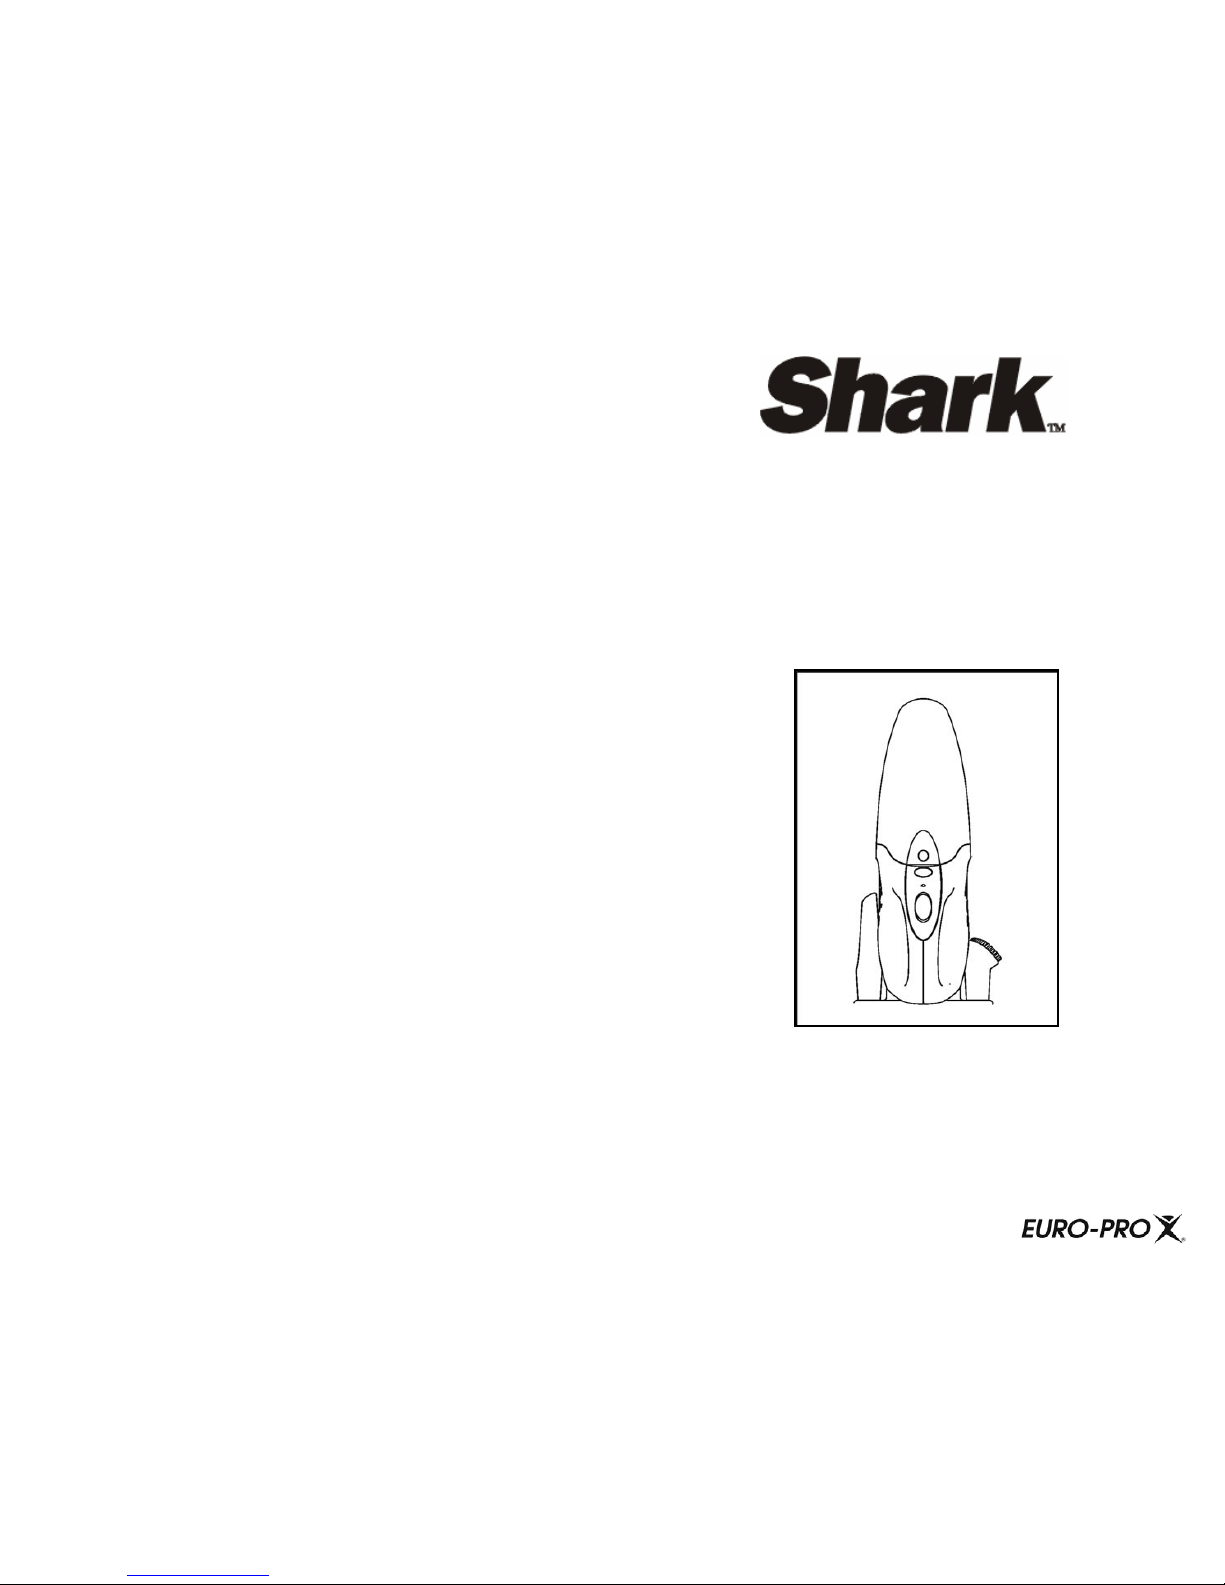
1. Place the charging base near an
electrical power outlet (120 V~, 60 Hz.)
and plug in.
2. Place the unit in the charging base.
The charging indicator light will shine
red to indicate that the vacuum
cleaner is properly positioned in the
charging base and that the unit is
being charged. (See fig. 1)
NOTE: Ensure that the On/Off
switch is in the "Off" position
before charging.
3. Always return the unit to the charging
base immediately after use so that it
will be ready and fully charged for it's
next use.
Before Use
1. This cordless vacuum is powered by
rechargeable nickle-cadmium
batteries. Before using the vacuum,
charge the vacuum cleaner for a
minimum of 16 hours.
NOTE: Ensure that the On/Off
switch is in the "Off" position
before charging.
2. The normal full charging time for this
vacuum is 16-20 hours. The vacuum
cleaner will run for maximum
operational time only if it has been fully
charged. To fully charge the unit,run
the vacuum cleaner until it stops, then
fully recharge the battery.
Assembly
Note: Dust cup filter must always be
used when operating the hand
vacuum.
1. To open the dust cup compartment,
push the dust cup release button
and remove the dust cup
container.
2. Verify that the dust cup filter is
inside, then re-attach the dust cup
container to the hand vacuum.
3
NOTE: Peak performance may only
be realized after the unit has been
charged and discharged two (2) or
three (3) times.
IMPORTANT: To maintain peak
performance of your cordless hand
vacuum, it is recommended that the
unit be fully discharged, then
completely re-charged
at least once a month.
3. Store the vacuum cleaner in the
charging base when not is use so that
it is always charged and ready to
use.
3. To attach the
crevice tool or
the dusting
brush to the
hand vacuum,
push the
attachment into
the suction hole
in the front of the
dust container.
Fig. 1
Fig. 2
Fig. 3
Fig. 5
Fig. 4
Using Your Cordless Vacuum
1. Remove the vacuum cleaner from
the charging base
2. To start the unit, push the "On/Off"
switch to the "On" position.
3. To stop the vauum cleaner, press
the "On/Off" switch to the "Off"
position.
4. A crevice tool is provided for
cleaning narrow, hard to reach
places. A dusting brush is provided
for cleaning upholstery, furniture,
etc.
IMPORTANT: If during use, the
charging indicator light glows
amber, this indicates that the battery
is low and requires recharging.
OPERATING INSTRUCTIONS
Changing & Cleaning the Dust Cup
Filter
To achieve the best performance,
empty the dust cup container and
clean the dust cup filter after each use.
1. To remove the dust cup container,
press down on the dust cup release
button and pull off the dust cup
container.
2. Pull out the dust cup filter.
3. Empty the dust from the dust cup
container. (See fig. 6)
4. Rinse the dust cup filter in cold water,
and then wait until it dries completely
before replacing it back into the dust
cup container. Do not use a washing
machine to clean the dust cup filter.
Do not use a hair dryer to dry it. Air
dry only.
5. Replace the dust cup filter carefully
into the dust cup compartment.
NEVER operate vacuum cleaner
without dust cup filter in place.
6. Attach the dust cup container to the
cordless vacuum.
CAUTION: The suction hole must be
open and free of any obstructions at all
times. Otherwise, the motor will
overheat and could become damaged.
NOTE: It is recommended that the dust
cup filter be replaced every three (3)
months to ensure peak performance of
the unit.
4
Fig. 6
Battery Pack Replacement
& Disposal
This vacuum cleaner contains a nickelcadmium (Ni-Cd) batteries. Batteries
must be recycled or disposed of properly.
Call your nearest recycling center for
information on the recycling and disposal
of nickel-cadmium (Ni-Cd) batteries.
If uncertain as to how to remove the
battery pack, we suggest you take your
wet/dry hand vacuum to a reputable
small appliance service technician to
have this service preformed.
The battery pack of your SV729 is
replaceable, however care should be
taken when doing so. Follow these steps
when replacement is required:
1. Open the battery pack compartment
by removing the single Phillips head
screw located in the recess at the
rear of the unit. NEVER open the
battery compartment except to
change the battery pack when
required.
2. Remove battery compartment cover.
Set aside battery compartment cover
with the screw.
3. Carefully detach the two (2) electrical
connectors from the battery pack by
pulling straight out from the battery
pack.
4. Lift out the battery pack and set
aside.
5. Insert the new battery pack and
re-connect the terminals by pushing
lead wires onto battery tabs.
6. Tuck the wiring inside the battery
compartment so that the wiring does
not interfere with the battery
compartment cover when it is
replaced.
Page 4

Battery Removal & Disposa l cont.
OPERATING INSTRUCTIONS
5
7. Re-install the battery compartment
cover by sliding it over the battery
towards the front of the unit, making
sure that the front snap engages the
body of the unit.
8. Replace the battery compartment
cover screw.
WARNING: NEVER use ordinary
batteries for replacement, as these may
leak and damage your vacuum cleaner.
Use only battery pack XBP729 provided
by EURO-PRO Operating LLC for
replacement.
CAUTION: NEVER use the unit
without the battery compartment cover
in place.
NOTE: Any other servicing should be
performed by an authorized service
representative.
1. Make sure that the intended wall area
for the wall mounting bracket to be
drilled is free from any hidden
electrical wires, water pipes and gas
lines.
2. Select an appropriate place close to a
wall power outlet (120V~, 60 Hz).
3. Do not mount near direct sunlight,
near a heat source or outdoors.
4. Select an appropriate drill type for the
material to be drilled.
5. Carefully measure and mark the
location of all bracket holes and
then drill holes and screw the wall
mounting bracket onto the wall.
CAUTION
• Use only with the battery pack
supplied with the unit.
• Do not attempt to remove the battery
pack from the unit to charge it.
• Never attempt to throw the battery
pack or unit into a fire or incinerate it.
• Do not attempt to remove or damage
the battery casing.
• Battery must be recycled or disposed
of properly at the end of it's
service life.
Wall Mounting Bracket
TROUBLESHOOTING GUIDE
PROBLEM POSSIBLE REASON POSSIBLE SOLUTION
HAND VACUUM
WILL NOT
OPERATE
1. Batteries discharged.
2. No power in electrical
outlet supplying
transformer.
1. Charge unit.
2. Check fuse or breaker.
Replace fuse/reset
breaker.
HAND VACUUM
WILL NOT PICKUP OR SUCTION
POWER IS WEAK
1. Dust cup c ontainer is
full.
2. Dust cup filter needs
cleaning or
replacement.
3. Unit needs
recharging.
1. Empty dust cup
container
2. Remove dust cup
filter and check for
object(s) in a ir duct
and remove. Clean or
replace dust cup
filter.
3. Charge unit.
DUST ESCAPING
FROM HAND
VACUUM
1. Dust cup c ontainer is
full.
2. Dust cup filter is not
installed co rrectly.
3. Puncture/hole in dust
cup filter.
1. Empty dust cup
container.
2. Review dust cup filter
installation
instructions .
3. Replace dust cup
filter.
6Printed in China
OPERATING INSTRUCTIONS
Call: 1 (800) 798-7398
Monday to Friday 8:30 A.M. - 5:00 P.M. Eastern Standard Time
or
visit our website: www.sharkclean.com
FOR TECHNICAL SUPPORT
Call: 1 (800) 798-7398
Monday to Friday 8:30 A.M. - 5:00 P.M. Eastern Standard Time
Replacement dust cup filter SKU# XSB728
Replacement battery pack SKU# XBP729
Please Note
The Dust Cup Filter is washable. It should, however, be replaced every three
(3) months to ensure peak performance of your vacuum.
Important
Make sure that Dust Cup Filter is completely dry before re-installing back
in the hand vacuum.
REPLACEMENT PARTS FOR MODEL SV729
Page 5

Model SV729
ONE (1) YEAR LIMITED WARRANTY
EURO-PRO Operating LLC warrants this product to be free from defects in material and
workmanship for a period of one (1) year from the date of the original purchase, when utilized for
normal household use, subject to the following conditions, exclusions and exceptions.
If your appliance fails to operate properly while in use under normal household conditions within
the warranty period, return the complete appliance and accessories, freight prepaid. For Customer
Service support, call 1 (800) 798-7398 or visit our website at www.sharkclean.com. If the
appliance is found by EURO-PRO to be defective i n material or workmanship, EURO-PRO will
repair or replace it free of charge. Proof of purchase date and $ 11.95 to cover the cost of return
shipping and handling must be included. *
Non-durable parts including, without limitation, dust cup filters, filters, brushes and electrical parts
which normally require replacement are specifically excluded from warranty.
The liability of EURO-PRO Operating LLC is limited solely to the cost of t he rep air or replac ement
of the unit at our option. This warranty does not cover normal wear of parts and does not apply to
any unit that has been tampered with or used for commercial purposes. This limited warranty does
not cover damage caused by misuse, abuse, negligent handling or damage due to faulty
packaging or mishandling in transit. This warranty does not cover damage or defects caused by
or resulting from damages from shipping or repairs, service or alterations to the product or any of
its parts, which have been performed by a repair person not authorized by EURO-PRO.
This warranty is extended to the original purchaser of the unit and excludes all other legal and/or
conventional warranties. The responsibility of EURO-PRO Operating LLC if any, is limited to the
specific obligations expressly assumed by it under the terms of the limited warranty. In no event is
EURO-PRO Operating LLC liable for incidental or consequential damages of any nature
whatsoever. Some states do not permit the exclusion or limitation of incidental or consequential
damages, so the above may not apply to you.
This warranty gives you specific legal rights, and you may also have other rights which vary from
state to state or province to province.
*Important: Carefully pack item to avoid damage in shipping. Be sure to include proof of
purchase date and to attach tag to item before packing with your name, complete address
and phone number with a note gi ving purchase infor mation, model number and what you
believe is the problem with item. We recommend you insure the package (as damage in
shipping is not covered by your warranty). Mark the outside of your package “ATTENTION
CUSTOMER SERVICE”. We are constantly striving to improve our products, therefor e the
specifications contained herein are subject to change without notice.
OWNERSHIP REGISTRATION CARD
FOR CANADIAN CONSUMERS ONLY
Please fill out and mail the product registration card within ten (10) days of purchase. The
registration will enable us to contact you in the unlikely event of a product safety notification. By
returning this card you acknowledge to have read and understood the instructions for use, and
warnings set forth in the accompanying instructions.
EURO-PRO Operating LLC, 4400 Bois Franc, St. Laurent, Quebec, H4S 1A7
_____________________________________________________________________________
Appliance model
_____________________________________________________________________________
Date purchased Name of store
_____________________________________________________________________________
Owner’s name
_____________________________________________________________________________
Address City Prov. Postal Code
7
Model SV729
CONSERVE ESTAS INSTRUCCIONES
8
Únicamente para uso doméstico
1. Nunca recargue esta unidad a la
intemperie
2. Nunca debe utilizarse a la intemperie o
sobre superficies húmedas.
3. No permita que se use como un juguete.
Es necesaria una supervisión muy
estricta cuando la utilizan o están cerca
los niños.
4. Debe utilizarse solamente como se
describe en este manual. Utilice
solamente lo recomendado por el
fabricante como accesorios.
5. No utilice el cargador si el cable de
alimentación ha sido dañado. No utilice
la aspiradora inalámbrica manual si el
cargador ha sido tirado, dañado, dejado a
la intemperie o se ha caído al agua.
Regrésela to EURO-PRO Operating LLC
para la revisión, reparación o ajuste.
6. Nunca maltrate el cable del cargador.
Nunca transporte el cargador o la base
tirando del cable ni desconecte a tirones
del tomacorriente; en lugar de eso,
agarre el enchufe y tire de él para
desconectar.
7. Siempre conserve el cable del cargador
alejado de superficies calientes.
8. Este producto incluye pilas recargables
de níquel-cadmio. Las pilas deberán ser
recicladas o eliminadas adecuadamente.
Nunca incinere las pilas ni las
exponga a temperaturas muy
elevadas, ya que podrían explotar.
9. Nunca toque el enchufe o el aparato con
manos húmedas.
10. Nunca inserte algún objeto en las
aberturas. No lo utilice estando obturada
alguna de las aberturas; manténgalo libre
de pelo, hilachas, pelos o cualquier cosa
que pudiera reducir el flujo de aire.
11. Mantenga el pelo, la ropa suelta, los
dedos y todas las partes del cuerpo
alejadas de las aberturas y las partes en
movimiento.
12. Nunca recoja nada que estéardiendo o
humeando como serían cigarrillos,
fósforos o cenizas calientes.
13. Nunca intente cambiar los accesorios
mientras la unida está en marcha.
14. Tenga mucho cuidado cuando esté
limpiando las escaleras.
15. Nunca la utilice para recoger líquidos
inflamables o combustibles tales como
sería la gasolina o en zonas en donde
éstos pudieran estar presentes.
16. Examine su aspiradora manual y siga
todas las instrucciones marcadas o en
etiquetas.
17. Nunca utilice el cargador con un cable de
extensión. Enchufe el cargador
directamente en un tomacorriente eléctrico.
Utilice el cargador solamente en un
tomacorriente estándar (120V~, 60Hz).
18. Nunca utilice la aspiradora manual sin
que el filtro de la taza guardapolvo esté
en su sitio.
19. Guarde bajo techo la aspiradora
inalámbrica. Guarde la aspiradora
inalámbrica después de usarla para
impedir accidentes.
20. Pueden ocurrir fugas de las pilas bajo
condiciones extremas. Si ese líquido, que
es un compuesto de 20-35% de hidróxido
de potasio le salpica la piel- lave
inmediatamente con jabón y agua o
neutralice con ácido débil como sería
el jugo de limón o vinagre. Si el líquido le
salpica los ojos, enjuague inmediatamente
con agua limpia durante un mínimo de 10
minutos y busque atención médica.
21. Utilice solamente bajo techo y en
superficies secas.
22. Nunca la utilice para algún propósito
distinto al que se describe en esta guía del
usuario.
23. Nunca intente utilizar el cargador con
cualquier otro producto ni intente recargar
este producto con otro cargador. Utilice
solamente el cargador modelo AD-1530UL (8) incluido con este artefacto.
24. El artefacto deberá desconectarse de la
fuente de alimentación durante la
extracción de la pila.
25. Las pilas de Ni-Cd deben reciclarse o
desecharse adecuadamente.
SALVAGUARDIAS IMPORTANTES
Mientras se está utilizando un artefacto eléctrico, deben observarse precauciones de
seguridad básicas, incluidas las siguientes:
LEA TODAS LAS INSTRUCCIONES ANTES DE UTILIZAR SU ASPIRADORA MANUAL
INALÁMBRICA.
ADVERTENCIA: Para reducir el riesgo de incendio, choques eléctricos o lesiones:
Las pilas de "Ni-Cd" deben
reciclarse o desecharse
apropiadamente
Rev. 04/03B
Page 6

Modelo SV 729
9.6 V DC
1. Contenedor de la taza guardapolvo
2. Botón para liberar la taza guardapolvo
3. Botón On/Off (Encendido/apagado)
4. Filtro de la taza guardapolvo
5. Indicador de recarga
6. Unidad principal
7. Cepillo de limpieza
8. Adaptador de recarga
9. Herramienta para rincones
10.Soporte de recarga con
tornillos para instalar en la
pared
(incluidos)
11.Enchufe hembra para la
recarga
Aspiradora Manual Inalámbrica
9
NOTA: La aspiradora manual inalámbrica Modelo SV729 se
envía con las pilas descargadas. La recarga de la
unidad durante 16 a 20 horas antes de su primer uso es
imperativa.
INSTRUCCIONES DE FUNCIONAMIENTO
Cómo Recargar Su Aspiradora
1. Coloque la base de recarga cerca de
un toma corriente eléctrico (120 V~
CA, 60 Hz.) y enchufe.
2. Ubique la unidad en la base de
recarga. Se encenderá la luz
indicadora de recarga de color rojo
para señalar que la aspiradora está
ubicada correctamente en la base de
recarga y que la unidad está siendo
recargada. (Vea la fig. 1)
NOTA: Cerciórese que el interruptor
On/Off está en la posición "Off"
(Apagado) antes de recargarla.
3. Siempre vuelva la unidad a la base de
recarga inmediatamente después de
cada uso, así estará lista y totalmente
cargada para su utilización siguiente.
Antes De Usarse
1. Esta aspiradora inalámbrica se
energiza con pilas recargables de
níquel-cadmio. Antes de utilizar la
aspiradora, recargue por un mínimo de
16 horas.
NOTA; Cerciórese que el interruptor
On/Off está en la posición “Off”
(Apagado) antes de recargarla.
2. El tiempo de recarga normal para esta
aspiradora es de 16 a 20 horas. La
aspiradora funcionará durante el
máximo de tiempo operacional
solamente si está totalmente
recargada. Para recargar totalmente la
unidad, haga que la aspiradora
marche hasta que se detenga,
entonces recargue la pila
completamente.
Ensambladura
Nota: Siempre deberá utilizarse el
filtro de la taza guardapolvo durante
la operación de la aspiradora
manual.
1. Para abrir el compartimiento de la
taza guardapolvo, presione el botón
de liberación de la taza
guardapolvo y quite el contenedor
de la taza guardapolvo.
2. Compruebe que el filtro de la taza
guardapolvo se encuentra en su
sitio y luego reponga el contenedor
de la taza guardapolvo en la
aspiradora manual.
10
NOTA: El rendimiento óptimo se
logra solamente después de que la
unidad se haya cargado y descargado
dos (2) o tres (3) veces.
IMPORTANTE:Si desea conservar la
funcionalidad óptima de su aspiradora
manual inalámbrica, le sugerimos que
la unidad se descargue
completamente se y luego, recargue
totalmente cuando menos una vez al
mes.
3. Guarde la aspiradora en la base de
recarga si no la utiliza, de manera que
siempre esté cargada y lista para
usarse.
3. Para afianzar la
herramienta para
rincones o
el cepillo de
limpieza a la
aspiradora manual,
inserte
el accesorio en
orificio de succión
en la parte delantera
del contenedor de
polvo.
Fig. 1
Fig. 2
Fig. 3
Fig. 5
Fig. 4
Receptáculo de recarga
Enchufe hembra para la recarga
Page 7

Como Utilizar Su Aspiradora
Inalámbrica
1. Extraiga la aspiradora de la base
de recarga.
2. Para poner en marcha la unidad,
presione el interruptor "On/Off" a
su posición "On" (Encendido).
3. Para detener a la aspiradora,
presione el interruptor "On/Off"
hasta la posición "Off".
4. Se dispone de una herramienta de
rincones para limpiar esos lugares
angostos y difíciles de alcanzar.
Se incluye un cepillo de limpieza
para limpiar muebles y tapicería,
etc.
IMPORTANTE: Si durante el uso, la
luz indicadora de recarga se inciende
de color ámbar, eso advierte que la
batería está baja y es necesaria la
recarga.
INSTRUCCIONES DE FUNCIONAMIENTO
Cómo Cambiar Y Limpiar El Filtro
De La Taza Guardapolvo
Para obtener el mejor rendimiento y
después de cada uso, vacíe el
contenedor de la taza guardapolvo y
limpie el filtro de la taza guardapolvo.
1. Para quitar el contenedor de la taza
guardapolvo presione hacia abajo el
botón de liberación de la taza
guardapolvo y quite el contenedor de
la taza guardapolvo.
2. Quite el filtro de la taza guardapolvo.
3. Vacíe todo el polvo del contenedor de
la de la taza guardapolvo. (
Ver la fig. 6)
4. Enjuague con agua fría el filtro de la
taza guardapolvo y espere hasta que
se seque totalmente antes de
reemplazarlo en el contenedor de la
taza guardapolvo. No utilice una
lavadora de ropa para limpiar el filtro
de la taza guardapolvo. Nunca utilice
un secador de pelo para secarlo.
Seque al aire solamente.
5. Reemplace cuidadosamente el filtro de
la taza guardapolvo en el
compartimiento de la taza guardapolvo.
NUNCA ponga en marcha la aspiradora
sin que el filtro de la taza guardapolvo
esté en su sitio.
6. Afiance el contenedor de la taza
guardapolvo a
la aspiradora
inalámbrica.
PRECAUCIÓN: El orificio de succión
debe estar abierto y libre de
obstrucciones en todo momento. Si no
es así, el motor se calentará
excesivamente y podría dañarse.
NOTA; Le recomendamos que
reemplace el filtro de
la taza guardapolvo cada tres(3) meses
para obtener el mejor rendimiento
posible de la unidad.
11
Fig. 6
Reemplazo y Desecho del Paquete
de Pilas
Esta aspiradora contiene un paquete de
pilas recargables de níquel-cadmio (NiCd) que deben reciclarse o desecharse
apropiadamente. Para información, llamar
al centro de reciclaje más cercano.
Si tuviese dudas sobre como sacar el
paquete de pilas, le sugerimos llevar la
aspiradora a un centro de servicio técnico
de buena reputación para artefactos para
que las saquen.
El paquete de pilas de la aspiradora
SV729 es reemplazable. Al cambiarlo
tener cuidado seguir estas instrucciones:
1. Abrir el compartimiento del paquete de
pilas sacando el tornillo con cabeza en
cruz que está empotrado en la
espalda de la unidad. NUNCA abrir
este compartimiento, excepto para
cambiar el paquete de pilas.
2. Quitar la tapa del compartimiento y
ponerla a un costado con su tornillo.
3. Desenchufar cuidadosamente los dos
(2) conectores eléctricos del paquete
de pilas tirando derecho de ellos para
sacarlos del paquete de pilas.
4. Sacar el paquete de pilas y ponerlo a
un lado.
5. Insertar el paquete nuevo de pilas y
reconectar los terminales en el
paquete de pilas.
6. Acomodar los alambres dentro del
compartimiento sin que interfieran con
las pilas ni la tapa al reinstalarse.
INSTRUCCIONES DE FUNCIONAMIENTO
12
Reemplazo y Desecho del Paquete
de Pilas
7. Reinstalar la tapa del compartimiento
deslizándola sobre las pilas y hacia el
frente de la unidad, asegurándose que
la pestaña del frente enganche en el
cuerpo de la unidad.
8. Reinstalar el tornillo de fijación de la
tapa del compartimiento.
ADVERTENCIA: NUNCA usar pilas
comunes de repuesto porque podrían
tener fugas de ácido y dañar la unidad.
Usar sólo el paquete de pilas XBP729
provisto por EURO-PRO Operating LLC
como repuesto.
CUIDADO: NUNCA usar la unidad
sin la tapa del compartimiento de pilas.
NOTA: Cualquier otro servicio debe
hacerlo un técnico de un centro de
servicio autorizado.
Soporte para Instalar en la Pared
1. Antes de perforar la pared para
instalar el soporte, asegurarse que el
lugar no tenga ocultos alambres
eléctricos, tubos de agua o líneas de
gas.
2. Seleccionar un lugar apropiado cerca
de un tomacorriente de 120 VCA, 60
Hz.
3. No instalar cerca de fuentes de calor.
4. Seleccionar una broca adecuada
para el material de la pared que se va
a taladrar.
5. Medir y marcar cuidadosamente la
posición de todos los orificios del
soporte en la pared, taladrar los
orificios en la pared e instalar el
soporte con los tornillos de fijación.
CUIDADO
• Sólo usar el paquete de pilas provisto
con la unidad.
• No intentar sacar el paquete de pilas
de la unidad para cargarlo.
• Nunca arrojar el paquete de pilas o la
unidad al fuego ni incinerarlas.
• No sacar ni dañar la envoltura del
paquete de pilas.
• Las pilas deben reciclarse o
desecharse apropiadamente al final
de su ciclo de vida útil.
Las pilas de "Ni-Cd" deben
reciclarse o desecharse
apropiadamente
Page 8

13IMPRESO EN CHINA
INSTRUCCIONES DE FUNCIONAMIENTO
GUÍA DE LOCALIZACIÓN Y
REPARACIÓN DE AVERÍAS
PROBLEMA RAZÓN POSIBLE SOLUCIÓN POSIBLE
NO FUNCIONA LA
ASPIRADORA
1. Baterías descargadas.
2. No hay corriente en el
toma corriente que
alimenta al
transformador.
1. Recargue la unidad.
2. Verifique el fusi bl e o
disyuntor . Reemplace el
fusible o disyuntor
LA ASPIRADORA
NO ASPIRA O LA
FUERZA DE
SUCCIÓN ES
DÉBIL
1. El contenedor de la taza
guardapolvo está lleno.
2. El filtro debe limpiarse o
reemplazarse.
3. La unidad necesita
recarga.
1. Vacíe el contenedor de la
taza guardapolvo.
2. Quite el filtro y busque
objetos en el ducto de aire y
quítelos. Limpie o
reemplace el filtro de la taza
guardapolvos.
3. Recargue la unidad
SE ESCAPA EL
POLVO DE LA
ASPIRADORA
1. El contenedor de la taza
guardapolvo está lleno.
2. El filtro no está instalado
correctamente.
3 . El filtro de la taza
guardapolvos tiene un
piquete o un agujero
1. Limpie el contenedor de la
taza guardapolvo.
2. Consulte las instrucciones
para instalar el filtro de la
taza guardapolvos.
3. Reemplace el filt ro de la
taza guardapolvos
Filtro de Repuesto SKU# XSB728 para contenedor de polvo
Paquete de pilas de repuesto SKU# XBP729
Llamar al: 1 (800) 798-7395
Lunes a Viernes de 8:30 A.M. a 5:00 P.M. Hora Estándar del Este o
visite nuestro website: www.sharkclean.com
PARA ASISTENCIA TÉCNICA
Llamar al: 1 (800) 798-7395
Lunes a Viernes de 8:30 A.M. a 5:00 P.M. Hora Estándar del Este
REPUESTOS PARA EL MODELO SV729
Nota: Los filtros para el contenedor de polvo son lavables, sin
embargo se recomienda cambiarlos cada tres (3) meses
para mantener el rendimiento máximo de la aspiradora.
Importante: Asegurarse que el filtro de polvo esté completamente seco
antes de reinstalarlo en la aspiradora de mano.
Modelo SV729
14
Modelo SV729
GARANTÍA LIMITADA POR UN (1) AÑO
EURO-PRO Operating LLC garantiza que este producto está libre de defectos de los materiales y de la mano de
obra por un período de un (1) año contado desde la fecha de compra original y cuando se usa en entornos
domésticos normales únicamente, sujeto a las condiciones, exclusiones y excepciones siguientes.
Si su artefacto no funciona correctamente durante su operación en un entorno doméstico normal dentro del
período de garantía, devuelva, el artefacto completo con los accesorios accesorios, con envío prepagado. Para
Servicio al Cliente, llame al 1 (800) 798-7395 o visite nuestro sitio Web www.sharkclean.com
Si la determinación de EURO-PRO es que la unidad está defectuosa de materiales o mano de obra, EURO-PRO
la va a reparar o reponer sin costo. Se deberá incluir la evidencia de la fecha de compra y $11.95 para cubrir los
costos de manipulación y del envío de regreso. *
Las piezas no duraderas, incluyendo sin limitación, los filtros de la taza guardapolvos, filtros, cepillos y
componentes eléctricos sujetos al reemplazo normal están exentas específicamente de la garantía.
La responsabilidad de EURO-PRO Operating LLC está limitada exclusivamente al costo de la reparación o del
reemplazo de la unidad, sujeta a nuestra elección. Esta garantía no ampara el desgaste normal de las piezas y
no es aplicable a ninguna unidad que haya sido manejada indebidamente o utilizada para propósitos
comerciales. Esta gara ntía limitada no ampara los daños ocasionados por uso inde bido, abuso, manipulación
negligente u otros daños ocasionados por un empaque defectuoso o malos tratos durante el tránsito. La
garantía no ampara los daños o defectos ocasionados, o resultantes de daños por embarque o por
reparaciones, servicio o alteraciones al producto o alguno de sus componentes llevados a cabo por personal no
autorizado por EURO-PRO.
Esta garantía se ofrece al comprador original de la unidad y excluye cualquier otro tipo de garantía, sea legal o
convencional. La responsabilidad de EURO-PRO Operating LLC, si existiera, es tá limitada a las obligaciones
específicas asumidas expresamente bajo los términos de la garantía limitada. De ninguna manera será EURO-
PRO Operating LLC responsable de daños incidentales o consecuenciales de ninguna naturaleza. Algunos
estados no permiten la exclusión o limitación de los daños incidentales o consecuenciales, de manera que lo
indicado anteriormente pudiera no ser aplicable en su caso.
Esta garantía le da derechos legales específicos, y usted podría tener otros derechos que varían de estado a
estado.
*Importante: Para evitar daños durante la transportación, empaque cuidadosamente el artículo. Antes de
empacar, cerciórese que incluye la evidencia de la fecha de compra y que le afianza al artículo una
etiqueta con su nombre, dirección completa y número de teléfono y una nota en la que proporciona
información de la compra, número del modelo y lo que usted crea que es el problema con el artículo. Le
sugerimos que asegure su paquete (ya que los daños durante la transportación no están amparados por
su garantía). Escriba claramente “ATTENTION CUSTOMER SERVICE” en la parte exterior de su paquete.
Debido a que intentamos constantemente mejorar nuestros productos, las especificaciones contenidas
aquí están sujetas a cambio sin aviso previo.
TARJETA DE REGISTRO DE PROPIEDAD
PARA CONSUMIDORES CANADIENSES SOLAMENTE
Para validar la Garantía Limitada precedente, por favor llene esta tarjeta de registro dentro y remítala por correo
de los diez (10) días siguientes a la compra. El registro nos permitirá contactarlo en el poco probable caso de
tener que enviarle una notificación de seguridad. Al enviar esta tarjeta, usted está aceptando haber leído y
entendido las instrucciones para el uso y las advertencias en el instructivo que se acompaña.
REMITIR EN:
EURO-PRO Operating LLC, 4400 BoisFranc, St. Laurent, QC H4S 1A7
______________________________________________________________________
Modelo del Artefacto
______________________________________________________________________
Fecha de Compra Nombre de la Tienda o Almacén
______________________________________________________________________
Nombre del Comprador (Propietario)
______________________________________________________________________
Dirección Ciudad Prov. Código Postal
Page 9

CONSERVEZ CES DIRECTIVES
15
USAGE DOMESTIQUE SEULEMENT
1. Évitez de charger cet appareil à
l'extérieur.
2. Évitez de l'utiliser à l'extérieur ou sur
des surfaces mouillées.
3. Évitez que l'aspirateur soit utilisé
comme un jouet. Une surveillance
étroite est nécessaire lorsque l'appareil
est utilisé par des enfants ou àproximité
de ceux-ci.
4. N'utilisez l'aspirateur que de la façon
décrite dans ce guide. N'utilisez que les
accessoires recommandés par le
fabricant.
5. Ne pas utiliser le chargeur si le cordon
est endommagé. Ne pas utiliser
l'aspirateur à main sans cordon si celuici a été échappé, endommagé, laisséà
l'extérieur ou échappé dans l'eau. Dans
ce cas, retournez-le à EURO-PRO
Operating LLC à des fins d’examen, de
réparation ou de réglage.
6. Évitez de faire un emploi abusif du
cordon du chargeur. Évitez de
transporter le chargeur ou son socle par
le cordon ou de tirer sur le cordon pour
débrancher le chargeur: tirez plutôt la
fiche pour la débrancher.
7. Assurez-vous que le cordon du chargeur
demeure éloigné des surfaces chaudes.
8. Ce produit est muni de piles
rechargeables au nickel-cadmium. Les
piles doivent être recyclées ou jetées
aux rebuts de façon convenable. Ne
pas incinérer les piles ou les exposer
aux températures élevées:
elles
pourraient exploser.
9. Ne pas manipuler la fiche ou l'appareil si
vos mains sont mouillées.
10. Évitez d'insérer des objets dans les
ouvertures. Évitez d'utiliser l'aspirateur
si les ouvertures sont obstruées.
Assurez-vous qu'elles sont libres de
poussière, de peluches, de cheveux et
de tout ce qui peut réduire le débit d'air.
11. Assurez-vous que vos cheveux,
vêtements lâches, doigts ou autres
parties du corps sont éloignées des
ouvertures et des pièces en
mouvement.
12. Évitez d'aspirer tout objet brûlant ou
fumant comme des cigarettes,
allumettes ou cendres chaudes.
13. Évitezde tenter de changer les accessoires
pendant que l'aspirateur est en marche.
14. Soyez particulièrement prudent en nettoyant
les escaliers.
15. Évitezd'utiliser l'aspirateur pour aspirer des
liquides inflammables ou combustibles
comme du carburant ou de l'utiliser dans des
endroits où de tels liquides pourraient être
présents.
16. Lisez toutes les étiquettes et avis sur
l'aspirateur à main et observez-les.
17. Évitez d'utiliser le chargeur avec une
rallonge électrique. Branchez le chargeur
directement dans une prise électrique. Ne
branchez le chargeur que dans une prise
électrique standard (120V~, 60Hz).
18. Évitez d'utiliser l'aspirateur à main sans
que le filtre de la coupelle à poussière
soit en place.
19. Rangez l'aspirateur à main sans cordon à
l'intérieur. Rangez-le après l'usage pour
prévenir les accidents.
20. Dans des conditions extrêmes, les piles
peuvent fuir. Si le liquide, composéà
20-35 % d'une solution d'hydroxyde de
potassium, éclabousse la peau, lavez
immédiatement la partie atteinte à l'eau et
au savon, ou utilisez un acide doux comme
du jus de citron ou du vinaigre. Si le liquide
éclabousse les yeux, rincez-les
immédiatement à grande eau propre
pendant au moins dix minutes et faites appel
à un médecin.
21. N'utilisez l'aspirateur que sur des surfaces
sèches à l'intérieur.
22. Évitez d'utiliser l'aspirateur à toute fin autre
que celles décrites dans ce guide.
23. Évitez d'utiliser le chargeur pour tout autre
produit et évitez de charger cet appareil
avec tout autre chargeur. N'utilisez que le
chargeur AD-1530-UL (8) fourni avec
l'appareil.
24. L'appareil doit être débranchéde sa source
d'alimentation lors de l'enlèvement de la
pile.
25. La pile « Ni-Cd » doit être recyclée ou jetée
aux rebuts convenablement.
CONSIGNES DE SÉCURITÉ IMPORTANTES
Lors de l'usage de tout appareil électrique, des précautions fondamentales
doivent être observées, y compris les suivantes :
LISEZ TOUTES LES DIRECTIVES AVANT D’UTILISER VOTRE ASPIRATEUR À MAIN
SANS CORDON.
AVERTISSEMENT:afin de réduire le risque d'incendie, de
choc électrique ou de blessure :
La pile "Ni-Cd" doit être
recyclée ou jetée aux
rebuts convenablement.
Rev. 04/03B
Modèle SV 729
9.6 V DC
1. Coupelle à poussière
2. Bouton de relâche de la
coupelle à poussière
3. Commutateur marche/arrêt
4. Filtre de la coupelle à poussière
5. Indicateur de recharge
6. Boîtier principal
7. Brosse à épousseter
8. Adaptateur de recharge
9. Suceur plat
10.Socle de recharge avec
outil pour installation
murale
(inclus)
11.Prise de recharge
Aspirateur À Main Sans Cordon
16
Remarque : les piles de l’aspirateur sans cordon modèle SV729
ne sont pas chargées au moment de l’envoi. Ainsi, il
est requis de charger les piles pendant 16 à 20 heures
avant l’usage initial.
Page 10

DIRECTIVES D’UTILISATION
Recharge De Votre Aspirateur
1. Placez le socle de recharge près d'une
prise électrique (120 V~, 60 Hz.)
et branchez-le.
2. Placez l'appareil dans le socle de
recharge. L'indicateur de recharge
s'allumera pour indiquer que
l'aspirateur est bien placé dans le
socle et que la recharge a commencé
(voir fig. 1).
REMARQUE: avant de
recharger, assurez-vous que le
commutateur marche/arrêt est
en position d'arrêt.
3. Après l'usage, rangez toujours
l'aspirateur dans son socle de
recharge. Ainsi, il sera toujours prêt à
utiliser.
Avant l'Usage
1. Cet aspirateur sans cordon est
alimenté par des piles rechargeables
au nickel-cadmium. Avant d'utiliser
l'aspirateur, chargez-le pendant au
moins 16 heures.
REMARQUE : assurez-vous que le
commutateur marche/arrêt est en
position d'arrêt avant de
commencer la recharge.
2. La durée de recharge normale de cet
aspirateur est de 16 à 20 heures.
L'aspirateur ne fonctionnera pendant
une durée maximum que s'il a été
pleinement chargé. Pour le charger
pleinement, faites fonctionner
l'aspirateur jusqu'à ce qu'il s'arrête et
rechargez ensuite les piles au complet.
Assemblage
Remarque : le filtre de la coupelle à
poussière doit toujours être en
place lors de l'usage de l'aspirateur.
1. Pour ouvrir la coupelle à poussière,
appuyez sur le bouton de relâche
et retirez la coupelle.
2. Assurez-vous que le filtre s'y trouve
et fixez de nouveau la coupelle à
l'aspirateur.
17
Remarque: le meilleur rendement
n'est atteint qu'après que l'aspirateur
ait été chargé et déchargé deux (2) ou
trois (3) fois.
IMPORTANT: pour maintenir le
meilleur rendement de l'aspirateur à
main sans cordon, il est recommandé
de le décharger au complet et de le
recharger ensuite au moins une fois
par mois.
3. Lorsque l'aspirateur n'est pas utilisé,
rangez-le dans son socle de recharge.
Ainsi, il sera toujours prêt à utiliser.
3. Pour fixer le
suceur plat ou
la brosse à
épousseter à
l'aspirateur,
insérez
l'accessoire dans
l'orifice de succion
à l'avant de la
coupelle à
poussière.
Fig. 1
Fig. 2
Fig. 3
Fig. 5
Fig. 4
Prise de recharge
Fente de recharge
Usage De Votre Aspirateur Sans
Cordon
1. Retirez l'aspirateur du socle de
recharge.
2. Pour le faire démarrer, mettez le
commutateur marche/arrêt en position
de marche (« On »).
3. Pour l'arrêter, mettez le commutateur
marche/arrêt en position d'arrêt («Off»).
4. Un suceur plat est fourni pour le
nettoyage des espaces étroits et
difficiles d'atteinte. Une brosse à
épousseter est fournie pour nettoyer les
meubles, etc.
IMPORTANT: si l'indicateur de
recharge passe au jaune pendant l
l'usage, cela signifie que la pile est
faible et qu'elle doit être rechargée.
DIRECTIVES D’UTILISATION
Changement Et Nettoyage Du Filtre
De La Coupelle À Poussière
Pour obtenir le meilleur rendement,
videz la coupelle à poussière et
nettoyez le filtre de la coupelle après
chaque usage.
1. Pour retirer la coupelle, appuyez sur le
bouton de relâche de la coupelle et
tirez la coupelle.
2. Tirez le filtre de la coupelle.
3. Videz la poussière contenue dans le
filtre de la coupelle (voir fig. 6).
4. Rincez le filtre de la coupelle à l'eau
froide et attendez qu'il soit
complètement sec avant de le remettre
dans la coupelle. Évitez de laver le
filtre de la coupelle dans la laveuse.
Évitez d'utiliser un séchoir à cheveux
pour le sécher. Laissez-le sécher à
l'air seulement.
5. Remettez soigneusement le filtre dans
la coupelle à poussière. ÉVITEZ
d'utiliser l'aspirateur sans que le filtre
de la coupelle à poussière soit en
place.
6. Fixez la coupelle à poussière sur
l'aspirateur sans cordon.
ATTENTION : l'orifice de succion doit
être ouvert et libre d'obstructions en
tout temps. Sinon, le moteur pourrait
surchauffer et s'endommager.
REMARQUE: il est recommandé de
changer le filtre de la coupelle à
poussière à chaque période de trois (3)
mois pour assurer un rendement
optimal.
18
Fig. 6
Enlèvement et élimination des
piles
Cet aspirateur contient des piles au
nickel-cadmium (Ni-Cd). Les piles
doivent être recyclées ou jetées aux
rebuts convenablement. Votre centre
local de recyclage pourra vous donner
plus de détails à ce sujet.
Si vous êtes incertain de la façon de
retirer le bloc-piles de votre aspirateur,
nous vous recommandons de vous
adresser à un technicien qualifié qui
pourra se charger de le faire.
Le bloc-piles de votre SV746 est
remplaçable. Toutefois, en le
remplaçant, faites preuve de grande
prudence. Suivez ces étapes si un
remplacement est requis :
1. À l'aide d'un tournevis Philips,
retirez la vis unique se trouvant en
retrait à l'arrière de l'aspirateur.
Soulevez et tirez le couvercle du
compartiment à piles. NE JAMAIS
enlever le couvercle du
compartiment à piles sauf pour
changer le bloc-piles au besoin.
2. Mettez de côté le couvercle et la vis.
3. Détachez soigneusement les deux
(2) connecteurs électriques du blocpiles en les tirant tout droit.
4. Retirez l'ancien bloc-piles et mettez-le
de côté.
5. Insérez le nouveau bloc-piles et
refaites la connexion des connecteurs
en appuyant les fils sur les languettes
des piles.
6. Repliez les fils dans le compartiment
à piles afin qu'ils ne nuisent pas au
couvercle une fois celui-ci refermé.
Page 11

DIRECTIVES D’UTILISATION
19
Enlèvement et élimination des
piles
7. Réinstallez le couvercle du
compartiment à piles en le faisant
glisser sur la pile vers l'avant de
l'appareil et en vous assurant qu'il est
bien enclenché dans l'appareil.
8. Remettez en place la vis du
couvercle.
AVERTISSEMENT: ÉVITEZ d'utiliser
des piles de rechange ordinaires. Elles
pourraient fuir et endommager votre
aspirateur. N'utilisez que le bloc-piles
de rechange XBP729 fourni par EUROPRO Operating LLC.
ATTENTION: ÉVITEZ d'utiliser
l'aspirateur sans que le couvercle du
compartiment à pile soit en place.
REMARQUE: toute autre réparation
doit être effectuée par un réparateur
agréé.
Support mural
1. Assurez-vous que l'aire du mur où
vous désirez installer le support mural
est libre de fils électriques, de
conduites d'eau et de conduites de
gaz dissimulés.
2. Choisissez un endroit convenable
près d'une prise murale (120V~,
60 Hz).
3. Évitez de fixer le support près de
l'ensoleillement direct, d'une source
de chaleur ou de l'extérieur.
4. Choisissez un fraise à forer de type
convenant au matériel dont est
composé le mur.
5. Mesurez soigneusement et marquez
l'endroit de chaque orifice du support.
Ensuite, percez les trous et vissez le
support mural dans le mur.
ATTENTION
• N'utilisez que le bloc-piles fourni
avec l'appareil.
• Évitez de retirer le bloc-piles de
l'appareil pour le recharger.
• Évitez de jeter le bloc-piles ou
l'appareil dans les flammes ou de
l'incinérer.
• Évitez d'enlever ou d'endommager
le boîtier des piles.
• Après leur durée de vie utile, les
piles doivent être recyclées ou
jetées aux rebuts convenablement.
La pile "Ni-Cd" doit être
recyclée ou jetée aux
rebuts convenablement.
20Imprimé en Chine
DIRECTIVES D’UTILISATION
DÉPANNAGE
PROBLÈME CAUSE POSSIBLE SOLUTION POSSIBLE
L’ASPIRATEUR À
MAIN NE
FONCTIONNE PAS
1. Les piles sont
épuisées.
2. Le prise électrique
alimentant le chargeur
ne fonctionne pas.
1. Chargez l’appareil.
2. Vérifiez le fusible ou
le disjoncteur.
Rem placez le fu sible
ou enclenchez de
nouveau le
disjoncteur.
L'ASPIRATEUR À
MAIN N’ASPIRE PAS
OU LA SUCCION
EST FAIBLE
1. La coupelle à poussière
est pleine.
2. Le filtre de la coupelle
à poussière doit être
nettoyé ou changé.
3. L'aspirateur doit être
rechargé.
1. Videz la coupelle à
poussière.
2. Retirez le filtre de la
coupelle, trouvez et
retirez tout objet
obstruant l’entrée d’air.
Nettoyez ou remplacez
le filtre de la co upelle.
3. Chargez l’appareil.
LA POUSSIÈRE
S’ÉCHAPPE DE
L’ASPIRATEUR À
MAIN
1. La coupelle à poussière
est pleine.
2. Le filtre de la coupelle
n’est pas correctement
installé.
3. Le filtre de la coupelle
à poussière est perforé.
1. Videz la coupelle à
poussière.
2. Lisez de nouveau les
directives d’installation
du filtre de la coupelle.
3. Rem place z le filtre de
la coupelle.
Composez le: 1 (800) 798-7395
du lundi au vendredi, de 8 h 30 à 17 h 00, heure normale de l’Est
Ou visitez notre site Web au: www.sharkclean.com
SOUTIEN TECHNIQUE
Composez le: 1 (800) 798-7395
du lundi au vendredi, de 8 h 30 à 17 h 00, heure normale de l’Est
Filtre de rechange pour coupelle à poussière No XSB728
Bloc-piles de rechange No XBP729
pour le modèle SV729
Remarque
Le filtre de la coupelle à poussière est lavable. Pour assurer un rendement optimal de
votre aspirateur, il doit toutefois être remplacé àchaque période de trois (3) mois.
Important
Avant de remettre le filtre de la coupelle à poussière dans l'aspirateur à main,
assurez-vous qu'il soit complètement sec.
FILTRES DE RECHANGE
Page 12

Modèle SV729
21
Modèle SV729
GARANTIE LIMITÉE D’UN (1) AN
La société EURO-PRO Operating LLC garantit ce produit contre toute défectuosité de matériel et de fabrication
pendant une période d'un (1) an à partir de la date d'achat originale lorsqu'utilisé à des fins domestiques
normales. Les conditions, exclusions et exceptions suivantes sont à prendre en considération.
Si l'appareil ne fonctionne pas de façon appropriée malgré des conditions normales d'utilisation domestique
pendant la période de garantie, retournez-le avec ses accessoires, frais de port prépayé. Pour rejoindre le
service à la clientèle, téléphonez au 1 (800) 798-7395 ou visitez notre site Web: www.sharkclean.com
Si EURO-PRO découvre que l'appareil comporte des défectuosités de matériel ou de fabrication, EURO-PRO
le réparera ou le remplacera gratuitement. Une preuve de la date d'achat est requise. De plus, un montant de
11,95 $ est exigé pour couvrir les frais d'expédition de retour et de manutention.*
Les pièces non durables incluant, sans y être limité, les filtres des contenants à déchets, les filtres, les brosses
et les composants électriques, qui doivent normalement être remplacés, sont spécifiquement exclus de la
garantie.
La responsabilité de la société EURO-PRO se limite exclusivement au coût de la réparation ou du remplacement
de l'aspirateur, à sa seule discrétion. Cette garantie ne couvre pas l'usure normale des pièces et ne s'applique
pas aux appareils qui auraient été altérés ou utilisés à des fins commerciales. Cette garantie limitée ne couvre
pas les dommages causés par un usage inapproptié ou abusif, une manutention négligente ou des dommages
dus à un emballage défectueux ou à une manutention sans précaution pendant le transport. Cette garantie ne
couvre pas les dommages et les défectuosités découlant de dommages subis pendant l'expédition ou les
réparations, l'entretien ou les modifications du produit ou de l'une de ses pièces, qui auraient été effectués par
un réparateur non autorisé par EURO-PRO.
Cette garantie s'applique à l'acheteur d'origine du produit et exclut toutes les autres garanties légales et (ou)
conventionnelles. La responsabilité de la société EURO-PRO, le cas échéant, se limite aux obligations
spécifiques et expressément contenues dans les modalités de cette garantie limitée. En aucune circonstance
la société EURO-PRO ne saurait être tenue responsable des dommages indirects quels qu'ils soient. Certaines
provinces n'autorisent pas l'exclusion ou la limitation des dommages indirects. Ainsi, cette clause risque de ne
pas s'appliquer dans votre cas.
Cette garantie vous donne des droits juridiques spécifiques, qui peuvent varier d’une province àl'autre.
*Important : Emballez soigneusement les articles à retourner afin qu'ils ne s'endommagent pas pendant
leur expédition. Veuillez inclure la preuve de la date d'achat et fixez-la sur l'étiquette apposée sur
l'appareil avec vos nom, adresse au complet et numéro de téléphone, ainsi que les informations relatives
à l'achat, le numéro de modèle et une explication du problème avant de l'emballer. Nous vous
recommandons d'assurer l'envoi (puisque les dommages pendant l'expédition ne sont pas couverts par
cette garantie). Inscrire « ATTENTION: CUSTOMER SERVICE » sur l'emballage. Nous améliorons sans
cesse nos produits. Ainsi, les fiches techniques contenues dans la présente peuvent changer sans
préavis.
FICHE D'ENREGISTREMENT DU PROPRIÉTAIRE
POUR LES CONSOMMATEURS CANADIENS SEULEMENT
Veuillez remplir cette fiche et la poster dans les dix (10) jours suivant l'achat afin de valider la
garantie limitée qui précède. L'enregistrement nous permettra de communiquer avec vous pour
tout avis de sécurité au sujet du produit. En nous retournant cette fiche, vous convenez davoir lu
et compris les directives d’utilisation et les avertissements précisés dans les directives
.
RETOURNER À :
EURO-PRO OperatingLLC, 4400 Bois Franc, ST. LAURENT, QUEBEC, H4S 1A7
______________________________________________________________________
Modèle de l'appareil
______________________________________________________________________
Date d'achat Nom du magasin
______________________________________________________________________
Nom du propriétaire
______________________________________________________________________
Adresse Ville Prov. Code postal
 Loading...