

Shark LIFT-AWAY NV590UK Series Quick Start Manual
MAINTENANCE
Please be sure to read the enclosed Shark® Owner's Guide prior to using your unit.
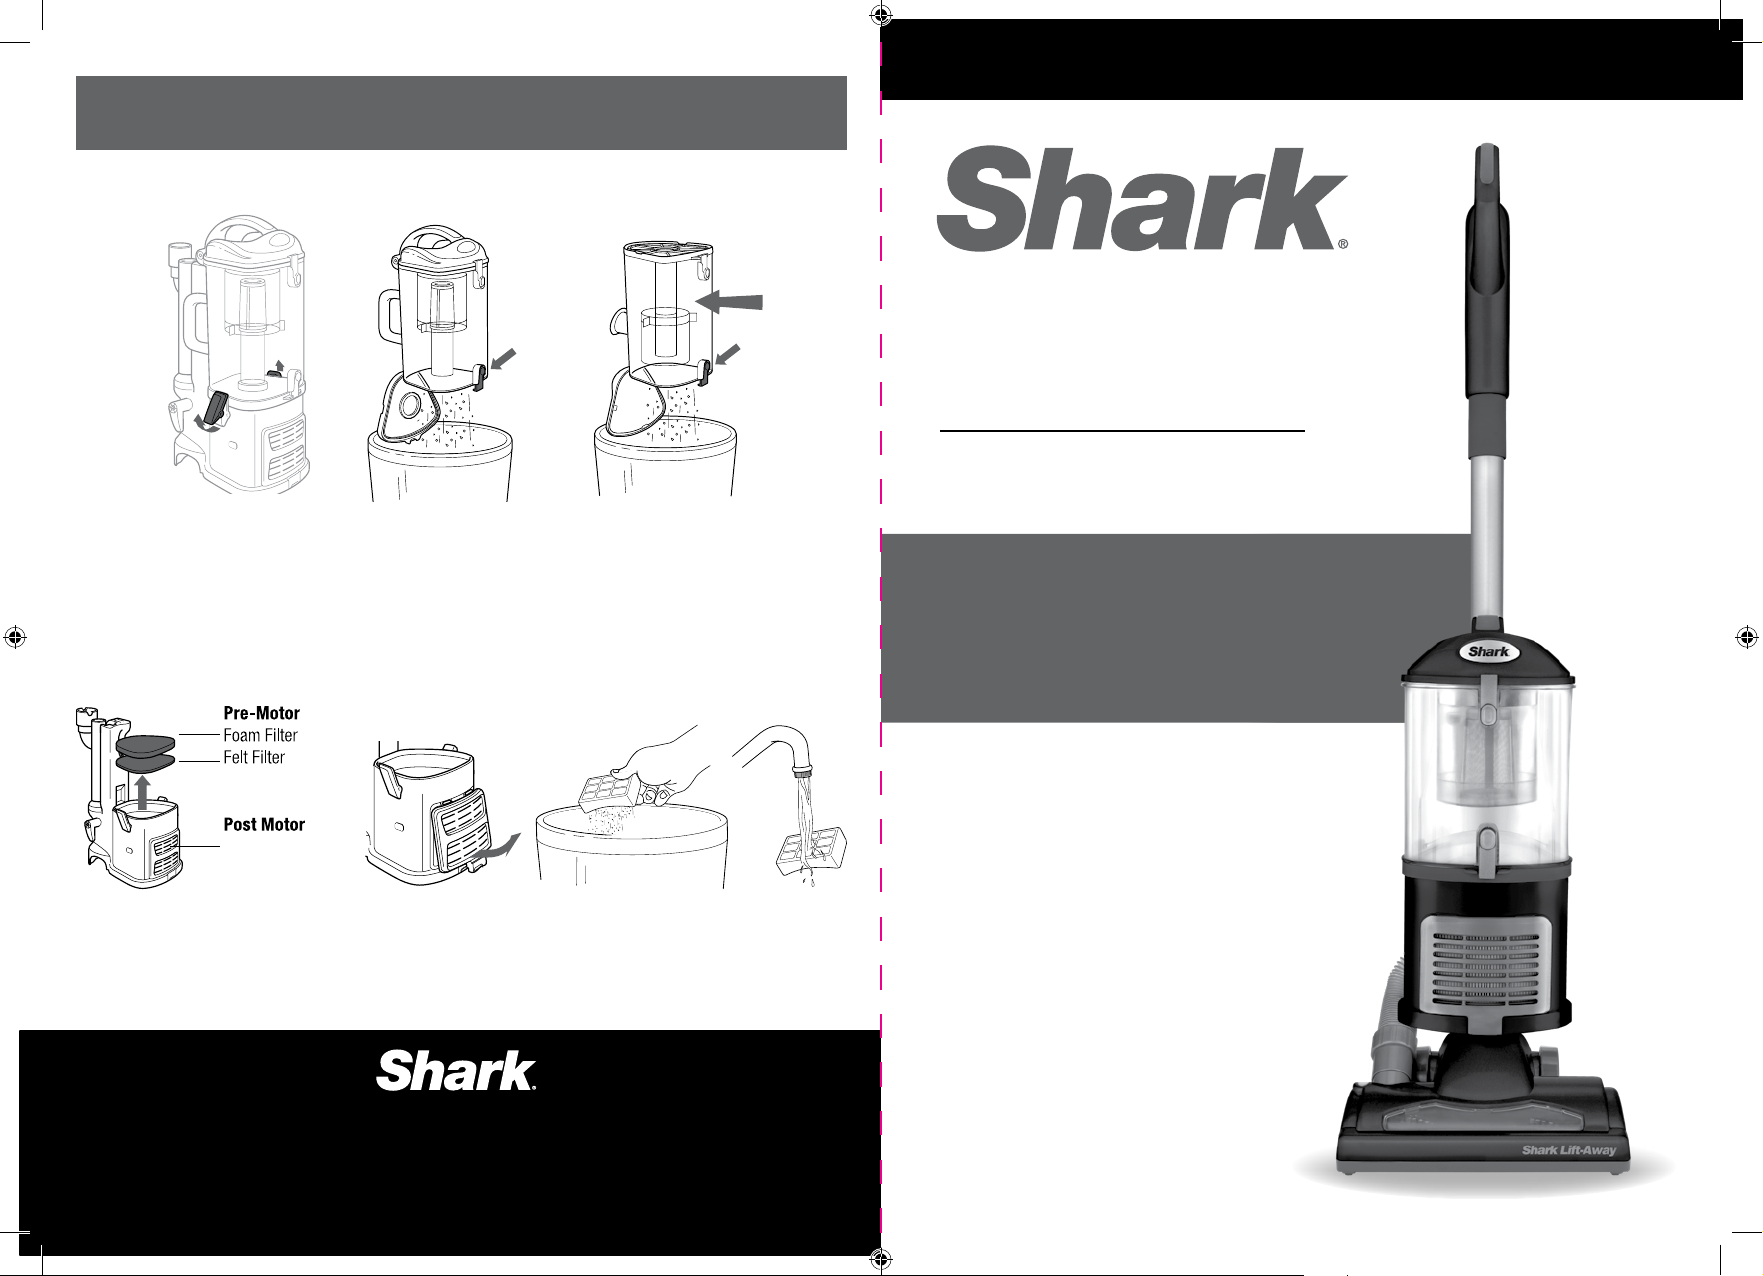
Empty dustcup after each use
Wash filters every month.
Rinse pre-motor filter with luke warm water and allow to air dry completely.
Tap loose dirt from pre-motor filters as needed between washes.
Note: The filters may discolour over time. This is normal.
LIFT-AWAY™
CORDED UPRIGHT
VACUUM CLEANER
NV590UK Series
QUICK
START
GUIDE
Pre HEPA
Rinse post-motor filter with luke warm water and allow to air dry completely for 24 hours.
Tap loose dirt from post-motor filter as needed between washes.
Note: DO NOT put the filter in the washing machine or dishwasher.
To register your product visit registermyshark.com
For additional parts and accessories, visit sharkclean.eu
©2018 Euro-Pro Europe Limited. SHARK is a registered trademark of SharkNinja Operating LLC.
LIFT-AWAY is a trademark of Euro-Pro Europe Limited.
Use this Quick Start Guide
to learn about your new
vacuum’s great features.
WHAT’S INSIDE:
ASS E M B LY
2 WAYS TO CLEAN:
A
Handle with Stretch Hose
B
Accessory Holder
C
Extension Wand
D
Portable Lift-Away®
E
Motorised Floor Nozzle
F
14 cm Crevice Tool
G
Dusting Brush
H
Accessory Holder
F G H
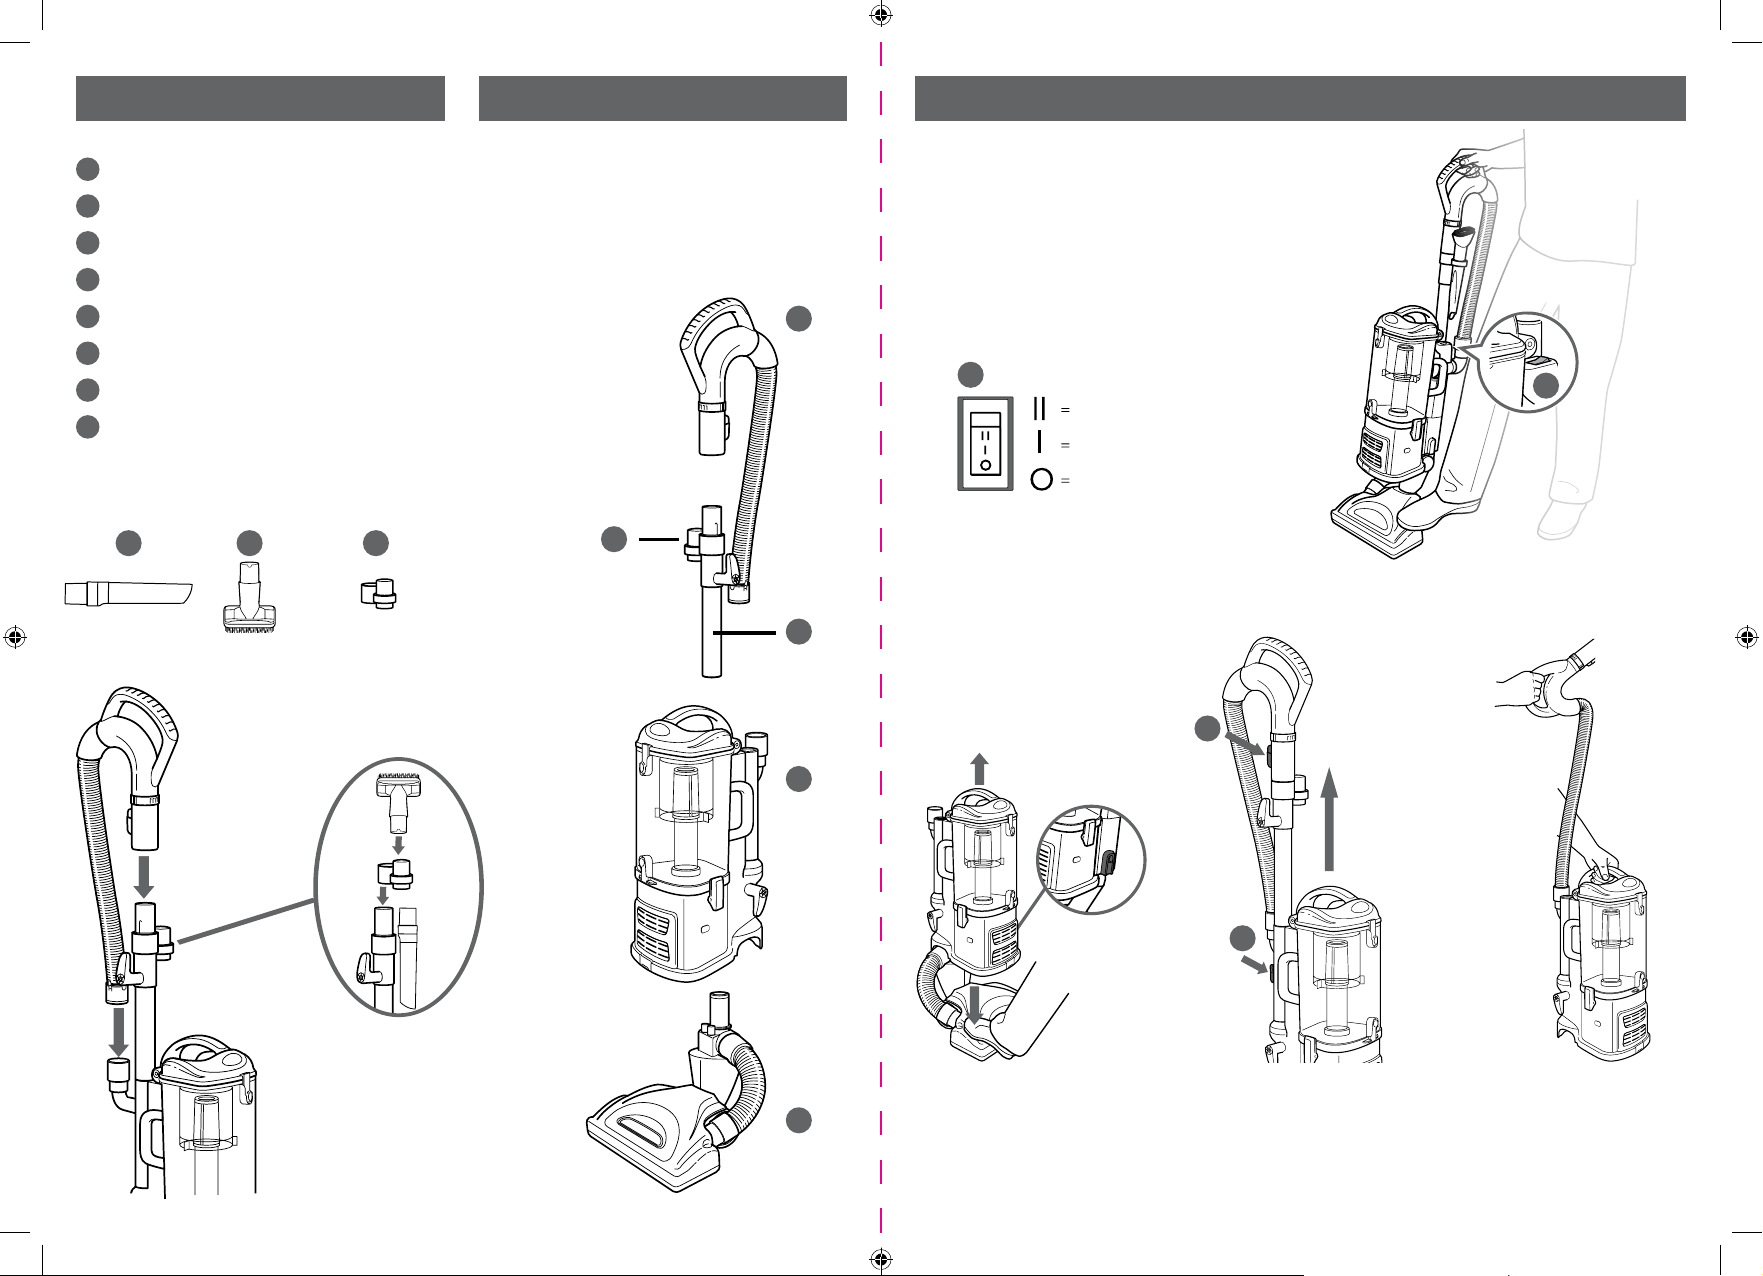
Attach onboard
accessories
1. Attach vacuum pod to floor nozzle.
2. Insert wand into pod.
3. Insert handle and hose into wand.
4. Press hose into back of pod.
B
1. UPRIGHT
Power
Press the On/Off switch (A) to the position 'I' or 'II'
Floor Settings (B)
“I” position to vacuum hard floors
A
C
“II” position to vacuum carpets and rugs.
B
Carpet
Hard Floor
OFF
2. LIFT-AWAY
™
A
A
For complete instruction booklet,
see the enclosed Instructions.
The top flap of your box shows the
select accessories that are included
with your model.
D
B
1
Separate the portable Lift-Away
E
canister from the floor nozzle by
pressing the release floor nozzle
button on the side of the canister.
Gently hold the nozzle to the floor
with your foot and pull the pod up.
2 Press the handle release button
(a) and pull the handle up or press
the extension wand button to
release (b) and pull the extension
wand up.
3 Attach desired accessory
onto the end of either the
extension wand or the
handle.
 Loading...