

Shark BR-442537, BR-373537, BR-353237, BR-404027, BR-455037E Operating Instructions And Parts Manual
...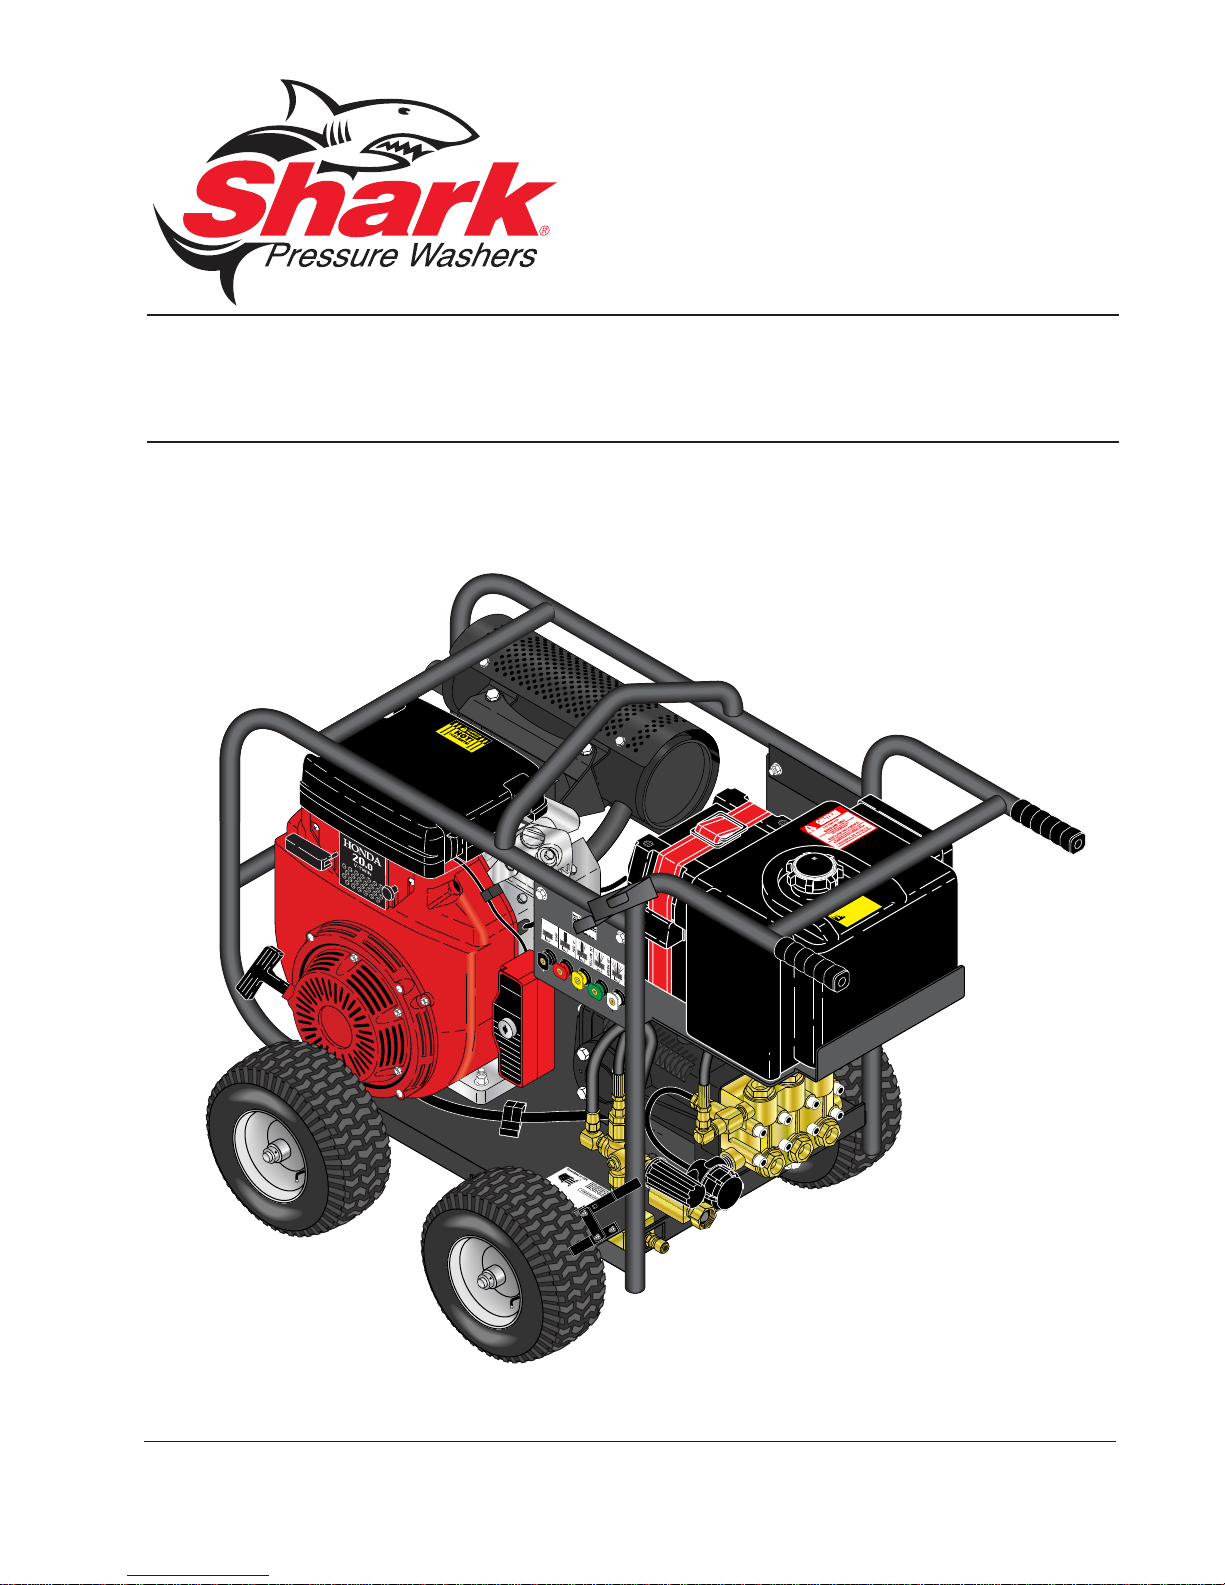
MODEL: BR
OPERATING INSTRUCTION
AND PARTS MANUAL
■ BR-442537 ■ BR-353237 ■ BR-373537
■ BR-404027 ■ BR-455037E ■ BR-343087E
For technical assistance or the SHARK dealer nearest you, call 1-800-771-1881
or visit our website at www.shark-pw.com
97-723


Important Safety Information ................................................................4-5
Component Identifi cation Small...............................................................6
Component Identifi cation Large...............................................................7
Assembly Instructions..............................................................................8
Operating Instructions ........................................................................9-10
Applying Detergent and General Operating Techniques........................11
Shut Down and Clean-Up......................................................................12
Storage..................................................................................................12
Troubleshooting................................................................................13-14
Preventative Maintenance .....................................................................15
Oil Change Record................................................................................15
Exploded View - Large...........................................................................16
Exploded View Parts List..................................................................17-19
Exploded View - Small...........................................................................20
Exploded View Parts List..................................................................21-22
Hose and Spray Gun Assembly.............................................................23
Specifi cations....................................................................................24-25
Warranty
CONTENTS
Model Number _________________________________
Serial Number _________________________________
Date of Purchase _______________________________
The model and serial numbers will be found on a decal at tached
to the pressure washer. You should record both serial number and
date of purchase and keep in a safe place for future ref er ence.
3
96-718, 97-721, 97-723 • REV. 8/05a
INTRODUCTION & IMPORTANT SAFETY INFORMATION
Thank you for purchasing a this pressure washer.
All in for ma tion in this man u al is based on the lat est
prod uct in for ma tion avail able at the time of print ing.
Manufacturer reserves the right to make changes at
any time with out incurring any obligation.
Owner/User Responsibility:
The owner and/or user must hav e an un der stand ing of
PRESSURE W ASHER
the manufacturer’ s operating instructions and warnings
be fore us ing this pressure washer. W arning in for ma tion
should be emphasized and understood. If the op er a tor
is not fl uent in En glish, the manufacturer’s in struc tions
and warnings shall be read to and dis cussed with
the op er a tor in the operator’s native lan guage by the
pur chas er/owner, making sure that the operator com pre hends its contents.
Owner and/or user must study and maintain for fu ture
ref er ence the man u fac tur ers’ instructions.
OPERATOR’S MANUAL
The operator must know how to stop the machine
quick ly and un der stand the operation of all controls.
Never per mit any one to op er ate the engine without
proper in struc tions.
This manual should be considered a permanent
part of the machine and should remain with it if
ma chine is resold.
When ordering parts, please specify model and
serial number.
MPORTANT SAFETY
I
INFORMATION
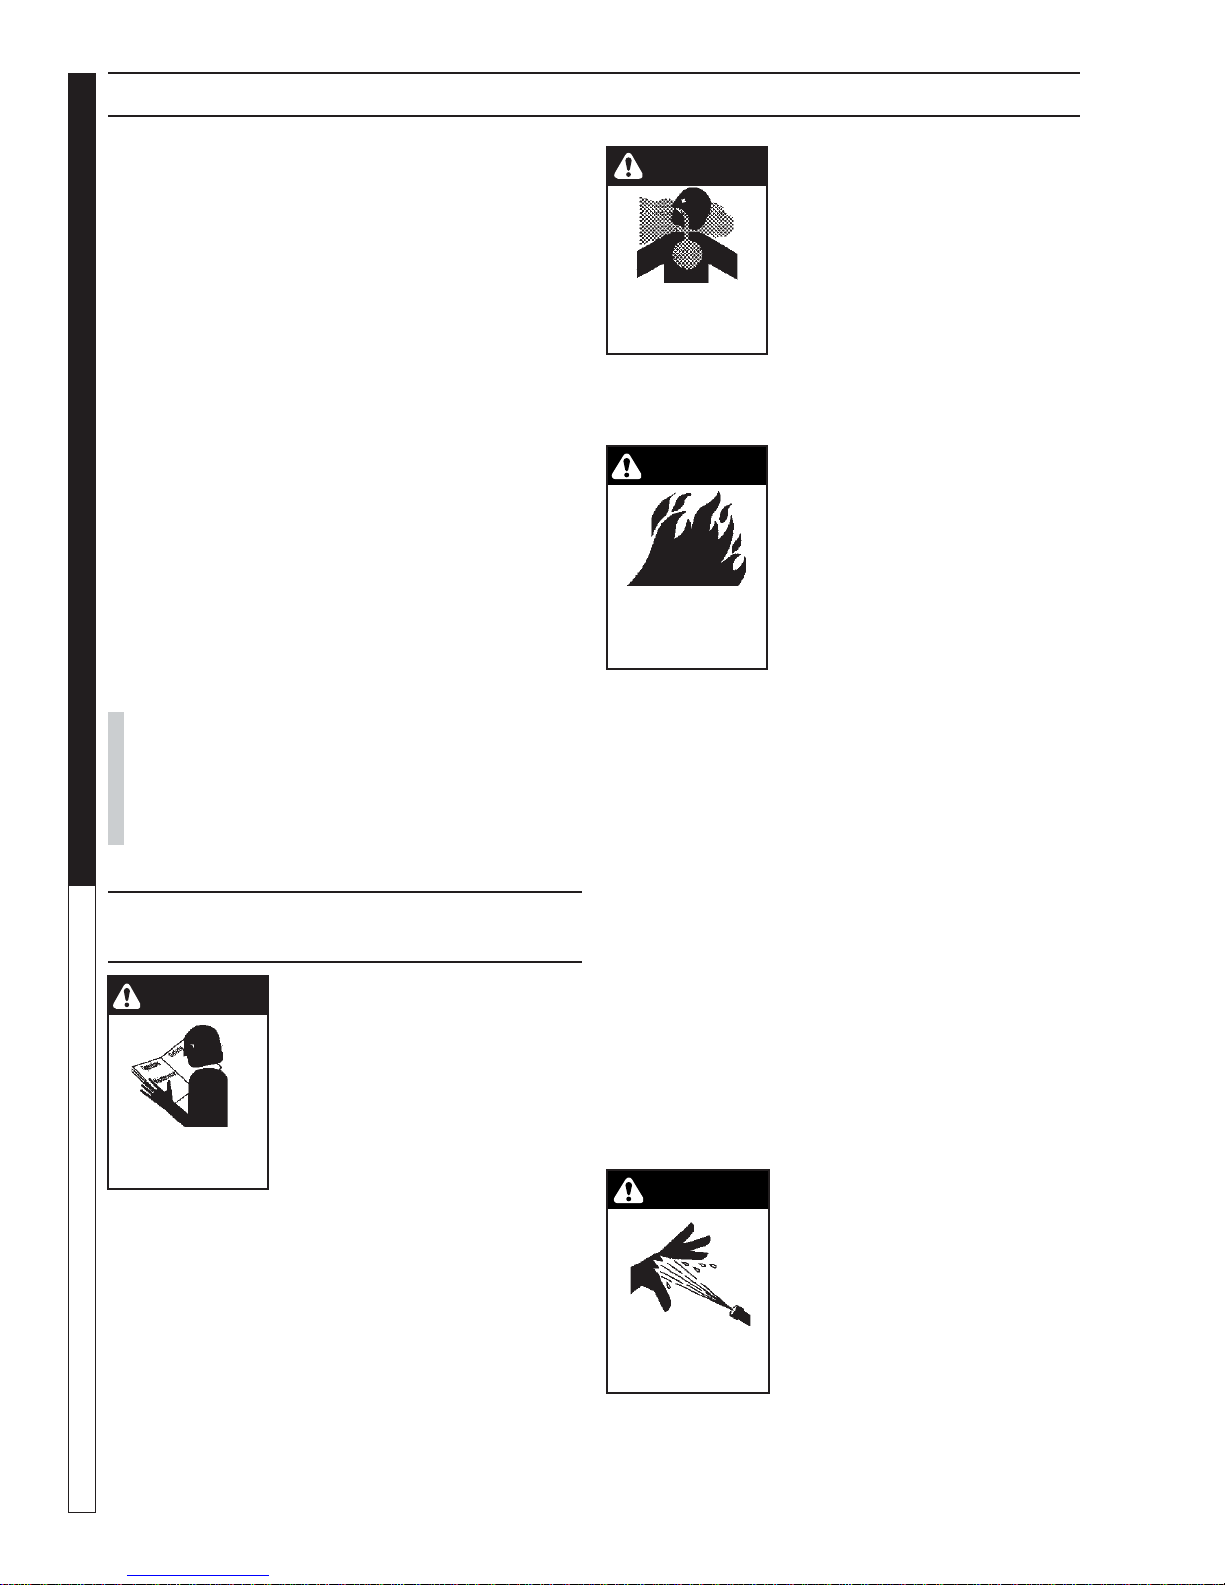
CAUTION
READ OPERATOR’S
MANUAL THOR OUGH LY
PRI OR TO USE.
2.All installations must com ply with local codes. Con tact your elec tri cian, plumb er, utility com pa ny or the
sell ing dis trib u tor for spe cifi c details.
3. This machine has been pro vid ed with Warn ing and
In struc tion decals for the safety of the operator. If
these decals are removed or be come damaged
they should be re placed. Contact your dealer for
re place ment de cals.
CAUTION: To reduce the risk of
in ju ry, read op er at ing in struc tions care ful ly be fore us ing.
1. Read the own er's man u al
thor ough ly. Fail ure to fol low
in struc tions could cause mal func tion of machine and re sult
in death, se ri ous bodily injury
and/or prop er ty dam age.
CAUTION
CAUTION: Risk of as phyx i a tion
— Use this product only in a well
ven ti lat ed area.
4. Avoid installing ma chines in
small areas or near ex haust
RISK OF
ASPHYXIATION.
USE ONLY IN A WELL
VENTILATED AREA.
fans. Ex haust con tains poi son ous car bon mon ox ide gas;
ex po sure may cause loss of
con scious ness and may lead to
death. It also con tains chemicals known, in cer tain
quan ti ties, to cause can cer, birth de fects or oth er
re pro duc tive harm.
WARNING
WARNING: Flammable liquids
can create fumes which can
ig nite caus ing prop er ty damage
or se vere in ju ry.
WARNING: Risk of fi re — Do not
add fuel when the prod uct is
RISK OF FIRE.
DO NOT ADD FUEL
WHEN OPERATING
MACHINE.
operating.
WARNING: Risk of explosion —
Do not spray fl am ma ble liq uids.
5.Do not place ma chine near fl ammable ob jects as
the en gine is hot.
6. Allow engine to cool for 2 minutes before re fu el ing. If
any fuel is spilled, make sure the area is dry be fore
test ing the spar k plug or start ing the en gine. (Fire
and/or ex plo sion may oc cur if this is not done.)
When refueling gasoline engines on mo bile or
por ta ble equipment, make sure to refuel:
a. outdoors;
b. with the engine on the equip ment stopped;
c. with no source of ig ni tion within 10 feet of the
dis pens ing point; and
d. with an allowance made for ex pan sion of the
fuel should the equip ment be exposed to a
high er am bi ent tem per a ture.
In an overfi lling or spillage situation, additional pre-
cau tions are nec es sary to en sure that the sit u a tion
is han dled in a safe man ner.
WARNING
WARNING: High pressure stream
of water that this equip ment can
pro duce can pierce skin and its
un der ly ing tis sues, lead ing to
se ri ous in ju ry and pos si ble
am pu ta tion.
HIGH PRESSURE
SPRAY CAN PIERCE
SKIN AND TIS SUES.
4
96-718, 97-721, 97-723 • REV. 8/05a
INTRODUCTION & IMPORTANT SAFETY INFORMATION
PRESSURE WASHER
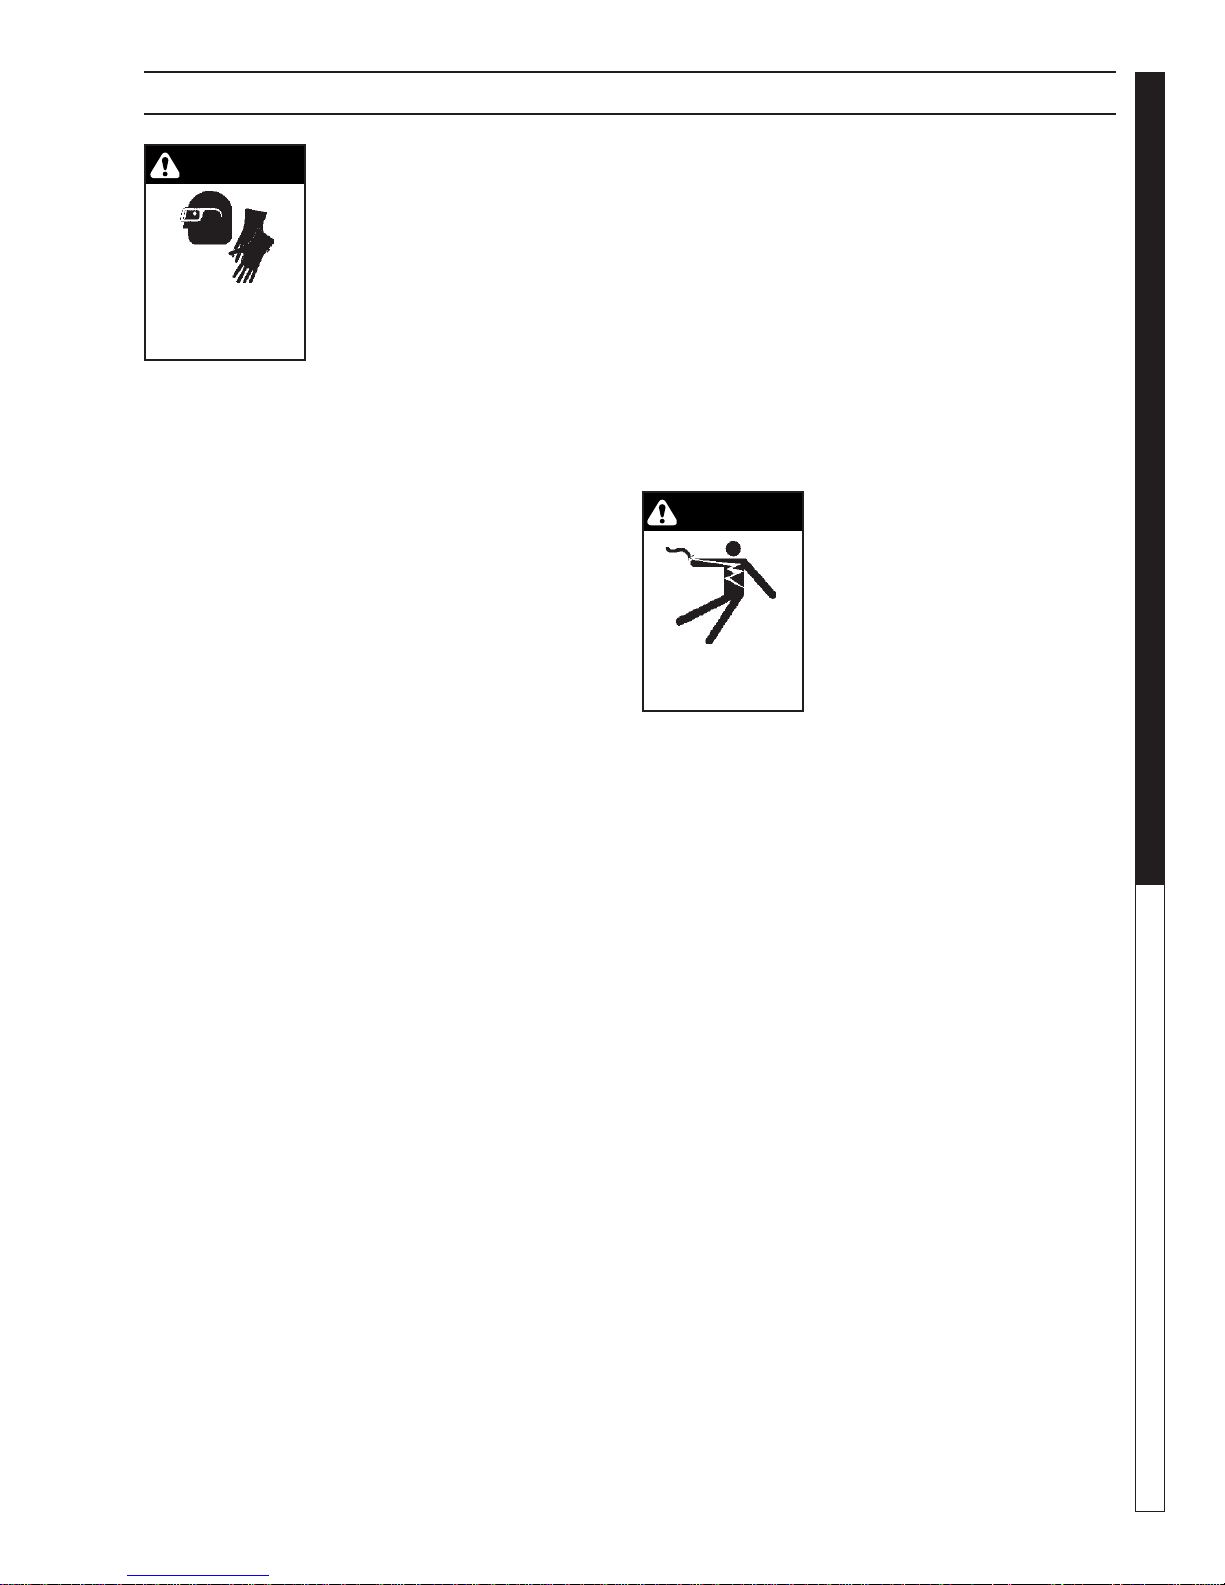
WARNING
WARNING: High pressure spray
can cause paint chips or other
par ti cles to become air borne and
fl y at high speeds. To avoid per son al in ju ry, eye safe ty de vic es
must be worn.
PROTECTIVE
EYEWEAR AND
CLOTH ING MUST
BE WORN.
7. Protective cloth ing and foot
protection must be worn when
using this equipment.
8. High pres sure de vel oped by these machines will
cause per son al in ju r y or equip ment dam age. Use
cau tion when op er at ing. Do not di rect dis charge
stream at peo ple, or se vere in ju ry or death will
re sult.
9. Never make ad just ments on ma chine while in
operation.
10. Do not block or tie spray gun in open position.
11. Do not place hands or feet on non-insulated areas
of the pres sure washer when starting gas o line
engine.
12. When applying detergents, fol low the safety rules
on the de ter gent label.
13. Use detergent from a covered D.O.T. approved
con tain er.
14. Cleaning area should be provided with adequate
slopes and drainage. This will reduce the pos si bil i ty
of a fall due to slippery surface.
15. The best in sur ance against an accident is pre cau tion and knowl edge of the ma chine.
16. Manufacturer will not be liable for any changes
made to our stan dard ma chines, or any com po nents not pur chased from the manufacturer.
17. Read engine safety in struc tions provided.
WARNING
WARNING: Keep water spray
away from electrical wir ing or
fa tal elec tric shock may re sult.
18. Never run pump dry or leave
spray gun closed long er than
5 min utes.
KEEP WA TER SPRAY
AWAY FROM
ELECTRICAL WIRING.
19. Do not allow children to op er ate the pressure wash er at
any time.
20. Do not allow machine to run un at tend ed.
21. Inlet water sup ply must be cold and clean fresh
water.
CAU TION: Spray gun kicks back – Hold with both
hands.
CAU TION: Risk of injury – Dis con nect battery
ground ter mi nal be fore servicing.
OPERATOR’S MAN U AL
5
96-718, 97-721, 97-723 • REV. 8/05a
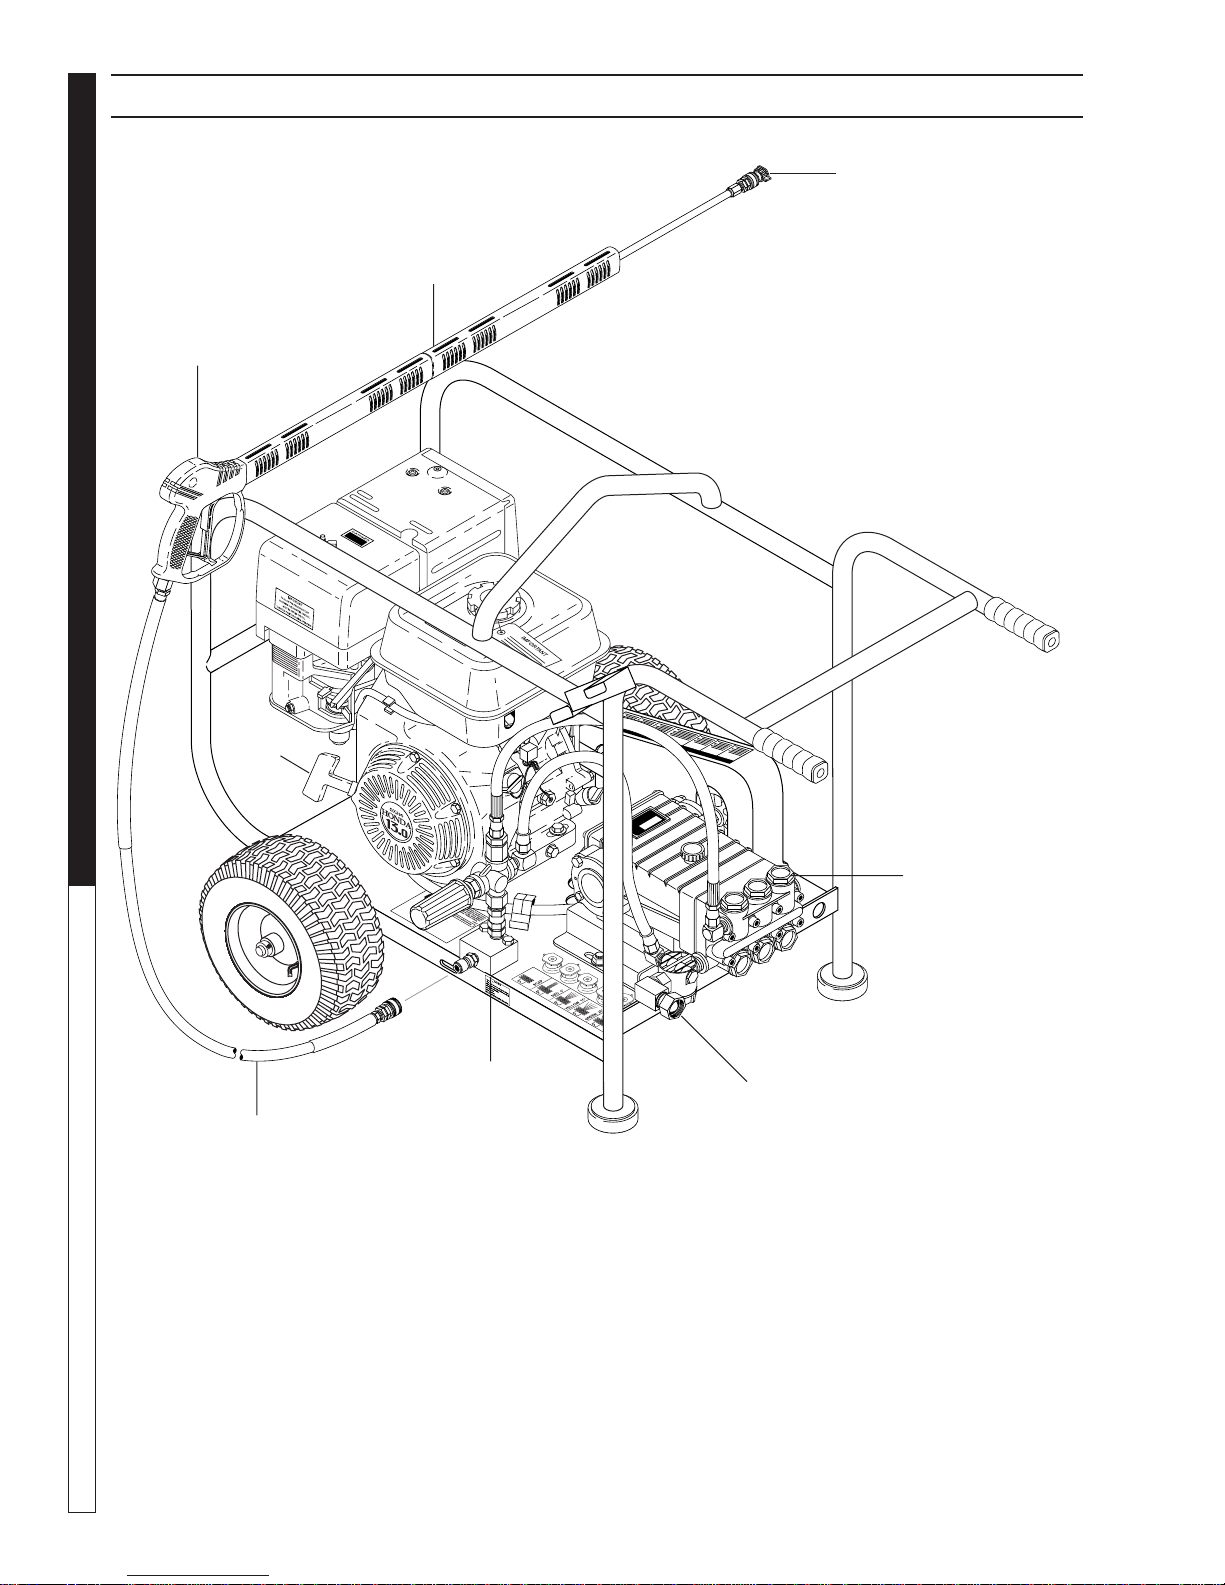
COMPONENT IDENTIFICATION — SMALL MODELS
Nozzle
Wand
PRESSURE W ASHER
OPERATOR’S MANUAL
Spray Gun
Starter
Grip
Pump
High Pressure
Hose
Pump — Develops high pressure.
Starter Grip— Used for starting the engine man u al ly.
Spray Gun — Controls the application of water and
de ter gent onto cleaning surface with trigger device.
In cludes safe ty latch.
Detergent Injector — Allows you to siphon and mix
detergents (not shown).
6
High Pressure
Discharge
Wand — Must be connected to the spray gun.
High Pressure Hose — Connect one end to water
pump dis charge nipple and the other end to spray
gun.
Note: If trigger on spray gun is released for more
than 2 minutes, water will leak from valve. Warm
water will dis charge from pump protector onto fl oor.
This sys tem pre vents internal pump dam age.
96-718, 97-721, 97-723 • REV. 8/05a
Water Inlet
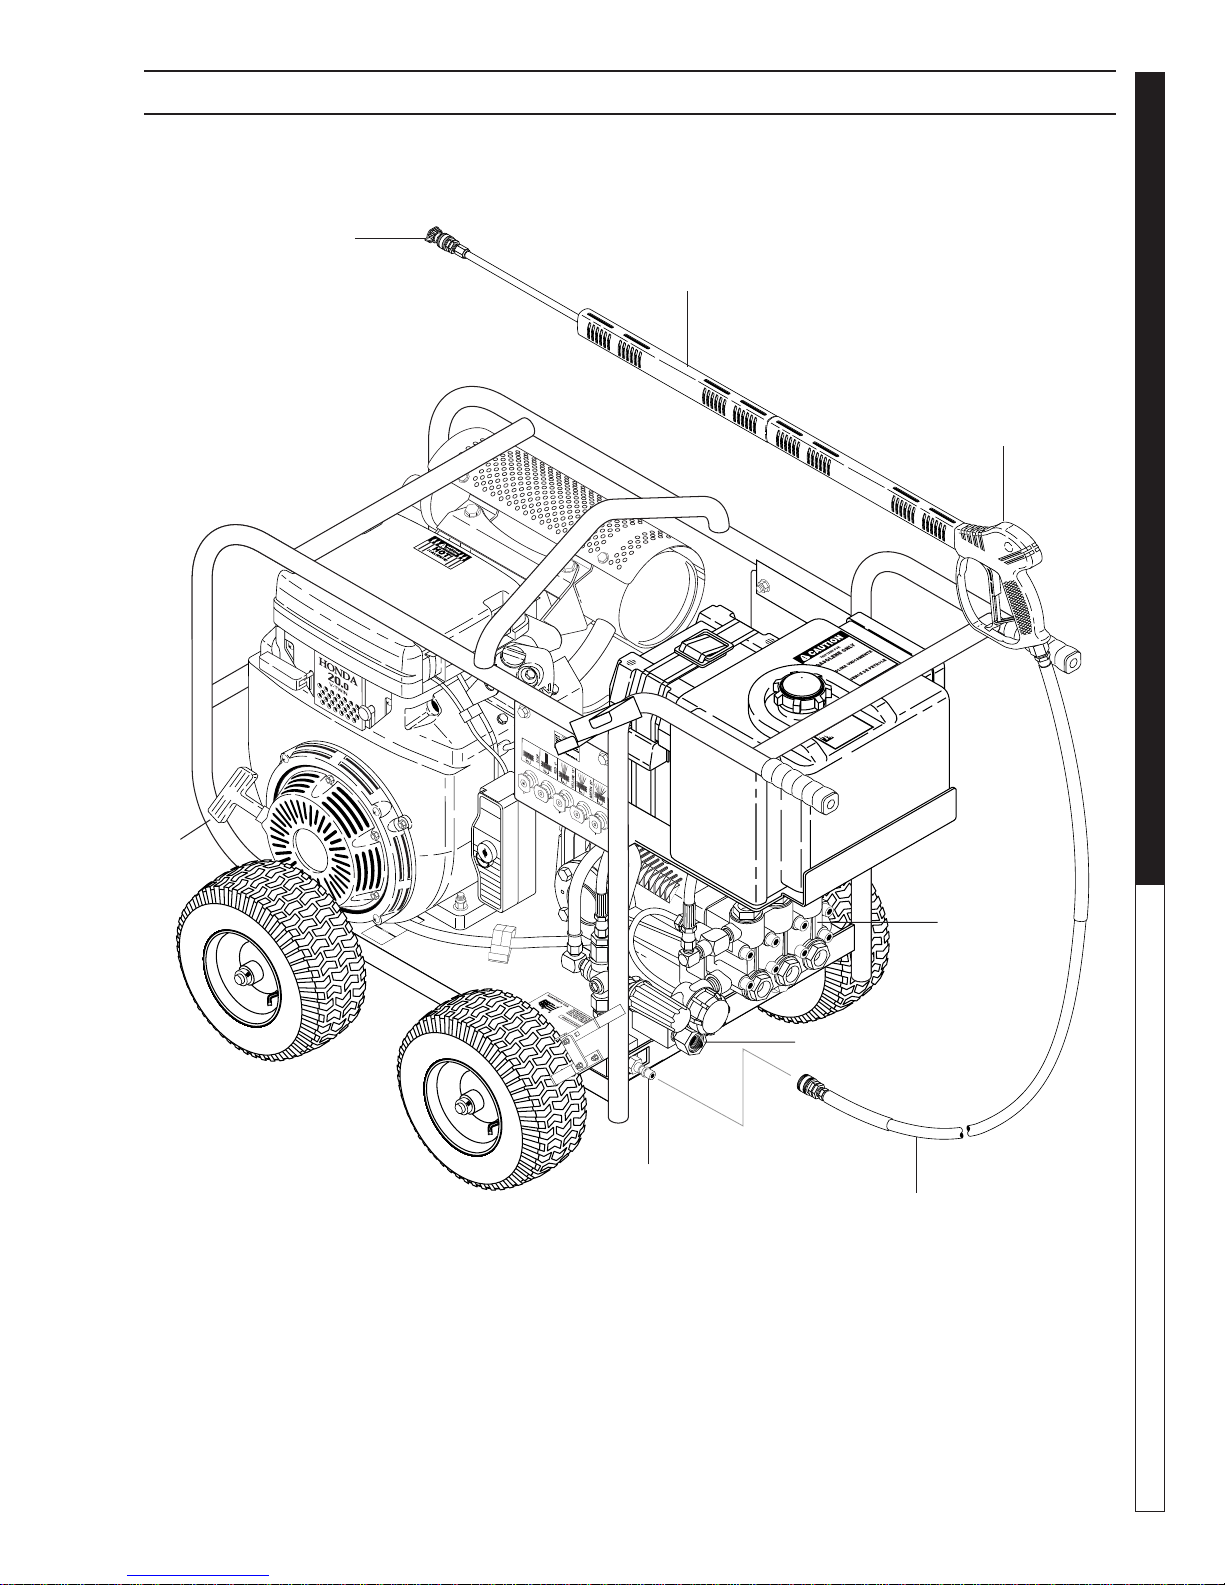
COMPONENT IDENTIFICATION — LARGE MODELS
Nozzle
Wand
Spray Gun
PRESSURE WASHER
OPERATOR’S MAN U AL
Starter
Grip
High Pressure
Discharge
Pump
Water Inlet
High Pressure
Hose
7
96-718, 97-721, 97-723 • REV. 8/05a
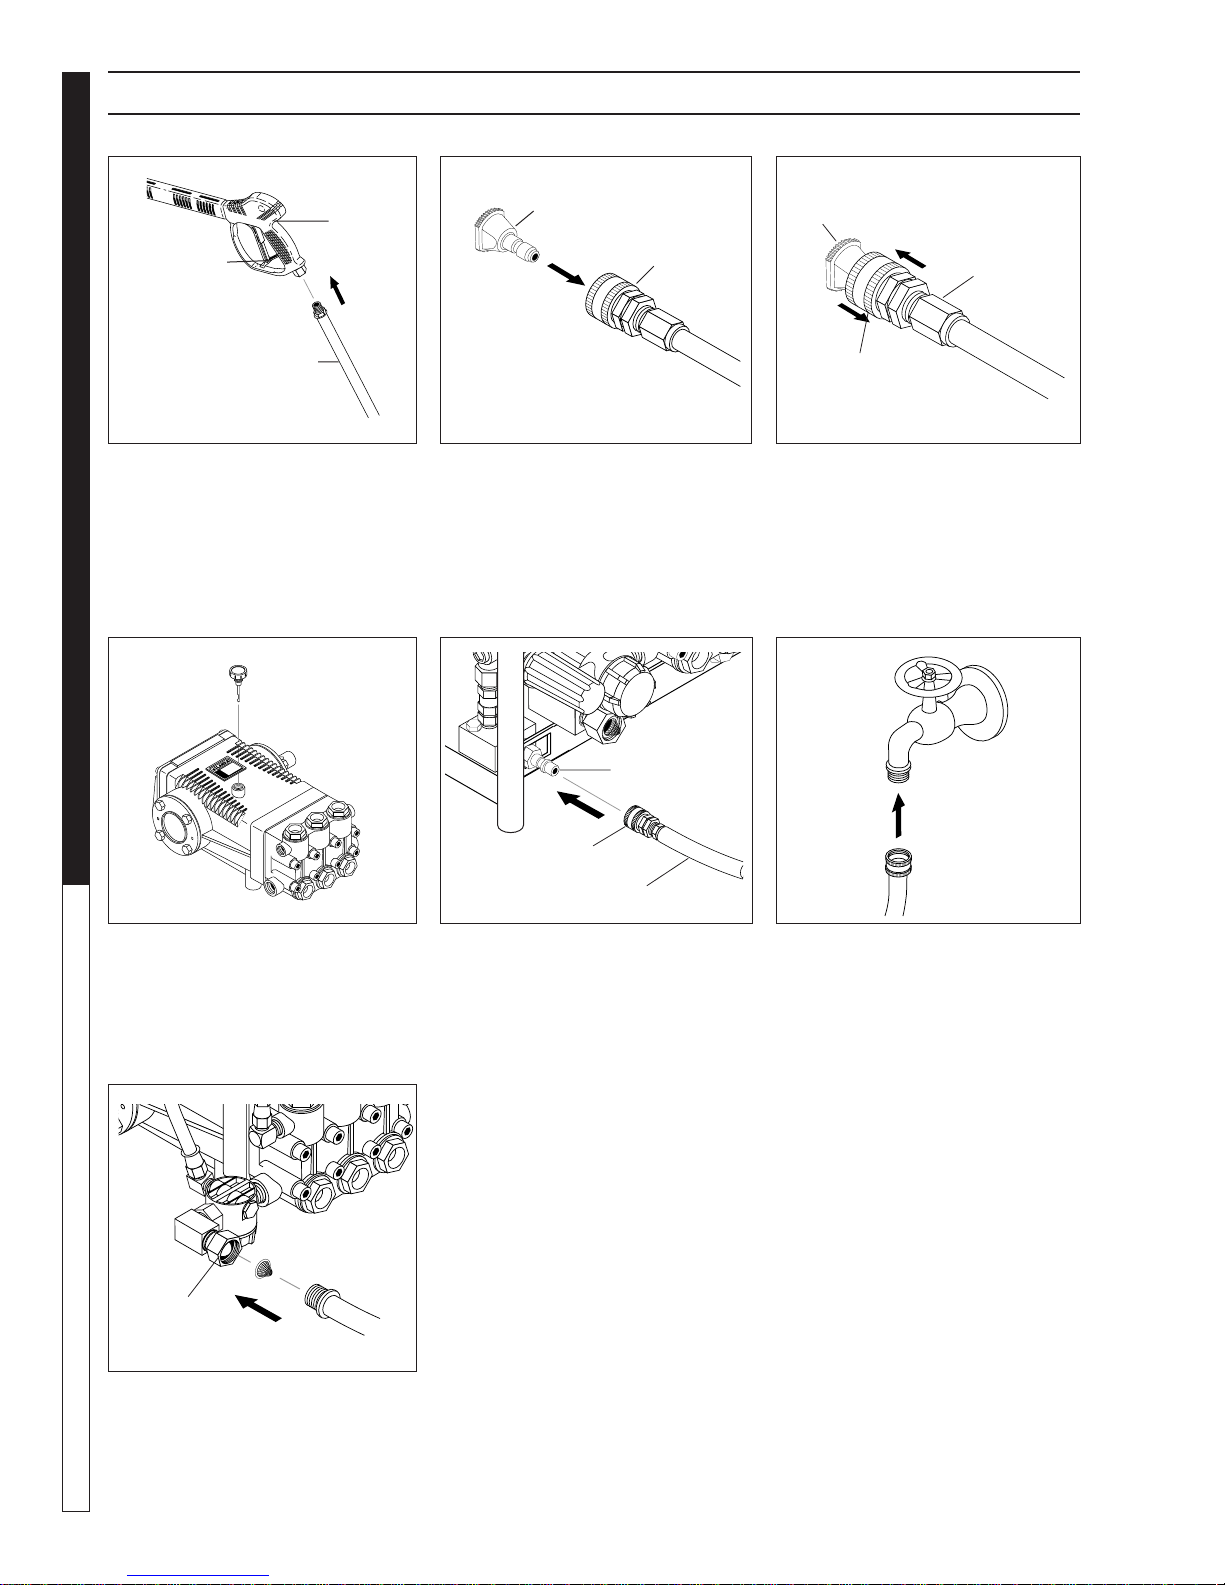
ASSEMBLY INSTRUCTIONS
Spray
Gun
Safety
Latch
PRESSURE W ASHER
High Pressure
Hose
STEP 1: Attach the high pres sure
hose to the spray gun using tefl on
tape on hose threads.
OPERATOR’S MANUAL
Dipstick
Pressure
Nozzle
Wand
Coupler
STEP 2: Pull the spring-load ed col-
lar of the wand coupler back to in sert
your choice of pres sure noz zle.
Discharge
Nipple
Pressure
Nozzle
Wand
Coupler
Wand
Collar
STEP 3: Release the coupler col lar
and push the nozzle until the collar
clicks. Pull the nozzle to make sure
it is seat ed properly.
Cold
Water
Source
STEP 4: Remove shipping cap and
install oil dipstick. Check pump oil
level by using dipstick or observe
oil level in oil window (if equipped).
Use 30 wt. non detergent oil.
Pump
Water Inlet
STEP 7: Check inlet fi lters, remove
debris, then connect garden hose
to pump wa ter in let. CAU TION: Do
not run the pump with out wa ter or
pump dam age will result.
8
Garden
Hose
Coupler Collar
High Pressure Hose
STEP 5: Connect the high pres sure
hose to the pump discharge nipple.
Push coupler collar forward until
se cure.
96-718, 97-721, 97-723 • REV. 8/05a
Garden
Hose
STEP 6: Connect garden hose to
the cold water source.
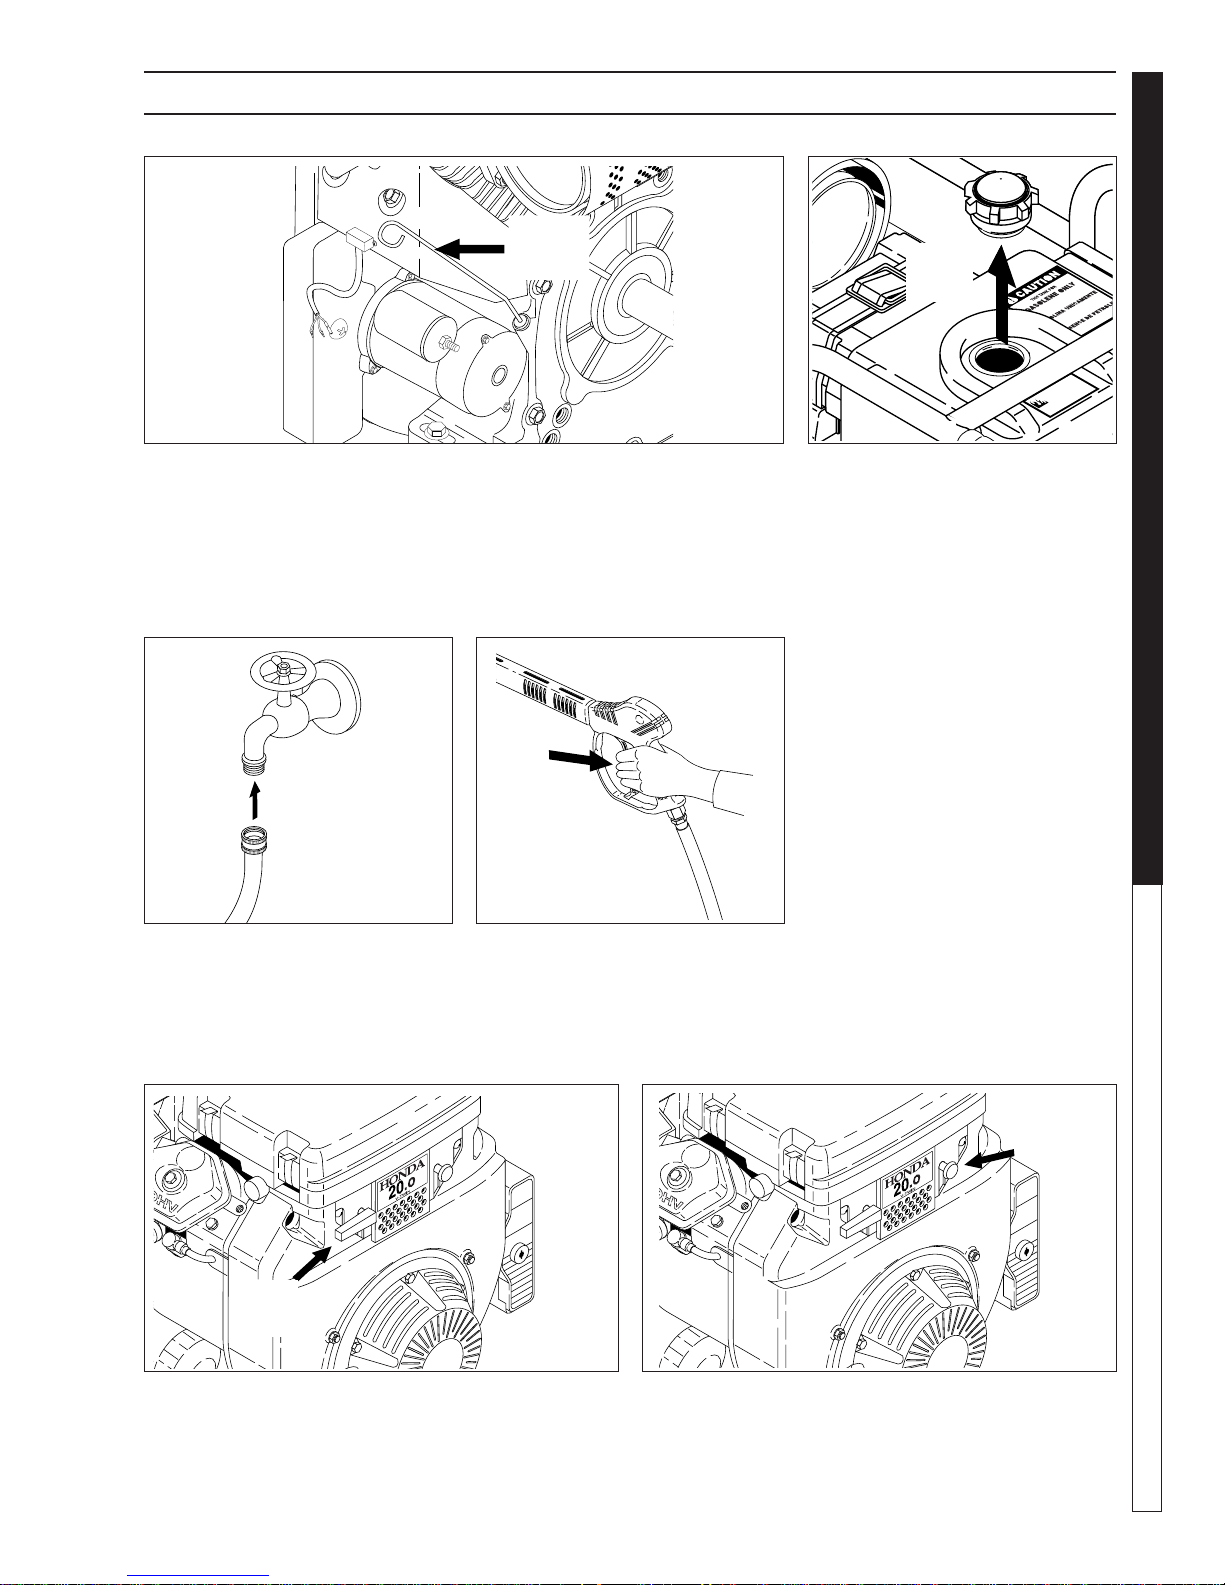
OPERATING INSTRUCTIONS
Engine
Oil
Dipstick
PRESSURE WASHER
Gas
Tank
OPERATOR’S MAN U AL
STEP 1: Check engine oil level. Oil level should be level with the bottom
of the oil fi ller neck. Be sure the ma chine is level when checking the oil
level. (Refer to the en gine's op er at ing manual included with machine.) W e
rec om mend that the oil be changed after the fi rst 5 hours of use, then once
every 50 hours. Note: Im prop er oil levels will cause low oil sensor to shut
off engine. IMPORTANT! Do not run engine with high or low oil le vels
as this will cause engine damage.
Cold
Water
Source
Garden
Hose
STEP 3: Connect garden hose
to the cold water source and turn
wa ter on completely. Never use
hot wa ter.
STEP 4: Tr igger the spray gun to
elim i nate trapped air then wait for a
steady fl ow of water to emerge from
the spray noz zle.
STEP 2: Fill gas tank with un lead ed gasoline. Do not use leaded
gas o line.
Fuel
Valve
STEP 5: Rotate the fuel shut-off valve to the "On" po-
si tion. Slide the fuel valve lever to the "ON" position.
When the engine is not in use, leave the fuel valve in
the "OFF" position.
STEP 6: Pull the choke knob out to the "Chok e" po si tion
(on a warm engine, when in the run po si tion, leave the
choke knob in). Push the choke knob to the "Closed"
po si tion. T o restart a warm engine, leave the chok e knob
in the "Open" position.
96-718, 97-721, 97-723 • REV. 8/05a
Choke
Knob
9
 Loading...