

Page 1
Sharedband Power Router 2+
Sharedband Power Router 2+
Quick Install Guide
Page 2
Sharedband Power Router 2+
Sharedband Router Setup Steps
1) Remove the Sharedband router from its packaging and place the router in a suitable location
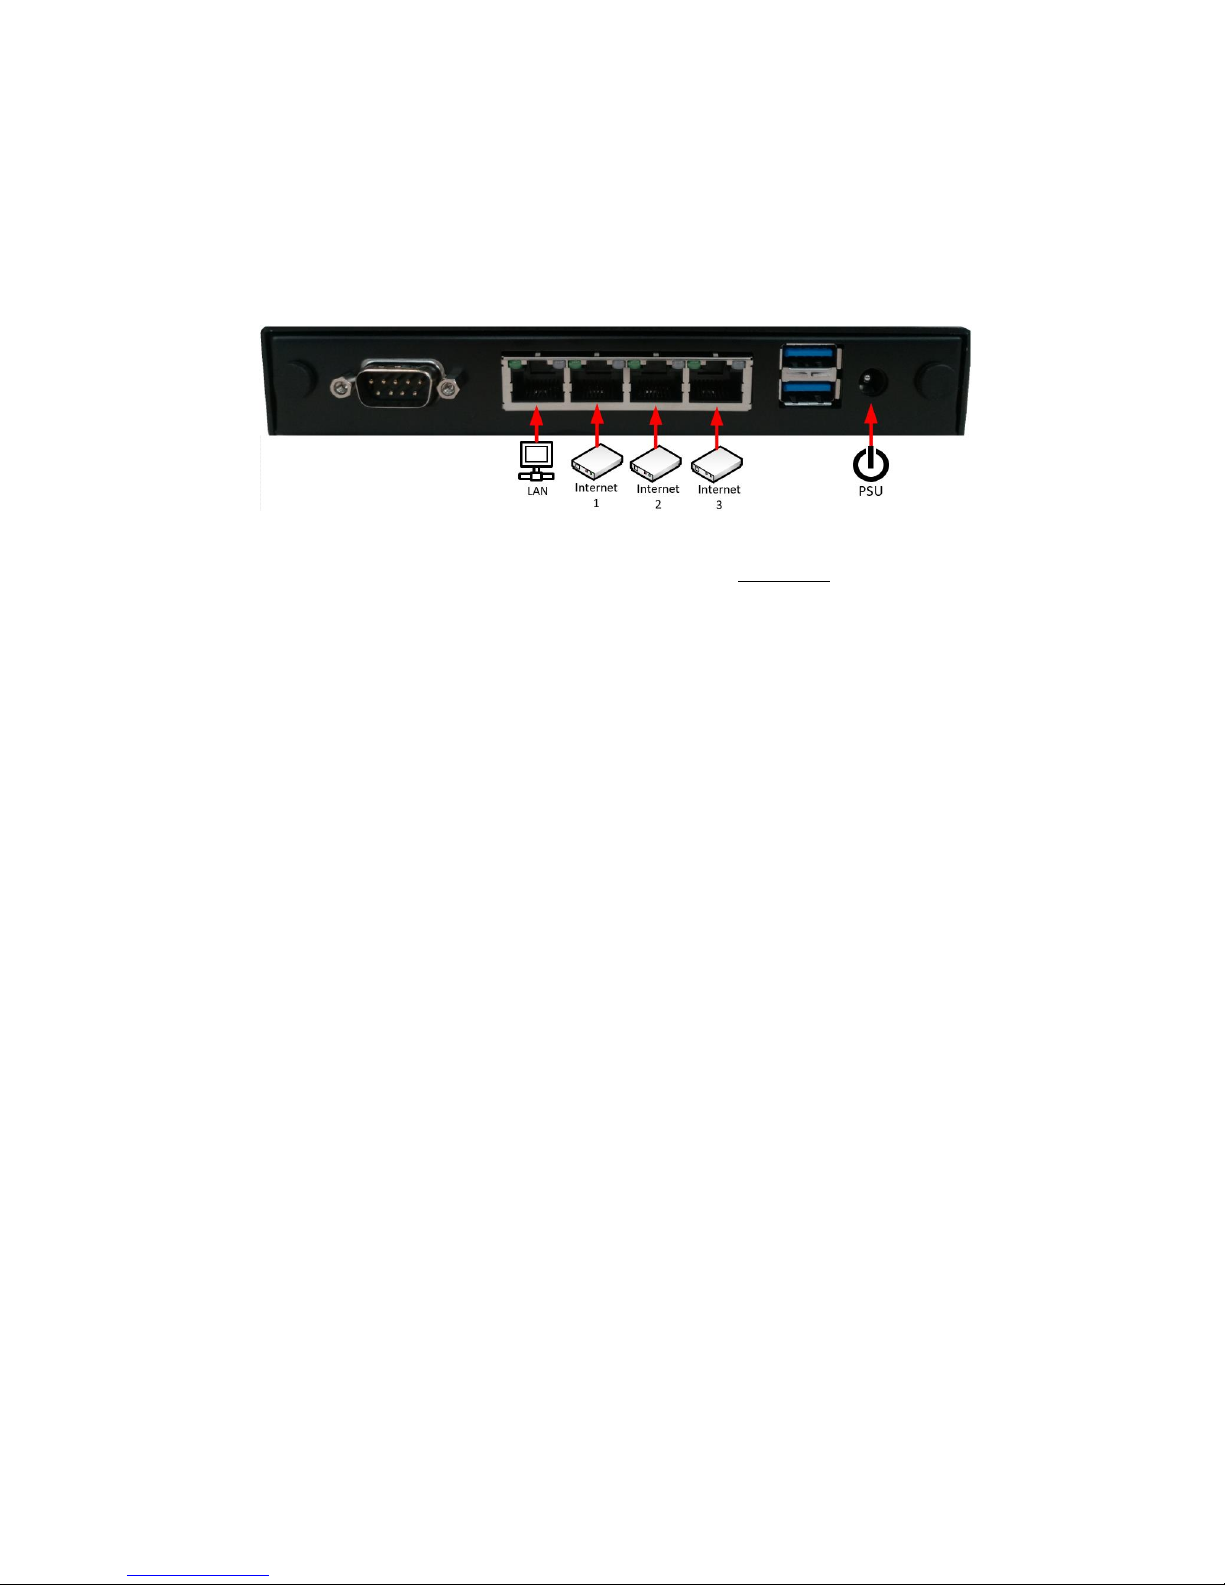
2) Use the included Ethernet cables to connect the router’s ‘Internet’ ports to the modems/routers provided by
your ISP. Please note that the number of the Internet interface that the Modem/Router is connected to will
correspond to the Ethernet WAN connection interface number displayed within the GUI of the router
3) Use an included Ethernet cable to connect the router’s ‘LAN’ port to your Local Area Network or firewall. If
you are teaming a Power Router 2+ with another, please do so using an unmanaged switch
4) Use the included power adapter to connect router’s ’PSU’ socket to a mains power outlet
Page 3
Sharedband Power Router 2+
Verify Successful Setup
5) Each router is identified using a node identifier. This is a unique single digit number clearly marked on the
underside of the router. Using a computer connected to the unmanaged switch, open a web browser and visit
http://192.168.3.1 to connect to router/node 1
6) When prompted for sign in credentials, please input the following:
Username: admin Password: Bonding123 (we recommend that you change this password)
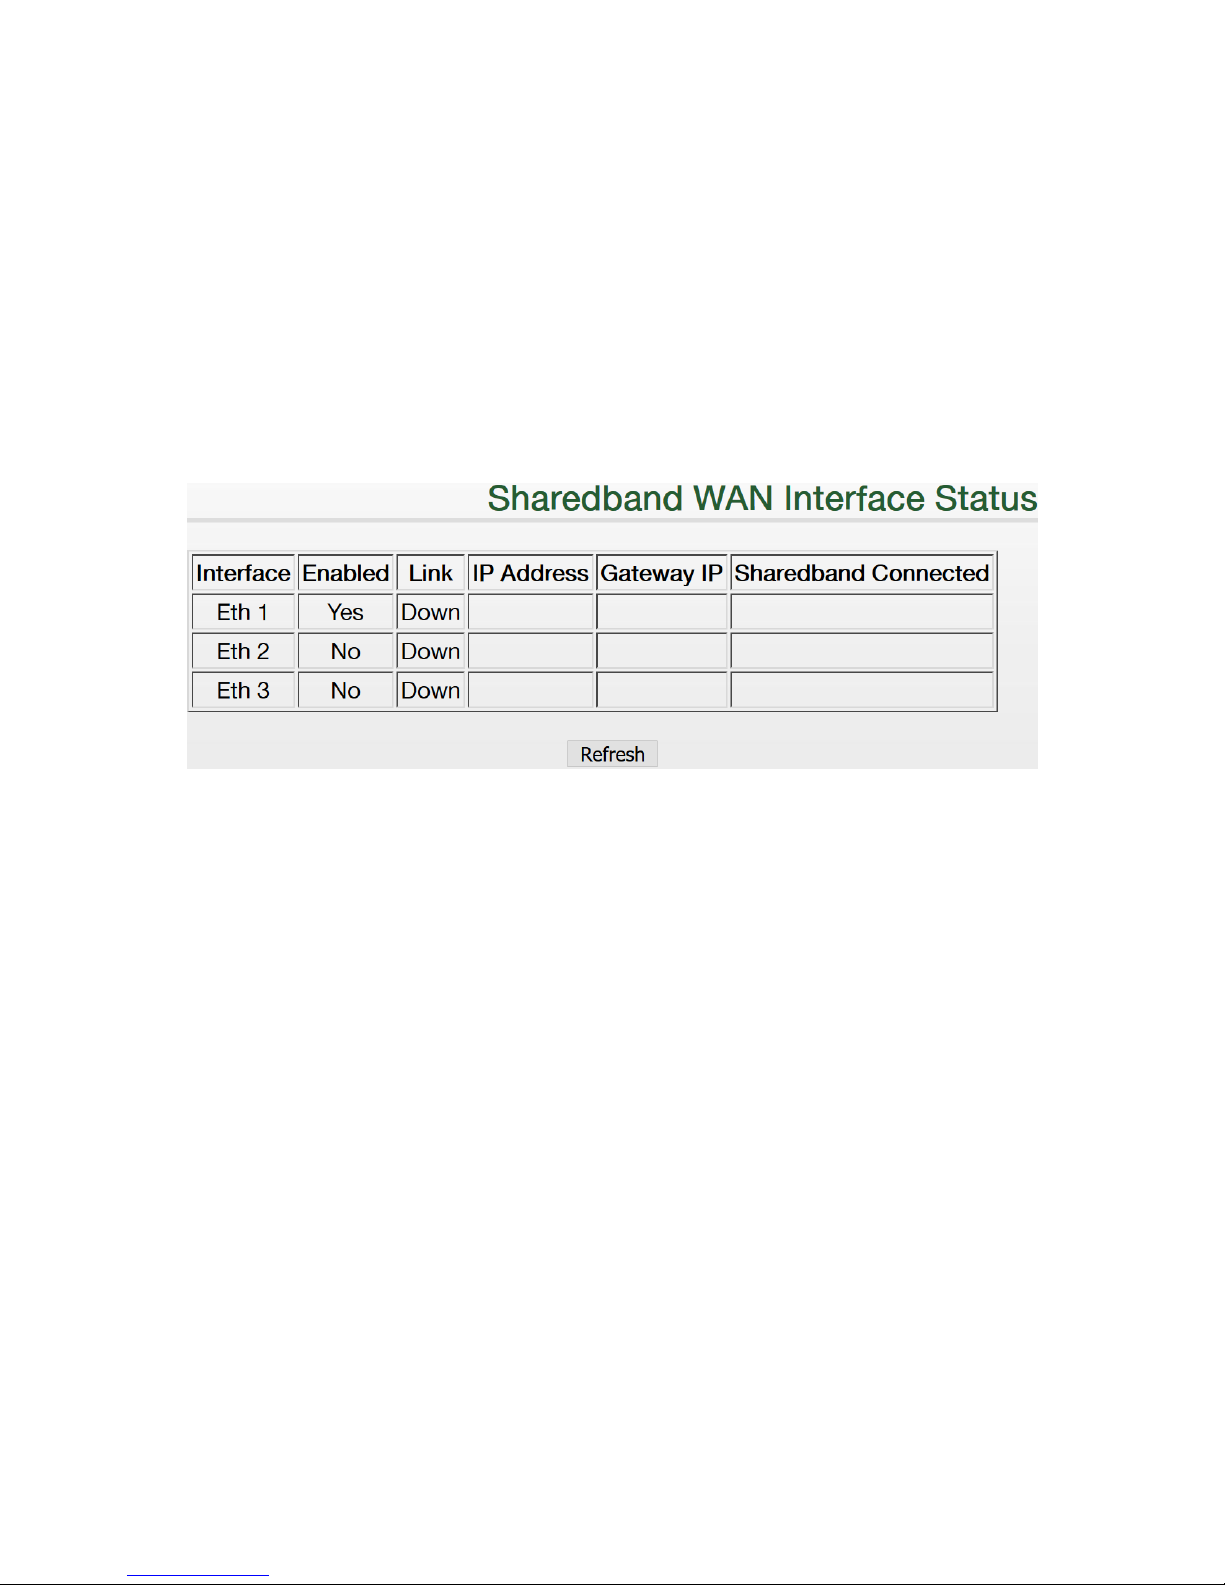
7) In the menu positioned at the left of the displayed web page, select ‘Status’ followed by ‘Click for WAN
Interface Status’. The status of each Ethernet WAN connection can be confirmed using the following
information:
• Link – An interface link showing successfully as ‘Up’ indicates that a physical connection to a
powered-on ISP router/modem exists
• Sharedband Connected – A ‘Yes’ status indicates that the interface is communicating
successfully with the Sharedband aggregation service
Troubleshooting ‘WAN Interface Status’
If the WAN-side routers (provided by your ISP) you are connecting to the Sharedband routers don't operate
DHCP, you will need to set a static IP on each Ethernet interface to enable communication. The following
guidance explains how to achieve this:
a) Open a web browser and visit the IP address of the router (default is 192.168.3.1)
b) Sign in to the router when prompted
c) In the menu select ‘Settings’
d) Select the desired ’WAN connection setup (Ethernet)’ interface that you wish to reconfigure
Page 4
Sharedband Power Router 2+
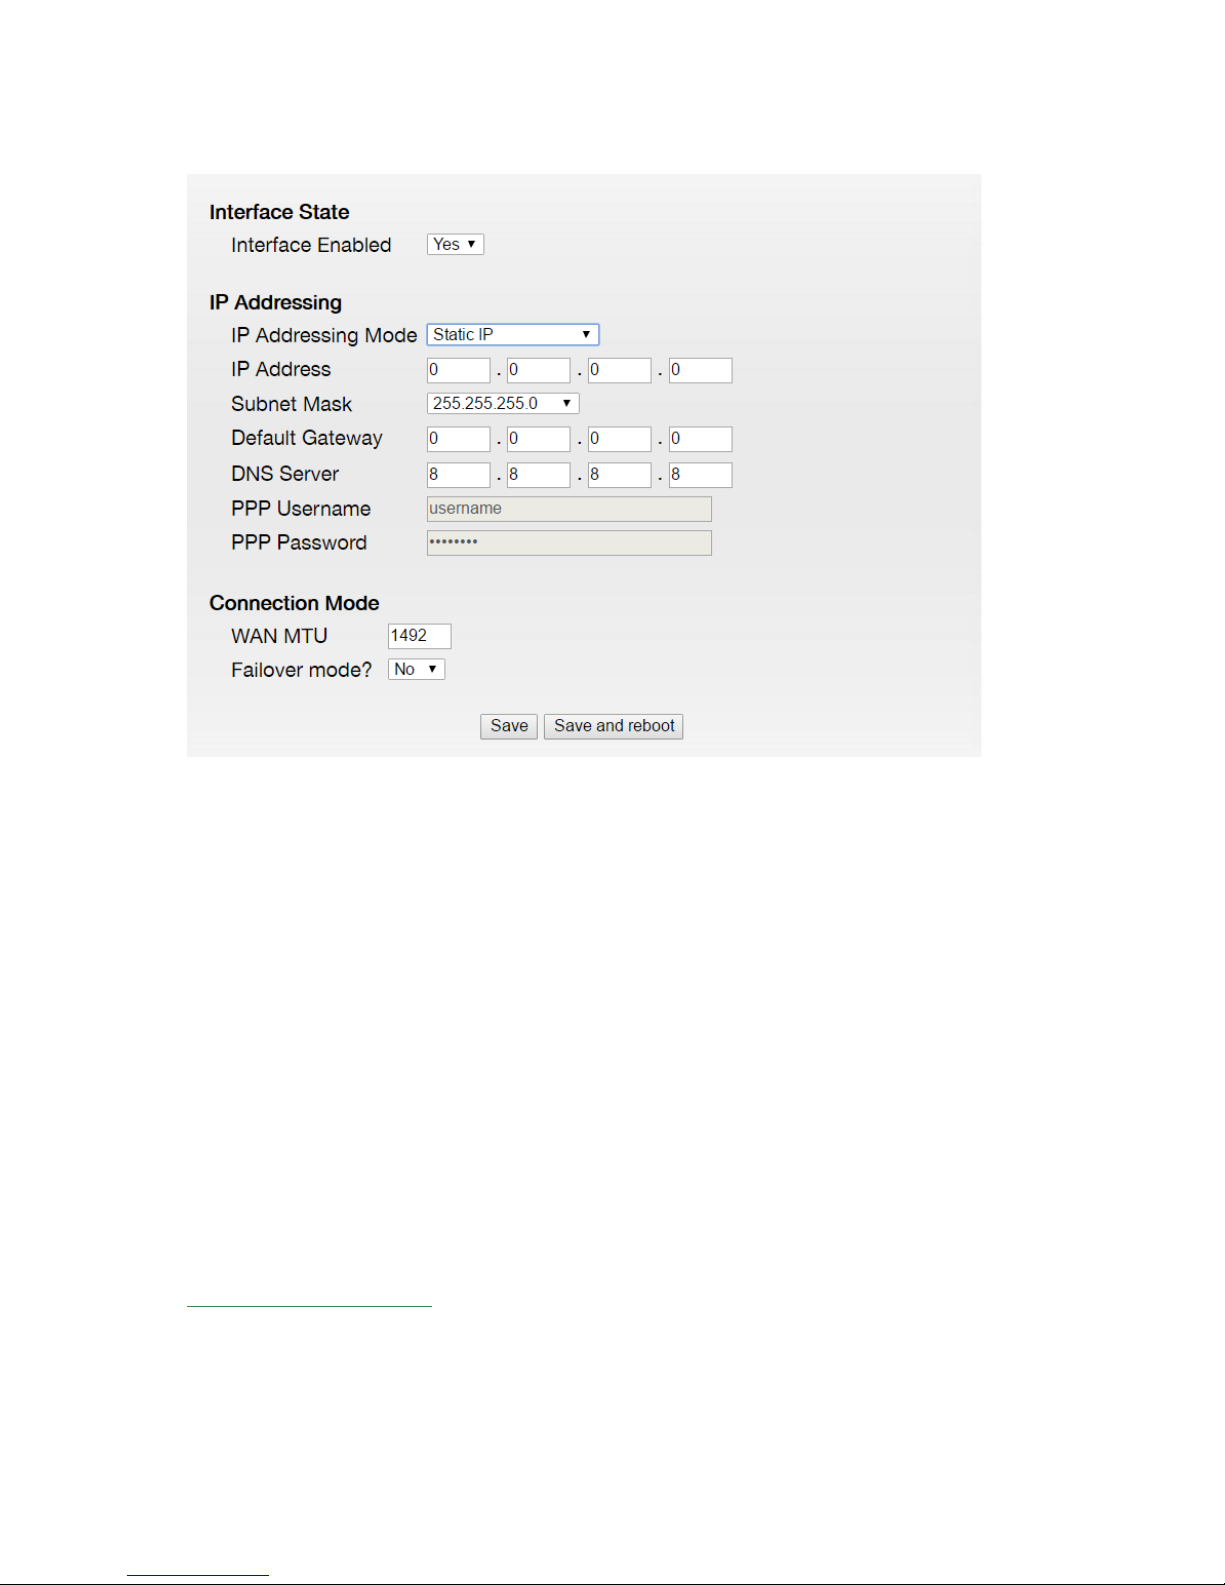
e) In the ’IP Addressing Mode’ drop down, select ‘Static IP’ as per the screenshot below:
f) Input the appropriate IP address into the ‘IP Address’ field. An appropriate address is one that is unique, in
the same subnet as your WAN-side router and not in the 192.168.3.X subnet. For example, if the WAN-side
router’s IP address is 192.168.1.1 an appropriate IP address to input for the Sharedband router would be
192.168.1.X (where X is any number between 2 and 254). If you need assistance in determining the WAN-side
router’s IP address, please refer to any supplied documentation or contact its supplier or manufacturer
g) Ensure that the ‘Subnet Mask’ is set to 255.255.255.0
h) Input the IP address of the WAN-side router into the ‘Default Gateway’ field
i) Input the IP address of the WAN-side router or an alternative destination of your choice into the ‘DNS Server’
field
j) Click the ’Save and reboot’ button at the bottom of the page
k) Once the Sharedband router has restarted, repeat steps a) to j) for any other WAN interfaces you wish to
reconfigure
More Information
Both our helpful knowledgebase and support ticketing system are accessible online at:
http://support.sharedband.com
 Loading...