

SHARE AGV User Manual

AGV
- 0 -
Product Description
Thank you for having chosen SHARE, the Headset for Motorcycle Riders that can be used
with your Bluetooth®
(*)
devices. This Manual will help you operate the headset, but you
should first familiarize yourself with the Bluetooth® functional on your cellular phone or
MP3 player or GPS device before using the headset.
SHARE lets you to handle mobile phone calls or enjoy music from your MP3 player, listen
to FM radio or GPS instructions while you are riding motorcycles in the most safe and
comfortable manner. You can also have crystal clear full-duplex driver to passenger (driver
to driver) voice inter-communications without using any mobile phone. The twelve-language
TTS (Text To Speech) function provides a user friendly operator interface.
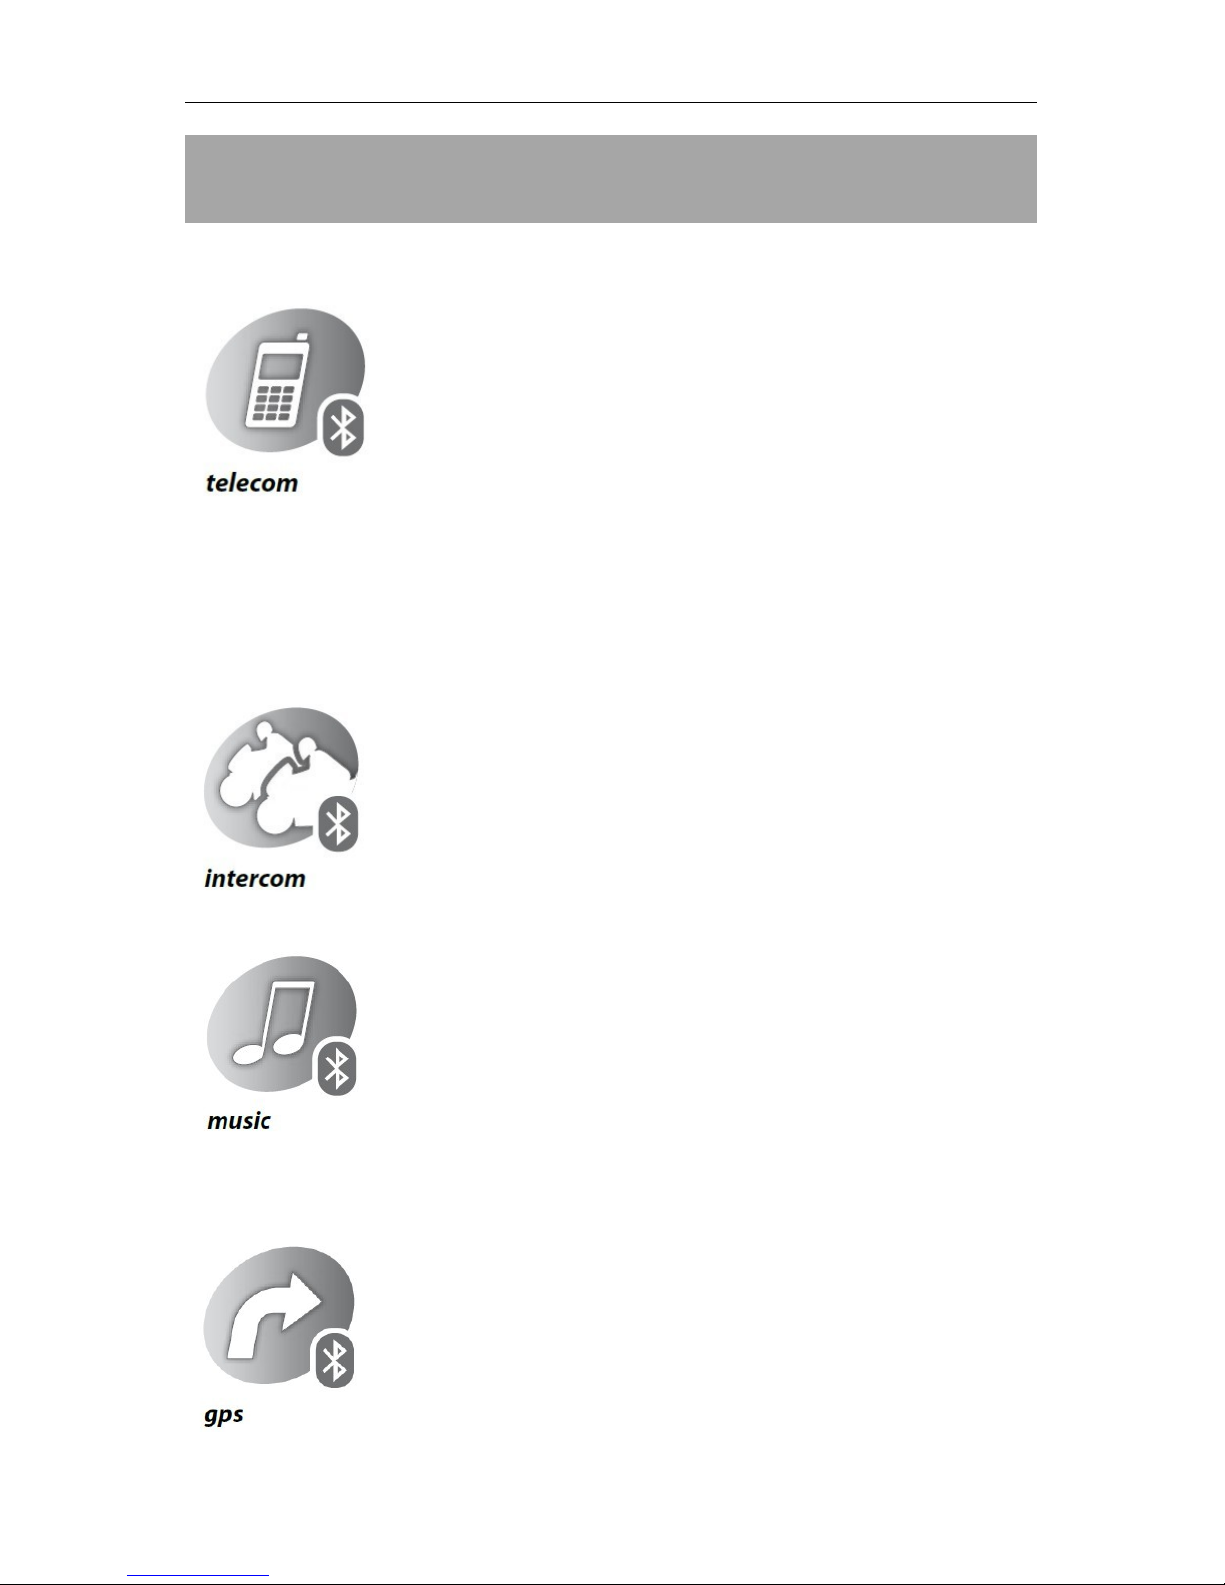
You can simultaneously connect the following devices to your SHARE headset:
• Two mobile phones (or a mobile phone and a GPS Navigator for motorcycles)
• Two MP3 players (also integrated into mobile phones)
• Another SHARE headset for intercom communications
• Another device by means of the cable
Moreover you can access the integrated FM Radio.
All of these devices can be used and managed with the SHARE headset.
(*)
and “Bluetooth” are registered trademarks owned by Bluetooth SIG, Inc., Kirkland, WA, USA.
AGV
- 1 -
User Interface
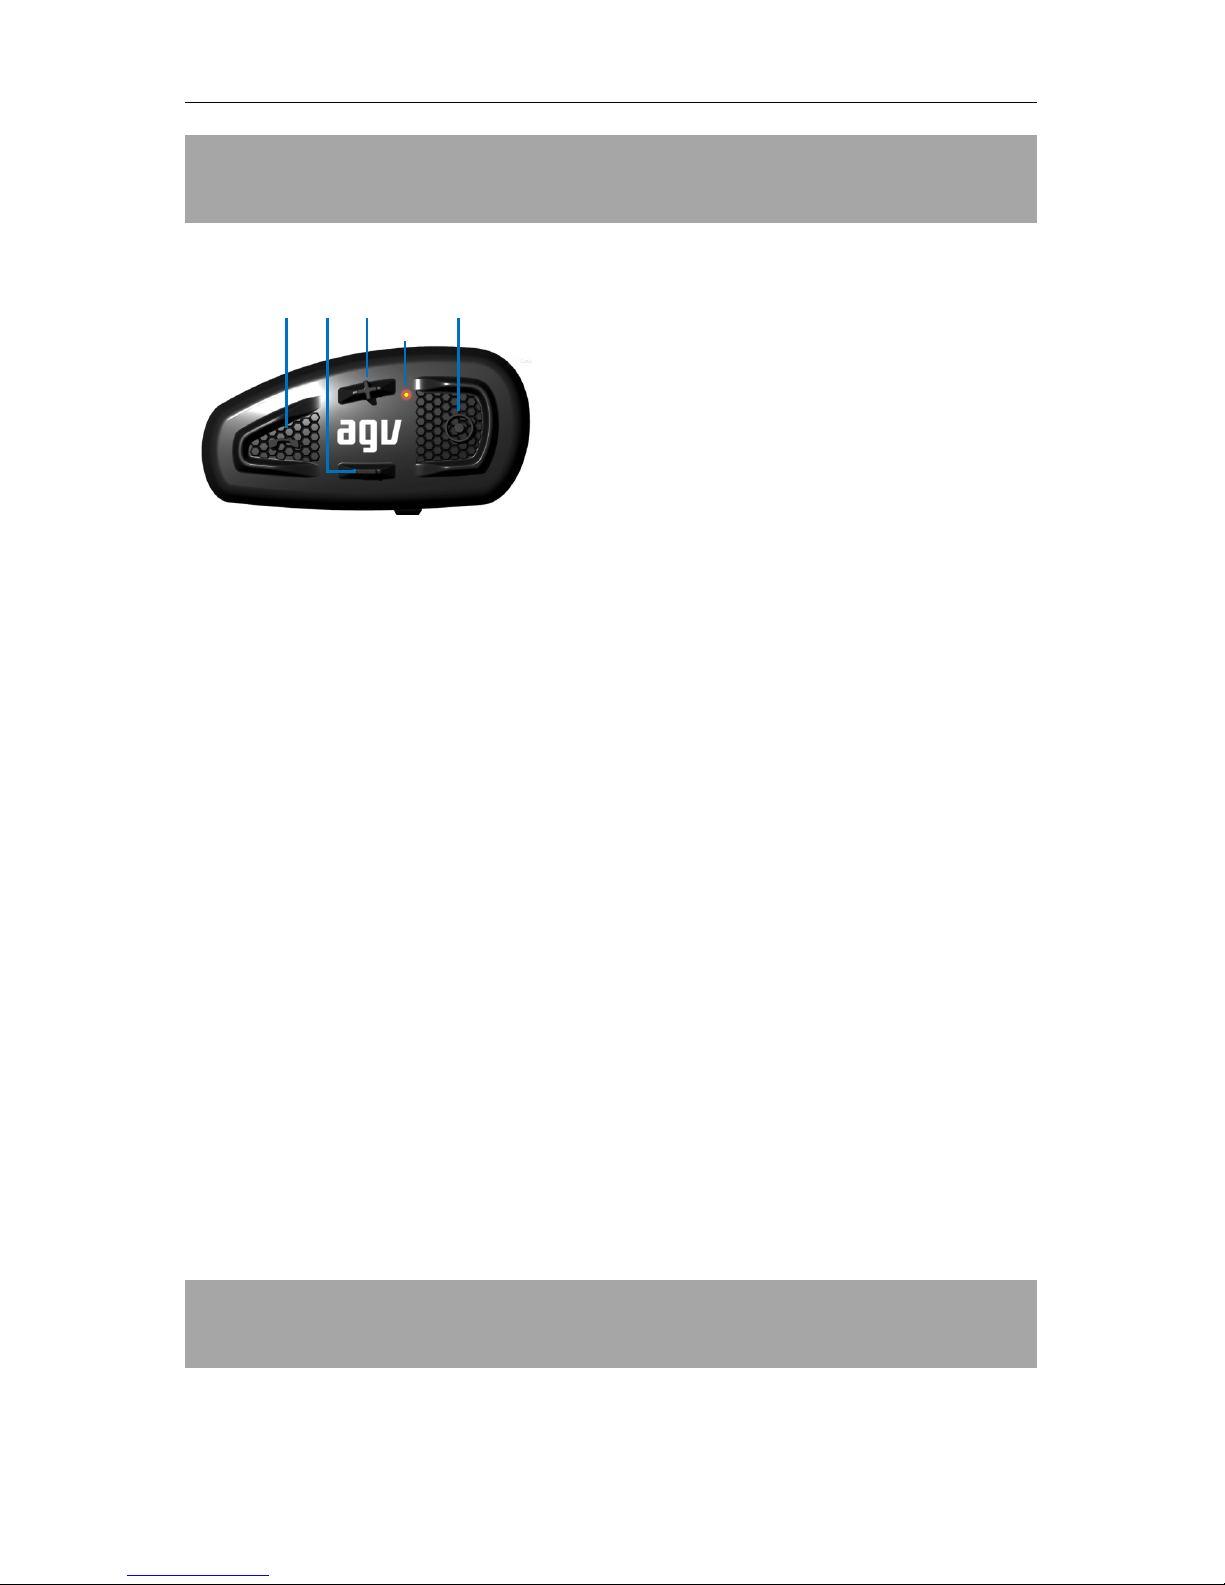
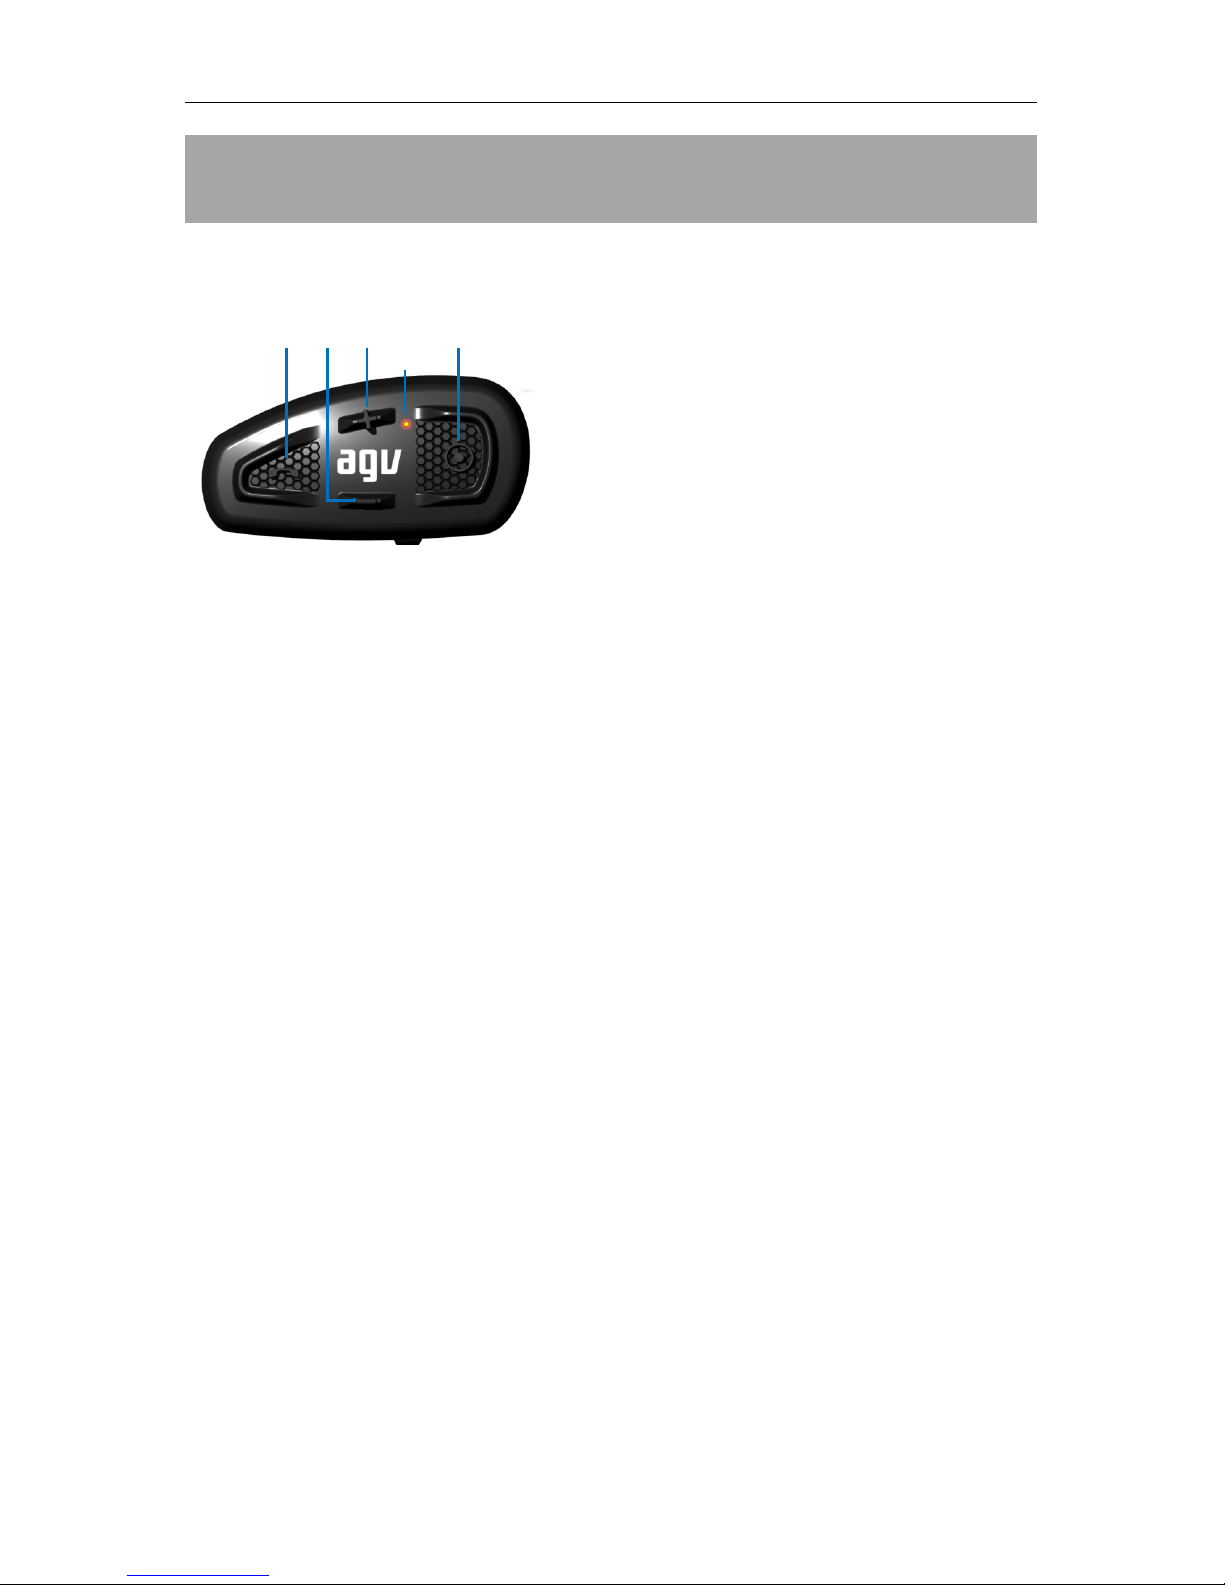
SHARE can be controlled by its ergonomic external keypad, with intuitive and good feeling buttons:
1. MFB (Multi-Function Button) !
• Mode Switch (Music/FM/Aux Audio)
• Call
• Play, Pause
2. MINUS !
• Volume down
• Redial
• Track Backward
• FM Prev Channel, FM Frequency Seek Down
• Language Select Down
3. PLUS "
• Volume up
• Voice dial
• Track forward
• FM Next Channel, FM Frequency Seek Up
• Language Select Up
4. CTRL (Control) #
• Power
• Pairing
• Intercom
5. LED light indicator
1" 2" 3" " " 4"
" " " 5"
AGV
- 2 -
Main Features
" Hands-free mode: automatically switch seamlessly among
Bluetooth® mobile phone, GPS navigator, Intercom, Music, FM
Radio and Aux input
" 2 mobile phone links supported (HFP/HSP profiles); one link can be
set as super priority
" Call Answer, reject and hang up functions supported
" Auto Answering (hands-free) feature
" Support last number redial and voice dial (through the mobile phone
feature)
" Phonebook access profile supported
" 3 Way call handling supported
" TTS reports caller number or name in 12 languages
" Independent Hands-free mode volume control based on background
noise
" Support 10meter range full duplex intercom.
" DSP wind noise suppression and noise dependent auto volume
adjust to ensure the crystal clear voice quality
" Independent intercom volume control
" Streaming the music from the mobile phone or other music sources
(A2DP profile).
" Support two links with two different music audio source at the same
time
" Support music play, pause, backward and forward control (AVRCP
profile)
" Soft music volume restore function
" Independent music mode volume control
" Support direct connection with the GPS Navigator
" Highest priority selectable
" Independent GPS mode volume control
AGV
- 3 -
Audio Priorities and Automatic Audio Switch
" Frequency band 76~108MHz
" RDS function
" FM frequency seek up and down
" 8 FM memory channels
" Soft FM volume restore function
" Independent FM mode volume control and mute/unmute
" Accept aux audio input (3.5mm jack connector)
" Soft aux audio volume restore function
" Independent aux audio volume control and mute/unmute
" User operation feedback (Text To Speech)
" Reports caller number and caller name
" Reports the battery status
" Reports FM frequencies and RDS information
" 12 Languages text to speech supported
" Upgradable firmware
" SHARE configuration on PC
" FM station settings via PC
" PC wizard software with 12 languages user interface
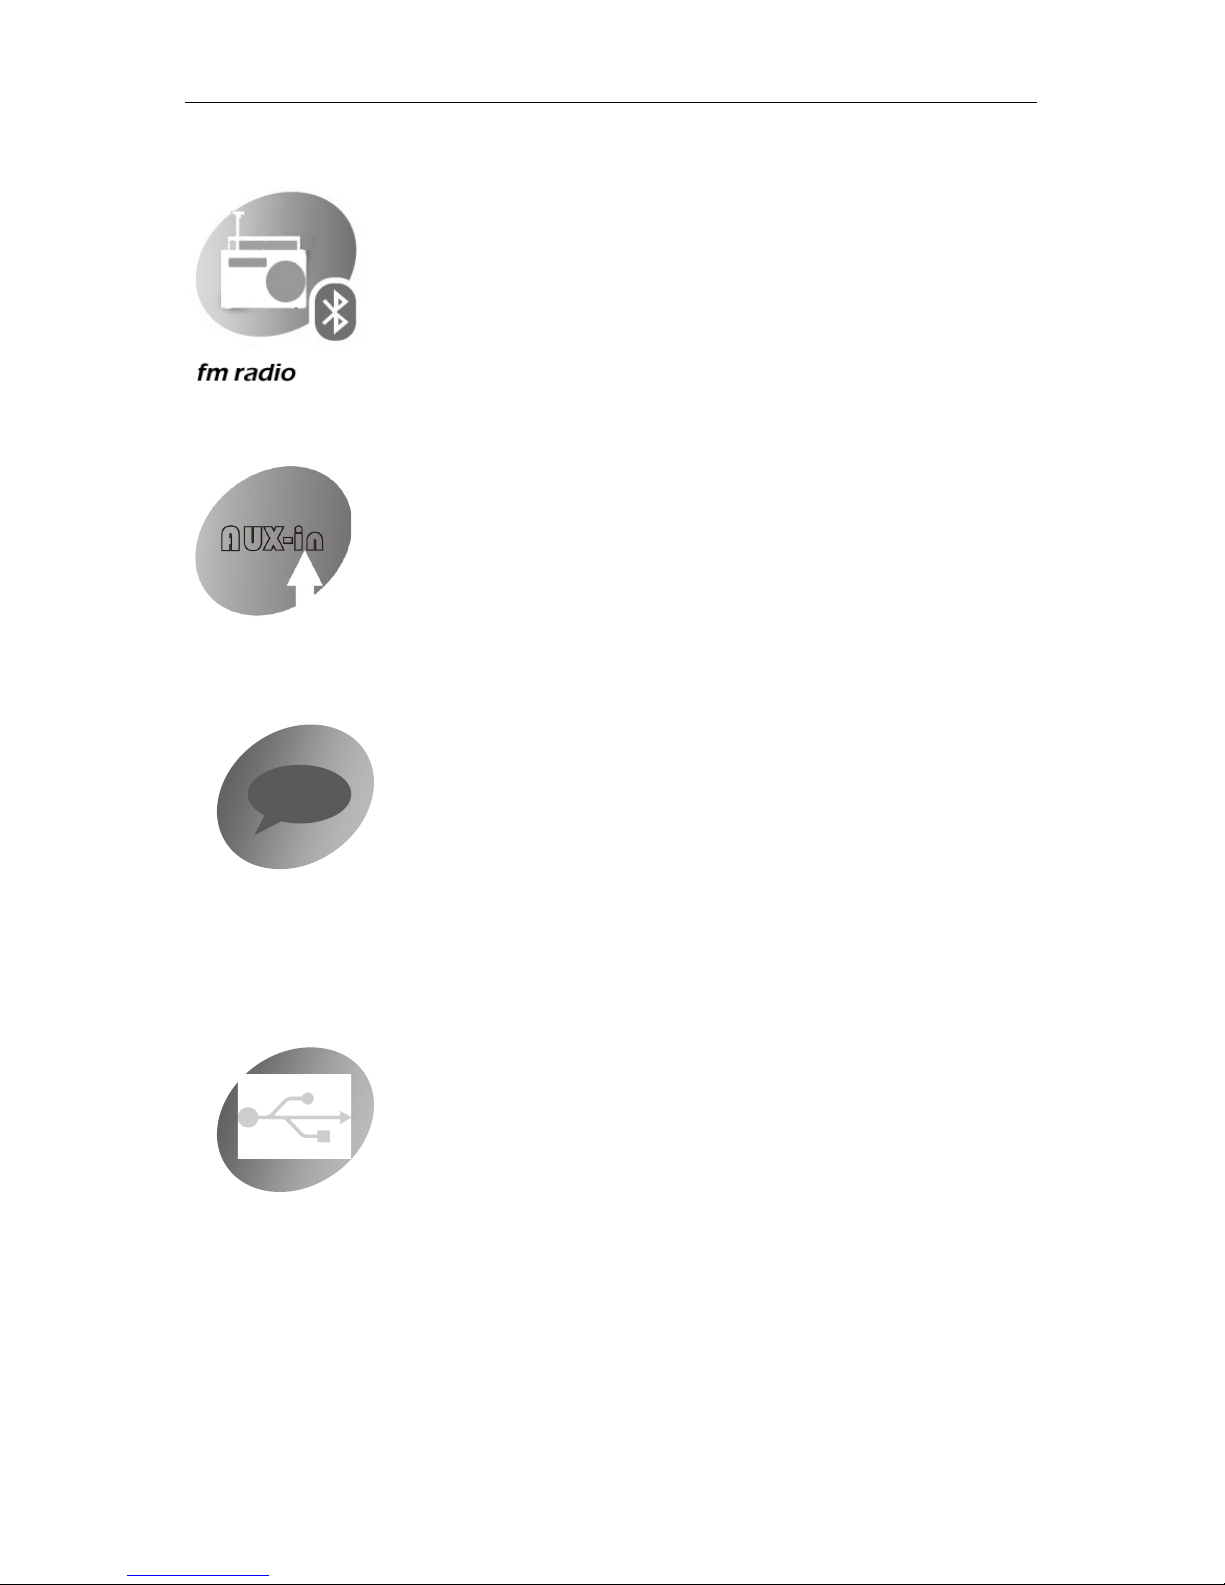
TTS
AUX-in
vocal messages
USB setup

AGV
- 4 -
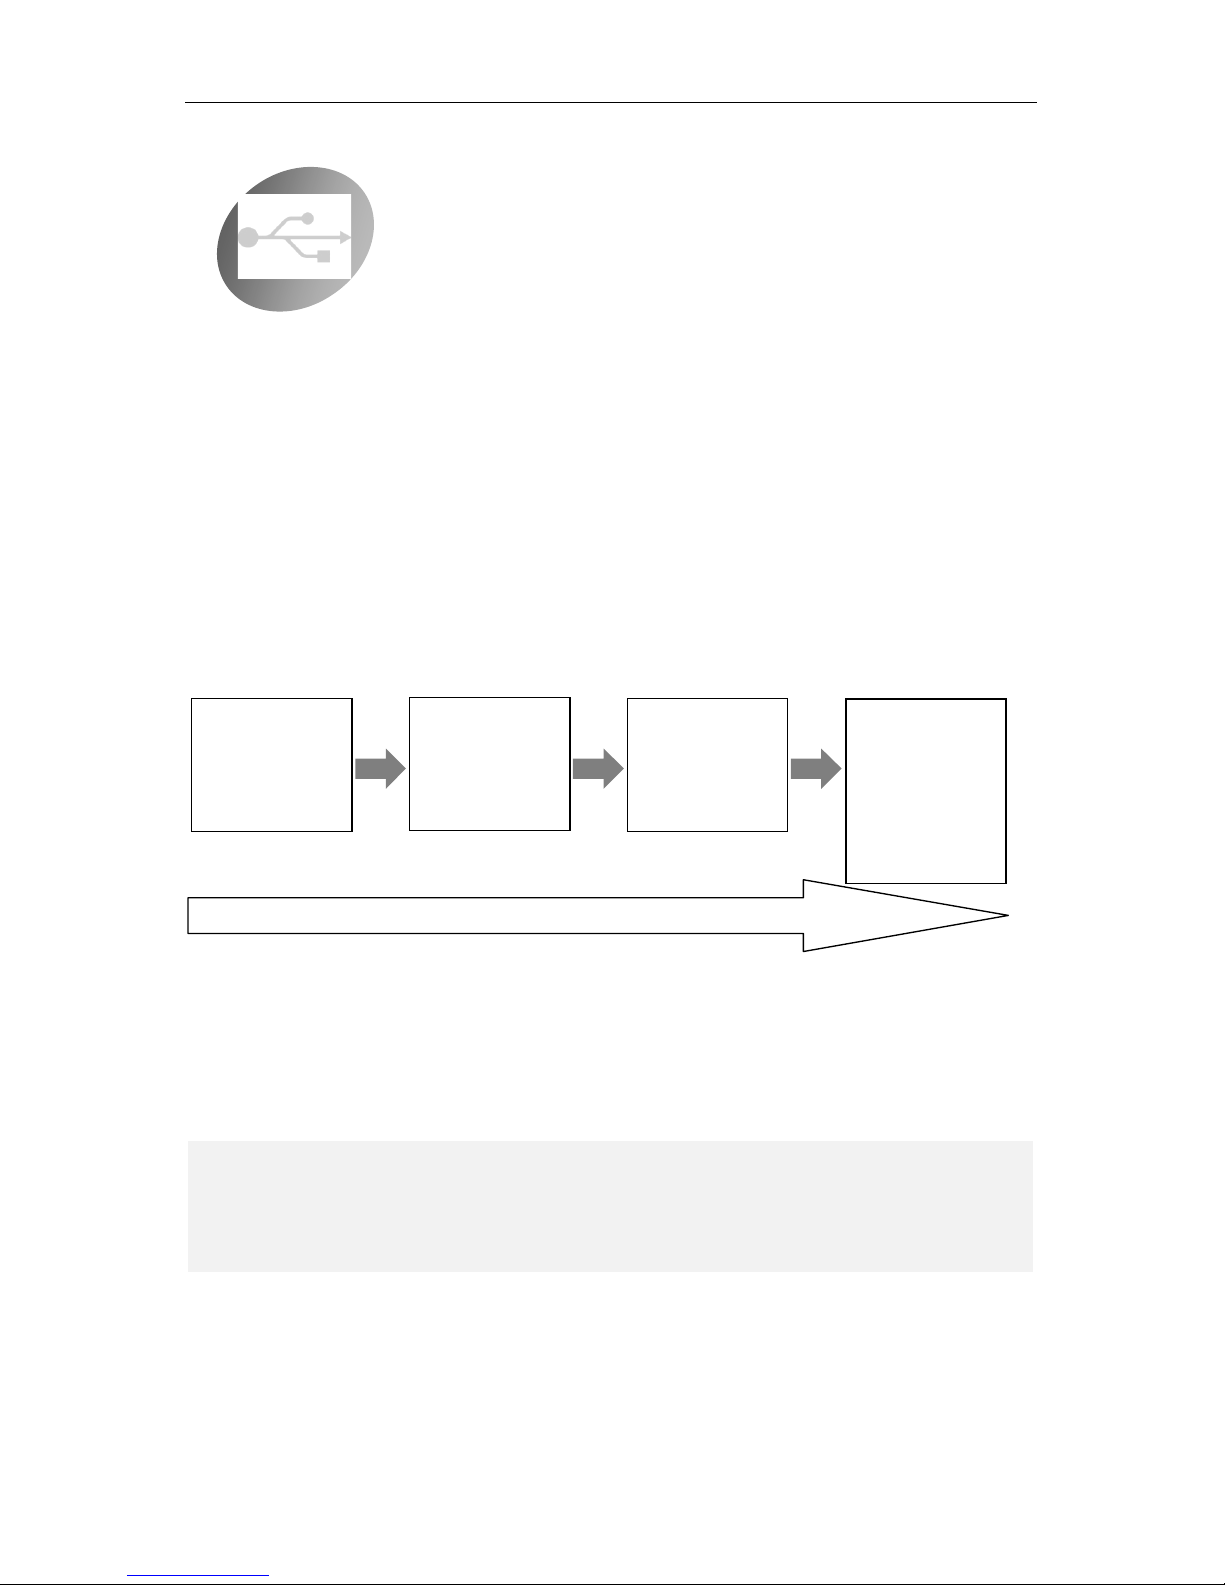
Higher priority audio will override the lower priority audio. If the audio is in the same priority level, the
audio activation depends on the pairing order.
The priority sequence from high to low can be shown as following chart:
If the lower priority audio is interrupted by the higher priority audio, after the higher priority audio ends,
the lower priority audio is restored.
For example, while SHARE headset is in music playback mode, if there is an incoming call, the audio will
automatically switch to mobile phone call; at the end of the phone call, the audio will automatically return
to previous music playback mode.
High Priority
Low Priority
First Music link,
Second Music link,
FM Radio
or
External Aux in
Super Priority
or
first phone link
Non - Super Priority
or
second phone link
Intercom
NOTE
The headset may require a few seconds to restore back to previous audio source; this delay depends on
several factors and conditions, included the connected device features.
AGV
- 5 -
Settings
System setup
Power on
In power off state, press # (CTRL Button) and hold it for about 5 seconds, until you hear a “READY”
note, release the button, the blue indicator will flash to indicate power on successfully.
After power on, the device will auto report the last set audio mode (mono or stereo) and the current battery
level range (very low, low, half and full) by TTS.
If the SHARE has never been paired to any device or paired devices have been cleared, it will
automatically switch to pairing mode after powered on. If the SHARE finds already paired devices, it will
auto connect to the last 2 sets of paired and connected mobile phones or GPS devices. The message
“CONNECTED TO DEVICE”, followed by the Bluetooth® registered name of the device, confirms the
successful connection.
After power on, wait at least 20 seconds before turning off the SHARE headset.
Power off
In power on state, press # (CTRL Button) and hold it for about 6 seconds, until you hear the
“POWERING DOWN” prompt, LED indicator blinks red for a second and then it switches off to indicate
the headset has been powered off.
After power off, wait at least 30 seconds before restarting the SHARE headset.
Battery charge
In order to charge the battery inside the SHARE headset, connect the proper USB cable to the wall charger
or to a PC USB port.
LEDs will indicate when the charge phase has completed.
Reset
If the SHARE headset enters into a lock state or it needs to be reset due to a firmware upgrade procedure,
charge the system by inserting the USB cable and connecting it to the wall charger or to a USB port. The
first effect of this operation consists in SHARE headset reset.
NOTE
The message “CONNECTED TO DEVICE” (followed by the proper device name) may be repeated
twice, one for indicating the connection as telephone (HFP connection) and one for indicating the
connection as media player (A2DP connection).

AGV
- 6 -
Device Pairing and Connection
Pairing is the procedure that enables connection between two different devices through wireless
technology. This pairing procedure has to be repeated only once: devices will remember other previously
paired devices.
Two paired devices can be connected together to exchange data and use them together by means of a
wireless channel. This connection can be automatically established each time two paired devices can
detect each other or by manually forcing them through a proper procedure on each of them.
Pairing with mobile phone, MP3 player or GPS
Place the SHARE headset and the mobile phone (MP3 Player or GPS) in a visible area within 1 meter
range.
Make sure the SHARE headset is in power off state.
Press and hold # (CTRL Button) for about 8 seconds, until you hear a “PLEASE PAIR DEVICE
NOW, ENTER PIN CODE 0000” prompt.
When the Blue LED and the Red LED alternately flash, release the button; the SHARE headset enters
in pairing state.
By following the mobile phone or GPS navigator instructions, turn on the Bluetooth® function, and
search for the headset devices.
From the devices found on your mobile phone, select the device named “Share Easy vx.xx” and try to
pair it by entering, if required on mobile phone, the pin code <0000>. Once paired successful, the LED
indicator will change from Blue/Red alternately to Blue flashing and the message “PAIRING
SUCCESSFUL” and “CONNECTED TO DEVICE” (followed by the proper device name) indicates
that the SHARE headset has been connected with your mobile phone.
If your mobile displays a message to confirm acceptance to access your contacts and call history,
please select “yes” to allow the SHARE headset to link to your phone book and last call to use them to
provide you with more convenient features.

AGV
- 7 -
You can now use SHARE to answer calls or to enjoy the music from mobile phone.
If no devices have been paired, the message “FAILED TO PAIR TO DEVICE” warns you.
To pair a second cell phone or GPS device just repeat all steps.
Pairing Intercom Headsets
Place two SHARE headsets in a visible area within 1 meter range.
Make sure SHARE headsets are in power off state.
For both SHARE headsets press and hold both # (CTRL Button) on the two headsets for about 8
seconds, until you hear a “PLEASE PAIR DEVICE NOW, ENTER PIN CODE 0000” prompt.
When the Blue LED and the Red LED alternately flash, release the button; the SHARE headset enters
in pairing state.
Short press # (CTRL Button) on only one SHARE headset; it will prompt “PLEASE PAIR
INTERCOM NOW” and search for the other one in pairing state and try to pair with it.
Within a few seconds, both headsets will turn off the Red light, and then slowly flash Blue. Pairing is
finished.
Pairing is a onetime process. Once the headsets are paired during this setup procedure, they will remain
paired and automatically recognize each other whenever they are within the proper range.
NOTE
SHARE headset accesses to your phone book only for providing more comfortable services, like the
announcing of the caller name, or for activating a voice dial. No data will be transferred from your
mobile phone to SHARE headset.
Sometimes the access to the phone book is not completed and SHARE features based on it cannot work
well. Just in case, please switch off and on your SHARE headset or the Bluetooth® channel on your
mobile phone.
Not all mobile phone allows a complete access to the phone book, so some SHARE headset features
based on it cannot properly work also after the above procedure.
The request to access the phone book is repeated for each connection of the mobile phone (not only at
the first pairing); to allow a proper functionality, such a request must be accepted before to start to use
the SHARE headset with the mobile phone.
NOTE
The MP3 player included into the mobile phone doesn’t require any specific pairing and connection to
the SHARE headset.
Anyway, for properly use such a MP3 player, also the “multimedia” connection mode has to be
enabled on Bluetooth® connection of the mobile phone.
NOTE
It is not necessary the ! (tasto CTRL) is pressed on both SHARE headsets at the same time; it can be
done also in sequence, but the seco none must be activated immidiately after the first one.
NOTE
Do not short press # (CTRL Button) on both SHARE headsets

AGV
- 8 -
Super Priority Pairing
The SHARE headset can handle devices by assigning to one of them the “super priority” property to
override all other devices.
To assign the super priority property to a mobile phone or GPS navigator, follow the normal pairing
procedure (steps 1 to 4) and press the ! (MFB button) before turning on Bluetooth® on the device to be
paired.
Place the SHARE headset and the mobile phone (or GPS) in a visible area within 1 meter range.
Make sure the SHARE headset is in power off state.
Press and hold # (CTRL Button) for about 8 seconds, until you hear a “PLEASE PAIR PHONE
NOW, ENTER PIN CODE 0000” prompt.
When the Blue LED and the Red LED alternately flash, release the button; the SHARE headset enters
in pairing state.
If you want to assign super priority property to the phone or to the GPS , just short press the ! (MFB
button) once at this time; it will prompt “PLEASE PAIR PRIORITY VOICE NOW” and then the LED
indicator flash pattern will be changed to red twice and blue twice quick flashing. Super priority
pairing is ready.
By following the mobile phone or GPS navigator instructions, turn on the Bluetooth® function, and
search for the headset devices.
From the devices found on your mobile phone, select the device named “Share Easy vx.xx”, and try to
pair it by entering, if required on mobile phone, the pin code <0000>. Once paired successful, the LED
indicator will change from Blue/Red alternately to Blue flashing and a “di” tone indicates that the
SHARE headset has been connected with your mobile phone.
Stop the Pairing Procedure
To stop an initiated pairing procedure there are two possibilities:
• Wait until the pairing procedure automatically timeouts
• Switch off the SHARE headset by holding down the # (tasto CTRL)
Manual Connect to Last Connected Mobile Phone
SHARE headset automatically connects the last paired device when it has been detected.
If no mobile phone has not been automatically connected with the headset, a short press ! (MFB button)
will initiate connections to the last paired mobile phones.
If a mobile phone is already connected to SHARE, a long press of the ! (MFB button) will initiate
connections to the second to last paired mobile phone or GPS device.
NOTE
Only one device can be defined as super priority device; the latest super priority paired device will
replace the previous one. Only a mobile phone or a GPS navigator (i.e. the HFP/HSP links) can be
assigned as super priority.

AGV
- 9 -
Clear All Pairing Devices
In power on and without any active phone call, press and hold both ! (MFB button) and ! (MINUS
button) together for 6 seconds; when the Red LED flashes 2 times release buttons and, after all paring
devices have been cleared, the SHARE headset will automatically power off.
Audio control
Volume Up or Down
In any audio active state, press and hold " (PLUS button) to increase the volume of the corresponding
audio source; press and hold ! (MINUS button) to decrease the volume of the corresponding audio
source. Release the button when the volume reaches the desired level. When the maximum or minimum
volume is reached, a “MAXIMUM VOLUME” or “MINIMUM VOLUME” message is prompted.
The volume of each audio source(two phones, two music, intercom, FM Radio, Aux in)can be
individually tuned, i.e. 7 different independent volume parameters can be used.
Volume Levels Automatic Save
All favorite volume levels for each audio source are saved by the SHARE headset at the power off, so at
next power on, the SHARE headset can automatically set the last user favorite volume level, without any
operation required by the user.
Automatic Noise Dependent Volume Control
During phone calls, intercom calls or GPS audio messages, if the wind noise or environment noise is very
high and the current volume is not at maximum level, the SHARE headset will automatically increase the
volume level according to the noise level, and when the noise disappears for a while, the volume
automatically returns to the original level.
Mono/Stereo
NOTE
If the connection with a previously paired device doesn’t take effect, it can be due to several reasons,
including a crash of the Bluetooth® feature on the device to be connected. To solve this issue, there are
several actions to apply:
• Switch off and on the SHARE headset
• Switch off and on the Bluetooth® feature on the device to be connected
• Repeat the pairing procedure
• Clear all pairing list on the device to be connected and repeat the pairing procedure

AGV
- 10 -
SHARE headset can work in both mono and stereo mode. Mono mode means only one speaker works and
it can be used to always have one ear free to listen to environmental noises.
To switch between stereo and mono mode, connect the SHARE headset to a PC and use the proper
SHARE wizard software.
Text To Speech Function
12 Available Languages
The 12 available languages are listed below:
• English (British and American)
• French
• Italian
• German
• Spanish (European and Mexican)
• Portuguese
• Chinese
• Russian
• Polish
• Japanese
Language Selection
Make sure the SHARE headset is in power off state.
Press and hold # (CTRL Button) for about 8 seconds, until you hear a “PLEASE PAIR PHONE
NOW, ENTER PIN CODE 0000” prompt.
When the Blue LED and the Red LED alternately flash, release the button; the SHARE headset enters
in pairing state.
Press and hold the " (PLUS button) and ! (MINUS button) together for more than 1 second, you
will hear a TTS prompt ”PLEASE SELECT LANGUAGE”
The language selection mode is enabled for 20 seconds; during this time press " (PLUS button) or
! (MINUS button) to select the desired language; for each selected language, the TTS will voice
prompt the language name
Short press ! (MFB button) or do not press any " (PLUS button) or ! (MINUS button) for 20
seconds and the selected language will be confirmed and stored

AGV
- 11 -
USB setup
Connection to a PC
The SHARE headset can be connected to a Windows® PC for the following operations:
• Firmware upgrade
• Device configuration of the following parameters:
o Audio mono/stereo
o VOX activation on/off
o Auto/manual call answering and delay on automatic answering
o FM channels stored stations
o TTS language
Such operations can be performed by means of the proper AGV wizard software, available on the AGV
website (www.agv.com). This software must be installed on the PC before connecting it to the SHARE
headset.
To connect the SHARE headset to a PC, the proper USB cable must be used. Once this cable is inserted
into both the SHARE headset and PC USB port, the SHARE resets and switches to battery charge state.
To enable its communication with the wizard software, in power off state press and hold the # (CTRL
Button) for more than 20 seconds, until no more Red and Blue LED lights flash on the keypad. At that
time the SHARE headset can be detected by the wizard software.
NOTE
During the long pressing of the ! (CTRL Button) for enabling the communication, the keypad LED
flashes in different ways:
• Red slow flashes: battery under charge
• Blue slow flashes: device on
• Red/Blue fast flashes: pairing mode
• No flashes (or some Blue flashes): communication mode
AGV
- 12 -
Operation
Phone call Operation
Answer incoming call
When there is an incoming phone call, short press ! (MFB button) to manually answer the call.
Automatically answer incoming call
The SHARE headset has an automatic answer function: at the 3rd incoming call ring tone (about 8 seconds)
and no reject operations have been completed, the SHARE headset will answer the phone call
automatically. The delay before automatically answering the call can be set by the application Wizard for
PC.
Reject incoming call
Once you hear the ring tone, press and hold the ! (MFB button) for 1 second until you hear a “du” tone;
release the button and the call will be rejected.
Hang up call
In call active state, press and hold the ! (MFB button) for 1 second until you hear a “du” tone to hang up
the call.
Place a call on hold
In call active state, a short press ! (MFB button) to place the call on hold; the caller will hear a tone
while on hold. A new short press of the ! (MFB button) activates the held call.
Audio transfer
In call active state, press and hold the " (PLUS button) and ! (MINUS button) for 1 second and, after
a “du” tone, the call will be transferred from the helmet to the mobile phone. By repeating this operation,
the call will transfer back to the SHARE headset.
Last number redial

AGV
- 13 -
While the SHARE headset is connected with the mobile phone and system is idle (no intercom, music, FM
Radio or Aux audio is playing) , quick double press ! (MINUS button) then the Mobile phone will dial
the last number called.
If the SHARE headset is in active intercom mode, first close the intercom session by short pressing the #
(CTRL Button), then the last number redial function can be normally used. If the SHARE headset is in
music, FM Radio or Aux in mode, first pause/mute such mode by short pressing the ! (MFB button).
If there are two mobile phones connected at same time with the SHARE headset, the number of the last
outgoing call is dialed on the same phone that dialed the last outgoing call; if no calls have yet been dialed,
the last number dialed with first connected mobile phone is dialed.
Voice Dial
While the SHARE headset is connected with the mobile phone and system is idle (no intercom, music, FM
Radio or Aux audio is playing) , quick double press " (PLUS button) then the mobile will prompt you
to speak out your desired voice command.
If the SHARE headset is in active intercom mode, first close the intercom session by short pressing the #
(CTRL Button), then the voice dial function can be normally used. If the SHARE headset is in music, FM
Radio or Aux in mode, first pause/mute such mode by short pressing the ! (MFB button).
If the voice dial function has been erroneously activated, double press " (PLUS button) again to cancel
it.
If there are two mobile phones connected at same time with the SHARE headset, the voice dial command
is initiated on either the first connected mobile phone or the last phone on which an outgoing call was
made.
Three Way Call Or Call From Two Mobile Phones
The following operations refer to the case with 2 mobile phones connected to SHARE headset and there is
an already active call on one of them:
1) Accept incoming call on the other mobile phone, hold active call
Short press the ! (MFB button) once to keep the current active call on hold and accept the incoming
call;
2) Accept incoming call on the other mobile phone, hang up active call
Quick double press the ! (MFB button) once to hang up the current active call, and accept the
incoming call;
3) Switch between two calls
With two calls (one active and one held), press the ! (MFB button) once to place the active call on
hold state; press again the ! (MFB button) once to switch back to the original active call and held
NOTE
Please make sure your mobile phone supports Voice Dial before activate Voice Dial function. Be
careful each mobile phone has a proper voice command to effectively start a new call. Read carefully
your mobile phone user manual in order to use the voice call function.
Anyway voice dial features and their usage (e.g. also the voice dial procedure cancellation) are
strongly dependent on the mobile phone.
AGV
- 14 -
call;
4) Hang up active call
Just long press the ! (MFB button) for 1 second to hang up the active call;
5) Add held call to three way call
If the mobile phone and the telephone operator support three-way conference calls, if on the same
phone there is a held and an active call, short press ! (MFB button) and " (PLUS button) to add
the held call to the three-way conference call.
Intercom Operation
Manually Turn On/Off Intercom Talk
When there are no active phone calls or GPS messages, short press the # (CTRL Button) on one of
either paired SHARE headsets to turn on the Intercom talking function.
During intercom active mode, short press the # (CTRL Button) on one of either connected SHARE
headsets to turn off the Intercom conversation.
Vox Turn On Intercom Talk
When there are no active phone calls or GPS messages, a loud shout to the microphone will turn on the
Intercom talking function.
If no voice is detected for an interval more than 60 seconds long (on both connected SHARE headsets), the
intercom will be automatically terminated.
GPS Navigator Operation
Preliminary operations
Pair SHARE headset to GPS devices and please refer to the GPS navigator User Manual first to share the
audio information from GPS via HFP/HSP link.
NOTE
For using all the above three ways call features, neither of two mobile phones has to be paired into the
priority voice mode.
AGV
- 15 -
Pair the GPS the same way as pairing to a mobile phone. Please refer to the pairing instruction in the
pairing section. The GPS navigator will occupy one HSP/HFP link: if one GPS device is connected with
the SHARE headset, then only one mobile phone can be connected to the headset.
Automatic switch
The SHARE headset will automatically switch to the GPS mode when the GPS Navigator has an audio
message to send to the user.
After prompting GPS messages, SHARE headset automatically switches back to the previous operation.
MP3 Music Operation
MP3 player start
In phone mode, without any active call, press ! (MFB button) to start the MP3 player.
Music play/pause control
In music playing mode, short press once the ! (MFB button) to toggle the music play/pause state.
NOTE
Only specific for motorcycle GPS navigators are suitable to be used with headsets. GPS navigators
with wireless Bluetooth® technology not specific for motorcycle don’t work with the SHARE headset,
because they cannot work with external headsets.
GPS navigators already installed on the mobile phone don’t require any specific pairing and
connection to the SHARE headset. Their functionalities exclusively depend on the mobile phone
characteristics and SHARE headset hasn’t any effect on them.
In any case, not all GPS navigators have been tested for compatibility with the SHARE headset; please
test your GPS navigator device before your purchase.
NOTE
A few seconds of latency can be introduced (this delay depends on several factors and conditions,
included the connected device features), but no messages should be lost: it depends on GPS Navigator
characteristics.
NOTE
With some mobile phones the first play command immediately after connection does not take place:
such a first play command has to be entered directly on the mobile phone. Following commands can be
done by using the SHARE keypad.
AGV
- 16 -
Music skip forward
In music playing mode, short press once the " (PLUS button) to skip the music forward.
Music skip backward
In music playing mode, short press once the ! (MINUS button) to skip the music backward. Some
mobile phones at first short press just restore back to the start of the song; another following short press on
the ! (MINUS button) within 3 seconds skips backward to previous song.
Multiple A2DP Music Stream Handling
SHARE headset applications support two music streams from two different devices (stand alone MP3
players or MP3 players in mobile phones), i.e. the user can listen to music from two different connected
devices by switching from one to the other.
If the SHARE headset is streaming audio from one device, all controls are active on this device. The
operation sequence for switching between two audio sources is:
1) Short press ! (MFB button) to pause the current playing music source
2) Long press the ! (MFB button), until you hear a “di” tone, to toggle to the second mobile phone
music control
3) After the control shifts to the second mobile phone, the user can use the play/pause function to
control and listen to the second music source
4) To switch to the previously streaming device, repeat the sequence
FM Radio operation
Turn On/Off FM
Quick double press the ! (MFB button) to turn On/Off the FM Radio receiver. When FM Radio is turned
on, it will try to receive the last channel played.
The SHARE headset prompts the FM frequency of the station and its RDS name (if and when available).
Seek forward
NOTE
The RDS name of a FM station depends on the transmitting station and on the quality of the FM
received signal. Due to these dependencies, sometime names can be cut or not well prompted.

AGV
- 17 -
Short press " (PLUS button) makes the FM radio automatically search for the next station on a higher
frequency, and a "dudu" tone means that the highest frequency station is reached. Short press ! (MINUS
button) to loop search-back.
For each new tuned FM station, SHARE headset prompts the FM frequency of the station and its RDS
name (if and when available).
Seek backward
Short click ! (MINUS button) makes the FM radio automatically search for the next at a lower frequency,
and a "dudu" tone means that the lowest frequency station is reached. Short click " (PLUS button) to
loop search-back.
For each new tuned FM station, SHARE headset prompts the FM frequency of the station and its RDS
name (if and when available).
Select channel
Double press the " (PLUS button) or ! (MINUS button) to select the next/previous channel.
After each channel change, the SHARE headset prompts the FM frequency of the station and its RDS
name (if and when available).
Station save and replace
Select the channel where the new radio station is to be stored. After seeking the desired station forward or
backward, within 15 seconds press and hold the ! (MFB button) for more than 1 second; the FM station
will be saved on the active channel and the message “FM STATION SAVED” confirms that the station
has been successfully saved.
Max 8 stations can be saved. After that, any further saving operation replaces the last saved station.
Mute FM audio
During FM receiving state, short press the ! (MFB button) to mute/unmute the FM radio audio.
AUX-in operation
Aux Audio Auto Switch
While there are no active phone calls or intercom talks, once the aux cable plug is inserted into the USB
jack, the SHARE headset will automatically switch to the external aux audio. After detaching the aux
cable from the SHARE headset USB connector, the audio will switch back to the mobile phone mode.

AGV
- 18 -
Manual Switch To Aux Audio
With the aux cable plug inserted into the USB jack, the user can manually switch to the Aux audio mode
by quick double pressing the ! (MFB button). Double pressing the ! (MFB button) switches between
Aux Audio, FM Tuner and Phone mode, so to exit Aux in mode, double press the ! (MFB button).
Mute/Unmute Aux Audio
While SHARE headset is in Aux audio mode, short press the ! (MFB button) to mute/unmute the audio
AGV
- 19 -
Main commands: synoptic table
Off mode
Button
action
effect
# (CTRL Button)
continuous press
communication with wizard software on PC (if
connected)
very long press
Power on and pairing
long press
Power on
Phone Call mode
Button
action
effect
! (MFB button)
long press
• Force connection to a second previously paired device
• (with an active call) Hang up an active call
short press
• (if no connected devices) Force connection to a
previously paired device
• (during an incoming call) Answer phone call
• (with double calls active) Switch phone call
• (no calls) Play the MP3 and switch to MP3 Music
mode
double press
Switch to other sources: FM Radio and AUX-in (if any)
" (PLUS button)
long press
Increase volume level
short press
-
double press
Voice dial
! (MINUS button)
long press
Decrease volume level
short press
-
double press
Recall last number
# (CTRL Button)
very long press
Power off
long press
-
short press
Intercom call
double press
-
" (PLUS button)
with
! (MINUS button)
long press
Audio transfer from SHARE headset to mobile phone
AGV
- 20 -
Intercom mode
Button
action
effect
! (MFB button)
long press
-
short press
-
double press
-
" (PLUS button)
long press
Increase volume level
short press
-
double press
-
! (MINUS button)
long press
Decrease volume level
short press
-
double press
-
# (CTRL Button)
very long press
Power off
long press
-
short press
Intercom off
double press
-
MP3 Music mode
Button
action
effect
! (MFB button)
long press
Switch control to the second connected MP3 (if any)
short press
Pause the MP3 and switch to Phone Call mode
double press
Switch to other sources: FM Radio and AUX-in (if any)
" (PLUS button)
long press
Increase volume level
short press
Skip forward
double press
-
! (MINUS button)
long press
Decrease volume level
short press
Skip backward
double press
-
# (CTRL Button)
very long press
Power off
long press
-
short press
Intercom call
double press
-
FM Radio mode
Button
action
effect
! (MFB button)
long press
Store the current station frequency on the last channel
AGV
- 21 -
short press
Mute the FM Radio
double press
Switch to other sources: Phone/MP3 Player and AUX-in
(if any)
" (PLUS button)
long press
Increase volume level
short press
Seek frequency forward
double press
Go to next channel
! (MINUS button)
long press
Decrease volume level
short press
Seek frequency backward
double press
Go to previous channel
# (CTRL Button)
very long press
Power off
long press
-
short press
Intercom call
double press
-
Aux-in mode
Button
action
Effect
! (MFB button)
long press
-
short press
Mute the Aux-in
double press
Switch to other sources: Phone/MP3 Player and FM
Radio
" (PLUS button)
long press
Increase volume level
short press
-
double press
-
! (MINUS button)
long press
Decrease volume level
short press
-
double press
-
# (CTRL Button)
very long press
Power off
long press
-
short press
Intercom call
double press
-
AGV
- 22 -
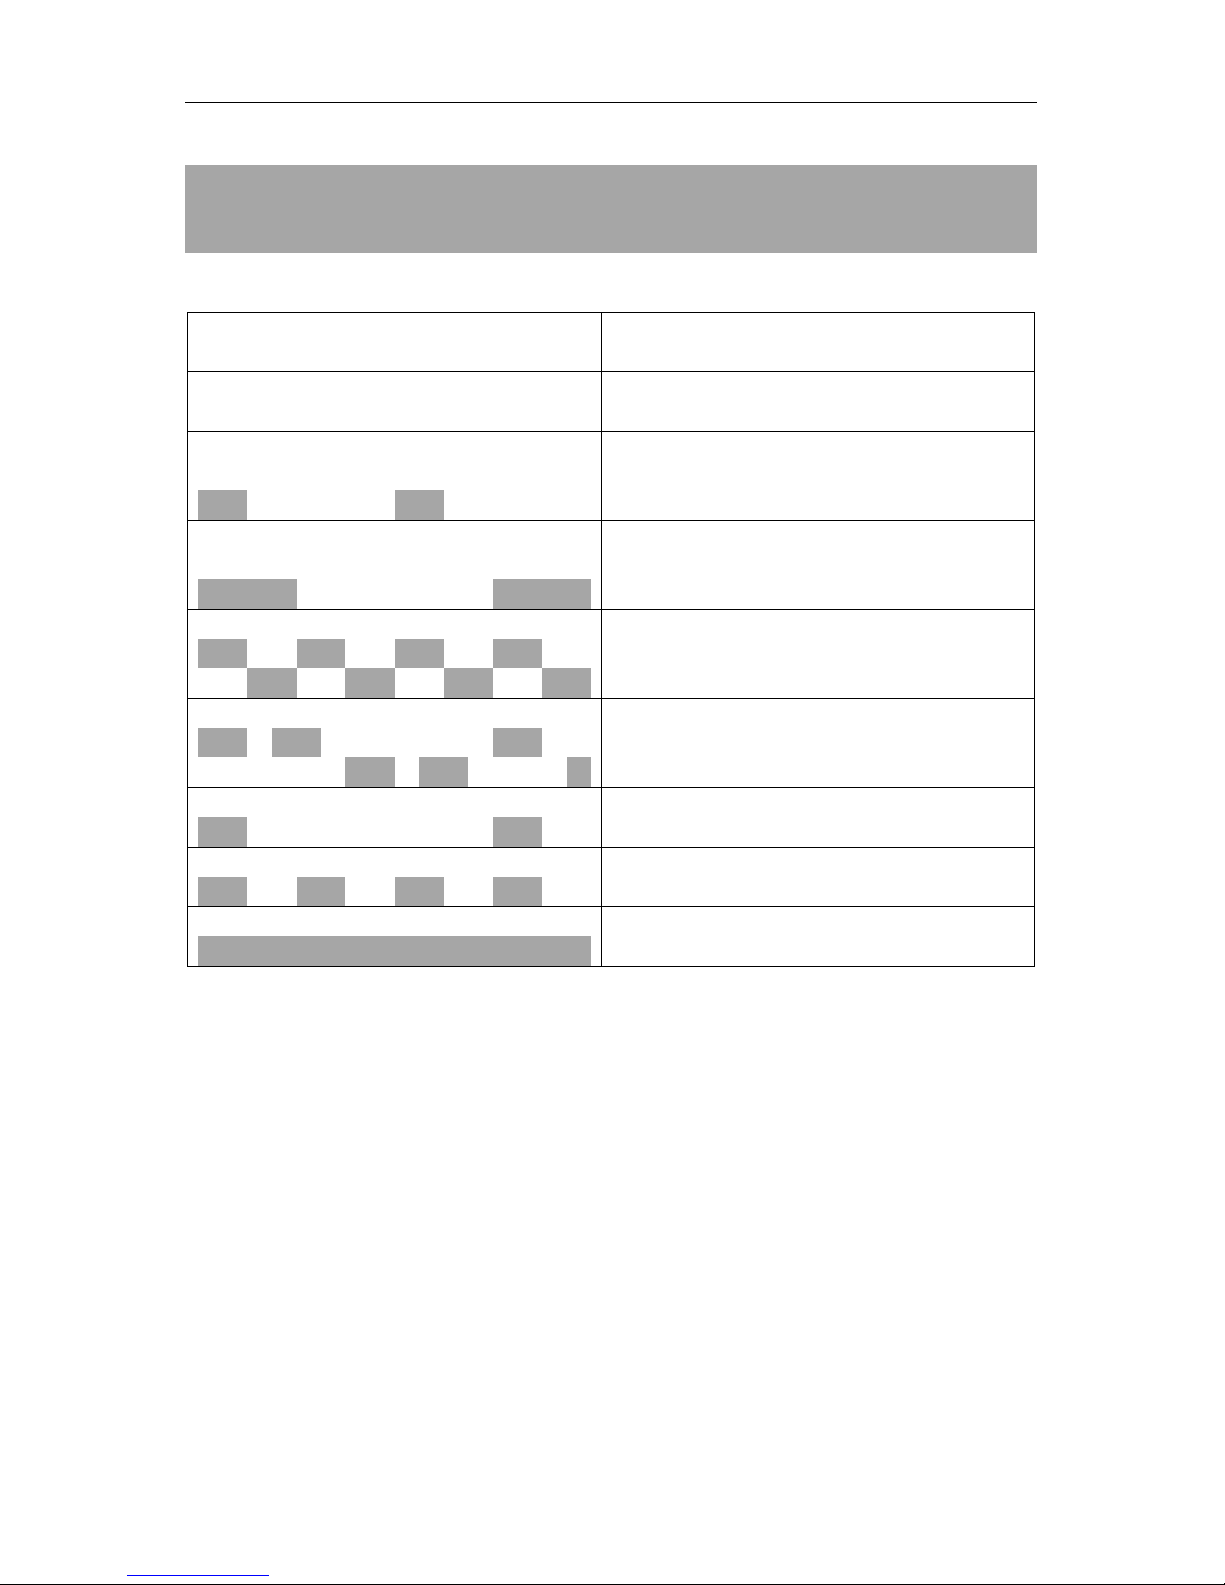
LED light Indicator
LED Indicator type
State
All LED Indicators off
Power off or communication with wizard software
on PC
Blue LED indicator short Flash once every 2
seconds
System on and idle
Blue LED indicator long Flash once every 3
seconds
Connected with device
Red/Blue lights one time flashing alternately
Pairing mode
Red/Blue lights two times flashing alternately
Super Priority Pairing mode
Red light flashing every 3 seconds
Battery is low
Red light flashing every 1 second
Charging State
Solid red light
Charged Full State

AGV
- 0 -
Description du produit
Merci d'avoir choisi SHARE, le système audio pour motards à utiliser avec les appareils
Bluetooth®
(*)
. Ce manuel vous aidera à utiliser correctement le système audio, mais vous
devez tout d'abord vous familiariser avec les fonctions Bluetooth® de votre téléphone
portable, de votre lecteur MP3 ou de votre navigateur GPS.
Le système SHARE vous permet d'utiliser votre téléphone portable, d'écouter de la musique
à partir de votre lecteur MP3, d'écouter la radio FM ou de recevoir des informations de votre
navigateur GPS, tout en conduisant votre moto sans renoncer à votre confort et sans aucun
risque pour votre sécurité. Vous pouvez également communiquer de façon claire et
bidirectionnelle avec le passager (ou avec un autre motard) sans utiliser de téléphone
portable. La fonction TTS (Text To Speech – conversion du texte en paroles) en 12 langues
différentes, permet de bénéficier d'une interaction pratique avec le système.
Le système SHARE peut être connecté simultanément aux différents appareils suivants :
• Deux téléphones portables (ou bien un téléphone et un navigateur GPS pour moto)
• Deux lecteurs MP3 (également intégrés dans les téléphones portables)
• Un autre système SHARE pour les communications intercom
• Un autre appareil relié au moyen d'un câble
Vous pouvez également utiliser la radio FM intégrée.
Tous ces appareils peuvent être utilisés et gérés à l'aide du système SHARE.
(*)
et “Bluetooth” sont des marques déposées appartenant à la société Bluetooth SIG, Inc., Kirkland, WA,
USA.
AGV
- 1 -
Interface Utilisateur
SHARE peut être contrôlé au moyen du clavier externe et ergonomique, doté de touches intuitives et
simples à identifier :
1. MFB (Multi-Function Button) !
• Changement de fonction (Musique/FM/Aux Audio)
• Appel
• Lecture, Pause
2. MOINS !
• Diminution du volume
• Rappel du dernier numéro
• Chanson précédente
• Station de radio FM précédente, changement de fréquence FM (vers basses fréquences)
• Changement de langue (précédente)
3. PLUS "
• Augmentation du volume
• Appel vocal
• Chanson suivante
• Station de radio FM suivante, changement de fréquence FM (vers hautes fréquences)
• Changement de langue (suivante)
4. CTRL (Control) #
• Allumage/extinction
• Appairage
• Intercom
5. voyant LED
1 2 3 $ 4$
5$
AGV
- 2 -
Caractéristiques Principales
" Mode mains libres : commutation automatique sans interruption
entre téléphone portable Bluetooth®, navigateur GPS, Intercom,
Musique, Radio FM et entrée Aux.
" Ce mode est en mesure de supporter deux connexions avec des
téléphones portables (profils HFP/HSP) ; l'une des connexions peut
être définie comme ultra prioritaire
" Il permet également de gérer les fonctions de réponse, de rejet et de
fin d'appel
" Fonction de réponse automatique (mains libres)
" Fonction de rappel du dernier numéro et d'appel vocal (en fonction
des caractéristiques du téléphone portable)
" Fonction d'accès au répertoire
" Fonction de gestion d'appel à 3 personnes
" Fonction TTS en 12 langues pour annoncer le numéro et le nom de
l'appelant
" Fonction de gestion de communication intercom bidirectionnelle
jusqu'à 10 mètres
" Suppression du bruit du vent basé sur système DSP et réglage
automatique du volume afin de garantir la clarté et la qualité de la
voix
" Contrôle indépendant du volume intercom
" Diffusion de la musique à partir du téléphone portable ou des autres
sources musicales (profil A2DP)
" Fonction de support de deux connexions simultanées à deux sources
musicales différentes
" Fonction de support de commandes de lecture, de pause, de chanson
précédente et de chanson suivante (profil AVRCP)
" Fonction d'augmentation progressive du volume au départ de la
moto
AGV
- 3 -
" Fonction de supportde connexion directe avec le navigateur GPS
" Possibilité de sélection de priorité élevée
" Contrôle indépendant du volume du navigateur GPS
" Bande de fréquences 76~108MHz
" Fonction RDS
" Recherche de fréquences FM bidirectionnelle
" 8 stations mémorisables
" Fonction d'augmentation progressive du volume au départ de la
moto
" Contrôle indépendant du volume de la radio FM et fonction "mute"
" Entrée audio aux. (connecteur jack 3.5mm)
" Fonction d'augmentation progressive du volume au départ de la
moto
" Contrôle indépendant du volume de la radio FM et fonction "mute"
" Indications sur les opérations de l'utilisateur (Text To Speech)
" Annonce du numéro ou du nom de l'appelant
" Indication de l'état de la batterie
" Annonce des fréquences de la radio FM et des informations RDS
" Gestion de 12 langues différentes
TTS
Entrée
AUX.
Messages
vocaux
AGV
- 4 -
Priorité audio et Commutation Audio Automatique
La source audio présentant la priorité la plus élevée interrompt la source présentant une priorité plus faible.
En cas de source présentant le même niveau de priorité, l'activation dépend de l'ordre d'appairage.
L'ordre de priorité de la plus élevée à la plus faible, est reporté dans le schéma suivant :
En cas d'interruption de la source à basse priorité par la source présentant une plus haute priorité, le
fonctionnement de la source à basse priorité est rétabli au terme de l'interruption.
Par exemple, le système SHARE est en mode de diffusion musicale et l'utilisateur reçoit un appel, la
communication bascule automatiquement sur l'appel ; à la fin de l'appel, la communication reprend le
mode de diffusion musicale précédemment interrompue.
" Possibilité de mise à jour du firmware
" Configuration à partir d'un PC
" Réglage des stations FM à partir d'un PC
" Logiciel pour PC avec interface utilisateur disponible en 12 langues
Haute
Basse priorité
Premier lecteur de
musique connecté,
Second lecteur de
musique connecté,
Radio FM ou
entrée Aux.
Ultra-priorité
ou
premier téléphone
connecté,
Non - Ultra-priorité
ou
second téléphone
connecté,
Intercom
REMARQUE
Il est possible que le système nécessite quelque secondes pour rétablir la source audio interrompue ;
ce retard dépend de plusieurs facteurs et de différentes conditions, ainsi que des caractéristiques de
l'appareil connecté.
Configuration
USB
AGV
- 5 -
Réglages
Réglages du système
Allumage
En conservant le système éteint, maintenir la touche # (CTRL) pressée pendant environ 5 secondes
jusqu'à ce que vous entendiez la phrase “PRÊT À L'EMPLOI”, relâcher ensuite la touche et le voyant bleu
clignotera pour confirmer l'allumage correct du système.
Une fois allumé, à l'aide de la fonction TTS, le système répète automatiquement le dernier mode audio
sélectionné (mono ou stéréo) et l'état de la batterie (très bas, bas, moyen et haut).
Si le système SHARE n'a jamais été rattaché à un appareil ou si les appareils rattachés ont été supprimés,
le mode d'appairage s'activera automatiquement au démarrage du système. Si le système SHARE trouve
des appareils préalablement rattachés, celui-ci se connectera automatiquement aux 2 derniers téléphones
portables ou navigateurs GPS connectés. Le message "CONNECTÉ À L'APPAREIL", suivi du nom
Bluetooth® de l'appareil, confirme la réalisation de la connexion.
Après l'allumage, attendre au moins 20 secondes avant d'éteindre le système SHARE.
Extinction
En conservant le système allumé, maintenir la touche # (CTRL) pressée pendant environ 6 secondes
jusqu'à ce que vous entendiez la phrase "EXTINCTION EN COURS", le voyant à LED rouge va s'allumer
pendant environ 1 seconde et s'éteindra ensuite pour indiquer que le système est éteint.
Après l'extinction, attendre au moins 30 secondes avant de redémarrer le système SHARE.
Rechargement de la batterie
Pour recharger la batterie du système SHARE, brancher le câble USB fourni au chargeur ou à un port USB
de votre PC.
Les Led vous indiqueront la fin de la phase de rechargement.
Reset
En cas de blocage du système SHARE ou de nécessité d'une remise à zéro à la suite d'une procédure de
mise à jour du firmware, recharger le système en insérant le câble USB et en le connectant au chargeur ou
REMARQUE
Le message "CONNECTÉ À L'APPAREIL" (suivi du nom de l'appareil en question) peut être répété
deux fois, la première pour indiquer la connexion en tant que téléphone (connexion HFP) et la seconde
pour indiquer la connexion en tant qu'appareil de diffusion musicale (connexion A2DP).

AGV
- 6 -
à un port USB. Cette opération aura pour premier effet de remettre le système SHARE à zéro.
Appairage et connexion des appareils
L'appairage est la procédure qui active la connexion sans fil entre deux appareils différents. Cette
procédure d'appairage doit être effectuée une seule fois : les appareils mémorisent les autres appareils
appairés préalablement.
Deux appareils appairés peuvent être connectés entre eux en mode sans fil pour transférer des données et
être utilisés ensemble. Cette connexion est établie automatiquement à chaque fois que les deux appareils
appairés se détectent à proximité de l'un de l'autre, ou peut-être forcée manuellement en effectuant des
procédures spéciales pour chacun des appareils.
Appairage avec un téléphone portable, un appareil de diffusion MP3 ou un
Navigateur GPS
Positionner le système SHARE et le téléphone portable (appareil MP3 ou Navigateur GPS) dans une
zone sans obstacle, à une distance inférieure à 1 mètre l'un de l'autre.
Vérifier que le système SHARE est éteint.
Maintenir la touche # (CTRL) pressée pendant environ 8 secondes jusqu'à ce que vous entendiez le
message “EFFECTUER L'APPAIRAGE DE L'APPAREIL, INSÉRER LE CODE PIN 0000”.
Lorsque les LED bleu et rouge clignotent par alternance, relâcher la touche ; le système SHARE passe
alors en mode d'appairage.
En suivant les instructions du téléphone portable ou du navigateur GPS, activer la fonction Bluetooth®
et rechercher le système SHARE.
Parmi les appareils détectés par le téléphone portable, sélectionner l'appareil appelé “Share Easy
vx.xx” et essayer de le rattacher en insérant le code pin <0000>, si un code est demandé par le
téléphone portable. Une fois que l'appairage a été effectué avec succès, le voyant à LED change de
couleur et passe du bleu/rouge clignotant par alternance au simple bleu clignotant, et les messages
"appairage DE L'APPAREIL RÉUSSI" et "CONNECTÉ À L'APPAREIL" (suivi du nom de l'appareil),
indiquent que le système est connecté au téléphone portable.
Si le téléphone portable affiche un message de demande de confirmation d'accès au répertoire et à la
liste des appels, sélectionner "oui" pour permettre au système SHARE de se connecter au répertoire et
au dernier appel effectué, afin d'utiliser ces informations pour améliorer les fonctions fournies.
 Loading...