

Shamic Sheetmetal Settler 600 Series Installation & Operating Instructions Manual
Revised: 14/05/2013 Printed: 20/05/2013 1
600 SERIES
INSTALLATION
&
OPERATING INSTRUCTIONS
Serial Number of Heater: ____________ Model: ___________________
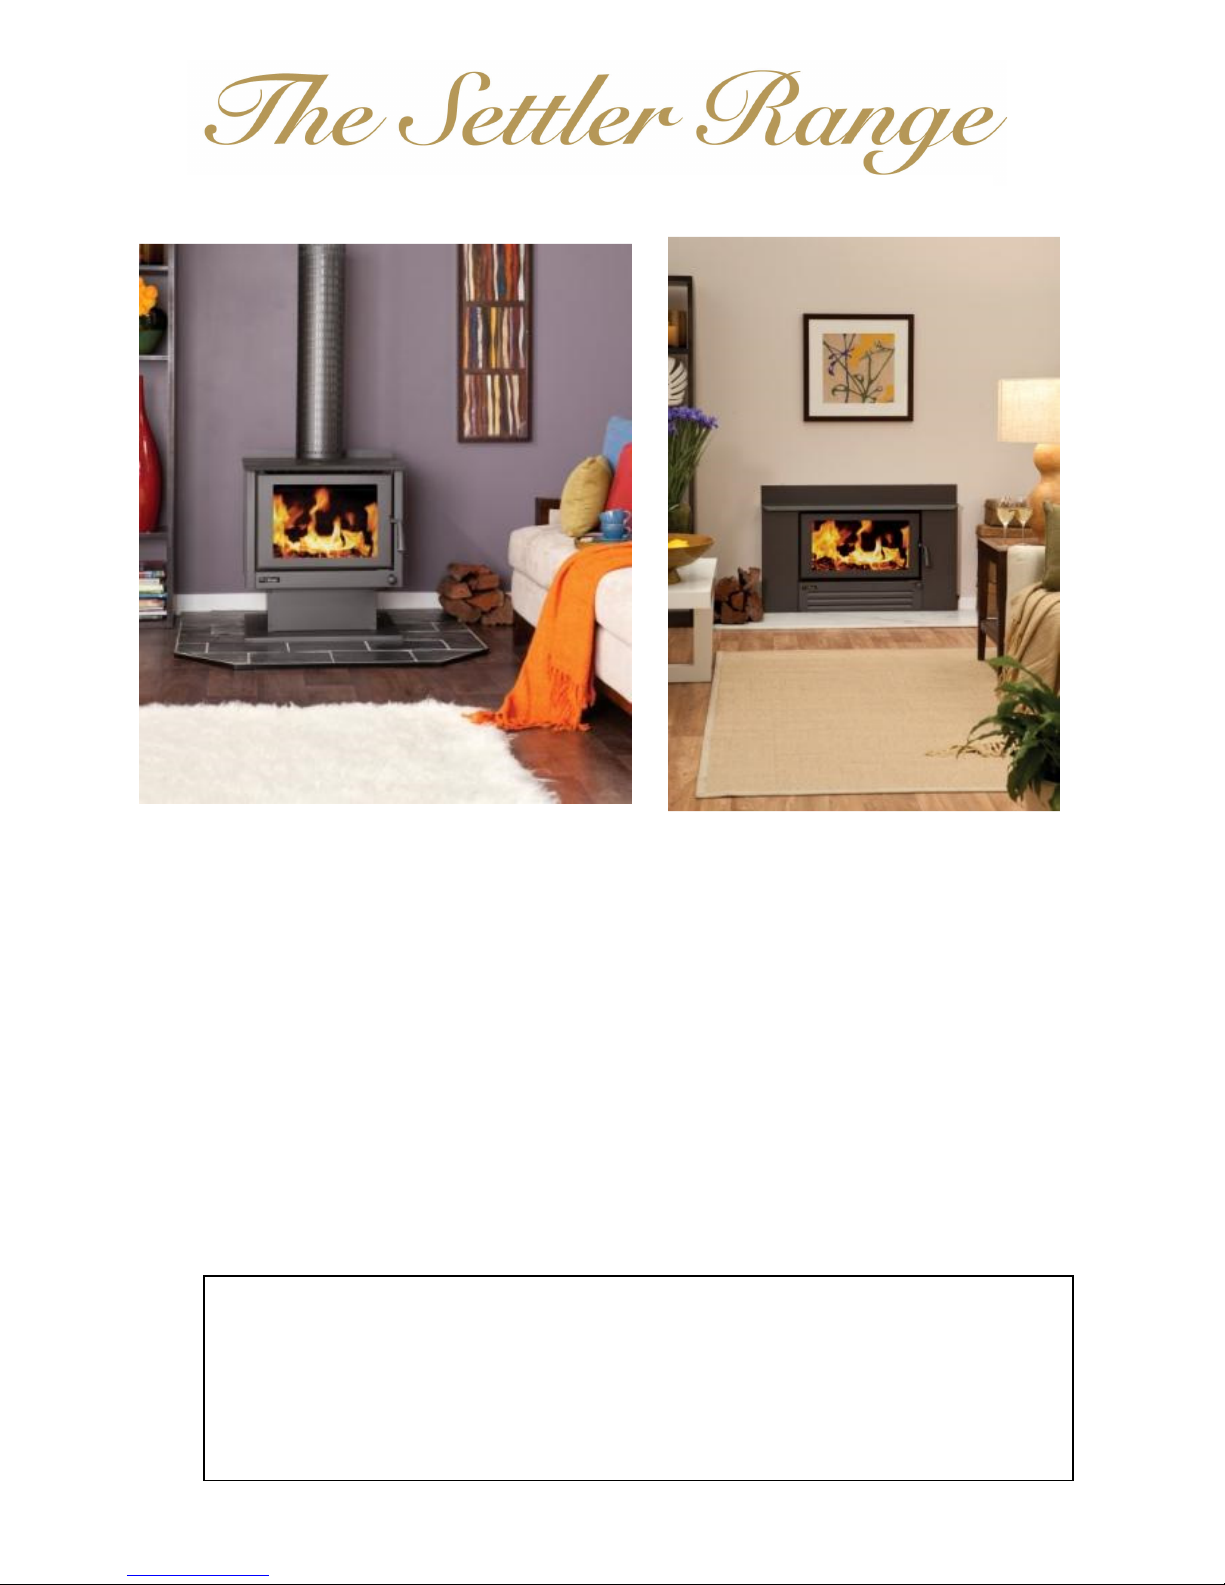
SETTLER
WOODHEATERS ARE AUSTRALIAN OWNED & MANUFACTURED
BY
SHAMIC SHEETMETAL
SHAMIC SHEETMETALSHAMIC SHEETMETAL
SHAMIC SHEETMETAL
(AUST.) PTY. LTD.
PO BOX 8, KILSYTH, VIC. 3136
PH: 03 9737 5300 FAX: 03 9761 6455
www.shamicheating.com.au
Revised: 14/05/2013 Printed: 20/05/2013 2
SAVE THESE INSTRUCTIONS
INSTALLATION AND OPERATION INSTRUCTIONS
Have your heater installed by a registered or licensed installer, and advise your insurers for
inclusion in your household contents policy.
In some states the installer is required to issue a certificate of compliance on the installation; ensure you obtain this if applicable!
SETTLER
Woodheaters should not be modified in any way!
Do not operate the heater with the door open for extended periods.
Always operate with door closed except when lighting or refuelling, and maintain all seals in
good condition!
Keep children away from the heater when operating!
SETTLER
Dealers can advise on
heater / door shield accessories for your unit.
WARNING:
When in operation heater door glass is extremely hot!
WARNING:
SETTLER
WOODHEATERS AND DEALER SPECIFIED FLUES SHALL BE
INSTALLED IN ACCORDANCE WITH THE AUSTRALIAN STANDARD AS 2918 AND THE
APPROPRIATE REQUIREMENTS OF THE LOCAL BUILDING REGULATORY
AUTHORITY.
WARNING:
DO NOT USE FLAMMABLE LIQUIDS SUCH AS PETROL, KEROSENE, OR
ENGINE OIL TO START OR REKINDLE THE FIRE!
WARNING:
“BURN ONLY HARDWOOD”
CAUTION:
MIXING OF APPLIANCE OR FLUE SYSTEM COMPONENTS FROM
DIFFERENT SOURCES OR MODIFYING THE DIMENSIONAL SPECIFICATIONS OF
COMPONENTS MAY RESULT IN HAZARDOUS CONDITIONS. WHERE SUCH ACTION IS
CONSIDERED, THE MANUFACTURER SHOULD BE CONSULTED IN THE FIRST
INSTANCE!
CAUTION:
THE USE OF SOME TYPES OF PRESERVATIVE TREATED WOOD AS FUEL
CAN BE HAZARDOUS (for example: treated radiata pine).
CAUTION:
DO NOT STORE FUEL WITHIN THE HEATER INSTALLATION CLEARANCES
OR WITHIN THE SPACE REQUIRED FOR FUEL CHARGING OR ASH REMOVAL!
CAUTION:
OPEN AIR SLIDE AND TURN FAN OFF BEFORE OPENING DOOR!
DISCLAIMER
The information supplied by this company is our interpretation of AS 2918 and we do not
accept responsibility for any errors or omissions.
All
SETTLER
Woodheaters have been tested in accordance with and comply to AS 4013.
Please read and thoroughly understand these instructions prior to operating this
appliance!
Please store these instructions in a safe place for future reference.
Revised: 14/05/2013 Printed: 20/05/2013 3
INSTALLATION INSTRUCTIONS (FREESTANDING MODELS ONLY)
Select the position of your heater carefully, taking into consideration all combustible materials
in the roof; eg. ceiling joists, roof trusses, etc.
Determine flue location through the ceiling:
Position the hearth correctly, then place the heater on the hearth so that the flue spigot on the
heater is correctly aligned with the flue location from the ceiling.
This heater has been tested and approved to AS 2918 using a
Shamic
ShamicShamic
Shamic
Flue Kit.
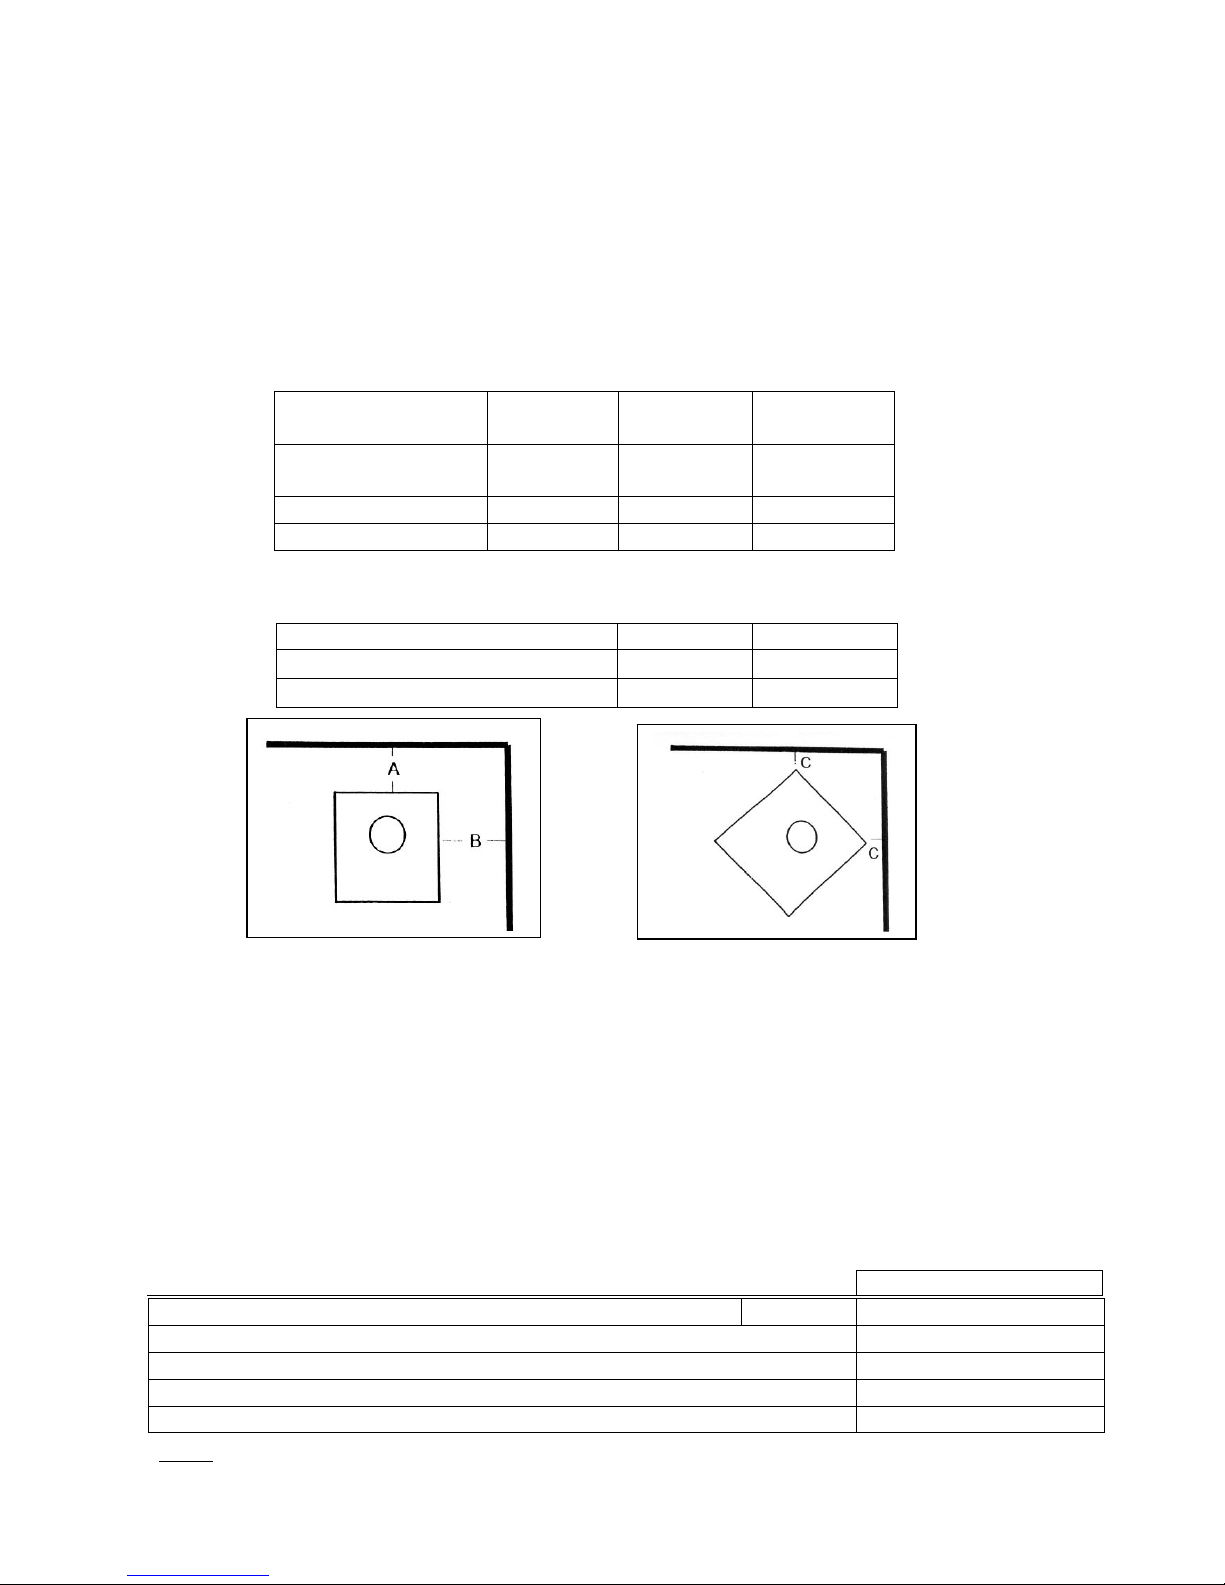
Clearance to combustible surfaces:
(Ensure correct model)
Dimensions in mm
Minimum distance
Millimetres
Reference
Symbol
Settler
C 600
Standard
Installation
A 125
B 300
Corner Installation C 100
25mm thick cement fibre sheeting or other non
combustible material with an equivalent thermal conductivity of 0.41 W/m K.
From Front of Heater 500
From Rear of Heater 100
From Side of Heater 200
Standard Installation Corner Installation
INSTALLATION OF FIRE PLACE INSERT MODELS ONLY
The heater must only be installed in either a sound concrete or masonry fireplace, connected
to a chimney, both of which must be inspected for soundness and thoroughly cleaned before
the heater is installed, or the
Shamic
ShamicShamic
Shamic
tested and approved Zero Clearance Heater Casing unit
in conjunction with a triple skin flue system. After removing the packaging, slide the heater into
the fireplace opening. A flue system must be connected to the heater, providing free and
effective discharge of combustion by-products outside the building and any enclosed or
confined space.
The stainless steel ring (supplied with the heater) must be fitted to the flue spigot of all Inbuilt
models for correct location of the flue.
Dimensions in mm
Minimum distance: Models: Settler I600
From top edge of hot air outlet to underside of mantle piece / shelf 540
From outer vertical edges of heater fascia to mantle piece uprights 25
Floor / hearth in front of heater from door sealing edge (fuel opening)
500
Floor / hearth in front of heater from either side of fire box opening 200
Note: The fireplace cavity must be sufficient to accommodate the external firebox dimension
with a minimum clearance of 25 mm all around.
 Loading...