

Page 1
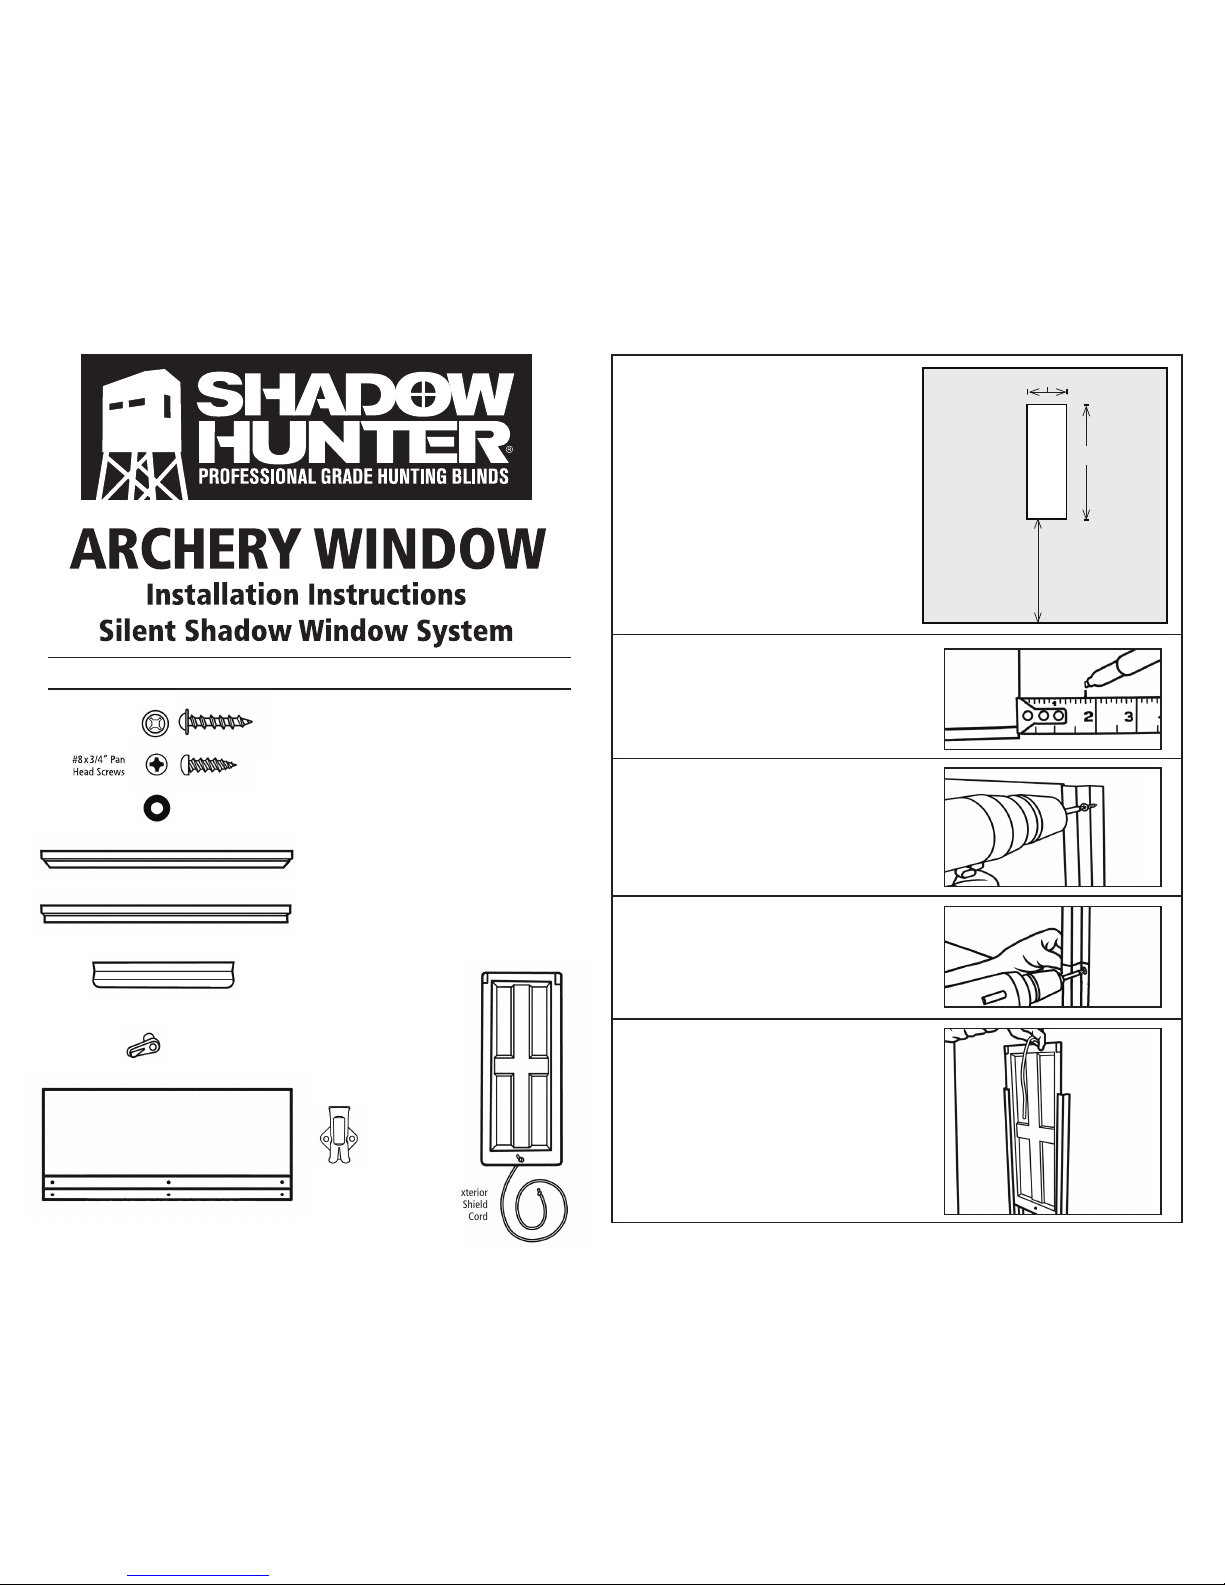
STEP 1. PREPARING YOUR BLIND
Mark the intended position of your window
using the measurements indicated here.
Cut the window frame.
STEP 2. INSTALL THE EXTERIOR
SHIELD TRACKS
2A - On each of the 24-1/2” sides, measure over 1-3/4”
at the top and bottom corners. Be sure to mark all
four spots.
2B - Using the marks as a guide, position the first
exterior shield track along one side of the window
opening. Raise the channel about 1/8” above the top of
the window. Use 1 pan head screw to hold the exterior
track in place.
Repeat step 2B on the opposite side.
2C - Using 2 pan head screws, install the top half
of the shield track (the short piece). Then, install the
bottom half of the shield track, with about 1” of the
bottom track overlapping the top track. The total length
of the combined shield tracks is 46-1/4”. Secure each
combined track with a total of 6 pan head screws.
(Archery window instructions continue on the other side)
Screws & hardware included
for one window systems:
[16] #8 x1" Washer Head Screws
Use 3 screws per interior glass track.
[30] #8 x3/4" Pan Head Screws
Use 6 screws per exterior shield track.
Use 3 screws per drip cap, evenly spaced.
[2] Rubber Window Shield Stops
[2] Interior Hinged Glass Panel
[2] Window Shield with Draw Cord
[2] Drip Cap
[4] Exterior Shield Tracks
[4] Exterior Shield Tracks
Extensions
[2] Speed Cinch®
[6] Window Latches
Speed Cinch®
Exterior
Window Shield
with Draw Cord
Interior Hinged Glass Panel
Exterior Shield Track
Exterior Drip Cap
#8 x1” Washer
Head Screws
Tools Needed: Cordless Drill • Square Drive Bit • Tape Measure • Saw • Staple Gun
Exterior Shield Track Extensions
Window
Latch
Rubber Window
Shield Stop
STEP 3. INSTALL THE EXTERIOR SHIELD
Drop the exterior shield into place behind the exterior
shield tracks. The cord hole should be on the bottom
of the shield.
8" WIDE
24-1/2" HIGH
27" from floor to
bottom of window
Page 2
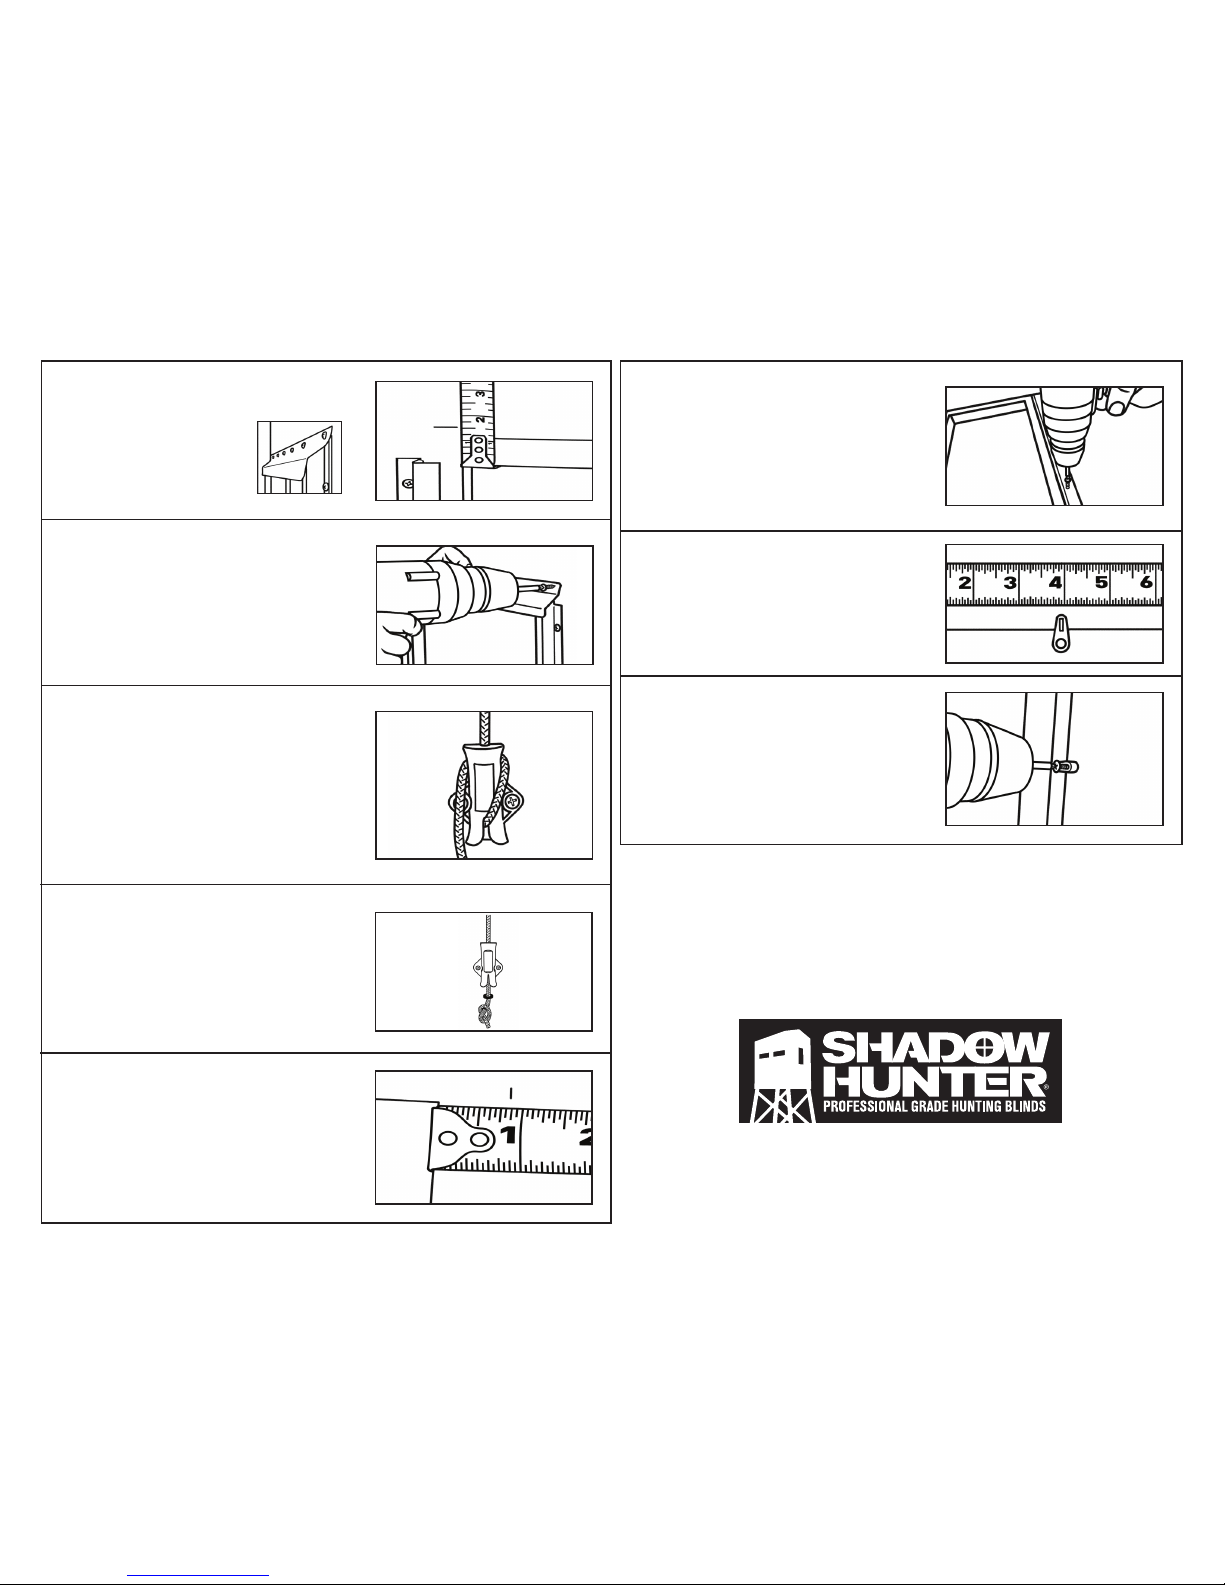
STEP 4. INSTALL THE EXTERIOR DRIP CAP
4A - It is critical to place the Drip Cap on top of the
Shield Track as seen in the image.
Begin by making guide marks
1-9 /16” above the window.
4B - Secure the drip cap on the right side with 1 pan
head screw. Then, make sure the drip cap is level and
rests on the marks. If so, secure with another pan head
screw.
Use 3 evenly spaced pan head screws to finish securing
the Drip Cap.
STEP 5. INSTALL THE DRAW CORD LOCK
5A-Pull the shield up and down a few times to center the
cord in the window. Once you’ve found the center, let the
shield down. Then measure 14” down from the center and
mark the position. Position the Speed Cinch® over the
mark, and place the tube in a vertical position. The notch
should be at the bottom. Secure the Speed Cinch® with
two #8 x1”screws. Run cord through the tube.
STEP 7. INSTALL THE INTERIOR GLASS
AND FASTENERS
7A - Hold the glass and hinge over the window
opening. Measure about 7/8” from the top of the
window cutout and make a mark. Then measure
about 7/8” from the left side of the window cutout,
making marks at both the top and bottom.
7B - Line up your glass window and place 3 washer
head screws in the metal hinge.
7C - Place 2 window latches on the right side of
the window. Measure 4” down from the top of
the glass and 4” up from the bottom of the glass.
7D - Use washer head screws to secure
window latches.
11/2018
Archery Window - Silent Shadow Window System
SUMMIT OUTDOORS, LLC
Fort Wayne, IN 46804 • Toll Free: 1-888-446-4868 Fax: 260-483-2070
www.shadowhunterblinds.com
5B - Run the cord through the speed cinch tube. Then
thread the cord throught the rubber shield stop. Now
tie a knot at the end of the cord. You may need to
adjust the knot to make sure the shield is at or just
below the window.
 Loading...