

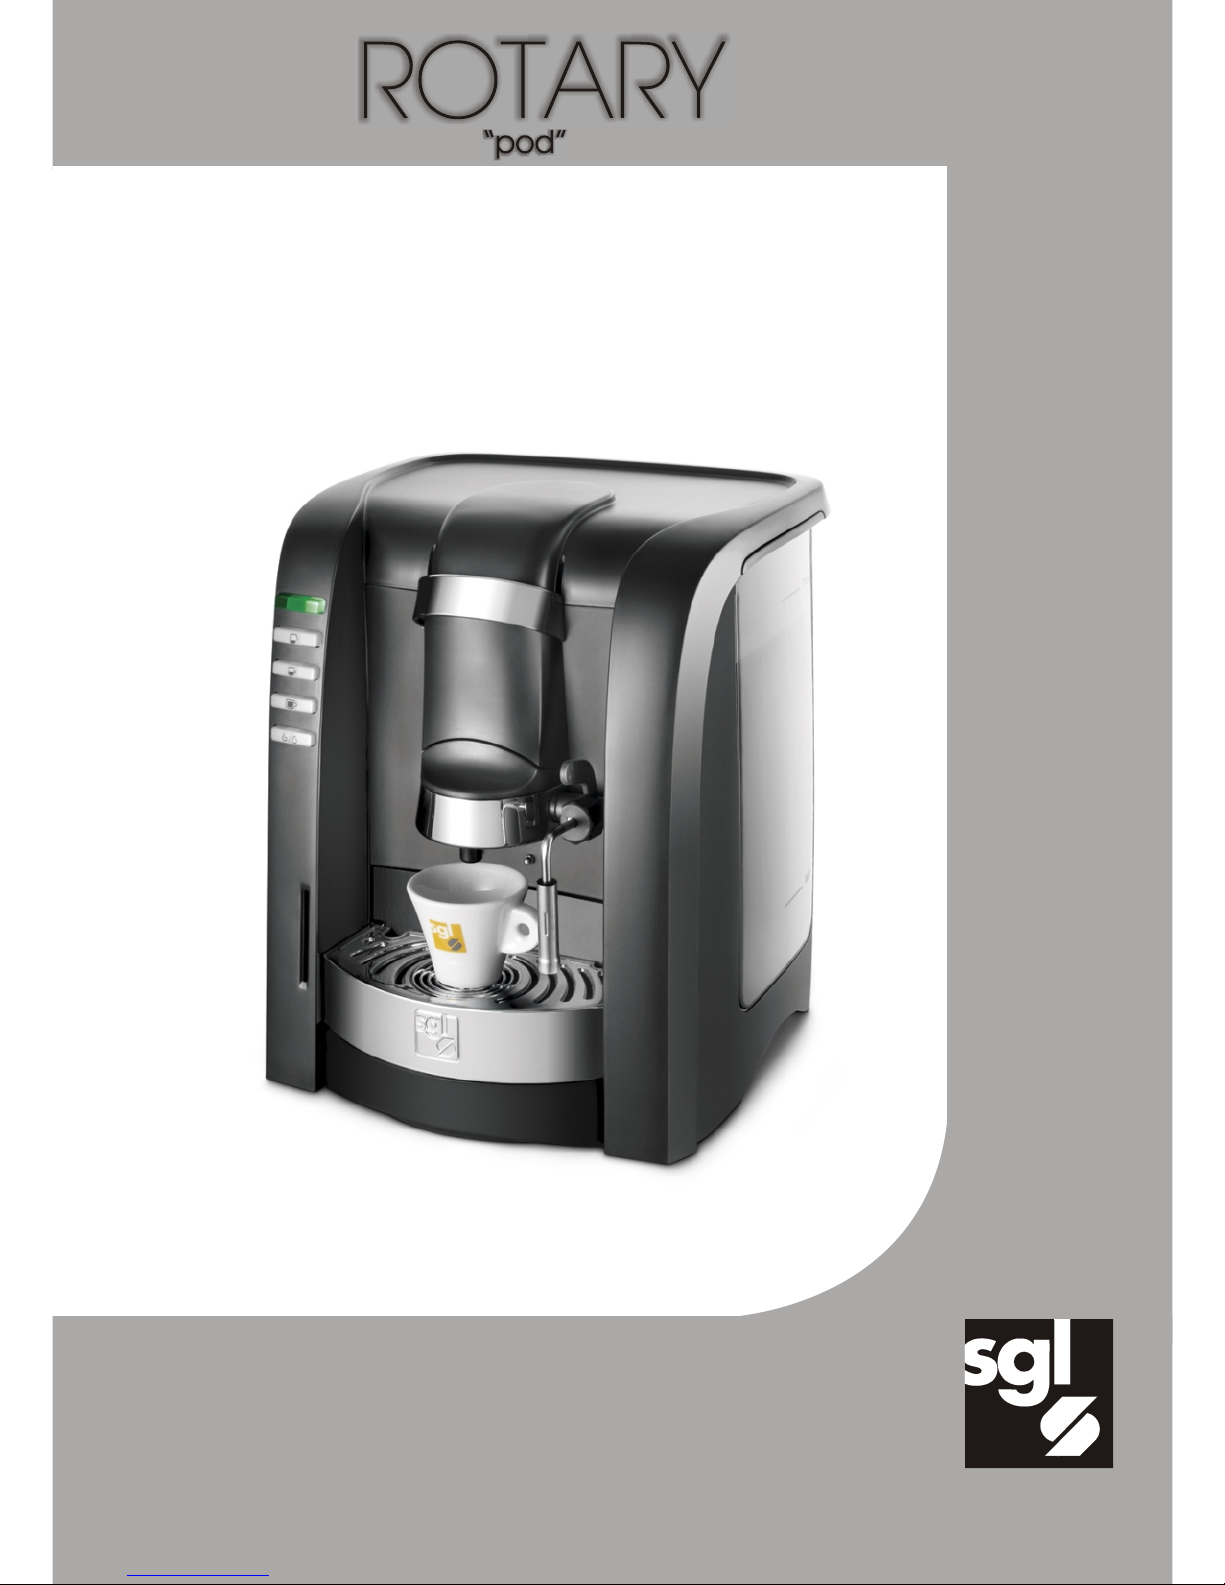
- Coffee Machine
- Machine à Café
sgl italia s.r.l.
ad unico socio
- Use and
maintenance
manual
- Mode d’emploi
et entretien

1
2
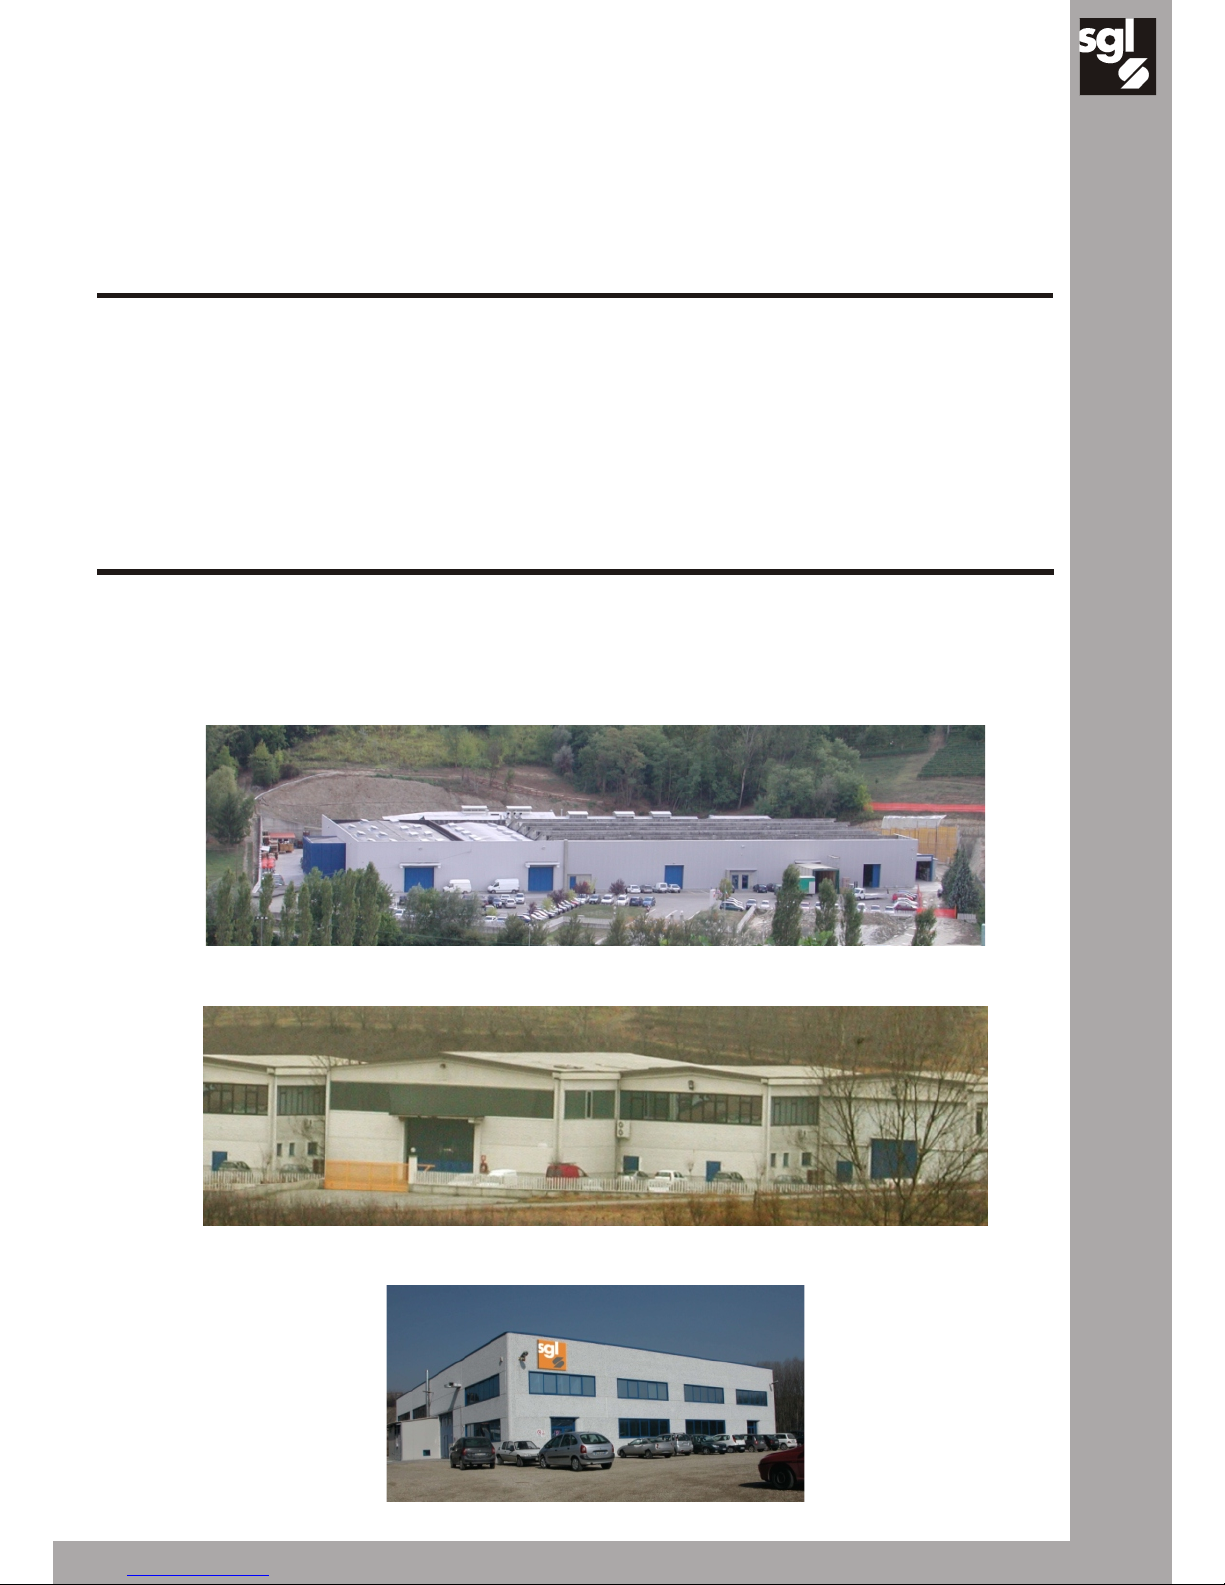
sgl italia operates since 1976 in the field of Espresso Coffee Dispensers.
The ISO 9001 certified-company is organized in a modern structure with adequate equipment and personnel, in order
to reach its quality and production goals. Thanks to its know-how and technical structures, it can produce highly
technological products, either completely designed by itself or according to customer's specification. Its sale network
is active in Italy through regional organizations and abroad through importers.
It takes particular care in design and production, in order to make products that can be certified by external
recognized entities.
Its products comply with general technical rules and assure very high performance.
They also comply with the European Union Directive on the free circulation of goods within Europe, as approved by the
CE mark.
sgl italia est active depuis 1976 dans le secteur de la conception et réalisation de Machines à café Espresso.
L'entreprise est certifiée ISO 9001, organisée de façon moderne suivant un organigramme qui prévoit des moyens et
des ressources humaines aptes à poursuivre les objectifs qualitatifs et productifs fixés. Le savoir-faire et les structures
techniques de l'entreprise permettent de mettre au point des produits à haut contenu technologique, et d'après sa
propre conception et suivant les spécifications requises exprès par le Client. Le réseau de vente est actif en Italie avec
des organisations au niveau régional et à l'étranger grâce aux importateurs.
La conception et la fabrication sont particulièrement soignées afin de réaliser des produits pouvant être certifiés par
des organismes extérieurs officiellement reconnus.
Afin d'assurer la conformité aux règles de la "bonne technique", à même de garantir de hautes performances
fonctionnelles, les produits satisfont à la Directive de l'Union Européenne en matière de la libre circulation des
marchandises en Europe avec l'approbation de la marque CE.

3
1
9
10
10
11
6
11
12
14
8
15
17
16
18
19
13
2
3
4
5
6
7
Vers./Ausf. Lux
Vers./Ausf. Lux
A
C
E
G
B
D
H
max
min
20
21
D
24 25
1
4
I
M
Q
R
P
12
13
14
9
15
17
6
5
7
4
3
16
max
min
22
23
Vers./Ausf. Lux
Vers./Ausf. Lux

INTRODUCTION
Thank you for choosing our new espresso coffee machine. This is an easy to use product
designed to occupy small spaces and easy to clean. However, before using this appliance,
take some minutes to read this instruction booklet carefully and keep it for future reference.
Also check the appliance is in proper conditions after being shipped.
PACKING CONTENTS
Upon delivery, the machine is packed in a specific customised box. Packing contents: 1)
machine, 2) instruction manual, 3) power supply cable.
Check that none of these three are missing, that neither the machine nor the package has
been damaged and there are no missing pieces. In case of damaged or missing pieces,
contact the dealer immediately before installing.
UNPACKING THE APPLIANCE
Open the box, lift the appliance together with its lateral foam protections, afterwards
remove them and place the appliance on a firm surface.
Strictly follow the operating instructions contained in this manual at all times and keep
the manual for future reference.
This machine is designed to make espresso coffee and to produce hot water and
steam (specific versions), so be extremely cautious so as not to get burnt with hot water
jets or due to an incorrect use of the appliance.
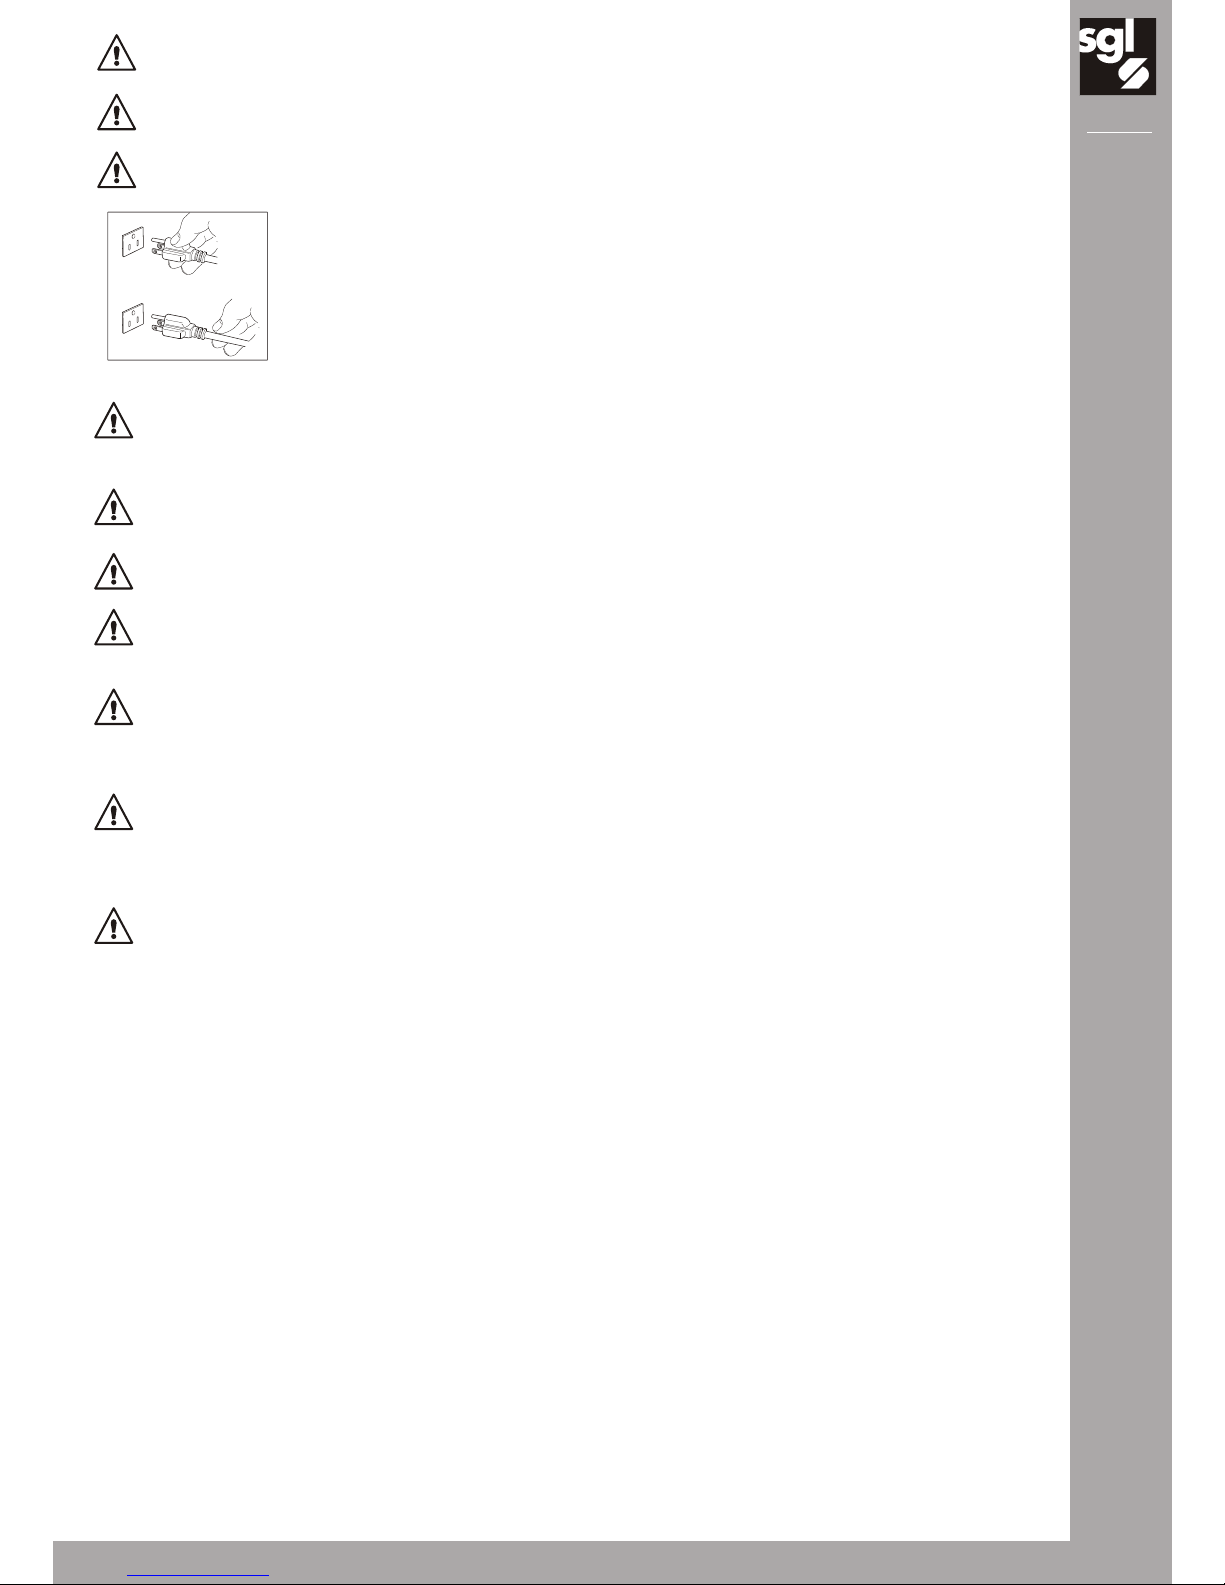
Before connecting or disconnecting the machine, make sure that the switch is at '0'
position.
Never touch hot parts.
Do not aim hot water or steam directly at you while using the machine (specific versions).
This appliance must be used only and exclusively for the intended uses described in this
manual ('Classification of the appliance and allowed uses' section), any other use not
described herein will be considered as misuse. The manufacturer shall not be liable for
any damage or injury caused by incorrect or irrational use of this appliance.
After unpacking the appliance, make sure that it has not been damaged; in case of
doubt, refer to a skilled technician.
Keep all packing components (box, polystyrene foam, bags, etc.) away
from the reach of children since they are potentially dangerous. Dispose
of them safely and without harming the environment, in compliance with
the regulations in force.
Before connecting the appliance, make sure that its rating (rating label at the bottom of
the machine) matches the mains rating. The manufacturer shall not be liable for any
damage or injury caused by the lack of an earth connection or by failure to observe the
measures above mentioned. For electrical safety reasons regarding this appliance, the
mains should be earthed and provided with a residual current device.
5
English
IMPORTANT SAFEGUARDS
Never touch the appliance with wet hands or feet.
Never immerse the appliance in water.
Uncoil the power supply cable completely in order to avoid dangerous overheating.
Never pull the cord to unplug the power supply cable from the mains
outlet.
Always disconnect the appliance before filling the water tank or carrying out any
checking operations.
Children should be supervised in order to make sure that they do not play with the
appliance.
Always look after the machine while it is functioning.
Do not place any foreign objects in the lid where pods are introduced.
It is advisable to keep the packing material (box, polystyrene, foam, bags, etc.) in order
to use it again for storage, transport.
In case of failure or malfunction of the appliance, turn it off, disconnect it from the
mains; do not attempt any repair or operation. For repairs, contact only a technical
service centre authorised by the manufacturer and require that original spare parts are
used. Failure to comply with these rules could compromise the appliance safety.
If the power supply cable gets damaged, the manufacturer or its technical support
service, or an adequately qualified technician should replace it to prevent any risks.
Short power supply cord is provided to reduce the risk resulting from becoming
entangled in tripping over a longer cord.
Longer extension cords are available and may be used if care is excercised in their use.
If an extension cord is used, (1) the marked electrical rating of the extension cord should
be at last as great as the electrical rating of the appliance, and (2) the longer cord
should be arranged so that it will not drape over the counter top or tabletop where it can
be pulled on by children or tripped over accidentally.
Keep an approximate 15-cm distance between the appliance and any walls or
machines surrounding it in order to help ventilation.
For any failure communication, contact the nearest technical service. Always quote the
model name and product serial number; this information is found on the rating label at
the base of the machine.
6
English
x
OK
SAVE THESE INSTRUCTIONS.

KEY for STANDARD version
01 = door opening / closing handle
pod introduction;
02 = steam tube control lever;
03 = steam tube;
04 = milk-frothing wand;
05 = old pods collection drawer;
06 = cups supporting grid, two positions;
07 = drops collection pan;
08 = warming plate for cups;
09 = operation warning light;
10 = coffee button (free dose) (start stop);
11 = steam button;
12 = hot water dispensing button;
13 = no function;
14 = tank cover;
15 = water 'maximum' level notch;
16 = water tank;
17 = water 'minimum' level notch;
18 = chip card slot (optional);
19 = chip card (optional);
20 - power supply cable;
21 = main switch;
22 = softener fixing/positioning clamp (Optional);
23 = softener (optional);
24 = filter;
25 = pod placement cradle.
KEY for LUX version
01 = door opening / closing handle
pod introduction;
02 = steam tube control lever;
03 = steam tube;
04 = milk-frothing wand;
05 = old pods collection drawer;
06 = cups supporting grid, two positions;
07 = drops collection pan;
08 = warming plate for cups;
09 = operation warning light;
10 = short coffee dispensing button;
11 = long coffee dispensing button;
12 = solubles selection button;
13 = steam / hot water button;
14 = tank cover;
15 = water 'maximum' level notch;
16 = water tank;
17 = water 'minimum' level notch;
18 = chip card slot (optional);
19 = chip card (optional);
20 - power supply cable;
21 = main switch;
22 = softener fixing/positioning clamp (Optional);
23 = softener (optional);
24 = filter;
25 = pod placement cradle.
TECHNICAL DATA
Standard ratings: (see rating plate at the bottom of the machine);
Water tank capacity: 1.7 lt.;
Weight: 7 Kg approx.;
Machine dimensions: L 295x D 290 x H 365 mm
CLASSIFICATION OF THE APPLIANCE AND ALLOWED USES
Machine intended to make coffee or other hot drinks, teas, herbal teas, etc., and
cappuccinos (specific versions).
INSTALLATION
Before installing the appliance, read the 'Safety general warnings' section carefully.
Place the machine on a flat, stable surface away from heat sources and air flows.
Before connecting the appliance to the electrical installation, make sure there is a
differential circuit breaker and that the mains supply is efficiently earthed. Also check that the
product ratings (see rating label at the bottom of the machine) are compatible with
electrical installation.
Place the appliance in a closed room and at a room temperature over 5ºC. If it is installed in
an area at a room temperature over 35ºC, the appliance may not work properly.
Fill tank 16 with fresh water, natural drinking water whenever possible, or, if the system water is
calcareous, natural mineral water. (Softener filter not supplied as standard).
Connect the power supply cable 20 at the machine.
7
English
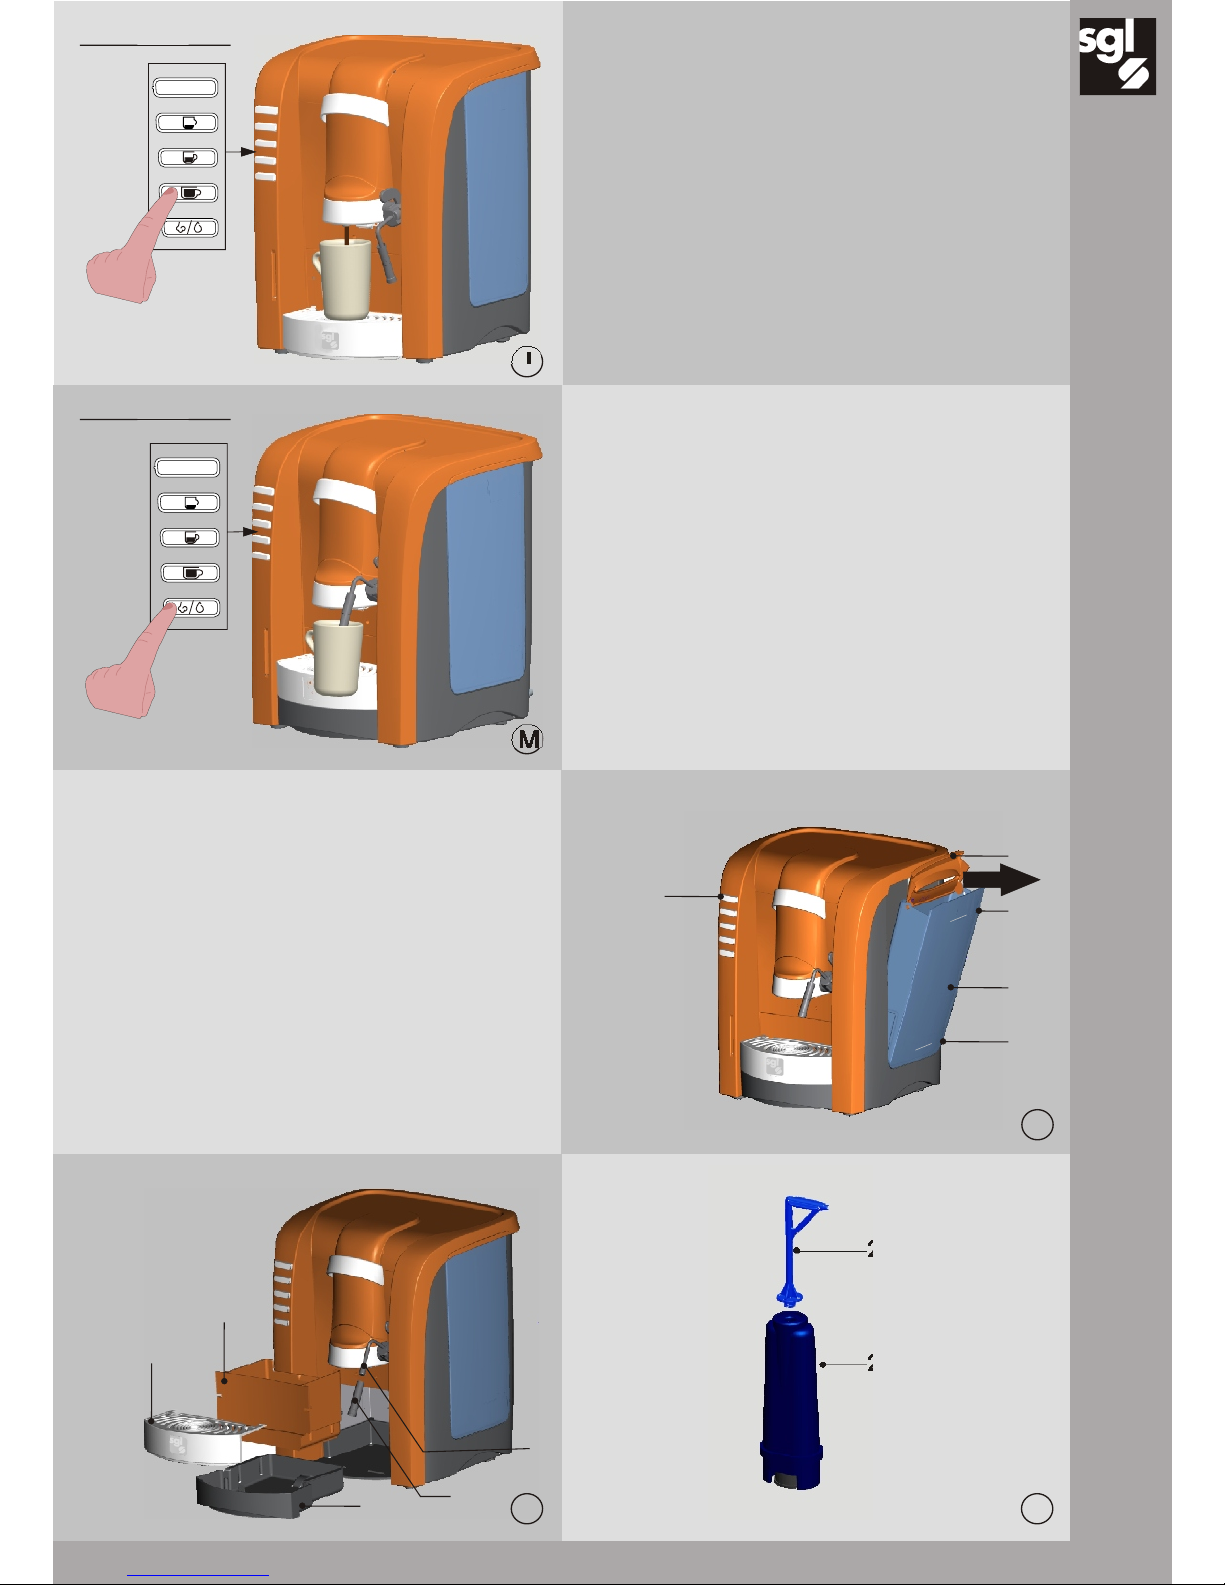
INSTRUCTIONS FOR MACHINE USE (figures B-C)
Before using the appliance for the first time, lift tank cover 14 and take out the tank; wash
thoroughly and fill it with fresh water. Place it back into its position. Connect the appliance
plug to the system power socket correctly earthed.
Turn on the machine by pressing switch 21.
Warning: before using the machine, pods must not be damaged. Deformed or broken
pods may get blocked in the appliance and damage it.
BRIEF NOTES ON APPLIANCE OPERATION (figure B)
When the machine is turned on via the main switch 21, the green LED 9 flashes; a few
seconds later, when the LED is steadily on, the appliance is hot and ready to be used. Now it is
possible to dispense drinks using keys 10-11-12-13 (see LUX).
Other operation conditions are signalled by the two red and green Leds 9 according to the
attached “Warning” table.
Chip card version (if present):
Insert card 19 in the corresponding slot 18 as illustrated in figure B (for use modes refer to the
chip card instruction leaflet that is customised according to the type of card used. The leaflet
is supplied separately, not together with the coffee machine).
WARNING: dispensing is enabled and limited by the possibility to recharge through the chip
card system.
WARNING:
Before using the unit for the first time, when it has not been used for a long time or when kept
without water, pour a cup of water from the dispenser following steps given in “COFFEE
PREPARATION” on the instruction manual before preparing coffee.
Failure to follow these instructions may damage the unit and will exempt the manufacturer
from any responsibility regarding the unit working conditions.
It also is advisable, when using the unit for the first time, to place the coffee nozzle about half
the water tank making the water pour into a cup. This operation can also be carried out
without pod or using an old one. Read the “COFFEE PREPARATION” section for this operation.
This operation should be repeated whenever the unit is not used for a long time.
To get a perfect espresso it is necessary to turn on the machine 5-10 minutes before using it
and to warm up cups by placing them on the warming cover 8.
COFFEE PREPARATION (figures A-B-D-E-F-G-H-I-L)
With green LED 9 steadily on, place the cup at the centre of grid 6 just underneath the
coffee dispenser, open the lid to introduce pod by operating handle 1 vertically, insert the
pod in its corresponding place on filter 24, be careful to place it adequately in the relevant
cradle 25, afterwards close the lid (figure D).
Lux Version:
Press switch 10 (figure E) if you want a short coffee, and switch 11 (figure G) if you want a long
coffee.
Dispensing will finish automatically when the default dose is reached. If you want to interrupt
the dispensing process before it finishes, press the same switch to do so.
If you want a different dose, use a large cup or glass and move grid No. 6 to the second
position by a simple operation (figure H); afterwards press switch 12 (figure I) to start
dispensing;
8
English

dispensing will automatically stop when it reaches 150 ml, the max default dose. If you want
to interrupt the dispensing process before it finishes, press the same switch again. Dispensing
also allows programming different doses at will; see this procedure in the 'Dose
programming' section.
Remark: after being used, pod are automatically ejected into the used pods container 5.
This system allows a thorough cleaning of the coffee dispensing mechanism by eliminating
the chance that used pods remain into the container for a long time.
WARNING:
The pod insertion lid should be open only for the time needed to introduce such pod in its
corresponding seat, as shown in figure D.
Avoid touching the parts not involved in loading with your hands or any other foreign object.
Do not tamper the pod holder or any other moving components.
IMPORTANT:
Do not remove the drops collection pan during any type of dispensing, coffee / steam / hot
water.
WARNING:
During any type of dispensing (coffee / steam / hot water), the appliance has a safety
device that prevents opening of the pod insertion lid which is locked. Under no
circumstance should you force it open.
The manufacturer shall not be liable in case of damages caused by failure to observe the
above mentioned instructions and resulting from appliance misuse.
CAPPUCCINO PREPARATION (figures A-M-N) (if present)
Warning: first dispense the coffee, then the milk.
NEVER touch steam tube 3-4 with your hands so as to avoid unwanted burns; move it to the
desired position by operating the control lever 2.
Follow the instructions listed below to dispense steam:
Lux Version (figure M):
1) Leave steam tube 3/4 at home position and press steam button 13: a few seconds later,
when the dispensed steam flow is constant, aim it to the desired position by acting on
control level 2, and dip the milk-frothing wand in the milk jug where you have previously
poured some milk. Move the milk jug up/down; once you get the desired froth, press switch
13 and dispensing is stopped after 90 seconds maximum (Figure M).
Always clean the wand and the tube with a damp cloth after each dispensing process.
9
English

COOLING SYSTEM FUNCTION
This appliance has a hydraulic circuit cooling system. After each steam dispensing, the
cooling system allows dispensing coffee as soon as the green light turns on and remains
on. In this cooling phase, some water drops may fall into the drops collection pan, which
should be considered totally normal.
HOT WATER DISPENSING (figures A-M-O) (if present)
First of all never touch the hot water dispensing tube with your hands so as to avoid unwanted
burns; direct it to your position by operating the hot water dispensing control lever 2.
Follow the instructions listed below to dispense hot water:
Place a cup underneath the water dispensing tube 3.
Lux Version (figure M):
Hold key 13 down as long as you want product to be dispensed. Release the key once the
desired quantity is obtained. The dispensing process stops after 30 sec.
PODS COLLECTION DRAWER FULL (figure A)
The machine is pre-set for a pods count of 12 dispensing activations. When such value is
reached, the red LED 9 flashes quickly to signal that drawer 5-6-7 needs to be emptied.
Remove it, empty the content and put it back into place firmly; (green LED on) (the operation
should last at least 5 seconds to allow for software reset.
WARNING: used pods count is reset each time the drawer is removed and such operation
last longer than 5 seconds.
NO WATER (figure P)
Lux Version:
This condition is signalled when the red warning light 9 comes on steadily, any machine
dispensing process for short or long coffee already in progress is finished; the solubles
selection dose ensures a dispensing length equal to 100 ml, but the steam and water
dispensing are finished at once.
Warning: before filling the tank, unplug the power supply cable from the mains outlet.
CHIP CARD FUNCTION (if present) (figure B)
This function is used to manage any dispensing process through payment system using Chip
Card 19.
PROGRAMMING DOSES (if present) (figure B)
Only for the Lux version:
Machines manufactured by SGL Italia feature a series of pre-set parameters for each type of
dispensing process. Dose settings can be modified only after the self-learning dosing mode
is activated. This machine is delivered from the factory with this function disabled; follow the
steps below to enable it:
A) with the machine off, press the first coffee button (10) and switch on the machine by
means of the main switch; press and hold coffee button (10) longer than 5 seconds, from the
moment the machine is turned on;
B) for 5 seconds no indicator light will come on, afterwards the green light (9) starts flashing
quickly to signal that the self-learning function is active; afterwards release button (10) and
the appliance will be ready for use after the stand-by position is restored, without the need to
turn the device off and on again.
The reverse operation (to disable the self-learning function) can be carried out. Follow steps
“A” and “B” described above, but the quick-flashing light (9), described at “point “B”, will be
red instead, signalling that the self-learning function is disabled.
10
English

Once the self-learning function is activated, dose settings for 'short' coffee / 'long' coffee /
soluble selections' can be modified by following these programming steps: Switch on the
machine, make sure there is water in the tank, and get the machine ready for use. Before
programming doses, wait at least 5 minutes after the machine is switched on. Insert a pod
into the pod holder, close the lid and press button 10 11 or 12. Hold it down until the desired
dose is obtained. After five seconds the (green and red) LEDs of indicator light 9 start flashing
alternately, thus signalling that programming is in progress. Once the desired dose is
obtained, release the button. Only the green LED will be on, signalling programming is over.
Wait a couple of seconds and proceed to program another coffee option. (Repeat these
adjustments until you obtain the desired doses). It is advisable to carry out a final checking of
the doses set.
This appliance is delivered from the factory with default doses.
DRAWER AND LID SAFETY FUNCTIONS
The lid to insert pods has two safety devices, an electrical one and a mechanical one, that
do not allow machine regular operation when the lid is open.
Electrical safety device prevents rotation of the pod holder, condition that is signalled
(flashing red LED) simply after pressing the dispensing button to obtain the desired amount,
whereas the mechanical device does not allow opening the lid during dispensing.
If during dispensing, the drawer is removed, such dispensing is interrupted immediately.
Upon closing the drawer, the machine cancels the dispensing cycle in progress.
CLEANING AND MAINTENANCE
CLEANING AFTER USE (FIG. Q)
Before starting any cleaning operation, unplug the plug from the power socket. NEVER
IMMERSE THE MACHINE IN WATER.
- Clean with a cloth damped with water and dry thoroughly.
- Always place the machine on degreased and dry surfaces.
- Remove grid 6, take out and empty drawer/pan 5 / 7.
- Slide off the milk-frothing wand 4 (operation to carry out after each cappuccino) with a light
downward push.
- In the case the pipe 3 were clogged, being really careful, it is possible to act on the
dispensing hole with a needle in order to clean it.
- The pod holder can be cleaned carrying out an empty coffee cycle, see 'Coffee
preparation' section.
- Wash every removed part with hot water and kitchenware detergent. Dry thoroughly and
refit them.
PROLONGED MACHINE INACTIVITY
If the appliance is not going to be used for a long time, it is advisable to:
- Turn it off and disconnect all electric;
- Empty the water tank.
It is also advisable to turn off the appliance every day, when it is not used, so as to save
energy. As a matter of fact, when the appliance is turned on again, it rapidly reaches its ideal
operating temperature (approx. 2/3 minutes).
DROPS COLLECTION PAN CLEANING (figure Q)
Pan 7 has to be rinsed thoroughly in order to remove coffee scales. It can be washed with
hot water and dishes liquid detergent or specific washing powder in order to eliminate
coffee scales.
11
English

WATER TANK (figure P)
Tank 16 has to be cleaned weekly with dishes liquid detergent;
The water in the tank has to be replaced every day. It is advisable to use good quality water
with low mineral content but not de-ionised or distilled water
SOFTENER FILTER (FIG. R) (not included)
The softener accessory developed for this appliance is not included in the machine
package at the moment of the purchase, but it can be acquired separately.
The package includes:
- Bracket 22 for fixing and positioning the softener;
- Softener 23;
- Softener instructions for use sheet.
The softener can treat approximately 50 litres of water (1,500 dispensing processes) after
which it has to be replaced.
IMPORTANT: it is advisable to use the softener. Damages caused by limestone are not
covered by the warranty.
The manufacturer shall not be liable for any damage caused by failure to observe the
above mentioned standards.
IF NEEDED AND FOR OPERATIONS NOT DESCRIBED IN THIS MANUAL, CONTACT THE NEAREST
TECHNICAL SERVICE.
The manufacturer reserves the right to introduce, at any time, any technical or aesthetic
changes for productive or commercial reasons.
12
English

WARNING SIGNALS
MACHINE STATUS
Machine turning ON
Green LED
Red LED
Coffee dispensing
Stand-by
Hot water dispensing
Steam dispensing
Drawer open
Full drawer
Empty tank
Emptying credit
No credit
Fault *
(Heating condition)
Door open
*In order to restore the normal functionality of the coffee maker, it is necessary to turn it off and on again. In case of persistence of the fault, the intervention of a technician is
necessary.
Slow LED flashing
Slow LED flashing
Slow LED flashing
Slow LED flashing
Slow LED flashing
Slow LED flashing Slow LED flashing Slow LED flashing
Slow LED flashing
Led steadily on
Led steadily on
Led steadily on
Quick LED flashing
Slow LED flashing if dispensing
is required
(chip card version only )
Blue LED
Warning summary chart
13
English

Problem Possible causes Solution
Machine does not turn
on. Warning light 9 off.
Machine does not
dispense.
Water spills out the drops
collection pan.
Neither hot water nor
steam is dispensed.
Cappuccinos are not
creamy enough.
Machine blocked
(switched on but unable
to dispense).
! Machine not connected to the
mains.
! Electrical problem.
! Failure signalled by an
intermittent warning light 9.
! High water level in the pan.
! Dispensing tube clogged.
! Milk not cold enough.
! Steam dispensing tube
clogged.
! Dispense request with open lid,
for four subsequent times.
! Pod holder incorrect
functioning.
! Connect the machine to the
mains; see the 'Installation'
section. Contact an
authorised service centre if
required.
! Make sure that the rating
values match the mains rating.
! Refer to the 'Warnings' table.
! Empty the pan and resume
regular operation; see the
'Drops collection pan
cleaning' section.
! Clean the hot water / steam
dispensing tube with a needle.
(Do this with machine off).
! Always use milk at fridge
temperature.
! Clean the tube; see the
'Cleaning after Use' section.
! Failure signalled by intermittent
red and green LED flashing.
Turn the appliance off and
then on again. If the problem
persists, contact the nearest
service centre.
The table above lists the solutions to the problems that may occur. For other failures not
included in the chart above, contact the nearest authorised service centre.
Troubleshooting
14
English
Coffee is not correctly
dispensed.
Coffee is dispensed
only in drops.
! Pod incorrectly placed.
! Coffee dispenser blocked.
! Wait until the preset coffee
dispensing process finishes
and repeat it using a new pod
this time, see the 'Coffee
Preparation' section.
! Carry out a washing cycle for
the coffee dispenser; see the
'Instructions for Machine Use'
section.

INTRODUCTION
Nous vous remercions d'avoir choisi notre machine à café espresso. Celui-ci est un produit
simple à utiliser, facile à nettoyer, conçu pour occuper d'espaces réduits. Avant de l'utiliser,
prenez quelques minutes pour lire attentivement ce manuel, qui devra d'ailleurs être
conservé pour des futures consultations. Vérifiez en outre les conditions du produit après le
transport.
CONTENU DE L'EMBALLAGE
Lors de la livraison, la machine est emballée dans une boîte spéciale, contenant : 1) la
machine ; 2) le manuel d'instruction ; et 3) le câble d'alimentation.
Contrôlez que rien ne manque, que ni la machine ni l'emballage ne soient endommagés,
et qu'il n'y ait pas de pièces manquantes. En cas de pièces manquantes ou
endommagées, adressez-vous tout de suite au vendeur avant d'effectuer n'importe quelle
opération d'installation.
DÉBALLAGE DE L'APPAREIL
Ouvrez la boîte, soulevez l'appareil avec les mousses de protection latérales, retirez celles-ci
et placez l'appareil sur une surface stable.
Respectez toujours scrupuleusement les instructions d'utilisation reportées sur ce
manuel et conservez-le pour de futures consultations.
Cette machine a été construite pour la distribution de café espresso, d'eau chaude et
de vapeur (versions spécifiques). Faites très attention à ne pas vous brûler avec les jets
d'eau chaude ou par un usage inapproprié de cette machine.
Avant de brancher ou débrancher la machine, assurez-vous que l'interrupteur est en
position " 0 ".
Ne touchez jamais les parties chaudes.
N'adressez pas l'eau chaude ou la vapeur directement vers vous pendant que vous
utilisez la machine (versions spécifiques).
Cet appareil ne doit être destiné qu'à l'usage décrit dans ce manuel (paragraphe "
Classification de l'appareil et usages permis "). Tout autre usage est considéré comme
inapproprié. Le fabricant décline toute responsabilité pour des dommages possibles
causés par des usages erronés ou bien illégitimes de l'appareil.
Après avoir déballé l'appareil, assurez-vous qu'il est intact. En cas de doute, adressezvous au personnel qualifié.
Les parties qui composent l'emballage (boîte, mousse, sachets, etc.) ne
doivent pas être laissées à la portée des enfants ; elles peuvent être
considérées des sources potentielles de danger. Ne jetez pas les pièces
de l'emballage dans l'environnement mais éliminez-les suivant les
normes en vigueur.
Avant de brancher l'appareil, assurez-vous que les données indiquées sur la plaquette
(adhésif placé au-dessous de l'appareil) correspondent à celles du réseau électrique.
Le fabricant décline toute responsabilité face à l'inobservance de ce qui est indiqué cidessus ou par rapport aux dommages causés par le manque de mise à la terre de
l'installation. Pour la sécurité électrique de cet appareil, l'installation de mise à la terre et
un dispositif différentiel résiduel sont obligatoires.
15
Français
CONSIGNES DE SECURITE

16
Français
x
OK
Ne touchez jamais l'appareil des mains ou des pieds mouillés.
N'immergez jamais l'appareil dans l'eau.
Déroulez le cordon d'alimentation de toute sa longueur afin d'éviter des surchauffes
dangereuses.
Ne tirez pas le cordon d'alimentation pour débrancher l'appareil du
réseau électrique.
Débranchez toujours l'appareil quand vous remplissez d'eau le réservoir ou lorsque vous
effectuez n'importe quelle opération de contrôle.
Les enfants doivent être surveillés afin d'éviter qu'ils jouent avec l'appareil.
Surveillez toujours l'appareil durant le fonctionnement.
N'introduisez pas d'objets étrangers à travers le volet d'introduction de capsules.
Nous conseillons de garder le matériel d'emballage (boîte, polystyrène, mousses,
sachets, etc.) afin de le réutiliser pour ranger ou transporter l'appareil ultérieurement.
En cas de panne ou de mauvais fonctionnement de l'appareil, éteignez-le et
débranchez-le du réseau électrique ; ne réalisez aucune modification ou intervention
sur celui-ci. Pour le faire réparer, adressez-vous exclusivement à un centre d'assistance
agrée par le fabricant et demandez que des pièces de rechange originales soient
utilisées. L'inobservance de cette règle pourrait compromettre la sécurité de l'appareil.
Si le câble d'alimentation est endommagé, celui-ci devra être remplacé par le
fabricant ou par le service d'assistance technique, ou à défaut par une personne
qualifiée, de façon à prévenir tout danger.
Un cordon d’alimentation court est fourni pour réduire le risque qui dérive du fait de
rester pris ou trébucher sur un cordon plus long.
Des cordon d’extention plus longs sont disponibles et ils peuvent être utilisés en cas
d’une utilisation qui nécessite une attention particulière.
Si un cordon d’extention est utilisé, (1) la puissance électrique indiquée sur le cordon
d’extention devra être au moins égale à la puissance électrique de l’appareil et (2) le
cordon plus long devra être rangé avec soin et il ne devra pas pendre du dessus du
banc ou de la table où les enfants peuvent le tirer ou trébucher sur lui.
Placez l'appareil à 15 cm environ des parois ou des autres machines de façon à en
favoriser l'aération.
Pour toute communication (pannes, etc.), contactez le centre d'assistance le plus
proche, indiquez toujours le nom du modèle et le numéro de série de l'appareil. Les
données sont indiquées sur l'étiquette placée au-dessous de l'appareil.
CONSERVEZ CE MODE D’EMPLOI.

DONNÉES TECHNIQUES
Données électriques : (regardez la plaquette au-dessous de l'appareil) ;
Capacité du réservoir : 1,7 l ;
Poids : 7 kg environ ;
Dimensions : L 295 x P 290 x H 365 mm.
CLASSIFICATION DE L'APPAREIL ET USAGES PERMIS
Cette machine est destinée à la distribution de café et à la préparation de boissons
chaudes, thés, tisanes, cappuccino, etc. (versions spécifiques).
INSTALLATION
Avant de procéder à l'installation, lisez avec attention le paragraphe " Avertissements
généraux de sécurité ".
Placez la machine sur une surface plane, stable et loin des sources de chaleur et des
courants d'air.
Avant de brancher l'appareil à l'installation électrique, assurez-vous de la présence d'un
disjoncteur différentiel et de l'efficacité de la mise à la terre du réseau électrique. En plus,
vérifiez que les données indiquées sur la plaquette du produit (regardez l'adhésif placé audessous de l'appareil) correspondent à celles du réseau électrique.
Placez l'appareil à l'intérieur et à une température ambiante supérieure à 5 ºC. S'il est installé
dans des endroits où la température ambiante est supérieure à 35 °C, de mauvais
fonctionnements pourraient se produire.
Remplissez le réservoir 16 avec de l'eau fraîche, dans la mesure du possible avec de l'eau
potable naturelle ou, si l'eau du réseau est particulièrement calcaire, avec de l'eau
minérale naturelle (le filtre adoucisseur n'est pas fourni de série). Branchez le cordon
d'alimentation 20 à la machine.
LÉGENDE vers. " LUX "
01 = poignée d'ouverture et fermeture du volet
d'introduction des dosette ;
02 = levier de commande de la buse de vapeur ;
03 = buse de vapeur ;
04 = tube mousseur de lait ;
05 = bac de récupération des dosette usées ;
06 = grille de soutien des tasses à deux positions ;
07 = bac recueille-gouttes ;
08 = plaque réchauffe-tasses;
09 = voyants de fonctionnement ;
10 = bouton de distribution du café court ;
11 = bouton de distribution du café allongé ;
12 = bouton de sélection des solubles ;
13 = bouton vapeur / eau chaude ;
14 = couvercle du réservoir ;
15 = cran de niveau d'eau max. ;
16 = réservoir d'eau ;
17 = cran de niveau d'eau min. ;
18 = logement de la carte à puce (en option) ;
19 = carte à puce (en option) ;
20 = cordon d'alimentation ;
21 = interrupteur général ;
22= étrier de fixation et positionnement de
l'adoucisseur (en option) ;
23 = adoucisseur (en option);
24 = filtre:
25 = logement de la dosette.
LÉGENDE vers. " STANDARD "
01 = poignée d'ouverture et fermeture du volet
d'introduction des dosette ;
02 = levier de commande de la buse de vapeur ;
03 = buse de vapeur ;
04 = tube mousseur de lait ;
05 = bac de récupération des dosette usées ;
06 = grille de soutien des tasses à deux positions ;
07 = bac recueille-gouttes ;
08 = plaque réchauffe-tasses;
09 = voyants de fonctionnement ;
10 = bouton de café (dose libre) (démarrage /
arrêt) ;
11 = bouton de vapeur ;
12 = bouton de distribution d'eau chaude ;
13 = aucune fonction ;
14 = couvercle du réservoir ;
15 = cran de niveau d'eau max. ;
16 = réservoir d'eau ;
17 = cran de niveau d'eau min. ;
18 = logement de la carte à puce (en option) ;
19 = carte à puce (en option) ;
20 = cordon d'alimentation ;
21 = interrupteur général ;
22 = étrier de fixation / positionnement de
l'adoucisseur (en option) ;
23 = adoucisseur (en option);
24 = filtre:
25 = logement de la dosette.
17
Français

MODE D'EMPLOI DE LA MACHINE (figures B-C)
Avant d'utiliser l'appareil pour la première fois, soulevez le couvercle du réservoir 14 et
extrayez le réservoir, lavez-le soigneusement et remplissez-le avec de l'eau fraîche.
Replacez-le dans son logement. Branchez la fiche de l'appareil à la prise de courant du
réseau électrique, doté d'une mise à la terre appropriée.
Appuyez sur l'interrupteur 21 pour allumer la machine.
Attention : pour pouvoir les utiliser, les dosettes ne doivent pas être endommagées. Les
dosettes déformées ou cassées peuvent se bloquer dans l'appareil et l'endommager.
BRÈVES REMARQUES SUR LE FONCTIONNEMENT (figure B)
Lors de l'allumage de la machine au moyen de l'interrupteur général 21, la DEL verte 9
clignote ; après quelques instants, la DEL reste allumée de manière fixe et l'appareil est donc
chaud et prêt à l'emploi. Il est alors possible de distribuer des boissons à l'aide des touches
10-11-12-13 (ver. LUX).
Toutes les autres conditions de fonctionnement sont signalées par deux DEL (rouge et verte)
9 selon le tableau " Signalisations " ci-joint.
Version carte à puce (si présente)
Insérez la carte 19 dan son logement 18 comme illustré sur la figure B (pour connaître le
mode d'emploi, consultez la notice d'instructions de la carte à puce, qui est personnalisée
en fonction du type de carte utilisée, et est fournie séparément de la machine à café).
ATTENTION : l'autorisation de la distribution dépend de la disponibilité de recharge de crédits
par le système de la carte à puce.
ATTENTION : Lors de sa première utilisation, lorsque l'appareil reste inutilisé pendant de
longues périodes ou reste sans eau, il faut, avant de faire le café, distribuer une petite tasse
d'eau par le distributeur comme indiqué au paragraphe " PRÉPARATION DU CAFÉ " du
manuel d'instruction.
Le fait d'omettre cette opération peut endommager gravement la machine et entraîner
l'annulation immédiate de la responsabilité du fabricant sur son fonctionnement.
Lors de sa première utilisation, il est également conseillé de laisser couler par le bec de
distribution du café environ la moitié du réservoir d'eau dans une tasse. Il est possible de
réaliser cette opération même sans la présence d'une dosette ou en utilisant une dosette
usée. Pour connaître la procédure respective, lisez le paragraphe " PRÉPARATION DU CAFÉ ".
Il est conseillé de répéter cette opération en cas d'une longue période d'inactivité de la
machine.
Pour obtenir un espresso optimal, il faut allumer la machine 5-10 minutes avant de l'utiliser et
la plaque réchauffe-tasses 8 vous aidera à disposer de tasses toujours chaudes.
PRÉPARATION DU CAFÉ (figures A-B-D-E-F-G-H-I-L)
Une fois la DEL verte 9 allumée fixe, placez la tasse au milieu de la grille 6 sous le distributeur
de café, ouvrez le volet d'introduction de dosettes en agissant sur la poignée 1 en sens
vertical, insérez la dosette dans son logement, placez-la sur le filtre 24 en ayant soin de la
poser parfaitement sur le logement 25, puis refermez le volet (figure D).
Version Lux :
Si vous désirez un café court, appuyez sur le bouton 10 (figure E) ; si vous désirez un café
allongé, appuyez sur le bouton 11 (figure G).
La distribution se terminera automatiquement lorsque la dose sera atteinte (préréglée en
usine). Si vous souhaitez interrompre la distribution à l'avance, appuyez de nouveau sur le
même bouton pour la terminer.
Si vous désirez une dose plus grande, il est possible d'utiliser une grande tasse ou un grand
verre. Pour cela, déplacez la grille nº 6 dans la deuxième position, par une simple opération
18
Français

(Figure H), puis appuyez sur le bouton 12 (figure I) pour commencer la distribution, qui se
terminera automatiquement lorsque la dose maximale de 150 ml (préréglée en usine) sera
atteinte. Si vous souhaitez interrompre la distribution à l'avance, appuyez de nouveau sur le
même bouton pour la terminer. Ce type de distribution permet également de programmer
la dose à volonté, moyennant la procédure décrite dans le paragraphe " Programmation
des doses ".
Remarque : Une fois la dosette utilisée, elle est expulsée automatiquement dans le bac de
dosettes usées 5. Ce système permet d'obtenir toujours un nettoyage parfait du
mécanisme de distribution de café, tout en éliminant la possibilité de laisser des dosettes
usées à l'intérieur du bac pendant de longues périodes.
ATTENTION :
L'ouverture du volet d'introduction des dosettes doit être effectuée uniquement pendant le
temps nécessaire à l'introduction de la dosette dans son logement, comme illustré sur la
figure D.
Éviter de toucher avec les mains ou avec d'autres objets étrangers les parties non
concernées par le chargement et de manipuler le porte-dosette ou les autres parties en
mouvement.
IMPORTANT :
Ne pas extraire le bac recueille-gouttes pendant tout type de distribution, café / vapeur /
eau chaude.
AVERTISSEMENT :
L'appareil est équipé d'un dispositif de sécurité qui empêche l'ouverture du bac
d'introduction des dosettes qui sera donc bloqué pendant tout type de distribution (café /
vapeur / eau chaude). Ne forcer l'ouverture en aucun cas.
Le fabricant décline toute responsabilité pour des dommages causés par l'inobservance
des prescriptions susmentionnées et par l'utilisation inappropriée de l'appareil.
PRÉPARATION DU CAPPUCCINO (figures A-M-N) (si présent)
Attention : Distribuez d'abord le café, puis le lait.
NE TOUCHEZ JAMAIS la buse de vapeur 3-4 avec les mains afin d'éviter des brûlures
désagréables. Orientez-la dans la bonne position en agissant sur le levier de commande 2.
Pour obtenir de la vapeur, effectuez les opérations suivantes :
Version Lux (figure M) :
1) Tout en laissant la buse de vapeur 3-4 au repos, appuyez sur le bouton de vapeur 13 :
Après quelques instants, lorsque la distribution de vapeur devient consistante, orientez la
buse dans position désirée à l'aide du levier de commande 2, et plongez le tube mousseur
de lait dans un pot contenant du lait. Ensuite, bougez le pot à lait de haut en bas jusqu'à
obtenir la mousse souhaitée, puis appuyez sur le bouton 13. La distribution s'arrêtera après
un temps maximum de 90 secondes. (Figure M)
À la fin de chaque distribution, nettoyez toujours le tube mousseur et la buse avec un chiffon
mouillé.
19
Français

FONCTION SYSTÈME DE REFROIDISSEMENT
Cet appareil est équipé d'un système de refroidissement du circuit hydraulique, qui permet,
après chaque distribution de vapeur, de distribuer immédiatement de café, à peine la
lumière verte rallumée de manière fixe. Dans cette phase de refroidissement, il est possible
que quelques gouttes d'eau tombent dans le bac recueille-gouttes, ce qui est tout à fait
normal.
DISTRIBUTION D'EAU CHAUDE (figures A-M-O) (si présent)
Surtout ne touchez jamais la buse de distribution de l'eau chaude avec les mains afin
d'éviter des brûlures désagréables. Orientez-la dans la bonne position en agissant sur le
levier de commande de la buse de distribution d'eau chaude 2.
Pour obtenir de l'eau chaude, effectuez les opérations suivantes :
Placez une tasse au-dessous de la buse de distribution d'eau 3.
Version Lux (figure M) :
Tenez pressée la touche 13 tout au long de la distribution et relâchez-la une fois la quantité
désirée atteinte ; l'arrêt est toutefois prévu après 30 s.
BAC DE RÉCUPÉRATION DES DOSETTES PLEIN (figure A)
La machine est préréglée pour une quantité maximale de dosettes correspondant à 12
distributions. Une fois cette valeur atteinte, la DEL rouge 9 s'allume en clignotant rapidement
pour indiquer le besoin de vider le bac 5-6-7 ; retirez-le et videz son contenu, puis réinsérez-le
de manière stable (allumage de la DEL verte, l'opération doit durer au moins 5 secondes
pour autoriser la réinitialisation du logiciel).
ATTENTION : Le décompte des dosettes usées est remis à zéro à chaque extraction du
bac d'une durée supérieure à 5 secondes.
MANQUE D'EAU (FIGURE P)
Version Lux :
Cette condition est signalée par l'éclairage du voyant lumineux rouge 9 de manière fixe. La
machine terminera de toute façon les distributions de café en cours (la dose de sélection
des solubles garantira une longueur de distribution de 100 ml), tandis que les distributions de
vapeur et d'eau se termineront immédiatement.
Avertissement : Avant de remplir le réservoir, débranchez l'appareil du réseau électrique.
20
Français

FONCTION CARTE À PUCE (figure B) (si présente)
Cette fonction permet de gérer les distributions au moyen d'un système de paiement en
utilisant la carte à puce 19.
PROGRAMMATION DES DOSES (figure B) (si présente)
Uniquement pour la version Lux :
FONCTIONS DE SÉCURITÉ DU VOLET ET DU BAC
Le volet d'introduction des dosettes est équipé de deux dispositifs de sécurité, l'un électrique
et l'autre mécanique, qui empêchent le fonctionnement normal de la machine lorsque le
volet est ouvert.
La protection électrique empêche la rotation du porte-dosette, cette condition n'étant
avertie (la DEL rouge clignote) qu'après avoir appuyé sur le bouton de la distribution
souhaitée, tandis que la protection mécanique empêche l'ouverture du volet pendant la
distribution. Si lors de la distribution le bac est extrait, celle-ci est tout de suite interrompue. En
fermant le bac, la machine annulera le cycle de distribution en cours.
NETTOYAGE ET ENTRETIEN
NETTOYAGE APRÈS L'EMPLOI (FIG. Q)
Débranchez toujours la machine avant de la nettoyer. N'IMMERGEZ JAMAIS LA MACHINE
DANS L'EAU.
- Nettoyez la machine avec un chiffon mouillé avec de l'eau, puis essuyez soigneusement.
- Placez toujours la machine sur des surfaces dégraissées et sèches.
Les machines fabriquées par sgl italia ont une série de paramètres préréglés pour chaque
distribution. La modification des paramètres de doses est possible uniquement après avoir
activé la fonction d'auto-apprentissage des doses. La machine sort d'usine avec la fonction
non activée, pour l'activer, suivre la procédure décrite tout de suite :
A) Lorsque la machine est éteinte, appuyez sur le premier bouton de café (10) et allumez la
machine au moyen de l'interrupteur général, en maintenant le bouton de café (10) toujours
pressé pendant plus de 5 secondes, depuis l'allumage de la machine ;
B) Durant ces 5 secondes aucun voyant ne s'allumera, ensuite le voyant (9) vert s'allumera
en clignotant rapidement, ce qui indique l'état d'activation de la fonction d'autoapprentissage ; puis relâchez le bouton (10) et l'appareil, une fois la position de veille
rétablie, sera prêt à l'emploi, sans avoir besoin de l'éteindre et de le rallumer.
Il est possible d'effectuer l'opération inverse, c'est-à-dire désactiver la fonction d'autoapprentissage en suivant les opérations « A » et « B » décrites ci-dessus sauf que le
clignotement rapide du voyant (9), décrit dans le « point B », sera en couleur rouge, ceci
signifie que l'auto-apprentissage sera désactivé.
Une fois la fonction d'auto-apprentissage activée, il est possible de modifier les réglages
des doses « court/allongé/sélection des solubles » selon la procédure de programmation
suivante : Allumez la machine, assurez-vous qu'il y a de l'eau dans le réservoir et rendez la
machine prête à l'emploi. Avant de programmer les doses, laissez s'écouler au moins 5
minutes après l'allumage. Insérez la dosette dans le porte-dosette, fermez le volet et
appuyez sur le bouton 10 - 11 -12 jusqu'à atteindre la dose souhaitée. Après cinq secondes,
les DEL (verte et rouge) et le voyant 9 commenceront à clignoter alternativement pour
signaler l'état de programmation en cours. Une fois la dose souhaitée atteinte, relâchez le
bouton ; seule la DEL verte restera allumée pour signaler la sortie de l'état de
programmation. Attendez quelques secondes, puis programmez au besoin l'autre
sélection de café (les réglages peuvent se répéter jusqu'à atteindre les doses souhaitées). Il
est conseillé de réaliser une vérification finale des doses réglées.
L'appareil sort d'usine avec les doses préréglées.
21
Français

- Enlevez la grille 6, retirez et videz le bac 5 / 7.
- Retirez le tube mousseur de lait 4 (opération à réaliser après chaque préparation de
cappuccino) d'une légère traction vers le bas.
- Si le tube 3 est bouché, il est possible de déboucher très soigneusement le trou de
distribution à l'aide d'une aiguille.
- Pour nettoyer le porte-dosette, il est possible d'effectuer un cycle à vide de café. Lisez le
paragraphe " Préparation du café ".
- Lavez avec de l'eau chaude et du détergent pour vaisselle toutes les parties déposées ;
rincez-les soigneusement et remontez-les.
PÉRIODES D'INACTIVITÉ DE LA MACHINE
Si l'appareil restera inutilisé pendant une longue période, il est recommandé de :
- L'éteindre et de débrancher les raccordements électriques;
- Vider le réservoir d'eau.
Il est également recommandé d'éteindre quotidiennement l'appareil lorsqu'il n'est pas
utilisé, afin d'économiser de l'énergie ; en effet, lors du rallumage, la machine reprend
rapidement la température optimale de fonctionnement (environ 2-3 minutes).
NETTOYAGE DU BAC RECUEILLE-GOUTTES (figure Q)
Le bac 7 doit être rincé soigneusement afin d'enlever toute trace de café. Il est possible de
le laver avec de l'eau chaude et du détergent pour vaisselle liquide, ou bien avec une
poudre spécifique pour enlever toute trace de café.
RÉSERVOIR D'EAU (figure P)
Le réservoir 16 doit être nettoyé hebdomadairement avec un détergent pour vaisselle
liquide.
L'eau du réservoir doit être remplacée tous les jours. Utilisez de préférence de l'eau de bonne
qualité, avec un faible contenu en minéraux ; il ne faut pas utiliser de l'eau distillée ou
déminéralisée.
FILTRE ADOUCISSEUR (FIG. R) (non inclus)
L'accessoire adoucisseur développé pour cet appareil n'est pas inclus dans l'emballage de
la machine au moment de l'achat, mais il est possible de l'acheter à part. Le contenu de
l'emballage est le suivant :
- étrier de fixation et positionnement de l'adoucisseur 22 ;
- adoucisseur 23 ;
- mode d'emploi de l'adoucisseur.
L'adoucisseur sert à traiter environ 50 litres d'eau (1 500 distributions), après quoi il faut le
remplacer.
IMPORTANT : Il est conseillé d'utiliser l'adoucisseur. Les dommages causés par le calcaire ne
sont pas couverts par la garantie.
Le fabricant décline toute responsabilité pour des dommages causés par l'inobservance
des règles susmentionnées.
EN CAS DE NÉCESSITÉ ET POUR DES OPÉRATIONS N'ÉTANT PAS DÉCRITES DANS CE MANUEL,
ADRESSEZ-VOUS AU CENTRE D'ASSISTANCE LE PLUS PROCHE.
Le fabricant se réserve le droit d'apporter à tout moment des modifications techniques
ou esthétiques sur la machine pour des raisons commerciales ou de production.
22
Français

Tableau récapitulatif des signalisations
*Pour rétablir le fonctionnement de la machine, il faut l'éteindre et la rallumer. Si l'anomalie persiste, il faut demander l'intervention d'un technicien.
ÉTATS DE LA MACHINE
SIGNALISATIONS
Allumage de la machine
(phase de réchauffement)
DEL verte DEL rouge
DEL bleue (uniquement version
munie de carte à puce)
Clignotement lent de la
DEL
Clignotement lent de la
DEL
Clignotement lent de la
DEL
Clignotement lent de la
DEL
Clignotement lent de la
DEL
Clignotement lent de la
DEL
Clignotement lent de la
DEL
Clignotement lent de la
DEL
Clignotement lent de la
DEL
Clignotement lent de la DEL
lorsqu'une distribution est
demandée
DEL éclairée fixe
DEL éclairée fixe
DEL éclairée fixe
Distribution de café
Distribution d'eau chaude
Distribution de vapeur
Volet ouvert
Bac ouvert
Bac plein
Réservoir vide
Crédits sur le point
de s'épuiser
Crédits épuisés
Anomalie de fonctionnement*
Clignotement lent de la
DEL
Veille
23
Français

Problème Causes possibles Solution
La machine ne s'allume
pas. Voyant 9
éteint.
La machine ne distribue
pas.
Le café n'est pas
distribué
correctement.
Sortie d'eau par le bac
recueille-gouttes.
Aucune distribution
d'eau chaude ou
vapeur.
Le café est distribué par
gouttes.
Le cappuccino est peu
crémeux.
Machine bloquée
(allumée mais
incapable d'effectuer
des distributions).
! Machine débranchée du
réseau électrique.
! Problème électrique.
! Anomalies signalées par le
clignotement du voyant 9.
! Dosette mal placée.
! Haut niveau d'eau dans le
bac.
! Buse de distribution bouchée.
! Distributeur de café bouché.
! Le lait n'est pas assez
froid.
! Buse de distribution de
vapeur bouchée.
! Demande de distribution
lorsque le volet est ouvert
pendant quatre fois
consécutives.
! Fonctionnement incorrect du
porte-dosette.
! Branchez la machine au
réseau électrique. Pour cela,
lisez le paragraphe «
Installation ». Le cas échéant,
adressez-vous à un centre
d'assistance agrée.
! Contrôlez que les données
indiquées sur la plaquette
correspondent à celles du
réseau électrique.
! Consultez le tableau «
Signalisations ».
! Attendre la fin de la distribution
de café réglée et refaire la
procédure avec une nouvelle
dosette. Pour cela, lisez le
paragraphe « Préparation du
café ».
! Videz le bac et reprenez
l'utilisation normale. Pour cela,
lisez le paragraphe «
Nettoyage du bac recueillegouttes ».
! Nettoyez la buse de
distribution eau chaude /
vapeur à l'aide d'une aiguille
(opération à réaliser lorsque la
machine est éteinte.)
! Effectuez un cycle de lavage
du distributeur de café. Pour
cela, lisez le paragraphe «
Mode d'emploi de la machine
».
! Utilisez toujours du lait à la
température du
réfrigérateur.
! Nettoyez le tube. Pour cela,
lisez le paragraphe «
Nettoyage après l'emploi ».
! Anomalies signalées par le
clignotement simultané de la
DEL rouge et de la DEL verte.
Éteignez et rallumez l'appareil.
Si le problème persiste,
contactez le centre
d'assistance le plus proche.
Résolution des problèmes
Ce tableau contient les solutions aux problèmes pouvant se présenter. En cas de pannes non incluses
dans ce tableau, contactez le centre d'assistance agrée le plus proche.
24
Français


595807700 - 01 - 02/09
sgl italia srl ad unico socio
Industria elettrodomestici
Direzione e coordinamento di N & W Global Vending SpA
Via Cocito, 23 - 14040 Castelnuovo Calcea (AT) - Italy
Tel. +39.0141.957281 Fax +39.0141.957302
www.sgl-italia.com
 Loading...