

SEWOO LK-P12B User Manual
All specifications are subject to change without notice
USER’S MANUAL
MODEL : LK-P12B
SEWOO TECH CO.,LTD.
374-2, Gajang-dong, Osan-si, Gyeonggi-do, 447-210, Korea
TEL : +82-31-459-8200 FAX : +82-31-459-8880
www.miniprinter.com
P12B Rev. B 12/13

1
RISK OF EXPLOSION IF BATTERY IS REPLACED BY AN INCORRECT TYPE.
DISPOSE OF USED BATTERIES ACCORDING TO THE INSTRUCTION

2
3
Table of Contents
1. Safety Caution
4
2.
Unpacking
6
3. Product overview 7
4. Installation & Usage 8
4-1. Display 8
4-2. Installing the Battery 9
4-3. Removing the Battery 10
4-4. Charging the Battery 11
4-5. Using the Vehicle Charger 12
4-6. Installing Belt Clip 13
4-7. Roll Paper installation 14
4-8. Peel Mode 15
4-9. Shoulder Strap Installation 17
4-10. Diagnostic Test 18
5. Peripherals Connection 20
5-1. Bluetooth Connection 20
5-2. Interface Cable Connection 21
6. Printer Cleaning 22
6-1. PrintHead Cleaning 22
6-2. Platen Roller Cleaning 23
7. Pritner Specication 24
7-1. Specication 24
8. CPCL Command Compatibilit
y
26
9. ESC/POS Command Compatibilit
y
29
10. ZPL Command Compatibilit
y
31

4
5
WARNING
Failure to follow these instructions could result in re, electric shock,
or other injuries, or property damage
Failure to follow these instructions could result in re, electric shock,
or other injuries, or property damage
(Turn off the power at installation,
transportation, wiring and inspection.)
(You may get hurt and it can be broken
when it falls)
(Potential risk of re or unit malfunction)
(Potential risk of re or unit malfunction)
(Potential risk of discoloration or
electric shock)
(Potential risk unit malfunction, electric
shock or re. When the product needs
to be repaired, please contact in place
where you ordered.inspection.)
Dealer
Do not pull out the power plug to turn off
the product.
Do not install the product in uneven or
inclined surface.
If the product that needs to be repaired,
please contact in place where you ordered.
Please do not give excessive shock.
Keep product away from the water and
other material.
Do not disassemble, repair or modify the
product.
CAUTION
For higher reliability and safety, consider the following precautionary measures.
Read and follow the instructions carefully before running of the product.
1. Safety Caution
WARNING
Failure to follow these instructions could result in re, electric shock,
or other injuries, or property damage
Indication
Prohibition
(Potential risk of electric shock or re)
(Potential risk of electric shock or re) (Potential risk of electric shock or re)
(Potential risk of electric shock or re)
Must follow
Do not disassemble
Unplug the power from the
outlet
Grounding to prevent electric
shock
Do not handle the product
with wet hands
Do not pull or touch the power plug with
wet hands.
Do not bend the wire and do not allow the
wire to be pressed by heavy object.
If a power plug is broken or a plug is cut or
worn, do not use it.
Do not overload the power plug into one
outlet.
6
7
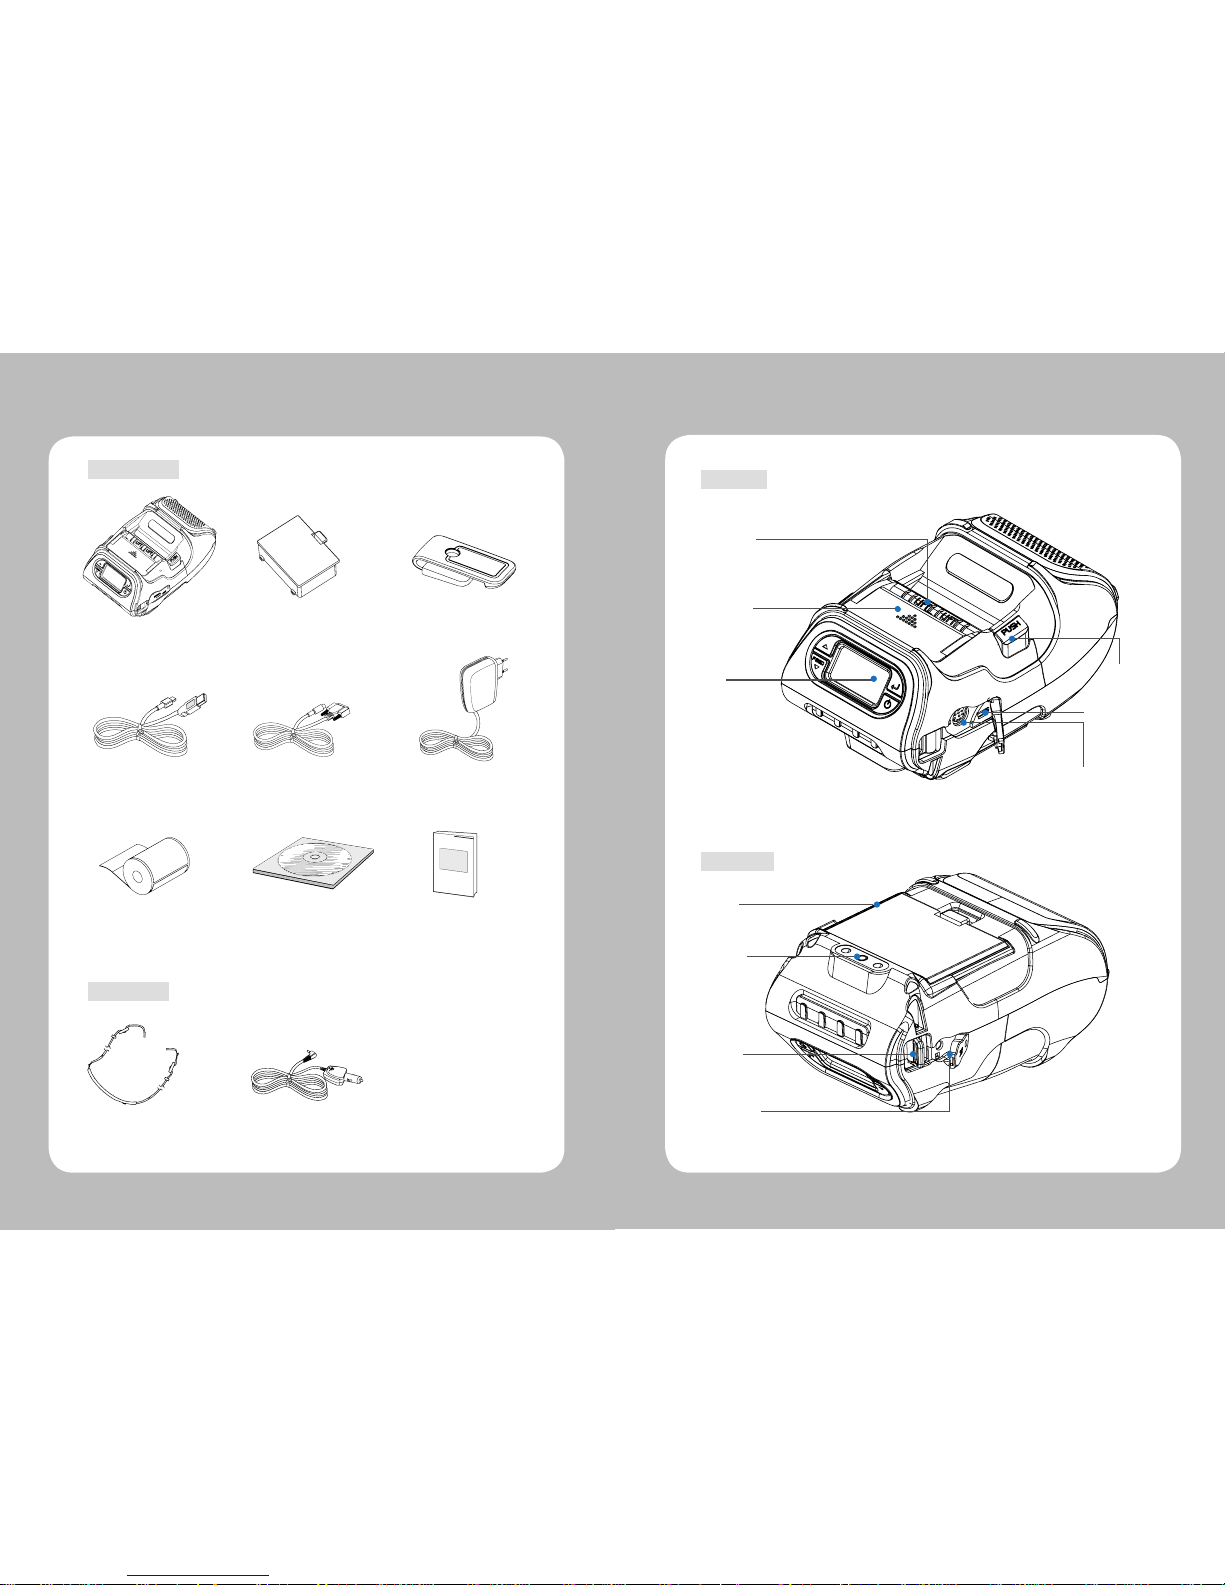
2. Unpacking
Optional
Standard
SHOULDER
STRAP RING
3. Product overview
CHARGER
CONNECTOR
COVER OPEN
BUTTON
Front
Bottom
PEELER BODY
PEELER WING
BATTERY
BELT CLIP
CONNECTOR
SERIAL
USB
DISPLAY
Printer
Battery
Belt Clip
Recharger
CD
USB Cable
Quick Reference
Paper
Shoulder Strap
Serial cable
Cigar jack
8
9
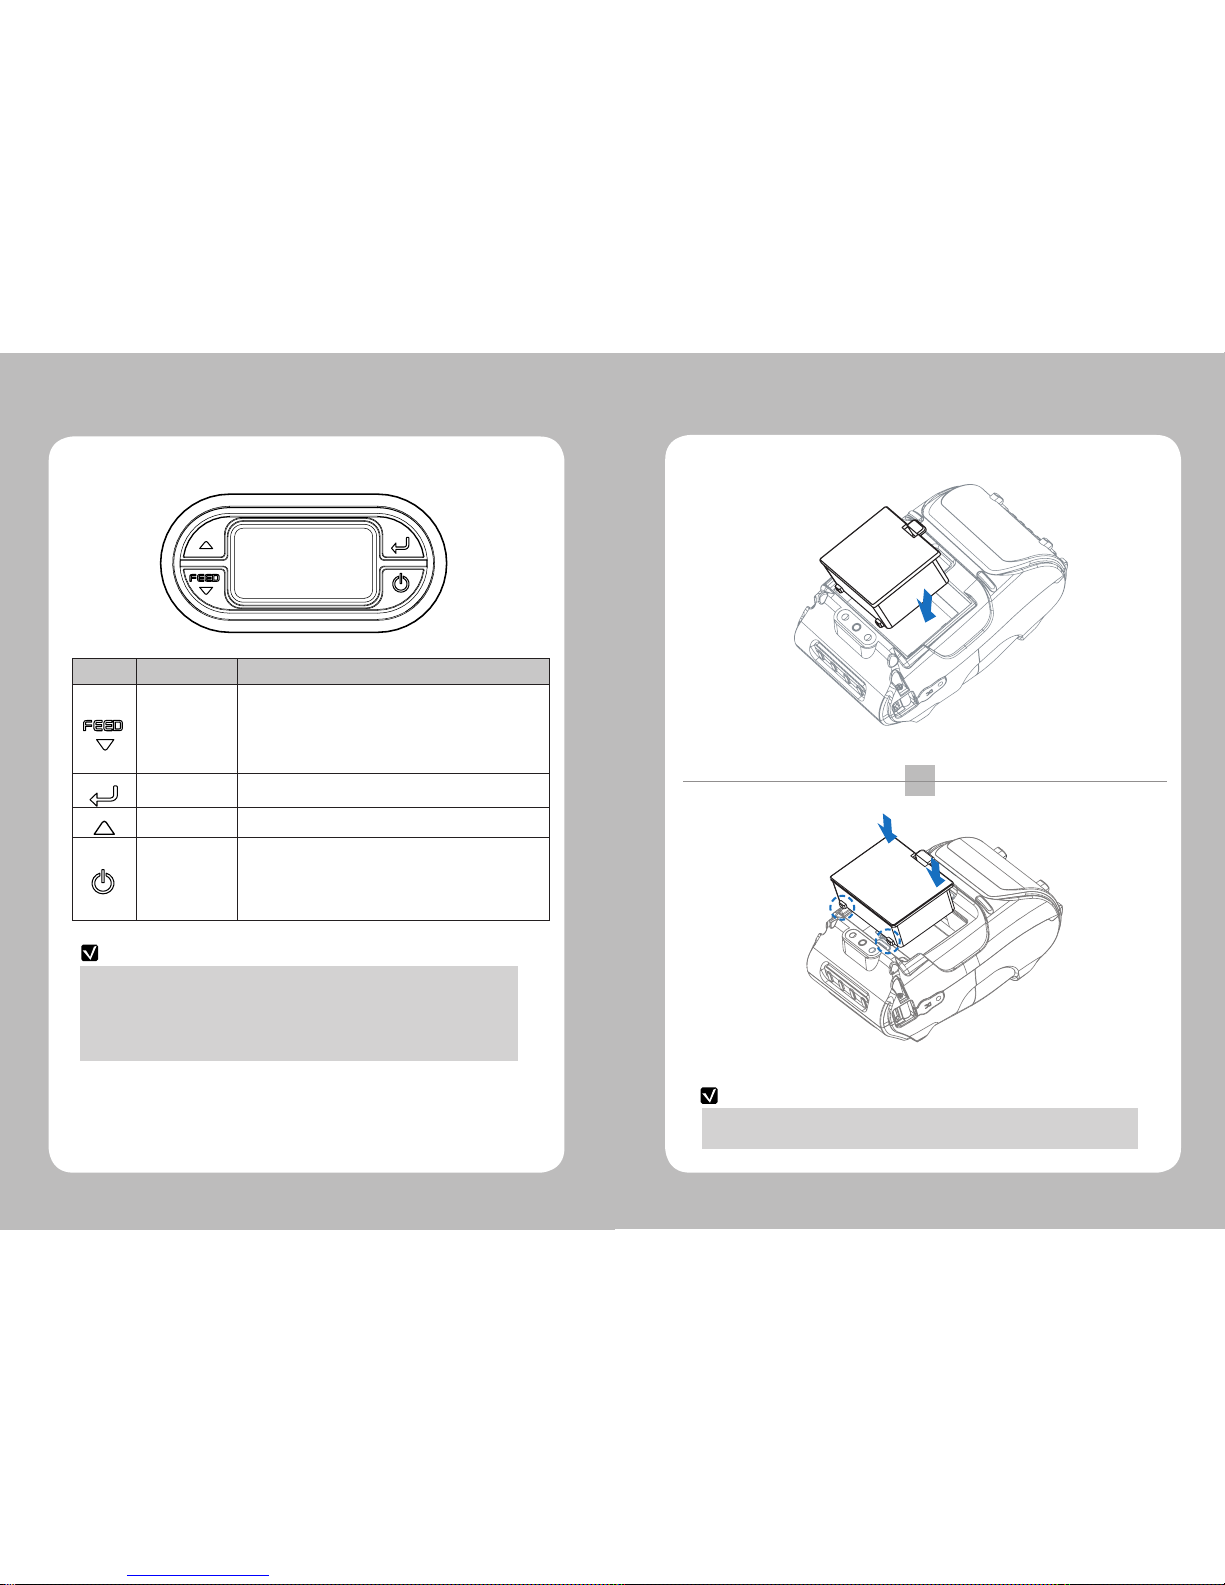
4-1. Display
4. Setting Up the Product
Button Name function
Paper Feed/
Down button
Advances the supply. Clears error message.
Moves down through menu options.
1. Refer to “3-10” for Diagnostic Test information.
2. Refer to the service manual regarding Hexadecimal
Dumping.
Enter button
Selects the highlighted menu option.
Up button
Moves up through menu options.
Power
button
Turns the printer on and off. Press to turn
power on. Press for three seconds to turn power off.
Wakes the printer from sleep mode.
NOTE
1. The battery status LEDs indicate amount of power remaining. Actual run-time
remaining depends on factors such as the contents of output,
distance to computer, etc.
2. When the battery level is very low, high density printing can result in the printer
switching o during printing resulting in possible loss of data.
4-2. Installing the Battery
NOTE
Remove the battery. Insert the battery as shown.
1
2
Replace the battery.
You must fully charge the battery when you receive the printer.
Batteries can be charged in the printer or in an optional external cradle
 Loading...