

Severtson Spirit Series Instruction Manual
Spirit Series In-Ceiling Recessed Flush Mount Screens
Instruction Manual for Standard Electric and Tension Deluxe
Thank you for purchasing your Severtson In-Ceiling Projection Screen.
Please read the full manual before installation and use. Keep this manual for future reference.
1
Warning
1. Install projection screen in a location where screen material and electronic parts cannot get wet.
2. Read instruction manual to prevent accidental damage from incorrect installation methods or operation.
3. Keep screen material and electronic parts far from heat sources such as radiators, portable heaters, fireplaces,
or loudspeakers.
4. Only plug into three pronged outlets with a ground.
5. Accessories supplied by authorized Severtson dealers are acceptable to use with this electric projection screen.
Using other brand accessories with this screen voids the warranty.
6. Unplug the screen when not in use for long periods of time. Disconnect from power during electrical storms.
7. Any unauthorized repairs or custom changes to the screen material, casing or electronics void the warranty of
the screen.
8. Once the screen is connected to a power source the screen is an electrical device and should be treated as one.
9. Before installing this product, please make sure the structure can support up to four times the weight of the
product to prevent product from falling and causing damage and injuring someone.
10. There is no need to check parts inside the screen casing. To prevent electrical shock, do not open end caps.
2
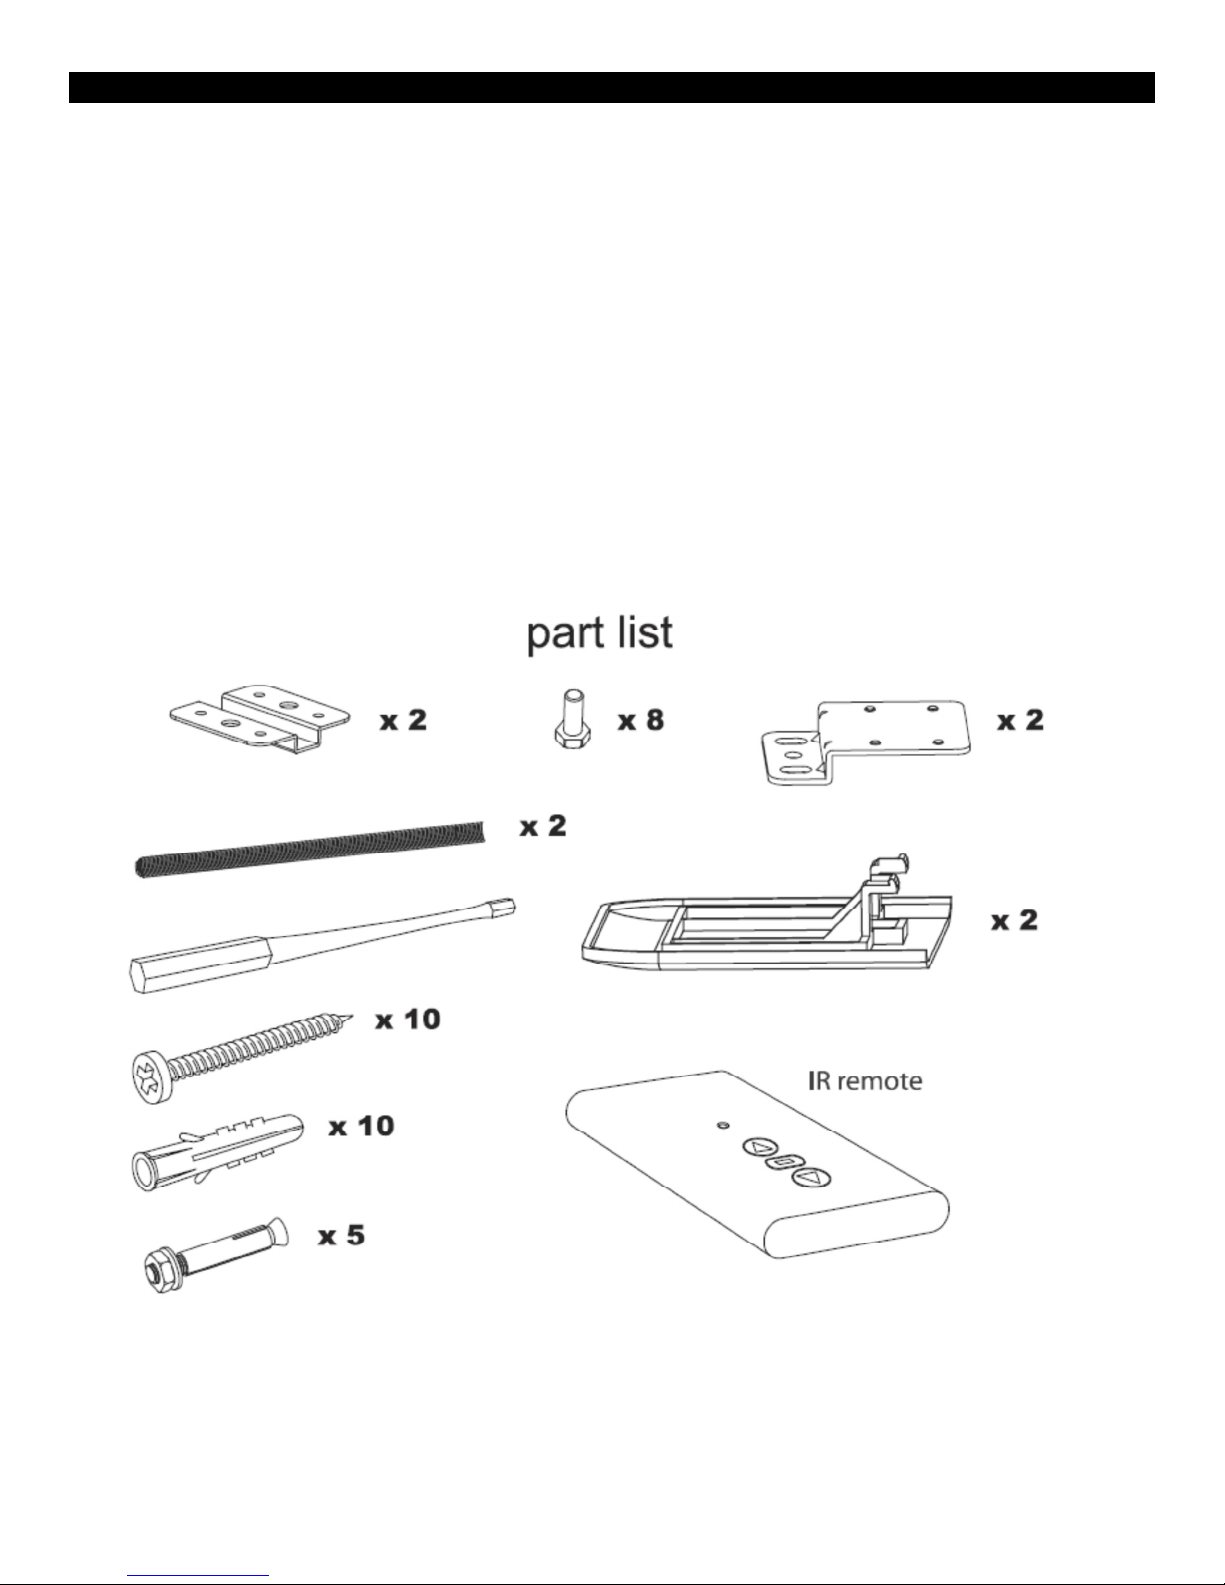
Preparation for the install
When installing the projection screen it is important that you choose the correct fasteners for your ceiling type.
Choosing the wrong fasteners can cause damage to the screen and severely injure a person. If you do not know the
proper fastener type then it is required to hire a professional.
Find a proper location on your ceiling to install the projection screen. Make sure that no load bearing supports will be
cut or compromised during the installation.
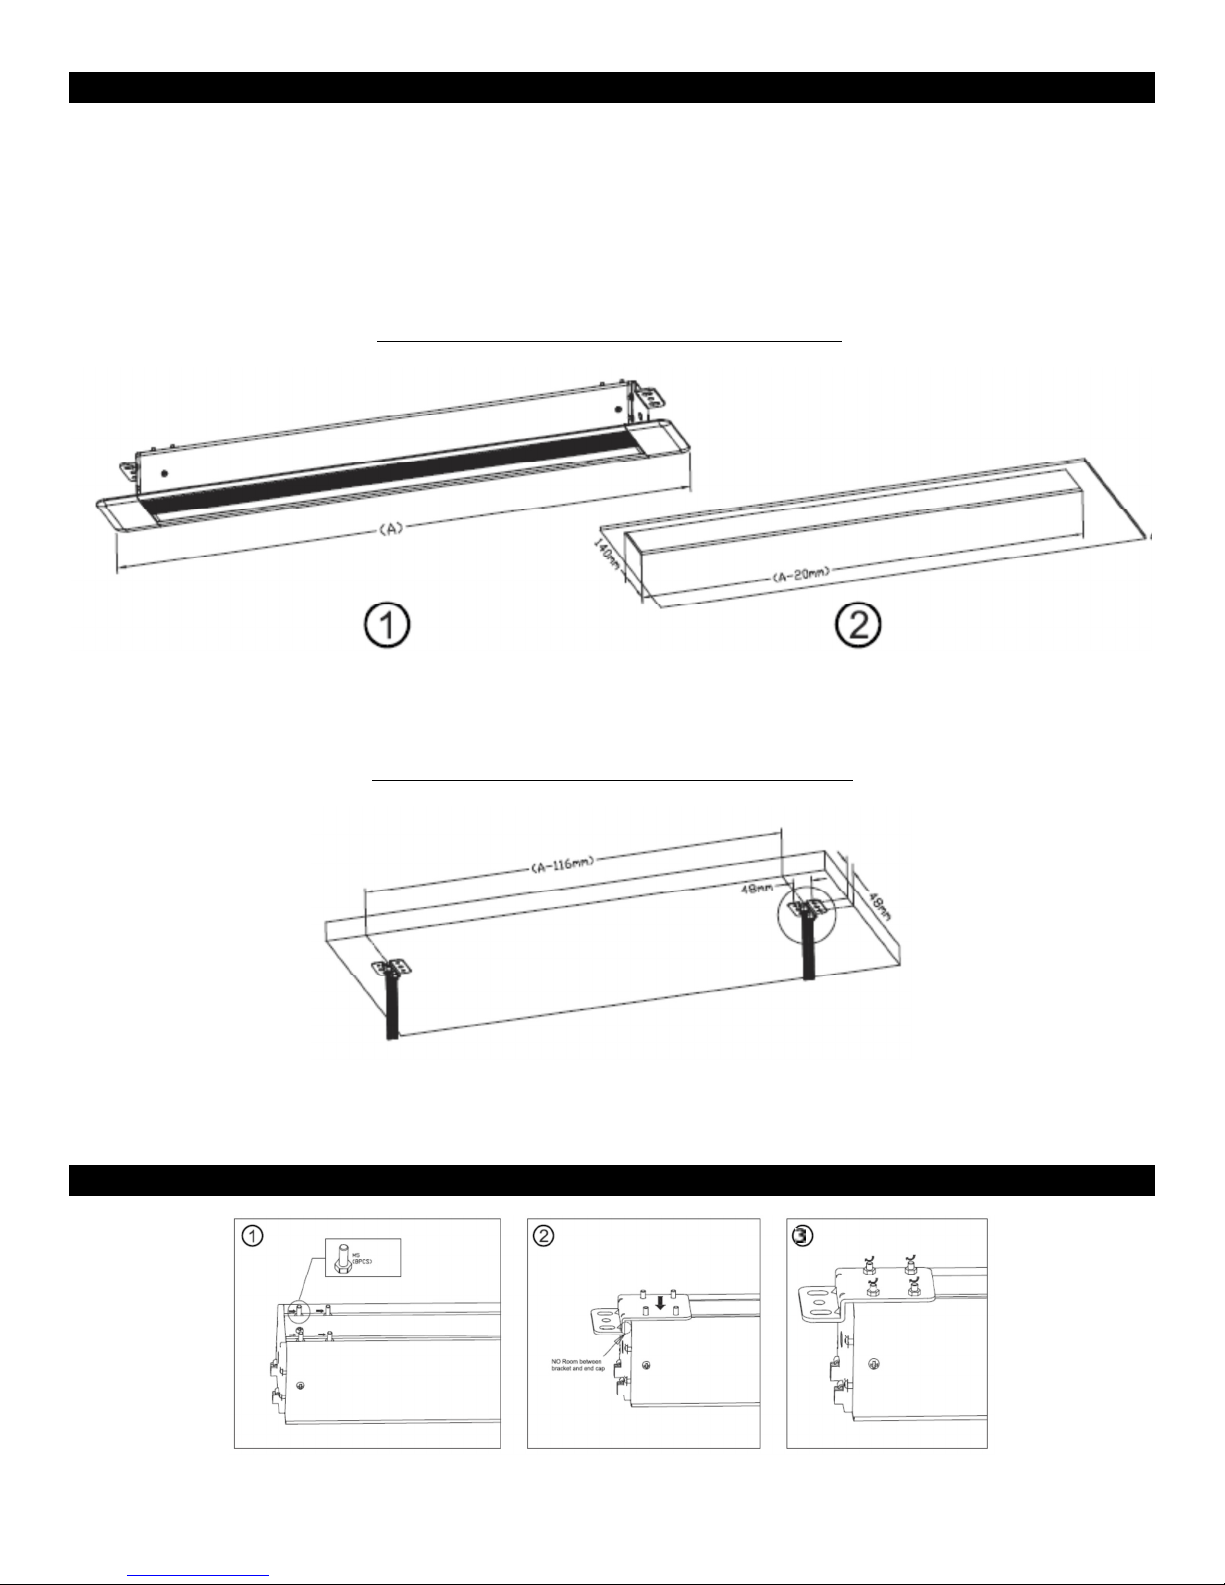
Prepare to cut a hole in your ceiling as shown below.
Measure the total width of the case (A) and subtract 20mm(3/4”) for your hole length. The hole width will be
140mm(5 ½”). After you have identified your location and have measured twice you are now prepared to cut once.
Measure and mark the place for your ceiling brackets.
The distance between the center part of each ceiling bracket is (A) and subtract 116mm(4 ½”). The ceiling mounting
bracket holes are placed 48mm(1 7/8”) apart.
Installation
3
 Loading...