

Severtson GE169XXX, GT169XXX, GE1610XXX, GT1610XXX, GT235XXX Instruction Manual
...
Instruction Manual for
Cinema & Tension Deluxe Electric Series
MODEL: GE169XXX, GE1610XXX, GT169XXX, GT1610XXX, GT235XXX
Thank you for purchasing a Severtson projection screen.
Before use, please read the instructions carefully. After installation, store the instructions for future reference.
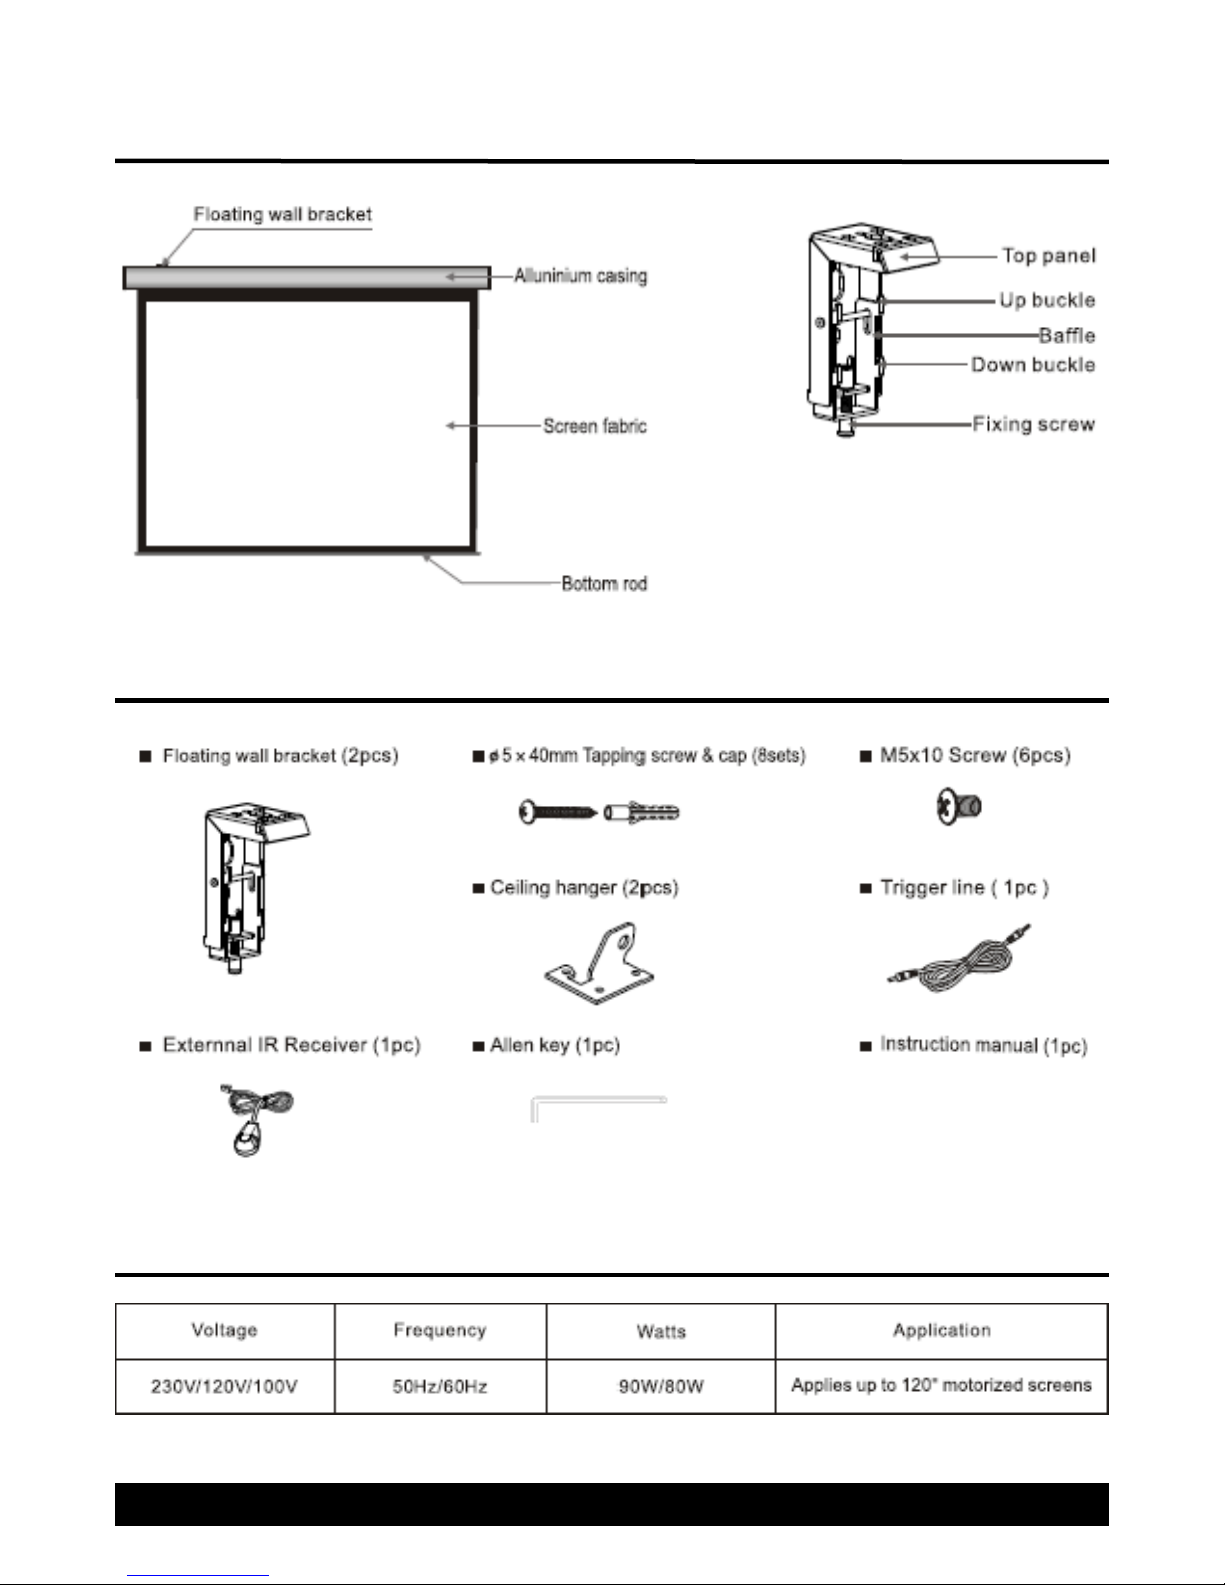
Overview
Parts Included
Motorized Screen Power Specifications
2
Installation Instructions
Take out all the parts from the packaging and verify that all the parts have been included, then
follow the steps below to install the screen.
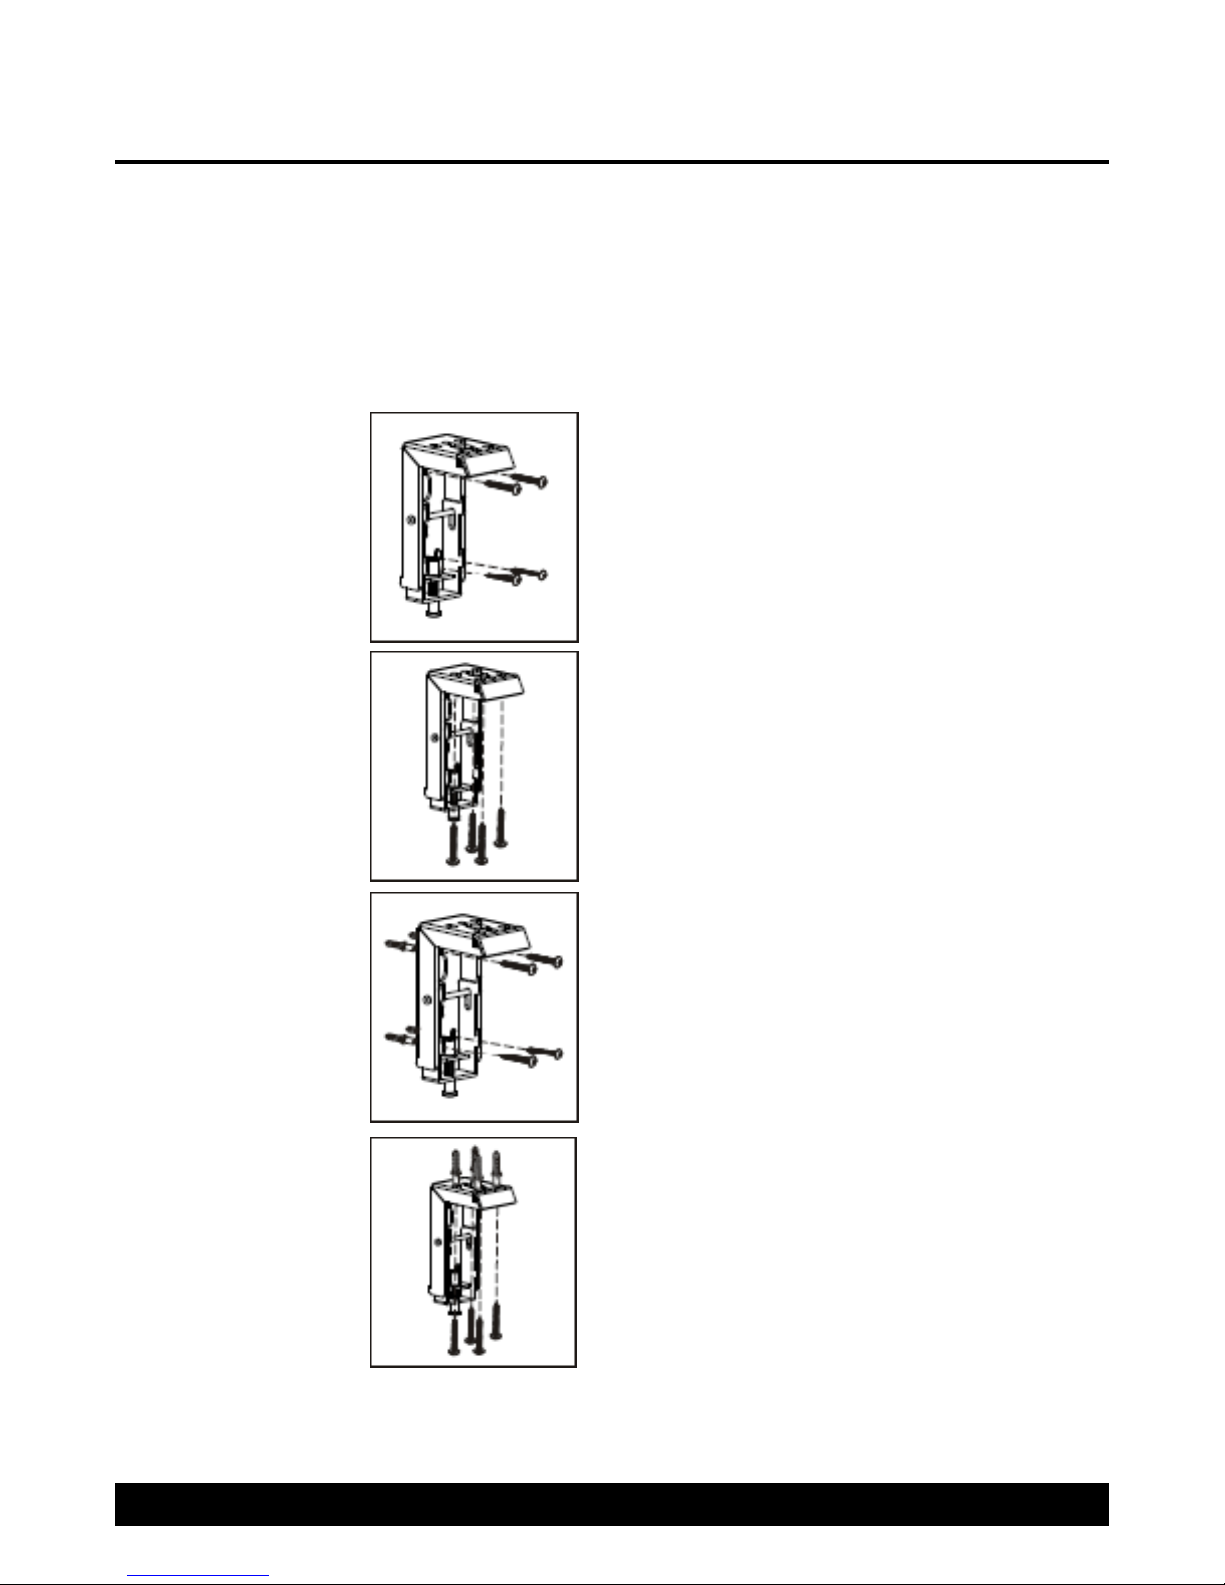
1. Determine the desired mounting method and follow the correct procedure for installing the
mounting brackets (See Table-1 Below). Make sure the brackets are level before securing
them in place. For hanging by wire installation, see instructions on page 4.
Mounting Method Screw Placement Instructions
Using four wood screws (5x40mm) for each
bracket, secure each bracket to the wall. Make
Wood Framed Wall
sure that the screws penetrate into the studs
of the framed wall, otherwise the brackets will
not be securely fastened.
Wood Ceiling
Concrete Wall
Concrete Ceiling
Using four wood screws (5x40mm) for each
bracket, secure each bracket to the ceiling.
Make sure that the screws penetrate into the
studs of the ceiling, otherwise the brackets will
not be securely fastened.
Use an electric drill to drill four holes for each
bracket and hammer the provided tapping anchors into each hole. Secure the brackets onto
the wall by fastening the tapping screws
(5x40mm) to the tapping anchors.
Use an electric drill to drill four holes for each
bracket and hammer the provided tapping anchors into each hole. Secure the brackets onto
the ceiling by fastening the tapping screws
(5x40mm) to the tapping anchors.
Table-1
3
 Loading...