

Page 1
www.severin.com
RK 2425
DE Gebrauchsanweisung
GB Instructions for use
FR Mode d’emploi
NL Gebruiksaanwijzing
ES Instrucciones de uso
IT Manuale d’uso
DK Brugsanvisning
SE Bruksanvisning
FI Käyttöohje
PL Instrukcja obsługi
GR Oδηγίες χρήσεως
RU Руководство по эксплуатации
Reiskocher 4
Rice cooker 10
Cuiseur à riz 15
Rijstkoker 21
Arrocera 27
Cuoci riso 33
Riskoger 39
Riskokare 44
Riisikeitin 49
Garnek do gotowania ryżu 54
Συσκευή μαγειρέματος ρυζιού 60
Рисоварка 66
Page 2

GB
Rice cooker
Dear Customer,
Before using the appliance, please read the
following instructions carefully and keep this
manual for future reference. The appliance
must only be used by persons familiar with
these instructions.
Connection to the mains supply
The appliance should only be connected to
an earthed socket installed in accordance
with the regulations. Make sure that the
supply voltage corresponds with the voltage
marked on the rating label. This product
complies with all binding CE labelling
directives.
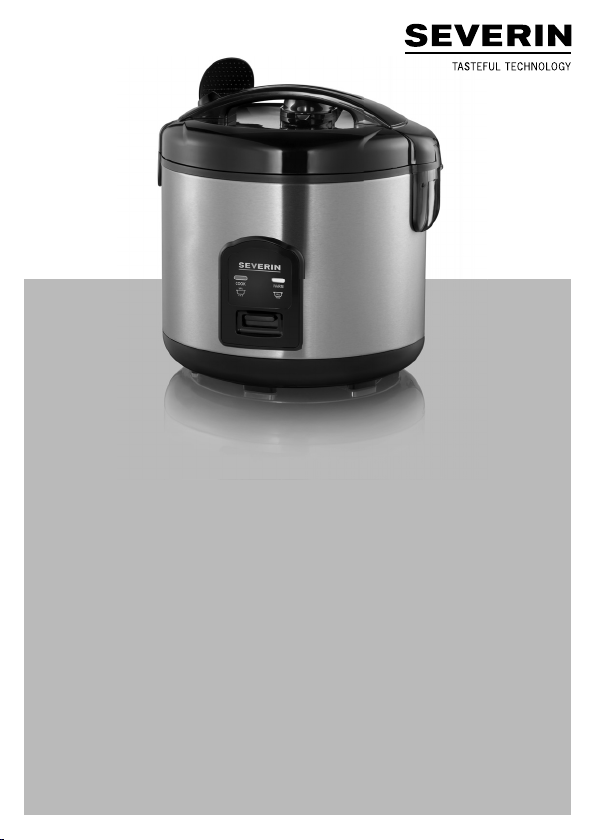
Familiarisation
1. Lid with handle
2. Steam release
3. Condensation collection container
4. Cooking indicator light (red)
5. Keep-warm indicator light (yellow)
6. Selector switch
7. Steaming tray
8. Rice pan
9. Spoon and holder
10. Measuring cup (Cup)
11. On/Off switch (on the left side on the
unit)
12. Power cord with connector
13. Lid release
Important safety instructions
∙ In order to avoid hazards,
and to comply with safety
requirements, repairs to this
10
electrical appliance or its
power cord must be carried
out by our customer service.
If repairs are needed,
please send the appliance
to our customer service
department (see appendix).
∙ Before cleaning the
appliance, ensure it is
disconnected from the
power supply and has
cooled down completely.
For detailed information
on cleaning the appliance,
please refer to the section
Cleaning and care.
∙ To avoid the risk of electric
shock, do not clean the
appliance with liquids or
immerse it.
Caution: Any misuse
∙
can cause severe personal
injury.
Caution: The rice pan
∙
heats up during operation
and will remain warm for
some time afterwards.
Page 3

∙ This appliance is intended
for domestic or similar
applications, such as the
- staff kitchens in shops,
offi ces and other similar
working environments,
- agricultural working
environments,
- by customers in hotels,
motels etc. and similar
accommodation,
- in bed-and breakfast type
environments.
∙ This appliance may be used
by children (at least 8 years
of age) and by persons with
reduced physical, sensory
or mental capabilities, or
lacking experience and
knowledge, provided they
have been given supervision
or instruction concerning the
use of the appliance and
fully understand all dangers
and safety precautions
involved.
∙ Children must not be
permitted to carry out any
cleaning or maintenance
work on the appliance
unless they are supervised
and at least 8 years of age.
∙ The appliance and its power
cord must be kept well away
from children under 8 at all
times.
∙ Children must not be
permitted to play with the
appliance.
∙ Caution: Keep any packaging materials
well away from children – such materials
are a potential source of danger, e.g. of
suffocation.
∙ Every time the appliance is used, the
main body including the power cord as
well as any attachment fi tted should
be checked thoroughly for any defects.
Should the appliance, for instance, have
been dropped onto a hard surface, or if
excessive force has been used to pull the
power cord, it must no longer be used:
even invisible damage may have adverse
effects on the operational safety of the
appliance.
∙ Do not allow the housing or its power
cord to touch hot surfaces or to come into
contact with any heat sources.
∙ During operation, the appliance must be
placed on a level surface, resistant to
heat and water.
∙ Caution: Danger of scalding.
During operation, hot steam is emitted
through the steam release valve in the
11
Page 4

lid. Exercise extreme caution: There is a
risk of scalding, especially when opening
the lid.
∙ Always ensure that the steam release is
fi tted with the vents facing away from the
handle.
∙ Caution: When removing the rice, use
only the spoon provided. In order to
prevent damage to the surface-coating of
the rice pan, do not use sharp or pointed
objects; if the coating is damaged, the
rice pan can no longer be used.
∙ Attention: Only the rice pan must be
fi lled with water. Do not, under any
circumstances, pour water into the
housing.
∙ Do not leave the appliance unattended
during use.
∙ Always connect the power cord to the rice
cooker fi rst, before it is plugged into a wall
socket.
∙ Always switch off and remove the plug
from the wall socket
- in cases of malfunction,
- after use,
- during cleaning.
∙ When removing the plug from the wall
socket, never pull on the power cord;
always grip the plug itself.
∙ Do not allow the power cord to hang free;
the cord must be kept well away from hot
parts of the appliance.
∙ No responsibility is accepted if damage
results from improper use, or if these
instructions are not complied with.
Before using for the fi rst time
Before the appliance is used for the fi rst
time, remove the stickers from the rice pan
and clean the appliance as described in the
section Cleaning and care.
12
Measuring cup
The measuring cup (Cup) contains two
scales. One shows the content in millilitres
(ml), the other one in ‘cups’. The maximum
content (180 ml or 1 cup) is reached if the
cup is completely full.
For cooking rice, only a full cup measure is
required.
Rice pan with CUP and L-scales
∙ The CUP scale is suitable for measuring
rice with the measuring cup (Cup)
provided:
∙ Use the measuring cup to put the desired
quantity of rice into the rice pan (between
2 and 10 cups).
∙ Fill the rice pan with water up to the
appropriate CUP scale marking on inside
the pan. If, for example, 4 cups of rice
have been put in, the water level should
reach the 4-mark on the CUP scale inside
the pan.
∙ The L-scale permits measuring the
amount of rice using any standard
measuring cup:
∙ Fill the measuring cup with 0.6 -1.8 l of
rice.
∙ Fill the rice pan with water up to the
appropriate L-scale marking inside the
pan. If, for example, 1 L of rice has been
put in, the water level should reach up
to the 1.0 mark on the L-scale inside the
pan.
Temperature control
The appliance uses an integral temperature
control. Once the water has completely
evaporated during the cooking process, the
unit automatically switches to the keep-warm
function.
Page 5

Selector switch
The selector switch can be used to switch
between the cooking and keep-warm
functions.
The switch cannot be operated unless the
rice pan is correctly fi tted inside the housing.
Operation
Cooking rice
∙ Open the lid of the rice cooker by holding
down the lid release, and pulling the lid up
by its handle.
∙ Place the rice pan inside the appliance.
∙ Put the desired quantity of rice into the
rice pan (see Rice pan with CUP and
L-scales).
∙ Add water to the rice until the appropriate
mark on the Cup or L-scale inside the
pan is reached.
∙ Add salt as desired.
∙ Close the lid.
∙ Connect the power cord to the rice cooker
fi rst, and then insert the plug into the wall
socket.
∙ Turn the On/Off switch on the left side on
the appliance on.
∙ Push the selector switch down.
∙ The cooking process begins as indicated
by the red cooking indicator light.
∙ Once the water has completely
evaporated during the cooking process,
the unit automatically switches to the
keep-warm function. The red cooking
indicator light goes out and is replaced by
the yellow keep-warm indicator light.
∙ The rice should then be left to stand for
further 5 minutes before being removed
from the pan.
∙ Switch off the appliance and remove the
plug from the wall socket.
∙ Use the lid release to open the lid.
∙
Danger of scalding. Beware of
escaping steam.
Useful hints on cooking rice
∙ Always check the packaging for
information on whether the rice needs to
be washed before cooking.
∙ Should you prefer softer rice, check the
packaging for specifi c information about
steamed rice, or pre-soak the rice in water
for approximately 15 minutes before
cooking.
∙ This rice cooker is not suitable for
preparing rice pudding or creamed rice,
as the milk will burn.
Steaming
Meat, potatoes and vegetables can be
steamed using the steaming tray.
∙ Put 3 cups (Cup) of water into the rice
pan. This amount of water is suffi cient to
steam for 30 minutes.
∙ Put the prepared food into the steaming
tray and place it into the rice pan.
∙ Close the lid.
∙ Connect the power cord to the rice cooker
fi rst before inserting the plug into the wall
socket.
∙ Turn the On/Off switch on the left side on
the appliance on.
∙ Push the selector switch down.
∙ The cooking process begins.
∙ The steaming time largely depends on
the type of food used. While caulifl ower
and carrots require a steaming time of
approx. 15 minutes, zucchini only need
10 minutes.
∙ In order to prevent the steam from
escaping during the steaming process,
the lid should be kept closed.
∙ Once the desired steaming time has
elapsed, switch the appliance off and
13
Page 6

remove the plug from the wall socket.
∙ Use the lid release to open the lid.
∙ Danger of scalding. Beware of
escaping steam.
∙ Use an oven cloth to remove the
steaming tray carefully from the rice pan.
∙ Any remaining water in the rice pan may
be poured out once the appliance has
suffi ciently cooled down.
Condensation collection container
∙ The condensation container at the rear of
the lid collects any condensation forming
on the inside of the lid.
∙ The container must be emptied after each
cycle of use.
∙ Simply pull the container out, empty and
then re-insert it.
Cleaning and care
∙ Before cleaning, disconnect the appliance
from the mains and wait until it has
completely cooled down.
∙ To avoid the risk of electric shock, do
not clean the appliance with liquids or
immerse it.
∙ Do not use abrasives or harsh cleaning
solutions.
∙ The appliance should be cleaned only
with a damp, lint-free cloth.
∙ The rice pan, steaming tray and the
spoon can be cleaned with hot water.
Note: These parts are not dish-washer
safe.
∙ Empty the condensation container.
∙ The lid can be cleaned outside and inside
with a damp, lint-free cloth.
∙ The steam release should be removed
after each cycle of use und thoroughly
rinsed. Ensure that it is completely dry
before being replaced.
∙ Always ensure that the steam release is
14
fi tted with the vents facing away from the
handle.
Disposal
Devices marked with this symbol
must be disposed of separately
from your household waste, as
they contain valuable materials
which can be recycled. Proper disposal
protects the environment and human health.
Your local authority or retailer can provide
information on the matter.
Guarantee
This product is guaranteed against defects
in materials and workmanship for a period
of two years from the date of purchase.
Under this guarantee the manufacturer
undertakes to repair or replace any parts
found to be defective, providing the product
is returned to one of our authorised service
centres. This guarantee is only valid if the
appliance has been used in accordance with
the instructions, and provided that it has not
been modifi ed, repaired or interfered with
by any unauthorised person, or damaged
through misuse.
This guarantee naturally does not cover
wear and tear, nor breakables such as
glass and ceramic items, bulbs etc. This
guarantee does not affect your statutory
rights, nor any legal rights you may have
as a consumer under applicable national
legislation governing the purchase of goods.
If the product fails to operate and needs
to be returned, pack it carefully, enclosing
your name and address and the reason for
return. If within the guarantee period, please
also provide the guarantee card and proof
of purchase.
 Loading...