

Seuic AUTOID 6L W Series User Manual

JiangSu SEUIC Technology Company Co., Ltd.
SEUIC
User Manual
AUTOID®6L W Series Mobile Computer
Standard WINDOWS CE Product User Manual
Version 1.1

JiangSu SEUIC Technology Company Co., Ltd.
Copyright Notice
The information contained in this manual is provided in the form of
“maintaining the status quo”, subjected to amendments without prior
notice.
The company makes no warranty of the contents contained in this manual,
including but not limited to the implied warranty of merchantable quality
and fitness for a particular purpose. The company is not responsible for
errors contained in this manual or accidents and incidental losses due to
supply, implementation or use of this manual or the examples in it.
Software copyright 2012 SEUIC Company
This manual contains proprietary information for copyright protection.
All Copyrights Reserved. No part of this manual may be photocopied,
republished, adapted or translated without the prior written permission of
SEUIC, except for being allowed by copyright law. The copyright of this
manual and related application software are owned by the company, and
are protected under the People’s Republic of China and international
copyright laws.
All other trademarks and copyrights are the property of their respective
owners.
If you need more product information and support, please contact our

JiangSu SEUIC Technology Company Co., Ltd.
sales representative, or directly log on to our website.
Jiangsu SEUIC Technology Co., Ltd.
Company address: NO.15 XinghuoRoad,Nanjing New & High Technology
Industry Development Zone,210061,Nanjing City,JiangsuProvince,China.
Tel: 86-25-52261298
Fax:86-25-52268995
Company official website:www.seuic.com
Product website:www.chinaautoid.net
Mailbox:AUTOID@seuic.com
Service Hotline :400-777-0876
1
Usage Note
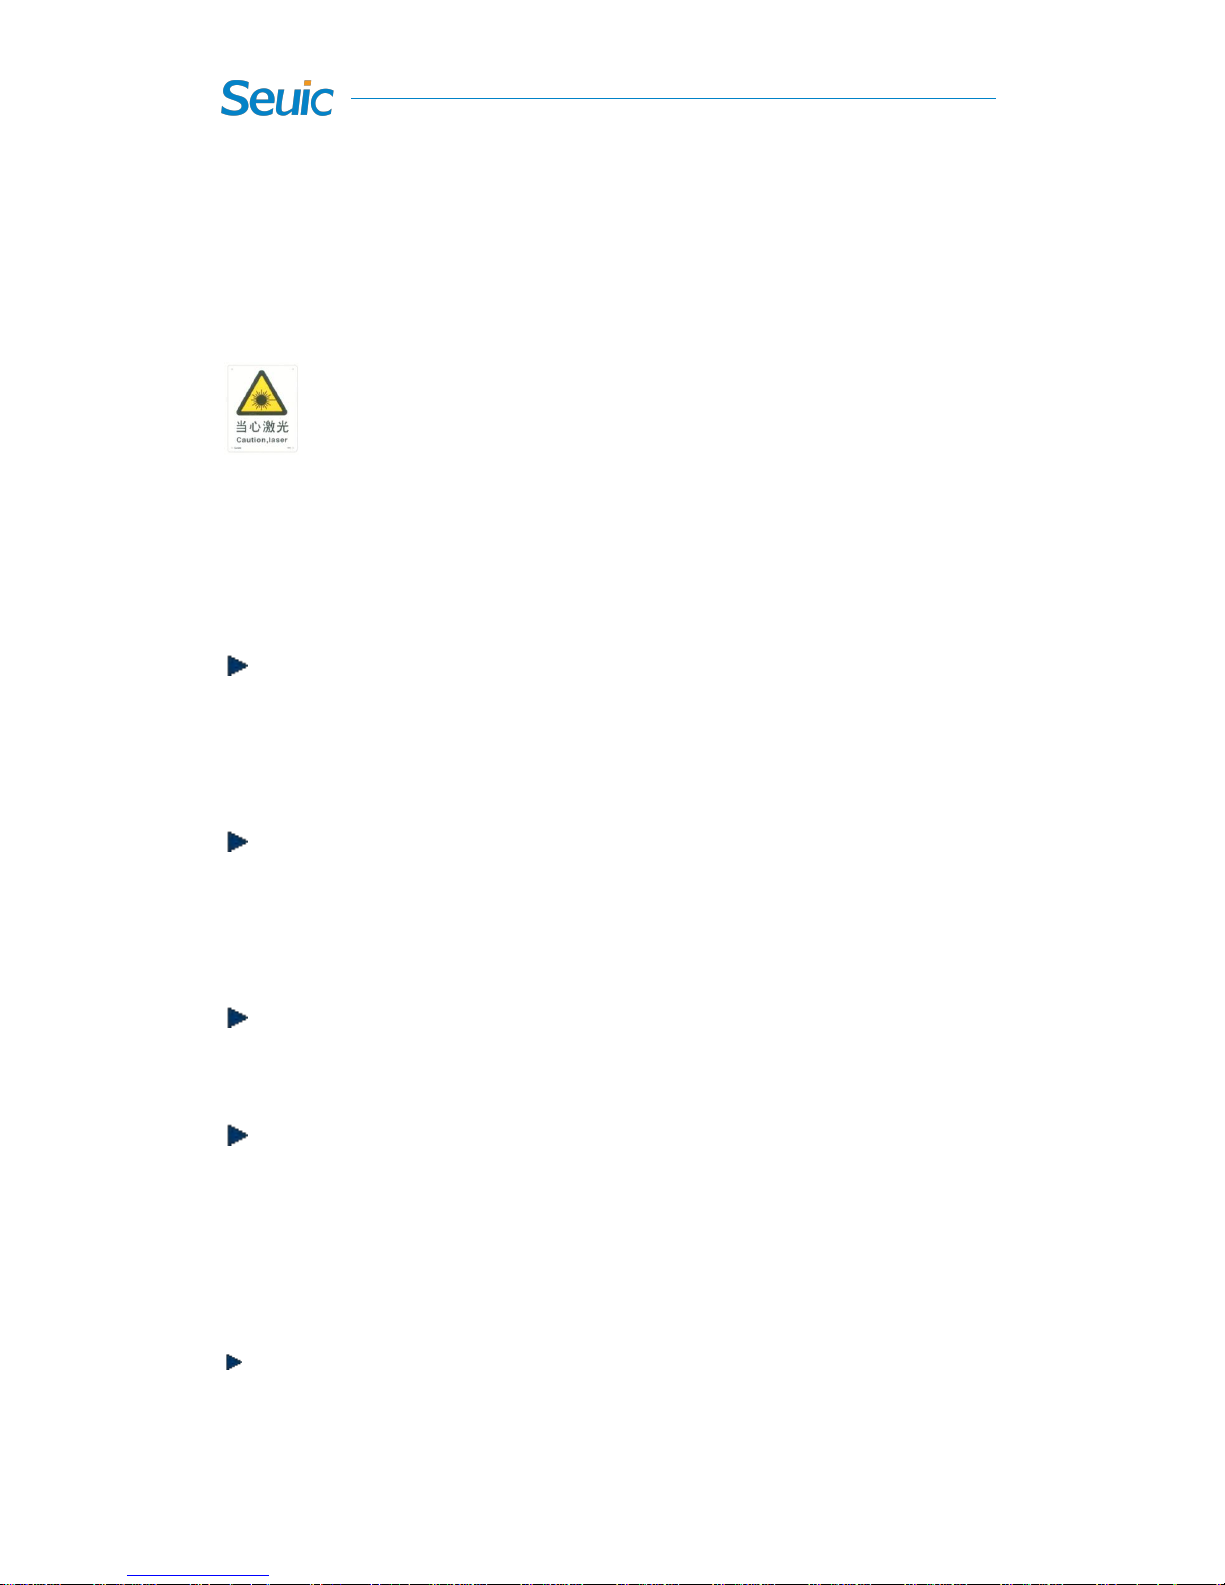
Caution for Laser scan engines
Laser radiation; users do not stare into beam. Class II laser
product.
Safety notes
Please use the Seuic-approved battery or charger (including the
transformer). Due to the different circuit designs, use of incompatible
battery or charger may present a risk of fire or explosion.
Do not arbitrarily disassemble the device, or insert foreign objects
into the device. Otherwise, the device may be short circuited or the
circuit may be damaged.
Do not place the device, battery and charger (including the
transformer) close to fire source.
Please follow the current national regulations to properly dispose of
or recycle the used batteries.
Maintenance notes
This product is waterproof and dust-proof, but it still should be kept
away from being operated in the environment of extremely high or

2
low temperature. Please refer to temperature and humidity standards
in the product specifications.
Do not press the screen hard. When working with the AUTOID
®
device, use the supplied stylus to avoid the scratch or damage to the
screen. Please use a soft cloth moistened with a small amount of the
commercial LCD cleaner instead of spraying cleaner directly onto the
screen.
Do not use any chemical cleaning agent to clean the LCD screen.
Keep the scanning exit window clean and never use sharp objects on
the surface of the exit window.
If this product has not been used for a long time, please make sure to
download the data to the computer store, and remove the main battery.
Please separately store the device and battery pack.
It will take a long time to fully charge the battery when it is the first
time to work or recovery from storage.
In the event of device failure, please take down the situation and
information and contact with maintenance staff.

3
Document issue record
Version Issue date description
V1.0 Dec.05,2014 Complete CE6.0 English version
V1.1 Dec.23,2015 Complete CE6.0 English version

4
Contents
Usage Note
..........................................................................................................................................
1
Caution for Laser scan engines
...................................................................................................
1
Safety notes
.................................................................................................................................
1
Maintenance notes
.....................................................................................................................
1
Preface
.................................................................................................................................................
6
A6L series layout
.........................................................................................................................
8
Keyboard
.....................................................................................................................................
8
Quick Start Guide
..............................................................................................................................
11
About charging
..................................................................................................................
13
Charging time
............................................................................................................................
14
Battery power supply
................................................................................................................
15
LED indicators
............................................................................................................................
16
Reboot the system
....................................................................................................................
17
WINDOWS CE basic operations
..............................................................................................
18
First use
.....................................................................................................................................
19
Work state
..........................................................................................................................
20
Desktop
.............................................................................................................................
21
Taskbar
..............................................................................................................................
22
Start Menu
.........................................................................................................................
23
Input methods
....................................................................................................................
23
Setting and optimization
...........................................................................................................
25
Memory
.............................................................................................................................
28
System
...............................................................................................................................
29
Keyboard
...........................................................................................................................
29
Touchscreen
......................................................................................................................
31
Indicators and notifications
...............................................................................................
33
Device Name
.....................................................................................................................
34
Network and dial-up connections
.....................................................................................
35
Windows Explorer
............................................................................................................
36
About ACTIVESYNC
..............................................................................................................
37
Install MS ActiveSync
......................................................................................................
37
Sync with the computer
....................................................................................................
38
File manager
......................................................................................................................
40
Backup and Restore
..........................................................................................................
43
APPCENTER Manager
............................................................................................................
44
Remote Desktop Connection
....................................................................................................
49
Wireless
.............................................................................................................................................
52
3.1 GPRS
...................................................................................................................................
53
3.1.1 Dial-up connection
...................................................................................................
53
3.1.2Dial-up Setting
..........................................................................................................
55
3.1.3 Make new connection
..............................................................................................
56
3.2 WCDMA(3G)
................................................................................................................
61

5
3.2.1 Dial-up Connection
..................................................................................................
61
3.2.2 Dial-up Setting
.........................................................................................................
61
3.3 Wi-Fi
...................................................................................................................................
62
3.3.1 Wi-Fi Connection
.....................................................................................................
62
3.3.2 WirelessManager
.....................................................................................................
64
3.4 Bluetooth(BT)
................................................................................................................
66
Data Capture
......................................................................................................................................
68
4.1 1D Scan
...............................................................................................................................
68
4.2 2D Scan
...............................................................................................................................
73
4.3 RFID Automatic Recognition
.............................................................................................
82
4.4 Camera
................................................................................................................................
86
4.5 GPS
.....................................................................................................................................
88
Accessories
........................................................................................................................................
89

6
Preface
You are welcome to purchase the AUTOID® 6L W seriesmobile
computers developed by Jiangsu SEUIC Technology Co., Ltd.
The AUTOID® 6L W series Mobile Computer is a handhelddata capture
terminalusing the Texas Instruments, Cortex-A8-DM3710(TI) application
processor. Compared with the previous generation PXA255 /270
processor products, our new generation of TI products have the lower
power consumption and faster, stronger capability to work continuously.It
is more suitable for mobile office workersto process dataon-site.
Product design fully takes into account ergonomic requirements,
providing a full range of comfortable handling, coupled with the anti-skid
hand strap, so that mobile office workers can do their work in a
convenient, safe, efficient and relaxed way.
The purpose of this manual is to help you quickly and easily learn to use
the AUTOID®6L product. Although we have tried to ensure the accuracy
of the product screen, there may still be some differences between the
product screen and the actual screen display. Please refer to the actual
screen display of the product.
When using this manual, you will also need to see the following
additional information:

7
Tip: A description or explanation of the subject;
Related information: Extended information about the subject;
Note: Notice or warning about the subject. Please be sure to follow the
information to operate, otherwise it will have a devastating impact.
Thank you for purchasing the SEUIC product!
8
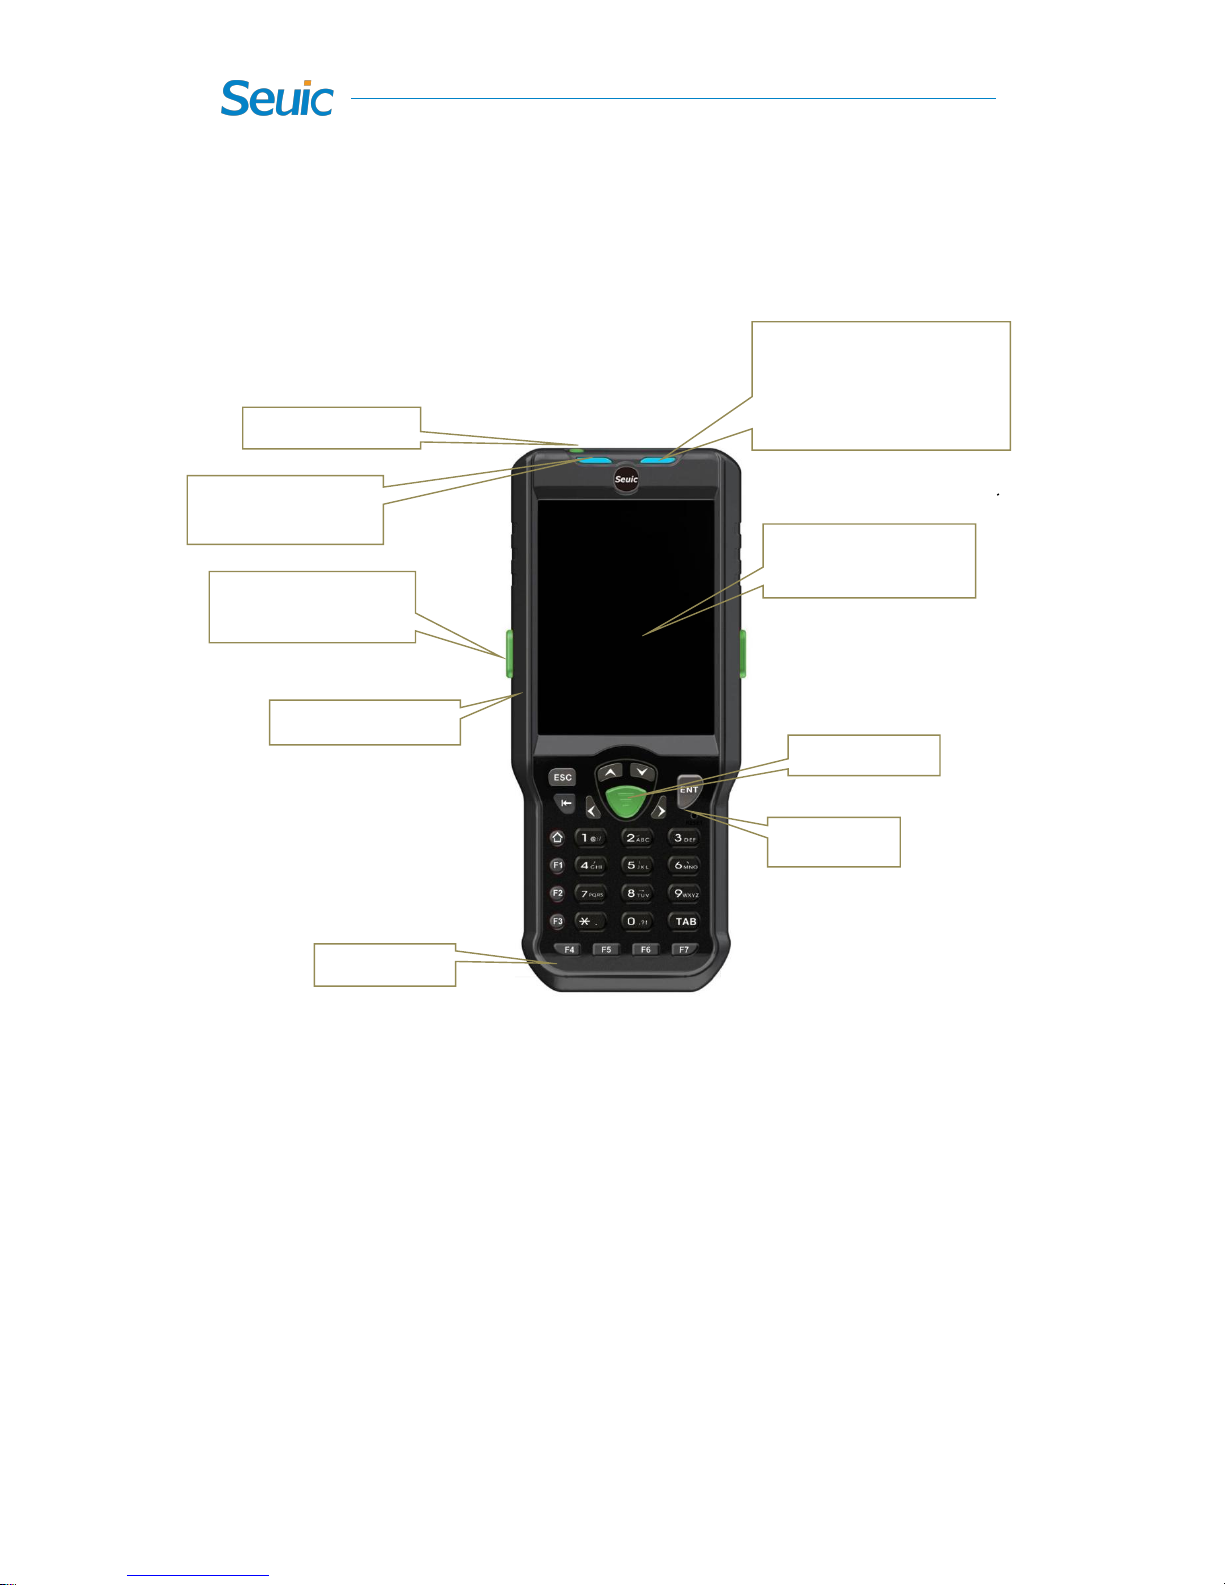
A6L series layout
Figure 1-1
Keyboard
The keyboard on the device includes 27 keys in total. The keyboard has
Scan notification
indicator
Charging indicator
Sleep breathing light
Low battery indicator
Hall detection indicator
Scan button
Reset key
USB charge port
3.5’transparent
screen
Power button
Microphone
Side-mounted scan
button
9
white, blue and orange color words and letter symbols. White words
represent main function, and blue and orange words represent as a
secondary function. Press the blue function key to achieve the blue
functions, and then press the corresponding keyboard.Press the orange
function key to achieve the orange functions, and then press the
corresponding keyboard. The functions of the keys may vary depending
on the application.
The configuration of 27-key keyboard includes the mixed English letters
and number keys, the CapsLk key, the direction keys, the function keys,
the hard and soft keyboard switch key, TAB, ESC, ENTER and so on.
Figure 1-2
Key
Function
Function description
Scan key
Scan bar code

10
Side-mounted
Scan key
Scan bar code
Home
Hard keyboard input method switch
reset
Reset the device
Enter
Confirm
#
Delete
ESC
Return or Exit
0
0 key and symbols
*
* Key for . in English and 。In Chinese
1
Number 1 key and symbols
2
Number 2 key, A. B. C in English keyboard
Stroke input method: horizontal stroke
3
Number 3 key, D. E. F in English keyboard
4
Number 4 key, G.H.I in English keyboard
Stroke input method: left-falling stroke
5
Number 5 key, J.K.L in English keyboard
Stroke input method: vertical stroke
11
6
Number 6 key, M. N. O in English keyboard
Stroke input method: right-falling stroke
7
Number 7 key, P.Q.R.S in English keyboard
8
Number 8 key, T.U.V in English keyboard
Stroke input method: horizontal hook
9
Number 9 key, W.X.Y.Z in English keyboard
Quick Start Guide
First use
Install the battery and switch the battery lock to the left side. Press the
Powerbutton and then the device will automatically boots. In the
battery-powered system working state, toggle the battery door switch and
unlock the battery door. The system automatically goes intoDeepSleep
mode and the battery door detection light is on.
Boot
You can turn on the device by pressing and holding the power button for
3s. In Deep Sleep mode, press and hold the power button for 1s to wake
up the system. If the device is powered bythe battery, make sure that the
battery door switch is closed. (If the device does not respond after
pressing the power button, you can press the reset button on the back of

12
the device to re-initialize it.).
Power off
When the device is turned on, the device will automatically turn off after
it stays idle for a preset time period. You can set the Scheduled power off
in the Power in the Control Panel. Reasonable settings will save battery
power and extend the use of time.
The end of the work; press and hold the power button for 3 seconds and
then you can choose to sleep or power offin the prompt box.
Reset
AUTOID®6L Series Reset Method:
1. Use the stylus to tap the reset button on the device keyboard to reset;
Install the battery memory card, SIM card
If you need to transport or do not use the device for a long time, please
remove the battery and then separately store the battery and device.
Note: Any improper use may affect the battery life.
1) Hold the device in one hand and turn mental buckles on two sides of
the battery cover in the other hand. Turn the left one in 90
°
counterclockwise and the right one 90°clockwise;
2) Release the battery cover, and remove the battery cover. Remove the
battery from the bottom up;

13
3) Use your finger to pull down the memory card holder;
4) Insert the memory card (microSD or microSDHC);
5) Use your finger to pull up the memory card holder to lock it up;
6) Install the SIM card as instructed;
7) Insert the battery into the battery compartment at an appropriate angle
and make sure the battery contacts are aligned with the battery
compartment;
8) Close the battery cover and rotate the left and right metal buckles in
the opposite direction while removing the battery cover.
Note: The newly unpacked battery must be charged before use.It is
recommended to prepare a main battery for contingencies in the
implementation of the task.
The device does not support the card hot plug, and you must reset the
card after plugging and unplugging it.
About charging
Due to the main battery and spare battery battery at the factory only with
a small amount of electricity used for tests, you have to use the charger to
charge the battery before using it for the first time. After installing the
main battery, directly connect the device to the power adapter to charge.
The AUTOID®6L can be not only directly charged, but also
14
compatiblewith any charge cradle you purchase.
Charging the main battery
The device can be charged via a power adapter or a standard USB cable.
The charge indicator is red while charging, then turns green when fully
charged.
Charging the battery
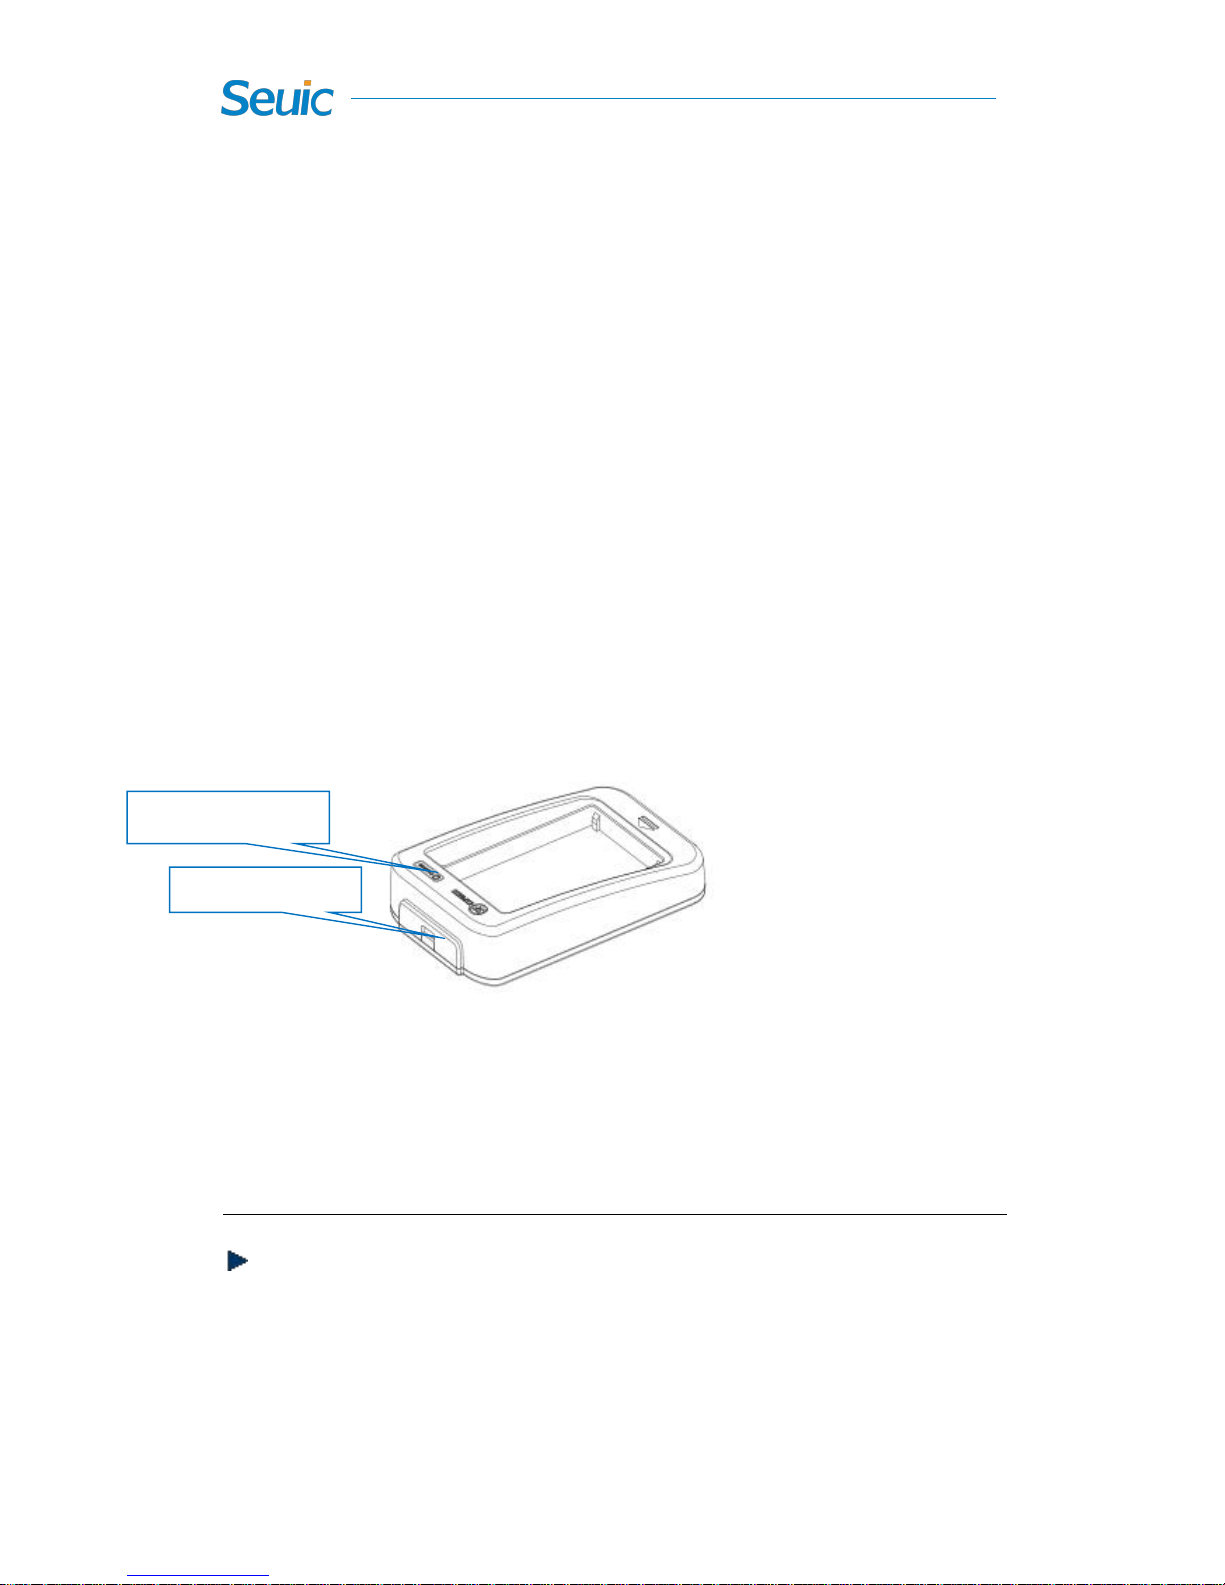
Place the battery on the single charge cradle and connect it to the power
source. The indicator in the middle of the cradle is red while charging,
then turns green when the battery is fully charged.
Figure 1-3
You can also use the 4-slot battery charger to charge the battery.
Charging time
Main battery: The main battery fully charges about 4 hours for the
first time through the adapter, and the LED indicator is solid red while
charging, then turns solid green when fully charged.
Charging indicator
Charging port

15
Spare battery: Since the spare battery power is supplied by the main
battery, it fully charges at least 24 hours for the first time and is not
necessary to be fully charged before use.
Charging temperature
The best operating temperature is room temperature 18~2500C.
The battery will not be charged if the temperature lower than-00C or
higher than 400C.
Battery power supply
If wireless network service or data capture application is enabled, the
battery power will drain quickly. Please disable some services or
functions to slow down battery power consumption.
In order to avoid the work inconvenience caused by low power of the
main battery, it is recommended that you prepare a fully charged
main battery or connect to an external power source at work.
Note: If you do not use the product for a long time, please charge the
device at least once every two months to ensure that the spare battery of
the device will not be over-discharged.

16
LED indicators
The LED lighton the top left of device is the scanning notification
light. When the red light is on, it indicates that the scan is successful.
The scan notification light is disabled in the factory default settings,
and if you want to switch it on,you can enable it in the settings of scan
application.
The backlight sensor window is on the left side of the LED indicator.
The backlight will change with the external ambient light (This
function must be set up in the Backlight before it takes effect).
In the middle is the charging indicator. The indicator is red while
charging, and then turns solid green when fully charged.
On the right side are the GSM signal light, battery door detection
indicator and low battery indicator. When the GPRS module is
enabled, the GSM signal light slowly blinks blue. It fast blinks blue
during dialing process or data communication. The red light is on
after battery installment, indicating that the switch has been loosened
or not been locked properly yet. Please check it and close it again,
otherwise the device can’t be booted. The indicator flashes red in the
normal use of the device, indicating the main battery power is less
than 15% and needs to be charged.

17
Reboot the system
If the A6L series does not respond to your input or operation, you may
need to restart the software of the A6L series.
Hot start: Use the stylus to gently click the Reset button on the device
keyboard.
Note: After the system is reset and directly enter the WINDOWS CE
desktop, the files that were not saved before are lost and those
applications that were enabled before are disabled, in which all operations
are lost as well.
Cold start: Press and hold the Power button for 3s and then the operation
prompt box will pop up. Tap Power off and press the Power button again
to reboot.
18
Figure 1-4
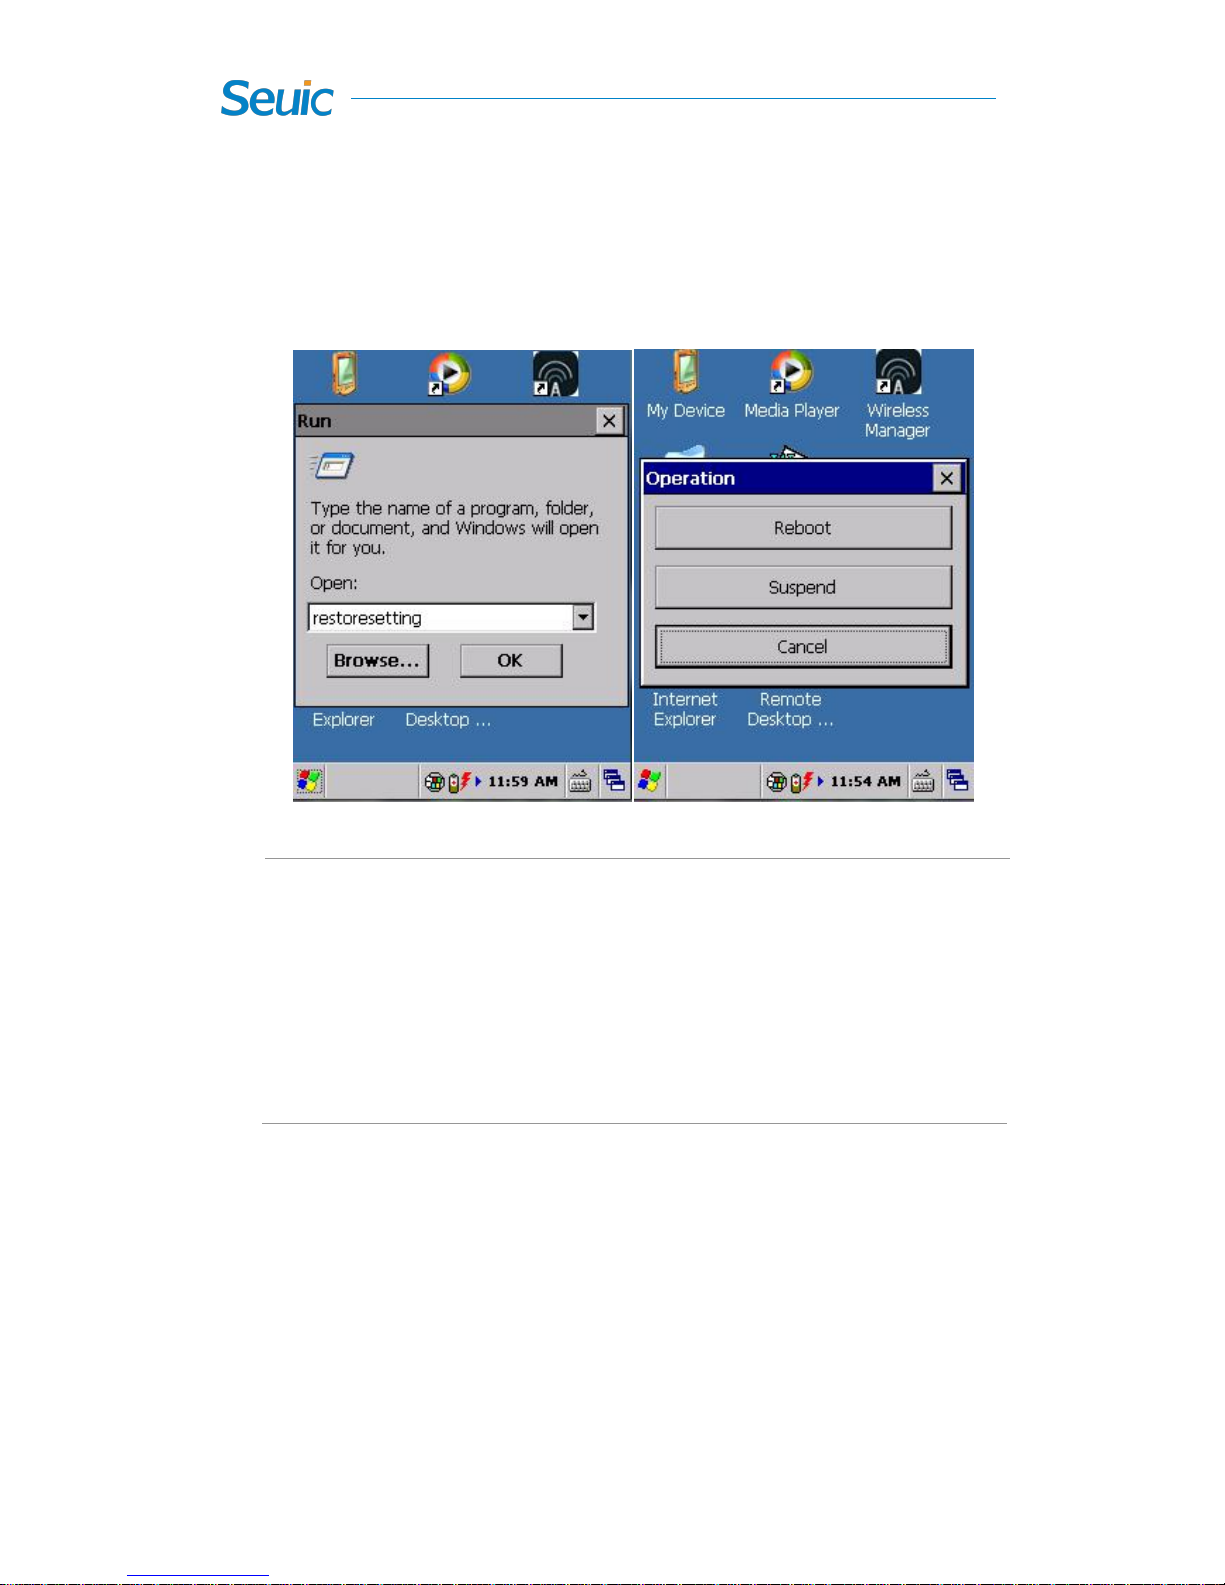
Restore the factory settings: Tap Start menu -> Run. Enter
restoresetting and then tap OK to enter the Restore Factory Settings
screen. Select Restore factory settings.
Figure 1-5
Note: After restoring the factory settings, the device will re-enter the
calibration interface and re-calibration is needed beforeentering the
desktop. The application software installed by the customer will be
lost and needs to be re-installed.
WINDOWS CE basic operations
This chapter mainly introduces the basic skills of using the AUTOID®6L
series. It is not difficult for users who are familiar with the CE system.If
you have understood the essential operations of WINDOWS CE6.0, it is

19
very easy for you to use the AUTOID®6L series products.
Double-tap the screen with the stylus to open items.
Tap and hold the stylus on the selected icon to see a list of actions
available for that item, equivalent to the mouse right click, you can
perform the action you want to perform.
Tap on the blank and drag in a list to select multiple items at a time.
Tap on this icon, in the toolbar to close the window or the running
application.
Tap on this icon, in the toolbar to save the previous settings, and
then close the window.
First use
When the AUTOID®6L series product is installed with the battery for the
first time, press the green Power button on the top left of the device to
boot with the battery cover locked. Therefore, the device has a battery
cover detection function. Only when the battery cover is properly locked
can the device be booted after pressing the Power button.
In the battery-powered system work, remove the battery cover and then
the system automatically goes into the deep sleep mode.

20
Work state
Work mode
1) You can hold and press for 1s to turn on the AUTOID®6L product
and enter the work mode.
2) In the sleep mode, you canhold and press the Power button for 1s
to wake up the system. If AUTOID®6L product is powered by the
battery, make sure that the battery cover is properly locked.
Standby mode
1) When the AUTOID®6L product is turned on, the AUTOID®6L
product automatically goes into sleep and enter into standby mode if
no operation is performed for a specified period of time.
2) When you finish work, press and hold the power button for 1s and
then the system directly goes into sleep mode.
3) When you finish work, press and hold the power button for 3s to
select the sleep system to enter sleep mode or shutdown mode.
Recommendation: You can use the Power in the Control Panel to set
the Auto sleep time on the AUTOID®6L product. Reasonable settings
will save battery power and extend the use of time.
21
Desktop
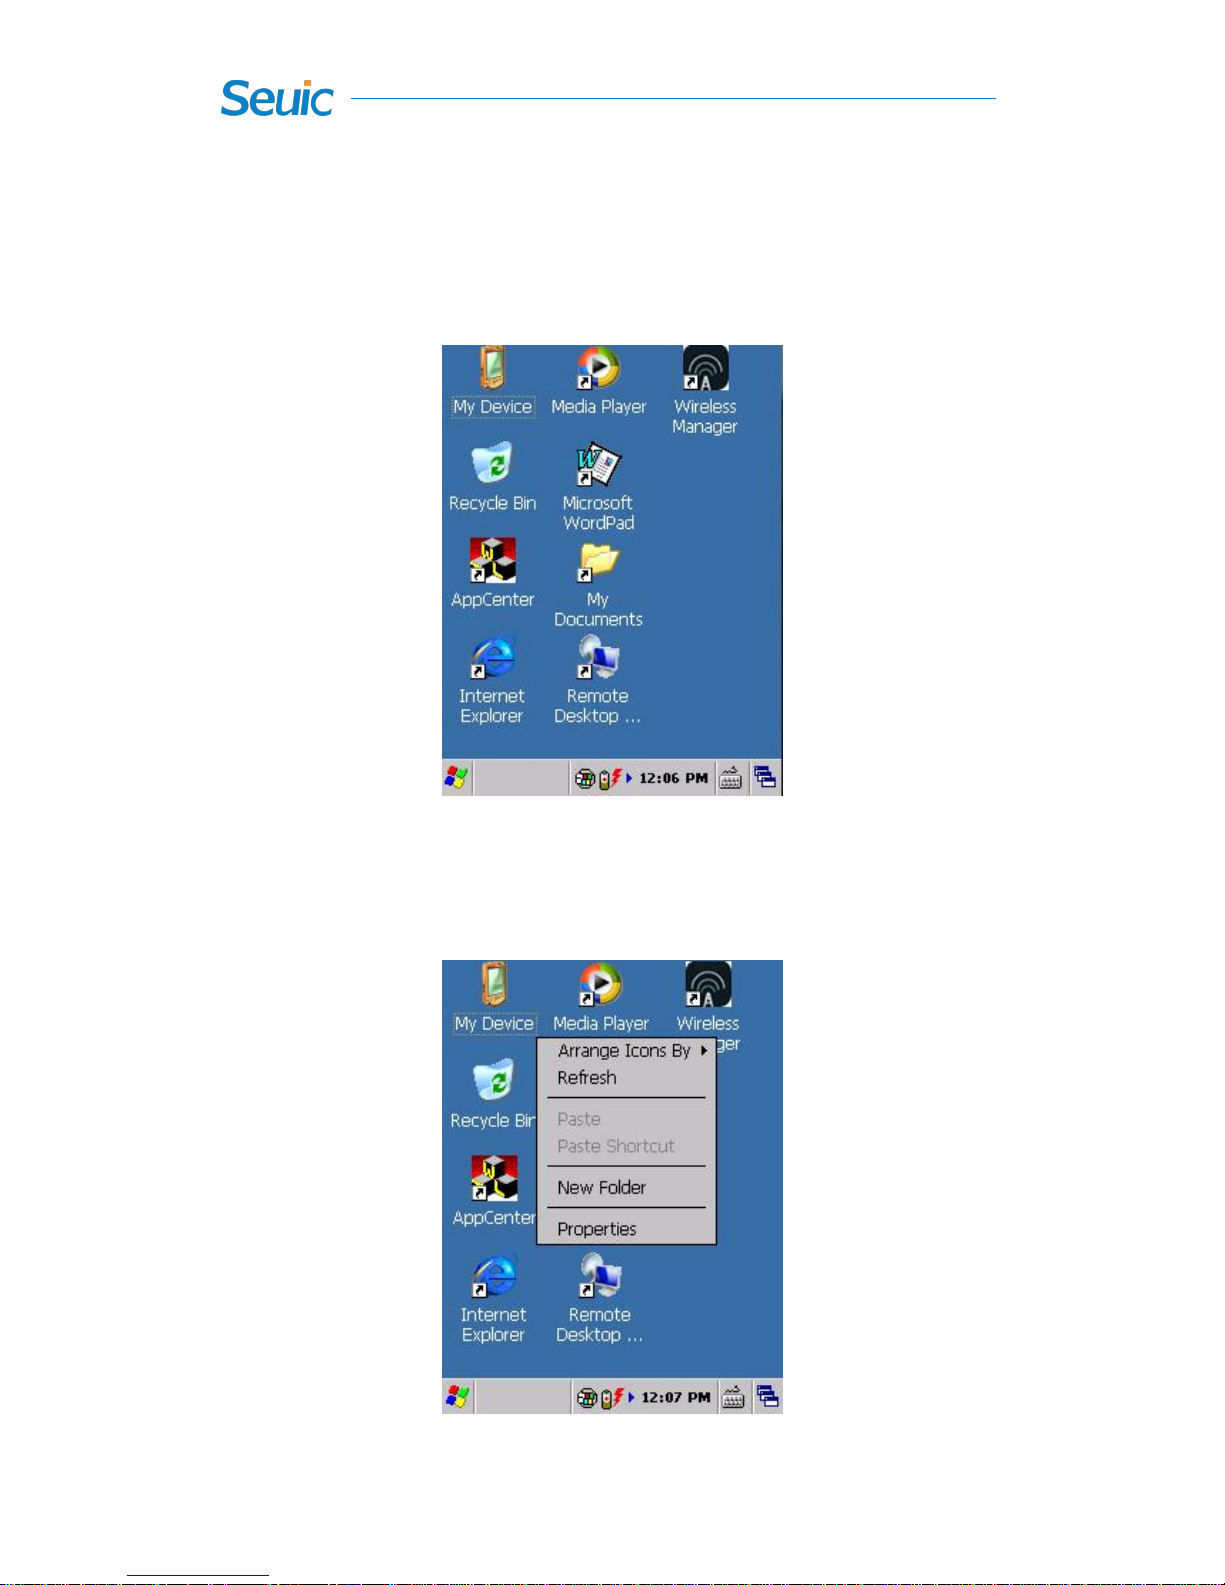
Press the Power button to enter the work mode and wait a few seconds for
the WINDOWS CE desktop.
Figure 2-1
Tap on the blank of the screen, and you can select the property in the
subsequent menuto set self-defined desktop or other features.
22
Figure 2-2
If you want to return to the desktop while performing other applications,
tapon window switch button in the Taskbar on the right side and select
the desktop.
Taskbar
Some icons often appear at the bottom of the Taskbar;
Start Menu .
Input method .
Window switch button .
Signal display icon of various types of connection status, minimized
applications and so on.
Tap on this icon, to view the network connection configuration.
Tap on this icon, to view the GPRS connection.
Tap on this icon, to view the power status details.
Tap on this icon, to view the GPRS settings.
Tap on this icon, to view the WIFI status and settings.
Tap on this icon, to view the USB connection status.
Tap on this icon, to set the date/time/time zone.
23
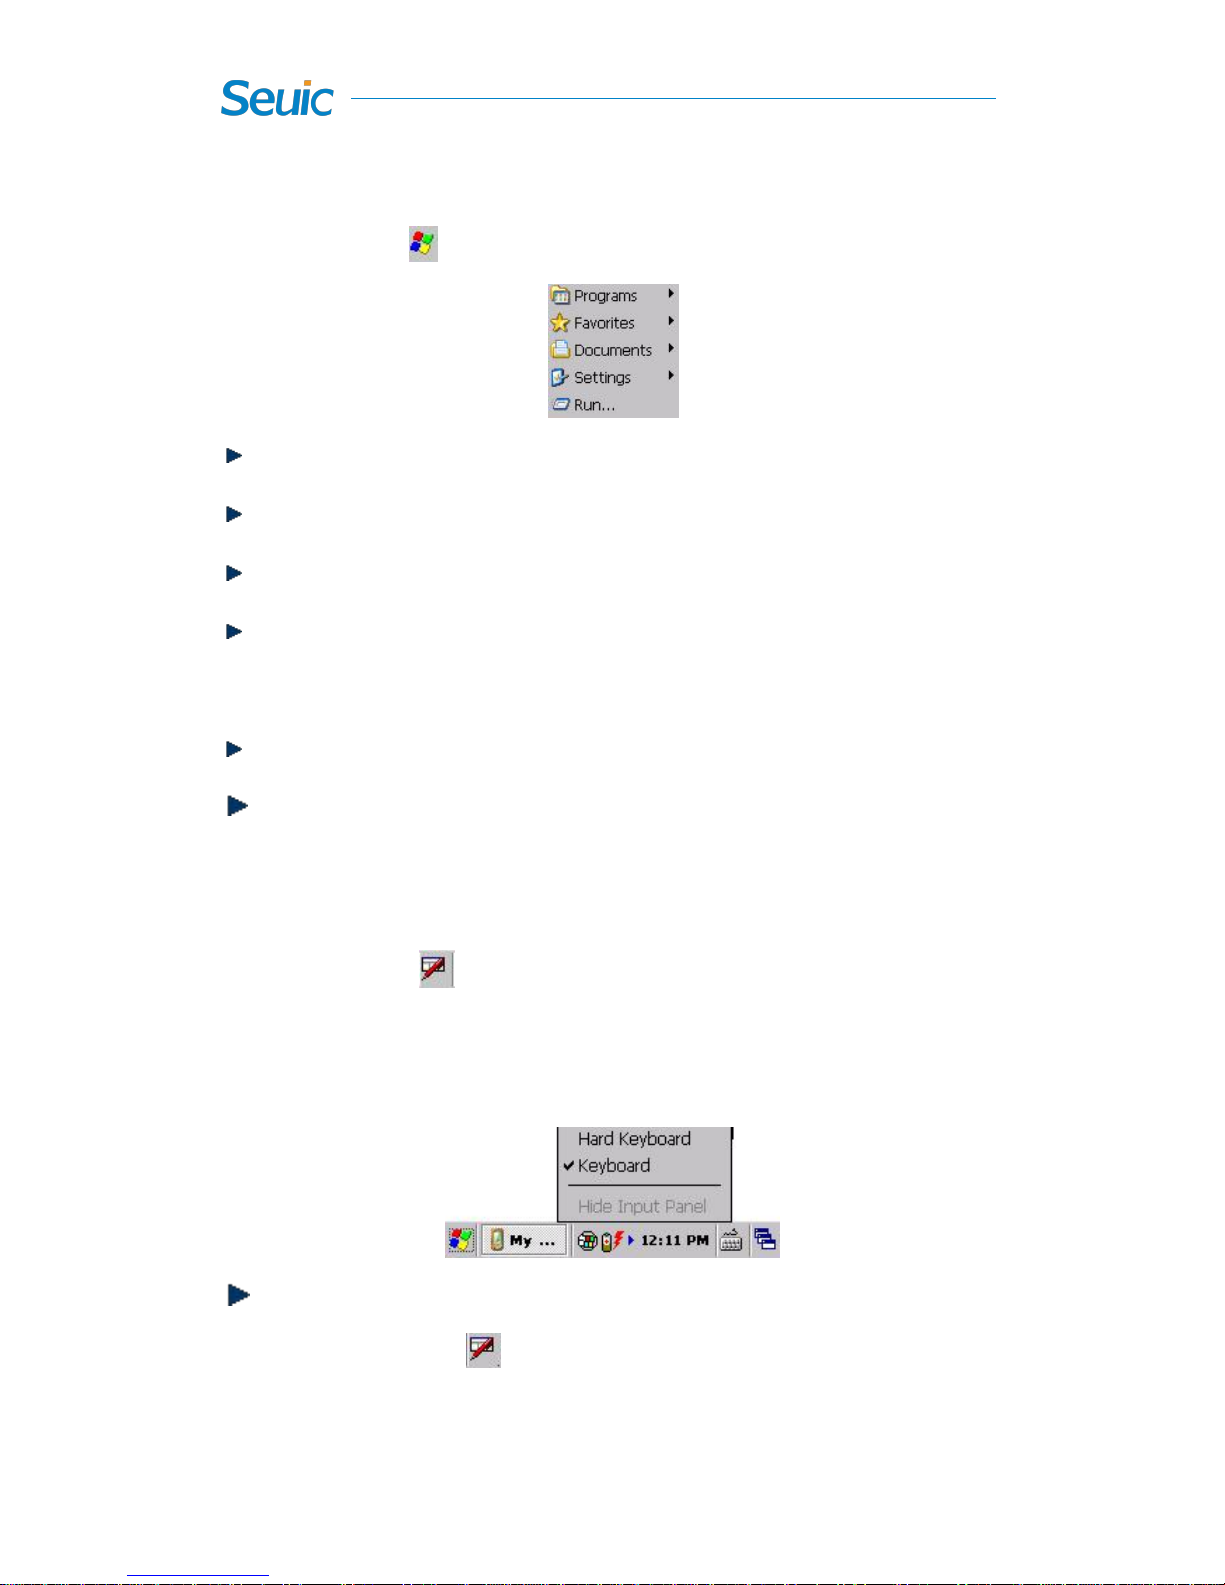
Start Menu
Tap on this icon, at the bottom of the Taskbar to open the Start Menu.
Programs: Tap on it to view the applications;
Favorites: Show the contents of the Favorites;
Documents: Show recently opened documents;
Settings: Display Control Panel, Network and Dial-up Connections,
Taskbar and Start Menu;
Help: Tap on it to open the online help documentation;
Run: Run the program.
Input methods
Tap on this icon, at the lower right of the Taskbar to open the input
method selection bar, or the orange hard keyboard switch key on the
device hard keyboard. There are four ways to enter data:
Keyboard
Tap on this icon, at the bottom right of the screen and select
Keyboard in the pop-up input method menu. The Input Panel then
24
appears on the screen bottom. The following input will be done with the
help of the keyboard.
Tap on the keyboard to enter letters or numbers;
During the input process, you can also control the following keys:
“”Remove the cursor on the left or use the stylus to drag the selected
character;
“Del” Deletes the character at the cursor position;
“Esc” Returns to the previous operation.
Soft Keyboard
Tap on this icon, at the bottom right of the screenand select“Soft
Keyboard” in the pop-up input method menu. The Input Panel then
appears on the screen bottom. Tap to enter the appropriate letters and
numbers.
Hard Keyboard
Tap on this icon, at the bottom right of the screen and select
Keyboard in the pop-up input method menu. A blue bar input box will
thenappear at the screen bottom. Tap on the keyboard and then the
corresponding letters or symbols will appear at the bottom of the
screen input box. Tapon or press the appropriate keyboard to select.
Handwriting input
Tap on this icon, at the bottom right of the screen. When the
Input Panel appears and then select “Handwriting Input” to make

25
Handwriting full screen input. Do not enter the input panel box
while handwriting input. Tap on the “Symbol” on the Input Panel to
select the punctuation mark.
Precautions:
In order to improve the recognition rate of handwriting input method,
please write characters in a standard way as possible as you can.
Setting and optimization
Battery
Main battery
The main power comes from rechargeable lithium batteries.
It takes around 4 hours to be fully charged in the normal condition, but
the charging time varies according to different use conditions.
Backup battery
When you remove or run out of main battery power, the backup battery
will be responsible for basic power supply.
When the backup battery power is full, you can keep the system sleep for
about 3 hours, during which you must charge or replace the main battery
as soon as possible. Under different conditions of use, the system sleep

26
time will be different.
Tip: You can view the battery level by tapping on the Start Menu ->
Settings -> Control Panel -> Power icon, or tap on this icon, in the
Taskbar to view the battery level.
Battery level
When the battery level (10%) is low, the AUTOID®product screen
displays a pop-up message box intermittently to warn you. If you see
a low battery warning message, connect to the AC power source to
charge immediately so that the AUTOID®product can work normally.
When the battery level (4%) is critically low, the AUTOID®product
will go to sleep, and you need to connect the AUTOID® product to
an AC power source to charge the battery before you normally use it.
Power management
How long the battery can last when fully charged depends on how
you use the AUTOID®product. In the case of normal use, fully
charged battery can last for more than 10 hours. The use of power
management at this time helps to save power.
Warning: The intensity of screen backlight, wireless network service
and data capture application will affect the battery working time.
 Loading...