

Page 1
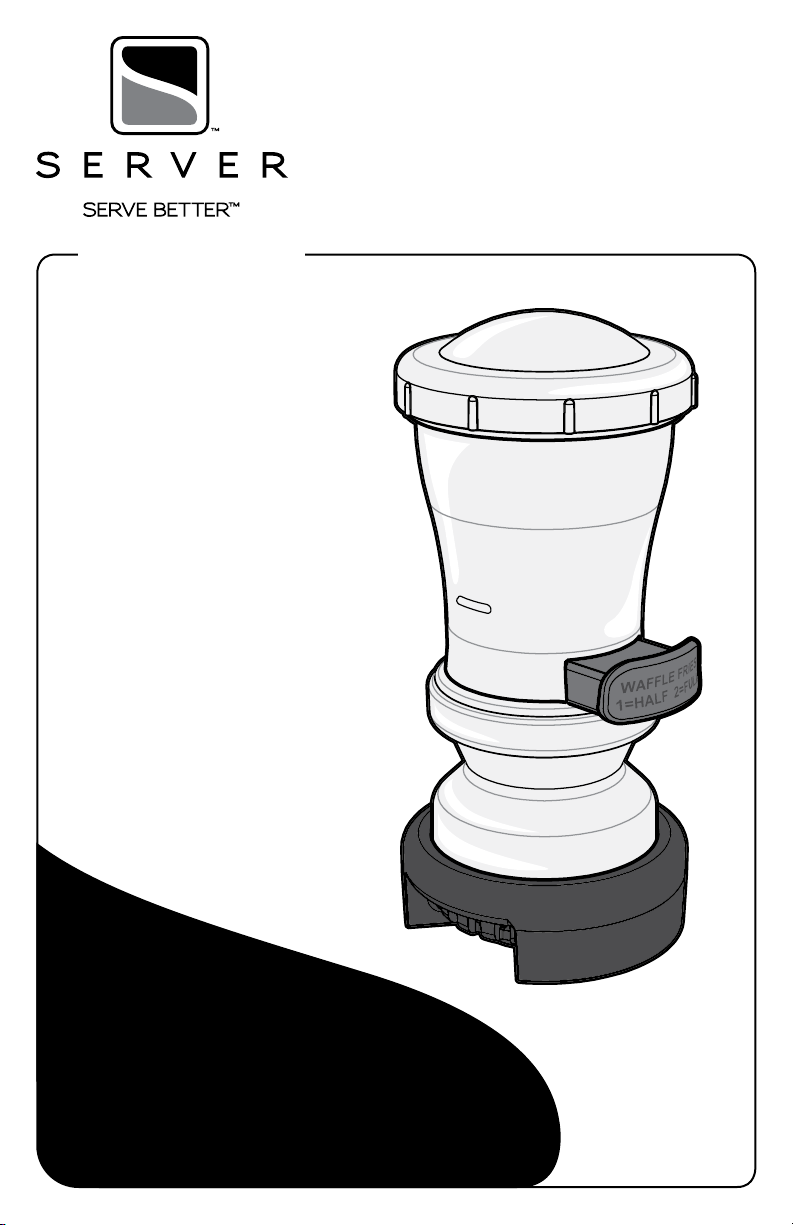
InSeason
™
Seasoning
Dispenser
MODEL: INS
87284
10 COUNT
GREEN TRIGGER
0.46 TSP PORTION
87298
1 COUNT
GREEN TRIGGER
0.46 TSP PORTION
Thank You
...for purchasing our InSeason Dispenser™—
This handheld, lightweight model is customized to
dispense precise portions of granular seasonings
for consistent taste and texture.
PERFECTLY SEASONED EVERY TIME!
Page 2
ASSEMBLY
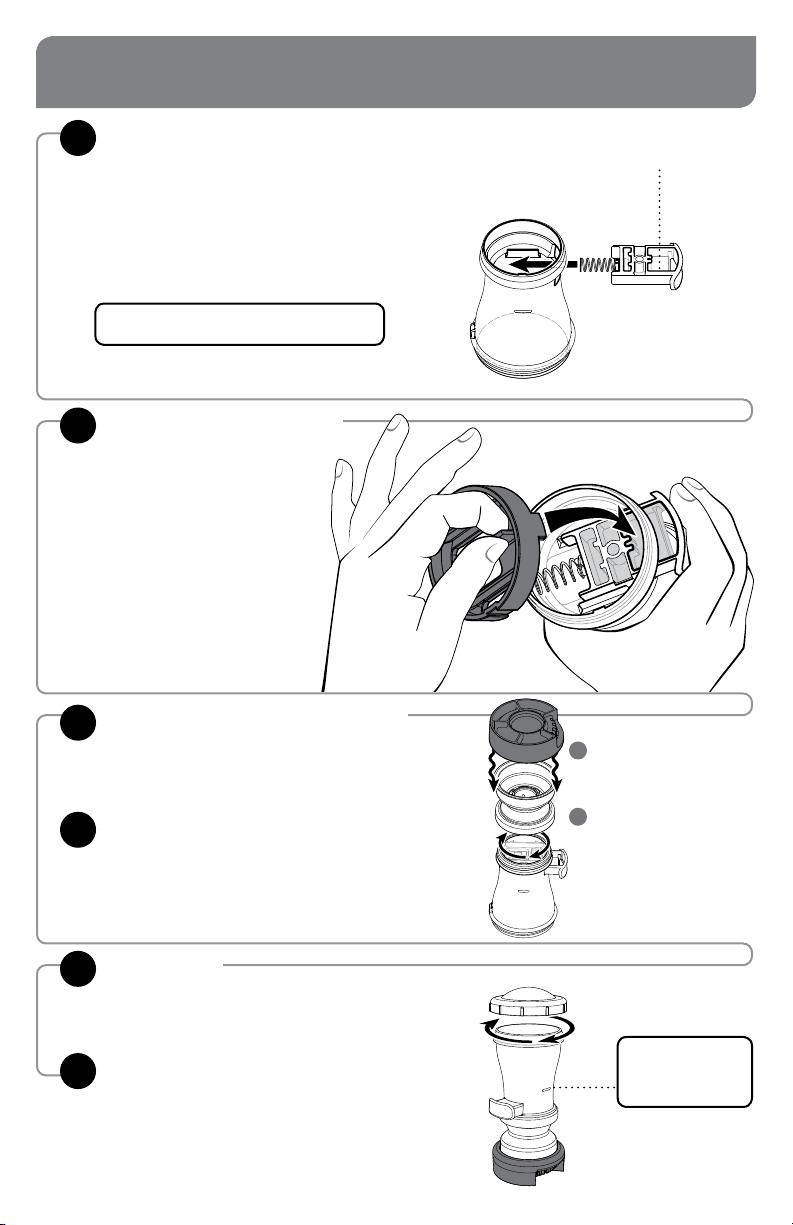
INSERT TRIGGER ASSEMBLY
1
With unit upside down on countertop, slide
spring end of trigger assembly into side slot.
Smooth side of trigger should face down.
Green trigger sets 0.46 TSP portion size.
INSTALL CLOSER PLATE
2
into unit body.
Hold closer plate by grasp tab.
Slowly push trigger assembly
into unit body.
Ensure spring does not pop loose.
Insert closer plate rim tab into
largest interior opening of trigger.
WASH ALL PARTS
PROPERLY BEFORE USE.
Portion size is stamped in trigger cavity.
See page 3.
3
4
5
6
Page 2
INSTALL SPREADER
onto unit body, rotating clockwise to tighten.
INSTALL PORTION SHAKER
ATTACHMENT
Rotate until it snaps onto spreader edge.
For ease of use, rotate dispensing slots on
shaker away from trigger.
FILL UNIT
Flip unit right-side up and
add granular ingredient.
INSTALL LID
onto unit body, rotating clockwise to tighten.
4
3
IMPORTANT: Refill
when product level
falls below fill line.
Page 3
SAFETY
According to food and safety regulations, most
foods must be stored and/or served at certain
temperatures or they could become hazardous.
Check with local food and safety regulators for
specific guidelines. Server Products, Inc. cannot be
responsible for the serving of potentially hazardous
product.
The dispenser is designed for use in high-heat
environments, but is not intended for direct contact
with heat sources such as griddle surfaces.
DISASSEMBLY
REMOVE LID
1
EMPTY UNIT
2
Pour out any remaining ingredient.
REMOVE PORTION SHAKER
3
ATTACHMENT
REMOVE SPREADER
4
REMOVE CLOSER PLATE
5
Set unit upside down on countertop.
Grasp tab of closer plate while holding
trigger in.
Pull closer plate up and out of unit.
Slowly release trigger to home position,
to ensure spring does not pop loose.
IMPORTANT
Clean, rinse, sanitize, and dry parts daily or regularly
to comply with local sanitization requirements.
NSF International listed.
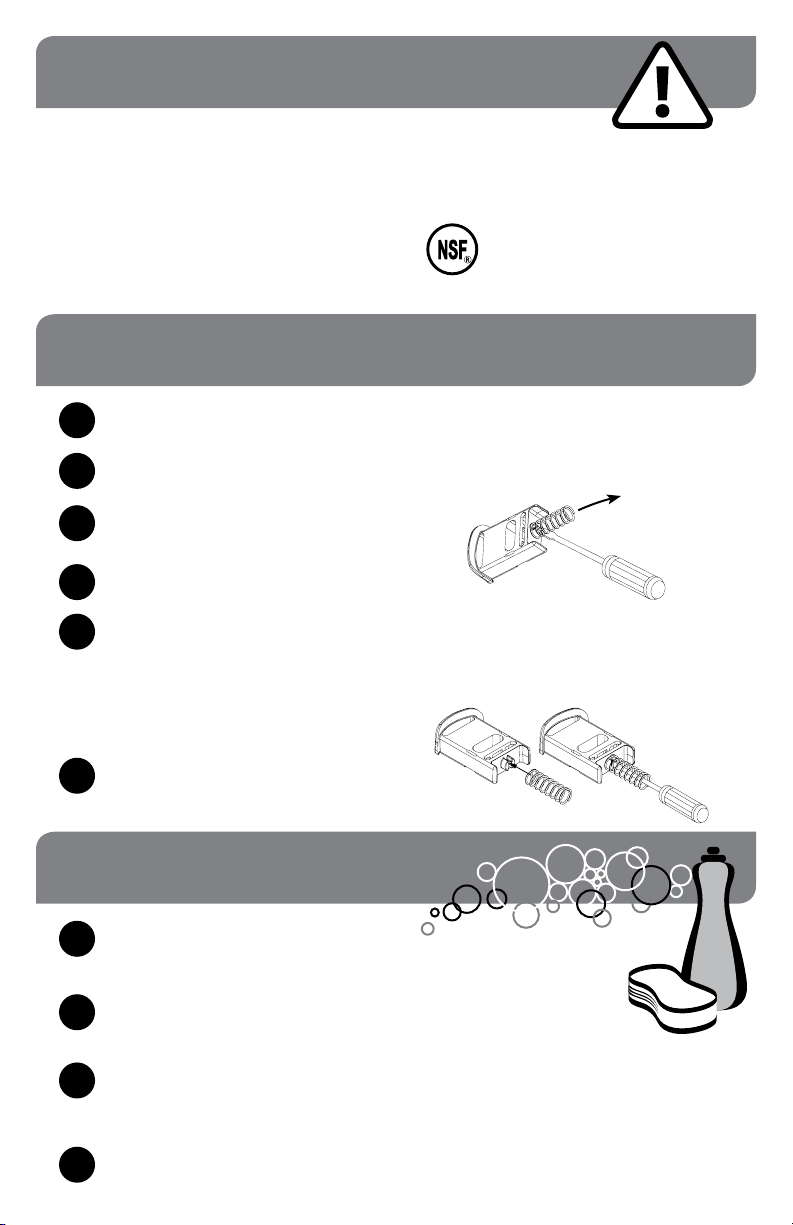
REMOVE SPRING FROM TRIGGER
only if necessary for cleaning.
• Pry off spring with a flathead screwdriver.
• Push straight end of spring out of center groove
in circular tab of trigger.
RE-INSTALL SPRING
• Align straight end of spring into center groove in
circular tab of trigger.
• Use flathead screwdriver to press down on
straight end of spring.
• Snap spring into circular tab of trigger.
REMOVE TRIGGER ASSEMBLY
6
from side slot of unit.
CLEANING
WASH
1
After disassembly, wash all parts with
dishwashing detergent and hot water.
RINSE
2
Fully rinse all parts thoroughly with clear
water.
SANITIZE
3
all parts according to local sanitization
requirements. All parts in contact with food
must be sanitized.
AIR DRY
5
all parts fully before refilling.
YES!
Use dishwashing
soap and hot water
• Dishwasher safe
• Do not use abrasive, caustic or ammonia
based cleansers.
• Do not use cleansing agents with high
concentrations of acid, alkaline or chlorine.
• Do not use metal scrapers or cleaning
pads that could scratch surfaces.
Page 3
Page 4
INDIVIDUAL PARTS
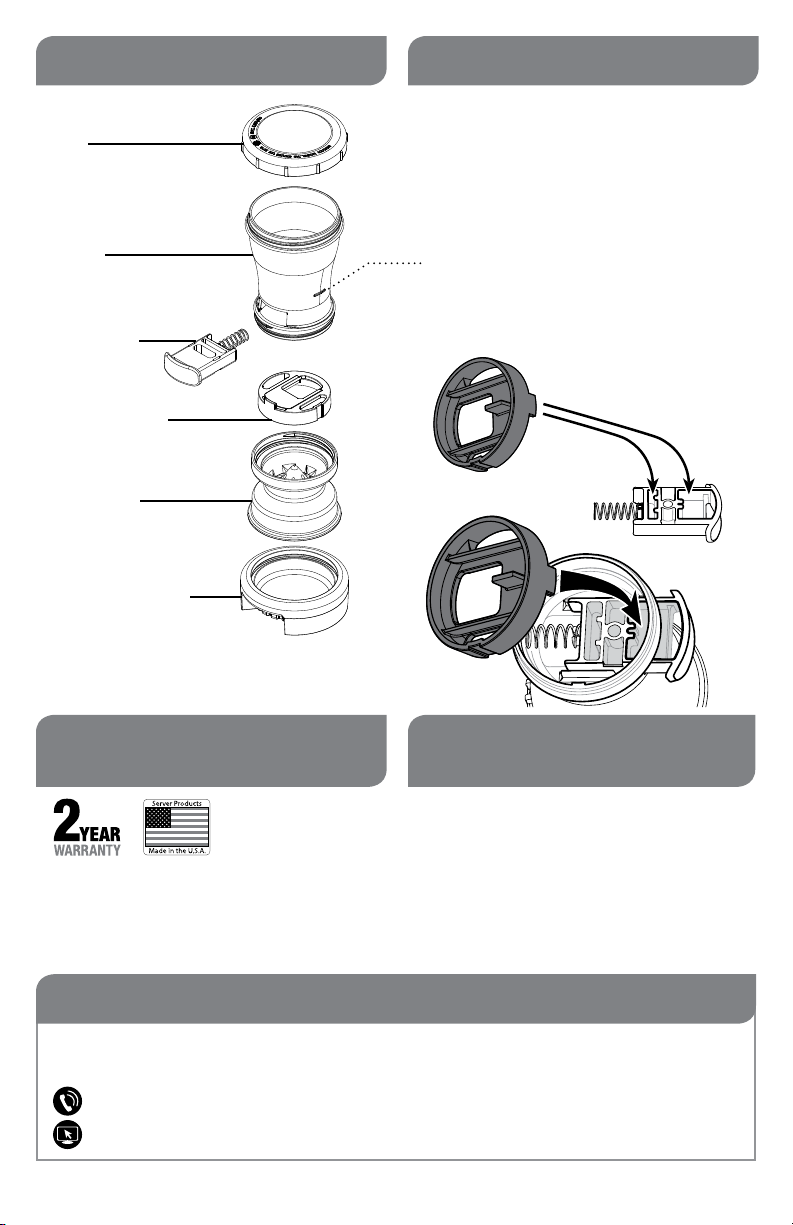
LID
87883
BODY
87884
GREEN TRIGGER
ASSEMBLY
87285
Dispenses
0.46 TSP
CLOSER PLATE
87095
SPREADER
87885
PORTION SHAKER
ATTACHMENT
87282
TROUBLESHOOTING
INCONSISTENT PORTIONS?
Heat and moisture can cause ingredients
to settle and become packed in.
• Shake unit to dislodge light clumping.
• Ensure ingredients have not become clogged
within the unit—Disassemble and inspect.
• Clean unit and air dry fully before refilling.
• Ensure ingredient level is above fill line.
TRIGGER WON’T PUSH IN?
• Ensure closer plate is properly installed with
rim tab in the largest opening of trigger.
NO YES
SERVER PRODUCTS
LIMITED WARRANTY
Server Products equipment is backed by a
two-year limited warranty against defects in
materials and workmanship.
For complete warranty information go to:
www.Server-Products.com
GENERAL SERVICE,
REPAIR OR RETURNS
Before sending any item to Server Products for service,
repair, or return, contact Server Products customer
service to request a Return Authorization Number.
Merchandise must be sent to Server Products with this
number. Service is extremely prompt. Typically, units
are repaired and ship out within 48 hours of receipt.
Merchandise being returned for credit must be in new
and unused condition and not more than 90 days old
and will be subject to a 20% restocking charge.
HELP or ORDERING REPLACEMENT PARTS
Server Products Inc.
3601 Pleasant Hill Road
Richfield, WI 53076 USA
262.628.5600 | 800.558.8722
Page 4
Please be prepared with the Part Numbers for your
items. Individual part numbers are listed above.
Manual #01713-RevB 081716
 Loading...