

serverLink SL-271-DP, SL-271-V Quick Installation Manual
Quick Installation Guide SL-271-DP 2 Port Cable KVM Switch for DisplayPort/USB/Audio & Microphone
Rev. 1.2 Copyright© All rights reserved
SL-271-DP
2 Port Cable KVM Switch
DisplayPort/USB and Audio
Quick Installation Guide
Introduction
The SL-271-DP is a 2 port DisplayPort/USB & Audio KVM Switch
with two fixed KVM cables & a QuickSwitch button for simple
switching. It allows you to access and control your computers
using only one USB keyboard & mouse, DisplayPort monitor,
speakers & microphone.
Supports maximum digital resolution up to 2560 x 1600.
Active Sync Replication (ASR) technology ensures maximum
compatibility. ASR is an advanced video emulation technology
that ensures simultaneous full-time DDC emulation to all
connected ports. This ensures 100% video compatibility when
using operating systems like Windows 7 and Windows 8, which
have a more demanding requirement for full-time DDC emulation.
The USB keyboard and mouse ports are fully transparent USB
2.0 hub ports that feature full driver support for advanced
keyboard and mouse functionality.
If your connected keyboard and mouse only use one USB port,
the other USB port can be used to connect high-speed USB
devices such as USB external storage devices or webcam etc.
Installation
Step 1. Connect the shared USB keyboard, mouse, monitor,
speaker/headphone and microphone to its relevant port
on the SL-271-DP. If your keyboard and mouse uses
only one USB port on the KVM, you can connect any
USB device to the other USB port on the KVM to share
this device between the connected computers.
Step 2. Connect each KVM PC port to a computer using the
DisplayPort/USB/Audio combo cable. After you have
connected the KVM and computers, you can operate
the KVM switch immediately.
Operation of KVM Switch
There are three methods to control your KVM Switch.
1. QuickSwitch Button
2. Keyboard Hotkey sequences
3. Optional KVM Switcher Software
QuickSwitch Button
The QuickSwitch Button is a wired control switch that allows you
direct switching control of the KVM switch. Simply press the
QuickSwitch Button to toggle between computers.
Keyboard Hotkeys
Universal Hotkey sequence * = ScrLk + ScrLk
* Not available for Mac.
Optional Switcher Software
Step 1. Insert the CD ROM into your CD drive, and the Autorun
screen will pop up (If the Autorun feature has not been
enabled on your computer. Just find the Autorun.exe on
the CDROM and double-click it to start).
Step 2. Click the “Software Installation for Windows/Mac” to start
installation. (If the Mac version software does not start,
you should copy it to your local hard disk on Mac).
Follow the instructions to complete.
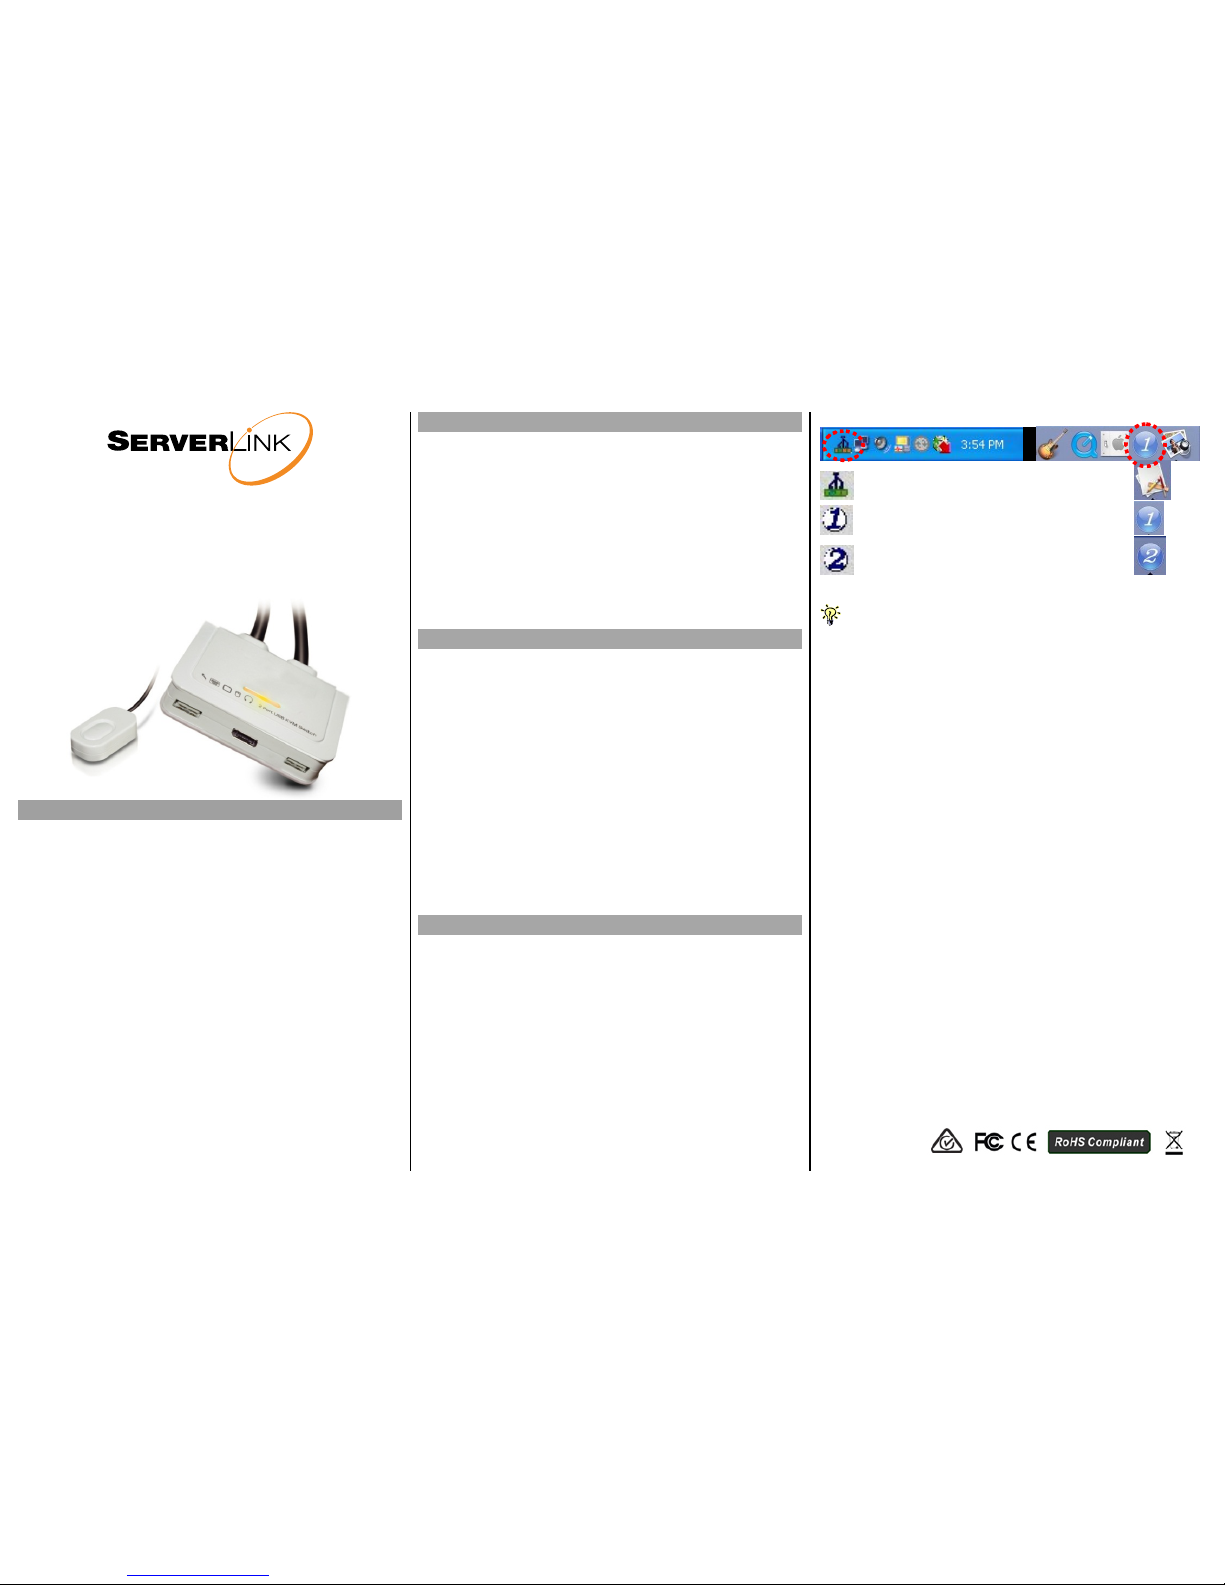
Step 3. Once the installation is complete, you will see a KVM
Switcher icon in the system tray of your desktop. Rightclick to invoke the operation menu and double-click to
invoke the configuration box.
Windows Mac OS
No live connection detected
Current active computer channel is on port 1
Current active computer channel is on port 2
The Windows switcher software is recommended for use on
Windows 2000 or later. The Mac switcher software is recommended for
use on Mac OS 10.4 and later.
For more information regarding the optional switcher software,
please refer to the Quick Reference Sheet.
Quick Installation Guide SL-271-DP 2 Port Cable KVM Switch for DisplayPort/USB/Audio & Microphone
Rev. 1.2 Copyright© All rights reserved
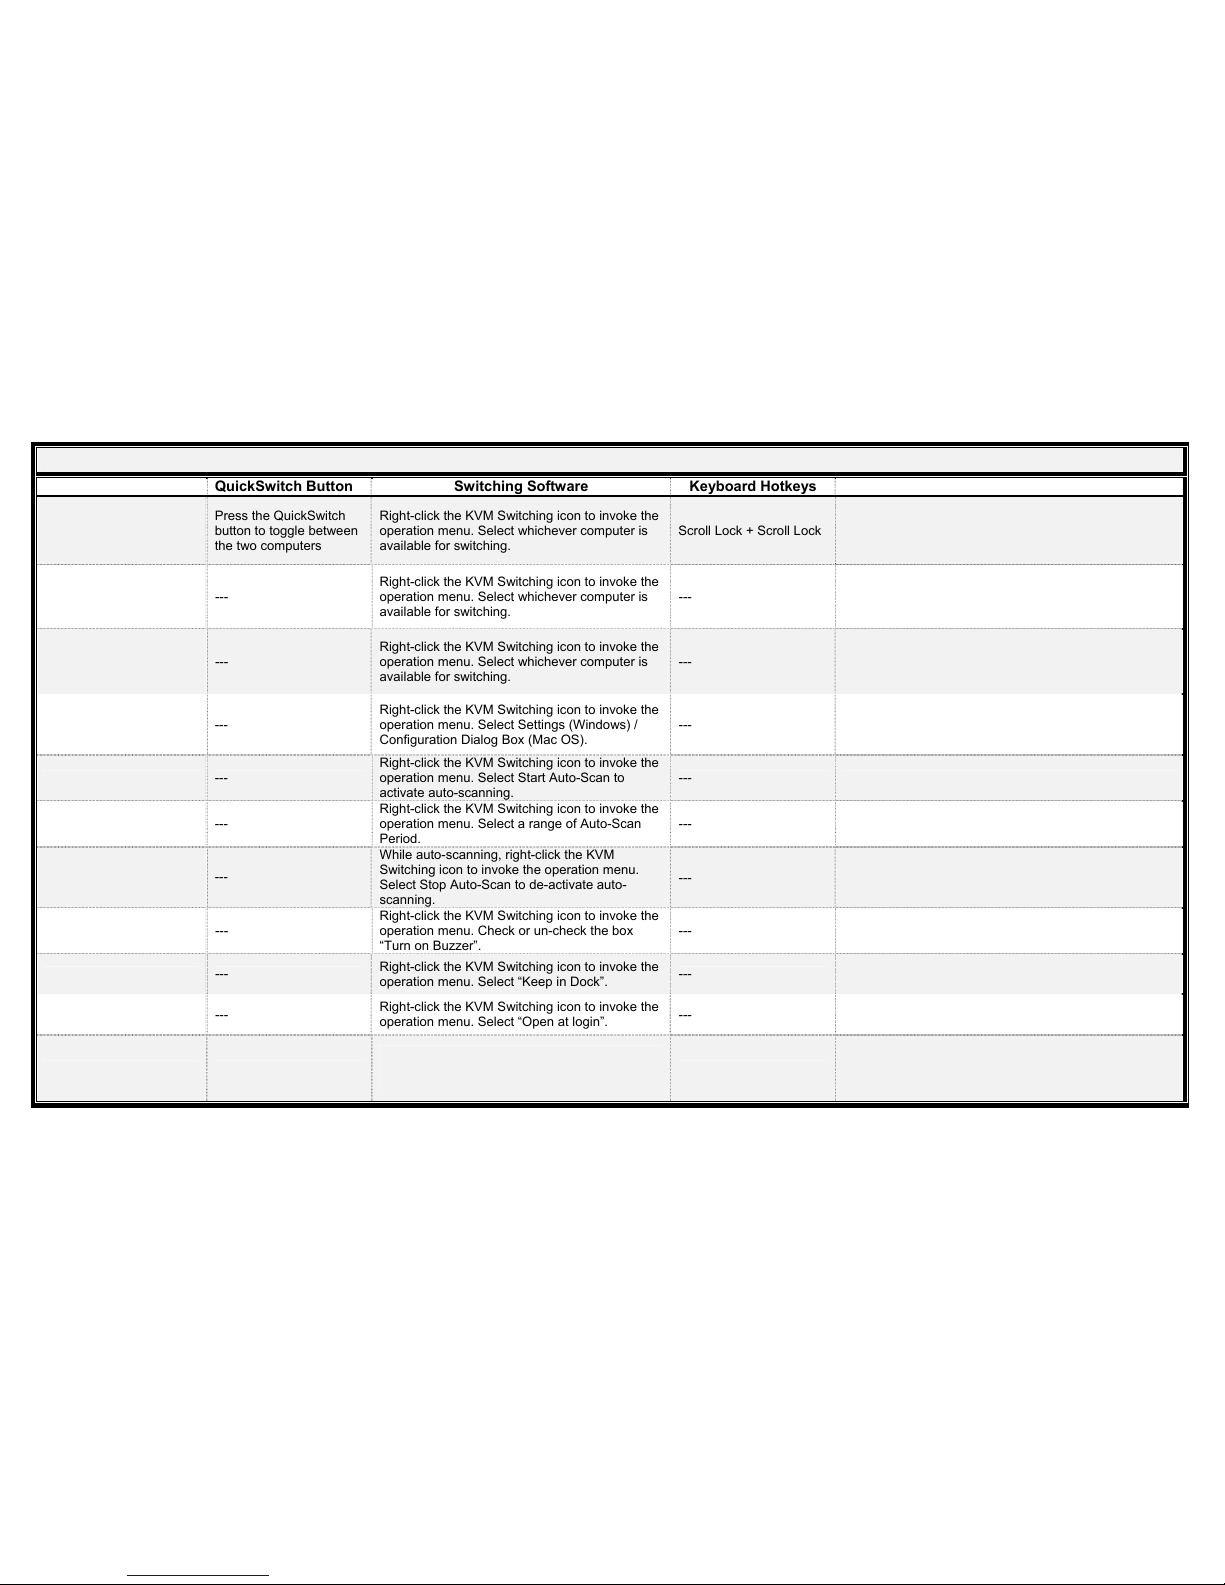
Quick Reference Sheet
Command QuickSwitch Button Switching Software Keyboard Hotkeys Description
Select PC Port
Press the QuickSwitch
button to toggle between
the two computers
Right-click the KVM Switching icon to invoke the
operation menu. Select whichever computer is
available for switching.
Scroll Lock + Scroll Lock Select PC port
Next Lower PC Port
---
Right-click the KVM Switching icon to invoke the
operation menu. Select whichever computer is
available for switching.
---
Next lower PC port
Next Higher PC Port
---
Right-click the KVM Switching icon to invoke the
operation menu. Select whichever computer is
available for switching.
---
Next higher PC port
Define Hotkey Preceding
Sequence
---
Right-click the KVM Switching icon to invoke the
operation menu. Select Settings (Windows) /
Configuration Dialog Box (Mac OS).
---
User–definable hotkey sequence for direct computer
selection is “Ctrl +Alt+ [command key]”
For Mac, instead of Scroll Lock key, you may use Userdefinable hotkey sequence to switch
Autoscan
---
Right-click the KVM Switching icon to invoke the
operation menu. Select Start Auto-Scan to
activate auto-scanning.
---
Starts Autoscan
Autoscan with
Programmable Delay
Time
---
Right-click the KVM Switching icon to invoke the
operation menu. Select a range of Auto-Scan
Period.
---
Autoscan duration adjust to (10 ~ 60 seconds)
Stop Autoscan
---
While auto-scanning, right-click the KVM
Switching icon to invoke the operation menu.
Select Stop Auto-Scan to de-activate auto-
scanning.
---
Stop Autoscan during scan mode
Beeper
---
Right-click the KVM Switching icon to invoke the
operation menu. Check or un-check the box
“Turn on Buzzer”.
---
Toggle Beeper on/off
Keep in Dock (Mac only)
---
Right-click the KVM Switching icon to invoke the
operation menu. Select “Keep in Dock”.
---
KVM switching icon will remain in the system tray of your
desktop
Open at Login (Mac only)
---
Right-click the KVM Switching icon to invoke the
operation menu. Select “Open at login”.
---
Operate Switcher Software after login
Fix Audio Port
---
Right-click the KVM Switching icon to invoke the
operation menu. Check the box “Fix Audio Port
at PC” and select the desired PC port.
---
Check this option and then select the computer to fix the
audio/mic port to that selected computer. Once this option
is checked, the audio/mic port will be fixed and become
non-switchable.
 Loading...