

Page 1
I N S T A L L A T I O N I N S T R U C T I O N S
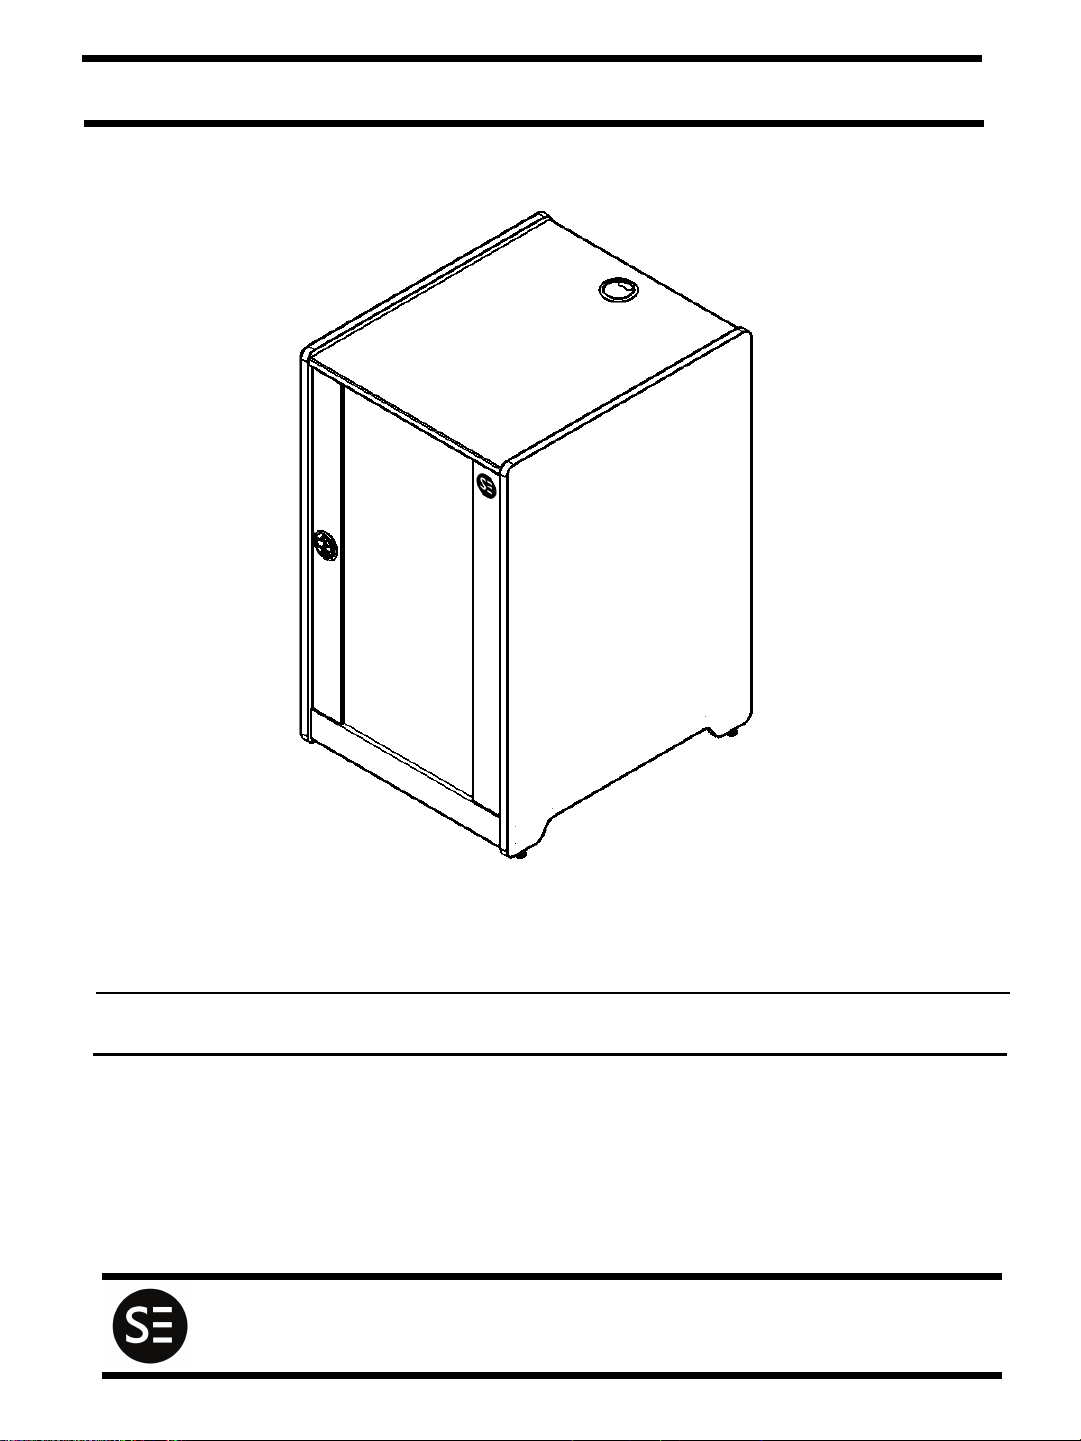
Universal Furniture Rack
DB Series
DB-12RU-56FS-XX2014
1
Page 2
DB Series Installation Instructions
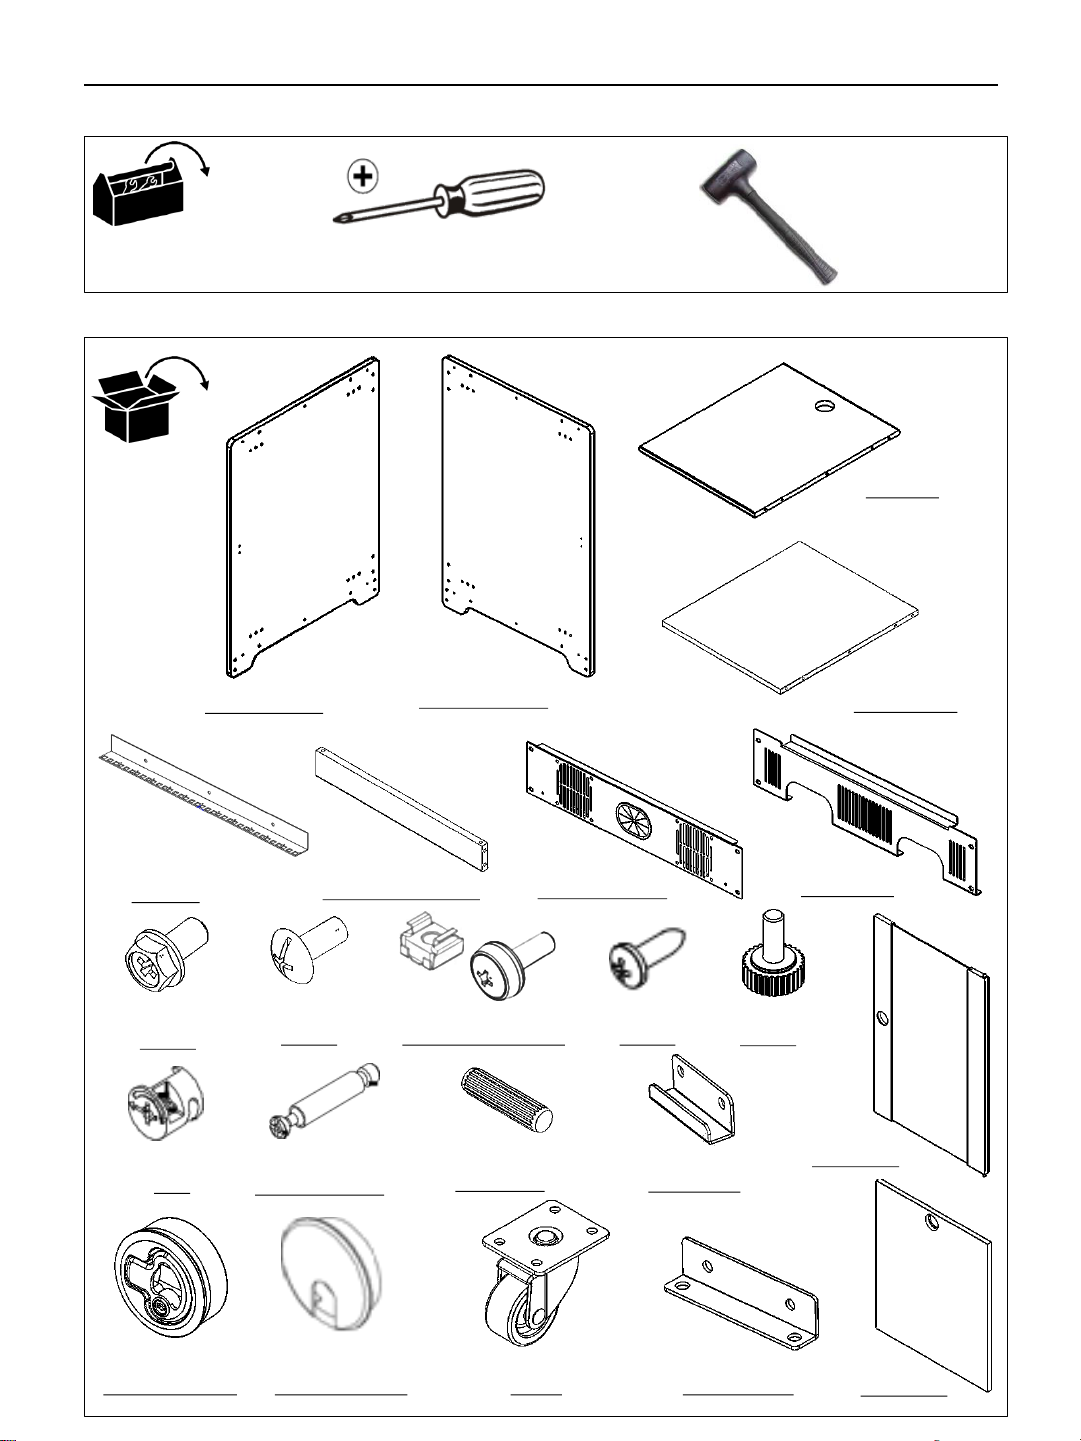
TOOLS REQUIRED FOR INSTALLATION
#2
PARTS
C (1)
Rack Top
E (4)
Rack rail
J (32)
M6x12
P (12)
Cam
A (1)
Left side panel
K (8)
M5x12
Q (12)
Connecting bolt
B (1)
Right side panel
F (2)
Front/Rear support
L (30/30)
Cage Nut and Screw
Dowel pins
R (16)
G (1)
Panel fits fan kit
M (2)
M4x12
Strike plate
S (1)
D (1)
Rack Bottom
H (1)
Cable entry
N (4)
M6x15
X (1)
Front door
T (2)
Latch (with lock)
w/2 keys
U (1)
Round grommet
V (4)
Caster
W (4)
Panel Bracket
Y (1)
Rear Panel
2
Page 3
DB Series Installation Instructions
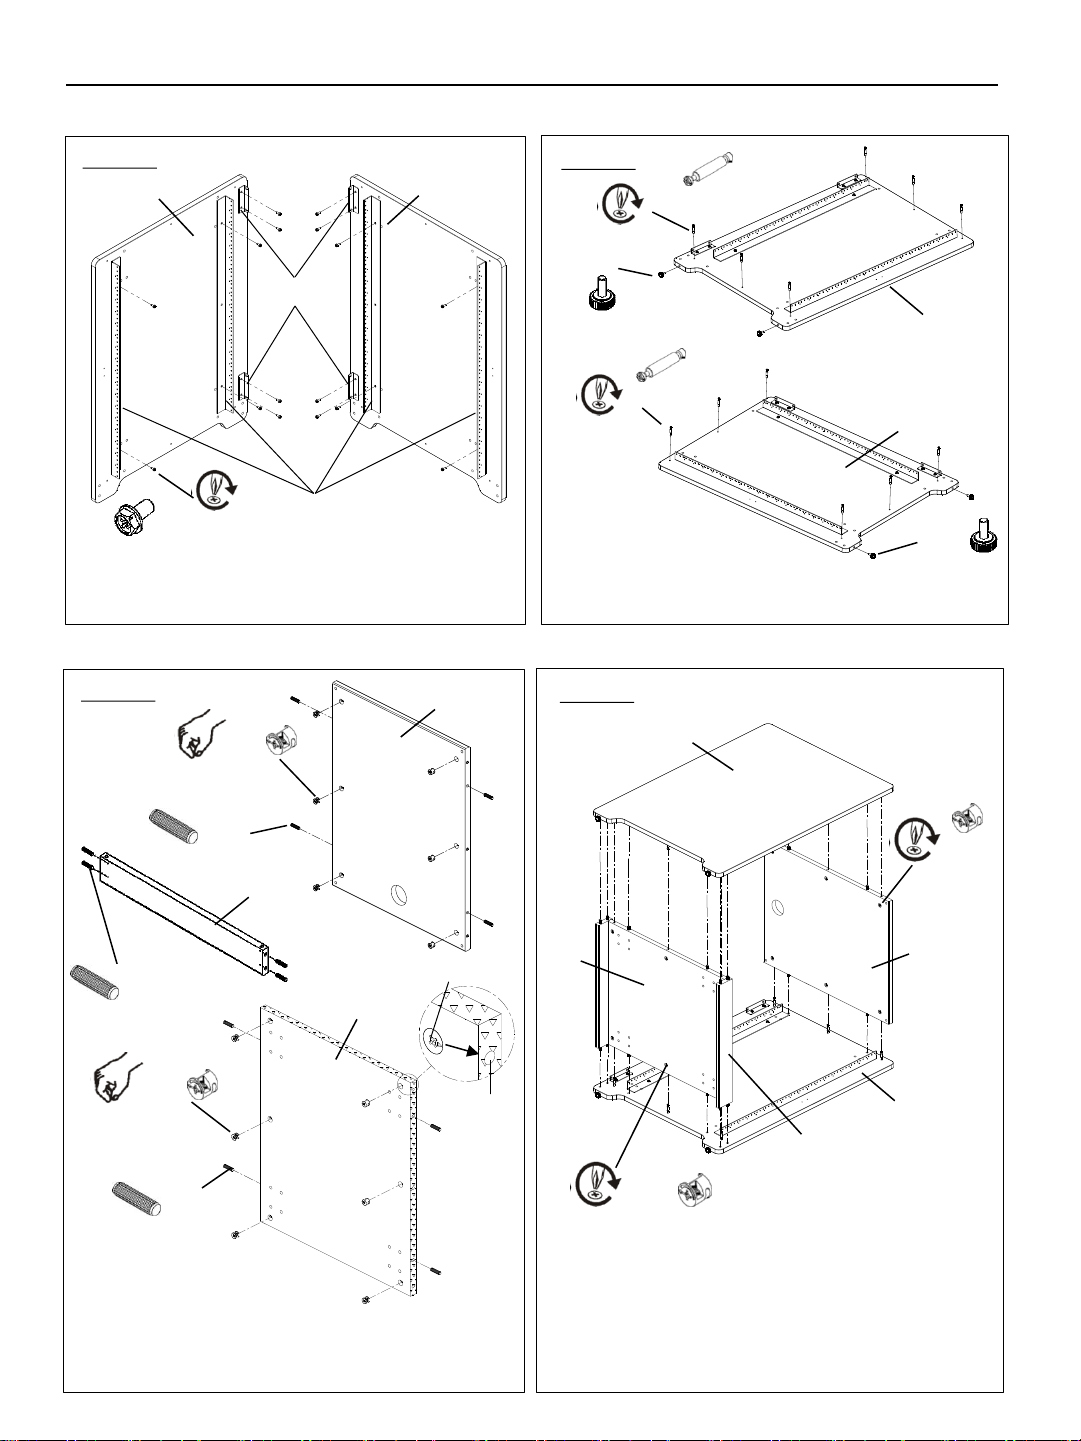
ASSEMBLY
STEP 1:
(A)
(W) x4
( J) x16
1. Use 16-M6x12 hex washer screws (J) to secure two rack
rails(E) & 4 panel bracket(W) to two side panels (A and B).
(E) x4
(B)
STEP 3:
(P) x6
(C)
STEP 2:
(Q) x6
(N) x2
(B)
(Q) x6
(A)
1. Screw 6 connecting bolts (Q)
into each side panel (A and B).
2. Screw 2-M6x15 adjustable stud (N) into each side panel
(A and B)
(N) x2
STEP 4:
(A)
(R) x4
(F) x2
(R) x4
(P) x6
(R) x4
1. Install 6 cams (P) into holes on rack top (C) and rack bottom
(D).
2. Press 4 dowel pin (R) into holes on front/rear support (F) and
rack top (C) and rack bottom (D).
Direction arrow
(D)
Hole for
mating fastener
(P) x6
(D)
(F) x2
(P) x6
1. Drop rack top (C), rack bottom (D) and front/rear support
(F) onto side panel with cams (P) engaging with connecting
bolts (Q).
2. Turn all cams clockwise to secure side panel (A and B).
(C)
(B)
3
Page 4
DB Series Installation Instructions
ASSEMBLY
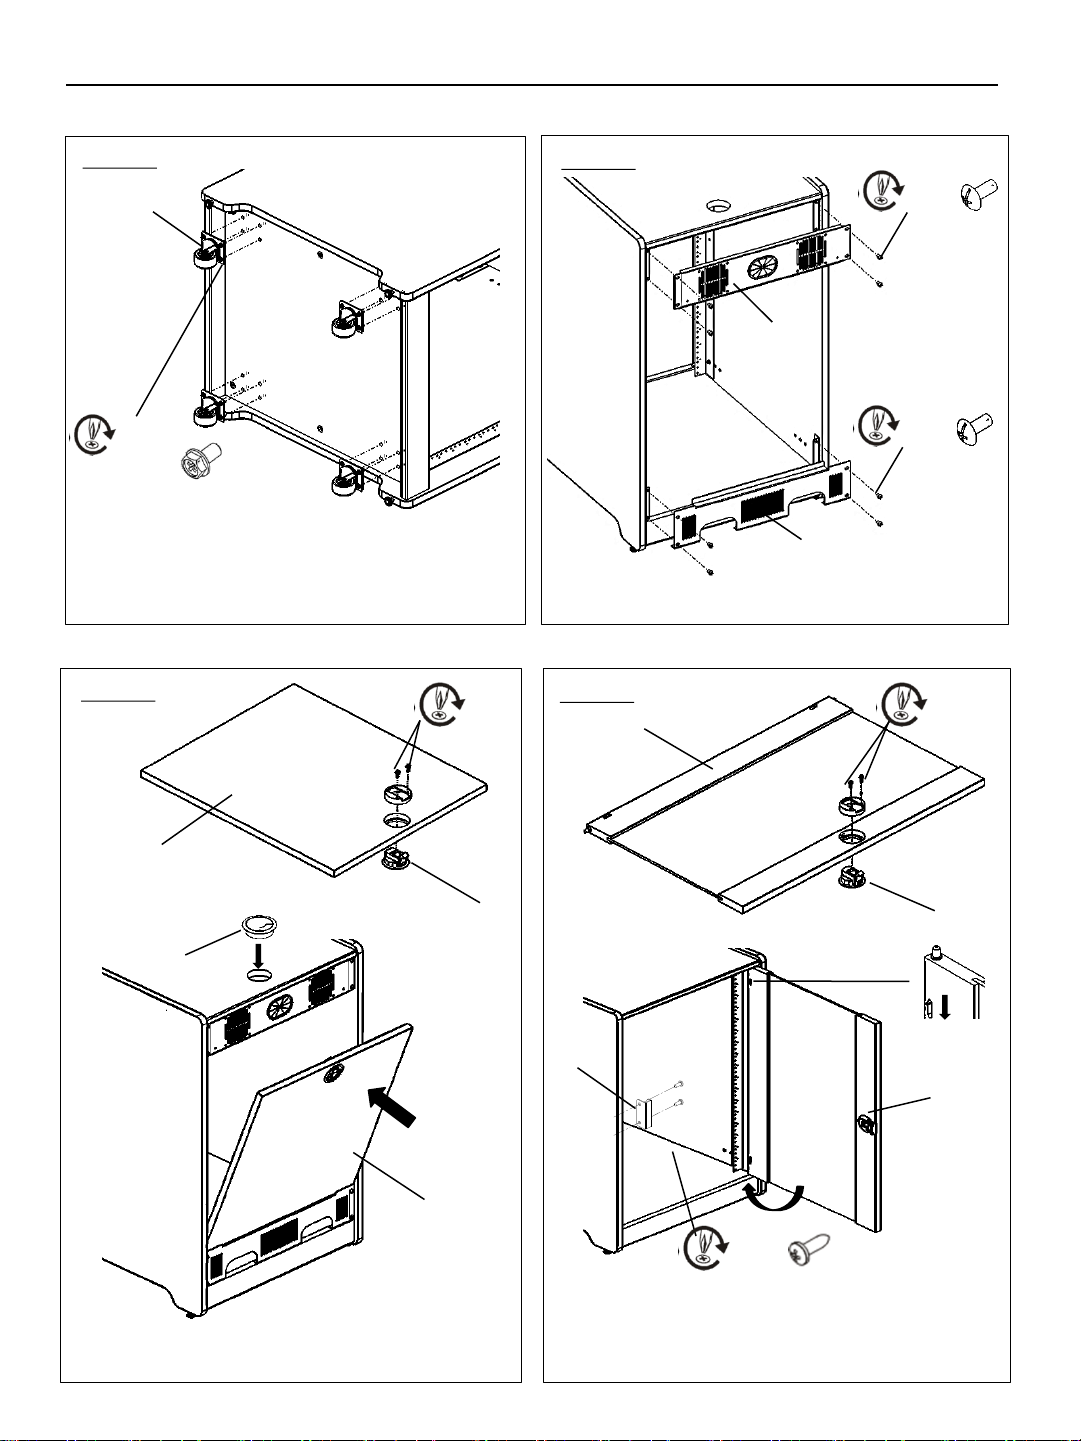
STEP 5:
(V) x4
( J) x16
1. Use 16-M6x12 hex washer screws (J) to secure 4 caster (V)
to rack bottom.
STEP 7:
STEP 6:
(K) x4
(G)
(K) x4
(H)
1. Use 8-M5x12 truss screws (K) to secure panel fits fan kit (G) &
cable entry (H) to two side panels.
STEP 8:
(X)
(Y)
1. Install latch (T) into holes on rear panel (Y) .
(U)
2. Push rear panel (Y) into main frame to close.
3. Install round grommet (U) into hole on rack top.
(Y)
(T)
(T)
1. Install latch (T) into holes on front door (X) .
(S)
(X)
(M) x2
2. Use 2-M4x12 wood screw(M) to attach strike plate(S) to
opposite side panel.
3. Pull the spring down and hold until it falls into the proper slot,
push front door (X) into main frame to close.
NOTE: Door can be attached to either side panel based on
user preference.
4
 Loading...