

Page 1
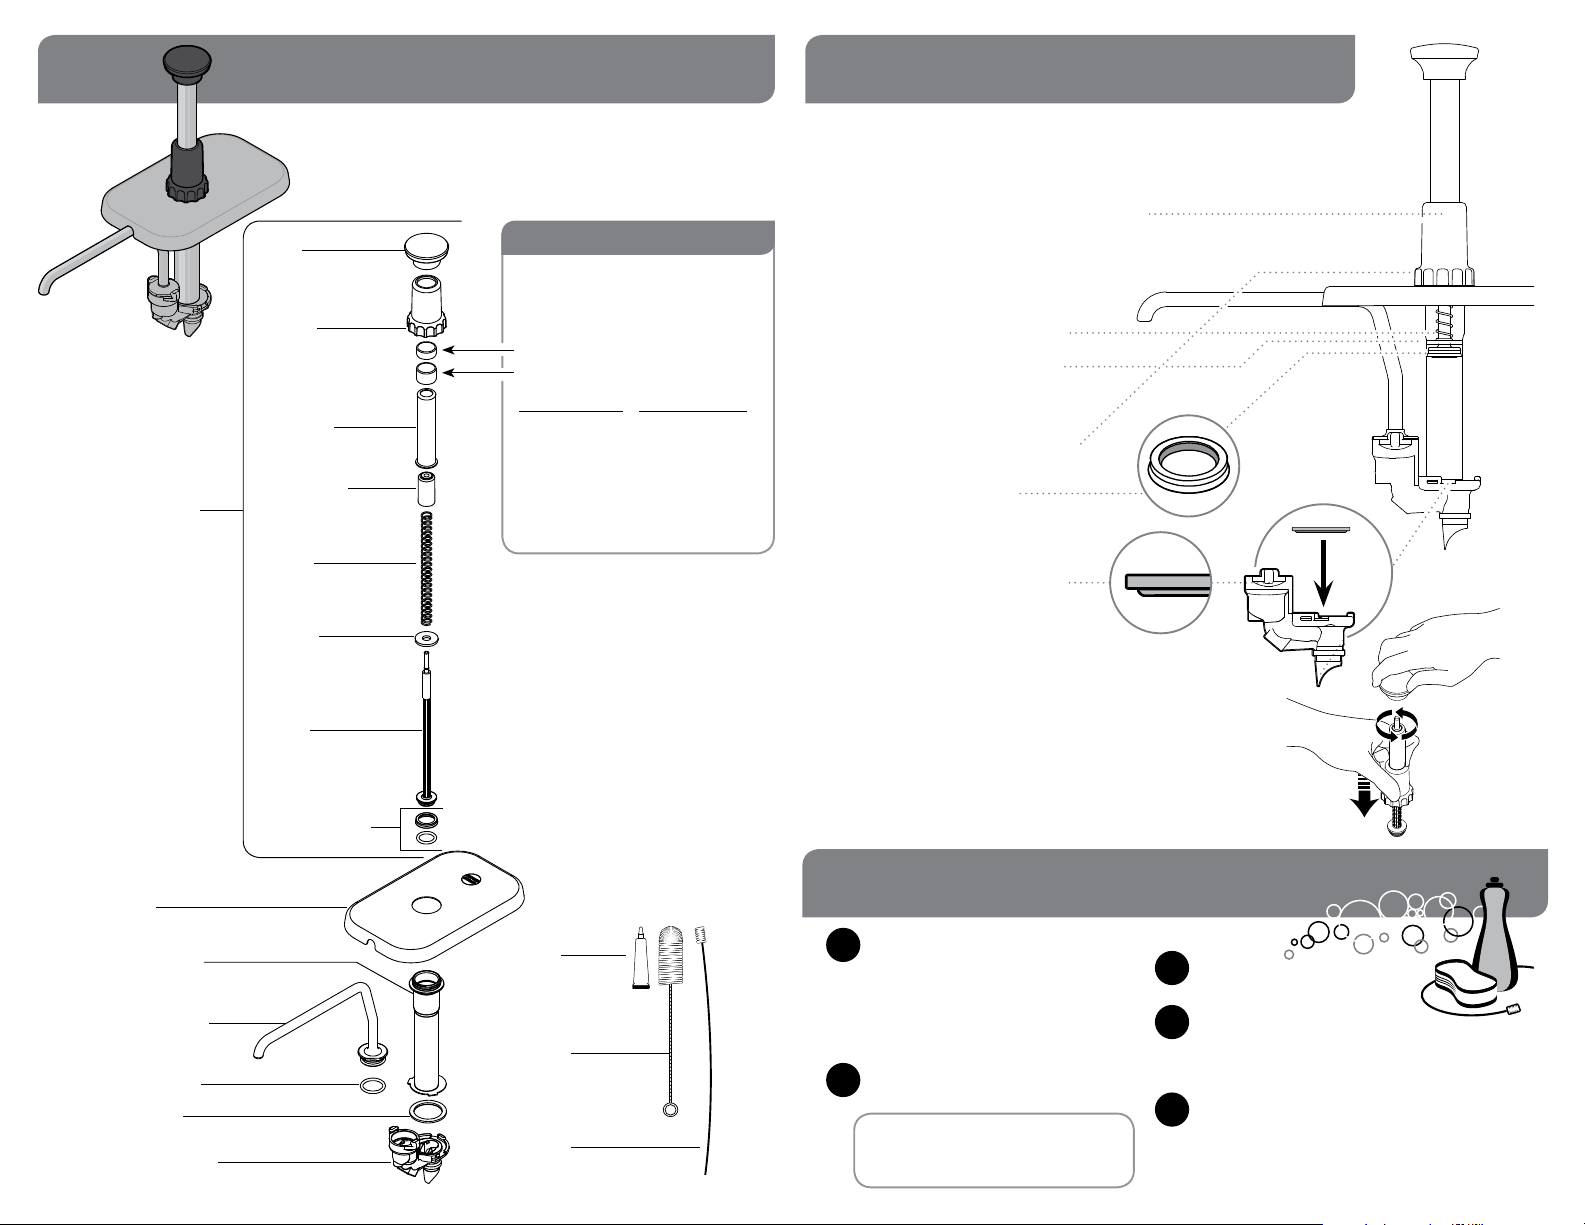
PLUNGER
ASSEMBLY
PARTS for PUMP 85820
KNOB
82023-000
LOCKING
COLLAR
83412
HEAD TUBE
82017
HEAD INSERT
82018
SPRING
82016
PORTION CONTROL
PUMP DELIVERS 1 FL OZ PORTIONS
To reduce portion, add
GAGING COLLAR(S)
83529 SM COLLAR: 1/8 fl oz reduction
82022 LG COLLAR: 1/4 fl oz reduction
COLLAR(S) USED PORTION RESULT
None 1 fl oz
1 Sm
3/4 fl oz
1 Lg
1 Lg + 1 Sm
2 Lg
1/2 fl oz
2 Lg + 1 Sm
1/4 fl oz
3 Lg
3 Lg + 1 Sm
7/8 fl oz
5/8 fl oz
3/8 fl oz
1/8 fl oz
TROUBLESHOOTING
PROBLEMS WITH FLOW OR PORTIONS?
• Clean pump.
• Food product may be too thick or contain
a solid that will not pass thr
• If used: Ensure gaging collar(s) are undamaged
and properly installed on head tube.
PLUNGER DOESN’T RETURN
TO TOP AFTER DISPENSING?
• Ensure that the spring is functional.
Replace broken spring if necessary.
• Ensure that the washer is installed
between the spring and piston head.
FOOD PRODUCT OOZES OUT
AROUND LOCKING COLLAR?
• Ensure seal is properly installed on piston.
TIP: Seal has a slight taper.
Install with flat side towards
top, flared side down.
LEAKS NEAR THE VALVE BODY?
• Ensure gasket is properly installed.
Flat side of gasket should face up.
ough pump.
LID
85829
CYLINDER
82362
DISCHARGE
TUBE
85827
O-RING, 1"
05127
GASKET
88554
VALVE BODY
82635
WASHER
82015
PISTON
82013
SEAL ASSEMBLY
83003
FOOD
EQUIPMENT
LUBRICANT
40179
BRUSH
82049
BRUSH
82526
PUMP DRIPS?
• Clean discharge tube with supplied brush.
• Inspect all o-rings. Replace if damaged.
•
oduct may be too thin.
Food pr
Visit www.Server-Products.com for more tips.
CAN’T FIND THREADS FOR KNOB?
• Look inside the cylinder.
If the knob is unscr
Press the collar down to expose the threads.
ewed, piston threads retract into the plunger.
CLEANING
FLUSH & RINSE
1
all pump surfaces with hot water.
Place lower end of pump into container
of hot water and operate pump until all
remaining product is expelled and only
hot water is discharged.
DISASSEMBLE & CLEAN
2
all washable parts with soap and hot water.
USE SUPPLIED BRUSH
to thoroughly clean inside discharge
tube and any confined areas.
Use dishwashing soap, hot water and nylon brush.
Pump is dishwasher safe.
RINSE
3
fully with clean water.
SANITIZE
4
all parts according to local sanitization
requirements. All parts in contact with food
must be sanitized.
AIR DRY
5
all parts fully.
Page 2
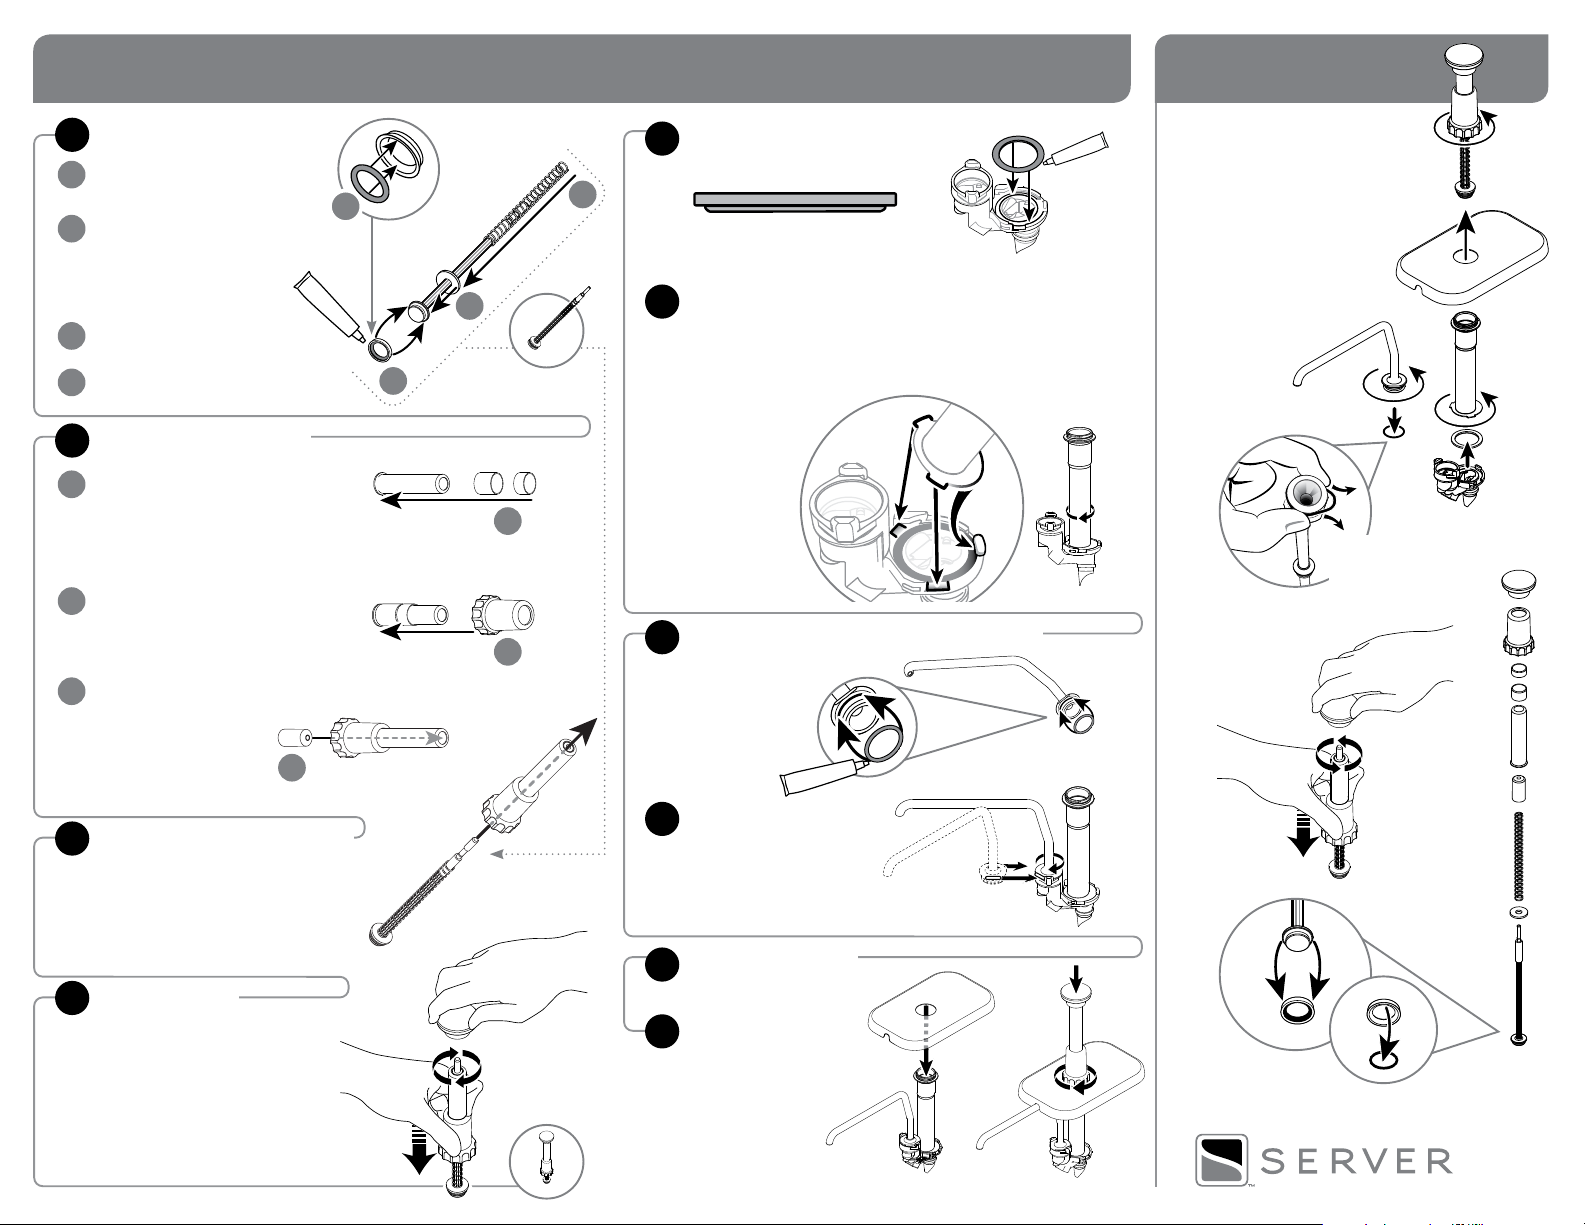
ASSEMBLY
DISASSEMBLY
PREPARE PISTON
1
INSTALL SMALL O-RING
A
into seal.
INSTALL SEAL
B
onto piston head. Apply food equipment
lubricant to outside of seal.
TIP: Flared end of seal should
face away from piston head.
SLIDE WASHER onto piston.
C
SLIDE SPRING onto piston
D
PREPARE HEAD TUBE
2
OPTIONAL:
A
ADD GAGING COLLAR(S)
to reduce portion size
SLIDE LOCKING COLLAR ON
B
SLIDE HEAD INSERT
C
(beveled edge first)
into head tube.
TIP: The end
with smaller hole
should go in first.
INSTALL GASKET
5
into valve body. Apply food equipment
lubricant on gasket.
A
C
B
SET ASIDE
FOR STEP 3
A
B
D
TIP: Flat side of gasket
should face up.
INSTALL CYLINDER
6
onto valve body.
TILT wide edge of cylinder under
nub on rim of valve body.
FIT TABS on cylinder into
corresponding notches
in valve body.
PRESS DOWN
firmly and
ROTATE
cylinder
clockwise
to secure
into slots.
INSTALL O-RING
7
onto discharge tube.
Apply food equipment
lubricant on o-ring.
PINCH & PULL
to remove o-ring
C
INSERT PISTON ASSEMBLY
3
into head tube assembly.
INSTALL KNOB
4
Press head tube down to compress
spring and expose piston threads.
Rotate knob clockwise to secure.
INSTALL
8
DISCHARGE TUBE
onto valve body. Rotate
discharge tube clockwise
and press down firmly to
secure into slots on valve body.
INSTALL LID
9
INSTALL PLUNGER
10
ASSEMBLY
 Loading...