

Page 1
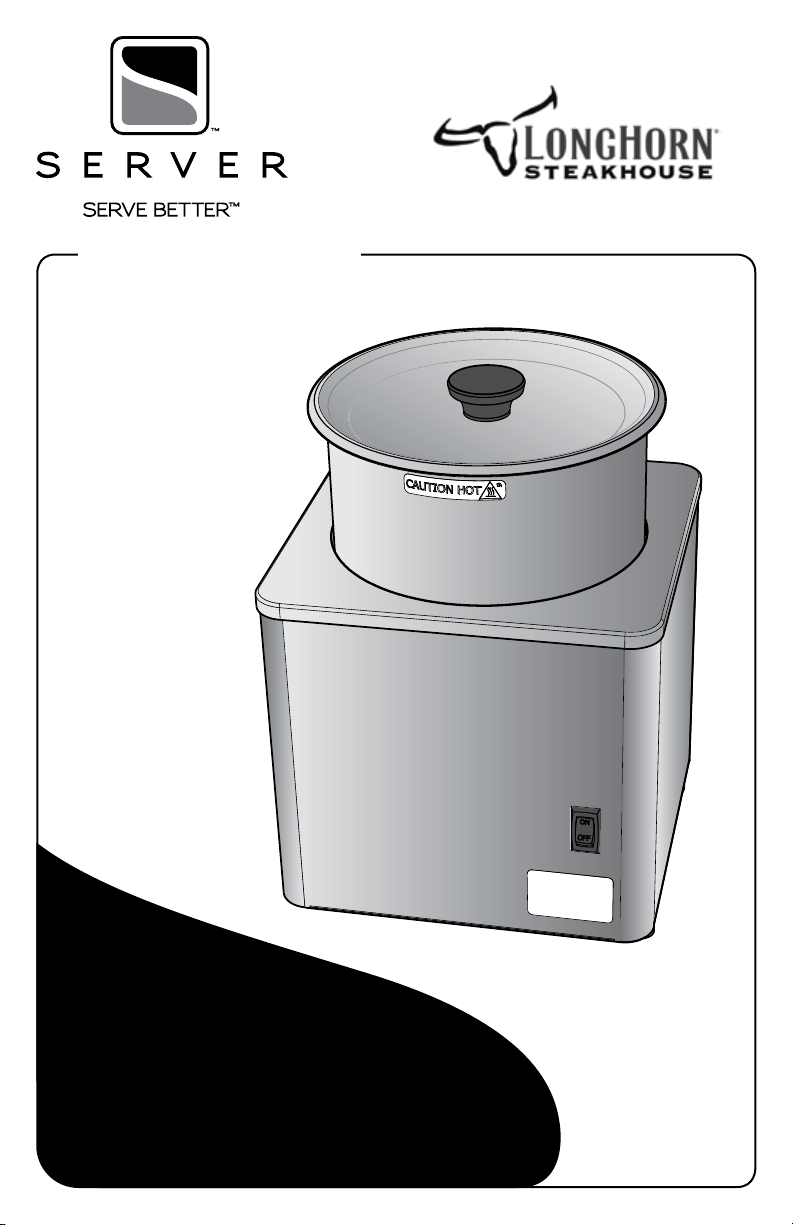
Mix-N-Serve™
2 Quart
MODEL: MNS
UNIT 05624
Thank You
...for purchasing our 2 Quart Food
Warmer/Mixer. Keep your butter or sauce
continuously stirred at the perfect temperature.
SIMPLE, EFFICIENT AND READY TO SERVE
Page 2
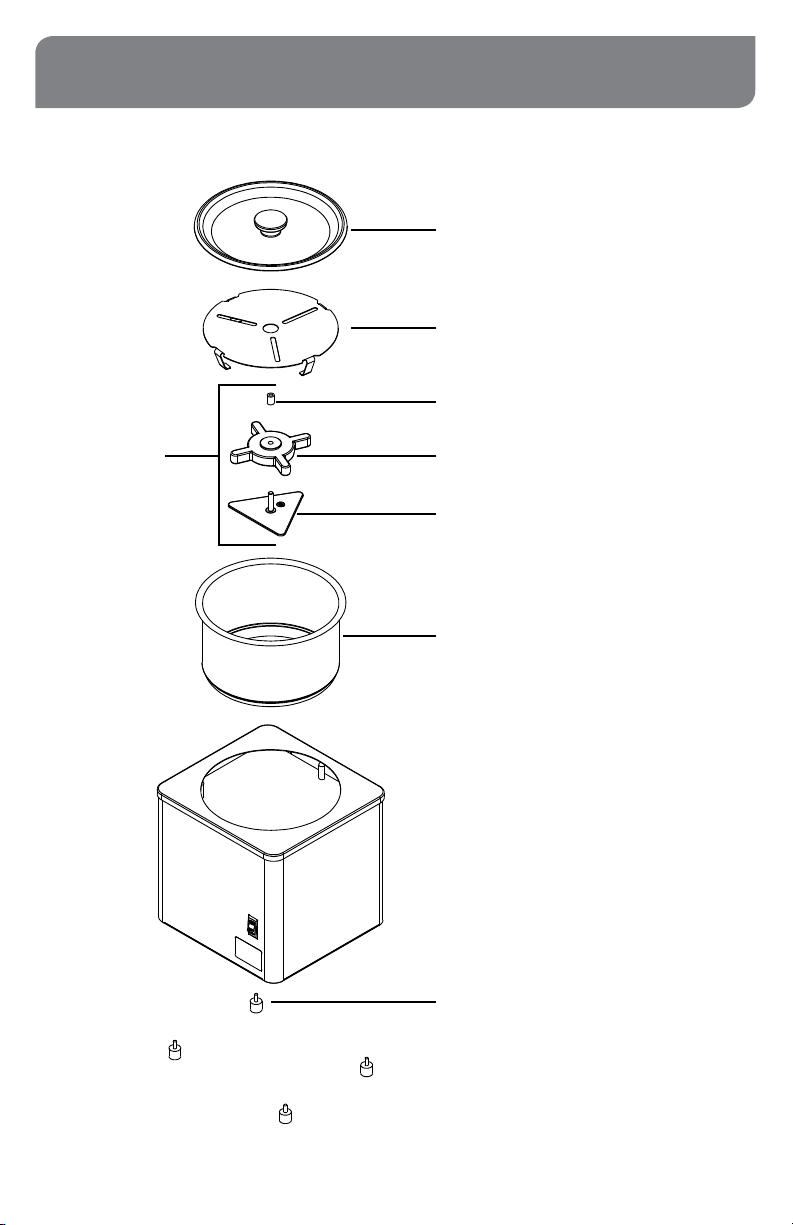
PARTS
STIR BAR KIT
05559
LID ASSEMBLY
05597
FALSE BOTTOM
05625
RUBBER TUBE
05599
STIR BAR MAGNET
05573
STIR BAR BASE
05561
VESSEL
05616
Page 2
FOOT WITH SCREW
81058
Page 3
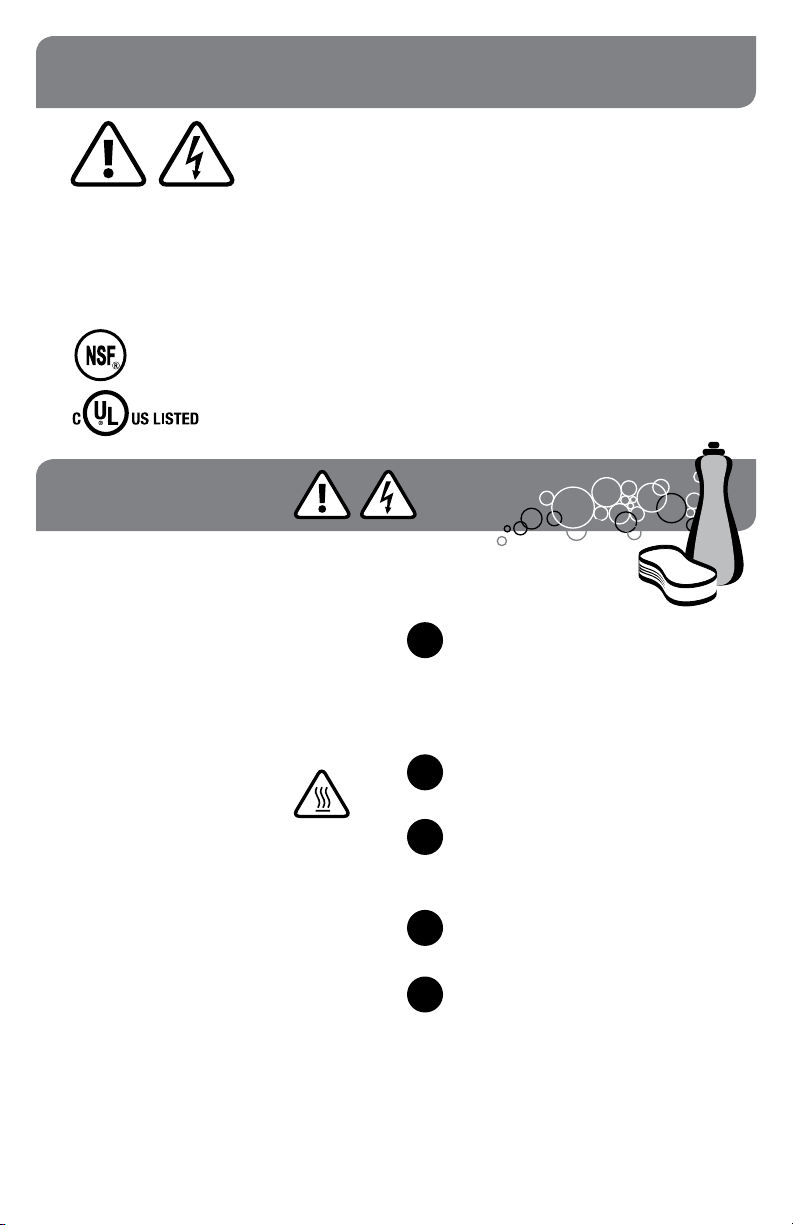
SAFETY
WARNING-
ELECTRICAL SHOCK COULD OCCUR
This unit must be earthed or grounded.
This requires all three prongs (terminals) on cord
plug to be plugged into power source.
According to food and safety regulations, most
foods must be stored and/or served at certain
temperatures or they could become hazardous.
Check with local food and safety regulators for
specific guidelines.
Be aware of the product you are serving and the
temperature the product is required to maintain.
Server Products, Inc. can not be responsible for
the serving of potentially hazardous product.
NSF International lists this model
as “Not acceptable for dispensing
potentially hazardous foods”.
CLEANING
WARNING-
ELECTRICAL SHOCK COULD OCCUR
• Electrical components of unit could be
damaged from water exposure or any liquid.
• Never immerse unit into water or any liquid.
• Never use any water jet or pressure sprayer
on unit.
• Ensure unit is “OFF” and unplugged.
CAUTION- HOT
Allow unit to cool before cleaning.
CARE OF STAINLESS STEEL
• A mildly abrasive nylon or brass brush may
be used to remove any stubborn deposits.
• Fully rinsing and drying all parts can help
prevent corrosion. Elements and minerals in
tap water can accumulate on stainless steel
parts and create corrosion.
• Do not use abrasive, caustic or ammonia
based cleansers.
• Do not use products containing acids,
alkalines, chlorine, or salt. These agents can
corrode stainless steel.
• Do not use metal scrapers or cleaning pads
that could scratch surfaces.
Server Products Inc. claims no responsibility for
actual serving temperature of product. It is the
responsibility of the user to ensure that any
product is held and served at a safe temperature.
WASH REMOVABLE PARTS
1
• Before first use and after use daily,
disassemble and clean unit.
• Ensure unit is “OFF” and unplugged.
• Wash vessel, false bottom, stir bar assembly
and lid with dishwashing soap and hot water.
RINSE fully with clear water.
2
SANITIZE all parts according to local
3
sanitization requirements. All parts in contact
with food must be sanitized.
DRY all parts fully with a clean soft cloth.
4
CLEAN EXTERNAL SURFACES
5
• Wipe daily with a clean damp cloth.
• Dry with a clean soft cloth.
• Glass and surface cleaners approved for use
in food contact areas may be used.
Page 3
Page 4

UNIT SETUP
WASH ALL PARTS PROPERLY BEFORE EVERY USE. See page 3.
Unit thermostat is factory preset to 150˚ F (65.5˚ C).
To adjust setting, see page 6.
INSERT VESSEL INTO BASE
1
Full volume of vessel is 3.15 quarts.
Limit product volume to 2 quarts:
• Allow room for any serving utensils.
• Prevent splashes or spills.
PLACE STIR BAR ASSEMBLY
2
AT THE BOTTOM OF VESSEL
3
4
5
6
7
Page 4
INSERT FALSE BOTTOM
inside vessel.
False bottom prevents interference
between rotation of stir bar and
serving utensil.
PUT FOOD INGREDIENT
into vessel.
PLACE LID over vessel.
PLUG CORD into power source.
PRESS SWITCH to the “ON” position.
5
3
2
4
Page 5

UNIT TAKE-DOWN
PRESS SWITCH to the “OFF” position.
1
UNPLUG CORD
2
CAUTION- HOT
Allow unit to cool before continuing.
REMOVE VESSEL, LID,
3
FALSE BOTTOM
& STIR BAR ASSEMBLY
EMPTY FOOD FROM VESSEL
4
Properly dispose of food or pour
any remaining food into a
storage container.
IMPORTANT: Make sure stir bar assembly
isn’t accidentally discarded.
CLEAN
5
See page3.
Page 5
Page 6

THERMOSTAT SETTING
PRESS SWITCH to the “OFF” position.
1
UNPLUG CORD
2
CAUTION- HOT
If unit has been in use,
allow unit to cool before continuing.
REMOVE VESSEL, LID,
3
FALSE BOTTOM, STIR BAR
& FOOD PRODUCT
TURN UNIT UPSIDE DOWN
4
on countertop.
DETACH BOTTOM FACE
5
OF UNIT
• Twist off all four feet by hand.
• Unscrew both screws with screwdriver.
LOOSEN SCREW IN
6
THERMOSTAT DIAL
Do not remove screw.
Use screwdriver to loosen.
YOU WILL NEED:
Phillips-head Screwdriver
7
8
9
Page 6
ROTATE DIAL by hand.
Reset thermostat by rotating clockwise
completely, then counterclockwise
completely. Then align screw with desired
temperature setting.
TIGHTEN SCREW TO
LOCK SETTING
REATTACH BOTTOM FACE
• Use screwdriver to secure both screws.
• Twist in all four feet by hand.
Page 7

WIRING
G
UNIT 05624 | 120V
BLACK
WHITE
REEN
1
2
3
4
5
1
2 3 4
SHROUD
Cord Assembly
Bushing/Strain Relief
Thermal Cutout
Wire Assembly, 4"
Rocker Switch
5
1 2
4
6
7
8
1
2
10
9
Gear Motor
6
Wire Assembly, 8"
7
Thermostat
8
Wire Assembly, 8"
9
10
400W Heating Element
Page 7
Page 8

TROUBLESHOOTING
UNIT DOES NOT HEAT?
• Ensure cord is securely plugged in.
• Ensure power is available from source.
• Ensure unit is on.
• Ensure thermostat is set correctly.
(see page 6)
SERVER PRODUCTS
LIMITED WARRANTY
Server Products equipment is backed by a
two-year limited warranty against defects in
materials and workmanship.
For complete warranty information go to:
www.Server-Products.com
GENERAL SERVICE,
REPAIR OR RETURNS
Before sending any item to Server Products for service,
repair, or return, contact Server Products customer
service to request a Return Authorization Number.
Merchandise must be sent to Server Products with this
number. Service is extremely prompt. Typically, units
are repaired and ship out within 48 hours of receipt.
Merchandise being returned for credit must be in new
and unused condition and not more than 90 days
old and will be subject to a 20% restocking charge.
Electrical parts (thermostats, heating elements, etc.)
are not returnable.
Servicing Cord: Specific tools are required for safe
and proper power supply cord removal and installation.
If cord must be replaced, only a representative of the
OEM (original equipment manufacturer) or a qualified
technician may replace cord. Cord must meet code
designation H05 RN-F requirements.
HELP or ORDERING REPLACEMENT PARTS
Server Products Inc.
3601 Pleasant Hill Road
Richfield, WI 53076 USA
262.628.5600 | 800.558.8722
SPSALES@SERVER-PRODUCTS.COM
Please be prepared with your Model, Part and
Series Numbers. This information and other
important data is located on the bottom of the unit.
Page 8
Manual #01797-RevA 072016
 Loading...