

Page 1
Serious Readers
Brighter by Design
®
classic range
for serious readers
Your User Guide
Please Read
& keep for reference
Page 2
Classic range
Heavyweight
Lightweight
Diagram 1
Diagram 2
Stay-put
Flexible Arm
Stay-put
Flexible Arm
Standby Switch
Standby Switch
Heavy Stayput
Base
Standby Switch
Swivel Joint
Getting Started
Your Classic Light is ready to plug in and
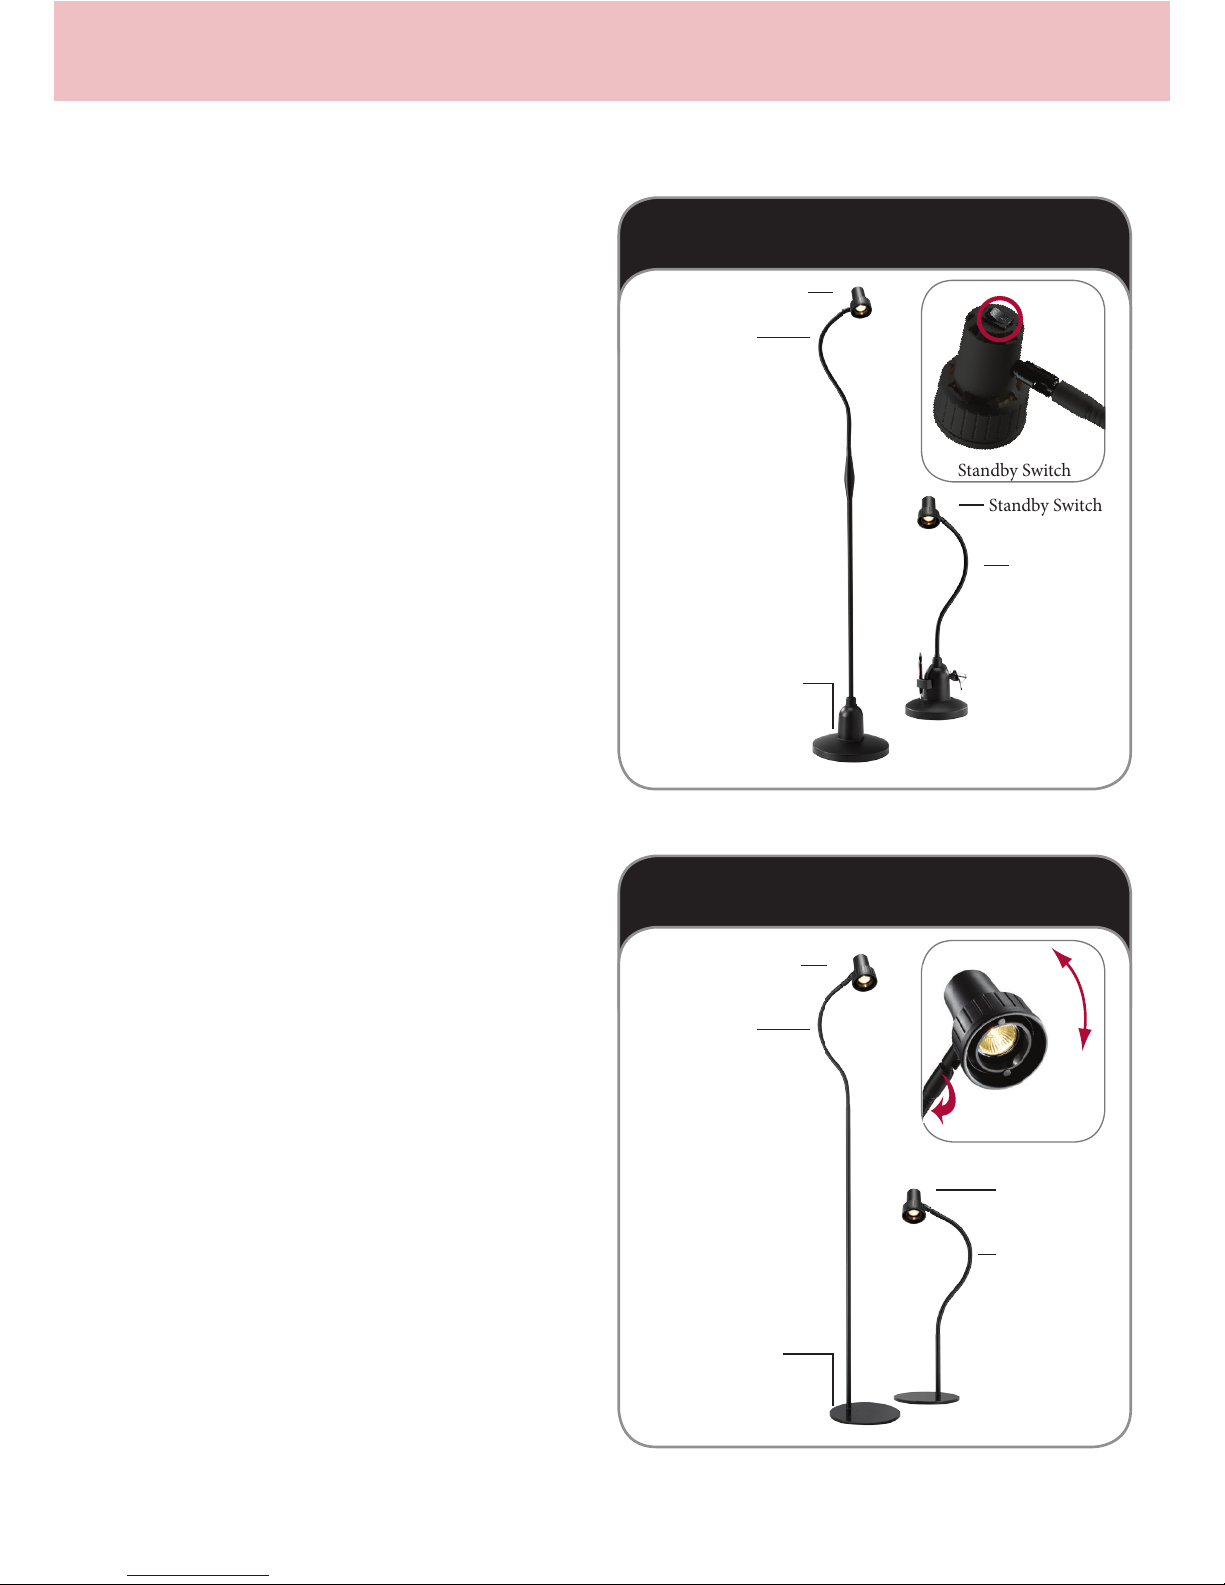
use. To operate the light, use the standby
switch located on the head of the light
(inset diagram 1).
If the standby switch has 0/1 markings on it
then the light does not have a dimmer and
the Dimmer section below can be ignored. If
there are no markings on the standby switch
then you have a dimmable model and you
can read the next section (“Dimmer”) to see
how to activate the dimmer.
Positioning
Your light is designed to help you easily
direct the beam just where you need it. It
is equipped with a swivel joint at the lamp
head (inset diagram 2) and a robust, exible,
stay-put arm for ne positioning.
Dimmer
If you have a dimmable model then turn the
light ON by using a quick, rm click on the
standby switch. To engage the dimmer, hold
the switch down and the light will dim down
and back up again. Simply release the switch
at the desired level. Use a quick, rm click
again to turn the light o.
When turned o using the standby switch
the light returns to the same light level
when switched back on again. When turned
o at the mains the light will return to full
brightness.
60
359
o
Standby Switch
Stay-put
Flexible Arm
Standby Switch
Stay-put
Flexible Arm
Lightweight
Easy to Move Base
o
Page 3
Pen & Glasses holder
Diagram 3
(only available on Heavyweight
Table Model)
1. Squeeze + Li
2. Li
2. Li
the original
Standby Mode
e Classic Light is not designed to be
opened so please do not attempt to tamper
with it. It is normal to leave the light on
standby when not in use. When in standby
mode it will consume less than 0.5w.
Table Accessories
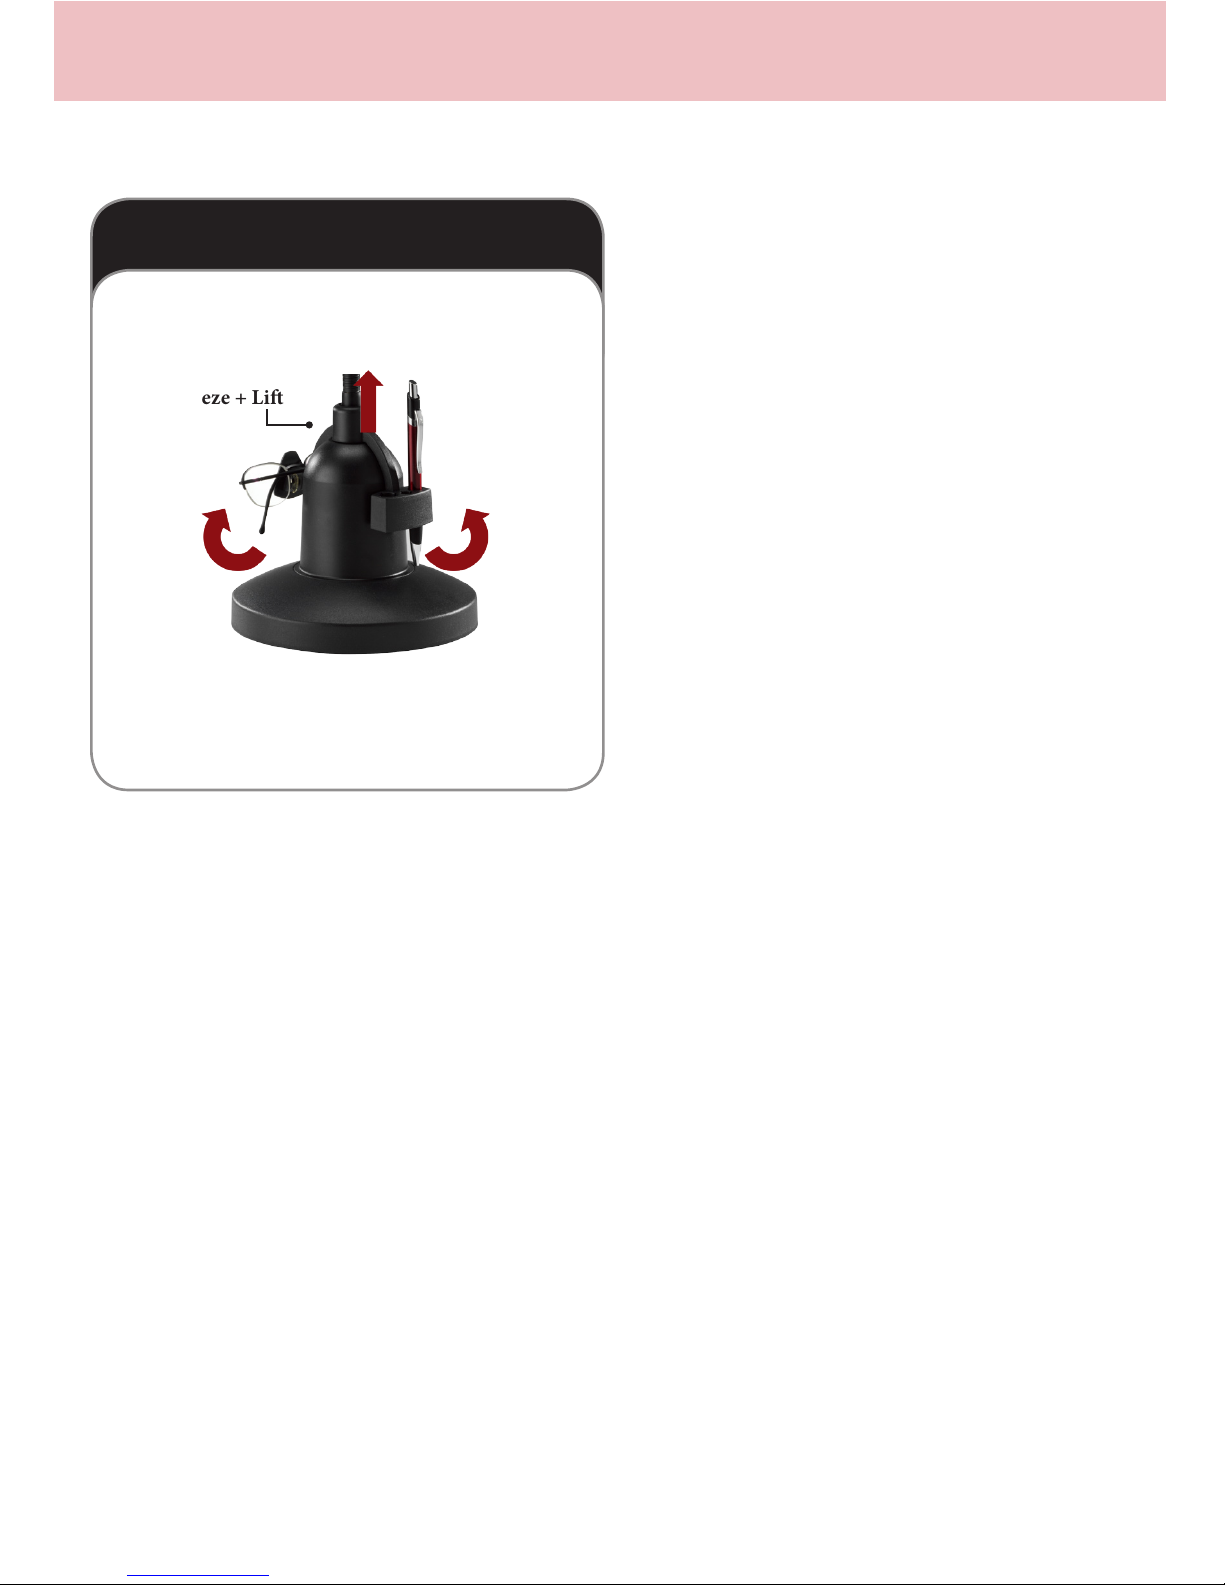
Heavyweight Table Lights are equipped with
pen and glasses holders. One or both of
these can be removed if you wish.
eRetaining Cap (1) is a friction t and
releases if squeezed and lied. If it seems
a little sti,you can loosen it by gently
levering BOTHholders (2) on either side.
Once the Retaining Cap has been released,
remove one or both holders and then clip
the capback into place (diagram 3).
Page 4
Contact us
If you require any assistance or spare bulbs, please call +44 (0)1296 390390
(Mon-Fri 8:30 to 17:30)
Bulb Change
Diagram 4
Screw action
shade for easy
bulb access
To undo
Changing your Bulb
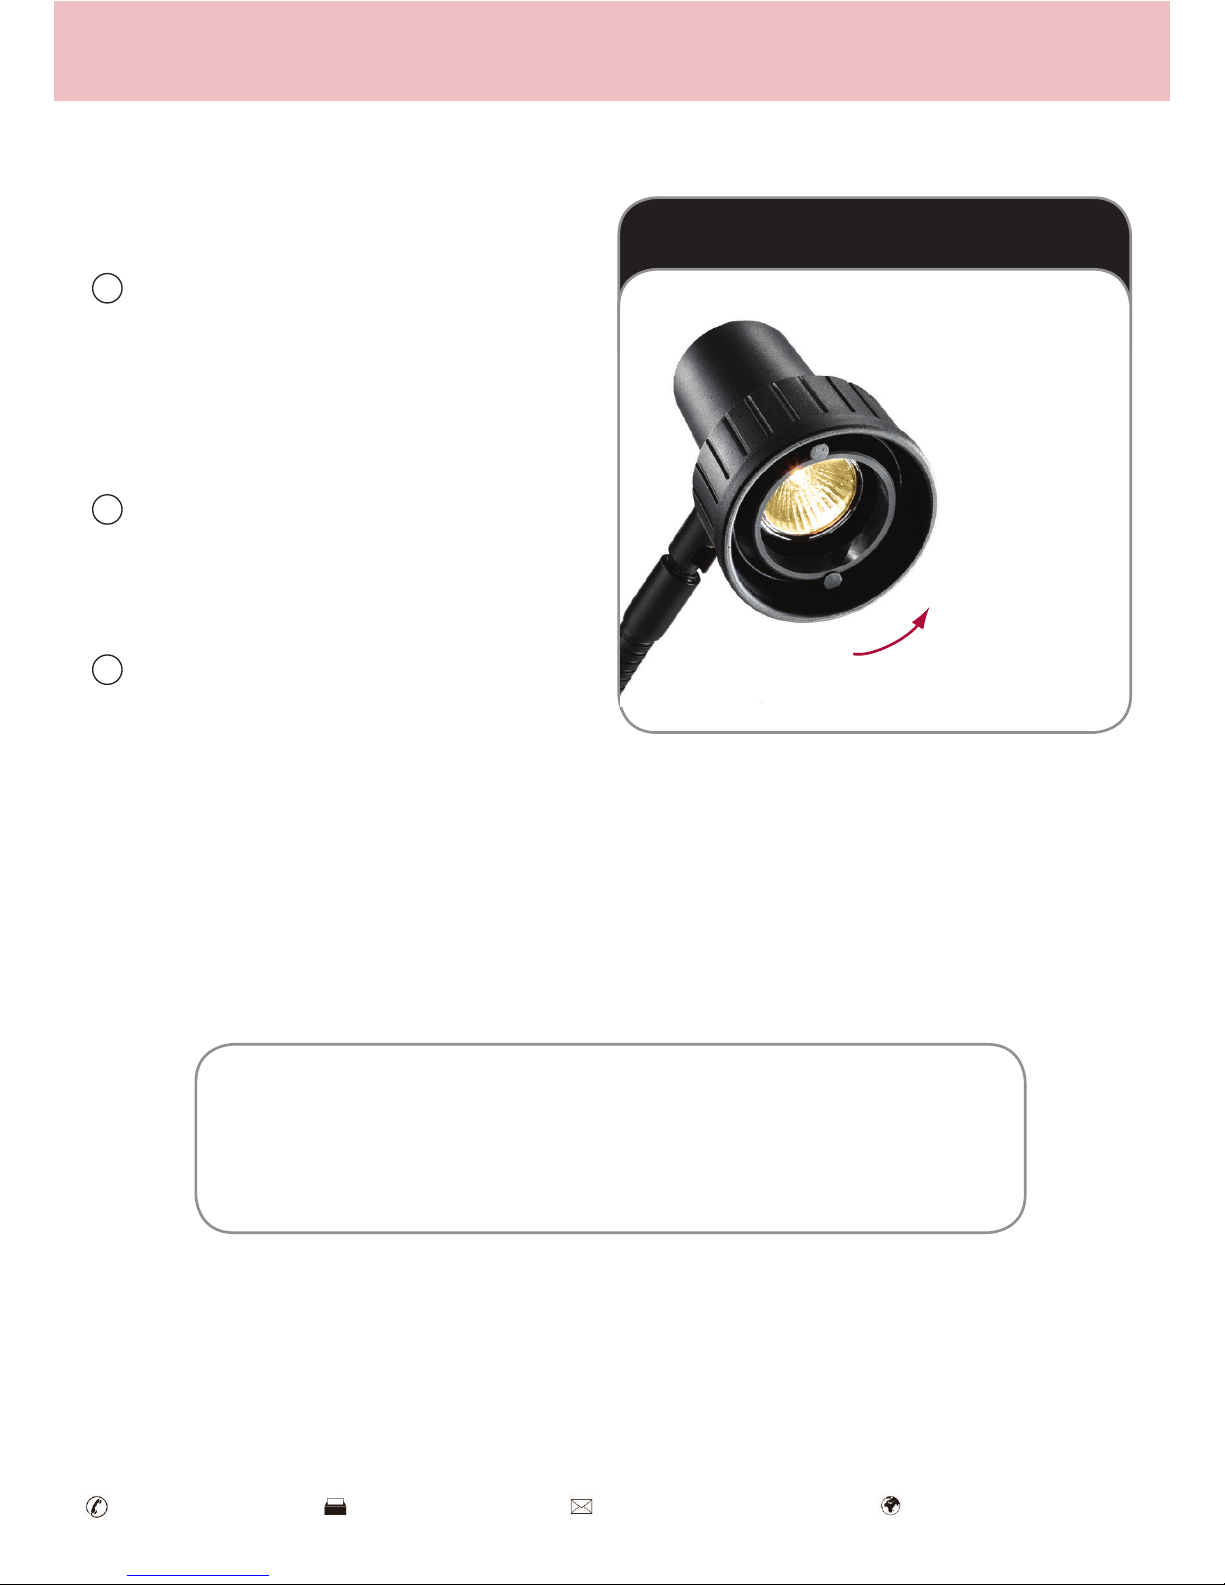
Disconnect your light from the power. If
the light has been on recently, allow 30
minutes for everything to cool down. To
access the bulb cavity unscrew the ribbed
front section by rotating anti-clockwise
(diagram 4).
Pull out the old two pinned bulb without
twisting. Insert the new bulb by pushing
the two male pins into the two female
holder sockets.
Replace the front shade by screwing it
on to the lamp head with a clockwise
quarter turn.
1
2
3
SR055
Serious Readers | Chapel Offices | Bierton | Bucks | HP22 5DW | Great Britain
Classic range
+44 (0) 1296 390390 +44 (0) 1296 393413 [email protected] www.seriousreaders.com
 Loading...