

Page 1
READ AND SAVE THESE IMPORTANT INSTRUCTIONS
Ultrasonic Air Humidifier
With Silver Ion and Night Light
Model:CF-2880
Page 2
WHEN USING ELECTRICAL APPLIANCES, BASIC SAFETY PRECAUTIONS
SHOULD ALWAYS BE FOLLOWED TO REDUCE THE RISK OF FIRE,
ELECTRIC SHOCK, AND INJURY TO PERSONS, INCLUDING THE
FOLLOWING:
1. Check the household voltage to ensure it matches the units rated
specification before operating.
2. Children should be supervised to ensure that they do not play with the
appliance.
3. DO NOT add water from moisture outlet directly, or it will hurt the unit.
4. Do not allow children to play with any product packaging, such as plastic
bags.
5. To avoid fire hazard, NEVER put the cord under rugs, near heat registers,
radiator, stoves, or heaters.
6. DO NOT place humidifier near heat sources such as stoves, radiators, and
heaters. Do locate your humidifier on an inside wall near an electrical outlet.
The humidifier should be at least 10cm away from the wall for best results.
7. Do not attempt to refill humidifier without first unplugging the unit from it’s
electrical outlet.
8. DO NOT operate any appliance with a damaged cord or plug, after the
appliance malfunctions, or if it has been dropped or damaged in any manner.
Return appliance to manufacturer for examination, electrical or mechanical
adjustment, or repair.
9. Always place humidifier on a firm, flat, level surface at least 60cm away from
the floor.
10. DO NOT allow the moisture outlet to directly face the wall.
11. NEVER tilt, move, or attempt to empty unit while it is operating.
12. Shut off and unplug before removing the water tank and moving the unit.
13. DO NOT attempt to repair or adjust any electrical or mechanical functions on
this unit. Doing so will void your warranty. The inside of the unit contains no
user serviceable parts. All servicing should be performed by qualified
personnel only.
14. Do not plug in the cord with wet hands: electric shock could result.
15. NEVER use detergents, gasoline, glass cleaner, furniture polish, and paint
thinner, or other household solvents to clean any part of the humidifier.
16. Do not pour water in any openings other than the water tank.
17. Excessive humidity in a room can cause water condensation on windows and
some furniture. If this happens, turn the humidifier OFF.
18. Never place housing under water flow or immerse in liquids.
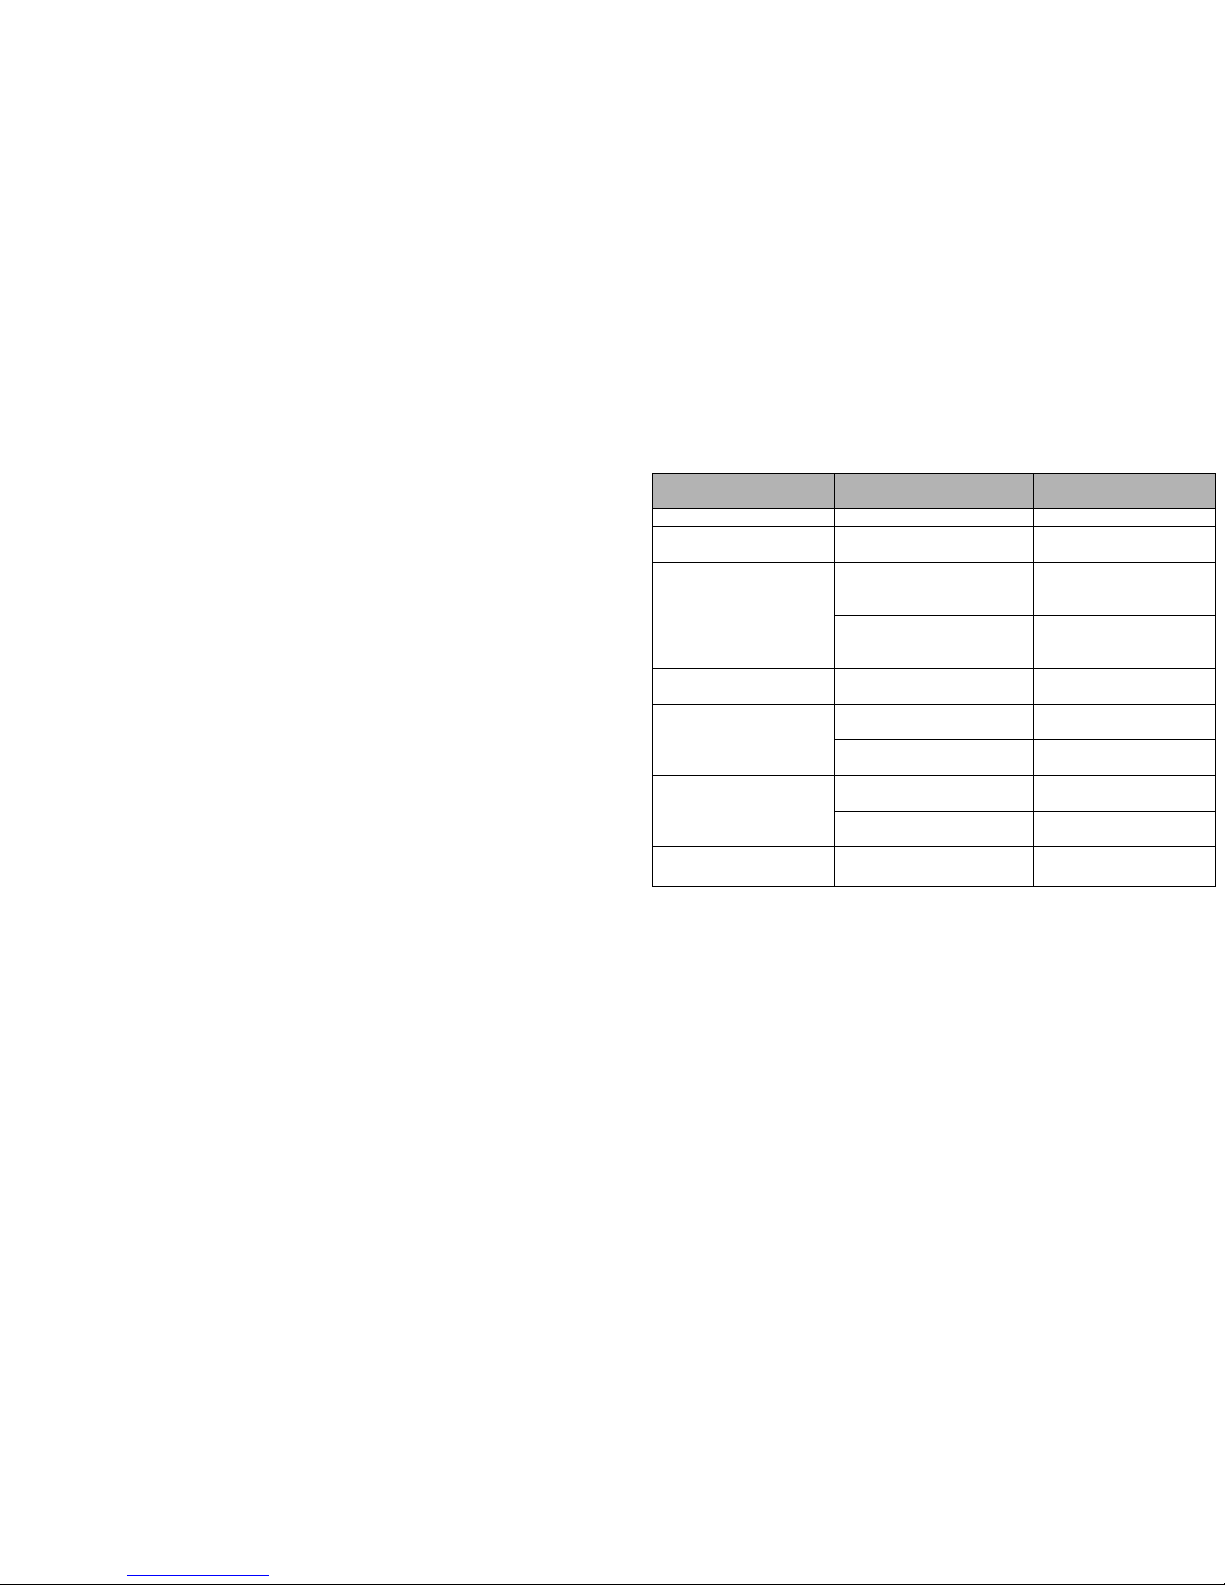
TROUBLE SHOOTING
If your humidifier is not working correctly please check the following causes:
TROUBLE
PROBABLE CAUSE
SULTION
Humidifier does not operate.
Power cable not plugged in
Plug in power cable.
The power light is on, but
there is no mist with wind
No water in water tank
Fill tank with water
The water mist produces
an unpleasant smell.
New machine.
Open the water tank and
leave it for 12 hours at
shady and cool place.
Dirty water or the water is
left in the water tank for too
long.
Clean the water tank and
change the water.
The power light is on, but the
humidifier doesn’t work
Too much water in the water
flume
Pour away some water
from the water flume
The output volume of the
mist is low
The transducer is dirty.
Clean transducer by a
soft brush
Water is too dirty or water
kept too long in the tank
Clean water tank and
change the water
Abnormal noise
Resonant in water tank
when water is too less
Fill water into water tank
Unit is on an unstable
surface
Move the unit to a stable
flat surface
Very tight tank cap
Over tightened
Add liquid soap to cap
gasket for easy opening
Trouble
Possible reasons
Shooting Way
1
6
Page 3

CLEANING AND MAINTENANCE INSTRUCTIONS
In the winter, the lack of humidity can dry out your skin and cause irritated nasal,
frequent colds, sore throats and etc. Humidifiers provide relative humidity to protect
our health. To get the most of the benefit from the humidifier and avoid product
failure, follow all maintenance instructions carefully. If the recommended care and
maintenance guidelines are not followed, micro-organisms may be able to grow in
the water within the humidifier.
DAILY MAINTENANCE
·Before cleaning, turn the power to OFF and unplug the unit from the electrical
outlet.
·Lift off the tank and the housing of the humidifier.
·Carry the water tank to a sink, then drain and rinse the water tank thoroughly to
remove any sediment and dirt. Wipe clean and dry with a clean soft cloth or
paper towel.
·Refill the water tank with cool tap water as instructed in filling the water tank
instructions.
WEEKLY MAINTENANCE
·Repeat steps 1-3 above.
·Fill one cup of white vinegar to the basin for about 15 minutes, then
wipe off the scale in the basin especially in the transducer with a soft brush.
·Remove the scale and white vinegar solution with a clean soft cloth.
CAUTION OF MAINTENANCE
·Make sure main body is never submerged into water
·Do not use any solvents or aggressive cleaning agents to clean the humidifier.
·Clean the inner parts with a soft cloth.
·Only use the brush to clean the transducer. This should be done once a week.
·Only use the soft brush packed with the unit.
·Change the water in the water tank at least once a week if water is standing for
more than one week.
STORING THE HUMIDIFIER
·Clean the humidifier as described earlier and dry thoroughly.
·Preferably store the humidifier in its original box.
·Avoid high temperatures.
CONSUMER SAFETY INFORMATION
Note: This is an electrical appliance and requires attention when in use.
Note: If moisture forms on the walls or windows of the room, turn off the humidifier.
The room already has plenty of humidity and additional moisture may cause
damage. Do not block air inlet or outlet.
CORD AND PLUG INSTALLATION SAFETY INSTRUCTIONS
The length of cord used on this appliance was selected to reduce the hazards of
becoming tangled in, or tripping over a longer cord. If a longer cord is necessary an
approved extension cord may be used. The electrical rating of the extension cord
must be equal to or greater than the rating of the humidifier. Care must be taken to
arrange the extension cord so that it will not drape over the countertop or tabletop
where it can be pulled on by children or accidentally tripped over.
PRE-OPERATING INSTRUCTIONS
1. Be sure the humidifier is OFF and disconnected from the electrical outlet.
2. Place the humidifier on a flat surface, about 60cm away from the floor and 10cm
away from the wall. We recommend you not to place the humidifier on important
furniture.
3. Filling the water tank instructions
-Remove the water tank by holding the handle and lifting straight upward.
(See figure 1)
-Twist off the tank cap located on the bottom of the tank by turning counter
clockwise and fill the water tank with cool, fresh water. DO NOT FILL WITH
WARM WATER AS THIS MAY CAUSE LEAKING.
-After filling the tank, replace the tank cap by firmly turning clockwise and then
replace the water tank on the base. The tank will immediately begin to empty into
the base.
4. Plug the AC/DC power cord into a rated electrical outlet.
5
2
Page 4

MAIN FEATURES
·Mini design to save space .
·Transparent water tank to ensure the water level is visible
·Easy to adjust moisture.
·Night light for emotion release or baby care.
·Advanced silver ion technology to kill the bacteria or viruses in the water(optional)
OPERATING INSTRUCTIONS
A) Power and moisture control knob
-Turn the knob A clockwise to turn the humidifier on and increase the
mist emission.
-Turn the knob A anticlockwise to reduce the mist emission and turn
the humidifier off.
B) Indicator light for power or waterless
-Indicator light for power on: Green
-Indicator light for waterless: Red.
If the indicator light becomes Red, please kindly refill the water as per
filling water tank instructions promptly.
ATTENTION!
If condensation forms on your windows or walls, please turn the humidifier off.
DESCRIPTION OF THE HUMIDIFIER
TECHNICAL DATA
·Product name: Ultrasonic Air Humidifier
·Input voltage: AC: 100V-240V, 50/60Hz DC: 24V
·Moisture capacity: 200 ml/h
·Water tank volume: 2.5L
·Rated power: 24W
·Dimension: 226(L) x141(W) x 280 (H) mm
·Weight: 0.8 kg
·Coverage Area: 25 m2
Moisture outlet
3
4
Water tank
Tank cap
Transducer
Main body
A
Control button
(Figure 1)
 Loading...