

Page 1

PSLHTM65
Electric Garden Shredder
Home Garden Leaf Shredder / Chipper / Mulcher
with 50-Liter Collection Bin
Page 2

TABLE OF CONTENTS
1. INTRODUCTION ------------------------------------------------------------------------ 2
2. Before you start ----------------------------------------------------------------------- 2
3. EXPLANATION OF SYMBOLS ------------------------------------------------------ 2
AND SAFETY WARNINGS
4. SHEREDDER COMPONENTS ------------------------------------------------------ 3
5. Safe Operating Practices ----------------------------------------------------------- 5
6. Careful Handling and Use of Electrical Tools -------------------------------- 7
7. Service ------------------------------------------------------------------------------------ 8
8. Personal Protective Clothing ----------------------------------------------------- 9
9. Tool-Specic Notes ------------------------------------------------------------------- 9
10. How do I assemble this product ----------------------------------------------- 12
11. How do I use this product ------------------------------------------------------- 14
12. How do I operate this product ------------------------------------------------ 16
13. How do I collect the shredded material ------------------------------------ 17
14. How do I replace the blades ---------------------------------------------------- 17
15. How do I maintain this product ----------------------------------------------- 19
16. Parts list ------------------------------------------------------------------------------- 19
17. Features and Technical Specs. ------------------------------------------------ 22
www.SerenLifeHome.com
Page 3
Before using the product for the rst time, please make sure you read these
operating instructions. Here you will nd information about how to use the
product safely and ensure its long service life. You should pay attention to
all of the safety instructions in this document!
Note: Illustrations and specications in this manual may vary according to
Country requirements and are subject to change without notice by the
manufacturer.
Before you start…
Proper use of the product
This device is only designed for chipping operations outside. The device is
designed for the cutting up of brous or woody organic material from the
household or garden. It may not be lled with stones, glass, metal, bones,
plastics or textile waste. This device is only designated for private use on
private property. Any other type of use is not permitted! Any unintended
use or any activities regarding the device that are not described in these
operating instructions will be considered an unauthorised misuse outside
the manufacturer's legal liability limits.
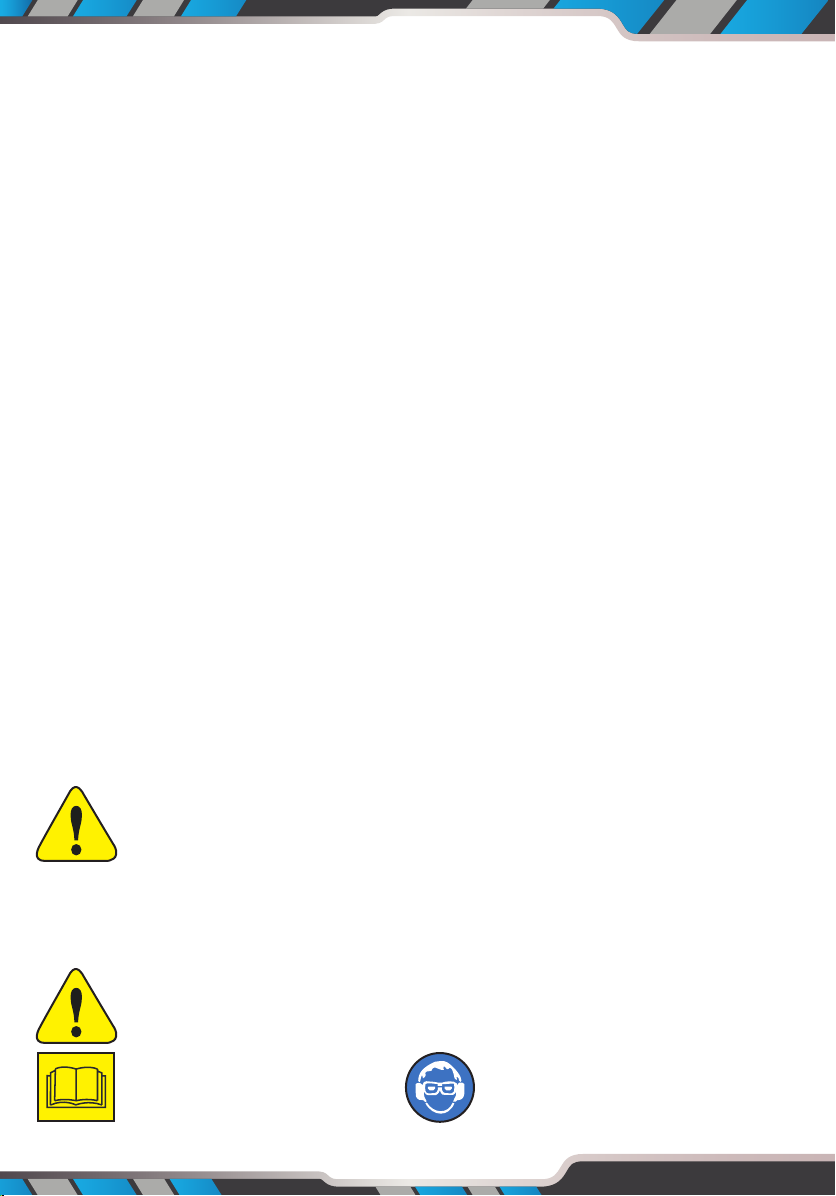
EXPLANATION OF SYMBOLS AND SAFETY WARNINGS
In the operating manual.
Notes indicating danger and other notes are clearly identied in the
operating manual. The following symbols are used:
Type and source of danger! This danger sign warns of damage to
the device, the environment or damage to property. Ignoring a
danger note can cause serious injuries and is a risk to life.
On the device
The following symbols are located on the device:
Read operator's manual Wear eye and ear protection
2
www.SerenLifeHome.com
Page 4
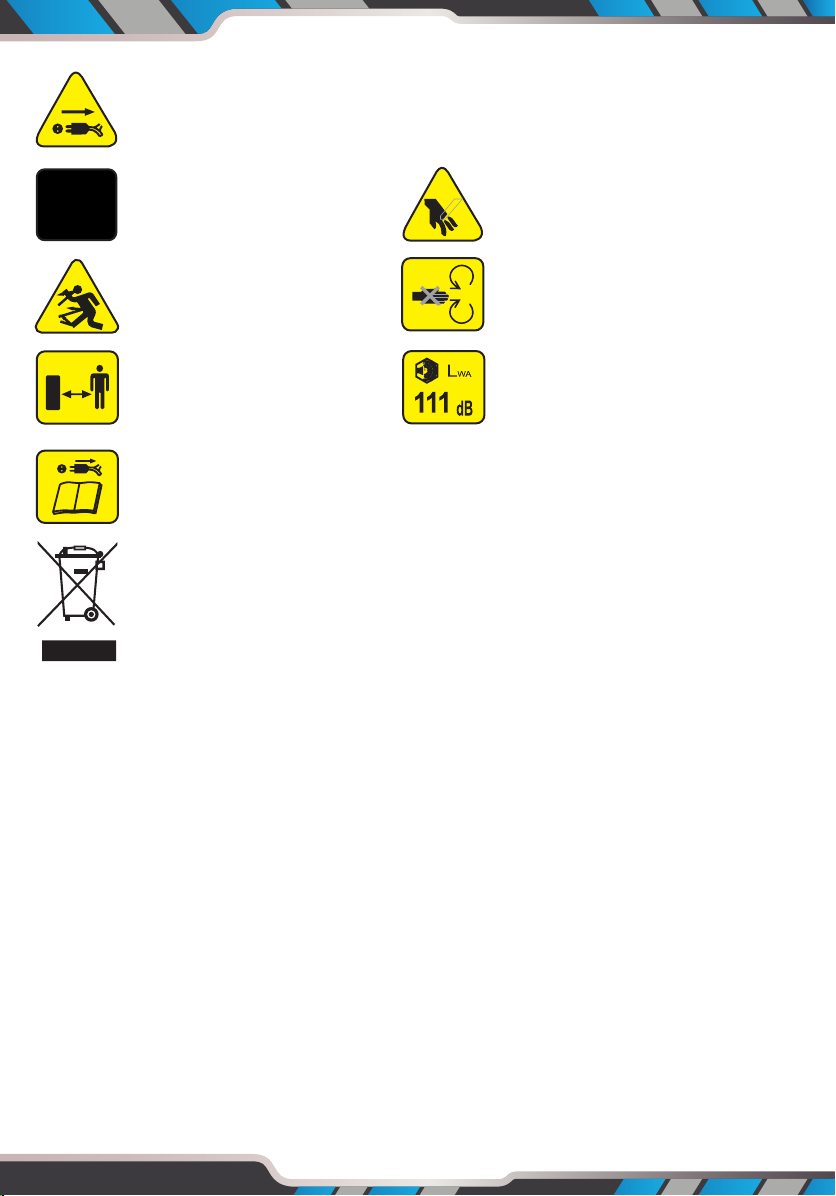
Immediately pull the plug out of the socket (separate unit from
the power supply) if the cable is damaged or cut.
Protect from Moisture
Danger – Rotating blades.
Keep hands and feet out of
openings while machine is
running.
Keep bystanders away Sound pressure level
(LWA)
Before carrying out any work on the chain saw such as
recruitment, cleaning, etc. and switch o plug from the socket.
Waste electrical products should not be disposed of with
household waste. Please recycle where facilities exist.
Check with your local authority or retailer for recycling device
SHEREDDER COMPONENTS
1. Feed hopper 6. Wheel
2. Shredder body 7. Feet
3. Motor cover 8. Main switch
4. Collection box 9. Circuit breaker
5. Frame 10. Cover knob
www.SerenLifeHome.com
3
Page 5

Figure 1
1
2
3
Figure 2
5
6
9
4
7
10
8
4
www.SerenLifeHome.com
Page 6

Safe Operating Practices
General Warning!
This appliance is not intended for use by persons (including children) with
reduced physical, sensory or mental capabilities, or lack of experience and
knowledge, unless they have been given supervision or instruction
concerning use of the appliance by a person responsible for their safety.
Children should be supervised to ensure that they do not play with the
appliance.
Training
Become familiar with the owner's manual before attempting to operate this
equipment.
Preparation
1. Do not allow children to operate this equipment
2. Do not operate this equipment in the vicinity of bystanders
3. Wear ear protection and safety glasses at all times while operating the
machine
4. Avoid wearing clothing that is loose tting or that has hanging cords or
ties
5. Only operate the machine in open space (e.g. not close to a wall or other
xed object) and on a rm, level surface
6. Do not operate the machine on a paved or gravel surface where ejected
material could cause injury
7. Before starting the machine, check that all screws, nuts, bolts, and other
fasteners are properly secured and that guards and screens are in place.
Replace damaged or unreadable labels.
Maintenance and Storage
1. When the machine is stopped for servicing, inspection, or storage, or to
change an accessory, shut o the power source, disconnect the unit from
the power supply, make sure that all moving parts have come to a
complete stop and where a key is tted remove the key. Allow the
machine to cool before making any inspections, adjustments, etc.
2. Always allow the machine to cool before storing;
5
www.SerenLifeHome.com
Page 7

Workplace Safety
• Ensure that the area you are working in is clean and well lit. Untidy or unlit
workplaces can lead to accidents.
• Do not use the electrical tool in an environment prone to the risk of
explosion, or in which ammable liquids, gases or dusts may be found.
Electrical tools cause sparks which may ignite dust or vapours.
• Keep children and other people away from the electrical tool when it is in
use. If distracted, you may lose control of the device.
Safety Tips for Electronic Devices
• The plug of the electrical tool must t into the socket. The plug may not be
modied in any way. Do not use an adapter plug in conjunction with a
grounded electrical tool. Unmodied plugs and the appropriate sockets
will reduce the risk of an electrical shock.
• Avoid body contact with grounded surfaces, for example, pipes, heating,
ovens and fridges.There is an increased risk of electrical shock if your body
is earthed.
• Keep the electrical tools away from rain or damp. Water entering into an
electrical device will increase the risk of an electrical shock.
• Do not misuse the cable to carry the electrical tool, to hang it up or to pull
the plug out of the socket. Keep the cable away from heat, oil, sharp edges
or moving device parts. Damaged or coiled cables increase the risk of an
electrical shock.
• If the supply cord is damaged, it must be replaced by the manufacturer, its
service agent or similarly qualied persons in order to avoid a hazard.
• When you use an electrical tool out in the open, use an extension cable
that is designed foroutside use.The use of an extension cable that is
designed for outdoor use reduces the risk of an electrical shock.
• If it is not possible to avoid using the electrical tool in a damp
environment, use a residual current circuit-breaker with a trigger current
of 30 mA or lower. The use of a residual current circuit-breaker reduces the
risk of an electrical shock.
• Arrange the connecting cable in such a way that it cannot be caught by
branches or similar when cutting.
6
www.SerenLifeHome.com
Page 8

Safety of persons
• Pay attention to what you are doing and be sensible when working with
an electrical tool. Do not use an electrical tool if you are tired or under the
inuence of drugs, alcohol or prescription drugs. A single moment of
inattention when using an electrical tool can lead to serious injuries.
• Wear personal protective gear and always wear goggles. Wearing personal
protective clothing, such as breathing masks, non-slip safety shoes,
protective helmet or ear defenders, according to type and use of the
electrical tool, will reduce the risk of injuries.
• Avoid starting the tool accidentally. Ensure that the electrical tool is
switched o before you connect it to the power supply and/or battery, or
transport it. If you have your nger on the switch when moving the device
or have it switched on when connecting to the power supply, this may
lead to accidents.
• Remove the adjusting tools or wrench before switching the electrical tool
ON. A tool or a wrench caught in a rotating part of the device may lead to
injuries.
• Avoid abnormal body positions. Ensure that you are standing rmly, and
keep your balance at all times. This will enable you to control the electrical
tool better in the event of unexpected situations.
• Wear suitable clothing. Do not wear loose-tting clothing or jewellery.
Keep hair, clothing and gloves well away from moving parts. Loose-tting
clothing, jewellery or long hair may become caught in moving parts.
• If dust suction and collection mechanisms can be mounted, ensure that
these are connected and used correctly.Using a dust suction unit can
reduce the risks posed by dust.
Careful Handling and Use of Electrical Tools
• Do not overload the device. Use the appropriate electrical tool for the job
in hand. Using the correct electrical tool allows you to work better and
more safety in the specied performance range.
7
www.SerenLifeHome.com
Page 9

• Do not use an electrical tool with a defective switch. An electrical tool that
cannot be switched on or o is dangerous and must be repaired.
• Pull the plug out of the socket and/or remove the battery before making
any settings to the device, changing accessories or putting the tool down.
These safety measures will help to prevent unintentional starting of the
electrical tool.
• Keep electrical tools that are not in use well out of the reach of children.
Do not allow people who are unfamiliar with the device or who have not
read these instructions to use the device. Electrical tools are dangerous if
they are used by inexperienced persons.
• Take good care of your electrical tools. Check whether the moving parts
function with no diculties and do not jam, check whether parts are
broken or damaged in such a way that the functionality of the electrical
tool is impaired. Have damaged parts repaired before using the device.
Many accidents are caused by badly maintained electrical tools.
• Ensure that your cutting tools are sharp and clean. Properly cared for
cutting tools with sharp cutting edges are less likely to become jammed
and are easier to operate.
• Use the electrical tool, accessories, adjustment tools etc in accordance
with these instructions. Take the working conditions and the tasks to be
completed into account. The use of electrical tools for tasks other than the
one they are intended for can lead to dangerous situations.
Service
• Only have your electrical tools repaired by qualied specialists and with
original replacement parts.This ensures that the safety of the electrical tool
is maintained.
• Before conducting any maintenance, make sure the device is unplugged
(disconnect the power supply) and wait until the blade shaft is at a
complete standstill. Allow the device to cool down before doing anything.
• Only those maintenance and fault elimination tasks described here, may
be carried out. Any other tasks must be completed by a specialist.
• Check all screws regularly to ensure that they sit tight.
8
www.SerenLifeHome.com
Page 10

• Conversions, independent modications and the use of non-approved
parts are not permitted.
• Only use original replacement parts. Only these replacement parts are
designed and suitable for the device. Other replacement parts will not
only lead to an invalidation of the guarantee, they may also endanger you
and your environment. Always store the device in a dry location.
• If the machine is switched off for the purpose of maintenance, storage or
to replace an accessory, ensure that the plug has been pulled from the
socket. Ensure that all of the moving parts have come to a standstill and, if
there is a key, remove it. Allow the machine to cool down before carrying
out maintenance, adjustment work etc.
• Always allow the machine to cool down before storing.
• Never transport the unit with the engine running. Protect the device from
becoming damaged during transportation.
Personal Protective Clothing
Wear goggles and ear defenders.
When working with the tool, wear sturdy footwear.
Wear protective gloves when working with the device.
Wear close tting clothes when working with the device.
Tool-Specic Notes
Risk of Electric Shock
Warning: The cutting tools continue to rotate after the engine has
been switched o.
Failure to comply with the following instructions will lead to serious
injury or death by electrocution.
9
www.SerenLifeHome.com
Page 11

• Before use, check the mains and extension cables for damages.
Pay attention to age and state.
• Never operate the device in a damp or wet environment. Never work in
the rain. Never feed wet leaves into the unit.
• Make sure the connection cable is always kept out of the working range of
the device. Makesure that cables always lead away from the rear of the
device.
• The device may only be connected to a socket that is correctly installed
and grounded.
• The fuse must be a residual current circuit-breaker with a measured
residual current of no more than 30mA .
• Make sure that the power supply corresponds with the connection
specications of the device before it is connected.
• The device may only be used within the specied limitations for voltage,
power and nominal rotation speed (see type plate).
• If required, only use extension cords that are appropriate for both the
device and the environment. If in doubt, ask an expert in electrical matters
• Never operate the device in ammable or explosive environments.
• If the power cable is damaged, immediately pull out the plug. Never use
the device if the powercable is damaged.
• When working with the device do not touch grounded objects (radiators,
water pipes etc.).
• If the device is not in use make sure the plug is pulled out.
• Make sure that the device is switched off before plugging in the mains
cable.
• Make sure that the device is switched off before unplugging it.
• Disconnect the power supply before transporting the device.
Risk of Cuts
Failure to comply with the following instructions will lead to serious
injury or death from cuts.
• Before starting the machine up, check all screws, nuts, bolts and other
xtures to ensure that they are tted tightly and make sure that all covers
10
www.SerenLifeHome.com
Page 12

and guards are in place. Labels that are damaged or cannot be read must
be replaced.
• Check, before switching ON, whether the blades are correctly mounted
and sit tightly.
• Never use the device without the feed hopper.
• If the chipper is blocked, rst switch off the device, pull the plug out of the
socket and wait until the machine has come to a complete stand still
before removing the blockage. Keep the ON/OFF switch clean and free of
foreign objects.
• Never attempt to remove cut material or hold onto material being cut
while the blade is operating. Remove chippings/saw dust only when the
device has been switched OFF.
• Avoid direct contact with the rotating cutting blade. Keep hands and feet
away from the openings when the machine is running.
• Never put hands or other parts of the body or clothing into the feed
chamber, ejection channelor in the vicinity of other moving parts.
Risk of Injury!
Failure to comply with the following instructions will lead to serious
injury or death.
• Make sure that the ller funnel is empty before starting the machine.
• Always remove the cut material from the ejection zone before it piles up.
In this way, you avoid blocking the chipper or allowing cut material to
enter the feed hopper opening via kickback. This may lead to accidents.
• In the vicinity of 3m around the cutting area, there should be no people or
animals as they maybe hurt by ying objects.
• Never operate the unit on tiled or cemented surfaces.
The cut material may rebound andcause injuries.
• Ensure that the ON/OFF switch is set to "O" when you put the plug into
the socket.
11
www.SerenLifeHome.com
Page 13

Damage to the device
Failure to comply with the following instructions leads to damage of
the device.
• The ventilation slots may not be covered by the collection container or by
chipped material.
• Do not overload the device. Only use the device for its intended purpose.
• If the machine starts to vibrate in an usual way, check it immediately.
How do I assemble this product?
Figure 3 Figure 4
Figure 5
12
www.SerenLifeHome.com
Page 14

Figure 7
Cover Knob
Figure 6
1. Turn ON the Foot A and Food B to the appropriate location (Fig.3), then
upside down the machine.
2. Mount the wheel in the same order illustrated in g 5 ensure the nut is
not too tight.
3. Lift up the button, push the collection box track to the appropriate
location (Fig 4).
4. Tighten the reamer knob. The reamer knob has a safety switch please
ensure the knob is tightened or the motor will not activate. (Fig. 6)
5. NOTE: It is dangerous to use the machine without the hopper. (Fig. 7)
www.SerenLifeHome.com
13
Page 15

How do I use this product?
• Before using the machine, read the instructions thoroughly and acquaint
yourself with the features of the machine.
• Before inspecting or servicing any part of the appliance, switch off, pull
the plug from the mains and make sure that all moving parts have come to
a complete stop.
1. Inspect the material to be shredded before starting. Remove any objects
or debris that could be thrown, jammed or become entangled in the
blades. Remove any soil from root balls. Foreign bodies like stones, glass,
metals, fabrics, or plastics must not enter the in-feed chute, these could
damage the blades.
2. Always place the machine on rm level ground.
During operation, do not tilt or move.
3. Allow the cutting blades to reach full speed before feeding the material
into the in-feed chute.
4. Use the machine to shred the following materials only:
• Twigs and branches (Max. diameter 40mm)
• Waste from pruning bushes
• Waste from trimming hedges
• Plant material and other garden waste
• Leaves and plant roots (remove soil from roots before shredding)
5. Do not ll soft waste such as kitchen rubbish into the shredder, but
compost them.
6. Feed the material to be shredded into the corner of the in-feed chute, if it
is not too bulky, the material will be drawn in by the blades.
7. Only insert as much material so that the in-feed chute will not be blocked
up.
8. Warning: Long material extending out from the machine could lash out
when being drawn in by the blades. Please keep at safe distance.
9. Ensure the shredded material can fall freely from the discharge chute.
10. To make ner compost the shredded material can be shredded for a
second time.
14
www.SerenLifeHome.com
Page 16

11. Do not allow the shredded material to build up to a level where it blocks
the discharge chute. If the material builds up too far it could reach the
cutting blades and be thrown out of the in-feed chute.
12. Organic material contains a large amount of water and sap that can
stick to the shredder. To avoid this the material should be left for a few
days to dry out. Large branches however are best shredded when they
are fresh.
13. If during cutting the blade stalls, stop the shredder immediately and
disconnect it from the mains supply before investigating the cause.
14. Remove any jammed debris from the blades and examine them for any
damage before recommencing shredding.
15. If the blade has stalled for more than 5 seconds the safety overload
switch will operate and switch the machine o. Allow the machine to
cool down for at least 1 minute before re-starting. Push the overload
switch rst and then push on the On/O switch to re-start the machine.
16. If the cutting mechanism strikes any foreign object or if the appliance
should start making any unusual noise or vibration, immediately switch
o and allow the cutting means to stop.
Pull the plug from the mains supply and take the following steps:
i. Inspect for damage.
ii. Replace or repair any damage parts.
iii. Check for and tighten any loose parts.
17. If the appliance becomes clogged, switch o and allow the cutting
means to stop. Pull the plug from the mains supply before cleaning
debris.
18. Keep the motor cooling vents clean of debris and other accumulations
to prevent damage to the motor or possible re.
19. Switch o, allow the cutting means to stop and pull the plug from the
mains supply whenever you leave the work area.
20. Do not allow processed material to build up in the discharge zone; this
may prevent proper discharge and can result in kickback of material
through the feed intake opening.
15
www.SerenLifeHome.com
Page 17

How do I operate this product?
Starting and Stopping the shredder
Press the switch marked “1” to start and marked “0” to stop the motor.
Press the “circuit breaker” button if the machine does not work, ensure you
have connected to the power supply. When the motor has been running for
a few seconds you can commence shredding.
The circuit breaker will be activated in the following circumstances:
a. A build up of shredded material around the cutting disc.
b. If the material bring shredded is greater then the motor capacity.
c. Where there is too much resistance against the cutting blade.
When the circuit breaker has been activated switch-OFF the shredder
and disconnect the power supply.
a. Unscrew the reamer knob at the base of the turret and open top section
b. Remove the debris or obstruction from the cutting area
c. Return the top section and tighten the reamer knob.
d. Leave motor a few minutes to cool down
e. Reconnect to the power supply and press the circuit breaker button.
f. When ready to start shredding press the “1” switch.
Warning: NEVER slacken o the tightening knob without having turned
o the ON/OFF switch and pulled the plug out o the socket.
Warning: The shredder will stop within 5 seconds after switching OFF.
Using the Plunger
There are a plunger provided to aid feeding less bulky material such as
small twigs, leaves, other garden waste and vegetation into the in-feed
chute.
1. Load the material into the hopper.
2. Insert the plunger into the in-feed chute pushing the material onto the
blade disc.
16
www.SerenLifeHome.com
Page 18

3. Wait until all the material has been shredder before adding more material.
Plunger
Material
The round hale at the entrance
Figure 8
Figure 9
NOTE: Your ngers must never enter the in-feed chute.
NOTE: Never use the tool if the hopper is not tted.
NOTE: Do not over reach.
How do I collect the shredded material?
• Shut-o the power unit before attaching or removing the bag.
• You can use either the collection bag supplied (if supplied) or place the
shredder on a tarpaulin sheet to catch the shredded material.
• When using the collection bag, you need to t the collection bag hooks
onto the sides of the discharge chute
Warning: The ventilation slots on the machine body must never be covered
by the collection bag or shredded material.
How do I replace the blades?
1. Ensure that the shredder is switched off and disconnected from the
mains supply.
2. Remove the top feed assembly by unscrewing the reamer knob securing
it to the body of the machine.
3. The blades have two cutting edges.
www.SerenLifeHome.com
17
Page 19

When the blades become worn they can be reversed to use the second
Hex spanner
Screwdriver
Remove 2 hex
cutting edge.
4. It is recommended that work gloves be used when replacing the blades.
5. Lock the blade disc using hex spanner. Unscrew the two inner hexagonal
headed screws and note the position of the cutting angle of the blade.
6. Remove the blade and rotate it through 180 degrees and t the blade to
the blade disc ensuring that the ground cutting edge is facing
downwards.
7. Repeat this for the other blade.
headed screws
Rotate blade 180
°
Figure 10
When both cutting edges of the blade have become worn they must be
replaced as a pair. The blades can be re-sharpened, but this must be done
by an experienced person using an oil stone. We do not recommend this be
done as the weight of each blade is critical to maintain the balance of the
cutting disc. Any imbalance could cause damage to the machine and
possible injury to the operator.
18
www.SerenLifeHome.com
Page 20

How do I maintain this product?
Item
Picture
Name
Amount
1
2
1. Warning: During maintenance and cleaning ensure the machine is
disconnected from the mains.
2. When the appliance is stopped for servicing, inspection, or storage, or to
change an accessory, switch o and pull the plug from the mains supply
before making any inspections, adjustments, etc.
3. If an extension cord is used it shall not be of lighter grade than the supply
cord already tted to the appliance.
4. Check the supply and any extension cord regularly for damage or signs of
ageing. Do not use the appliance, if the cords are damaged.
5. When servicing the cutting means be aware that, even though the motor
will not start due to the interlock feature of the guard, the cutting means
can still be moved if the motor is turned by hand.
6. Never attempt to override the interlock feature of the guarding.
7. Remove deposited matter from the machine using a brush.
8. Always clean the machine after use. Clean the plastic body and plastic
parts using soap and a moist cloth. Do not use aggressive agents or
solvents for cleaning.
9. Never clean the shredder with a jet of water or by rinsing.
Make sure that no water is allowed to enter into the shredder.
Part list
1
www.SerenLifeHome.com
1. wheel 2
2. cover of wheel 2
19
Page 21

3. bolt 1
3
6 3 5
4
4. nut 2
2
4
5. bushing 2
6. gasket 2
7. main part 1
7
8
8. Flat push stick 1
20
www.SerenLifeHome.com
Page 22

5
6
7
9. grass box 1
9
10. Spanner 1
10
11
www.SerenLifeHome.com
11. hex key 1
21
Page 23

PSLHTM65
Electric Garden Shredder
Home Garden Leaf Shredder / Chipper / Mulcher
with 50-Liter Collection Bin
Features:
• 3-in-1 Shredder / Chipper / Mulcher
• Go Green: Eco-Friendly Gardening Design
• Simple Electric, Corded Plug-in Operation
• Used to Make Nutrient-Rich Garden Mulch
• Turns Yard Waste into Organic Soil Compost & Fertilizer
• Easy-to-Use, Hassle-Free One-Button Control
• High-Powered Cutting Blade Motor
• Top-Loading Hooper Feed with Debris Pusher
• Chips & Shreds Sticks up to 1.6’’ -inches in Diameter
• Marine Grade Waterproof Rated Construction
• Durable & Long Lasting Cutting Blade
• Integrated Waste Collection Box
• Convenient Rolling Wheels for Mobility
• Safety Overload Auto Power-O Feature
• Perfect for Lawns, Gardens, Back Yards, Walkways, Landscapes
Technical Specs:
• Power Output: 15Amp
• Operation Speed: 4,000+ RPM
• Marine Grade Rating: IP-X4
• Waste Collection Box Capacity: Up to 50Liter
• Cutting Blade Material: Engineered Steel Alloy
• Max. Cutting Dia.: 40mm
• Operating Sound Level: 111dB
• Hopper Feed Opening Size: 16.0 ’’ -inches
• Construction Material: Engineered Polypropylene Housing
• Power Cable Length: 10.0 ft
• Power: 120V
• Total Unit Dimensions (L x W x H): 19.1” x 15.2” x 21.9” –inches
• Sold as: 1
22
www.SerenLifeHome.com
Page 24

 Loading...