

Page 1
Welcome to your
Camera
Page 2

Contents
Introduction to Your Camera .............................. 2
Features ........................................................................2
Components ................................................................ 4
Installing the Product ......................................... 7
Launching the App ............................................ 10
Mounting on the Wall ........................................ 13
Specifications ..................................................... 15
Works with SmartThings ....................................17
1
Page 3

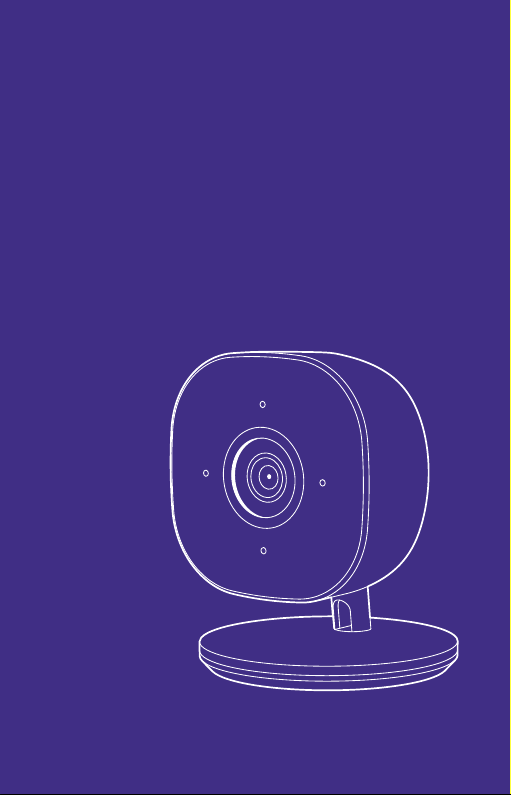
Introduction to Your Camera
This SmartThings Cam can monitor your home and
then alert any suspected motions in real time.
Features
Standalone system: Equipped with CPU and video
•
encoder for operation, which requires only power
and network connections.
HD video: Supports up to 1080p HD video with
•
H.264 encoding.
Trusted Platform Module (TPM): Its dedicated
•
chip safely shields cryptographic keys used for
authentication to ensure safe communication
between network components and encrypted
video data.
Built-in microphone: Used for bi-directional
•
conversation.
2
Page 4

Introduction to Your Camera
2 IR LEDs: Can provide illumination up to 5
•
meters away for better video quality.
High dynamic range (HDR): Balances the
•
illumination for clear image quality.
Motion detection zone: Can be changed by
•
dragging or tapping areas for motion monitoring.
Recording time: Can be specified to let the
•
camera record video upon motion detection.
3
Page 5

Introduction to Your Camera
Status LED
Components
Front panel
IR LEDs
Microphones
Component Description
Status LED Off: No power supplied
Blue On: Power supplied
Slow blinking of Blue: Booting in
progress
Fast blinking of Blue: Rebooted with
default settings
4
IR LEDs
Microphones
Lens
Light Sensor
Page 6

Introduction to Your Camera
Component Description
Status LED Green On: Wireless network
connected
Fast blinking of Green: Data
communication in progress
Amber On: Firmware upgrade failed.
Then the camera reboots after 5
seconds
Fast blinking of Amber: Camera
available for softAp or QR scan
Blinking of Blue and Amber: Upgrading
the firmware
Lens Fixed camera lens
IR Sensors Used for illumination
Microphones Used for conversation
Light Sensor Used to detect light
5
Page 7

Introduction to Your Camera
Rear panel
Reset Button
Power Plug
Stand
Mounting
Plate
Component Description
Power Plug Connect the power adapter here.
Never use other adapters
Reset Button Press for over 10 seconds to restore
the factory default settings. Then
the system reboots with the default
values.
Stand Used to support the camera on a
table or wall.
Mounting Plate Used to install the camera on a wall
after removing from the stand.
6
Page 8

Installing the ProductInstalling the Product
When the product is ready, install it by keeping the
following procedure:
Check the following items are included in the
1
package including this user guide.
Determine the location to install the product.
2
7
Page 9
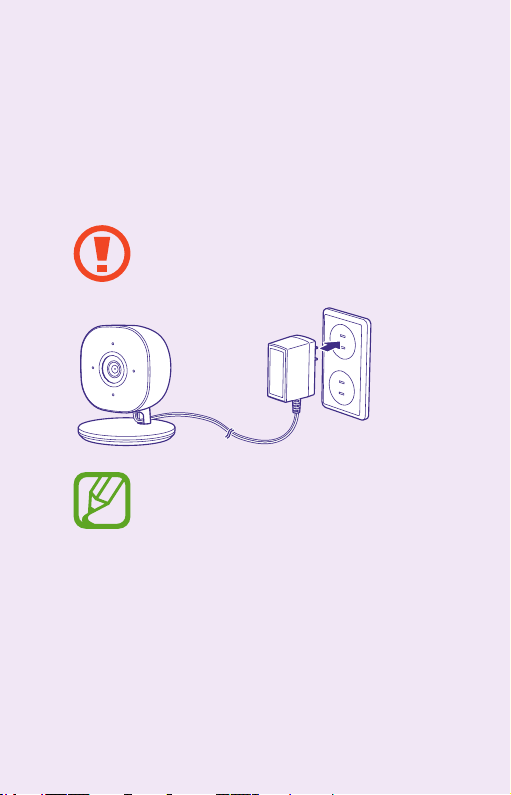
Installing the Product
Connect the power plug into the camera and
3
then plug the power connector into the outlet to
supply power.
Never use power adapters other than the
provided one. It may cause damage to the
system.
The status LED blinks (approx. 1 minute) in
amber during startup. Then the LED color
changes to blue before registration.
After wireless connection is finished, its
color changes to green.
8
Page 10

Installing the Product
Download the SmartThings app for Android or
4
iOS, create an account, and follow on-screen
instructions to add the device.
Use the SmartThings app to scan the QR code
5
at the bottom of the stand and then follow onscreen instructions to finish setup.
The QR code is located under the mounting
plate. When you cannot find the QR code,
remove the mounting plate.
9
Page 11

Launching the App
1
When you launch the app after all things are made,
the main screen appears on your mobile device.
For monitoring, select the desired site on the screen.
Then the following live view screen appears.
2
3
7
6
10
4
5
Page 12

Launching the App
No. Description
1 When clicked, the following menus appear:
My Info: Moves to the subscription page.
•
You can subscribe to the premium service
at Samsung.com.
Edit: Can edit the device information.
•
Settings: Moves to the camera plug-in
•
settings page.
Information: Displays the app information.
•
2 Toggles between full live view screen and
normal screen.
3 Displays the live view screen.
4 Enables/disables the microphone.
5 Mutes the video sound.
6 Captures video from the screen.
7 Records the live video.
11
Page 13

Launching the App
The differentiated subscription plans are provided
as follows:
Basic Plan Premium Plan
Free of charge $7.99 per month or $79.99 per
year
Can connect up to 2
SmartThings cameras
Can customize the
motion detection zones
Can clip the recording
for up to 10 seconds
No cloud archiving Cloud archiving available
Can connect up to 5
SmartThings cameras
Can customize the motion
detection zones
Can clip the recording for up to
60 seconds
12
Page 14

Mounting on the Wall
The camera is usually mounted on the wall for
permanent installation. In this case, follow the steps
below:
Remove the mounting plate from the stand by
1
sliding it forward from the stand.
Hold the mounting plate at the desired location
2
and mark the holes for two mounting holes.
Drill two pilot holes on the mounting surface at
3
the marked location.
13
Page 15

Mounting on the Wall
Align two mounting holes on the camera stand
4
with two pilot holes and then mount the plate
on the wall surface with two provided screws.
Slide the camera stand onto the mounting plate
5
until it clicks in place.
Insert the power cable into the hole of the stand,
6
connect the cable to the camera, and plug the
power adapter into the outlet.
Adjust the camera for better performance and
7
fix it firmly.
14
Page 16

Specifications
Power Adapter input:
100-240 V AC, 50/60 Hz
Adapter output:
12 V DC, 1 A
Color White
Sensor ½. 7" CMOS sensor
Dimensions
(H x W x D)
Operating
tempera
Storage
temperature
Video Up to 1080p at 30 frames/sec, H.264
Audio Bi-directional full-duplex audio,
Image resolution 1080p (1920 x 1080),
3.98” x 1.82” x 1.72”
(101 mm x 46.3 mm x 43.7 mm)
32 °F to 104 °F
(0 °C to 40°C)
-4 °F to 158 °F
(-20 °C to 70 °C)
encoding
G.711 (built-in microphone & 1W
speaker)
720p (1280 x 720),
VGA (640 x 480)
15
Page 17

Specifications
Viewing angle 145° diagonal
(Dewarping FOV is to be updated
later)
Night vision Built-in IR LEDs for night-time
illumination (range within 5 m)
IR LEDs 2
LED type 1 tri-color LED
(power/network/status)
Connectivity Wi-Fi 802.11b/g/n, 2.4 GHz/5 GHz
(WPA & WPA2 encryption supported)
Wireless interface IEEE 802.11ac, 802.11b/g/n
Vision Intelligence People/sound/obstruction detection
at the edge ABR (Adaptive Bit Rate)
Network protocols TCP/IP, HTTPS, DHCP, NTP, RTP, RTCP,
RTSP, DNS
16
Page 18

Works with SmartThings
SmartThings works with a wide range of connected
devices, including lights, cameras, locks,
thermostats, sensors, and more.
To purchase a device to connect to your product, be
sure to check the Works with SmartThings label.
17
 Loading...