

SEOWON INTECH WiMAX User Manual

Dual Mode USB Modem
User Manual


Contents
Product Overview
Product Package Contents ………………………………
USB Modem Layout …………… …………………………
03
03
System Requirements
Preparing USB Modem
………………………………………
04
Installing USIM card ………………………………………
05
Installing Connection Manager
Basics
…………………………
06
Getting Started ……………………………………………
Data Status Indication ……………………………………
10
11
Connection Manager Interface
Common Operations
…………………………
12
Connecting to Network ……………………………………
Auto Switch …………………… ……………………………
Update ………………………………………………………
Information ……… ……………………… …………………
Settings ……………………………………………………
18
24
27
28
29
Exiting Connection Manager
……………………………
33
Troubleshooting ……………………………… …………… …
Product Specification …………………………………………
Care and Maintenance ………………………………………
Safety Information ……………………………………………
Legal Information ………………………………………………
Warranty Information …………………………………………
2
34
35
36
37
38
39
USB Modem
User Manual
Product Overview
Product Package Contents
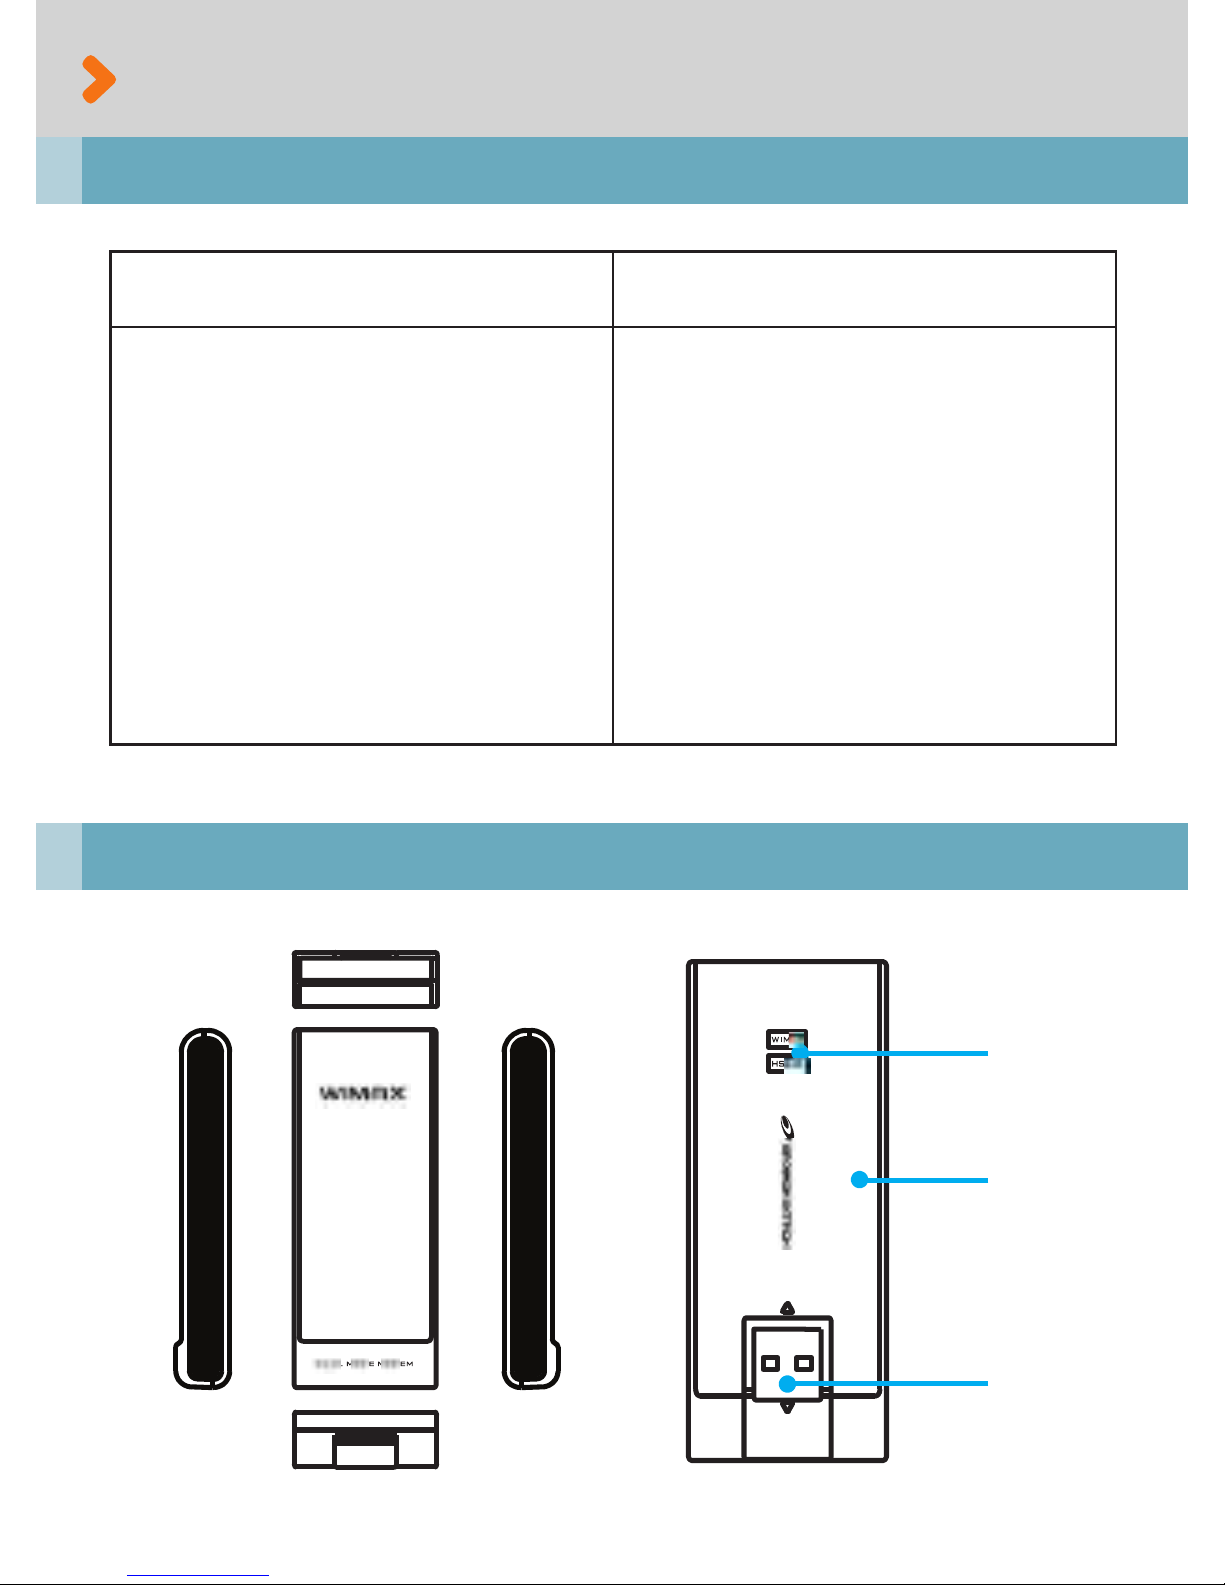
USB Modem Layout
LED status
indicator
Rear cover
USB
connector
3

System Requirements
CPU & memory
Interface
Supported OS
Free HD space
Pentium IV Processor or faster, 128MB RAM or
more
USB 2.0
Windows XP / Windows Vista / Windows 7
80MB or more
4
USIM
Preparing USB Modem
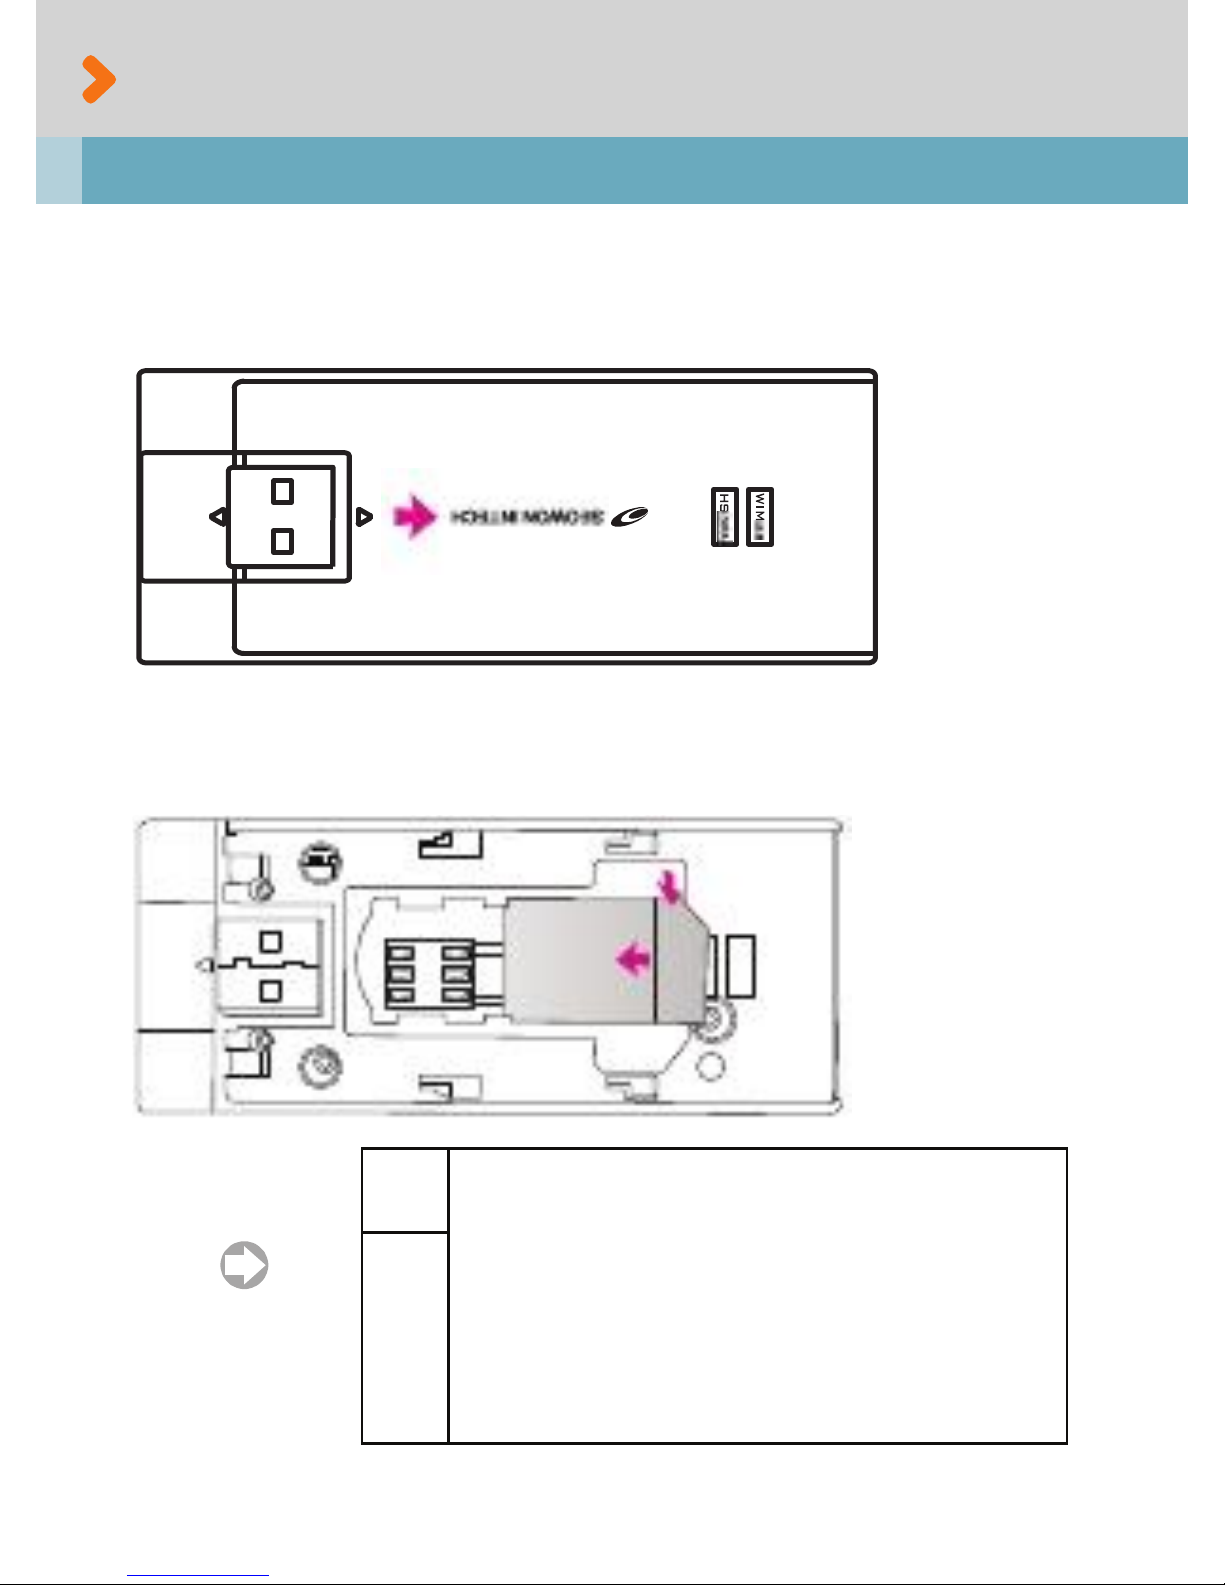
Installing USIM card
▶
▶
Remove the Rear Cover of your USB Modem by gently sliding it to the
arrow indicated below.
Carefully slide the USIM card into your modem until it lies flat in the
USIM holder with gold-colored contacts facing down.
USIM
5
Turn on your computer. Close all other applications.
Insert your USB modem into a USB port of your computer.
Preparing USB Modem
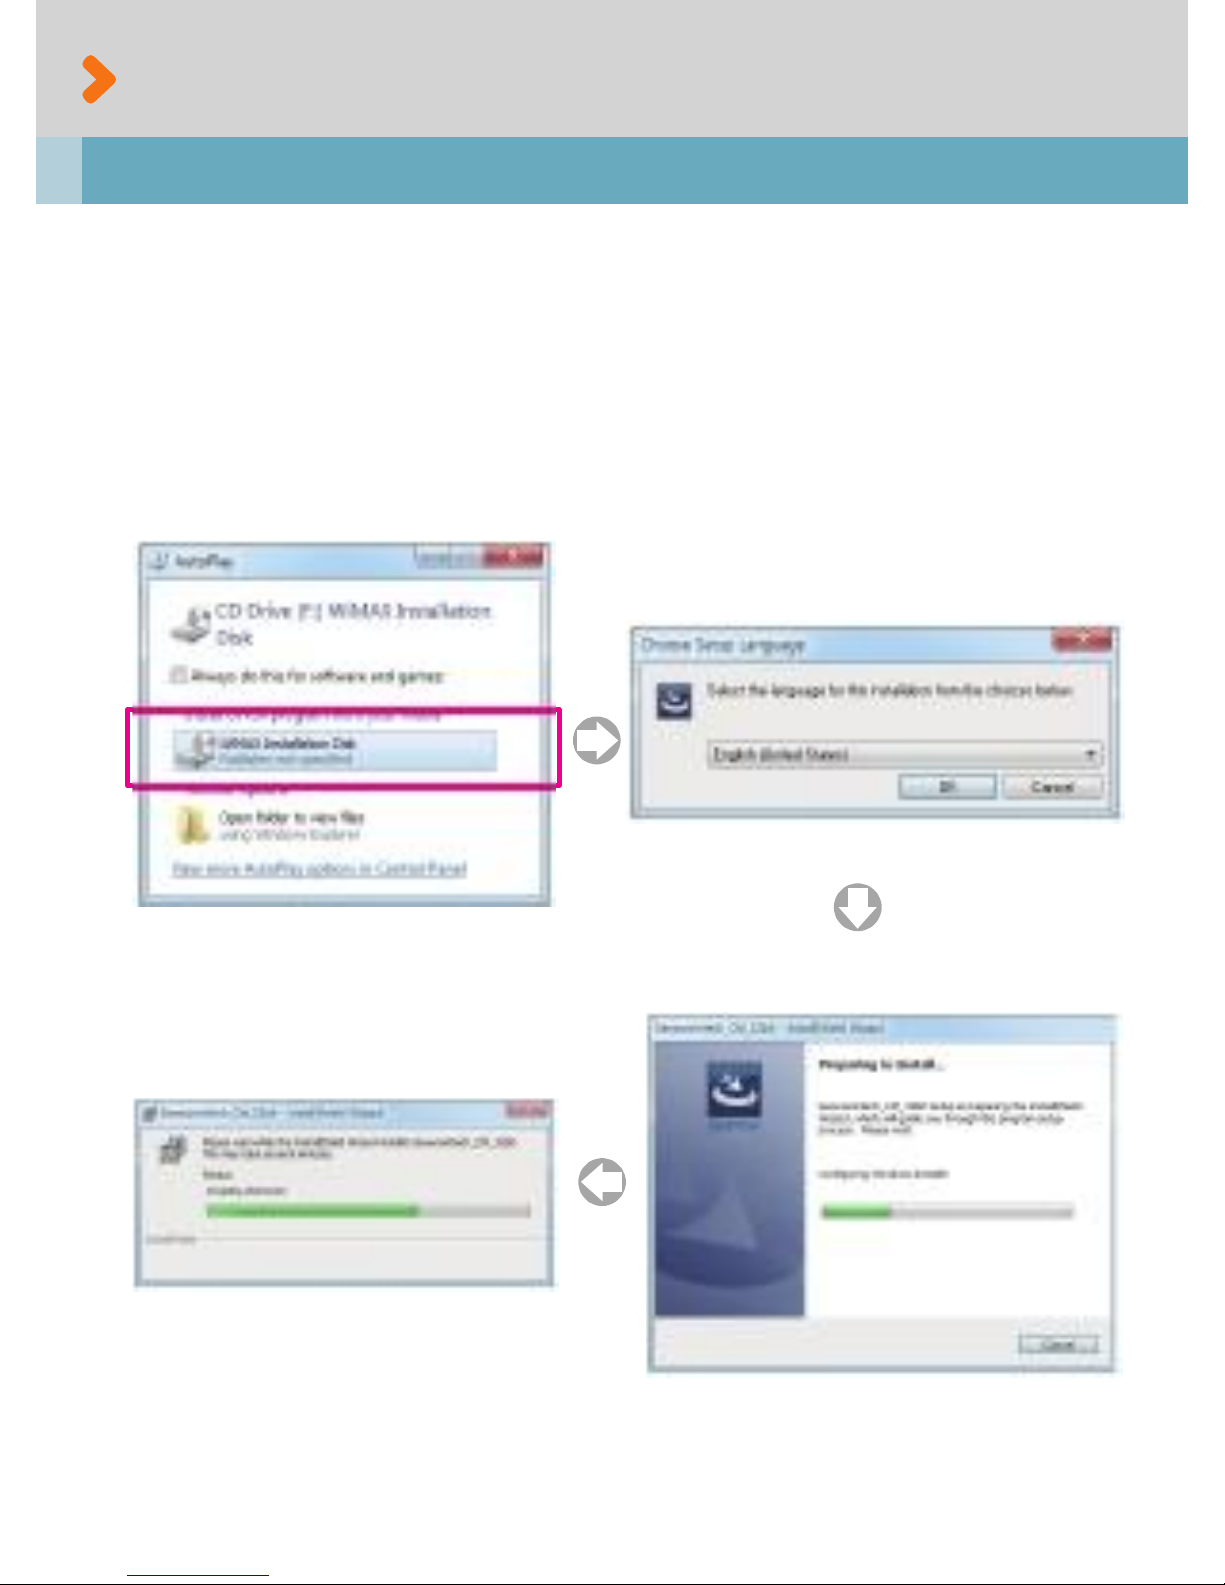
Installing Connection Manager
▶
▶
▶ Your computer will recognize the modem and automatically start the
installation.
▶ Click “WIMAX Installation Disk”.
▶ Choose a language used for the installation process.(Optional)
* The language selected here will become the default language for the Connect Manage interface.
6

Preparing USB Modem
Installing Connection Manager
▶
If the installation program does not launch automatically, go to My
Computer. Select „WiMAX Installation Disk‟ and double click it.
[Desktop] ▶ [My Computer] ▶ [WiMAX Installation Disk]
7
Preparing USB Modem
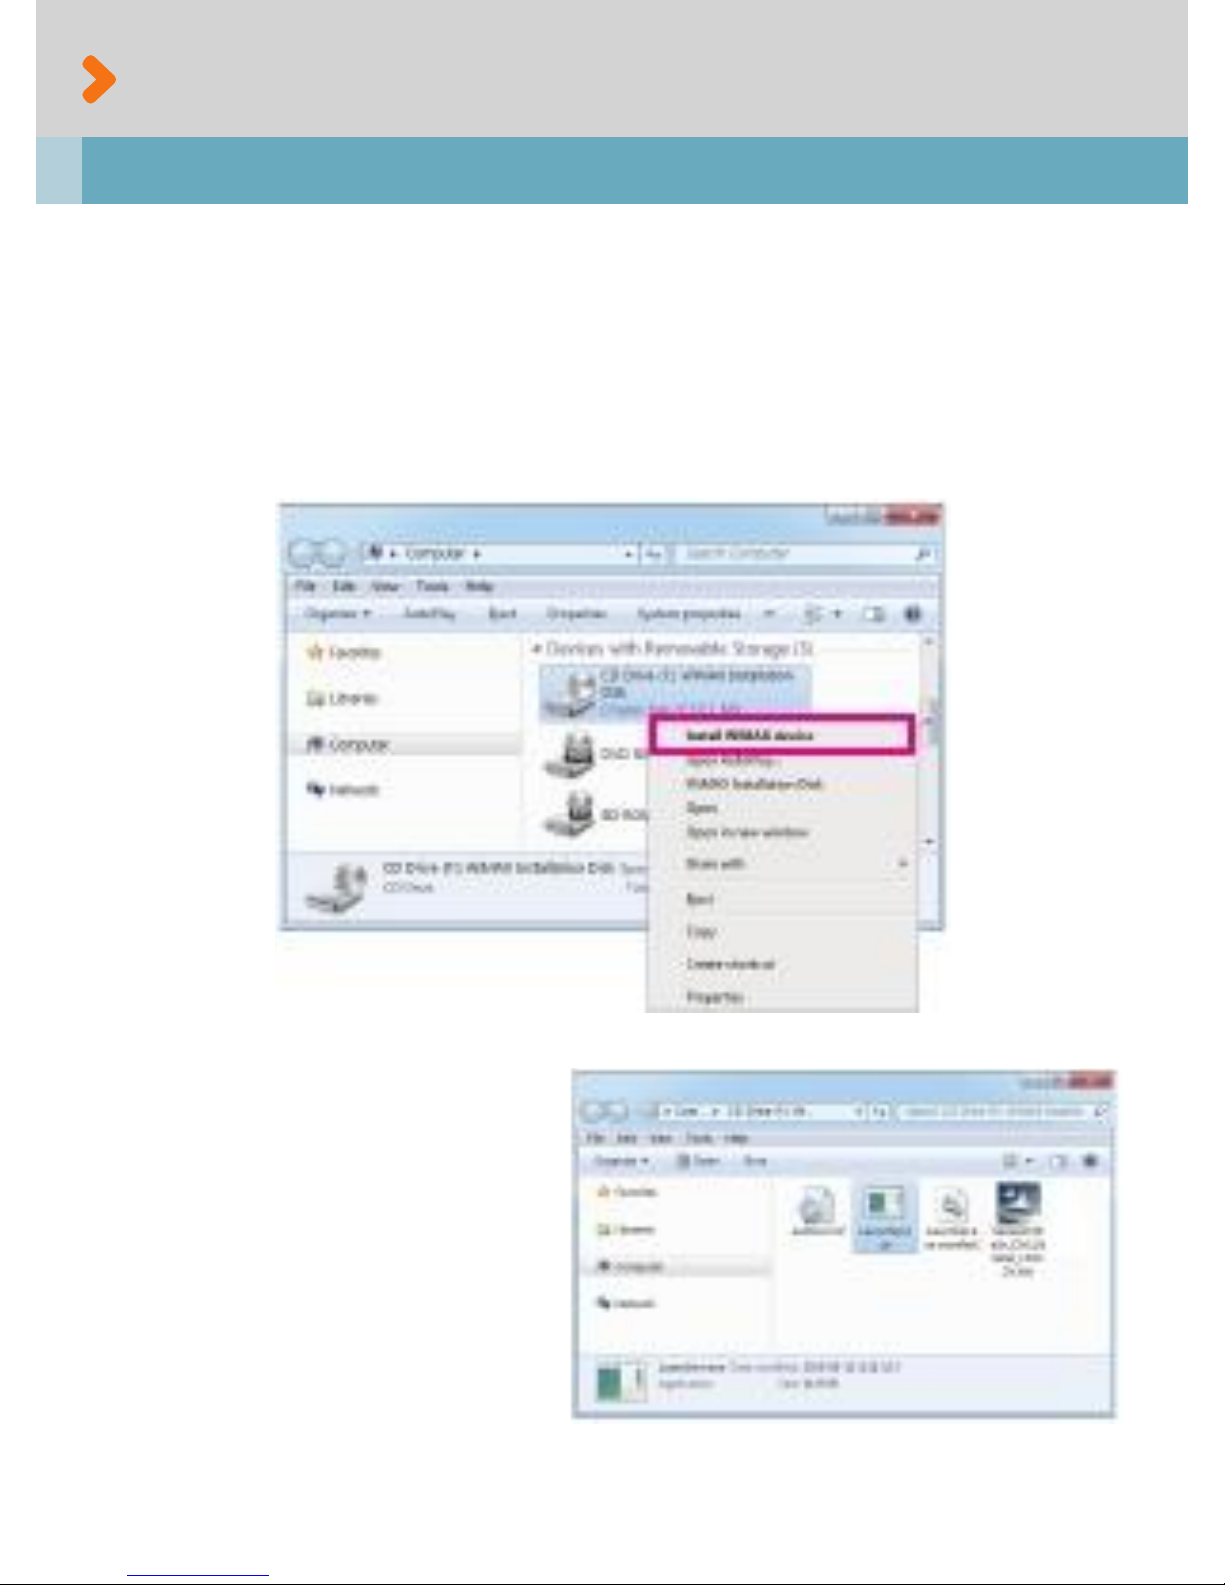
Installing Connection Manager
▶
▶
Or you click the RIGHT mouse button on WiMAX CD drive.
Select „Install WiMAX device‟ and then the installation sequence will
begin.
[Desktop] ▶ [My Computer] ▶ [WIMAX Installation Disk
(right mouse button)] ▶ [Install WiMAX device (Select)]
Or select OPEN at the pop-
up menu. Double click
„Launcher.exe‟. It will start the
installation process.
8

Preparing USB Modem
Installing Connection Manager
▶
▶
After installation is properly completed, you can see the two devices in
the „Device Manager‟.
[Desktop] ▶ [My Computer(click right mouse button)] ▶ [Properties]
▶ [Device Manager]
If your device manager shows an exclamation mark (!) on top of the icon
as seen below, please go to Troubleshooting (see page 34).
9
Basics
Getting started
▶
▶
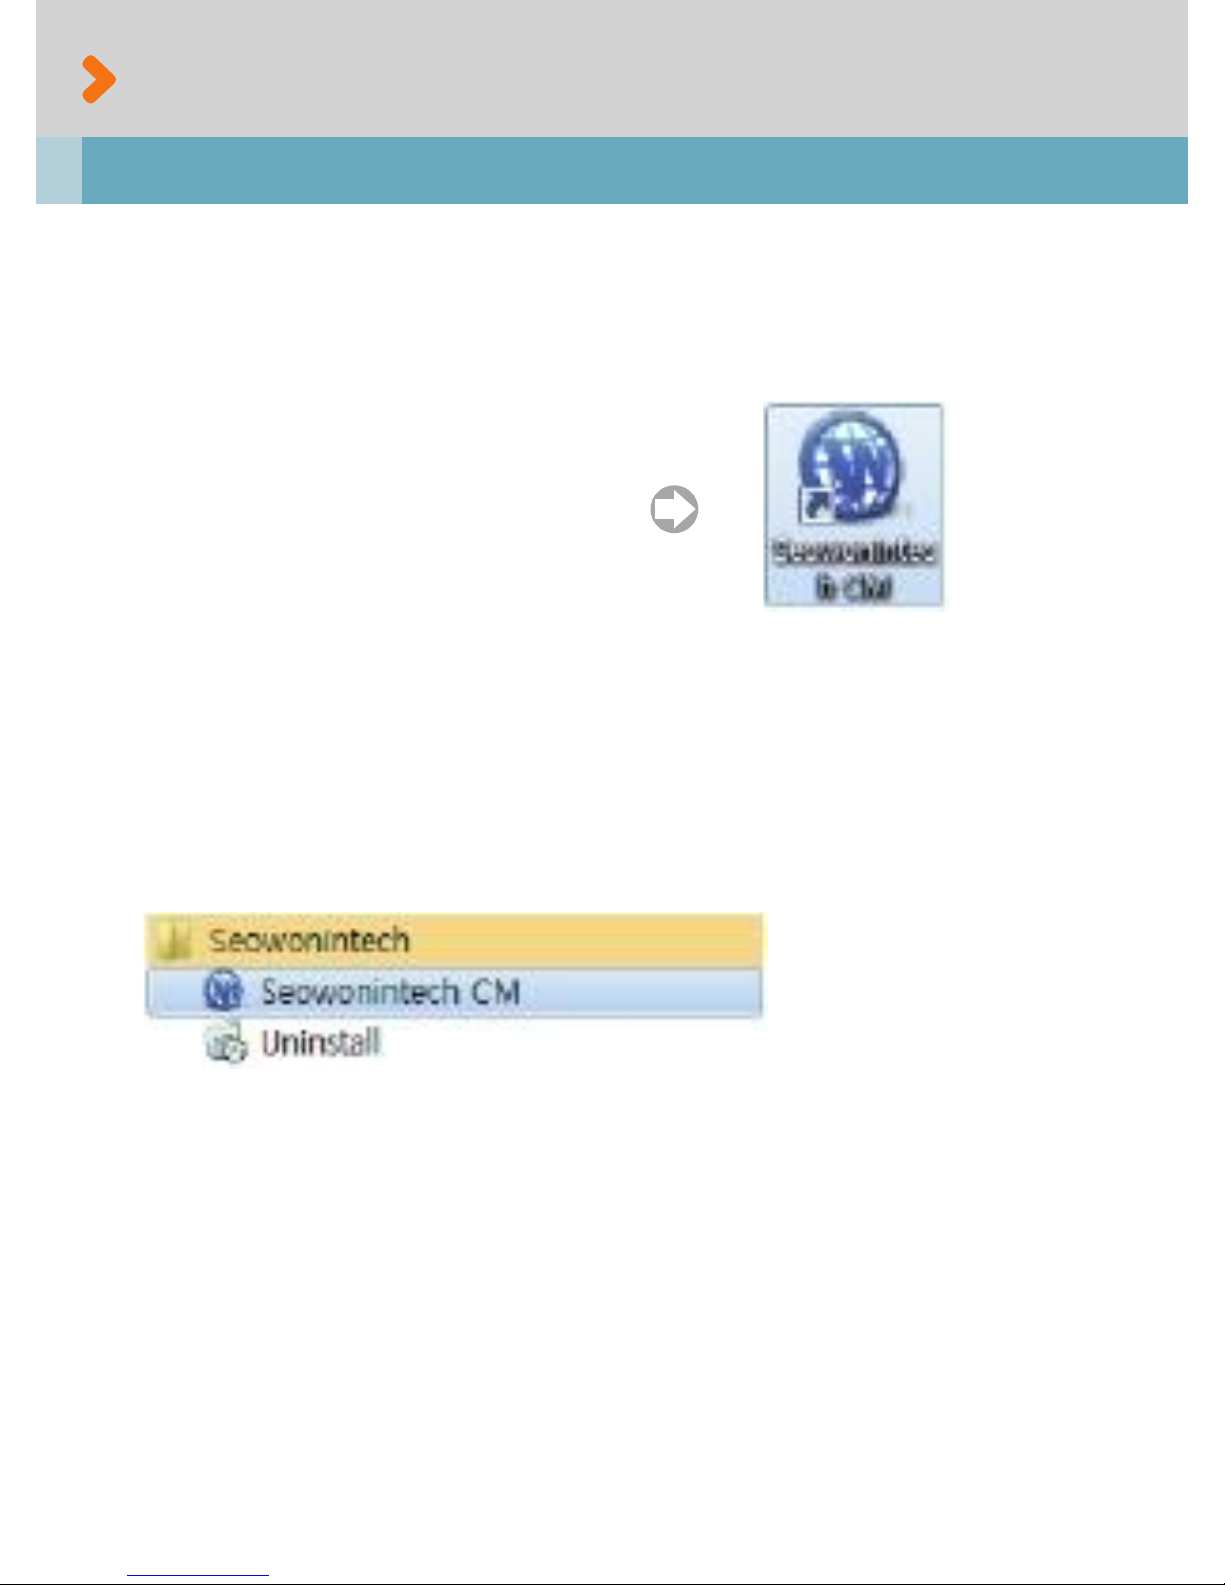
To start Seowonintech Connection Manager,
Double click on the Seowonintech CM icon on your desktop.
Click [Seowonintech CM]
Or click on the Windows Start menu and select „Seowonintech CM‟ from
the list of programs.
[Start] ▶ [Program] ▶ [Seowonintech] ▶ [Seowonintech CM]
10
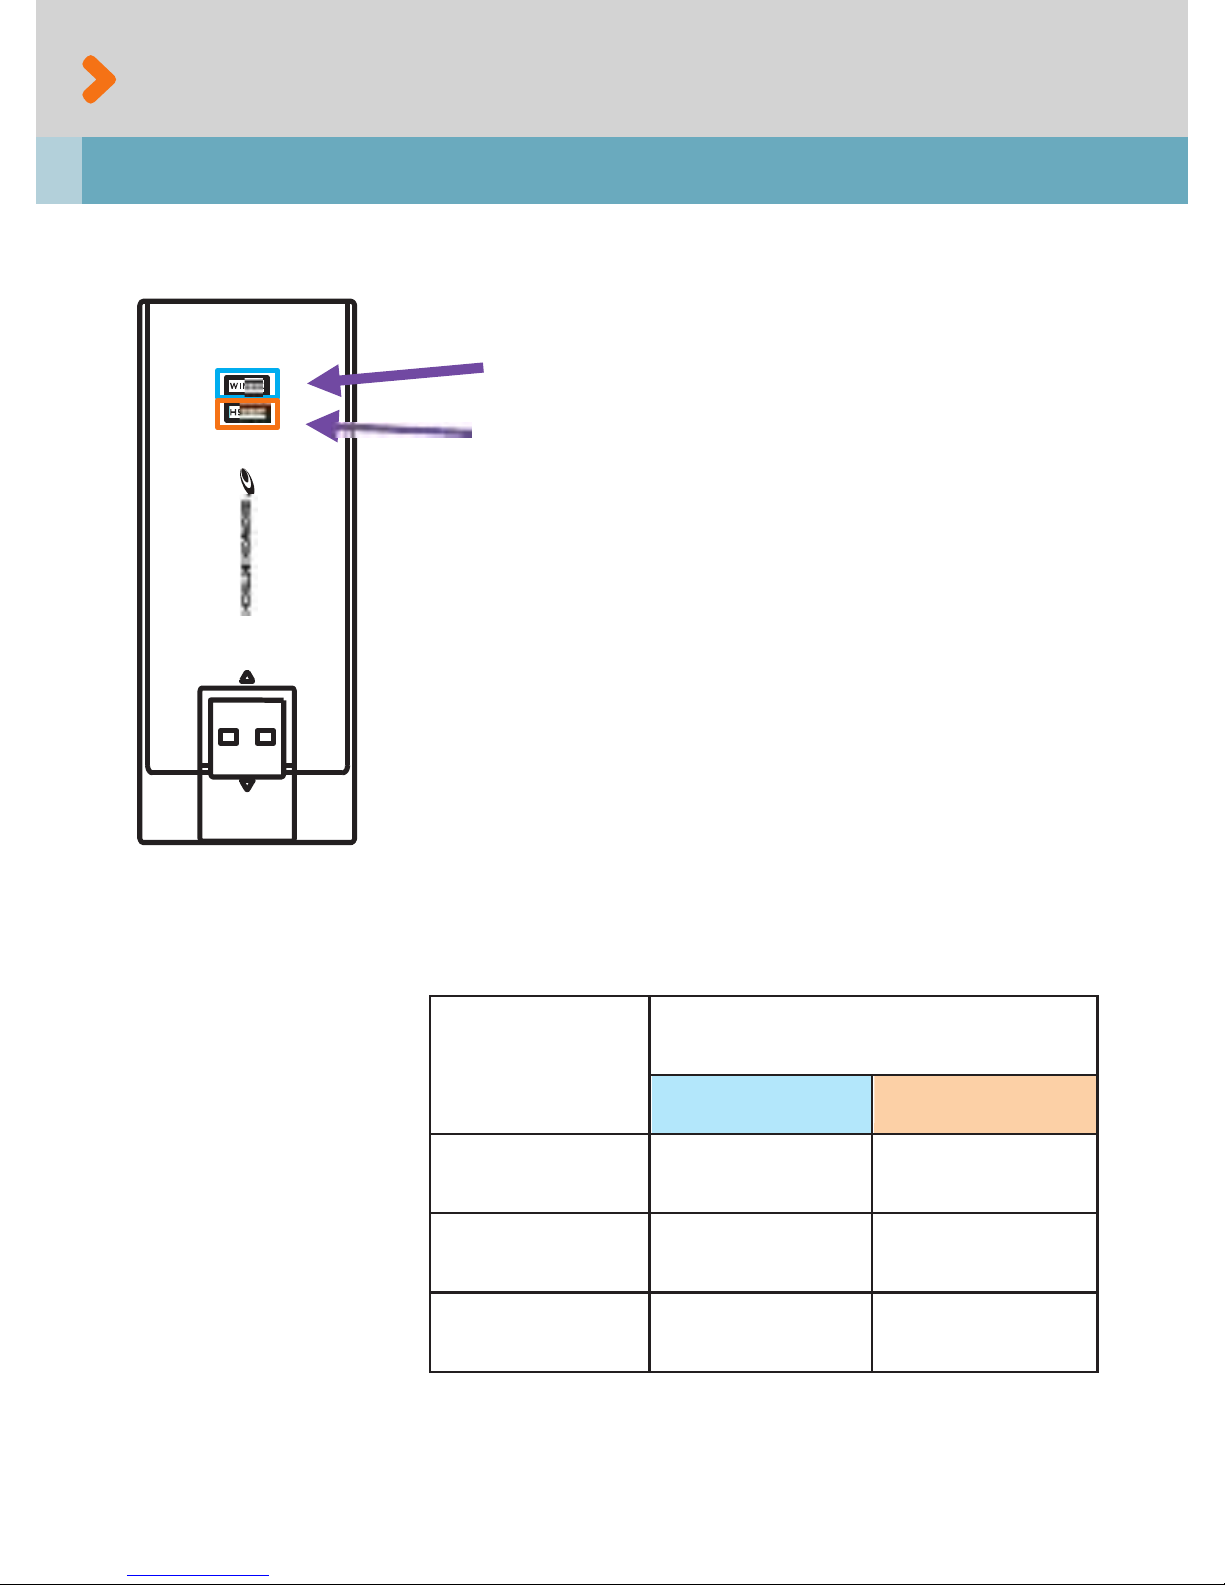
Status
LED color indication
WiMAX
HSDPA
Powered on
RED
RED
Stand by
RED
RED
Connected
BLUE
ORANGE
Basics
Data Status Indication
WiMAX – RED, BLUE.
HSDPA – RED, ORANGE
You can find the network connection status of your
modem by referring to a multi-colored LED status
indicators as seen the below chart.
11
Basics
Connection Manager Interface
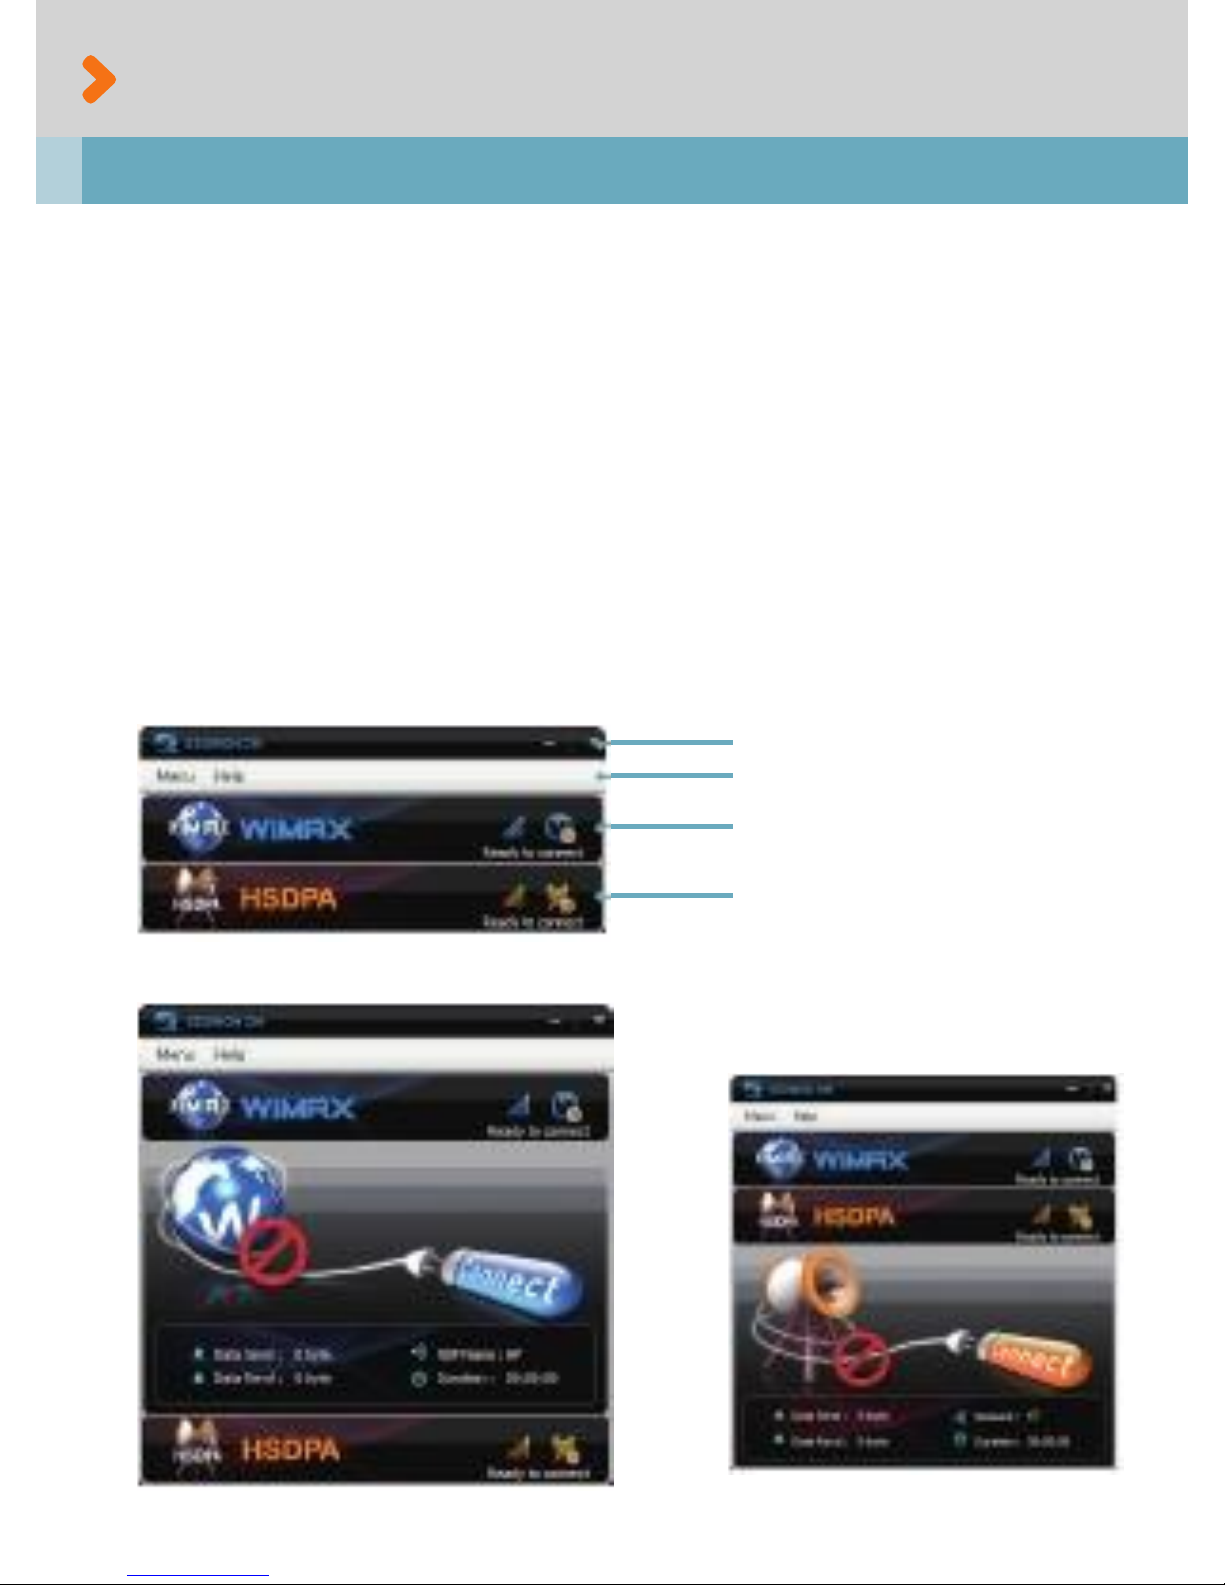
The Main Window layout
▶
▶
Title Bar – has the “Minimize” icon( _ ) and the “Miniaturize” icon ( x )
Menu Bar – has the “Menu” and the “Help”.
▶ WiMAX Area – has “Connect” button, and other Text and Icon indicating
„WiMAX network connection status.‟
▶ HSDPA Area – has “Connect” button, and other Text and Icon indicating „
HSDPA network connection status.‟
* Clicking on WiMAX or HSDPA Area expands or reduces a relevant interface Area. (see page 18)
<Default>
Title Bar
Menu Bar
WiMAX Area
HSDPA Area
<WiMAX Area, expanded>
<HSDPA Area, expanded>
12

Basics
Connection Manager Interface
Function Buttons
Produces a short menu: “INFORMATION”,
“SETTINGS”
Produces a short menu: “Manual”
Minimizes CM to the Windows Taskbar.
Miniaturize CM to the System Tray.
Connects to the Network (WiMAX or HSDPA).
Cancels Connecting task (applicable only in WiMAX).
Indicates “Connect (and Cancel)” is temporarily disabled:
this status is usually seen when CM is connecting/
disconnecting to HSDPA network or when your host
system fails to detect USB Modem.
Disconnects from Network (WiMAX or HSDPA).
13
 Loading...