

SEOWON INTECH SWU-3400AN User Manual
User Manual


Contents
Product Overview ························································· 03
Product Package Contents ········································ 03
Parts Description ······················································· 03
System Requirements ··················································· 04
Installing Seowon WiMAX CM ····································· 05
Common Operations ···················································· 08
Getting Started ·························································· 08
Connecting to Network ·············································· 09
Disconnecting from Network ····································· 11
Minimizing Compact View window ···························· 12
Extending Compact View window ····························· 13
Preferences in Extended View window ····················· 14
Upgrading the USB Modem ······································· 17
Exiting Connection Manager ····································· 20
System Requirements (MAC OS X) ····························· 21
Installing Seowon WiMAX CM (MAC OS X) ················ 22
Common Operations (MAC OS X) ······························· 24
Product Specication ··················································· 25
Care and Maintenance ················································· 26
Safety Information ························································ 27
Legal Information ························································· 28
Warranty Information ··················································· 29
2
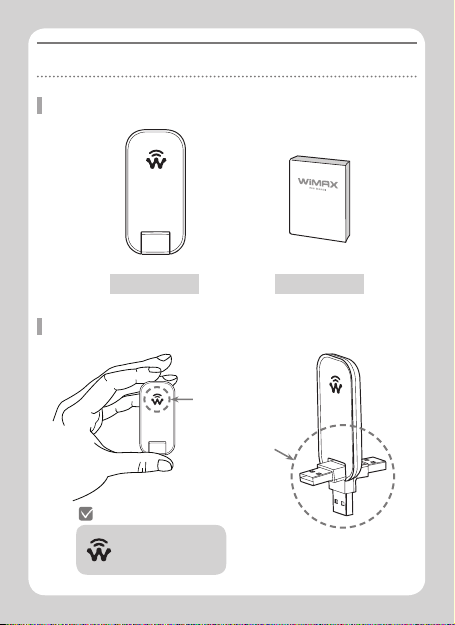
Product Overview
Product Package Contents
USB Modem User Manual
Parts Description
Lighting area
Lighting color
Red : Powered ON
Purple : Stand by
Blue : Connected
USB Connector
3
3

System Requirements
CPU & memory
Interface USB 2.0
Supported OS Windows XP / Windows Vista / Windows 7
Pentium IV Processor or faster, 128MB RAM
or more
4
4
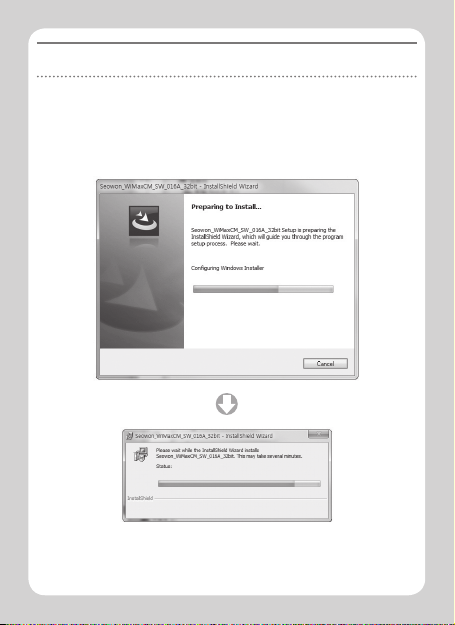
Installing Seowon WiMAX CM
▶
Turn on your computer. Close all other applications.
▶
Insert a USB modem into your USB port.
▶
Your computer will recognize the modem and automatically start
the installation.
5
5
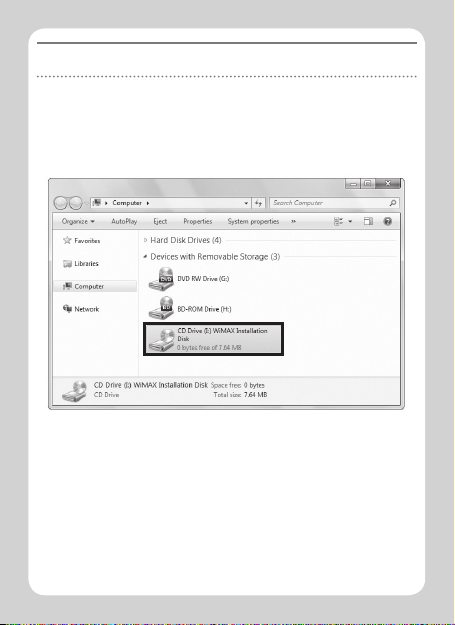
Installing Seowon WiMAX CM
▶
If the installation program does not launch automatically, go to My
Computer. Select ‘WiMAX Installation Disk’ and double click it.
[Desktop] ▶ [My Computer] ▶ [WIMAX Installation Disk]
6
6
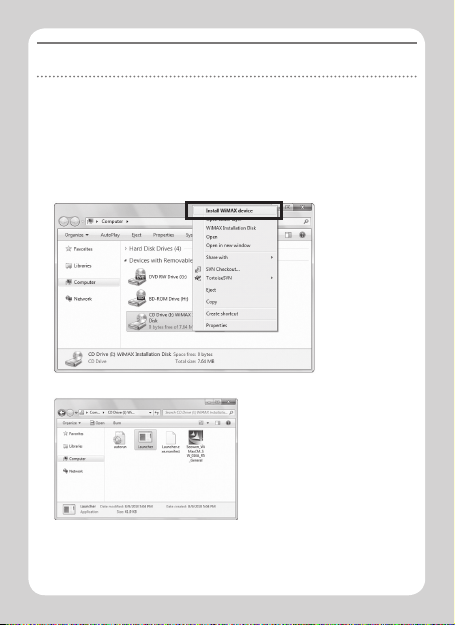
Installing Seowon WiMAX CM
▶
Or you click the RIGHT mouse button on WiMAX CD drive.
Select ‘Install WiMAX device’ and then the installation sequence will
begin.
[Desktop] ▶ [My Computer] ▶ [WIMAX Installation Disk (RIGHT
mouse button)] ▶ [Install WiMAX device (Select)]
▶
Or select OPEN at the pop-up
menu. Double click ‘Launcher’
It will start the installation
process.
7
7
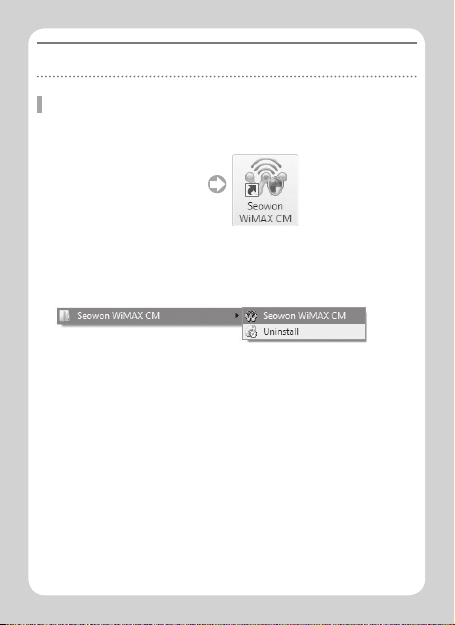
Common Operations
Getting Started
▶
To start Seowon WiMAX CM,
Double click on the Seowon WiMAX CM icon on your desktop.
Click [Seowon WiMAX CM]
▶
Or click on the Windows Start menu
and select ‘Seowon WiMAX CM’ from the list of programs.
[Start] ▶ [Program] ▶ [Seowon WiMAX CM] ▶ [Seowon WiMAX CM]
8
8

Common Operations
Connecting to Network : EAP-TTLS
▶
After the installation is complete, enter your Log-in ID and Password.
If “Save login and password” is checked, Seowon WiMAX CM will
save your ID and PW.
(You just need to click “connect” next time Seowon WiMAX CM
launches.)
▶
Click the [Connect] button in Compact View.
▶
Then, the messages of "Connecting", “IP Obtaining…”, and
“Connected to WiMAX" will appear.
9
9
 Loading...