

Page 1
Instructions for using the phone
Dear mobile phone users, Thank you for choosing our mobile phone.
Use this phone will bring you an unprecedented surprise experience:
the phone supports multiple GSM cards and multi-card standby function.
30-megapixel high-definition digital camera, allowing you to stay
colorful memories. Professional MP3 music player, MP4 video player to
enjoy, all-round multimedia to bring the body comfortable.
Safety Precautions
Before using your phone, please read the following brief rules
carefully and observe them.
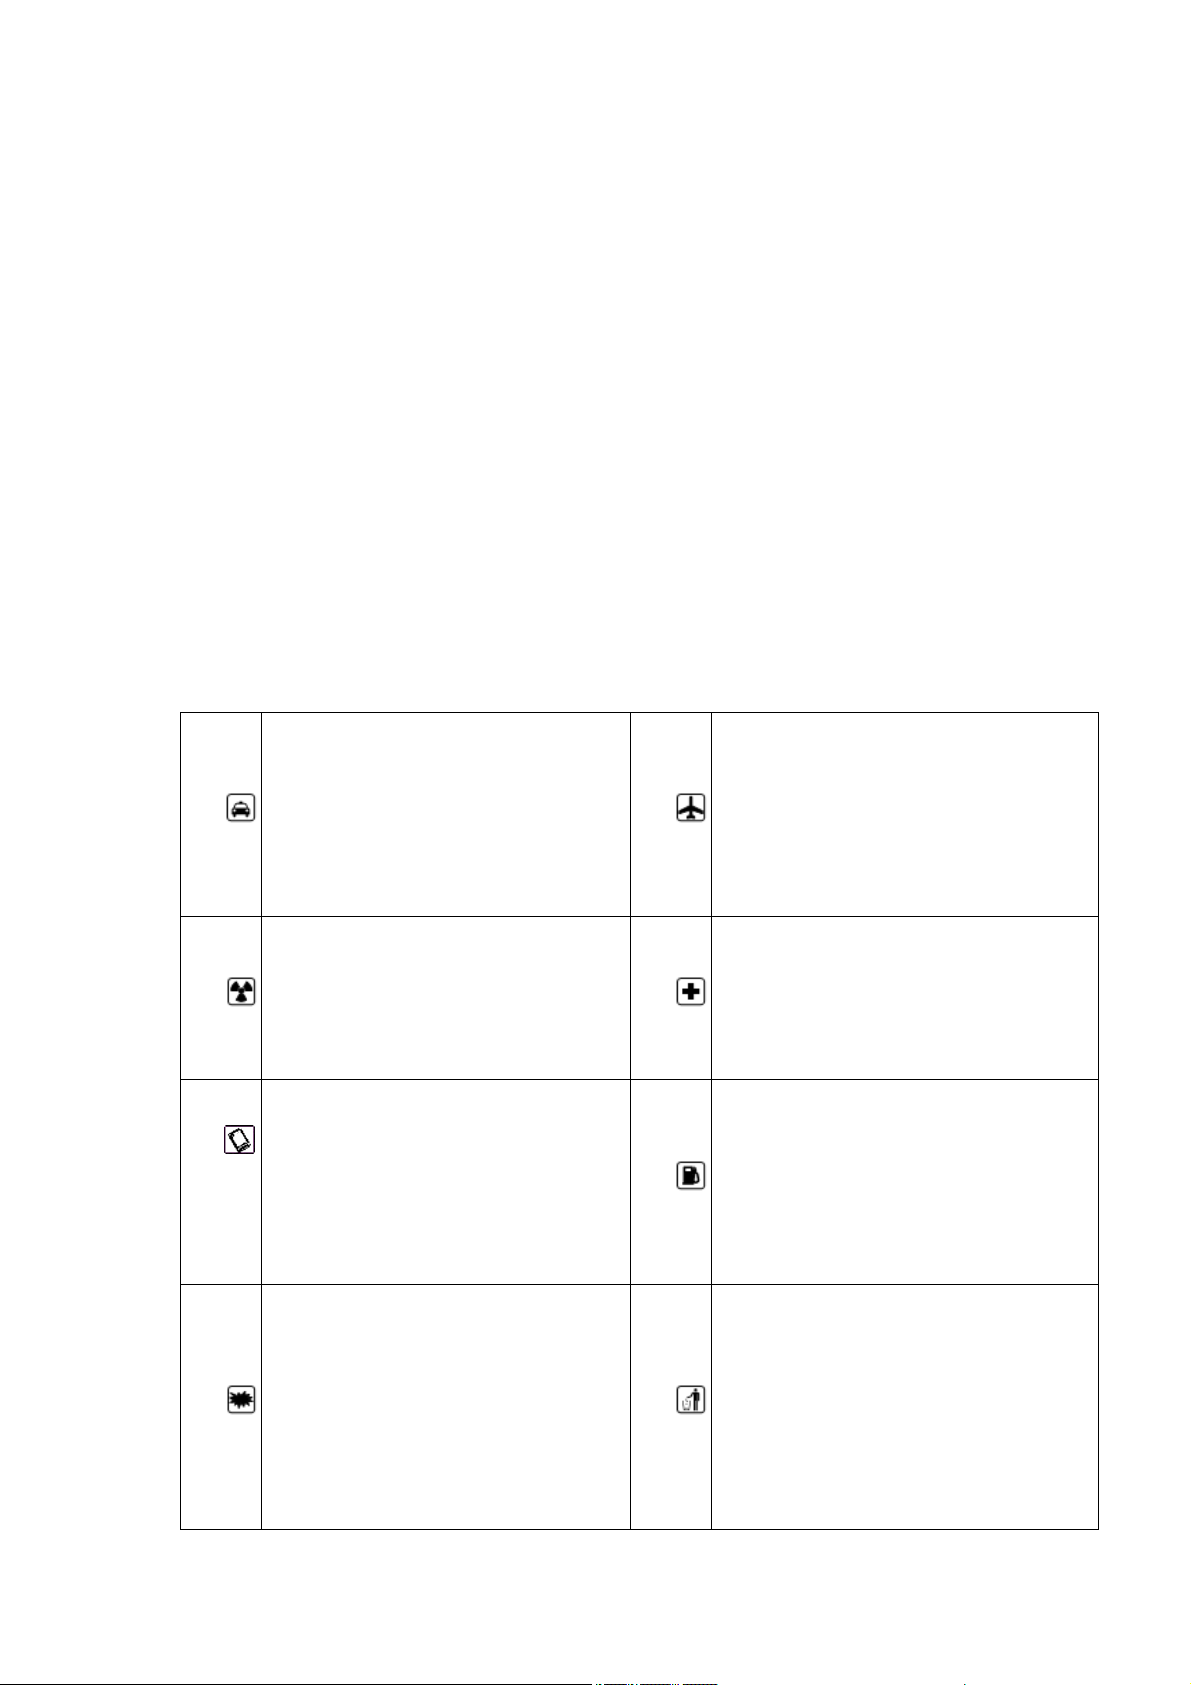
• The phone will interfere with
• To make or receive a call
the aircraft's communication
while driving, use your
•
headset or park your car
before using your phone.
•
network, make sure the phone is
in the process of flying in the
off state or flight mode.
•
•
•
• All handsets may be disturbed,
affecting their performance.
• To ensure optimum performance
and avoid damage to your
phone, use original
accessories and batteries. Do
not use unsupported products.
• To avoid interference with the
blasting operation, turn off
the phone at the site of the
explosion or post the "Turn
off the two-way radio" icon.
Observe and comply with any
•
•
•
• Turn off your phone near medical
devices that indicate that you
can not use your phone and in a
medical setting.
• At gas stations and near
dangerous goods such as fuels
and chemicals, turn off your
phone to avoid an explosion.
• Do not incinerate or dispose of
the battery as a general waste,
to avoid the risk of life and
damage to the environment.
Please comply with the local
government's environmental
Page 2

applicable regulations or
policy, timely processing and
•
•
regulations.
• When your phone needs to
connect with other devices,
please read the user's manual
of the device carefully to
ensure safety.
• Please back up important
information stored in your
phone or keep a handwritten
record so that important
information is not lost.
•
•
recycling.
• Some small parts, such as memory
cards, should be placed out of
the reach of children and
protected from swallowing by
children or other hazards. .
• Make sure your phone is on and
in the service area, enter the
emergency number, press the call
key to tell your location. Do
not end the call without
permission.
Page 3

Introduction to mobile phones
Install SIM card and battery
Press and hold the power button for about three seconds off;
Push down the battery cover and remove the battery cover.
Remove the battery. Install the SIM card 1 (according to the "SIM1" mark on the
card slot), install the SIM card with the contacts facing down (note the
direction of the notch on the SIM card is the same as the card slot). Push the
SIM card in from the card slot, (SIM card 2 is installed in a manner similar to
SIM card 1).
Install the battery so that the battery metal contact part of the cell phone
battery contact location, and then back into the battery cover.
Description:
1. In this manual, the function description is to insert two SIM cards as an
example, and select [Settings → Call Settings → Dual SIM Settings → Standby
Mode → Dual SIM Dual standby]. If you only insert a single card or not set to
dual card dual standby, you may interface, options and instructions of the
operation is different.
Install the memory card
Your phone supports T-Flash memory card, insert the memory card, you can
through the phone on the memory card file browsing, copying and other
operations, can expand the phone's storage space.
Remove the back cover and battery, according to the direction of the card cover
open the memory card cover;
Ø Insert the card with its gold-colored contacts facing down and the narrower
end of the card into the card slot until it fits perfectly with the card slot.
Close the card cover to complete the installation.
caveat:
Do not insert or remove the memory card quickly or frequently to avoid damaging
the memory card.
The battery is charged
Page 4

Use the travel charger to charge
Ø Put the battery into the phone correctly;
Ø Open the rubber cover at the bottom of the screen on the left side of the
phone, insert the charger with the arrow on the screen, insert the charger into
the charging connector, and connect the travel charger to a standard power
outlet.
Ø After inserting the charger, the battery strength icon at the top right of
the screen scrolls to indicate that charging has begun. When the battery is
full, the charge icon will stop scrolling and the battery symbol on the screen
will display full.
Ø After charging is complete, disconnect the charger from the standard power
outlet, and then press and hold the button on both sides of the charger to
disconnect the charger from the charger.
note:
1. Please use the standard battery and charger, otherwise it may cause an
explosion.
2. If the battery is completely discharged, the battery icon will not appear
for 2 to 3 minutes. Generally based on the current state of the phone (whether
to boot, call, etc.), the charging time is 2 to 5 hours.
3. Please use the charger to charge, try to avoid using USB cable charging.
4. To get the best performance from a new battery, complete the battery two to
three charge-discharge cycles. The initial charge of the new battery several
consecutive charge for more than 10 hours.
Power on and off
Boot
Press and hold the power button for about three seconds.
Shutdown
Press and hold the power button for about three seconds.
caveat:
Prohibit the use of mobile phones or the use of mobile phones in your area may
cause interference and danger
Please do not open your phone, and to ensure that the phone does not turn on
the timer switch and other functions.
Page 5

Main Menu
Call function
Dialpad
In standby mode, press the "dial key" button to enter the dial
interface, click the numeric keypad to dial;
Click "call" button, out of the SIM card selection interface, select
card 1, that is, use SIM1 to dial; select card 2, that is, use SIM2
to dial;
Make an international call
Dialing interface, enter the country code (if you enter the country
code need to enter "+", you can double-click the "*" key);
Enter the area code (usually without the previous "0") and the phone
number;
Click the "Call" button, out of the SIM card selection interface,
select the card 1, that is, use SIM1 to dial; select card 2, that is,
use SIM2 for dialing.
Make a call using Contacts
Go to Contacts and find the record you want;
Long press Record, select Call from the Options menu.
Dial the number with an extension
Dial-up interface, enter the total number;
Click [Options → Insert → Pause P], and then enter the extension
number;
Click the "Call" button, out of the SIM card selection interface,
select the card 1, that is, use SIM1 to dial; select card 2, that is,
use SIM2 for dialing.
Page 6

Make an emergency call
Dial-up interface, enter the emergency number;
Click the "dial" button, out of the SIM card
selection interface, select the card 1, that is,
use SIM1 to dial; select card 2, that is, use SIM2
to dial.
Answer or reject an incoming call
There is a call, click on "dial" button to answer; you can also open
the flip in the settings to answer the phone
To flip the phone after the phone will be able to answer, Covers
cover hang up
When there is a call, click the "Reject" button to refuse to answer;
The menu in the call
During a call, you can perform the following functions:
Contacts: Enter the contact list interface.
Dialpad: Enter the dialer interface.
Recording: The recording will be recorded, the recording file will be
automatically saved in the file manager.
Recording a call is illegal in some countries. Therefore, when you
make a call recording, you should first
Seek the consent of the other party.
Mute: Temporarily turns off the microphone during a call. When you
mute, you can hear the other party's voice, but the other party can
not hear you.
Page 7

Handsfree: Turns the speakerphone on or off.
Adjust the volume
During a call, you can adjust the handset volume by navigating the up
and down keys.
End the call
When you want to end a call, you can end the call by clicking the
"Hang up" button.
Call Records
Show your recent phone history.
Scroll to any number and press the dialing key to recall the call.
Alternatively, press [Options] to select another action. Use the 5
key to confirm.
Set to reject the call
On the Record Details page, press [Menu] to select [Set as Rejected]
and set the phone number as Rejected. The number can be found in
[Contacts → Blacklist].
Write SMS: Send SMS to the currently recorded number.
To write a multimedia message: Send a multimedia message to the
currently recorded number.
Language Call: Call back the number.
To add a new record: Hold the recorded number to the phonebook.
Contacts
Browse contacts
In the standby mode, click the Contacts button to enter the contact
list interface. Contacts are arranged in accordance with the unnamed,
Page 8

special symbols, numbers, letters (if the Chinese name is to take the
corresponding Chinese alphabet letters).
Create a new contact
SIM1: The entered records are added to SIM1. Only one number
can be stored under each name.
SIM2: The entered record is added to SIM2, and only one number
can be stored under each name.
Phone: In addition to the SIM1, SIM2 other than the contact
records are stored in the phone memory bank. New phone
contacts can edit the name of the phone number, home phone,
company phone, other phone numbers, select the contact picture,
ringtones and so on.
Note: The name of the new contact can be empty, the number can
not be empty.
The contact's function menu
Click "Options" to access the list of functions. The following
functions are available:
Group: Enter the group list interface.
Tag: Marks single or multiple contacts.
Business card: Import or export all cards.
Fast Dial: Enter the shortcut dial list interface.
Contact Display: Select how the contact is displayed.
More: The number of the machine set up and query the phone
capacity.
Page 9

Contact list interface, long press a record, operable functions
are:
Write message: Send a message to this contact.
Call: Call this contact.
Delete: Delete this contact.
Copy: Copy this contact.
Send business card: Send this contact as a business card.
Export: Exports this contact.
Add to Blacklist: Add this contact to the blacklist.
Information services
The information service is a network service. Whether the function
can work normally depends on the type of the SIM card and the
function service provided by the network operator. Please confirm
before using this function.
Write information
Before using this function, you must obtain the corresponding service
center number from the network operator. The memory capacity of the
SIM card varies depending on the card type.
SMS
In the standby mode, click the "Information Service" button to enter
the mailbox list interface, click [Write message → New message] to
enter the SMS editing interface, manually enter or insert the contact
from the address book as the recipient, edit the information content
Press "Send" to send the message.
Note: The phone supports multiple SMS editing, up to 4 commonly used
Page 10

SMS, each message can accommodate up to 268 Chinese characters or 612
pure English characters.
New SMS, click "Menu" to operate the functions are:
Inserting common words: Insert common words at the cursor position.
Add contact information: Extract names and phone numbers from the
address book and insert them into the message contents.
Add Emoji: Insert the emoji at the cursor position.
Turn on timed send: Turn on timed send.
Font Size: Set the font size when displaying information.
Save as draft: Save the edited message to Draft.
MMS
MMS is a multimedia information, support GIF, JPEG, WBMP, BMP format
image display.
note:
This feature is available only if supported by the network operator.
And only with compatible multimedia information function of the phone
to receive and display properly.
In standby mode, click the "Information Service" button to enter the
mailbox list interface, click [Write message → New multimedia
message] to enter the MMS editing interface, manually enter or insert
the contact as recipients, edit the content or insert the attachment
And then click Send to send the message.
New MMS, click "Menu" to operate the functions are:
Delete: Delete the edited text or inserted audio and video.
Page 11

Save As Draft: Saves the edited information to the Drafts.
Page Timing: Set the page timing of the slide.
Text Layout: Sets the position where the text is displayed.
Font Size: Sets the font size for the message display.
inbox
Store incoming SMS and MMS messages.
Outbox
Save the failed SMS and MMS messages.
Draft box
Save unsent SMS and MMS messages.
Sent
Save successfully sent SMS and MMS.
Security mailbox
The security mailbox can carry on the password protection to the
designated information, protect your information security.
Security list interface, click "Menu" to operate the functions are:
New SMS: Enter the SMS new interface.
New MMS: Enter the MMS interface.
Tag: Marks one or more messages.
Sort: Sets the sort of information sort.
Change Password: Change the password for entering the security
mailbox.
Security mailbox list interface, long press a record of operational
features are:
SMS: enter the new message interface.
MMS: enter the MMS interface.
Page 12

Voice calls: Make a voice call.
IP Phone: Dial an IP phone.
Delete: Delete this message.
Lock: Lock this message.
Move: Move this message.
Copy: Copy this information.
Add Sender To: Adds the sender to the address book.
Common phrases
Write a message that you can directly reference the default language.
Cell broadcast
Web services allow you to receive textual information about a variety
of content, such as news, weather conditions, traffic information,
and more. For details, contact your network operator.
Voicemail
This feature is similar to a voice mail machine, you can not answer
your calls in time to your private voice mailbox, so that callers
leave a message, and by SMS to inform you a voice mail message.
This function is provided by the network operator. If you need to
register the service, contact the network operator for more details.
Note:
You can set the "Call Forward" feature, the voice calls transferred
to the voice mailbox (the caller side for the message number).
Menu List
Settings: SMS, MMS, push messages related to the parameter settings.
Delete all: Go to Empty mailbox / Clear message interface.
Information Capacity: Displays the storage capacity of messages.
Page 13

SMS Export: Select SMS export mailbox and path.
The Internet
Note: 1. Your network service provider may not support certain features, in
order to ensure the normal operation of the browser
Line, please confirm whether your SIM card support and open Internet access.
2. If you browse the web, you'll be charged for traffic.
3. If you have a WLAN network conditions, you can access through the WLAN link
Internet is a combination of wireless communication and Internet application
platform that allows you to obtain a wealth of Internet information resources
and e-commerce applications.
Visit the website
Open the browser start page, the user can enter the interface through
the input URL, search, my bookmarks, history, saved pages. Menu More
menus: Home, Settings, Clear Log, and Exit Browser
Home page, you can access the service provider's home page (can be
pre-set or default home page)
multimedia
Audio player
The phone can play music files stored in the phone, you can also
download the ring tones to support MP3 background play.
To play an item, select the item from the list.
playlist
Page 14

Select Options> Music list, and then select a playlist.
Create a playlist
1. Select Options> New List.
2. Enter the name of the playlist and select 5 to confirm.
3. To add songs immediately, select Yes; to add songs later, select
No.
4. When you are finished, select Done.
Video player
Video player supports format 3gp, mp4, avi file playback.
If the file is an unsupported standard format, it must be converted
to a standard format file by the conversion tool.
Open: Opens the local browse list.
Local Browsing: Browse video files in your phone or memory card.
Local Playlist: You can play the saved video files. You can add the
videos from the memory card or the phone to the local playlist, so
that you can watch the video files the next time.
Camera functions
Take photos and sound clips with the camera's built-in function.
FM radio
The first time you open the FM radio, the system will automatically
scan the channel and record
(Note: you need headphones to act as an antenna, insert headphones
before use)
Search for broadcast channels
Page 15

• To search for a broadcast channel automatically, press the Menu key
→ Scan and Save.
• Manually search for a broadcast channel, fine-tune it by sliding
the roller on the screen (adjust the movement frequency red line), or
manually enter the frequency.
Background play
Click on the hook button, FM background background playback.
recording
Recording (Timed Recording) The station you are listening to is
automatically saved to the recording list.
Image viewer
Through the album, you can view the pictures in the memory card and
photos taken.
1. The phone automatically scans the files that are supported on the
memory card.
2. Select the album you want to open.
3. Press the Menu key to set, set, and other operations.
Application
Alarm clock
Go to Menu, select Alarm.
Create an alarm
1. Turn on the alarm that needs to be turned on.
2. Set the alarm parameters as required.
3. Choose Save.
To cancel the alarm, turn off the alarm switch.
Calendar schedule
Go to the menu and select Calendar.
Create an event
Page 16

1. Select Options → New Schedule.
2. Enter the details of the event as required.
3. Choose Save.
Calculator
1. In Menu mode, select Calculator.
2. Use the buttons corresponding to the calculator display to perform
the basic arithmetic operations.
Sound recorder
Go to the menu and select Sound Recorder.
1, according to the interface recording to start recording.
2. Press Pause to pause recording.
3. Press Stop to stop recording.
4, select the stop recording, the recording file will automatically
save the memory card "Audio" folder, you can click the folder to view.
flashlight:
Phone supports flashlight function, you can press the 0 key to open
STK
Go to the menu and select STK.
Access to the STK submenu allows you to use the value-added services
provided by your network operator.
This phone supports STK, but this service is provided by the network
operator. If SIM card and network operator do not support this kind
of service, this function can not be used. For more information,
contact your network operator.
Bluetooth
Activate the Bluetooth wireless function
1. Go to the menu and select Bluetooth.
2. Click the On / Off button to turn on the Bluetooth wireless
function.
Page 17

3. To allow other devices to position your phone, select the On /
Off button after clicking Local Visibility.
Find and pair with other Bluetooth-enabled devices
1. Select Paired Devices
2. Select the device from the list.
3. Enter the PIN code for the Bluetooth wireless feature or the
Bluetooth PIN for the other device (if available), and select Done.
Pairing completes when the owner of the other device enters the same
PIN code or accepts a connection. Depending on the device, you may
not need to enter a PIN code.
Use the Bluetooth wireless function to send data
1. Select the file or item you want to send from your phone's
application.
2. Select Send via Bluetooth.
→ Add New Device.
Use the Bluetooth wireless function to receive data
1. Enter the Bluetooth wireless feature PIN code, and select Done (if
necessary).
2. Select Yes to confirm that you want to receive data from the
device (if necessary).
Settings
Phone settings
The phone settings include the following items:
Time & Date: Set the time and date of the phone and the displayed
format.
Language Setting: Set the phone display language and input
language.
Auto Power On / Off: Set the time and repeat mode of auto power
on / off.
Restore factory settings: Restore the factory default settings.
Page 18

Scene mode
Preset the scene modes are: general mode, mute mode, conference mode,
indoor mode, outdoor mode, support for user-defined profile, up to 5
custom, the user can set the profile parameters.
Note: The preset profile does not support deletion, and the custom
profile supports deletion.
Connection management
Connection Management contains menu items that are:
Internet accounts: manage Internet accounts, support for editing
and deletion.
Data connection settings: You can choose to connect or always
connect as needed.
Network selection: You can choose to connect automatically or
manually.
display setting:
The display settings contain the following items:
Wallpaper Settings: Supported wallpaper categories are: static
wallpaper, more pictures.
Screen Backlight Brightness: Adjusts the brightness of the screen
backlight.
Key backlight time: adjust the key backlight time.
Page 19

Security Settings
The security settings contain the following settings:
PIN code: PIN code on and off, as well as PIN changes.
Warning: Please use this function with caution. If you forget
your PUK password, please consult your network operator. If the
PUK code input error 10 times, SIM card will be scrapped.
Modify PIN2 Code: Modify the PIN2 code.
caveat:
Please use this function with caution. If the input of PUK2 code
is wrong for 10 consecutive times, the SIM card will be discarded.
Phone lock: Turns the phone lock on or off
Modify the phone password: mobile phone password changes.
Privacy: Set the privacy protection function module.
Auto lock screen: Set the time for auto lock screen.
On: To enable this feature, you must first set the password. When it
is enabled, you need to enter the anti-theft password and notify the
mobile phone number (to receive the illegal SIM card to send
information about the illegal SIM card), set up, anti-theft function
started.
Off: Turn off the anti-theft function. Turn off anti-theft feature
must first enter the anti-theft password.
Change Password: Modify the security code.
caveat:
Page 20

Use this feature with caution. If you forget your password, you will
not be able to use your phone.
Fixed dialing: fixed dialing on and off, and the fixed dial list
management.
Blacklist: Blacklist settings and list management.
• Call settings
• Call settings include the following settings:
• Multi-card settings: contains the settings menu has a standby
mode, the card reply, set the card slot name.
• Call forwarding:
• Unconditional: Turns all incoming calls to voicemail or pre-
programmed phone numbers. Select Query Status to view the
current status of the unconditional branch service.
• Transfer in Busy: If the phone is in a call while it is on,
the incoming call will be transferred to the voicemail box or
the pre-set telephone number.
• Acknowledge Transfer: If no response is received after the set
time, the incoming call will be transferred to the voice
mailbox or the preset telephone number.
• Can not reach the transfer: When it is turned on, the incoming
call will be transferred to the voicemail box or the preset
telephone number when it can not be contacted because of no
signal or power off.
• Cancel All Transfer: Cancels all calls.note:
• You must turn off Airplane mode before you set up Call Forward.
• Call waiting:
Page 21

• On: When the call is successful, the network will notify you
of a new incoming call when you receive a new incoming call.
You can hold the current call and answer another call.
• Off: Closes the call waiting service. You will not be able to
receive calls again when you are on another person's call
during a call.
• Query Status: You can view the current status of the call
waiting service.
• Call Restriction:
• All outgoing calls: Restrict calls to any phone.
• All incoming calls: Limits all incoming calls.
• Roaming Calls: Can not answer calls while roaming.
• International Outgoing Calls: International calls are not
allowed.
• International Roaming Outbound: International roaming is
prohibited.
• Cancel All Restrictions: Cancels all call restrictions.
• Modify Call Barring Password: Modify the call barring
password.
note:
Some network operators limit the use of this feature. For details,
contact your network operator.
When you apply for this service, your network operator will provide
you with the initial network password.
Page 22

Line Selection: Line 1 or Line 2 can be selected.
Hide my number: Set the number of the machine to be displayed.
Other settings include IP push-to-talk, voice call tone per
minute, automatic redial, to connect the vibration, refused to
return to text messages, call voice broadcast.
File management
The file manager can manage the files in the phone memory card
Copy the file
1. Copy files, long press the pop-up copy menu, enter the copy mode.
2. Select the target folder to copy, click the right to confirm the
icon or enter the folder, click "Select the directory"
3. Copy multiple files, click the "mark" multi-select.
new folder
1. Open the file manager.
2. Press the Menu key → New Folder.
3. Enter the folder name and click Save.
Additional features
Udiskfunction
Udiskusingthefollowingsteps:
Before use, please make sure your computer is Windows7 or WindowsXP
system.
UsethesuppliedUSBdatacabletoconnectyourcomputerandmobilephone.
Phoneconnectedtothecomputer,selectthe[Udisk]inthephone.Afterthe
computeridentificationUdiskissuccessful,inthelowerrightcornerstatus
barwillappearagreenUSBdevicesmallicon.
Openthe"MyComputer",thenyou canseethe"removable disk",youcan
operatetheUdisk.
Page 23

Browse through the mobile phone multimedia files must be storedinthe
specifieddirectorytoidentify,ontheotherdirectory,thencannotreadorplay
throughthe phone. Such as picture files only in the "Photos"directorywhen
youcanreadonthephone.note:
1. When the phone is in the U disk usage, you can see some of the
default application files, once you delete the U disk default file
will be permanently lost.
2. U disk, first remove the U disk device on the computer, and get
the system to remind, safe pull U disk, or likely to cause data
loss, or even U disk file system damage.
3. Support USB1.1.
Phone maintenance
• Mobile phone is a high-precision electronic products, please
carefully maintenance. The following suggestions can help you
maintain your phone and extend the life of your phone:
• Mobile phones and their accessories should be placed out of the
reach of children.
• Keep the phone dry. Rain, moisture, or moisture can corrode the
circuit board. If the phone inadvertently water, should promptly
remove the battery, and immediately sent to the local authorized
service center for processing.
• Do not place the phone in a dusty place, otherwise it will
affect the normal use of mobile phones.
• LCD screen is the more vulnerable mobile phone parts, mobile
phones should be avoided on the ground or subject to strong
Page 24

vibration; prohibit the use of sharp objects touch the screen.
• Do not expose the phone to excessive heat. High temperature will
shorten the life of electronic equipment, destruction of the
battery, the phone plastic shell deformation or melting.
• Do not expose the phone to low temperature. Otherwise, when the
phone temperature rises to normal temperature, there will be
moisture inside the cell phone will damage the circuit board.
• Do not throw, knock or shake the phone violently, so as not to
damage the phone's internal circuit boards and precision
structure.
• Do not use chemicals, cleaning solvents or strong detergents to
clean the phone, use a soft cloth soaked in soapy water to scrub
gently.
• Do not paint the phone with paint to prevent the detachable
parts from sticking and affecting normal operation.
• Clean the lens with a clean, soft cloth. Such as: camera lens.
• Replace the antenna only with the use of matching or specified
antenna. Using an unauthorized antenna, accessory, or mobile
phone may damage the device and violate the radio regulations.
Simple troubleshooting
In the process of using the mobile phone, if the abnormal situation,
please refer to the following table to guide troubleshooting. If the
problem persists, contact your designated service center.
Phone can not boot
Page 25
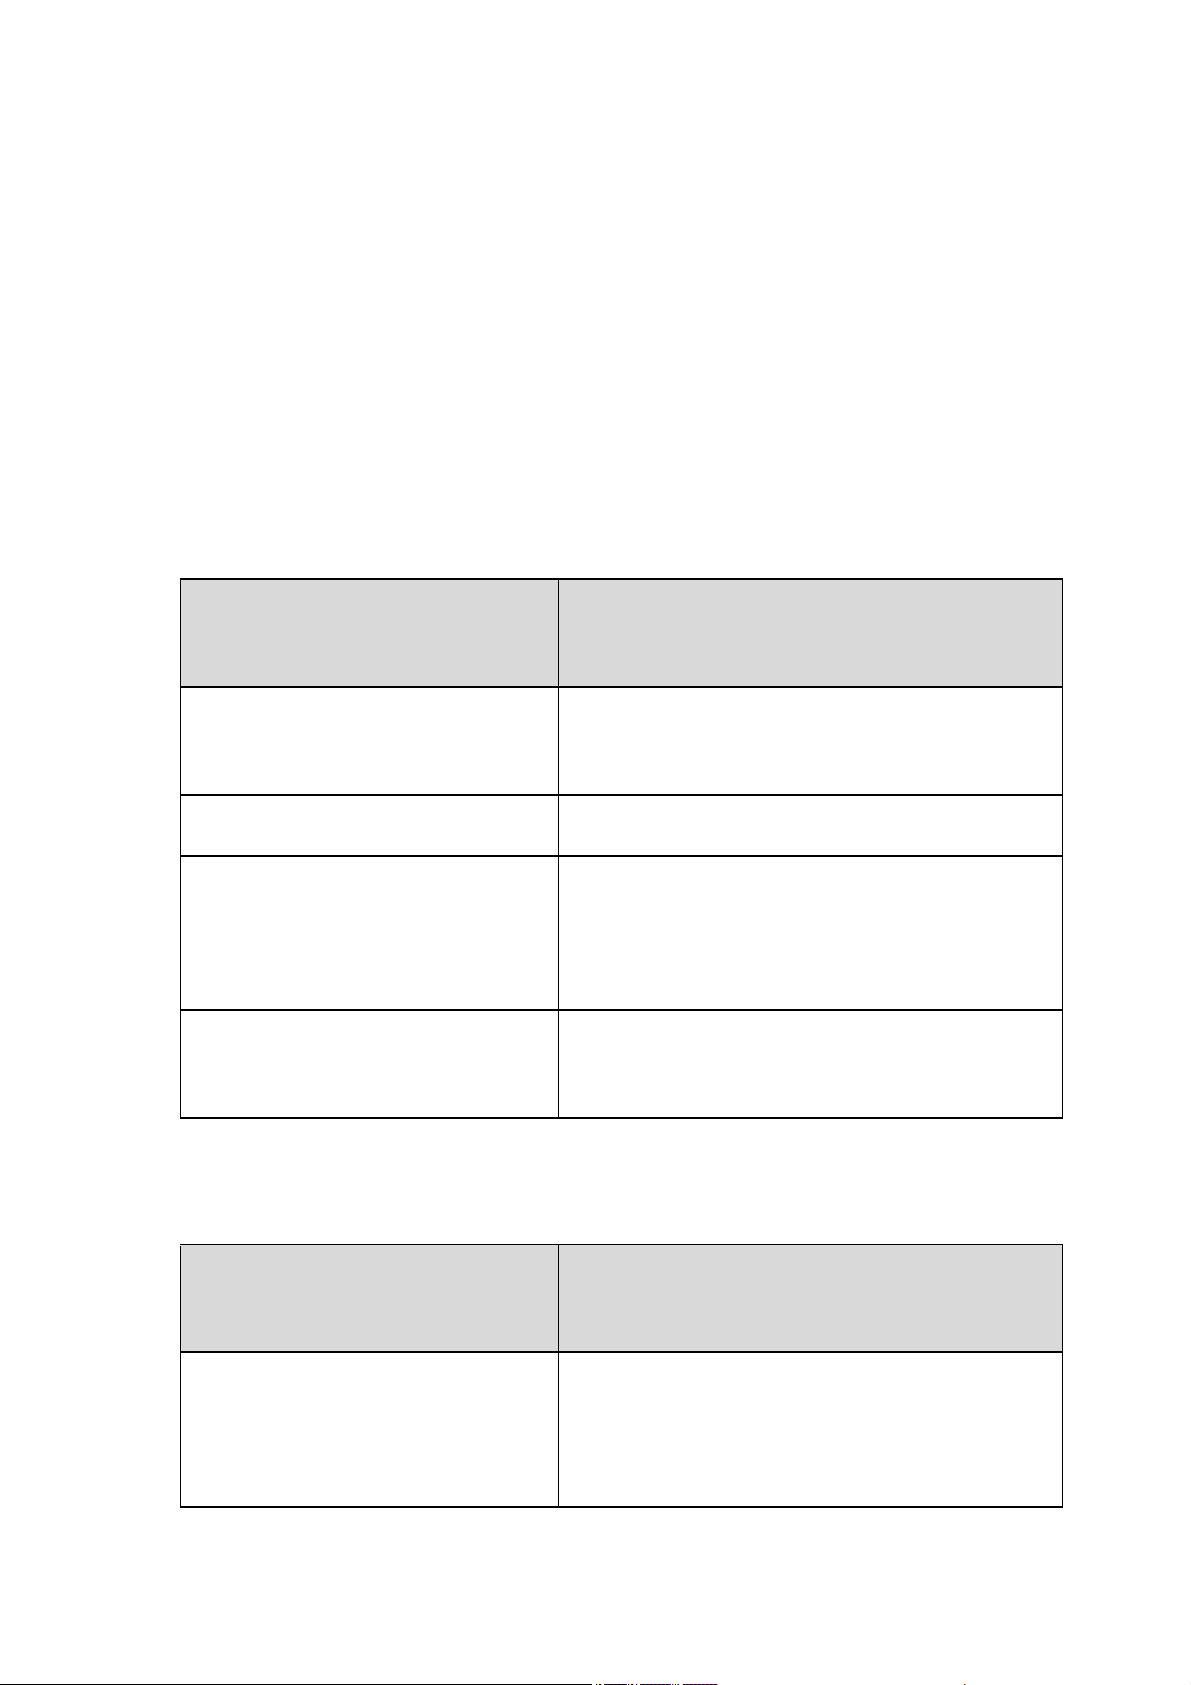
Possible Cause of Problem Solution
Hold down the hook key for a short time, please hold down the hook
button for more than three seconds
Charge the battery
The battery is installed incorrectly
Illegal use can not boot Please enter the correct anti-theft password
Phone automatically shut down
Possible cause of the
malfunction
Whether to enable the timer
shutdown function
The battery is low Please charge
The battery is loose Install the battery correctly according
Illegal use causes an
automatic shutdown
If you do not need the power-off
feature, cancel it
to the instructions for installing the
battery
Please enter the correct anti-theft
password
solution
PIN/PUKcodelock
Possible cause of the
malfunction
PIN (Personal Identification
Number) / PUK (Unlock PIN)
entered incorrectly
solution
Please enter the correct password
Page 26

note:
1. If the PIN code for three consecutive errors, then the SIM card
and many features of the phone will be locked,
For details, see "Security Settings" on p.
2. There is no guarantee that the correct PIN and PUK codes are
available. Contact the operator or the retailer.
Call quality is poor
Possible Cause of Problem Solution
The current signal strength mutation You may be in a high-speed
mobile state (by train or car, etc.), according to the signal
strength markers to determine, select the signal strength of the
local call to ensure call quality
If the signal is in a bad reception area, move to an open area
Unable to answer the call
Possible Cause of Problem Solution
Call Forwarding Cancels call forwarding as needed
Call Restriction Set the restriction on the call restriction as
required
Unable to make phone call
Possible Cause of Problem Solution
Phone is turned off please boot
Not in the network service area Make sure that the network is in
normal service state
The correct SIM card is not inserted correctly Make sure that your
Page 27

SIM card works properly
Call Restriction Set the restriction on the call restriction as
required
Keyboard Auto Lock Select the left soft key + # key to unlock the
keypad lock
Call volume is small
Possible Cause of Problem Solution
Call volume is too low Please adjust the call volume
The other party can not hear you
Possible Cause of Problem Solution
The microphone is too far from the sound source. Place the
microphone near your mouth
The caller does not ring
Possible Cause of Problem Solution
Incoming Call Reminder Set to Silent Please reset the incoming call
prompt to ringtone
The ring volume is set too low. Increase the volume
Call Forwarding Cancels call forwarding
The battery can not be charged
Possible Cause of Problem Solution
The battery is exhausted, and the time is too long Please cell phone
prompts the battery power is low, the timely charge
Poor contact between the battery and the phone Make sure that the
battery is properly installed
Page 28

Charger and mobile phone bad connection Please connect the charger
and the phone interface, then the phone screen appears charging icon
The battery or charger is damaged Please contact our designated
warranty
Ambient temperature is too low or too high Please ensure that the
phone is placed in the normal temperature charging
No network is displayed
Possible Cause of Problem Solution
SIM card is not installed correctly Please refer to the installation
instructions in the SIM card to install correctly
SIM card and mobile phone contacts have impurities Please ensure
that the SIM card and mobile phone contacts clean
Invalid SIM card Please check whether the SIM card has expired
The network environment is in the weak field strength area Please
move to the network signal strong place to use the handset
The phone can not detect the memory card
Possible Cause of Problem Solution
The memory card is not inserted correctly Use the memory card
correctly according to the insertion method of the memory card in
the manual
The memory card is damaged Replace the memory card
not enough space
Possible Cause of Problem Solution
MMS or SMS takes up too much storage Please delete unwanted MMS or
SMS to free up space
Page 29

The history saved in the browser takes up too much storage space
Select [Communication → Browser → WAP Settings → Browser Settings
→ Clear Cache] to free up space
Phone PC Camera can not implement menu options
Possible Cause of Problem Solution
The PC Camera menu 1 does not appear on the phone when the phone is
connected to the computer. Make sure the USB port on the computer is
in good condition
2. Make sure you are using the correct cable from the retailer
Security Information
Use of the environment
To ensure that you are using your device properly and to avoid
impact to you and the environment, keep in mind that you should
comply with all applicable regulations and regulations when using
your device in any location.
Switch off your phone and observe all safety signs and instructions
wherever it may cause an explosion, such as a gas station, a fuel
depot, a chemical plant, or an explosion. Violation of the relevant
provisions may cause an explosion, resulting in personal injury or
death.
The use of a mobile phone in an airplane may cause interference to
the flight operation of the aircraft and create a hazard. Therefore,
be sure to turn off your phone before boarding, and ensure that the
phone is turned off during the entire flight.
Page 30

When driving, please put the mobile phone in a special bracket, do
not place in the seat, or in the collision, the brakes may fall when
the place. Do not use the mobile phone during driving to ensure safe
driving and avoid traffic accidents. If you must use the phone,
please stop the car and then use the phone.
Keep the phone away from high-temperature environments to prevent
the phone from exploding as the battery temperature increases.
Additional safety information
When not using the phone, we recommend that you turn off the phone
and remove the battery to save energy and eliminate cell phone
radiation.
When using the phone, do not adjust the volume too much, to avoid
hearing damage.
Non-professionals, not self-open mobile phone terminals and
batteries.
It is recommended that you try not to use the magnet with a leather
holster to avoid the magnetic phone will switch on the machine
signal interference and hard iron buckle may crush the LCD screen;
plastic material of the mobile phone sets will lead to poor vapor
evaporation, corrosion inside the phone Components, and will lead
to oxidation of the shell fade.
Page 31

FCC Warning
Any Changes or modifications not expressly approved by the party responsible for
compliance could void the user's authority to operate the equipment.
This device complies with part 15 of the FCC Rules. Operation is subject to the following
two conditions: (1) This device may not cause harmful interference, and (2) this device
must accept any interference received, including interference that may cause undesired
operation.
This equipment has been tested and found to comply with the limits for a Class B
digital device, pursuant to part 15 of the FCC Rules. These limits are designed to provide
reasonable protection against harmful interference in a residential installation. This
equipment generate, uses and can radiate radio frequency energy and, if not installed
and used in accordance with the instructions, may cause harmful interference to radio
communications. However, there is no guarantee that interference will not occur in a
particular installation. If this equipment does cause harmful interference to radio or
television reception, which can be determined by turning the equipment off and on, the
user is encouraged to try to correct the interference by one or more of the following
measures:
—Reorient or relocate the receiving antenna.
—Increase the separation between the equipment and receiver.
—Connect the equipment into an outlet on a circuit different from that to which the
receiver is connected.
—Consult the dealer or an experienced radio/TV technician for help.
SAR tests are conducted using standard operating positions accepted by
the FCC with the phone transmitting at its highest certified power level in all
tested frequency bands, although the SAR is determined at the highest certified
power level, the actual SAR level of the phone while operating can be well below
the maximum value.
Before a new model phone is a available for sale to the public, it must be tested and
certified to the FCC that it does not exceed the exposure limit established by the FCC,
tests for each phone are performed in positions and locations (e.g. at the ear and worn
on the body) as required by the FCC.
For body worn operation, this model phone has been tested and meets the
FCC RF exposure guidelines when used with an accessory designated for this
Page 32

product or when used with an accessory that contains no metal and that positions
the handset a minimum of 5mm from the body.
Non-compliance with the above restrictions may result in violation of RF
exposure guidelines
 Loading...