

Page 1
GUN SAFE/EXECUTIVE SAFE
OWNER’S MANUAL
MANUEL DE L’UILISATEUR
COFFRE-FORT D’ARMES À FEU/DE DIRECTION
MANUAL DEL PROPIETARIO CAJA FUERTE PARA
ARMAS DE FUEGO/CAJA FUERTE EJECUTIVA
Page 2
2
Thank you for purchasing this
SentrySafe or ProStaff by SentrySafe
gun safe product.
Please read this manual before using this product.
We are pleased that you have chosen one of our gun safes to protect your firearms. You can be
assured that your safe meets the California Department of Justice standards for firearm safety.
This manual will provide you with the information you need to:
• unpack and set up your safe
• open the safe
• operate the lock
• take full advantage of your safe’s special features.
Remember to keep your combination a secret. Writing down a combination and putting it in a desk
drawer is like leaving your door key under the mat – it invites entry.
Please retain this manual for your records. If you have any questions about your gun safe, please
visit our website at www.sentrysafe.com or call Sentry Customer Service at 1-800-828-1438 or
1-585-381-4900. Customer Service representatives are ready to assist you, 8 a.m. to 8 p.m., E.S.T.,
Monday - Friday.
Table of Contents
Unbolting your gun safe from the shipping pallet . . . . . . . . . . . . . . . . . . . . . . . . . . . . . . . . . . . . . . . . . . . . . .2
Bolt-down instructions . . . . . . . . . . . . . . . . . . . . . . . . . . . . . . . . . . . . . . . . . . . . . . . . . . . . . . . . . . . . . . . . . . . . .2
Lock instructions . . . . . . . . . . . . . . . . . . . . . . . . . . . . . . . . . . . . . . . . . . . . . . . . . . . . . . . . . . . . . . . . . . . . . . . .3-5
Lock instructions: For safes with 3-number combination lock . . . . . . . . . . . . . . . . . . . . . . . . . . . . . . . .3
Lock instructions: For safes with UL Group 2 combination lock . . . . . . . . . . . . . . . . . . . . . . . . . . . . . .3
Lock instructions: Standard electronic lock . . . . . . . . . . . . . . . . . . . . . . . . . . . . . . . . . . . . . . . . . . . . . .3-4
Lock instructions: UL Type 1 electronic lock . . . . . . . . . . . . . . . . . . . . . . . . . . . . . . . . . . . . . . . . . . . . . .4-5
SentrySafe or ProStaff Fire-Safe gun safes . . . . . . . . . . . . . . . . . . . . . . . . . . . . . . . . . . . . . . . . . . . . . . . . . . . .5
1-Year Limited Warranty . . . . . . . . . . . . . . . . . . . . . . . . . . . . . . . . . . . . . . . . . . . . . . . . . . . . . . . . . . . . . . . . . . . .6
French . . . . . . . . . . . . . . . . . . . . . . . . . . . . . . . . . . . . . . . . . . . . . . . . . . . . . . . . . . . . . . . . . . . . . . . . . . . . . . . . .7-12
Spanish . . . . . . . . . . . . . . . . . . . . . . . . . . . . . . . . . . . . . . . . . . . . . . . . . . . . . . . . . . . . . . . . . . . . . . . . . . . . . . .13-18
Serial Number, Combination, Factory Code and Generic Code . . . . . . . . . . . . . . . . . . . . . . . . .Back Cover
A
Lock instructions
The combination for this safe has been randomly selected and appears on the back cover of this
manual. It is important that you keep this Owner’s Manual in a secure place other than IN your
safe; it is your reference for both the safe’s combination and Serial Number. Compare the Serial
Number on the back cover with the number found on the lower right side of the safe. If the
numbers do not match, do not attempt to operate the combination and call Sentry
Customer Service at 1-800-828-1438 or 1-585-381-4900, 8:00 a.m. – 8:00p.m. E.S.T.,
M-F.
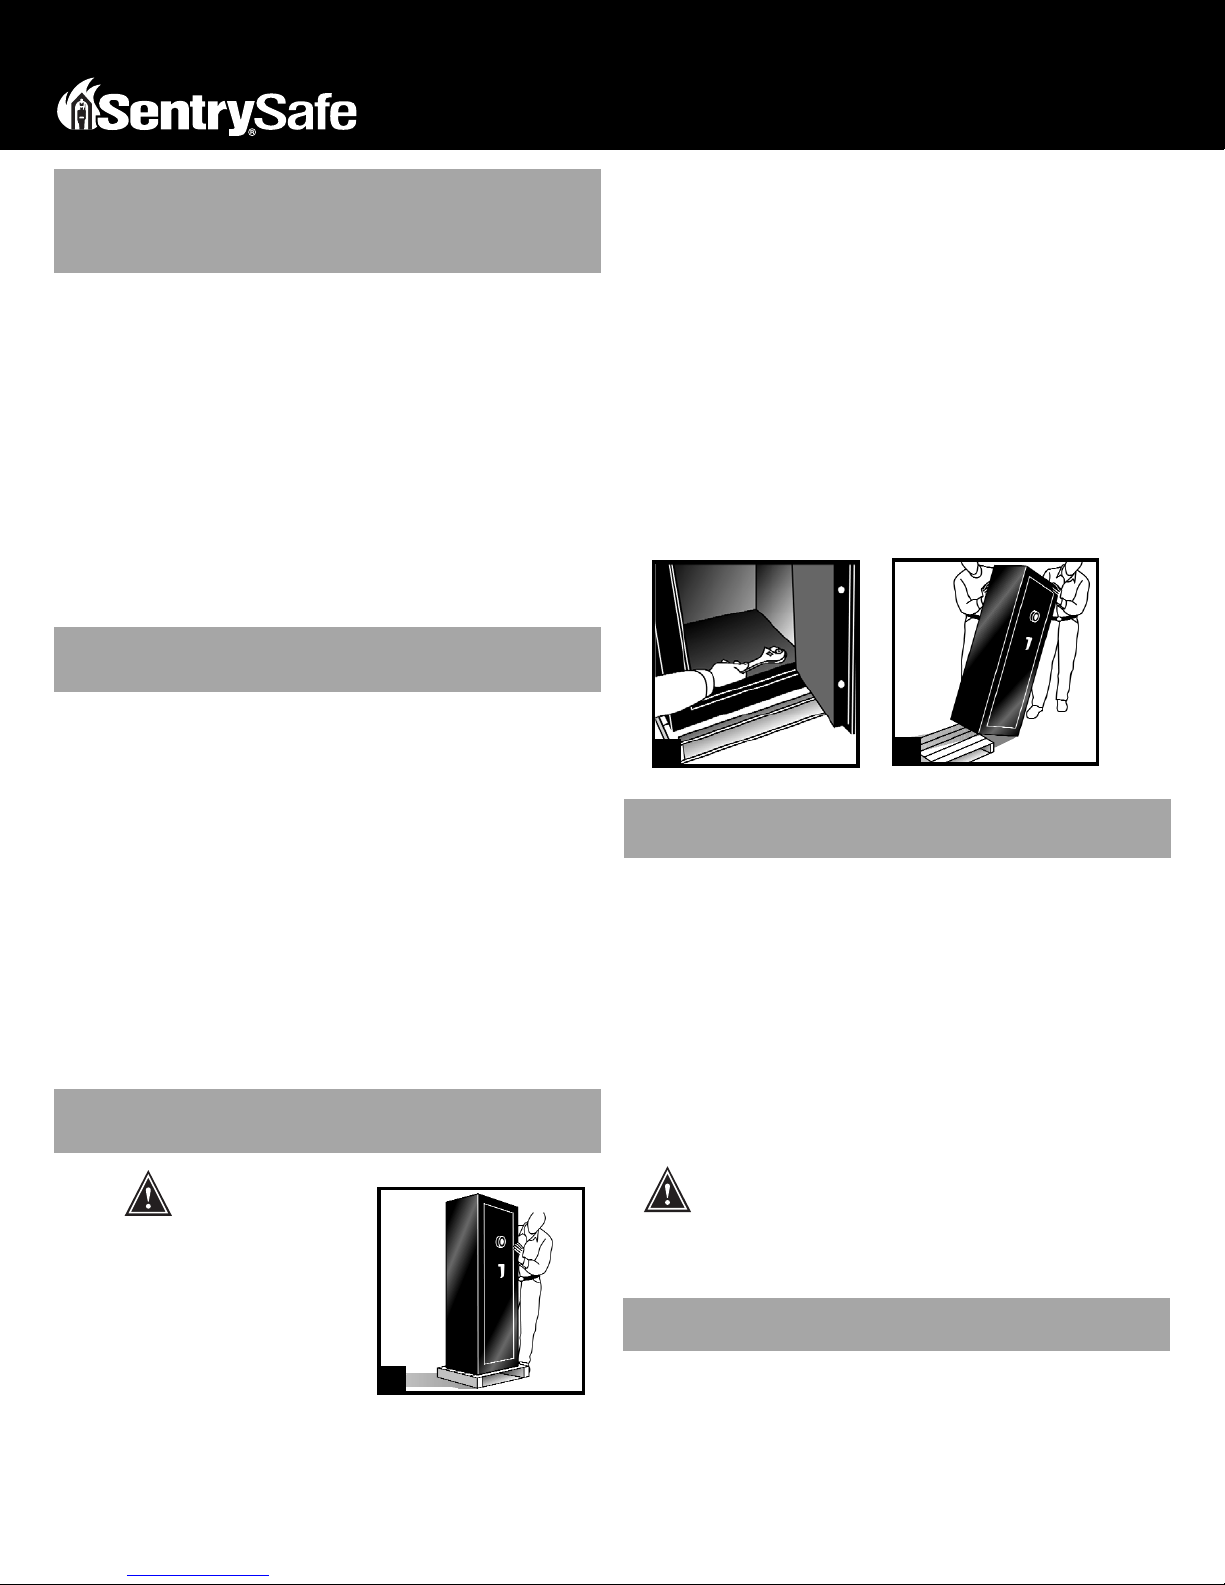
Unbolting your gun safe from the shipping pallet
WARNING!
This is a two-person operation and should not
be attempted without help. Before attempting
to unbolt your new safe, be certain someone is
with you to help steady the safe while you
work. Ensure the safe is standing upright on a
flat, level surface. (Fig. A)
NOTA: Sentry Group is not responsible for any
costs incurred for unit to be removed
from pallet and installed in place.
Tools/equipment required
• Adjustable wrench, pliers, or 17 mm (11/16”) socket wrench
• Hammer
Instructions
1. Using a wrench or pliers, remove the nuts located under the X-cut in the carpet in the bottom of
the unit. (Fig. B)
NOTE: If the bolts turn when you begin to remove the nuts, reach between the
slats of the pallet and hold the bolts, by hand and/or with pliers, as you
turn the nuts.
2. Once the nuts are removed, use a hammer to tap the bolts through the bottom of the safe.
3. Close door and put handle in locked position.
4. With your helper, slide safe to one edge of pallet. Tip the safe so that the edge moves to the
floor. (Fig. C)
5. Remove the pallet and stand the safe upright on the floor.
Bolt-down instructions
To help provide maximum security, Sentry strongly recommends this safe be bolted down.
(Hardware supplied)
1. Select a suitable and convenient location for your safe. Set the safe in place and use the holes
provided in the bottom or back of the safe to mark the location of the holes to be drilled in the
floor or wall. It is not recommended to attempt to bolt to both floor and wall. If bolting to a
wall, please ensure that the safe is resting firmly on the floor.
Note: Fire-Safe models cannot be bolted to the wall.
2. Move the safe away and drill holes of the appropriate diameter and depth for the type of
hardware and the mounting surface being used (2 each – bolts, washers and masonry anchors).
3. Place the safe back over the holes and install the fasteners as required. If a water resistant unit
was purchased, rubberized washers are provided. Assure that the area around the safe hole
opening is clean using a damp cloth. Place the rubber side of the washer facing down against the
safe floor and install the fastener.
Water-resistant models must be bolted down. The supplied hardware
MUST BE USED to bolt the safe to the floor to ensure the watertight seal,
or the water-resistant claim is invalid. See “Water-resistance protection”
on page 6.
NOTE: Sentry Group is not responsible for any costs incurred if unit is to be replaced.
B
C
Page 3

3
★
For safes with 3-Number Combination Lock
NOTE: See the sticker on the back cover of this manual for your combination.
IMPORTANT: The lock on this safe is in the open position. DO NOT operate the
combination until first reading and understanding the following instructions.
Test first with door open!
Test your combination several times with the door open, to make sure you have recorded it
correctly. Your combination is ready to use.
COMBINATION:
3-Number Combinations
1. Start with dial on zero.
2. Turn dial LEFT two turns and stop on the first number
of the combination the third time.
3. Turn dial RIGHT passing the second number of the
combination once, stopping on the number the second time.
4. Turn dial LEFT stopping first time on
To Close and Lock
With the door closed, spin the combination dial several times.
★★
For safes with UL Group 2 Combination Lock
NOTE: See the sticker on the back cover of this manual for your combination.
IMPORTANT: The lock on this safe is in the open position. DO NOT operate the
combination until first reading and understanding the following instructions.
Lock Test
Test first with door open!
Test your new UL Listed combination lock several times with the door wide open. First turn the dial
to the right until it stops at approximately 87, then turn the safe handle clockwise until it stops.
Open the door as far as it will go and turn the safe handle counterclockwise until it stops and the
live locking bolts are extended. Carefully follow the instructions below.
NOTE: The dial will not turn past zero unless the bolts are in the locked position
with the handle vertical.
Accurate alignment of the lock with the opening index (the vertical line at the top-center of the
dial) is essential for successfully operating your combination. Dial your combination slowly and
carefully to avoid passing the desired numbers. Should you dial past the correct number, the entire
combination will need to be re-entered. To avoid damaging the lock mechanism, never spin the dial
back and forth rapidly.
COMBINATION:
1. Start with dial on ZERO.
2. Turn the dial to the LEFT (counterclockwise). Pass the first number of the
combination threetimes. Stop on the firstnumber of the combination thefourth time.
3. Change the direction you are dialing. Going RIGHT (clockwise), pass the second
number of the combination two times and stop on the second number the third time.
4. Change directions again. Turning LEFT (counterclockwise),
pass the third number of the combination once and then continue
around in the same direction, stop on the third number of the combination.
5. Change directions again, turning RIGHT
until the dial stops completely and will not move.
6. Turn safe handle upward, to the left (clockwise) and open the door.
To Close and Lock
With the door closed, turn the handle counterclockwise to secure the locking bolts, then spin the
combination dial to the left at least four times to scramble the combination.
Lost combination
First, find your safe’s Serial Number. The Serial Number is printed on the small label on the right
side of the safe (outside). Send this and a check or money order for $12.00 (U.S. funds). Please
include a written statement of ownership witnessed and signed by a notary public or bank official.
The notary must have a different last name than the owner. Mail to: Sentry Group, Dept. 200,
882 Linden Avenue, Rochester, NY 14625-2784, USA, or fax statement (notary seal must be legible)
to 1-585-381-2940. Payment may also be made using your VISA or Mastercard credit card by phone
only. Call 1-800-828-1438 to make credit card payment. Do not fax credit card information.
*
NOTE: Prices subject to change without prior notification.
The sticker on the back cover of this manual contains the serial number and factory code for your
safe. It is important that you keep this Owner’s Manual in a secure place, other than in your
safe, for future reference.
Using the keypad on electronic safes
Caution!
Liquids can damage the keypad!
Caution!
Pen points or other sharp objects can puncture
the keypad membrane!
★★★
Standard Electronic Lock
To activate lock
Four alkaline AA batteries, Voltage: 6Vdc, (not included) are required to activate the keypad.
NOTE: Non-alkaline and rechargeable batteries ARE NOT RECOMMENDED.
To install batteries:
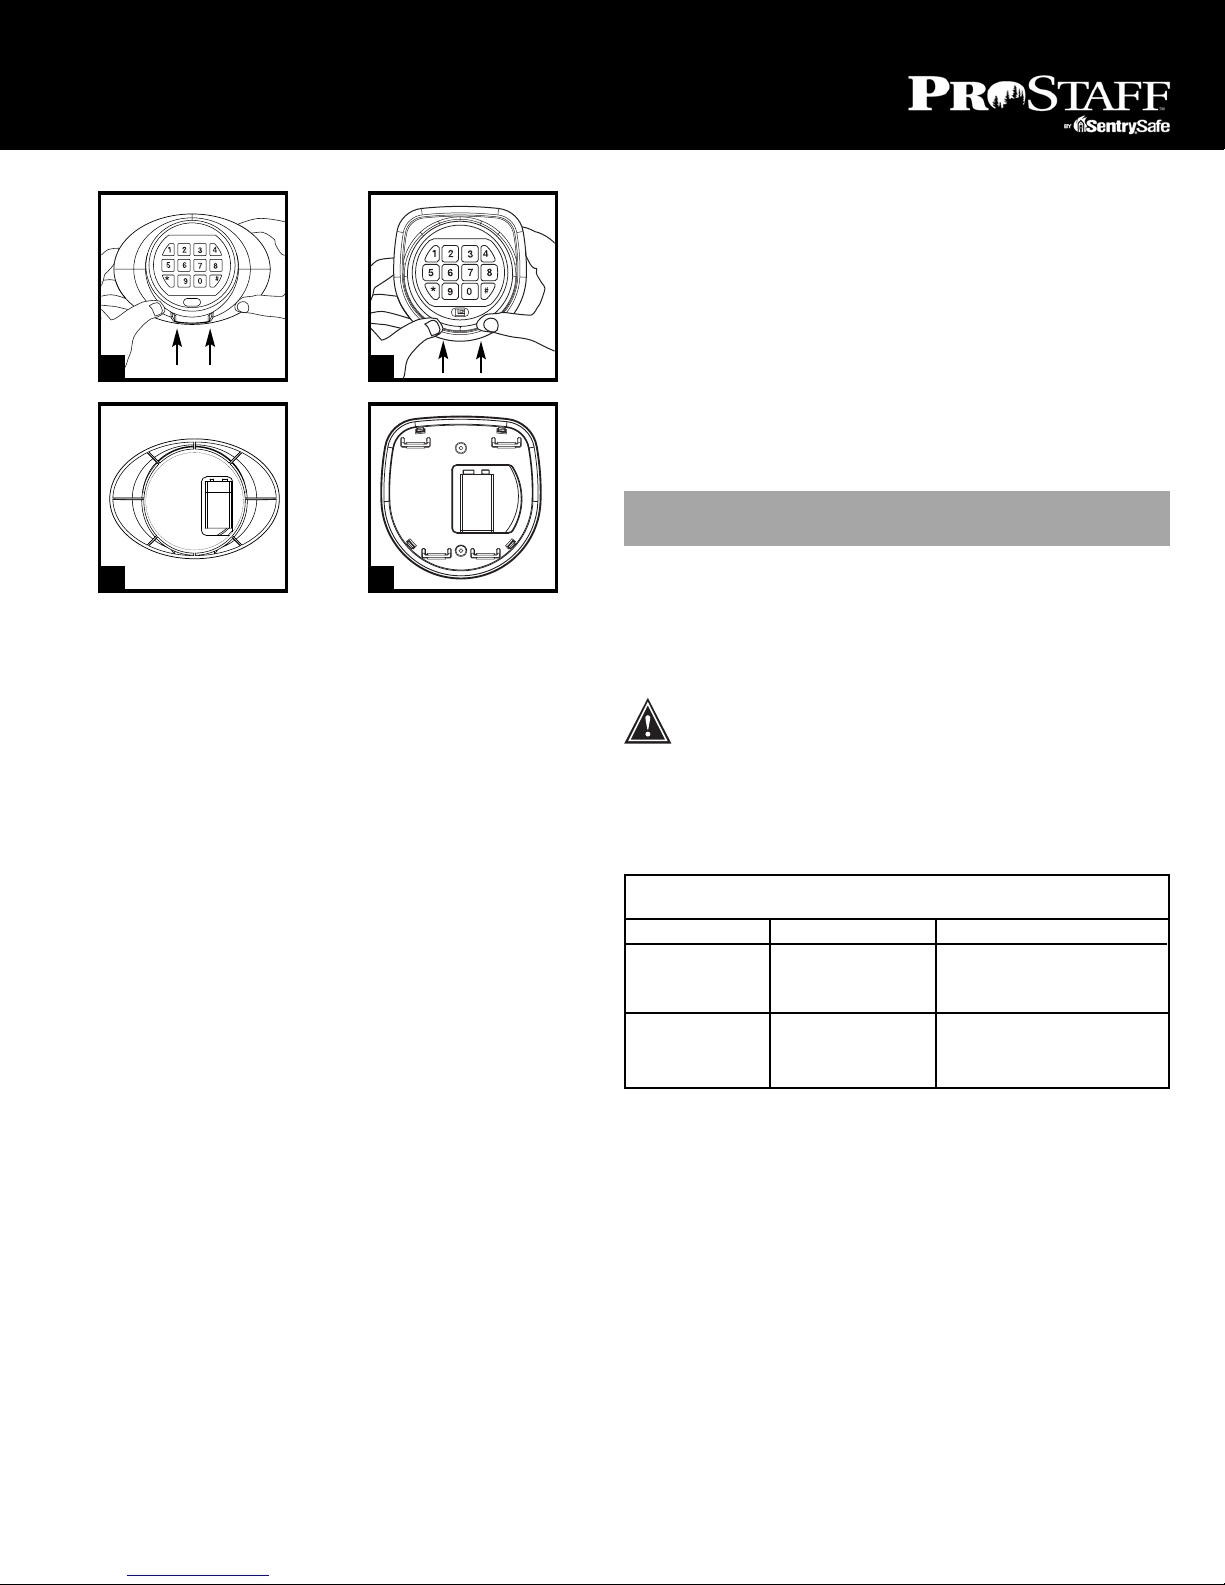
1. Using two hands, hold the keypad, thumbs down, on its left and right sides. Push up the keypad
with your thumbs, and disconnect it from the safe by pulling it towards you. (Fig. A)
2. Let the disengaged keypad hang by its wires. This will expose the battery holder. (Fig. B)
3. Install four alkaline AA batteries as illustrated on the back of the battery holder.
4. Reconnect the keypad by inserting the keypad's four posts into the matching holes.
5. Push down to snap into place.
A
B
Battery
Holder
Page 4
Test first with door open!
(See back cover of this manual for your factory code.)
Test your factory code several times with the door open.
NOTE: Only a light touch is needed. A green PROCEED light and a single beep indicate
that the keypad “felt” your touch. The lock allows 5 seconds for each key
press. If you pause longer, an error signal will occur (blinking red light
and three beeps), indicating you should start over.
1. Press the 5-digit factory code. The greenlight will come on.
2. Turn the handle clockwise and open the door.
Access codes
There are three possible ways to unlock and access the safe—by entering its preset Factory Code,
your own User Code or a User PIN (Personal Identification Number).
You can always open the safe by entering the 5-digit Factory Code. This code cannot be deleted.
But if you prefer to use your own code, you can program the safe to open to the 5-digit User Code of
your choice. If you wish to give someone else temporary access to the safe, you can program a User
PIN that can later be erased.
Programming a user code
There are two ways to program a user code.
A1.Press the Program key. (Prog.)
2. Enter the Factory Code. The green LED remains ON while you enter the 5-digit user code of
your choice. After 5 digits are entered the green LED turns OFF.
(To enter a new User Code, repeat these steps.)
B1.Press the red button on inside of door (hinge side). The lock will “beep” and the green LED
will come on.
2. Enter a 5-digit user code.
(To enter a new User Code, repeat these steps.)
Keep your new user code secure
For your records, please copy it here:
_______ _______ _______ _______ _______
Programming a user PIN
1. Press the Program key.
2. Press it a second time.
3. Enter your 5-digit User Code. The green LED remains ON.
4. Enter the 5-digit User PIN of your choice (any combination except 00000.) After 5 digits are
entered, the green LED turns OFF.
(To enter a new User PIN, repeat these steps. To erase the User PIN, press Program twice, enter
your User Code and then enter 00000.)
Key override
If your electronic lock fails or you do not have any codes available, you may use a key override to
access this unit.
1. Remove the battery cover, disconnect and remove the battery holder.
2. Insert the skeleton key into the key hole inside the opening for the battery.
3. Turn the key to the right.
4. Open the door.
Signals
Your electronic-lock safe communicates using several audio/visual signals.
Red (Error) LED + three beeps indicates one of the following:
1. You have pressed Program key out of sequence
2. You have entered an invalid code or User PIN.
3. You have let 5 seconds or more elapse between key entries.
Green (Proceed) LED + single beep occurs
1. After entering each digit of Factory or User Code, or User PIN
2. After pressing Clear key
3. After pressing Program key
Green LED only
1. Comes ON after you enter a valid code/User PIN and remains lit during the 4-second period
in which the safe can be opened.
2. Comes ON in the Program User Code mode after you enter the Factory Code and remains lit
until you have finished entering a 5-digit User Code.
3. Comes ON in the Program User PIN mode after you have entered your User Code and remains
ON until you have entered a 5-digit User PIN .
Questions?
Yellow LED
Indicates “low battery” and will typically turn ON if battery has been in use approximately two
years or longer.
Your electronic lock automatically performs a low battery test during each lock use.
If a “low battery” condition is detected the Yellow LED will come ON and remain ON during each
subsequent lock operation. (The lock will continue to function in a Low Battery state, until battery
failure.) The Yellow LED will turn OFF only after three consecutive “Good Battery” readings or after
the low batteries are replaced. (Note: If the new batteries are installed in less than 60
seconds the Yellow LED may come ON and stay ON during the first lock operation before it
returns to OFF.)
NOTE: It is recommended you replace the batteries after two years, or when the
yellow LED remains on.
Delay mode
The lock automatically enters a 2-minute Delay mode after an invalid code has been entered three
consecutive times. In this mode, the lock cannot be activated and any key entry will generate an
ERROR signal.
Lost keys or combination
First, find your safe’s Serial Number. The Serial Number is printed on the small label on the right
side of the safe (outside). Send this and a check or money order for $12.00 (U.S. funds) ($12.00 for
keys and $12.00 for combinations). Please include a written statement of ownership witnessed and
signed by a notary public or bank official. The notary must have a different last name than the owner.
Mail to: Sentry Group, Dept. 200, 882 Linden Avenue, Rochester,NY 14625-2784, USA, or fax statement (notary seal must be legible) to 1-585-381-2940. Payment may also be made using your VISA or
Mastercard credit card by phone only. Call 1-800-828-1438 to make credit card payment. Do not fax
credit card information.
*
NOTE: Prices subject to change without prior notification.
★★★★
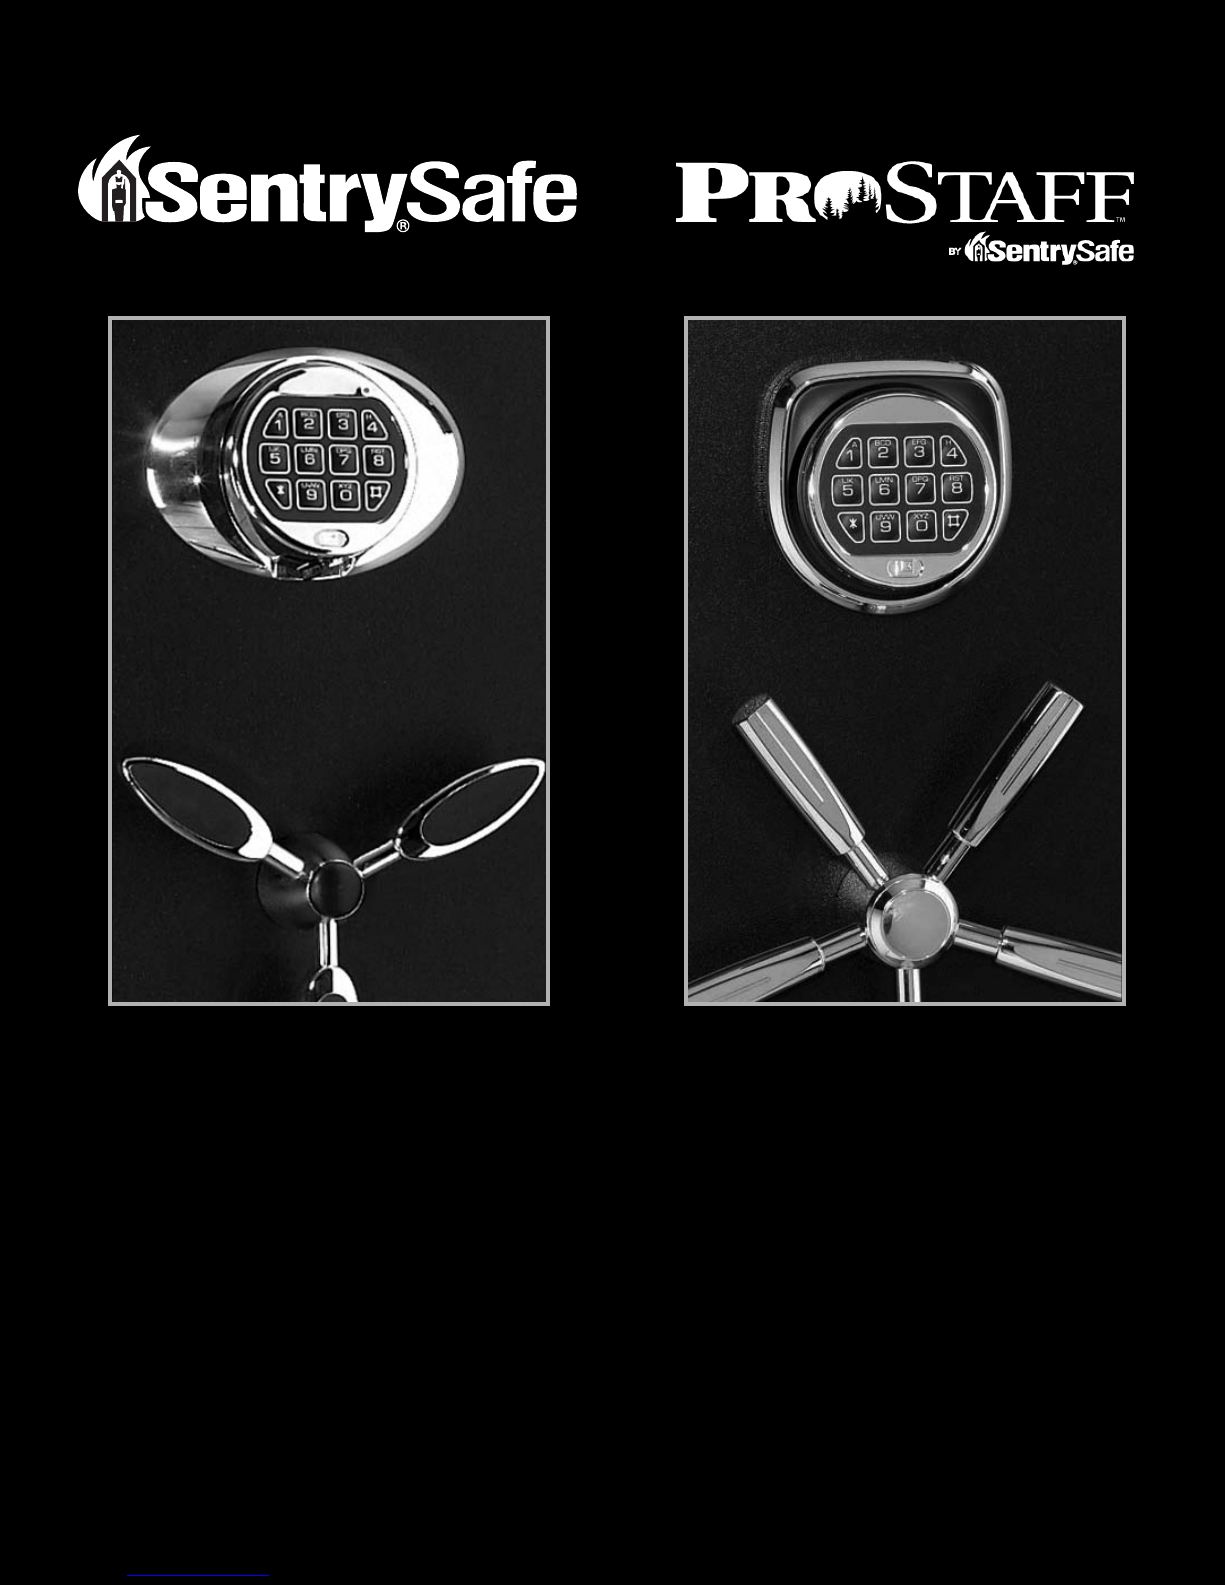
UL Type 1 Electronic Lock
SentrySafe UL Type 1 Electronic Lock ProStaff UL Type 1 Electronic Lock
To power the lock, one 9-volt alkaline battery is required (not included).
NOTE: Non-alkaline and rechargeable batteries ARE NOT RECOMMENDED.
Battery Installation
NOTE: Pulling on the battery to disconnect may damage the connecting wires. To
properly remove the battery, unsnap the connector cap with your finger,
while holding the battery.
4
Page 5
5
SentrySafe UL Type 1 Electronic Lock ProStaff UL Type 1 Electronic Lock
1. Using two hands, hold the keypad, thumbs down, on its left and right sides. Push up the keypad
with your thumbs and disconnect it from the safe by pulling it towards you. (Fig.A)
2. Let the disengaged keypad hang by its wires. This will expose the battery holder.
3. Fastenbattery to connectoron back sideof keypad andinsert batteryinto back ofkeypad. (Fig.B)
4. Reconnect the keypad by positioning slots over tabs and slide down.
Opening the lock
(See back cover of this manual for the generic code. This code was set by the factory
for all Type 1 locks, and it is recommended that you change it immediately upon
receipt of your safe.)
NOTE: The lock allows 10 seconds for each key press. If you pause longer, the lock
will not respond, indicating you should start over.
1. Press thesix-digit generic code.The lock responds with a “double beep”and the redLED flashes.
2. Turn handle clockwise and open the door.
NOTE: Three beeps indicate an incorrect code has been entered. Wait 30 seconds and
enter correct code.
Programming your own unique user code
(Always perform this with door open.)
1. Enter “zero” six times.
2. Enter the existing 6-digit generic code (1,2,3,4,5,6).
3. Enter your NEW 6-digit user code two times.
4. If a mistake is made, wait 30 seconds and repeat steps 1 – 3.
5. Test lock operation several times before closing door.
• Valid Code Entry – Double signal after valid 6-digit code is entered.
• Invalid Code Entry – Triple signal and old code is still valid.
Keep your new user code secure
For your records, please copy it here:
______ ______ ______ ______ ______ ______
Delay mode
The lock automatically enters a 5-minute delay mode after an invalid code has been entered four
consecutive times. At the end of the delay period, two more consecutive invalid codes will restart an
additional five minute delay period.
Battery replacement
When old battery is removed for replacement, your User Code will still work.
Low battery warning
Repeated beeping during an opening indicates that the battery is low and needs
immediate replacement.
Lost user code
To gain access in the event of a lost user code, first, find your safe’s Serial Number. The Serial
Number is printed on the small label on the right side of the safe (outside). Send this and a check
or money order for $12.00 (U.S. funds). Please include a written statement of ownership witnessed
and signed by a notary public or bank official. The notary must have a different last name than the
owner. Mail to: Sentry Group, Dept. 200, 882 Linden Avenue, Rochester, NY 14625-2784, USA, or fax
statement (notary seal must be legible) to 1-585-381-2940. Payment may also be made using your
VISA or Mastercard credit card by phone only. Call 1-800-828-1438 to make credit card payment. Do
not fax credit card information.
*
NOTE: Prices subject to change without prior notification.
SentrySafe and ProStaff Fire-Safe gun safes
See the chart below to determine the fire rating for your safe model.
Fire ratings
To be sure your safe performs as rated and complies with its ratings, remove it from the pallet
before installation.
ETL verified fire claim
Verified by ETL SEMKO to meet manufacturer’s specification for fire resistance 1200°F (649°C) or
1400°F (760°C) for 30 minutes endurance.
Lifetime after-fire replacement guarantee
If a SentrySafe or ProStaff Fire-Safe product is damaged by fire at any time while still owned by you
(the original owner), Sentry Group will ship a replacement free of charge, if you send the following
to Sentry Group, 882 Linden Avenue, Rochester, NY 14625-2784 USA:
• Your name and address;
• A description of the fire, with the model number, serial number and a photo of the burned unit,
and a copy of the report from the fire department, insurance or police.
A
B
B
A
Fire Ratings
ETL 1200°F (649°C) - 30 ETL 1400°F (760°C) - 30
SentrySafe Models GV8526, GX1852, GX8599 ES5251, ET8523
GXW2252H, GXW2252H-S
GT8423, GT8523
ProStaff by GPT1852, GPT1855G, GPT2245G
SentrySafe Models GPT2255G, GPW1842H, GPW1852H
GPW2242H, GPW2252H
Do not store your safe on the pallet on which it was shipped. SentrySafe or ProStaff
Fire-Safe gun safes which are ETL-tested and verified, will not comply with their
ratings if the safe is stored on the shipping pallet.
Page 6

FloodGuardTM Water-resistance protection
GXW and GPW series gun safes have been tested by the independent testing firm ETL SEMKO and
certified to be in compliance with the manufacturer's specifications for water-resistant protection.
Products were immersed in up to 2' of water for up to 72 hours and withstood water leakage.
Water-resistant models must be bolted down. The supplied hardware
MUST BE USED to bolt the safe to the floor to assure the watertight seal,
or the water-resistant claim is invalid.
NOTE: It is normal to feel a slight amount of resistance when closing the door and
locking water-resistant models.
NOTE: Sentry Group is not responsible for any costs incurred if unit is to be replaced.
Instructions for floor mounting
This kit contains:
• (2) lag screws
• (2) rubberized washers
• (2) masonry anchors
Required tools:
• Drill
• Wrench
• For wood anchoring: 7/16” (11.0 mm) drill bit
• For masonry anchoring: 7/16” (11.0 mm) masonry drill bit
Instructions
1. Unlock the safe and open the door.
2. Use a screw or drill bit to mark the floor through both holes.
3. Move the safe aside to clear both marked spots for drilling.
4. Drill into the floor:
• For wood: Using the 7/16”(11.0 mm)drill bit drill a hole 2 1/2”(64.0 mm) deep in each
marked spot.
• For masonry: Using the 7/16”(11.0 mm) masonry drill bit drill a hole 2 1/2”(64.0 mm) deep in
each marked spot. Install a masonry anchor in each hole.
5. Replace the safe in the desired position, with the holes in the safe aligned with those in the floor.
6. Securing the safe:
• For wood: Pass each lag screw through a washer (rubber side toward floor), then through the
safe and into a hole. Tighten with the wrench. (Fig.C)
• For masonry: Pass each lag screw though a washer (rubber side toward floor), then through
the safe and into a masonry anchor. Tighten with the wrench. (Fig. D)
✪
No computer disks, audio-visual media or photo negatives.
This product is not intended to protect computer diskettes, cartridges and tapes, audio or video
cassettes or photo negatives. For fire-resistant storage of these materials, ask your retailer for the
SentrySafe or ProStaff Fire-Safe media products.
Cleaning instructions
For units with either a stainless steel-look or high gloss door panel, the exterior may be cleaned
with a LINT FREE cloth (i.e. micro fiber, lens cleaner, etc). Caution: Do not use a paper-based
product (tissue, paper towel) as this may leave scratches.
1 year limited warranty
This product is warranted to the original purchaser for one year (1) from the date of purchase to be free of
structural and mechanical defects due to faulty materials or workmanship. If a structural or mechanical defect
occurs during the warranty period, Sentry Group (also referred to as “Sentry”) will repair or replace the
defective part(s) or product, at its option, at no charge. Replacement unit is provided with curbside delivery only.
Additional expense for inside delivery is the responsibility of the consumer. Sentry will not cover additional costs
for installation of the replacement unit.
For Warranty Service (North America only)
Please notify the Sentry Group Customer Service Department of the problem by phone(at 1-800-828-1438 or
1-585-381-4900, 8 a.m.- 8 p.m. E.S.T., M-F) or in writing to Sentry Group, 882 Linden Avenue, Rochester, New York
14625-2784, U.S.A. Do not ship your product back to Sentry Group. The Sentry Group Customer Service
Department will decide either to have the product returned, repaired, replaced, or refund your money.
Proof of Purchase Date
For all Sentry Group products, a dated store receipt is required as proof of purchase.
Limitations Of Warranty
1. Sentry’s responsibility and the buyer’s exclusive remedy under this warranty are limited to the repair or
replacement of the defective part(s) or product, at Sentry’s option. In no event shall Sentry be liable for any
incidental or consequential damages (including but not limited to loss or damage due to fire, water, theft or
vandalism) to persons or property resulting from the breach of this or any other express or implied warranty
applicable to the product. Some states, provinces and countries do not allow the exclusion or limitation of
incidental or consequential damages, so the above limitation or exclusion may not apply to you.
2. Except as may be otherwise provided by applicable law, Sentry disclaims any and all other
covenants and warranties, whether written or oral, express or implied, including, but not
limited to, the implied warranties of merchantability and fitness for a particular purpose.
The implied warranty applicable to this product shall not exceed the standard one year limited warranty.
Some states, provinces and countries do not allow disclaimers of implied warranties or limitations on their
duration, so the above disclaimer and/or limitation may not apply to you.
3. Sentry is not responsible for damage, defects, or malfunction to the product incurred during shipment.
The product was packed in accordance with Interstate Commerce Commission specifications, and with
reasonable handling, should be in good condition on arrival. Any claims for shipping damage should be made
directly to the carrier.
4. These warranties do not cover defects, damage, or malfunction caused by modification, alteration, repair or
service of the product by anyone other than Sentry or its authorized representative, or caused by physical
abuse to or misuse of the product. Sentry specifically disclaims coverage for damage that may result from
the product being bolted-down and/or damage that may result from the improper handling of the product
during moving and/or installation.
5. No Sentry agent, employee, representative, dealer or retailer has the authority to make or imply any
representation, promise or agreement which in any way varies the terms of this Limited Warranty.
6. This Limited Warranty shall apply to new, first quality Sentry products and shall not apply to factory seconds
or previously-owned products, or products previously damaged by such events including,but not limited to,
fire, flood, earthquake, burglary, handling by movers or installers.
All of the provisions of this Limited Warranty are separate and severable. If any provision is held invalid and
unenforceable, such determination shall not affect the validity or enforceability of the other provisions. This
Limited Warranty gives you specific legal rights, and you may also have other rights which vary from state to
state, province to province, or country to country.
WARNING!
If children live or visit in your home, do not leave your SentrySafe or
ProStaff Gun Safe/Executive Safe open and unattended. Children at play
could accidentally be locked inside the safe. Keep your safe closed and
locked at all times.
6
C
D
Page 7

7
Nous vous remercions d’avoir acheté
ce coffre-fort d’armes à feu
SentrySafe ou ProStaff.
Veuillez lire ce manuel avant de commencer
à utiliser ce produit.
Nous sommes enchantés que vous ayez choisi l’un de nos coffres-forts d’armes à feu pour protéger
vos armes. Vous pouvez être certain que votre coffre-fort est conforme aux normes du
Département de la justice de l’État de Californie.
Ce manuel vous fournira les informations importantes qui vous seront nécessaires pour :
• déballer et installer votre coffre-fort
• ouvrir le coffre-fort
• faire fonctionner le verrou
• bénéficier de tous les avantages spéciaux de votre coffre-fort.
N’oubliez pas de garder votre combinaison secrète. Écrire une combinaison et la laisser dans un
tiroir de bureau équivaut à laisser la clé de votre porte sous le paillasson – et constitue une
invitation à entrer.
Veuillez conserver ce manuel dans vos dossiers. Veuillez visiter notre site Web à l’adresse
www.sentrysafe.com ou appeler le service clientèle de Sentry au 1-800-828-1438 ou au
1-585-381-4900 pour toute question éventuelle au sujet de votre coffre-fort à armes à feu. Les
représentants de ce service sont à votre disposition de 8h00 à 20h00 (heure standard de la côte
est), du lundi au vendredi.
Table des matières
Anglais . . . . . . . . . . . . . . . . . . . . . . . . . . . . . . . . . . . . . . . . . . . . . . . . . . . . . . . . . . . . . . . . . . . . . . . . . . . . . . . . . .2-6
Déboulonnage de votre coffre-fort d’armes à feu de sa palette d’expédition . . . . . . . . . . . . . . . . . . . . .7
Instructions relatives au verrou . . . . . . . . . . . . . . . . . . . . . . . . . . . . . . . . . . . . . . . . . . . . . . . . . . . . . . . . . .8-11
Instructions relatives au verrou : coffres-fortséquipés d’un verrouà combinaison de 3chiffres . . .8
Instructions relatives au verrou : coffres-forts équipés d’un verrou à combinaison
UL de groupe 2 . . . . . . . . . . . . . . . . . . . . . . . . . . . . . . . . . . . . . . . . . . . . . . . . . . . . . . . . . . . . . . . . . . . . . . . .8
Instructions relatives au verrou : verrou électronique standard . . . . . . . . . . . . . . . . . . . . . . . . . . . . .9-10
Instructions relatives au verrou : verrou électronique UL de type 1 . . . . . . . . . . . . . . . . . . . . . . . .10-11
Coffres-forts d’armes à feu SentrySafe ou ProStaff Fire-Safe . . . . . . . . . . . . . . . . . . . . . . . . . . . . . . . . . .11
Garantie Limitée de 1 an . . . . . . . . . . . . . . . . . . . . . . . . . . . . . . . . . . . . . . . . . . . . . . . . . . . . . . . . . . . . . . . . . . .12
Espagnol . . . . . . . . . . . . . . . . . . . . . . . . . . . . . . . . . . . . . . . . . . . . . . . . . . . . . . . . . . . . . . . . . . . . . . . . . . . . . . .13-18
Numéro de série, combinaison, code d’usine et code générique . . . . . . . . . . . . . . . . . . . .dernière page
Déboulonnage de votre coffre-fort d’armes à feu
de sa palette d’expédition
Outils/équipements requis
• Clé à molette, pinces ou clé à douille de 17 mm (11/16”)
• Marteau
Instructions
1. Utilisez une clé ou des pinces pour retirer les écrous situés sous la découpe en X du tapis, au
bas de l’unité. (fig. B)
REMARQUE : si les boulons se mettent à tourner lorsque vous commencez à retirer
les écrous, passez la main à l’intérieur de la palette pour les maintenir une
place, à la main ou à l’aide de pinces, lorsque vous dévissez les écrous.
2. Lorsque les écrous ont été retirés, aidez-vous d’un marteau pour faire passer les boulons à tra-
vers le fond du coffre-fort.
3. Fermez la porte et mettez la poignée dans sa position
de verrouillage.
4. Demandez à l’autre personne de vous aider à faire glisser le coffre-fort vers un bord de la
palette. Faites basculer le coffre-fort jusqu à ce que l’un de ses côtés touche le sol. (fig. C)
5. Retirez la palette et remettez le coffre-fort à la verticale sur le sol.
Instructions de boulonnage
Afin de fournir un maximum de sécurité, Sentry recommande fermement que le coffre-fort soit
boulonné au sol. Ferrures de montage nécessaires (incluses).
1. Sélectionnez un emplacement pratique et approprié pour votre coffre-fort. Mettez-le dans
cet endroit et utilisez les trous percés au fond ou à l'arrière du coffre-fort pour marquer
l'emplacement des trous que vous percerez dans le sol ou dans le mur. Nous vous
recommandons de ne pas tenter de le boulonner à la fois au sol et au mur. Si vous désirez
boulonner votre coffre-fort à un mur, assurez-vous qu’il repose bien à plat sur le sol.
REMARQUE : les modèles Fire-Safe ne peuvent pas être boulonnés au mur.
2. Retirez le coffre-fort et percez des trous d'un diamètre et d'une profondeur appropriés pour le
type de matériel utilisé et la surface de montage (2 de chaque —boulons, rondelles et pièces
d’ancrage de maçonnerie).
3. Remettez le coffre-fort dans sa position d'origine et installez les attaches selon le nécessaire.
Si vous avez acheté une unité hydrorésistante, des rondelles caoutchoutées sont fournies.
Assurez-vous que la zone entourant l’ouverture du trou du coffre-fort est propre en utilisant un
chiffon humide. Orientez le côté en caoutchouc de la rondelle vers le bas, contre le plancher du
coffre-fort, puis installez l’attache.
Les modèles hydrorésistants doivent être boulonnés. Le matériel fourni
DOIT ÊTRE UTILISÉ pour boulonner le coffre-fort au plancher afin
d’assurer le joint étanche ; dans le cas contraire toute plainte ayant
trait à l’hydrorésistance est invalide. Reportez-vous à la section sur la
protection hydrorésistante de la page 11.
REMARQUE : Sentry Group ne peut être tenu responsable d’aucun des coûts encourus
en cas de remplacement de l’unité.
ATTENTION!
N’essayez pas de réaliser seul cette
opération qui doit être effectuée par deux
personnes. Avant d’essayer de déboulonner
votre nouveau coffre-fort, veillez à ce
qu’une autre personne puisse vous aider
à maintenir le coffre-fort en place pendant
que vous travaillez. Veillez également à ce
que le coffre-fort soit posé verticalement
sur une surface plate régulière. (fig. A)
REMARQUE : Sentry Group ne peut être tenu responsable d’aucun coût encouru pour
retirer votre unité de sa palette et la mettre en place.
A
B C
Page 8

8
Instructions relatives au verrou
La combinaison de ce coffre-fort a été choisie au hasard et celle-ci figure en bas. Il est important
que vous conserviez ce manuel de l’utilisateur dans un endroit sûr plutôt que DANS votre
coffre-fort ; celui-ci est votre source de référence à la fois pour la combinaison du coffre-fort et
pour le numéro de série. Comparez le numéro de série ci-dessous avec le numéro figurant sur le
coté droit inférieur du coffre-fort. Si les numéros ne correspondent pas, n’essayez pas
d’utiliser la combinaison et contactez le service clientèle de Sentry en composant
le 1-800-828-1438 ou le 1-585-381-4900 (de 8 h 00 à 20 h 00, heure de l'est, du lundi
au vendredi).
★
Coffres-forts équipés d’un verrou à
combinaison de 3 chiffres
REMARQUE : reportez-vous à l’autocollant situé à la dernière page de ce manuel
pour la combinaison.
IMPORTANT: Le verrou de ce coffre-fort est en position ouverte. N’utilisez PAS la
combinaison avant d’avoir lu et compris les instructions suivantes.
Essayez d’abord la combinaison
avec la porte ouverte !
Testez plusieurs fois votre combinaison avec la porte ouverte pour vous assurer que vous l'avez
enregistrée correctement. Votre combinaison est ensuite prête à être utilisée.
COMBINAISON :
Combinaisons à 3 chiffres
1. Commencez par mettre la roue sur zéro.
2. Tournez le cadran de deux tours vers la GAUCHE et arrêtez-vous
sur le premier numéro de la combinaison lors du troisième tour.
3. Tournez le cadran vers la DROITE en dépassant une
fois le deuxième numéro de la combinaison, puis en vous
arrêtant sur ce numéro lors de votre deuxième passage.
4. Tournez la roue vers la GAUCHE en l'arrêtant dès le premier tour sur
Fermeture et verrouillage
Avec la porte fermée, faites tourner la roue à combinaison plusieurs fois.
★★
Coffres-forts équipés d’un verrou à
combinaison UL de Groupe 2
REMARQUE : reportez-vous à l’autocollant situé à la dernière page de ce manuel
pour la combinaison.
IMPORTANT : la serrure de ce coffre-fort est en position ouverte. NE faites PAS
fonctionner la combinaison avant d’avoir lu et compris les instructions suivantes.
Test de fermeture
Essayez d’abord la combinaison avec la porte ouverte !
Testez votre nouvelle serrure à combinaison homologuée UL plusieurs fois avec la porte tout
ouverte. Commencez par tourner le cadran vers la droite jusqu’à ce qu’il s’arrête approximativement sur 87, puis tournez la poignée du coffre-fort dans le sens des aiguilles d’une montre jusqu’à
ce qu’elle s’arrête. Ouvrez la porte autant que possible et tournez la poignée du coffre-fort dans le
sens inverse des aiguilles d’une montre jusqu’à ce qu’elle s’arrête et que les boulons de
verrouillage mobiles soient sortis Suivezattentivement les instructions ci-dessous.
REMARQUE : la roue ne tournera pas au-delà du zéro tant que les pênes de
fermeture sont en position fermée avec la poignée verticale.
Un alignement précis de la serrure avec l’indice d’ouverture (la ligne verticale en haut au centre
de la roue) est essentiel pour faire fonctionner votre combinaison avec succès. Composez votre
combinaison lentement et en faisantattention pour éviter de passer au-delà des numéros désirés.
Pour le cas où votre roue dépasserait le bon chiffre, il vous serait nécessaire d’entrer à nouveau la
combinaison entière. Enfin d’éviter de causer des dommages au mécanisme de la serrure, ne fait
jamais tourner la rouerapidement dans un sens puis dans un autre.
COMBINAISON :
1. Commencez par mettre la roue sur ZÉRO.
2. Tournez la roue vers la GAUCHE (sens contraire des aiguilles
d'une montre). Passez le premier chiffre de la combinaison trois fois.
Arrêtez-vous sur le premier chiffre de la combinaison lors de la quatrième fois.
3. Changez de direction de tour de roue. Allez vers la DROITE
(sens des aiguilles d'une montre), passez le deuxième chiffre de la
combinaison deux fois et arrêtez-vous sur le deuxième chiffre la troisième fois.
4. Changez à nouveau de direction. En tournant vers la GAUCHE
(sens contraire des aiguilles d'une montre), passez le troisième chiffre
de la combinaison une fois, et ensuite continuez en tournant dans
la même direction, arrêtez-vous sur le troisième chiffre de la combinaison.
5. Changez encore de direction, en tournant vers la DROITE
jusqu'à ce que la roue s'arrête complètement, pour ne plus bouger.
6. Faites remonter la poignée du coffre vers la gauche (sens des aiguilles d'une montre) et
ouvrez la porte.
Fermeture et verrouillage
Avec la porte fermée, tournez la poignée dans le sens contraire des aiguilles d’une montre pour
sécuriser les pênes de fermeture, puis faites tourner la roue à combinaison vers la gauche, au
moins quatre fois pour brouiller la combinaison.
Perte du combinaisons
Commencez par rechercher le numéro de série de votre coffre-fort. Celui-ci est imprimé sur la
petite étiquette située à droite du coffre-fort (sur la paroi extérieure). Envoyez ceci ainsi qu’un
chèque ou un mandat d’une somme de 12 $ US. Veuillez inclure une déclaration de propriété écrite,
certifiée et signée par un notaire, ou par un membre de la direction d'une banque. Le notaire doit
avoir un nom de famille différent de celui du propriétaire. Envoyez la déclaration par courrier à :
Sentry Group, Dept. 200, 882 Linden Avenue, Rochester, NY 14625-2784, États-Unis ou par télécopie
(le sceau du notaire doit être lisible) au 1-585-381-2940. Le paiement peut également être effectué
par carte de crédit VISA ou Mastercard, par téléphone uniquement. Composez le 1-800-828-1438
pour payer par carte de crédit. N’envoyez pas les informations de votre carte de crédit par télécopie.
*
REMARQUE : Les prix peuvent être modifiés sans notification préalable.
Le numéro de série et le code d’usine de votre coffre-fort sont indiqués sur l’autocollant situé à la
dernière page de ce manuel. Il est important que vous conserviez ce manuel d’utilisation dans un
endroit sûr, autre que votre coffre-fort, pour pouvoir vous y reporter ultérieurement.
Comment utiliser le clavier
Attention !
Les liquides peuvent endommager le clavier !
Attention !
Les pointes de stylos ou autres objets tranchants
peuvent perforer la membrane du clavier !
Page 9

9
★★★
Verrou électronique standard
Pour activer la serrure
Quatre piles alcalines AA, Tension électrique : 6 V cc, (non incluses) sont requises pour activer le
clavier.REMARQUE : les piles non alcalines et rechargeables ne sont pas recommandées.
Installation des piles :
1. Prenez le clavier avec les deux mains, les pouces vers le bas, en le maintenant par ses côtés
gauche et droit. Poussez-le vers le haut à l’aide de vos pouces, puis détachez-le
du coffre-fort en le tirant vers vous. (fig. A)
2. Laissez le clavier désengagé pendre, suspendu à ses fils. Ceci permettra d’exposer le
réceptacle à piles. (fig. B)
3. Installez quatre piles alcalines AA conformément à l’illustration située au dos du réceptacle
à piles.
4. Reconnectez le clavier en insérant ses quatre montants dans les orifices correspondants.
5. Poussez sur le clavier pour le mettre en place.
6. Testez le verrou selon les instructions du manuel d’utilisation du coffre-fort.
Essayez d’abord le code usine
avec la porte ouverte !
(Reportez-vous à la dernière page de ce manuel pour le code d’usine.)
REMARQUE : Une très légère pression suffit. Un lumière verte (“CONTINUER”) et un
seul bip indiquent que le clavier a “perçu” votre pression. La serrure
permet une pause de 5 secondes entre chaque pression. Une pause plus
longue déclenchera un signal d’erreur (un clignotant rouge et trois bips)
indiquant qu’il faut recommencer dès le début.
Testezplusieurs fois votre Code Usine avec la porte ouverte.
1. Composez le Code Usine à 5 chiffres. La DEL verte s’allume.
2. Tournez la poignée dans le sens des aiguilles d’une montre et ouvrez la porte.
Codes d’accès
On peut déverrouiller le coffre-fort et l’ouvrir de trois manières différentes : en composant le Code
Usine, votre propre Code Usager ou un NIP Usager (Numéro d’Identité Personnel).
Vous pouvez toujours ouvrir le coffre-fort en composant le Code Usine à 5 chiffres. Ce code ne
peut pas être effacé. Mais si vous préférez utiliser votre propre code, vous pouvez programmer le
coffre-fort de telle sorte qu’il s’ouvre lorsque vous composez le Code Usager à 5 chiffres de votre
choix. Si vous voulez permettre à quelqu’un d’avoir temporairement accès au coffre-fort, vous
pouvez programmer un NIP Usager qu’il vous sera possible d’effacer plus tard.
Comment programmer une code usager
Il existe deux manières de programmer un Code Usager.
A1.Appuyez sur la touche Program. (Prog.)
2. Composez le Code Usine. La DEL verte reste alluméependant que vous composez le Code
Usager à 5 chiffres de votre choix. Une fois que 5 chiffres ont été composés, la DEL
verte s’éteint.
(Pour composer un nouveau Code Usager, répétez ces actions.)
B1.Appuyez sur le bouton rouge situé à l’intérieur de la porte (du côté des charnières). La
serrure émettra un bip et la LED verte s’allumera.
2. Composez un Code Usager à 5 chiffres.
(Pour composer un nouveau Code Usager, répétez ces actions.)
Gardez en toute sûreté votre nouveau code usager.
Pour mémoire, veuillez le copier ici :
_______ _______ _______ _______ _______
Comment programmer un NIP Usager
1. Appuyez sur la touche Program.
2. Appuyez de nouveau sur cette touche.
3. Composez votre Code Usager à 5 chiffres. La DEL verte reste allumée.
4. Composez le NIP Usager à 5 chiffres de votre choix (n’importe quelle combinaison autre que
00000). Une fois que cinq chiffres ont été composés, la DEL verte s’éteint.
(Pour composer un nouveau NIP Usager, répétez ces actions. Pour effacer le NIP Usager, appuyez
deux fois sur Program, composez votre Code Usager, puis 00000.)
Commande de déblocage
Si votre serrure électronique ne répond pas ou si vous n’avez aucun codes d’accès disponibles,
vous pouvez utiliser une commande de déblocage pour accéder à l’intérieur du coffre.
1. Ôtez le couvercle de la pile, déconnectez et enlevez le support de pile.
2. Insérez la clé passe-partout dans l’entrée de la serrure à l’intérieur de la cavité pour la pile.
3. Tournez la clé vers la droite.
4. Ouvrez la porte.
Le
réceptacle
à piles
A
B
Page 10

10
Signaux
Votre coffre-fort à serrure électronique communique à l’aide de plusieurs signaux audiovisuels.
DEL rouge (Erreur) + trois bips indiquent l’une des situations suivantes :
1. Vous avez appuyé hors séquence sur la touche Program.
2. Vous avez composé un code ou NIP Usager invalide.
3. Vous avez attendu 5 secondes ou plus entre l’introduction de deux chiffres.
DEL verte (Continuer) + un seul bip se produisent
1. Après l’introduction de chaque chiffre d’un Code Usager, Code Usine ou NIP Usager
2. Après qu’on ait appuyé sur la touche Clear
3. Après qu’on ait appuyé sur la touche Program
DEL verte seulement
1. S’allume après que vous ayez composé un code ou NIP Usager valide et reste allumée durant les
4 secondes pendant lesquelles le coffre-fort peut être ouvert.
2. S’allume en mode Programmation Code Usager une fois que vous avez composé le Code Usine et
reste allumée jusqu’à ce que vous ayez fini de composer un Code Usager à 5 chiffres.
3. S’allume en mode Programmation Mot de passe une fois que vous avez composé votre Code
Usager et reste allumée jusqu’à ce que vous ayez fini de composer un NIP Usager à 5 chiffres.
DEL jaune
Indique que les piles sont faibles et s’allumera normalement tant que les piles n’auront pas
dépassé leur durée utile de approximativement deux ans ou plus.
Chaque fois qu’elle est utilisée, votre serrure électronique exécute automatiquement un
test de décharge.
Lorsqu’une faiblesse des piles est détectée, la DEL jaune s’allume et reste allumée pendant
chacune des opérations subséquentes associées au fonctionnement de la serrure. (La serrure
continuera à fonctionner même si les piles sont faibles, jusqu’à ce que celles-ci soient épuisées).
La DEL jaune s’éteindra seulement après trois lectures “Piles en bon état” ou après que les piles
faibles ont été remplacées. (Remarque : si les nouvelles piles sont installées en moins de 60
secondes, la DEL jaune peut s’allumer et rester allumée pendant la première opération associée au
fonctionnement de la serrure, pour s’éteindre ensuite.)
REMARQUE : il est recommandé de remplacer les piles après deux ans, ou lorsque la
DEL jaune reste allumée.
Mode retardé
La serrure entre automatiquement en mode retardé de deux minutes lorsqu’un code invalide a été
composé trois fois de suite. Dans ce mode, la serrure ne peut pas être activée et l’introduction de
tout chiffre déclenchera un signal d’ERREUR.
Clés égarées ou combinaisons oubliées
Commencez par rechercher le numéro de série de votre coffre-fort. Celui-ci est imprimé sur la
petite étiquette située à droite du coffre-fort (sur la paroi extérieure). Envoyez ceci ainsi qu’un
chèque ou un mandat d’une somme de 12 $ US (USD 12,00 pour les clés et USD 12,00 pour les
combinaisons). Veuillez inclure une déclaration de propriété écrite, certifiée et signée par un
notaire, ou par un membre de la direction d'une banque. Le notaire doit avoir un nom de famille
différent de celui du propriétaire. Adressez à : Sentry Group, Dept. 200, 882 Linden Avenue,
Rochester, NY 14625-2784, États-Unis, or fax statement (notary seal must be legible) to
1-585-381-2940. Le paiement peut également être effectué à l’aide de votre carte de crédit VISA ou
Mastercard, par téléphone uniquement. Call 1-800-828-1438 to make credit card payment. Do not fax
credit card information.
*
NOTE: Prices subject to change without prior notification.
★★★★
Verrou Électronique UL de Type 1
Verrou électronique Verrou électronique
SentrySafe UL Type 1 ProStaff UL Type 1
Afin d’activer la serrure, une pile alcaline de 9 volts estrequise (non incluse).
REMARQUE : l’utilisation de piles non alcalines ou rechargeables N’EST PAS RECOMMANDÉE.
Installation des piles
REMARQUE : tirer sur la pile pour déconnecter pourrait endommager les fils de
connexion. Pour ôter correctement la pile, faîtes sauter le capuchon
avec un doigt tout en tenant la pile.
1. Prenez le clavier avec les deux mains, les pouces vers le bas, en le maintenant par ses côtés
gauche et droit. Poussez-le vers le haut à l’aide de vos pouces, puis détachez-le du coffre-fort
en le tirant vers vous. (fig. A)
2. Laissez le clavier désengagé pendre, suspendu à ses fils. Ceci permettra d’exposer le réceptacle
à piles.
3. Attachez la pile au connecteur de l’arrière du clavier, puis réinsérez-la à l’arrière du clavier.
(fig. B)
4. Reconnectez le pavé de touches en positionnant les fentes sur les languettes et en l
e faisant glisser.
A
B
B
A
Page 11

11
Classements de résistance au feu
ETL 649°C (1200°F) - 30 ETL 760°C (1400°F) - 30
Les Modèles GV8526, GX1852, GX8599 ES5251, ET8523
SentrySafe GXW2252H, GXW2252H-S
GT8423, GT8523
Les Modèles GPT1852, GPT1855G, GPT2245G
ProStaff GPT2255G, GPW1842H, GPW1852H
GPW2242H, GPW2252H
Ouverture de la serrure
(Reportez-vous à la dernière page de ce manuel pour le code générique. Ce code a été
établi en usine pour tous les verrous de type 1 ; nous vous recommandons de le
changer immédiatement après la réception de votre coffre-fort.)
REMARQUE : la serrure vous donne dix secondes par chiffre pour entrer la
combinaison. Si vous mettez plus de temps, la serrure ne répondra pas
indiquant qu’il vous faut recommencer depuis le début.
1. Composez le code générique à six chiffres. La serrure répond par un “ double bip ” et la DEL
rouge clignote.
2. Turn handle clockwise and open the door.
REMARQUE : trois bips indiquent qu’un code erroné a été entré. Attendez 30 secondes
et entrez la code correcte.
Comment programmer votre propre code USAGER
1. Entrez le code d’usine et MAINTENEZ ENFONCÉ LE DERNIER CHIFFRE de la COMBINAISON
jusqu’à ce que la serrure se signale par un double bip.
2. Appuyez sur 1. La serrure émet par deux fois.
3. Entrez votre nouveau code à six chiffres deux fois. (La serrure émet par deux fois après
chaque entrée.)
4. Si vous faites une erreur, attendez 30 secondes, puis répétez les étapes 1 à 3.
5. Essayez le fonctionnement du verrou plusieurs fois avant de fermer la porte.
• Entrée de code valide – - Signal double après que le code valide à 6 caractères ait été entré.
• Entrée de code invalide – Signal triple et l'ancien code est toujours valide.
Gardez en toute sûreté votre nouveau Code USAGER
Pour mémoire, veuillez la copier ici :
______ ______ ______ ______ ______ ______
Délai automatique
Le verrou entre automatiquement dans une période de délai de 5 minutes une fois qu’un code
invalide ait été composé cinq fois consécutives. Après ce premier délai, la composition de deux
autres codes invalides enclenche un autre délai de 5 minutes.
Remplacement des piles
Lorsque une pile usagée est délogée afin d’être remplacée, il vous sera toujours possible de faire
fonctionner votre Code Usager.
Avertissement de pile faible
Des bips successifs pendant l’ouverture indiquent que la pile est faible et a besoin d’être
remplacée immédiatement.
Perte du code d’usine
Pour obtenir l’accès en cas de perte du code utilisateur, commencez par trouver le numéro de série
du coffre-fort. Le numéro de série est imprimé sur une petite étiquette collée sur la paroi
extérieure droite du coffre-fort. Envoyez-le accompagné d’un chèque ou d’un mandat de 12,00
dollars US. Veuillez inclure une déclaration de propriété écrite, certifiée et signée par un notaire,
ou par un membre de la direction d'une banque. Le notaire doit avoir un nom de famille différent de
celui du propriétaire. Adressez à : Sentry Group, Dept. 200, 882 Linden Avenue, Rochester, NY
14625-2784, États-Unis, or fax statement (notary seal must be legible) to 585-381-2940. Le paiement
peut également être effectué à l’aide de votre carte de crédit VISA ou Mastercard, par téléphone
uniquement. Call 1-800-828-1438 to make credit card payment. Do not fax credit card information.
*
NOTE: Prices subject to change without prior notification.
Coffres-fort d’armes à feu SentrySafe
ou ProStaff Fire-Safe
Reportez-vous au tableau ci-dessous pour déterminer la classification de votre modèle de
coffre-fort en matière de protection contre les incendies.
Classements de résistance au feu
Pour obtenir les meilleures performances de votre coffre-fort et vous assurer de sa conformité
avec ses caractéristiques de classement, enlevez-le de la palette avant son installation.
Déclaration relative aux incendies vérifiée ETL
Conformité aux spécifications du fabricant, vérifiée par ETL SEMKO, pour la résistance aux
incendies pendant 30 minutes à 649°C (1200°F) ou 760 °C (1400 °F).
Garantie à vie de remplacement
après l’incendie
Si un produit de SentrySafe ou ProStaff Fire-Safe est abîmé par l’incendie à quelque moment que ce
soit pendant que vous (l’acheteur initial) en êtes encore propriétaire, Sentry Group vous enverra
un remplacement gratuitement si vous faites parvenir ce qui suit à Sentry Group, 882 Linden
Avenue, Rochester, NY 14625-2784 USA :
• vos nom et adresse ;
• une description de l’incendie, accompagnée du numéro de modèle, du numéro de série et d’une
photographie du produit brûlé, et une copie du rapport du service de pompiers, de l’assurance
ou de la police.
Protection hydrorésistante de FloodGuardTM
Les coffres-forts des séries GXW et GPW ont été testés par la firme indépendante de test ETL
SEMKO et certifiés conformes aux spécifications du fabricant dans le domaine de la protection
hydrorésistante. Les produits ont été immergés dans une profondeur d’eau maximum de 2 pieds
(60,96 cm) pendant une durée maximum de 72 heures sans présenter aucune fuite d’eau.
Les modèles hydrorésistants doivent être boulonnés. Le matériel fourni DOIT
ÊTRE UTILISÉ pour boulonner le coffre-fort au plancher afin d’assurer le
joint étanche ; dans le cas contraire toute plainte ayant trait à
l’hydrorésistance est invalide.
REMARQUE : Il est normal de sentir une légère résistance en fermant la porte et en
verrouillant les modèles hydrorésisants.
REMARQUE : Sentry Group ne peut être tenu responsable d’aucun des coûts encourus
si l’unité doit être remise en place
N’entreposez pas votre coffre-fort sur la palette sur laquelle il a été livré. Les coffresforts SentrySafe ou ProStaff Fire-Safe qui ont été testés et vérifiés par l’ETL ne seront
pas conformes à leur classement s’ils sont laissés sur leur palette d’expédition.
Page 12

Instructions d’installation au sol
Contenu du kit :
• (2) tirefonds
• (2) rondelles caoutchoutées
• (2) ancres de maçonnerie
Outils requis :
• Perceuse
• Clé
• Pour l’ancrage dans du bois : Foret de 7/16 pouce (11,0 mm)
• Pour l’ancrage dans de la maçonnerie : Foret de maçonnerie de 7/16 pouce (11,0 mm)
Instructions
1. Déverrouillez le coffre-fort et ouvrez la porte.
2. Utilisez une vis ou un foret pour marquer le sol à travers les deux trous.
3. Mettez le coffre-fort de côté afin de dégager les deux endroits que vous avez repérés
pour les percer.
4. Percez le sol :
• Pour du bois : Utilisez un foret de 7/16 pouce (11,0 mm) pour percer un trou d’une
profondeur de 2,5 pouces (64,0 mm) à chaque endroit repéré.
• Pour de la maçonnerie : Utilisez un foret de maçonnerie de 7/16 pouce (11,0 mm) pour
percer un trou d’une profondeur de 2,5 pouces (64,0 mm) à chaque endroit repéré. Installez
une ancre de maçonnerie dans chaque trou.
5. Remettez le coffre-fort dans la position désirée, les trous du coffre-fort étant aligné sur
ceux du sol.
6. Arrimer le coffre-fort :
• Pour du bois : Faites passer chaque tirefond dans une rondelle (côté caoutchouc
orienté vers le sol) et dans le coffre-fort, puis faites-le pénétrer dans un trou.
Serrez avec la clé. (Fig. C)
• Pour de la maçonnerie : Faites passer chaque tirefond dans une rondelle (côté caoutchouc
orienté vers le sol) et dans le coffre-fort, puis faites-le pénétrer dans une ancre de maçonnerie. Serrez avec la clé. (Fig. D)
✪
Aucun support audio-visuel, négatif
photographique ou disquette informatique
Ce produit n’est pas destiné à protéger les disquettes informatiques, les cartouches et les bandes,
les cassettes sonores ou les vidéocassettes or négatif photographique. Si vous désirez protéger ces
matériaux contre les incendies, demandez à votre détaillant des renseignements sur les produits de
rangement de médias SentrySafe ou ProStaff Fire-Safe.
Instructions de nettoyage
Si l’unité est équipée d’un panneau de porte à la finition de type acier inoxydable ou extrêmement
brillante, l’extérieur peut être nettoyé avec un chiffon NON PELUCHEUX (par ex. en microfibres, de
nettoyage de lentilles, etc.). Attention : N’utilisez pas un produit en papier (mouchoir,
essuie-tout) car il risquerait de rayer la surface.
Garantie limitée de 1 an
Ce produit est garanti à l’acheteur d’origine pendant un (1) an à compter de la date d’achat, contre tout
défaillance structurelle ou mécanique due à des vices de matériau ou defabrication.Si une défaillance
structurelle ou mécanique se produit pendant la période de garantie, Sentry Group (également désigné par
“ Sentry ”) réparera ou remplacera gratuitement, à son choix, la(les) pièce(s) défectueuse(s) ou le produit
accompagné(e)(s). Une unité de remplacement est fournie dans la mesure où la livraison est en bordure de
route. Des dépenses supplémentaires liées aux livraisons à l’intérieur sont à la charge du client. Sentry ne
couvrira aucun des frais supplémentaires liés à l’installation de l’unité de remplacement.
Service après-vente (Amérique du Nord seulement)
Veuillez indiquer le problème au service clientèle de Sentry Group en le contactant par téléphone (au
1-800-828-1438 ou au 1-585-381-4900, du lundi au vendredi, de 8h00 à 20h00 [heure de l’est]) ou par écrit en
envoyant votre courrier à Sentry Group, 882 Linden Avenue, Rochester, New York 4625-2784, États-Unis. Ne
renvoyez pas votre produit à Sentry Group. Le service clientèle de Sentry Group décidera si le produit
doit être renvoyé, réparé, remplacé ou remboursé.
Preuve de la date d’achat
Un ticket de caisse datéest requis entant que preuved’achat pour tousles produits de SentryGroup.
Limitations de garantie
1. La responsabilité de Sentry et le recours exclusif de l’acheteur aux termes de cette garantie sont limités à la
réparation ou au remplacement, au choix de Sentry, de la (des) pièce(s) défectueuse(s) ou du produit. En
aucun cas Sentry ne sera tenu responsable de tout dommage indirect ou consécutif (incluant, sans toutefois
s’y limiter, les pertes ou dommages dus aux incendies, à l’eau, au vol ou au vandalisme) de personne ou de
bien résultant de l’inobservation de la présente garantie ou de toute autre garantie expresse ou implicite
applicable au produit. Certain(e)s états, provinces et pays n’autorisant pas l’exclusion ou la limitation de
dommages indirects ouconsécutifs, il est possible quela limitation susmentionnéene vous soitpas applicable.
2. Sauf stipulation contraire de la loi applicable, Sentry décline chacune et l’ensemble des
conventions et garanties, qu’elles soient écrites ou orales, expresses ou implicites, et
incluant, sans toutefois s’y limiter, les garanties implicites de commerciabilité et
d’adaptation à un objectif particulier. La garantie implicite applicable à ce produit ne doit pas
dépasser la garantie limitée standard de un an. Certain(e)s états, provinces et pays n’autorisant pas les
exclusions de garanties limitées ou de limitations sur leur durée, il est possible que l’exclusion
susmentionnée ne vous soit pas applicables.
3. Sentry n’est pas responsable des dommages, défaillances ou dysfonctionnements encourus par le produit
au cours de l’expédition. Le produit a été emballé conformément aux spécifications de la Commission du
commerce interétats (Interstate Commerce Commission), et moyennant une manipulation raisonnable, il
devrait arriver en bon état. Toute réclamation concernant des dommages d’expédition doit être effectuée
directement auprès du transporteur.
4. Ces garanties ne couvrent pas les défaillances, les dommages ou les dysfonctionnements provoqués par une
modification, un changement, une réparation ou un entretien du produit effectué(e) par toute personne autre
que Sentry ou son représentant agréé ou encore provoqués par unabus physiqueou uneutilisation incorrecte
du produit. Sentry décline tout particulièrement la couverture des dommages pouvant résulter du
boulonnage du produit et/ou des dommages pouvant résulter de la manipulation incorrecte du produit
au cours de son déplacement et/ou de son installation.
5. Aucun agent, salarié, représentant, distributeur ou revendeur de Sentry n’a l’autorité d’effectuer ou
d’insinuer quelque déclaration, promesse ou accord que ce soit pouvant diverger de quelque manière que
ce soit des conditions de la présente garantie limitée.
6. La présente garantie limitée s'applique aux produits Sentry neufs, de toute première qualité, et n’est
applicable ni aux produits de qualité inférieure ou d’occasion, ni aux produits précédemment endommagés
par des événements tels que, mais non limité aux incendies, inondations, tremblements de terre,
cambriolages, manipulations par des déménageurs ou des installateurs.
Toutes les clauses de la présente garantie limitée sont séparées et dissociables. Si l’une quelconque de
ces clauses est jugée invalide et inapplicable, ladite détermination n’affectera ni la validité ni le caractère
exécutoire des autres clauses. La présente garantie limitée vous donne des droits légaux spécifiques. Il est
possible que vous ayez d’autres droits qui varient d’état à état, de province à province ou de pays à pays.
ATTENTION!
Si des enfants vivent chez vous ou s’ils vous rendent visite, ne laissez pas votre
Coffre-fort d’armes à feu/de direction SentrySafe ou ProStaff ouvert ou sans
surveillance. Des enfants en train de jouer pourraient accidentellement s’enfermer
à l’intérieur du coffre. Fermez et verrouillez votre coffre à tout moment.
12
C
D
Page 13

13
Gracias por comprar esta caja fuerte
a prueba de fuego marcas
SentrySafe o ProStaff de la línea SentrySafe.
Favor de leer este manual antes de usar el producto.
Nos da gusto que haya elegido una de nuestras cajas fuertes para proteger sus armas de fuego.
Usted puede tener la seguridad de que su caja fuerte cumple con todos los requisitos de seguridad
para armas de fuego del Departamento de Justicia del estado de California en E.U.A.
Este manual contiene toda la información que usted necesitará para:
• desempacar y colocar su caja fuerte
• abrir la caja fuerte
• manejar la caja fuerte
• aprovecharse completamente de todas las funciones de su caja fuerte.
Recuerde de mantener su combinación como un secreto. Si escribe la combinación y la coloca en
un escritorio, es como dejar la llave de su casa debajo del tapete de la entrada – invita a entrar.
Por favor conserve este manual para futura referencia. Si tiene cualquier duda con respecto
a su caja fuerte para armas, por favor visite nuestra página de internet en www.sentrysafe.com
o llame al departamento de servicio al cliente de Sentry. Tenemos representantes de la empresa
listos para atenderle, de 8 AM a 8 PM, hora estándar del este, lunes a viernes. Debe marcarse un
código de acceso antes de marcar el número 800. Es un proceso de 2 pasos.
Paso 1: marque 08 800 288 2872 o 001 800 462 4240
Paso 2: a la indicación marque 1-800-451-0821
Índice
Inglés . . . . . . . . . . . . . . . . . . . . . . . . . . . . . . . . . . . . . . . . . . . . . . . . . . . . . . . . . . . . . . . . . . . . . . . . . . . . . . . . . . .2-6
Francés . . . . . . . . . . . . . . . . . . . . . . . . . . . . . . . . . . . . . . . . . . . . . . . . . . . . . . . . . . . . . . . . . . . . . . . . . . . . . . . . .7-12
Separación de su caja fuerte para armas de la tariman . . . . . . . . . . . . . . . . . . . . . . . . . . . . . . . . . . . . . . . .13
Instrucciones para Cerrar . . . . . . . . . . . . . . . . . . . . . . . . . . . . . . . . . . . . . . . . . . . . . . . . . . . . . . . . . . . . . . .14-17
Instrucciones de la Cerradura: Para cajas fuertes
con una cerradura de combinación de 3 números . . . . . . . . . . . . . . . . . . . . . . . . . . . . . . . . . . . . . . .14
Instrucciones de la Cerradura: Para cajas fuertes
con una cerradura de combinación Grupo 2 . . . . . . . . . . . . . . . . . . . . . . . . . . . . . . . . . . . . . . . . . . . . .14
Instrucciones para Cerrar: Cerradura electrónica estándar . . . . . . . . . . . . . . . . . . . . . . . . . . . . .15-16
Instrucciones para Cerrar: Cerradura electrónica Tipo 1 “UL” . . . . . . . . . . . . . . . . . . . . . . . . . . .16-17
Cajas Fuertes para Armas de Fuego marca SentrySafe o ProStaff Fire-Safe . . . . . . . . . . . . . . . . . . . . . .17
Garantìa de 1 año limitada . . . . . . . . . . . . . . . . . . . . . . . . . . . . . . . . . . . . . . . . . . . . . . . . . . . . . . . . . . . . . . . . . .18
Numero de Serie, Combinación, Clave de Fábrica y Clave Genérica . . . . . . . .parte de atrás del manual
Separación de su caja fuerte para armas de la tarima
Herramientas/equipo requerido
• Llave ajustable, pinzas o una Llave de Cubo de 17mm (11/16”)
• Martillo
Instrucciones
1. Utilizando una llave inglesa o unas pinzas, quite las tuercas ubicadas debajo del corte en la
alfombra en forma de “X” debajo de la unidad. (Fig. B)
NOTA: Si los pernos giran cuando comienza a quitar las tuercas, detenga los
pernos a través de las tablillas de la tarima a mano y/o con pinzas, mientras
gire las tuercas.
2. Una vez que esten quitadas las tuercas, utilice un martillo para sacar los pernos a través de la
parte inferior de la caja fuerte.
3. Cierre la puerta y coloque la manija en posición cerrada.
4. Con la ayuda de su asistente, deslice la caja fuerte a una orilla de la tarima. Voltee la caja fuerte
de manera que la orilla se mueva hacia el suelo. (Fig. C)
5. Quite la tarima y coloque la caja fuerte en posición vertical sobre el suelo.
Instrucciones de empernado
Para garantizar la máxima seguridad, Sentry recomienda enfáticamente el empernado de la caja
fuerte. Herrajes necesarios (incluidos).
1. Seleccione un lugar apropiado y conveniente para la instalación de su caja fuerte. Coloque la caja
fuerte en posición y use los agujeros provistos en el fondo o parte trasera de la caja fuerte para
marcar el lugar de los agujeros a taladrarse en el piso o pared. No se recomienda tratar de
empernar la caja fuerte al piso y también a la pared. Si la caja fuerte se va a fijar a una pared, por
favor asegurese de que la caja fuerte se encuentre firmemente sobre el suelo.
Nota: Los modelos a prueba de fuego “Fire-Safe” no pueden fijarse a la pared.
2. Aleje la caja fuerte y taladre agujeros del diámetro y profundidad apropiados para el tipo de
herrajes que se usan y la superficie de montaje (2 c/u — pernos, arandelas y anclas
para concreto).
3. Coloque la caja fuerte sobre los agujeros e instale los sujetadores según sea necesario. Si
adquirió una unidad a prueba de agua, se incluyen rondanas recubiertas con hule. Asegúrese que
el área alrededor de la abertura del hoyo esté limpia, utilizando un trapo húmedo. Coloque el
lado de la rondana con hule hacia el fondo de la caja fuerte e instale el tornillo.
Los modelos resistentes a agua deben quedar atornillados en su lugar.
El fabricante ha provisto material de fijación Y DEBE USARSE para
atornillar la caja fuerte al suelo para asegurar que tenga un sello
hermético, o quedará inválida la cláusula a prueba de agua. Véase
“Protección a Prueba de Agua” en la página 17.
NOTA: La empresa Sentry Group no se hace responsable por gastos incurridos si la
unidad deberá ser reemplazada.
¡ IMPORTANTE
ADVERTENCIA!
Ésta es una función para dos personas
y no deberá ser intentada sin ayuda.
Antes de intentar desatornillar su caja
fuerte nueva, asegurase de que alguien
este con Usted para ayudarle a sostener
la caja fuerte mientras Usted Trabaje.
Asegúrese de estar en una superficie
plana y que la caja fuerte se encuentre parada verticalmente. (Fig. A)
NOTA: La empresa Sentry Group no se hace responsable por los gastos incurridos al
tener que quitar la unidad de la tarima e instalarla en su lugar.
A
B C
Page 14

14
Instrucciones para cerradura
La combinación de esta caja fuerte ha sido seleccionada al azar y es la que aparece abajo en este
manual. Es importante conservar este Manual del Propietario en un lugar seguro que no sea la
caja fuerte, ya que es el documento de consulta de la combinación de la caja fuerte y del Número
de Serie. Compare el número de serie que aparece abajo con el número que se encuentra en el
lado inferior derecho de la caja. Si los numeros no son iguales, no intente usar la
combinación y llame al departamento de Servicio al Cliente de Sentry de lunes a
viernes, 8:00 a.m. -8:00 p.m. hora estándar del este. Debe marcarse un código de
acceso antes de marcar el número 800. Es un proceso de 2 pasos.
Paso 1: marque 08 800 288 2872 ó 001 800 462 4240
Paso 2: a la indicación marque 1-800-451-0821
★
Para cajas fuertes con una cerradura de
combinación de 3 números
NOTA: Véase la calcomanía en la parte de atrás de este manual para obtener
su combinación.
IMPORTANTE: El candado en esta caja fuerte está en posición abierta. NO UTILICE la
combinación hasta haber leído y comprendido las siguientes instrucciones.
¡Haga primero una prueba con la puerta abierta!
Por favor intente su combinación varias veces con la puerta abierta, para cerciorarse de que la haya
apuntado correctamente. Su combinación está lista para ser usada.
COMBINACIÓN:
Combinaciones de 3 números
1. Empiece con el indicador numérico en cero.
2. Gire el indicador numérico dos vueltas hacia la IZQUIERDA
y pare a la tercera vuelta en el primer número de la combinación.
3. Gire el indicador numérico hacia la DERECHA pasando una vez el segundo
número de la combinación, y parando en el número la segunda vez.
4. Gire el indicador numérico hacia la IZQUIERDA, parando
la primera vez en
Para cerrar con combinación
Con la puerta cerrada, gire el indicador numérico varias veces.
★★
Para cajas fuertes con cerradura de
combinación Grupo 2
NOTA: Véase la calcomanía en la parte de atrás de este manual para obtener
su combinación.
IMPORTANTE: La cerradura de esta caja fuerte está en posición abierta.
NO use la combinación antes de haber leído y entendido las
siguientes instrucciones.
Prueba de la cerradura
¡Haga primero una prueba con la puerta abierta!
Pruebe la nueva cerradura con combinación (aprobada por UL) varias veces con la puerta abierta de
par en par. Gire primero el indicador numérico hacia la derecha hasta que pare aproximadamente
en 87, y luego gire la manija de la caja fuerte en sentido de las mancillas de un reloj hasta que pare.
Abra la puerta lo máximo posible y gire la manija en sentido opuesto a las mancillas de un reloj
hasta que pare y se extiendan los pernos activos. Siga atentamente las instrucciones
proporcionadas a continuación:
NOTA: El indicador numérico no girará después de cero a menos que los pasadores se
encuentren en la posición cerrada, con la manija en posición vertical.
El uso correcto de la cerradura con combinación dependerá en gran medida de la correcta
alineación de la cerradura con la guía de apertura (la línea vertical arriba del centro del indicador
numérico). Marque la combinación lenta y cuidadosamente sin pasarse de los números deseados.
Si se pasa de los números, debe marcarse toda la combinación nuevamente. Para no dañar el
mecanismo de la cerradura, nunca gire velozmente el indicador numérico en direcciones contrarias.
COMBINACIÓN:
1. Empiece con el indicador numérico en CERO.
2. Gire el indicador numérico hacia la IZQUIERDA. Pase el primer número de su
combinación tres veces. Pare en el primer número de la combinación la cuarta vez.
3. Cambie la dirección del indicador numérico hacia la DERECHA, pase el segundo
número de su combinación dos veces y pare en el segundo número de su
combinación la tercera vez.
4. Cambie la dirección del indicador numérico nuevamente. Girando hacia la
IZQUIERDA, pase el tercer número de su combinación una vez y luego continúe
girando en la misma dirección parando en el tercer número de su combinación.
5. Cambie la dirección del indicador numérico nuevamente, girando hacia la
DERECHA hasta que el indicador se detenga totalmente y no permita moverse.
6. Gire la manija de la caja fuerte hacia arriba, a la izquierda y abra la puerta.
Para Cerrar con Llave
Con la puerta cerrada, gire la manija en sentido contrario a las manecillas del reloj para asegurar
que los pasadores de la cerradura estén acoplados, luego gire el indicador numérico hacia la
izquierda al menos cuatro veces para sacar la cerradura de combinación.
Combinación perdidas
Primero, localize el número de serie de su caja fuerte. El Número de Serie se encuentra impreso
en la pequeña etiqueta del lado derecho (afuera) de la caja fuerte. Envíe éste y un cheque u órden
de pago por $12.00 (Moneda de E.U.A.). Por favor incluya una carta notarizada, con testigos y firmada
por un notario público u oficial bancario, declarando que usted es el propietario. El notario deberá
tener un apellido diferente al del propietario. Envíe por correo postal a : Sentry Group, Dept. 200,
882 Linden Avenue, Rochester, NY 14625-2784, USA, o envíe su reclamación por fax (sello del notario
deberá estar visible) al 1-585-381-2940. El pago se puede efectuar con tarjeta de crédito VISA o
Mastercard vía telefónica únicamente. No envíe la información de su tarjeta de crédito por fax.
Debe marcarse un código de acceso antes de marcar el número 800. Es un proceso de 2 pasos.
Paso 1: marque 08 800 288 2872 o 001 800 462 4240
Paso 2: a la indicación marque 1-800-451-0821
*
NOTA: Precios sujetos a cambio sin previo aviso.
La calcomanía en la parte de atrás de este manual contiene el número de serie y la clave de fábrica
para su caja fuerte. Es muy importante que usted mantenga este Manual de Usuario en un lugar
seguro, que no sea su caja fuerte, para futura referencia.
Page 15

15
Uso del teclado
¡Precaución!
¡Los líquidos pueden dañar el teclado!
¡Precaución!
¡Las puntas de bolígrafo u otros objetos puntiagudos
pueden perforar la membrana del teclado!
★★★
Cerradura electrónica estándar
Para activar la cerradura
Se requieren cuatro baterías alcalinas AA, Voltaje: 6 V cc, (no incluidas) para activar el teclado.
NOTA: Baterías no alcalinas y recargables NO SE RECOMIENDAN.
Para instalar las baterías:
1. Utilizando dos manos, detenga el teclado, dedos pulgares hacia abajo, de sus extremos izquierda
y derecha. Presione el teclado hacia arriba con sus dedos pulgares, y desconéctelo de la caja
fuerte jalándolo hacia usted. (Fig. A)
2. Deje que el teclado desenganchado cuelgue por sus cables. Esto revelara el sujetador de las
baterías.(Fig. B)
3. Instale cuatro baterías alcalinas AA como se muestra en la parte posterior del sujetador
de baterías.
4. Vuelva a conectar el teclado insertando los cuatro postes del teclado dentro
de las perforaciones.
5. Presione hacia abajo para fijar en su lugar.
6. Haga una prueba de la cerradura como se indica en el manual del propietario de la caja fuerte.
¡Haga primero una prueba con la puerta abierta!
(Véase la parte de atrás de éste manual para encontrar su clave de fábrica.)
Pruebe su código de fábrica varias veces con la puerta abierta.
NOTA: Sólo se necesita un toque ligero. Una luz verde “SEGUIR” y un solo pitido
indican que el teclado ha "sentido" su toque. La cerradura permite que
transcurran 5 segundos para cada pulsación del teclado. Si usted hace una
pausa más larga, se producirá una señal de error (una luz roja intermitente
y tres pitidos), indicando que debe volver a empezar.
1. Pulse el código de fábrica de cinco dígitos. La luz verde se encenderá.
2. Gire la manija en sentido de las mancillas de un reloj y abra la puerta.
Códigos de acceso
Hay tres maneras posibles de abrir una caja fuerte y tener acceso a la misma: introduciendo el
código preestablecido de fábrica, el propio código de usuario o un NIP de usuario (número de
identificación personal).
Siempre puede abrir la caja fuerte introduciendo el código de fábrica de 5 dígitos. Este código no
puede ser borrado. Pero si prefiere emplear su propio código, puede programar la caja para que se
abra con el código de usuario de 5 dígitos que usted seleccione. Si desea dar a alguien acceso temporal a la caja fuerte, puede programar un NIP de usuario que puede borrarse más tarde.
Programación de un código de usuario
Hay dos maneras para programar el código de usuario.
A1.Pulse la tecla de programación "Program". (Prog.)
2. Introduzca el código de fábrica. El indicador verde permanecerá encendido mientras usted
introduce el código de usuario que seleccione. El indicador verde se apagará después de
introducir los 5 dígitos.
(Para introducir un código de usuario nuevo, repita estos pasos).
B1.Oprima el botón rojo en la parte interior de la puerta (lado de las bisagras). Se escuchará
un pitido y la luz verde se encenderá.
2. Introduzca un código de usuario de 5 dígitos.
(Para introducir un código de usuario nuevo, repita estos pasos).
Proteja su nuevo código de usuario.
Para sus registros, anótela aquí.
_______ _______ _______ _______ _______
Programación de un NIP de usuario
1. Pulse la tecla de programa.
2. Púlsela por segunda vez.
3. Introduzca su código de usuario de 5 dígitos. El indicador verde permanece encendido.
4. Introduzca el NIP de usuario de 5 dígitos que seleccione (cualquier combinación excepto 00000).
Después de introducir los 5 dígitos, el indicador verde se apaga.
(Para introducir un NIP de usuario nueva, repita estos pasos. Para borrar el NIP de usuario, pulse la
tecla de programa dos veces, introduzca su código de usuario y luego introduzca 00000.)
Sobremando de llave
Si ocurre una falla en su cerradura electrónica o no tiene ningún código disponible, puede usar un
sobremando de llave para acceso a esta unidad.
1. Deslice la tapa del compartimiento de las baterías, desconecte el soporte de las baterías y
sáquelo.
2. Usando el segundo juego de llaves provisto , introduzca la llave en la cerradura dentro del com-
partimiento de las baterías.
3. Gire la llave hacia la derecha.
4. Abra la puerta.
A
B
El sujetador
de las
baterías
Page 16

16
Señales
Su caja fuerte con cerradura electrónica se comunica mediante varias señales audiovisuales.
El indicador rojo (error) y tres pitidos indican
una de las cosas siguientes:
1. Ha pulsado la tecla de programa fuera de secuencia.
2. Ha introducido un código no válido o una NIP de usuario no válida.
3. Ha dejado transcurrir 5 segundos o más entre pulsaciones de tecla.
El indicador verde (proseguir) se enciende
y se escucha un solo pitido
1. Después de introducir cada dígito de un código de fábrica, un código de usuario o una
NIP de usuario.
2. Después de pulsar la tecla de borrar (Clear).
3. Después de pulsar la tecla de programa.
INDICADOR verde solamente
1. Se enciende después de introducir un código válido o un NIP de usuario válida y permanece
encendido durante el período de 4 segundos en que la caja fuerte puede abrirse.
2. Se enciende en el modo de programación de código de usuario después de introducir el código
de fábrica y permanece encendido hasta que se ha terminado de introducir un código de usuario
de 5 dígitos.
3. Se enciende en el modo de programación de NIP de usuario después de introducir el código de
usuario y permanece encendido hasta que se ha introducido un NIP de usuario de 5 dígitos.
INDICADOR amarillo
Indica una "carga baja de las baterías" y generalmente se encenderá hasta después de que la
batería haya tenido un uso de aproximadamente dos años.
La cerradura electrónica realiza automáticamente una prueba de carga baja de las baterías durante
cada uso de la cerradura.
Si se detecta una situación de “carga baja de las baterías”, el indicador amarillo se encenderá
y permanecerá encendido durante cada operación posterior al cerrar. (La cerradura seguirá
funcionando en una situación de carga baja de las baterías hasta que éstas fallen.) El indicador
amarillo se apagará solamente después de tres lecturas consecutivas de “baterías cargadas” o
después de cambiar las baterías gastadas. (Nota: Si se instalan baterías nuevas en menos de 60
segundos, es posible que el indicador amarillo se encienda y permanezca encendido durante
la primera vez que se cierre, antes de apagarse.)
NOTA: Se recomienda cambiar las baterías después de dos años o cuando el indicador
amarillo permanezca encendido.
Modo de demora
La cerradura entra automáticamente en un modo de demora de dos minutos después de introducir
un código no válido tres veces consecutivas. En este modo, el cierre no puede activarse y todas las
pulsaciones de tecla generarán una señal de ERROR.
Llaves o combinación perdidas
Primero, localize el número de serie de su caja fuerte. El Número de Serie se encuentra impreso
en la pequeña etiqueta del lado derecho (afuera) de la caja fuerte. Envíe éste y un cheque u órden
de pago por $12.00 (Moneda de E.U.A.) ($12.00 Dólares E.U.A. para llaves y $12.00 Dólares E.U.A.
para combinaciones). Por favor incluya una carta notarizada, con testigos y firmada por un notario
público u oficial bancario, declarando que usted es el propietario. El notario deberá tener un
apellido diferente al del propietario. Envíe por correo postal a : Sentry Group, Dept. 200, 882 Linden
Avenue, Rochester, NY 14625-2784, USA, o envíe su reclamación por fax (sello del notario deberá
estar visible) al 1-585-381-2940. El pago se puede efectuar con tarjeta de crédito VISA o Mastercard
vía telefónica únicamente. No envíe la información de su tarjeta de crédito por fax. Debe marcarse
un código de acceso antes de marcar el número 800. Es un proceso de 2 pasos.
Paso 1: marque 08 800 288 2872 o 001 800 462 4240
Paso 2: a la indicación marque 1-800-451-0821
*
NOTE: Precios sujetos a cambio sin previo aviso.
★★★★
Cerradura electrónica Tipo 1
Cerradura Electrónica de SentrySafe Cerradura Electrónica de ProStaff
clasificada “UL” Tipo 1 clasificada “UL” Tipo 1
Para activar la cerradura, una batería de 9 V se requiere (no incluída). Voltaje: 9 V cc
NOTA: NO SE RECOMIENDAN las baterías no alcalinas ni las recargables.
Para instalar las baterías
NOTA: Si jala la batería para desconectarla puede causarle daño a los alambres.
Para retirar adecuadamente la batería, desconecte el conector con su dedo,
mientras detiene la batería.
1. Utilizando dos manos, detenga el teclado del lado derecho e izquierdo, con los pulgares
hacia abajo. (Fig. A)
2. Deje colgando el teclado por sus alambres. Esto expondrá el sujetador de la pila.
3. Fije la pila al conector en la parte de atrás del teclado e inserte la pila dentro
detrás del teclado. (Fig.B)
4. Vuelva a conectar el teclado colocando las ranuras sobre las pestañas y deslice hacia abajo.
Para abrir la cerradura
(Véase la clave genérica en la parte de atrás de este manual. Esta clave fue programada
en la fábrica para todas las cerraduras Tipo 1, y se recomienda que la cambie
inmediatamente después de recibir su caja fuerte.)
NOTA: La cerradura permite 10 segundos para teclear cada número. Si usted pausa
más, la cerradura no responderá indicando que deberá volver a empezar.
1. Digite la clave genérica de seis dígitos. La cerradura responde con un “sonido doble” y el
indicador rojo LED parpadea.
2. Gire la manija en sentido de las mancillas de un reloj y abra la puerta.
NOTA: Tres sonidos indican que un código incorrecto ha sido ingresado. Espere
30 segundos e ingrese la código correcta.
A
B
B
A
Page 17

17
Clasificaciones para fuego
ETL 649°C (1200°F) - 30 ETL 760°C (1400°F) - 30
Modelos marca GV8526, GX1852, GX8599 ES5251, ET8523
SentrySafe GXW2252H, GXW2252H-S
GT8423, GT8523
Modelos marca GPT1852, GPT1855G, GPT2245G
ProStaff de la línea GPT2255G, GPW1842H, GPW1852H
SentrySafe GPW2242H, GPW2252H
Programación de su propio código de usuario.
1. Ingrese el Código de Fábrica y MANTENGA OPRIMIDO EL ULTIMO DIGITO de la COMBINACION
hasta que la cerradura emita dos señales sonoras dobles.
2. Oprima 1. La cerradura señala dos veces.
3. Ingrese su nuevo código de seis dígitos dos veces. (La cerradura emite señales sonoras dos
veces después de cada ingreso válido.)
4. Si comete un error, espere 30 segundos y repita los pasos 1 – 3.
5. Haga varias pruebas con la cerradura antes de cerrar la puerta.
• Ingreso de una Clave Válida – señal doble después de ingresar una clave d 6 dígitos.
• Ingreso de una Clave Inválida – señal triple y la clave anterior sigue válida.
Proteja su nuevo código de usuario.
Para sus registros,anótelo aquí:
______ ______ ______ ______ ______ ______
Demora
Esta cerradura activa una demora de seguridad de 5 minutos después de ingresar una clave inválida
cuatro veces consecutivas. Al fin de este periodo de demora, dos o mas claves invalidas volverán a
activar un periodo adicional de demora de 5 minutos.
Cambio de baterías
Cuando la batería vieja se retire para reemplazo, su Código de Usuario seguirá funcionando.
Señal de baja batería
Señales sonoras repetidas durante la operación indican que la batería está baja y deberá ser
reemplazada inmediatamente.
Código de fábrica perdido
Para obtener acceso en caso de perder la clave de usuario, primero, encuentre el Número de Serie
de su caja fuerte. El Numero de Serie se encuentra impreso en una etiqueta pequeña que está
colocada del lado derecho de la caja fuerte (afuera). Envíe éste y un cheque u orden de compra
por la cantidad de $8.00 (en dólares moneda de E.U.A.). Por favor incluya una car
ta notarizada, con testigos y firmada por un notario público u oficial bancario, declarando que usted
es el propietario. El notario deberá tener un apellido diferente al del propietario. Envíe por correo
postal a : Sentry Group, Dept. 200, 882 Linden Avenue, Rochester, NY 14625-2784, USA, o envíe su
reclamación por fax (sello del notario deberá estar visible) al 1-585-381-2940. El pago se pue
de efectuar con tarjeta de crédito VISA o Mastercard vía telefónica únicamente. No envíe la
información de su tarjeta de crédito por fax. Debe marcarse un código de acceso antes de marcar
el número 800. Es un proceso de 2 pasos.
Paso 1: marque 08 800 288 2872 o 001 800 462 4240
Paso 2: a la indicación marque 1-800-451-0821
*
NOTA: Precios sujetos a cambio sin previo aviso.
Cajas Fuertes para Armas de Fuego marca
SentrySafe o ProStaff Fire-Safe
Véase la tabla siguiente para determinar la clasificación a prueba de fuego de su caja fuerte.
Clasificaciones para fuego
Para asegurarse de que su caja fuerte funcione como fue clasificada y que cumpla con sus
clasificaciones, sáquela de la tarima antes de su instalación.
No almacene su caja fuerte sobre la tarima en la cual fue enviada. Las cajas
fuertes SentrySafe o ProStaff Fire-Safe que han sido probadas y verificadas por la
empresa ETL, no cumplirán con sus clasificaciones a prueba de fuego si la caja
fuerte permanece almacenada sobre la tarima.
Reclamo de fuego verificado ETL
Verificado por ETL SEMKO para conformar con las especificaciones del fabricante de resistencia al
fuego a 649°C /1200°F o 760ºC/1400ºF durante 30 minutos.
Garantía de reemplazo de por vida después de fuego
Si un producto Fire-Safe de SentrySafe o ProStaff resulta dañado por un incendio en cualquier
momento mientras le siga perteneciendo a usted (el dueño original), el Grupo Sentry le enviará
un reemplazo gratuitamente si usted envía lo siguiente el Grupo Sentry, 882 Linden Avenue,
Rochester, NY 14625-2784 USA:
• Su nombre y dirección;
• Una descripción del incendio junto con el número de modelo, el número de serie, una foto de la
unidad quemada y una copia del informe del departamento de bomberos, la compañía de seguros
o la policía.
Page 18

Protección a prueba de agua
La empresa independiente ETL SEMKO ha probado las cajas fuertes de las series GXW y GPW
y ha certificado que están en cumplimiento con las especificaciones del fabricante de protección a
prueba de agua. Los productos que fueron sumergidos en hasta 1,20 m de agua hasta por 72 horas
y resistieron el agua.
Los modelos resistentes a agua deben quedar atornillados en su lugar. El
fabricante ha provisto material de fijación Y DEBE USARSE para atornillar
la caja fuerte al suelo para asegurar que tenga un sello hermético, o
quedará inválida la cláusula a prueba de agua.
NOTA: Es normal que se sienta una cierta cantidad de resistencia cuando cierre la
puerta de los modelos resistentes a agua.
NOTA: La empresa Sentry Group no se hace responsable por gastos incurridos si la
unidad deberá ser reemplazada.
Instrucciones para fijar al Suelo
Este material incluye:
• (2) tornillos con cabeza hexagonal
• (2) rondanas encauchadas
• (2) anclas para ladrillo
Herramientas requeridas:
• Taladro
• Llave inglesa
• Para anclar a Madera: Broca de 7/16” (11,0mm)
• Para anclar a Concreto: Broca de 7/16” (11,0mm)
Instrucciones
1. Abra la puerta de la caja fuerte.
2. Utilice un tornillo o una broca hacer una marca en el suelo a través de ambos hoyos.
3. Haga la caja fuerte a un lado para mostrar ambas marcas y poder usar el taladro para hacer
los hoyos.
4. Taladre el suelo:
• Para madera: Utilizando una broca de 7/16” (11,0mm), taladre un hoyo de 2 1/2”(64 mm) de
profundidad, usando cada marca como guía.
• Para concreto: Utilizando una broca de 7/16” (11,0mm), taladre un hoyo de 2 1/2”(64 mm) de
profundidad, usando cada marca como guía. Instale un ancla en cada hoyo.
5. Coloque la caja fuerte en la posición deseada, alineando los hoyos de la caja fuerte con aquellos
del suelo.
6. Para fijar la caja fuerte:
• Para madera: Pase cada tornillo a través de una rondana (el lado encauchado hacia el suelo),
pasando posteriormente a través de la caja fuerte y un hoyo. Apriete con una llave inglesa.
(Figura 1)
• Para concreto: Pase cada tornillo a través de una rondana (el lado encauchado hacia el
suelo), pasando posteriormente a través de la caja fuerte y finalmente por un ancla para concreto. Apriete con una llave inglesa. (Figura 2)
✪
No guarde discos de computadora, medios
audiovisuales o negativos de fotos.
Este producto no está diseñado para proteger disquetes, cartuchos y cintas de computadora,
audio-cassettes o videocassettes o negativos de fotos. Para almacenar estos materiales con
protección a prueba de fuego, pregunte en tienda por los productos para protección a prueba
de fuego para medios de la marca SentrySafe o ProStaff.
Instrucciones de Limpieza
Para productos con apariencia de acero inoxidable o con un panel de alto lustre sobre la puerta, el
exterior se puede limpiar con un trapo LIBRE DE PELUSA (como aquellos de microfibras o para
limpiar lentes, etc). Precaución: No utilice un producto a base de papel (pañuelo desechable,
o toalla de papel) ya que este puede dejar rayones.
Garantía de 1 año limitada
Este producto está garantizado al propietario original durante un (1) año a partir de la fecha de compra de estar
libre de defectos estructurales y mecánicos debidos a materiales defectuosos o trabajo de mala calidad. Si
ocurre un defecto estructural o existe un defecto mecánico durante el periodo de garantía, Sentry Group
(también nombrado como “Sentry”) reparará o reemplazará la(s) parte(s) defectuosas o el producto, a la
opción de Sentry Group, sin costo alguno. Se provee una unidad de reemplazo con entrega al exterior
del domicilio únicamente. El costo adicional generado por la entrega al interior del domicilio es la
responsabilidad del consumidor. Sentry no cubrirá gastos adicionales generados por la instalación de la
unidad de reemplazo.
Para Servicio de Garantía (América del Norte únicamente)
Por favor notifique al departamento de Servicio al Cliente de Sentry Group del problema por teléfono
de lunes a viernes de 8 AM a 8PM hora estándar del este. Debe marcarse un código de acceso antes de marcar
el número 800. Es un proceso de 2 pasos.
Paso 1: marque 08 800 288 2872 o 001 800 462 4240
Paso 2: a la indicación marque 1-800-451-0821
O por escrito a: Sentry Group, 882 Linden Avenue, Rochester, New York 14625-2784, U.S.A. No envíe su
producto a Sentry Group. El Departamento de Servicio al Cliente de Sentry Group decidirá si el producto se
devolverá, se reparará, se reemplazará o se si reembolsará su dinero.
Fecha del comprobante de compra
Para todos los productos de Sentry Group, un recibo de compra de la tienda con fecha se requiere como
comprobante de compra.
Limitaciones de la garantía
1. La responsabilidad de Sentry y el remedio exclusivo del comprador bajo esta garantía están limitados a la
reparación o el reemplazo de la(s) parte(s) defectuosas o del producto, a la opción de Sentry. En ningún
caso será responsable Sentry por cualquier daño incidental o consecuencial (incluyendo pero no limitado a la
pérdida o al daño causados por incendio, agua, robo o vandalismo) a personas o propiedad resultando de la
violación de esta o cualquier otra garantía expresa o implicada aplicable al producto. Algunos estados, provincias y países no permiten la exclusión o la limitación de daños incidentales o consecuenciales, así es que la
limitación o exclusión anterior pudiera no aplicarle a Usted.
2. Excepto como puede ser previsto de otra manera por ley aplicable, Sentry niega
cualesquiera y todos los convenios y garantías, sean escritas u orales, expresas o
implícitas, incluyendo, pero sin limitarse, a las garantías de comercialización y capacidad
para un propósito particular.La garantía implícita aplicable a este producto no excederá la garantía
limitada estándar de un año. Algunos estados, provincias y países no permiten la negación de garantías
implícitas o limitaciones en la duración, así es que la negación y/o la limitación anterior pudiera no
aplicarle a Usted.
3. Sentry no se responsabilizará por daños, defectos o el malfuncionamiento del producto incurridos durante
su transporte. El producto se empacó de acuerdo a las especificaciones de la Comisión de Comercio
Interestatal, y con un manejo razonable, deberá estar en buenas condiciones cuando se reciba. Cualquier
reclamo debido a daños ocasionados durante el transporte del producto se deberá hacer directamente con
el transportista.
4. Estas garantías no cubren defectos, daños, o el malfuncionamiento del producto causados por la
modificación, alteración, reparación o servicio del producto efectuados por cualquier otra empresa o
persona con la excepción de Sentry o sus representantes autorizados, o aquellos causados por abuso físico o
mal uso del producto. Sentry niega específicamente la cobertura por daños que pueden resultar si el
producto es empernado y/o daños que pueden resultar del mal manejo del producto al moverlo y/o
durante la instalación.
5. Ningún agente, empleadoo representante de Sentry, ni un distribuidor o tienda de menudeo, tiene la
autorización de hacer o implicar cualquier representación, promesa o acuerdo en el cual se varía de
cualquier forma de los términos de esta Garantía Limitada.
6. Esta GarantíaLimitada aplicará a productos nuevos, deprimera calidad de Sentry y no se aplicará a productos
de fabrica de segunda calidad o aquellos previamente usados, o a productos dañados previamente por
eventos que incluyen, sin limitarse a, incendios, inundaciones, terremotos, robos, el manejo por mudanza o
por los instaladores.
Todas las previsiones de esta Garantía Limitada son separadas y separables. Si cualquier previsión se toma como
inválida y no enforzable, dicha determinación no afectará la validez o enforzabilidad de otras previsiones. Esta
Garantía Limitada de brinda derechos legales específicos, y Usted pudiera tener otros derechos, que varía de
estado a estado, de provincia a provincia, o de país a país.
¡IMPORTANTE
ADVERTENCIA!
Si viven o visitan menores en su hogar, no deje abierta y sin supervisión su Caja
fuerte para armas de fuego/Caja fuerte ejecutiva SentrySafe o ProStaff. Menores
jugando pudieran quedar encerrados bajo llave dentro de la caja fuerte. Mantenga
cerrada y bajollave su caja fuerte en todo momento.
18
C
D
Page 19

19
Page 20

18
503825
Sentry Group
900 Linden Avenue
Rochester, New York 14625-2784 USA
Telephone: 585-381-4900
Customer Service: 1-800-828-1438
(8:00 a.m.– 8:00 p.m. E.S.T., Mon. – Fri.)
Fax: 585-381-2940
www.sentrysafe.com
El Departmento de Servicio al Cliente:
Debe marcarse un código de acceso antes de marcar el número 800. Es un proceso de 2 pasos.
Paso 1: marque 08 800 288 2872 o 001 800 462 4240
Paso 2: a la indicación marque 1-800-451-0821
(8a.m. a 8 p.m.,hora oficial delestede los EE.UU,de lunes a viernes)
Couleurs
Pour la peinture de retouche,
contacter le service clientèle au
numéro ci-dessous.
Vert
Noir
Vert de minuit
Noir cerise
Colores
Para pintura para retocar, llame
al Departamento de Servicio al
Cliente indicado abajo.
Verde
Negro
Verde Medianoche
Cereza Negra
Serial No.
➧
N° de série
➧
No. de serie
➧
Combination
➧
Combinaison
➧
Combinación
➧
Serial No.
➧
N° de série
➧
No. de serie
➧
Factory Code
➧
Code de fabricant
➧
Código de fábrica
➧
★
3-Number Combination Lock
Verrou à Combinaison
de 3 Chiffres
Cerradura de Combinación
de 3 Números
Serial No.
➧
N° de série
➧
No. de serie
➧
Combination
➧
Combinaison
➧
Combinación
➧
Serial No.
➧
N° de série
➧
No. de serie
➧
Generic Code
➧
Code Générique
➧
Clave Genérica
➧
★★
UL Group 2 Combination Lock
Verrou à Combinaison UL de Groupe 2
Cerradura de Combinación Grupo 2
★★★
Electronic Lock
Verrou Électronique
Cerradura Electrónica
★★★★
Type 1 Lock
Verrou Électronique
Cerradura Electrónica
Colors
For touch-up paint, call
the Customer Service
number below.
Green
Black
Midnight Green
Black Cherry
 Loading...