

Page 1
FS-IP5000
User Manual
Ver 1.0
©Sentry360 2014
Page 2

Table of Contents
1. Overview ............................................................................................................................ 3
1.1 Features ...................................................................................................................... 3
1.2 Package Contents........................................................................................................ 3
1.3 Dimensions .................................................................................................................. 4
1.4 Connectors .................................................................................................................. 5
2. System Requirements ...................................................................................................... 6
3. Access Camera ................................................................................................................. 7
3.1 Web Browser Configuration ......................................................................................... 9
Page 3

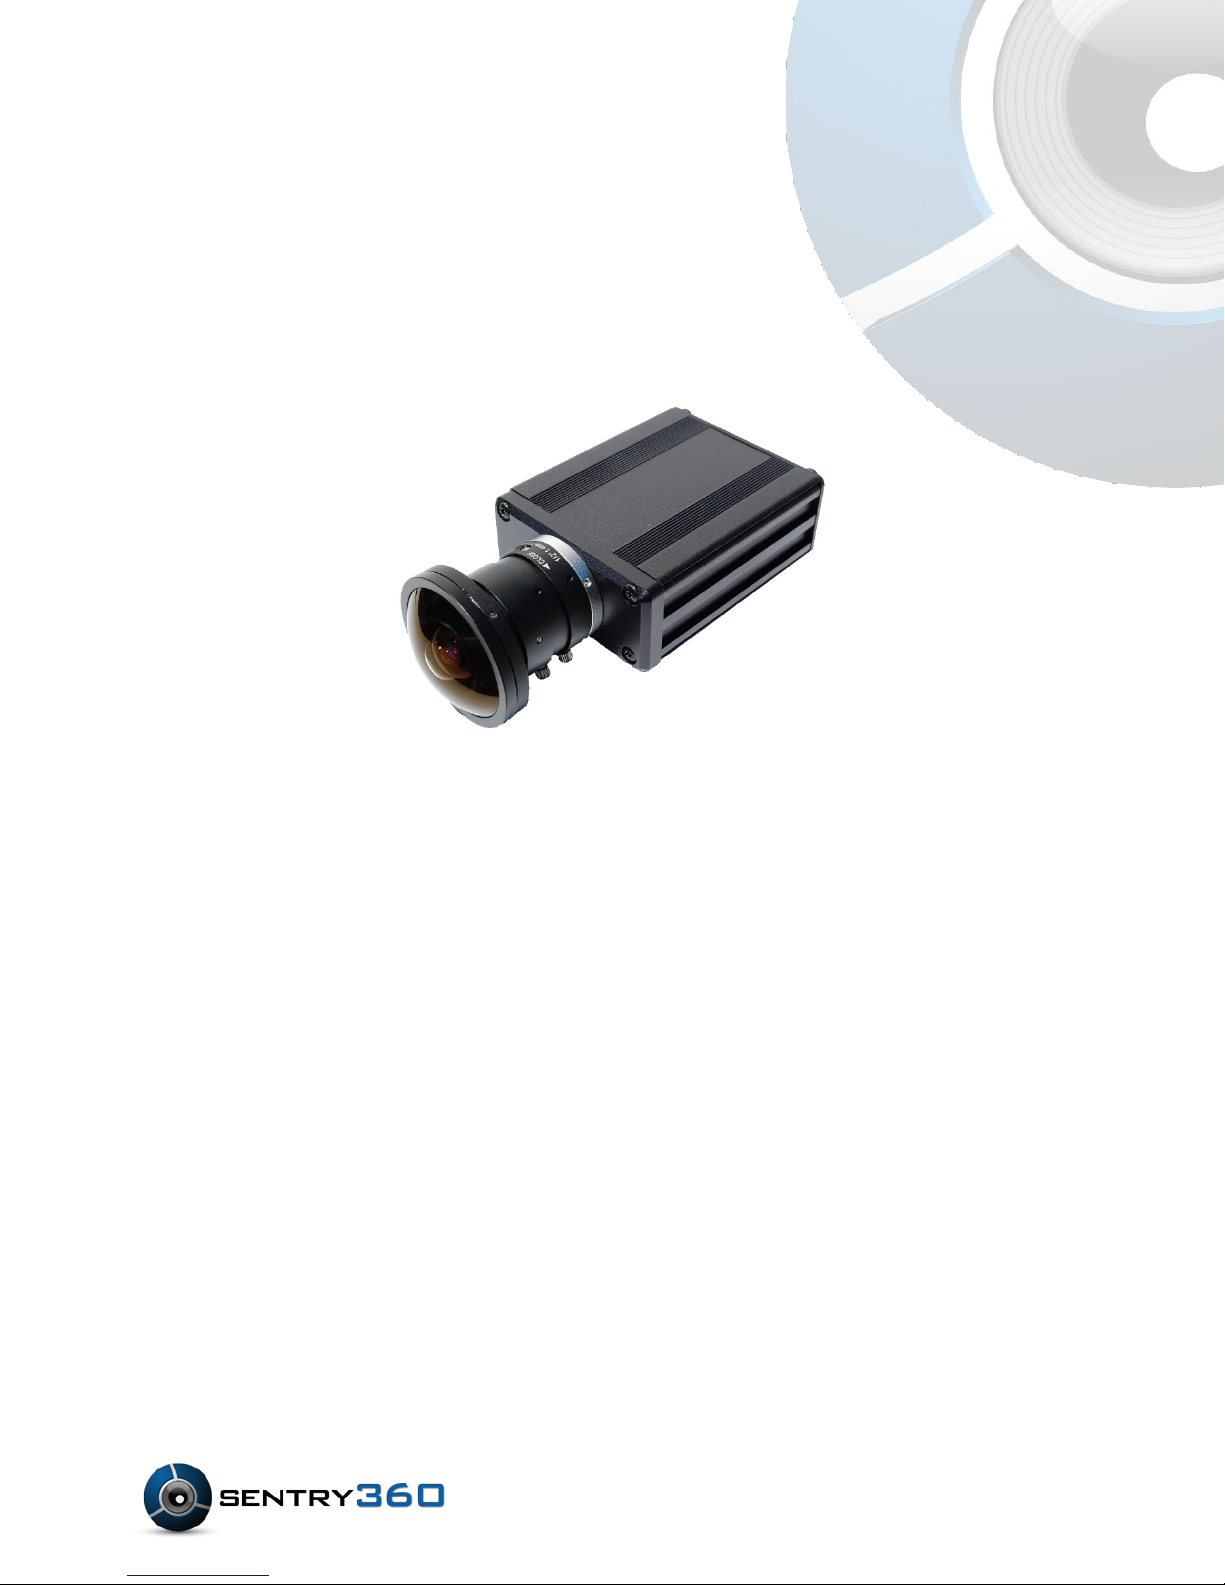
1. Overview
The FS-IP5000 camera is an MJPEG or H.264 encoding, 5.0 Megapixel resolution, IP
addressable, 360 degree camera. It is designed to deliver full-motion, high-definition,
progressive scan digital video across local area networks. The FS-IP5000 features a design
with no moving parts, creating a full 360 degree view with no blind spots. An optically corrected
fish-eye lens, designed exclusively for the FullSight™ camera, allows for immersive 360 degree
live view as well as pan-tilt-zoom during playback with the use of Sentry360’s API or SDK with
rd
any 3
playback can be one of the following: Panoramic Display, Quad Virtual Camera display, Single
Virtual PTZ camera display, or panoramic with 2 virtual cameras display with calibrated PTZ
capability between the panoramic image and virtual cameras.
1.1 Features
party network video recording software certified partner. User Interface options of live or
• 5.0 Megapixel CMOS Sensor
• Maximum Resolution: 2592 x 1944
• Maximum Framerate: 12 fps
• Full Onvif Compatibility
• Motion Detection
• PoE 802.3af
• 0.5 Lux at F/1.2 (color)
• 100/10 LAN Connection
• Protocols: UDP, TCP, HTTP, TFTP, RTSP
• Automatic Exposure
• Automatic White Balance
• Brightness, Contrast, Saturation Controls
• 1.4mm f-theta Fisheye Lens
1.2 Package Contents
Please check the package contains the following items listed below.
• Camera with Lens
• Quick Start Guide
Page 4

1.3 Dimensions
The FS-IP5000 camera and lens dimens ions are shown below.
Page 5

1.4 Connectors
Designation
Description
1
DC Power
12V DC Power Connector
2
LAN Port
PoE and Ethernet Port
The diagram below shows the FS-IP5000 connections.
Page 6

2. System Requirements
Items
System Requirement
Web Browser
Microsoft Internet Explorer
To connect to the FS-IP5000 via web browser, please ensure your PC has a good network
connection, and meets system requirements as des cr ibed below.
Mozilla Firefox
Google Chrome
Apple Safari
Page 7

3. Access Camera
Step 1. Power your camera using the correct power source (PoE switch, PoE injector, or
12V adapter).
Step 2. Download, install, and run sentryView™, Sentry360’s camera configuration tool,
here: http://sentry360.com/product/sentryview/
Step 3. Click the Scan button in sentryView™ to scan your network for connected cameras.
Step 4. To automatically configure your camera network settings, check the boxes of the
cameras you want to configure. Then click Auto Configure.
Page 8

Step 5. Confirm your network settings and click Configure.
Step 6. To manually configure your cameras, click Edit Camera Values at the bottom right,
enter your IP Address, Subnet Mask, Gateway, and DHCP settings. Click Apply to
save these values.
Step 7. Your cameras are now configured. If you are using sentryCore™ as your Video
Management System, please download the latest version here:
http://sentry360.com/product/sentrycore/
Step 8. Right click on a camera and select Browse. The prompt for entering the default
username and password will appear for logging in to the FS-IP5000-M.
Page 9

3.1 Web Browser Configuration
Camera configuration is accessed through the web browser interface by clicking the Show
Settings button.
When configuration is complete, click the System Tab -> Save to commit settings to permanent
memory.
 Loading...