

Page 1
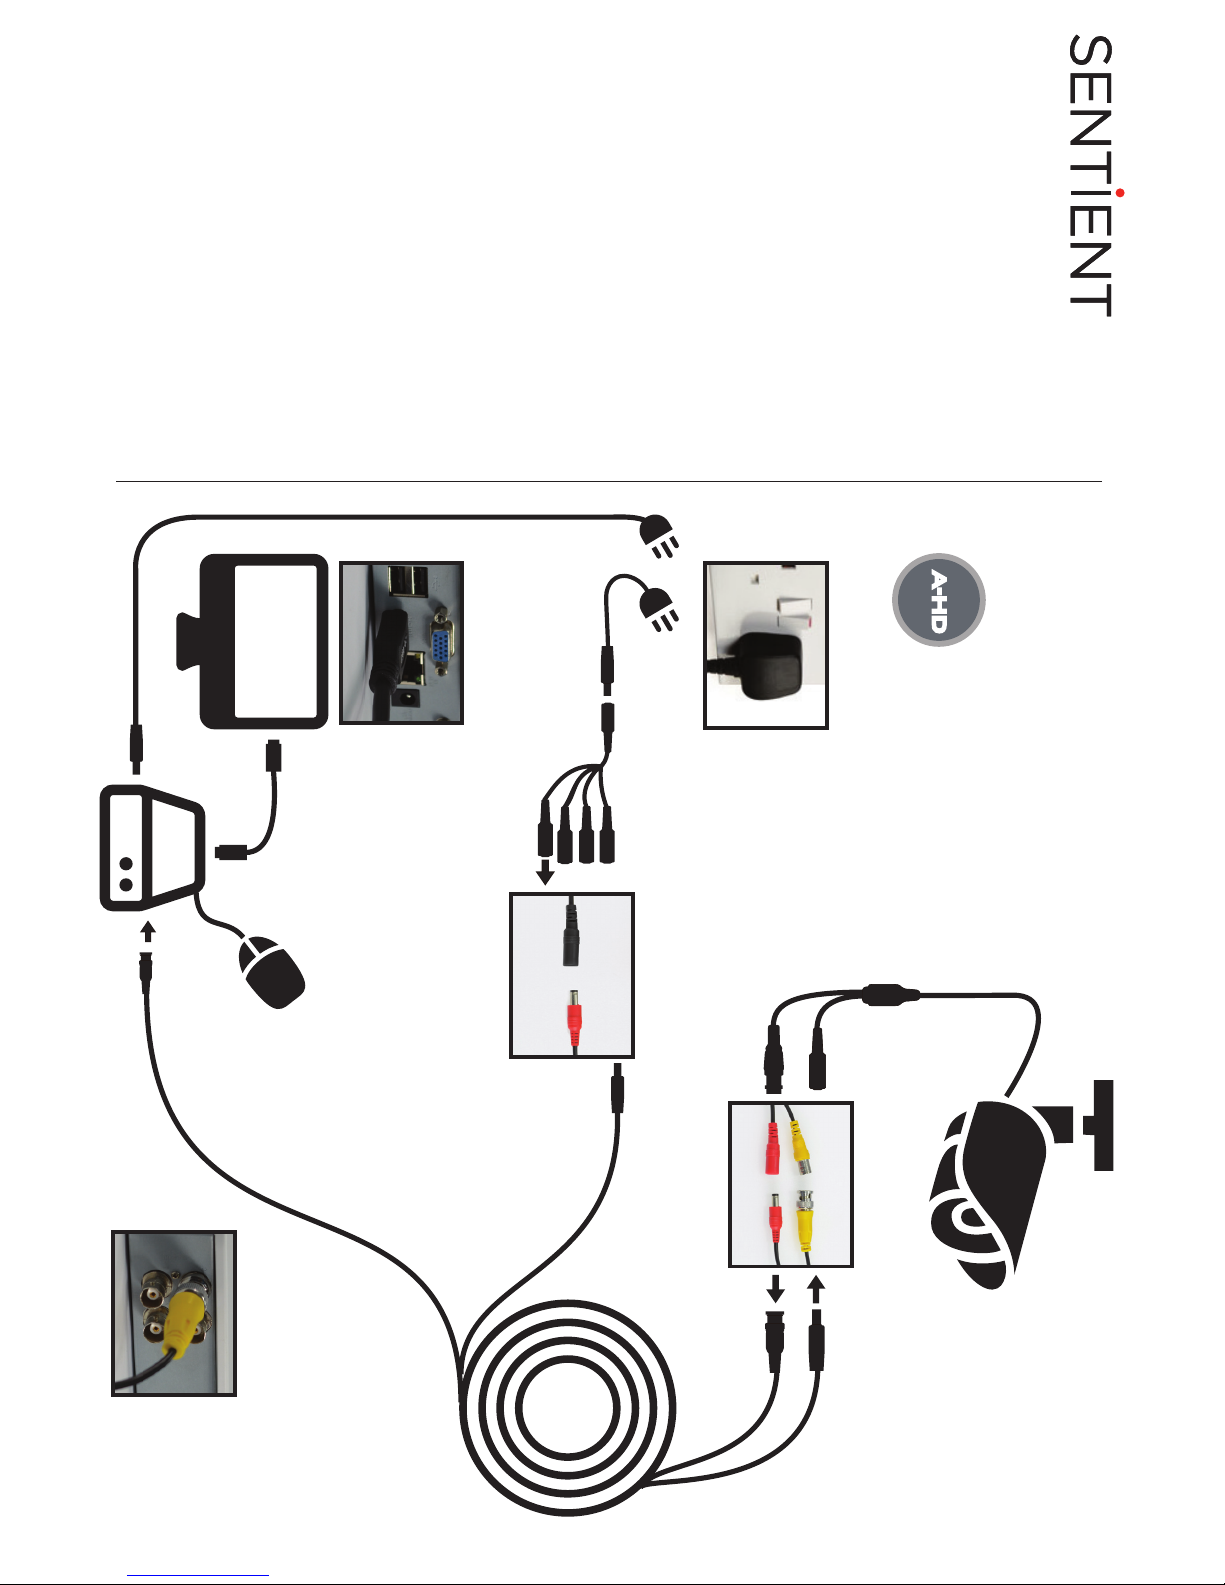
BNC Connector
Power Connector
Camera
Output to TV
or Monitor
BNC Connecto r
to DVR
Power Adaptor
4-Way Split Cable
Power
Connecto r
BEFORE INSTALLING ANYTHING WE
STRONGLY RECOMMEND THAT YOU
CONNECT YOUR CAMERAS TO YOUR DVR
AND TEST YOUR SYSTEM FIRST.
WE CHECK EVERYTHING TO MAKE SURE IT
IS WORKING WHEN IT LEAVES US BUT
OCCASIONALLY THINGS FAIL AND IT IS
BETTER TO KNOW NOW THAN AFTER YOU
HAVE FITTED EVERYTHING!
QUICK SET UP
GUIDE
This connects
your camera to
the DVR
This connects
your camera to
the power supply
Connect the
mouse to the
USB socket
(We recommend you
keep your cables
coiled whilst you test
your system)
1.
2.
3.
Connecting your cameras.
Your Cameras have 2 plugs
attached, one is a BNC connector
(for the video) the other is for
power. Connect these plugs into
the sockets on on the end of one
of the cables inlcuded in the kit.
1.
Switching on
Once you have connected all the
cables successfully. Then connect
the DVR & Camera power leads to
a power outlet. Switch on your TV
and select the HDMI socket you
have connected to.
3.
Connecting your DVR.
At the other end of the cable are
two plugs, these connect your
camera to the DVR and also the
power supply.
2.
DVR Power
A19RQ / A20RQ
SUPERIOR SECURITY
PRO
You can connect your system to
a HD TV using a HDMI cable, you
can also connect them together
using an RCA lead, or to a
monitor using a VGA lead.
You will also need to connect yout
DVR to a TV or monitor. You can
connect your system to a HD TV
using a HDMI cable, you can also use
the RCA (Video Out) socket or the
VGA socket on the back of the DVR.
Further, more detailed instructions on
how to operate your DVR are included
in the main manual which is on the set
up disc included.
We refrain from printing these large
manuals in an effort to limit our impact
on the environment.
Page 2
EASY SMART PHONE SETUP FOR LIVE VIEW & REMOTE PLAYBACK
Success! You should now be fully setup.
For the convenience of monitoring your Sentient security system on the move via your smart phone we have provided a quick and simple
remote connection setup service. Please follow the steps below closely to successfully setup the connection for live view and remote playback.
3.
1.
PLEASE MAKE SURE THAT YOUR DVR DEVICE IS SETUP AS SHOWN ON THE REVERSE SIDE OF THIS PAGE BEFORE CONTINUING.
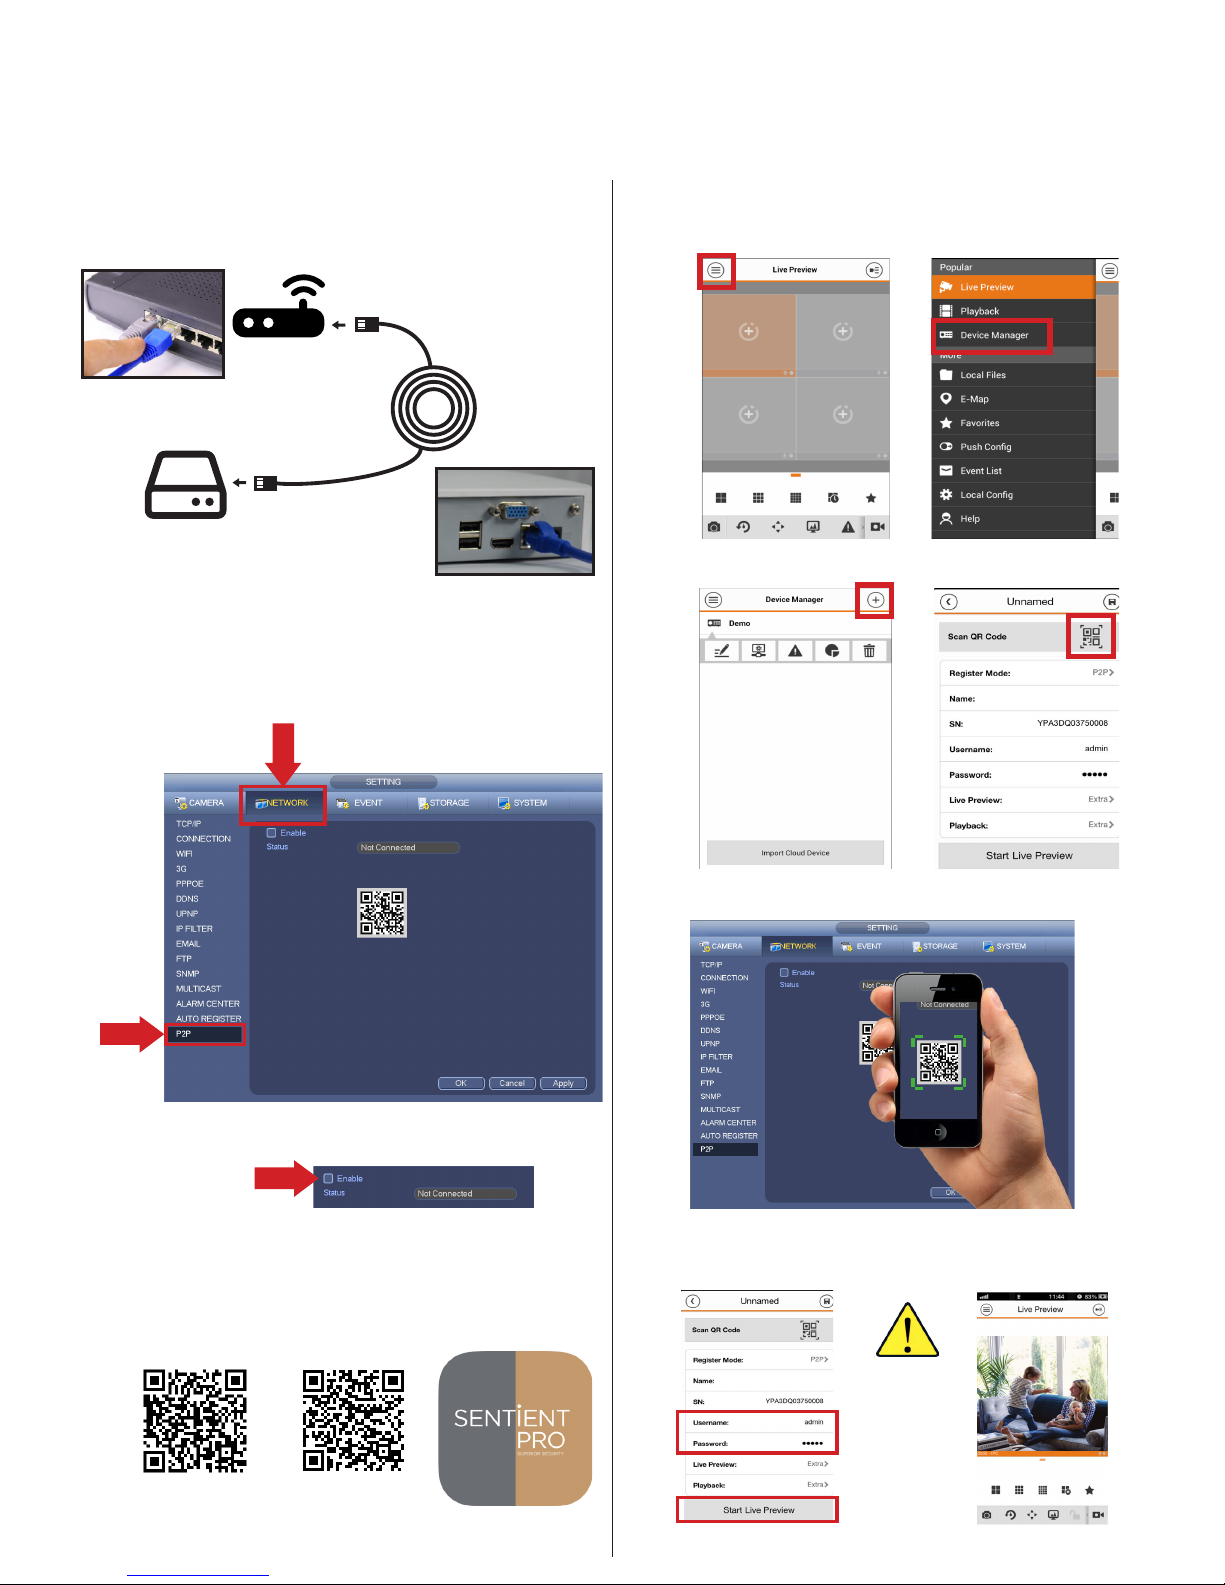
Internet connection
Connect the Ethernet cable into the ‘Net’ port on the rear of
the device, then connect the other end into one of the spare
ports on your modem-router, as shown below.
Ethernet connector
to DVR ‘NET’ port
Ethernet connector
to spare router port
Ethernet
cable
Modem - Router
2.
Enable P2P on your DVR
Turn the power on to the DVR device. When it has fully
booted up, from the main menu select ‘Setup’, then ‘Network’
and nally ‘P2P’. See image below:
Click the ‘Enable’ box to enable the P2P connection on the
device.
Click ‘OK’ to save.
4.
1. Select Network
2. Select
P2P
3. Click
here
Download and install Sentient Pro app to your smart phone
To be taken to the app download link please scan the QR
code below that corresponds to the type of smartphone
device that you use:
ANDROID APP iOS (APPLE) APP
Operating Sentient Pro smartphone app
When you have completed intallation of the app to your
smartphone, open the app.
4a. Select drop down
main menu
4b. Select ‘Device
Manager’
4c. Add new device
4d. Select QR code icon
to bring up scanner
4e. Scan QR code shown in the P2P section of the Network
menu (you can scan the QR code shown on the monitor screen).
4f. Please input:
Username: admin
Password: 888888
Then select ‘Start Live Preview’
4g. You will now
be able to view the
live camera feeds
from your DVR
It is very
important you
change the
password on
your device
to ensure
optimum
security.
 Loading...