

Page 1
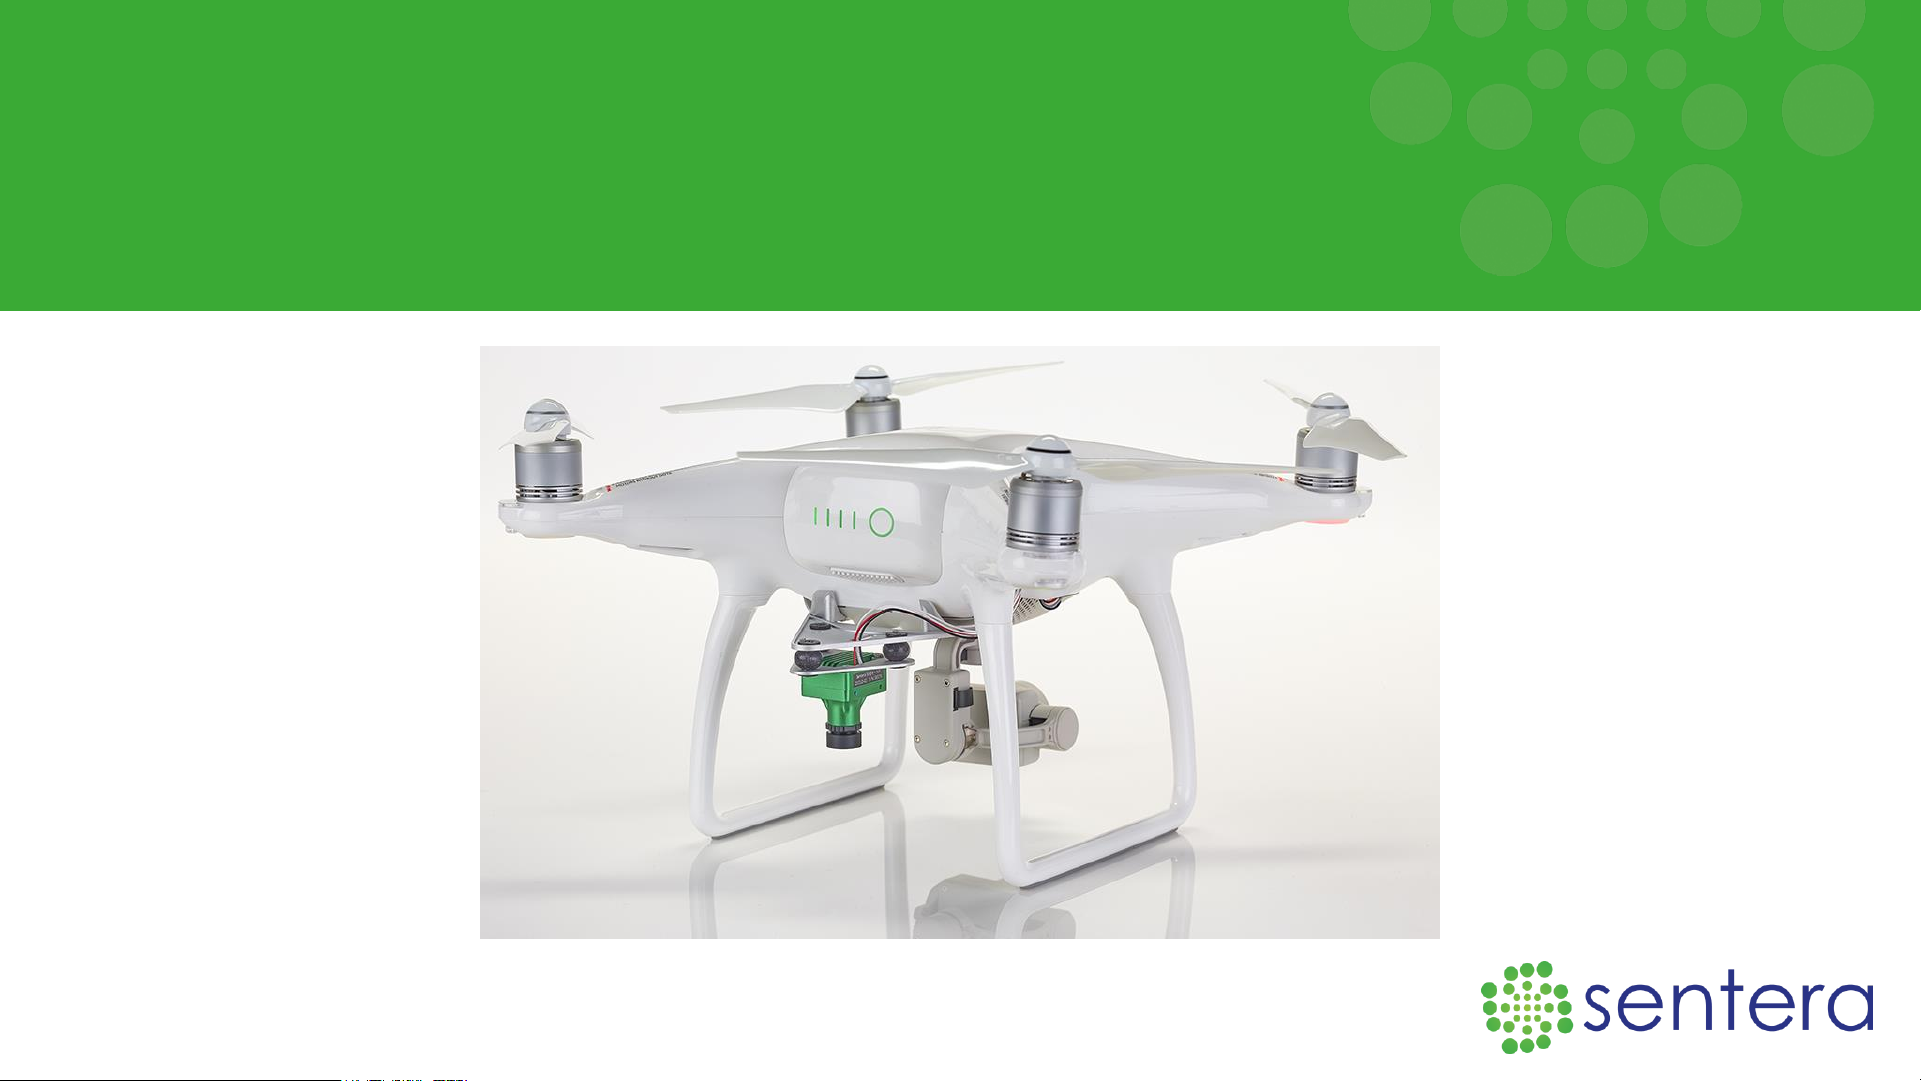
Phantom 4 Single Sensor
User Manual
Page 2

Flying a drone autonomously with FieldAgent is extremely
easy, but like driving a car, there is a training process that
should be completed before you can fly safely and
comfortably. This document will set you up for success,
regardless of your current skill level.
Advice: Set aside 1 day to become comfortable using your system.
Questions? Contact Sentera Support at:
CONGRATULATIONS ON YOUR
NEW SENTERA SOLUTION PURCHASE!
Page 3

Contents
1. Getting Licensed & Part 107
2. Manual Flight Practice
• Getting to know your Drone
• Flight Controls
• Incremental Practice Flight Ideas
3. Activating Your Free FieldAgent
Account
4. Autonomous Flight & FieldAgent
Mobile
• Preparing For the Field
• Flight Planning
• Monitoring your Flight
• Checking for Images
5. Looking at Your First Dataset &
FieldAgent Desktop
• Selecting Images for Import
• Navigating the Import Process
• Making Annotations
• Viewing Maps
• Adjusting Your NDVI Health Maps
• More Precise Data (Ordering Mosaics)
• Ordering Analytics
6. Fine Tuning Parameters to Work
For You
1
4
3
2
5
6
Page 4

If you are using your drone for business purposes, the FAA expects
you to obtain a Remote Pilot Certificate as outlined in the FAA Part 107
Rules.
This involves studying, registering for and passing a written exam.
To learn if your situation requires a Part 107 Remote Pilot Certificate, or
other general information about the exam, visit:
Sentera’s Part 107 Explanation Page
sentera.com/Part-107-Explanation/
S e c t i o n 1 G e t t i n g L i c e n s e d & P a r t 1 0 7
Section 1 Pg. 1
Page 5
Use your paper QuickStart from DJI and Section 2 of this guide to get to know
your drone. Practice flight ideas on page 5.
An online version of the latest Phantom Quick Start Guide and full manual can be
found here:
Phantom Quick Start Guide Link
www.dji.com/phantom-4/info#downloads
Tip: Make your first flight at a local park. Just ensure you are abiding by local
and federal laws. (Don’t fly over people!)
We recommend all users take their drone out to complete AT LEAST 10
successful manual flights before performing an autonomous mission with
FieldAgent.
Section 2 Pg. 2
S e c t i o n 2 M a n u a l F l i g h t P r a c t i c e
Page 6
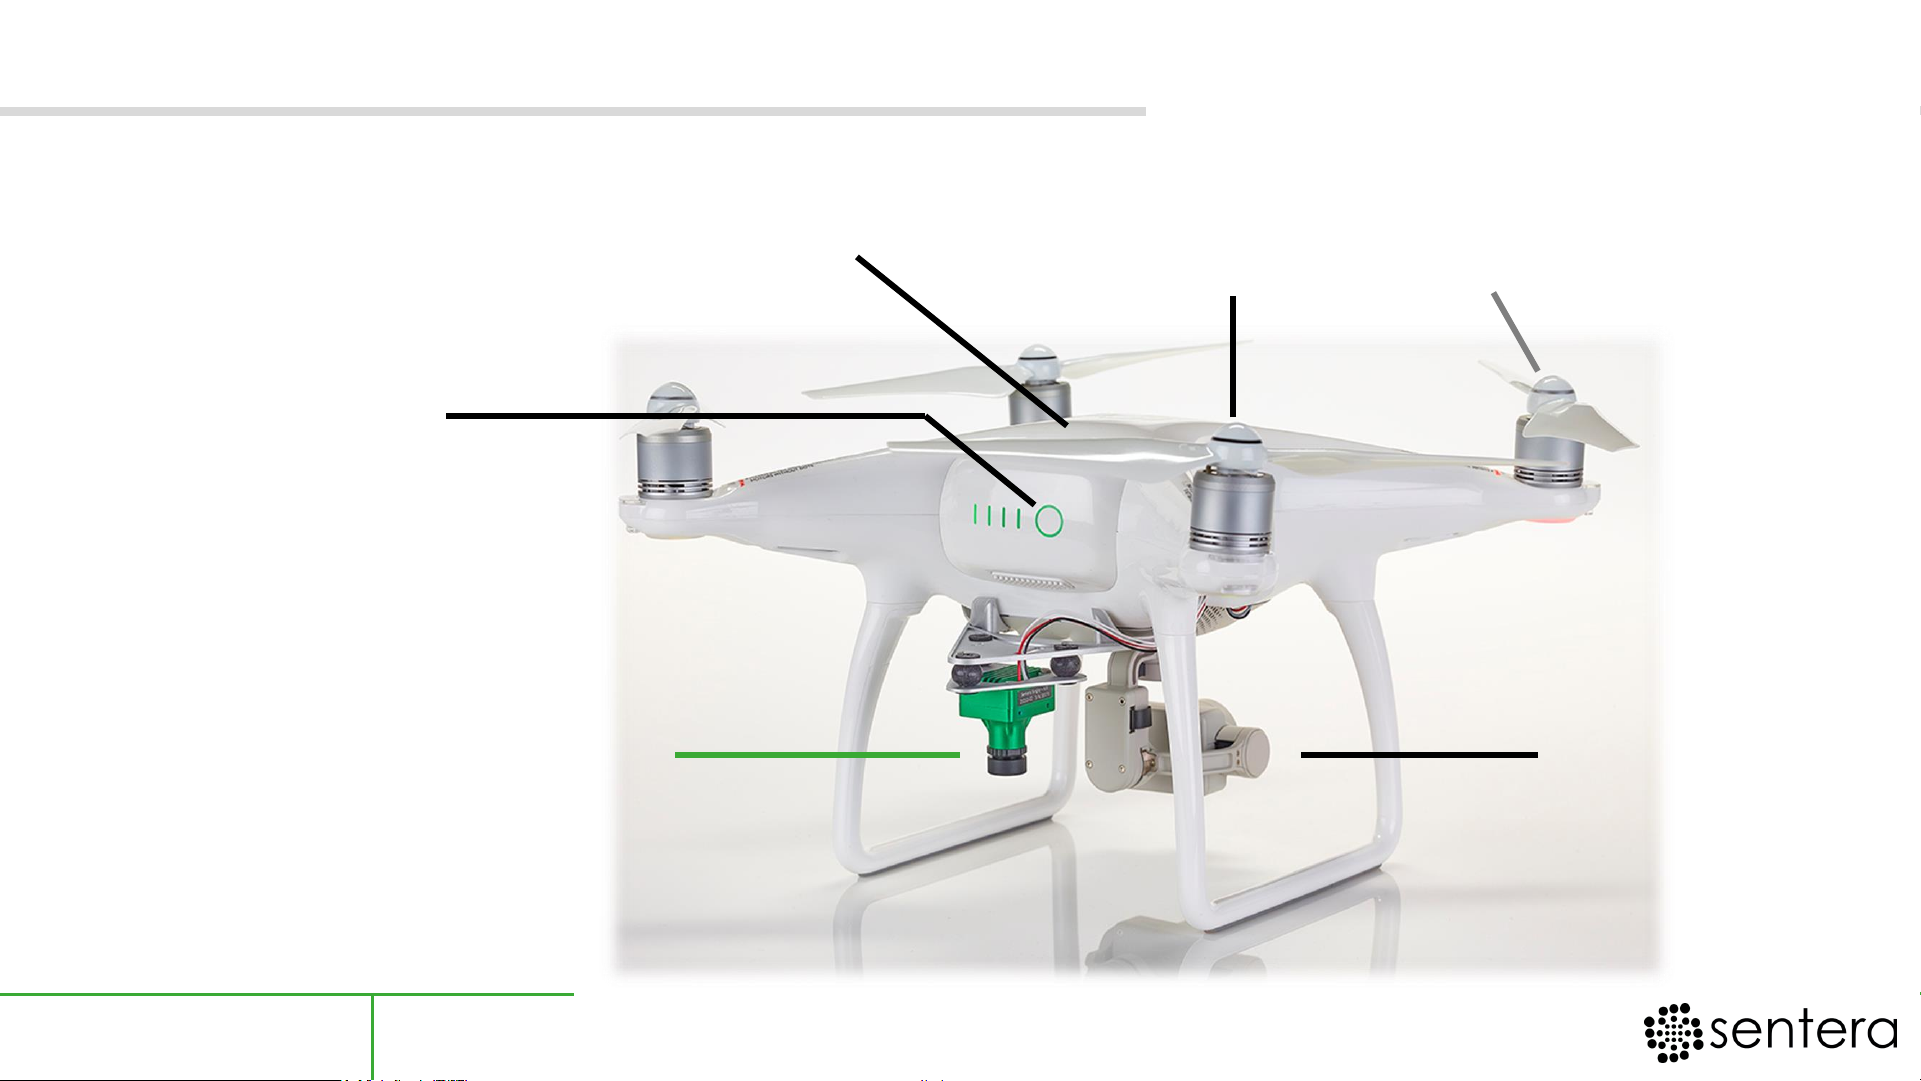
Sentera NDVI
Single Upgrade
DJI Color
Camera
Gimbal
Propellers
Match BLACK or GREY rings to motors
Push and
rotate to lock
into place
Battery
Power on/off by pressing
the circle once and then
again for 2 seconds.
Getting to Know Your Drone
Section 2 Pg. 3
GPS
The drone’s GPS is under the top cover
NEVER obstruct this area
Page 7

Up (Increase Altitude)
Down (Decrease Altitude)
Rotate
CW
Rotate
CCW
Forward
Backward
Left
Right
Basic In Flight :
Controls
Right Stick
Left Stick
Spin up Motors &
Take Off:
Up
Land & Turn Off Motors
Hold down on landing to
stop motors
Down
Connect Mobile
Device using
USB Cable
Power On
Controller
Launch DJI
Go 4
Power On
Vehicle
Setup:
Setup & Flight Controls
Section 2 Pg. 4
1
2
Page 8
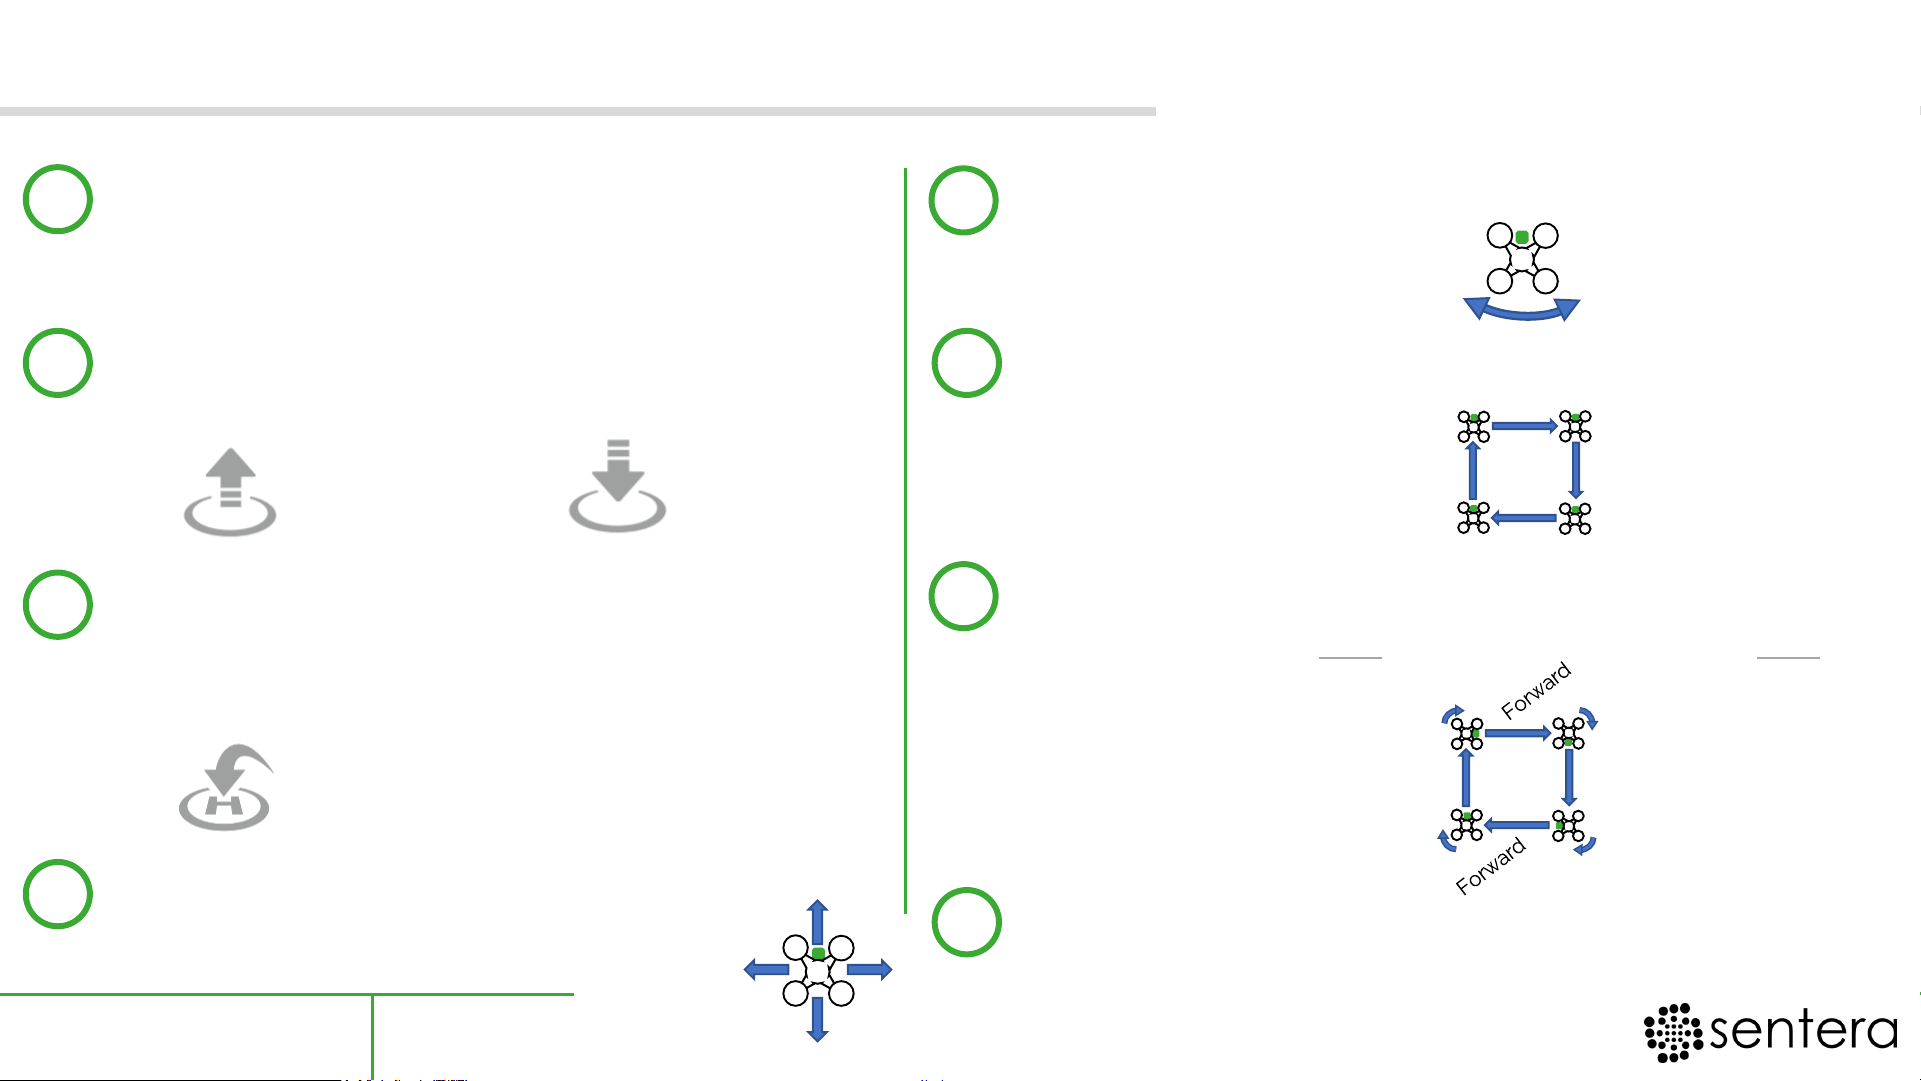
5. Rotate clockwise (CW) and counterclockwise (CCW)
Left stick only!
6. Fly a rectangular flight path facing one direction.
Right stick only!
7. Fly a rectangular flight path w/ 90⁰ CW rotation at
corners. Right stick only moves forward. Left stick only
rotates 90⁰ at corners.
1. Take-off. Hover at 10ft. Let go of sticks for 3
seconds and then land.
Left stick only!
2. Auto Take-off and Auto Land with the on
DJI Go 4 onscreen buttons
3. Take-off and hover at 50 ft. Fly out 100 ft.
Use Return to Home (RTH) button to bring
the drone back and land itself
4. Move Forward, Backward, Left, & Right.
The RTH Button is located both on
the physical controller and in the DJI
Go 4 App as an onscreen button
Practice with the right stick
Auto
Take-Off
Auto
Land
Incremental Practice Flights
Section 2 Pg. 5
1
4
3
2
5
6
7
CCW
CW
Backwards
Left
Right
Forwards
**Overhead View**
**Overhead View**
90⁰ CW
90⁰ CW
90⁰ CW
90⁰ CW
Forward Forward
8
Fly smooth Figure-8 patterns.
Use a combination of both the Right and Left Sticks
Page 9
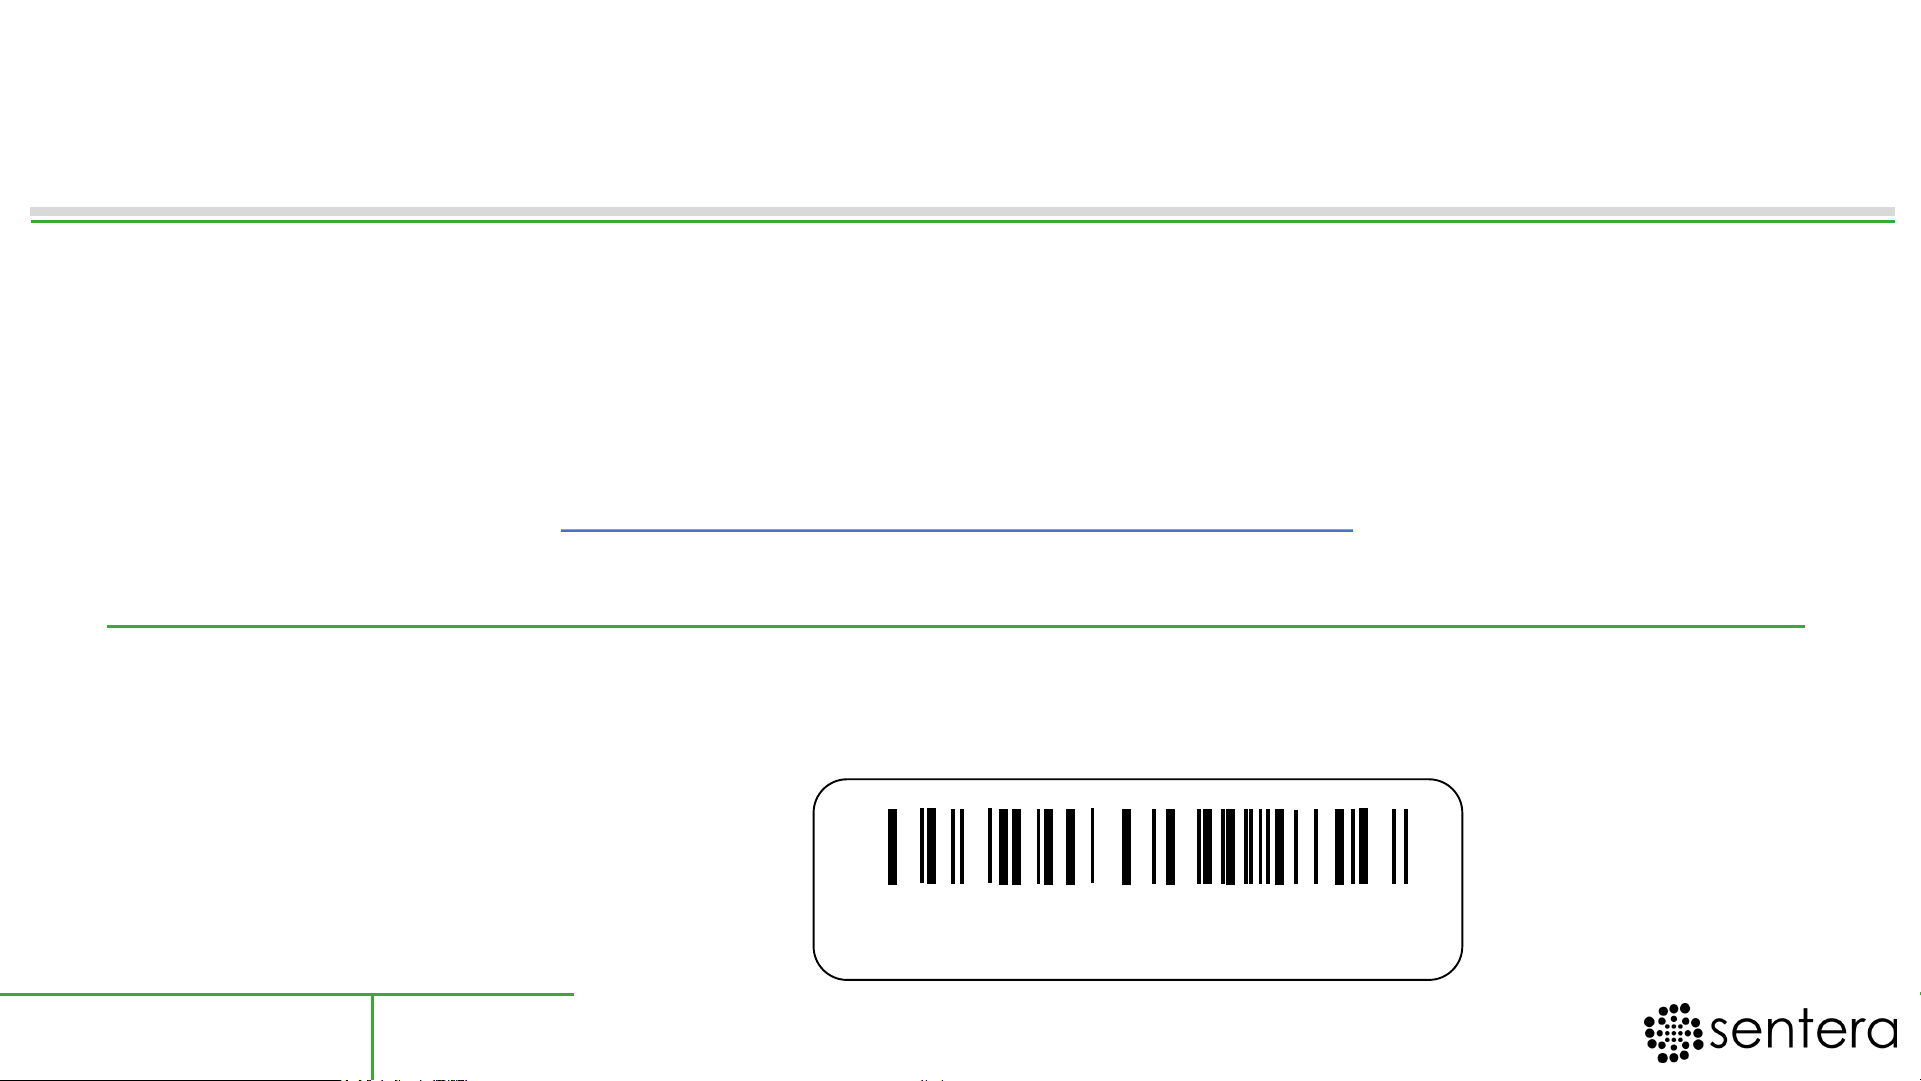
Each Sentera sensor includes a 1 year FieldAgent subscription
To activate your free year and create a FieldAgent Account, visit:
FieldAgent Account Activation Page
fieldagent.sentera.com/activate
Fill in your info and enter your activation code found on your shipment’s paper
Sentera “FIELDAGENT QUICKSTART GUIDE”
Example Code:
A J T Y – 1 S 8 D 2 9 J
Section 3 Pg. 6
S e c t i o n 3 A c t i v a t i n g Y o u r F i e l d A g e n t
A c c o u n t
Page 10
In the iOS App Store, search for "Sentera" and download the FieldAgent App.
Launch the app and log-in with the credentials you provided when creating your
FREE FieldAgent account in the previous section (3).
Questions? Contact Sentera Support at:
+1 (844) SENTERA (844.736.8372) | International Direct Dial: +1 612.204.2000
iOS App
S e c t i o n 4 A u t o n o m o u s F l i g h t &
F i e l d A g e n t M o b i l e
Section 4 Pg. 7
Page 11
Set up your full system outside as if you were getting ready to fly.
Power all systems on. Connect your mobile device to the DJI Hand
Controller with a USB cable.
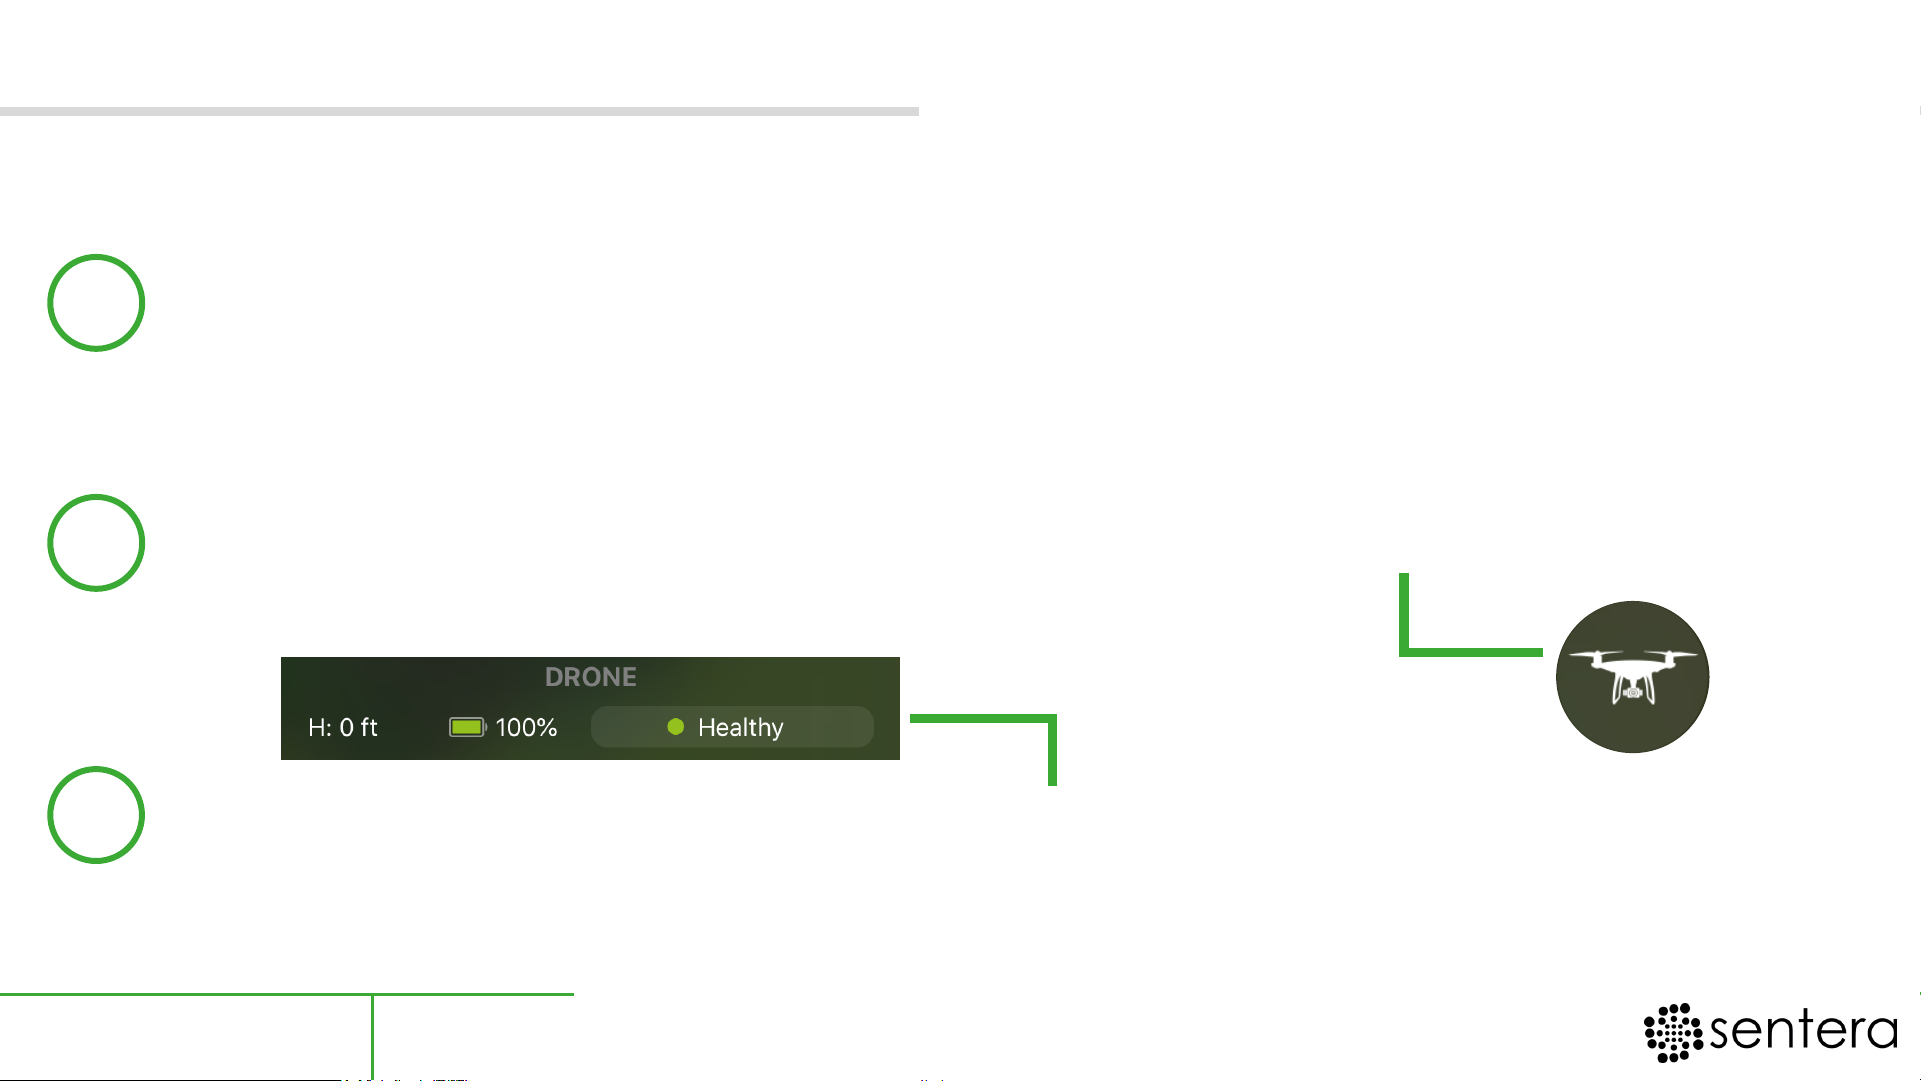
Launch the FieldAgent App and select the icon of the drone in the
lower left.
Check for a green dot and the word “Healthy". If your 'dot' is red, tap the
dot, and correct the issues listed. If you have questions, contact Sentera
Support @ 844-Sentera.
Before leaving for the field, test your equipment:
Preparing for the Field
1
2
3
Section 4 Pg. 8
Page 12
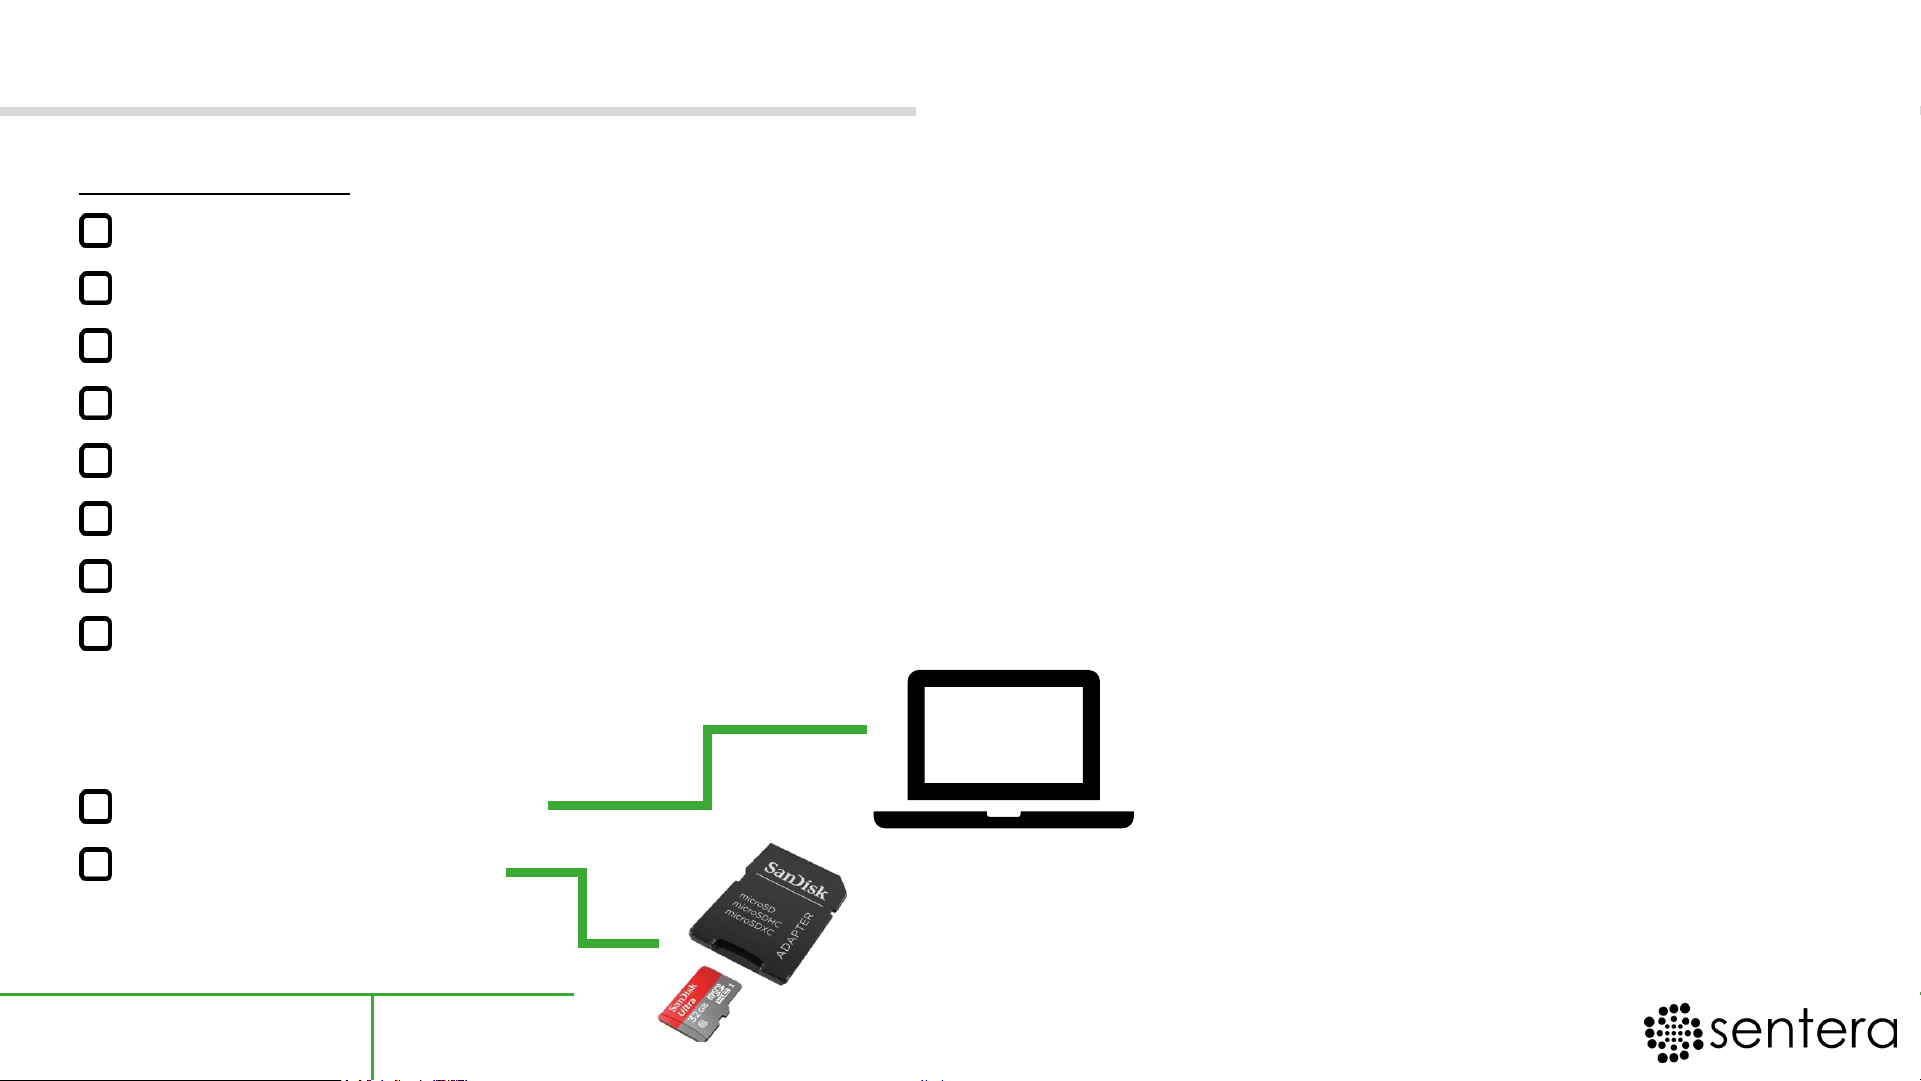
Packing List:
Drone (including propellers)
1 SD Card in the side of the drone
1 SD Card in the green Sentera Single
Fully charged drone battery(ies)
Fully charged Hand Controller
Fully charged iOS device w/ FieldAgent
Lightning USB Cable (For your iOS device)
Part 107 Identification (if applicable)
It’s also helpful to bring:
Laptop Computer
SD Card Reader
Preparing for the Field
Section 4 Pg. 9
Page 13
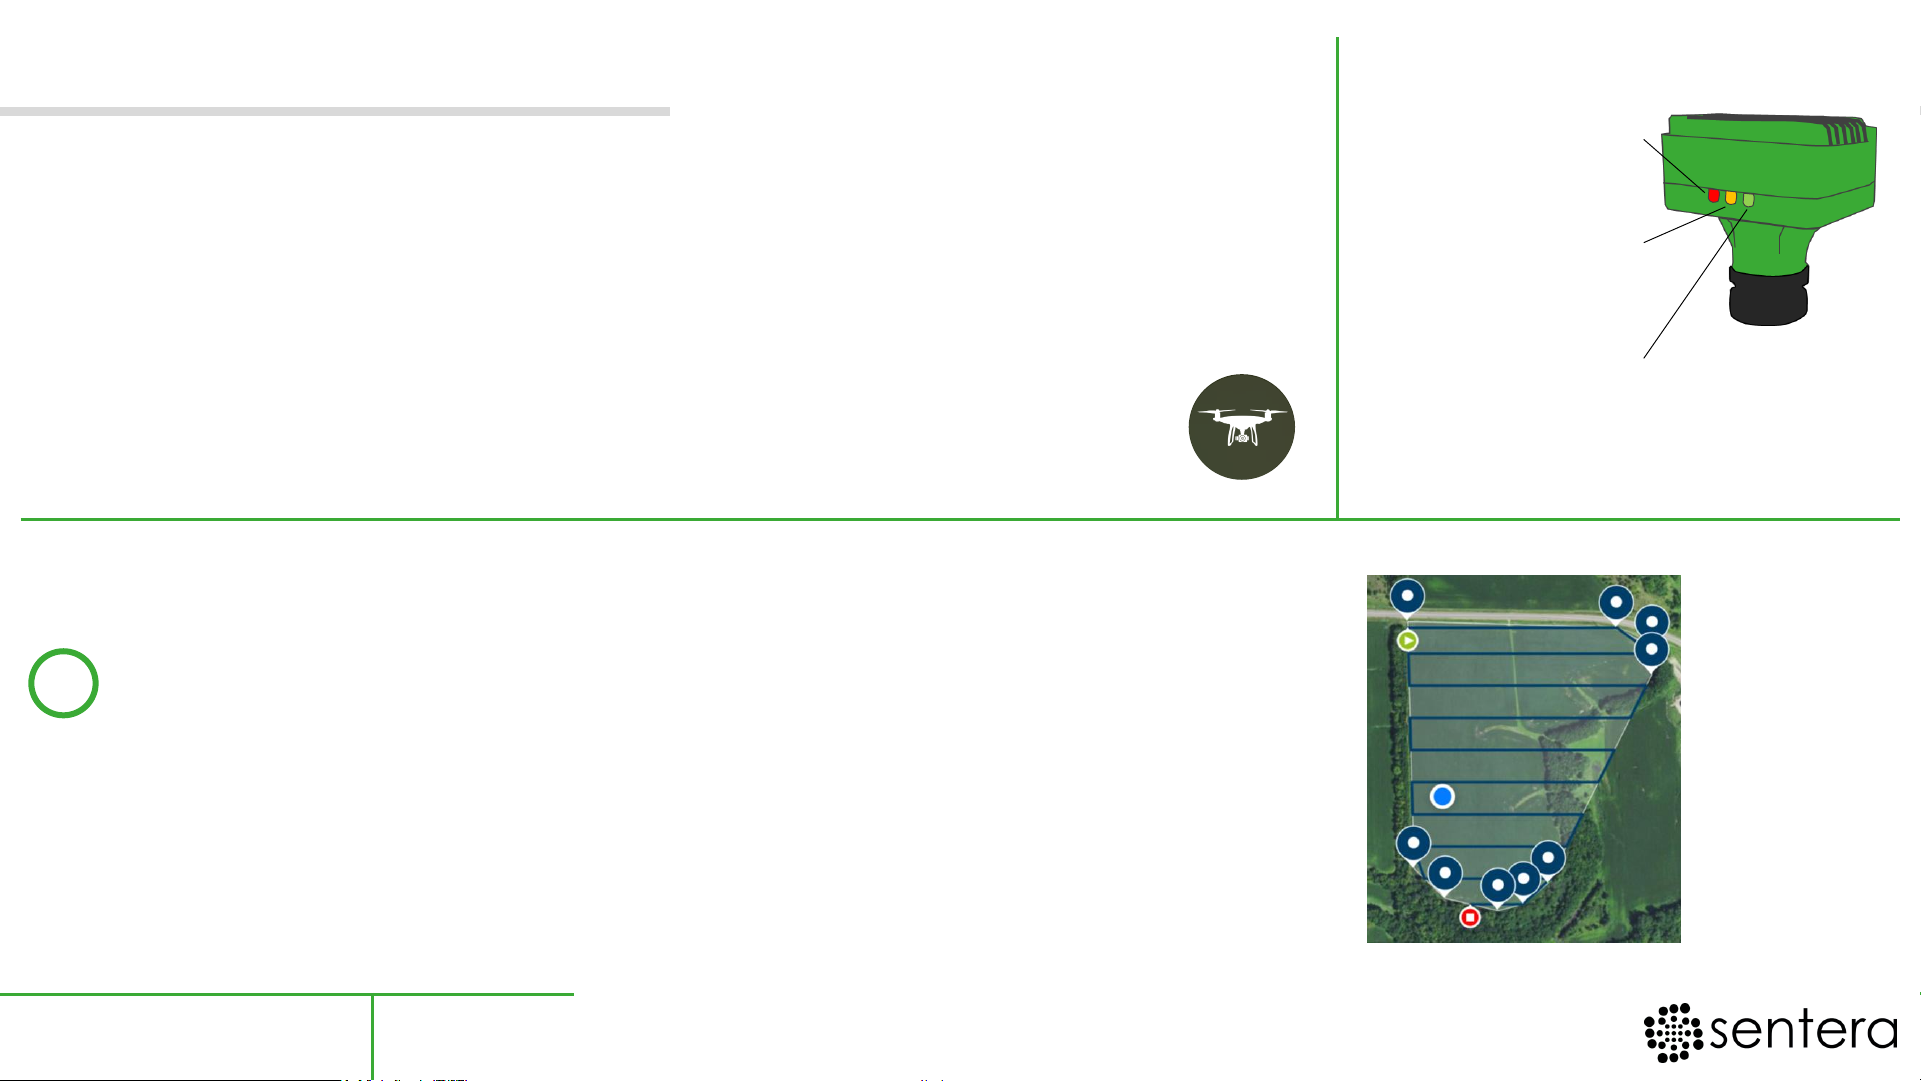
Set up your drone & controller in a safe location for flight.
Ensure the hand controller is in P-mode
(Top left toggle on the hand controller)
Launch FieldAgent on your Mobile Device and tap .
Ensure the area you want to fly is in frame.
Long tap the corners of your field
To delete a pin: Tap to select. Tap again to delete.
To edit the location of a pin: Tap to select. Then press and drag
to move
Preparing to Fly
PLANNING YOUR FLIGHT
Section 4 Pg. 10
1
SENSOR LIGHTS
Red
No SD Card/Error/Trigger
Yellow
Blinking = Waiting
Solid = Ready for Flight
Green
Powered
Wait for Solid Yellow & Green before
flight!
Page 14
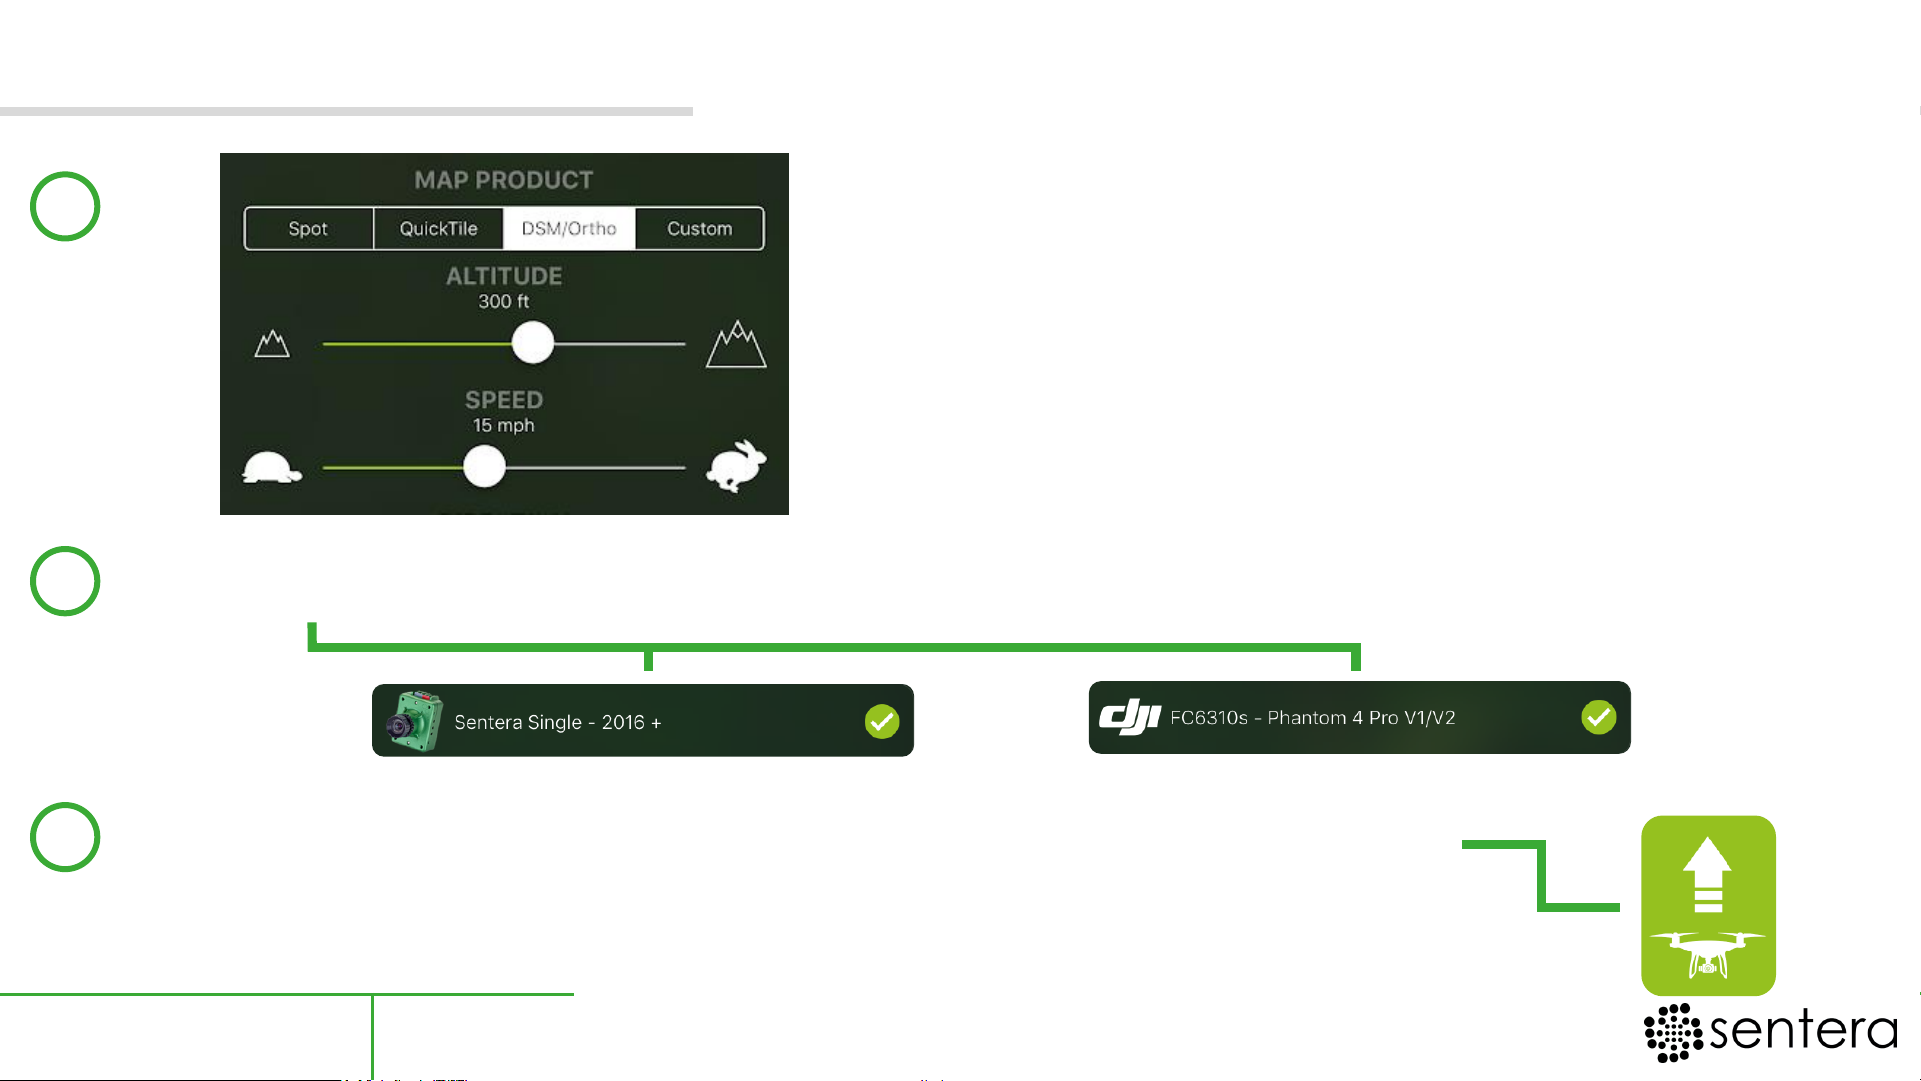
Set the
2
cameras on your vehicle. These are most likely
&
When you're ready to Take-Off, select the launch button
and stand back. Your drone will take-off to begin its flight!
Section 4 Pg. 11
3
2
4
Note: These settings will yield good results for your
first flight. You will most likely change these settings in
the future to better match your use case.
This is covered in section 6 of this document, “Fine Tuning for Your
Specific Use Conditions”
Preparing to Fly
Select “DSM/Ortho” and set Altitude & Speed
Page 15
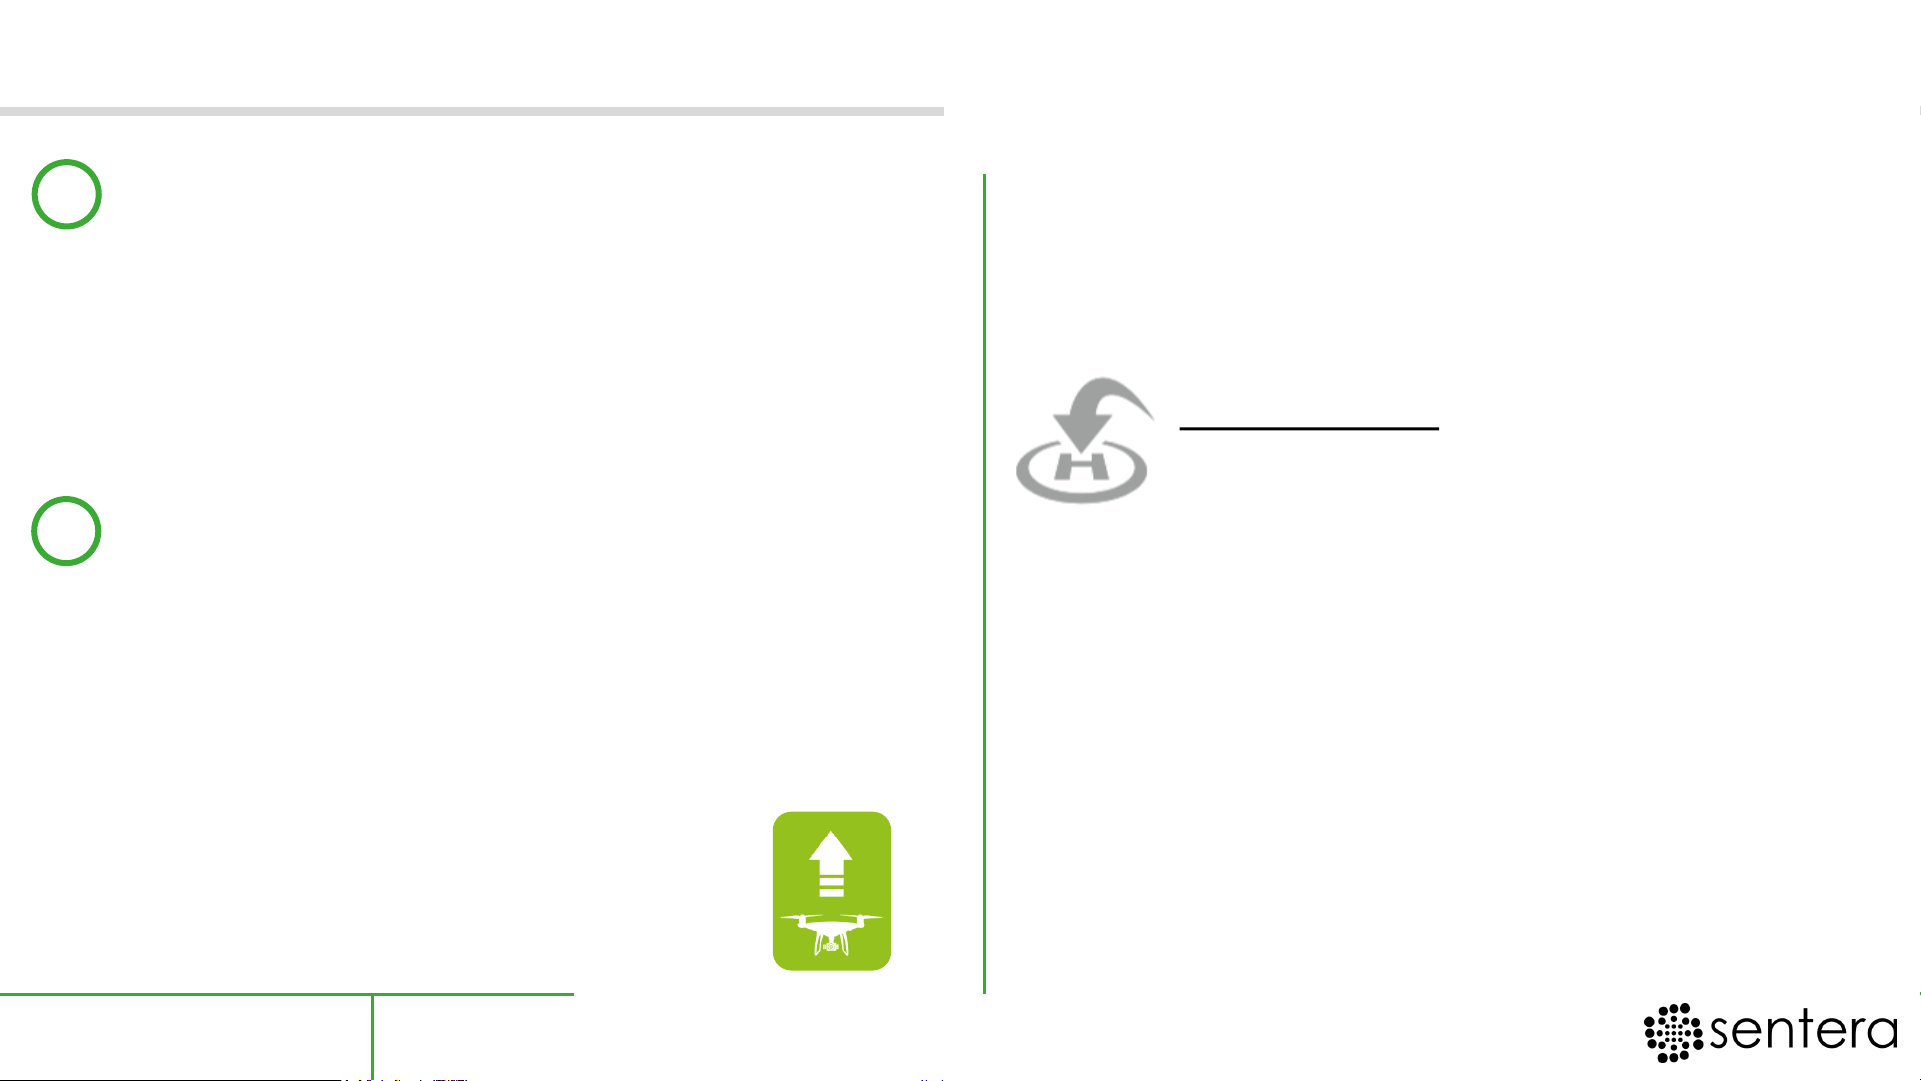
Watch your drone throughout the
flight. It will fly the planned route and
return to land almost exactly where it
took off. Fine tune the landing spot
with the control sticks if necessary.
Getting low on battery? Your drone
will automatically return and land.
Power off the drone and insert a fully
charged battery. Power on the drone,
select the launch button as you did for
take off, and your drone will
pick up where it left off.
RTH Button: Located on the
hand controller below the right
stick. Hold until the controller
starts to beep. This will bring the
drone home to land.
Section 4 Pg. 12
If an emergency occurs and the
mission must be suspended:
1. Press & Hold the
5
6
Monitoring your Flight
2. Manual Control (optional)
If it is not appropriate to command the
drone home immediately, press the RTH
button a second time. The drone will
hover to give you full manual control.
Page 16
You've performed your first autonomous flight!
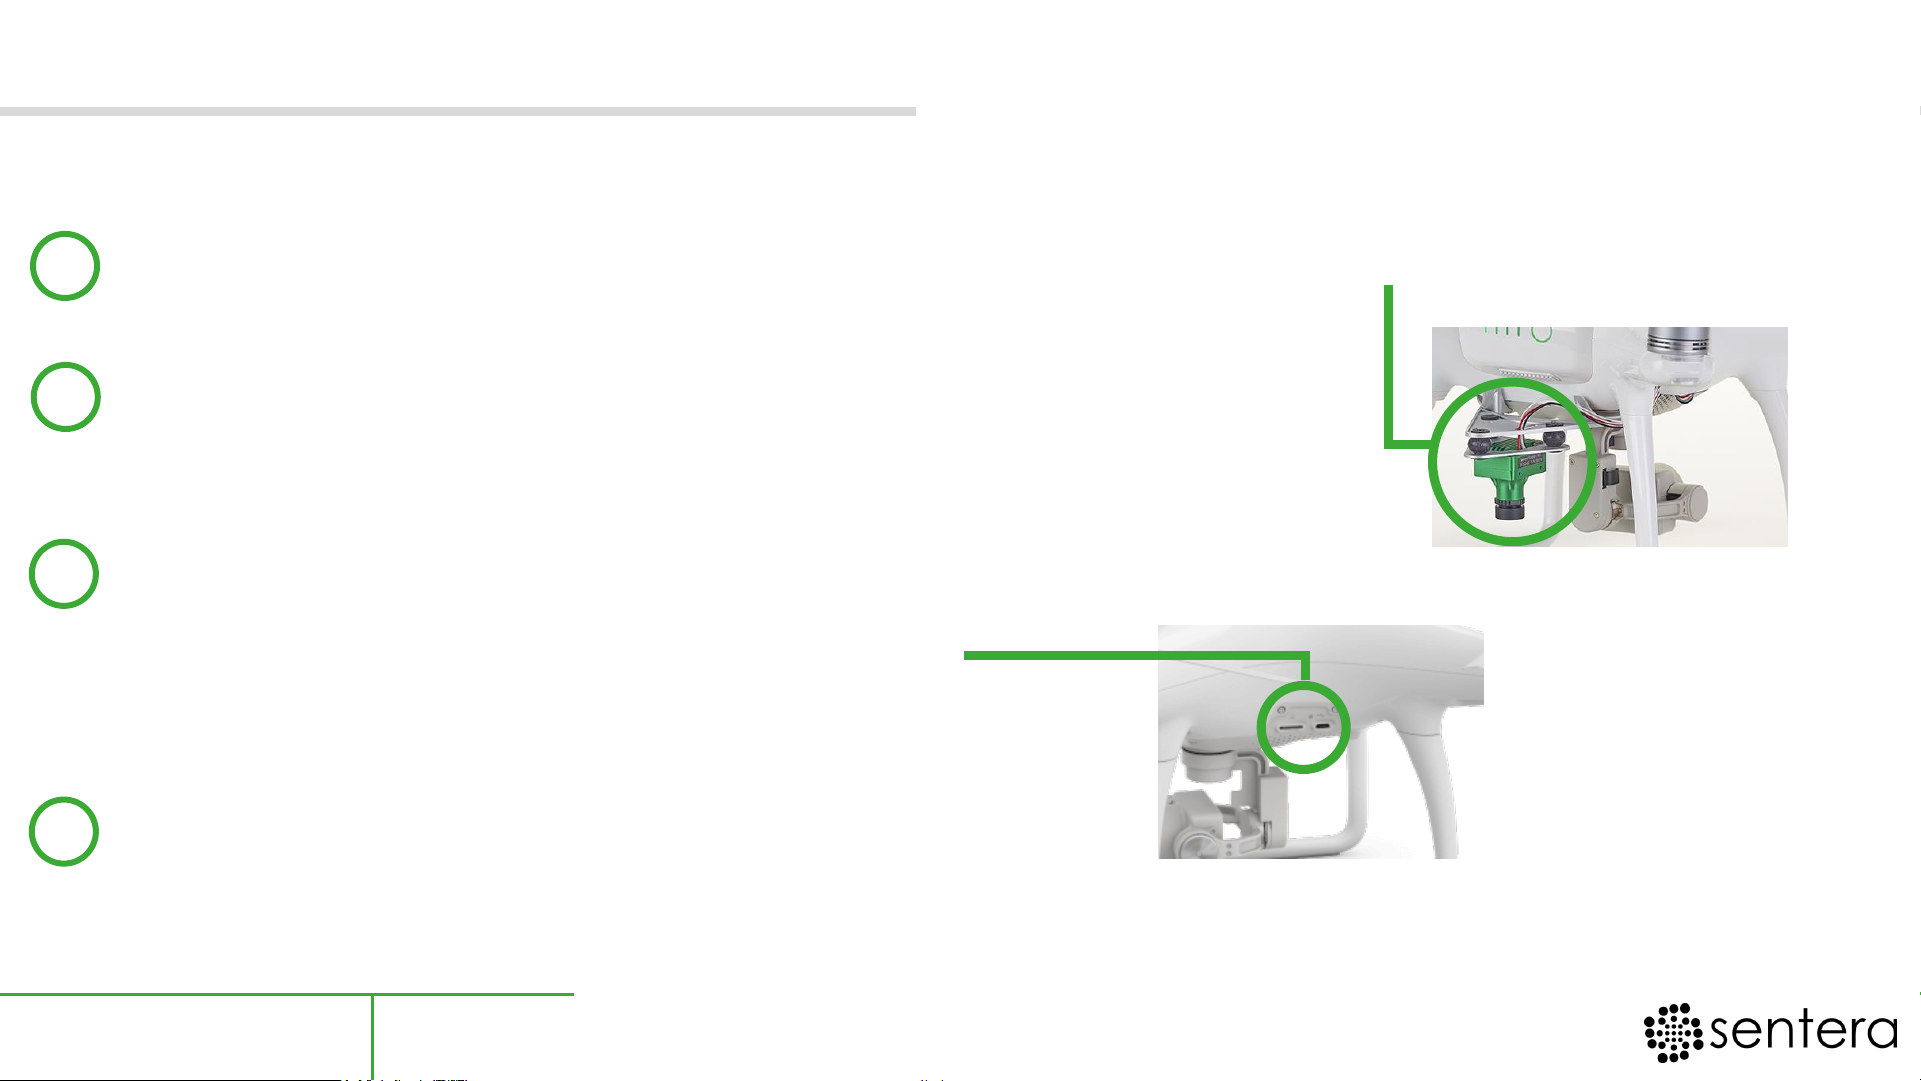
To check for images before leaving the field, remove the SD card from the green Sentera Single
and insert it into your computer.
Navigate to the folder containing the SD card and select snapshots >
appropriate date and time labeled folder.
Confirm photos are present from this flight.
There are 2 cameras on this vehicle, and therefore 2 SD cards.
Remove the SD card from the side of the Phantom.
This is the DJI RGB camera’s SD Card.
Again, confirm presence of photos
Head back, as you’re ready to process your first dataset!
Section 4 Pg. 13
Checking for Images
3
2
4
1
In the future you’ll be able to process data at the field’s edge. For today, we’ll take it one step at a time.
Page 17
• When you get back on Wi-Fi, download
FieldAgent for desktop by visiting:
FieldAgent Install Page
installs.sentera.com/fieldagent
• Follow the download process to install.
• Launch FieldAgent and login.
S e c t i o n 5 L o o k i n g a t y o u r F i r s t D a t a s e t
& F i e l d A g e n t D e s k t o p
Section 5 Pg. 14
Page 18
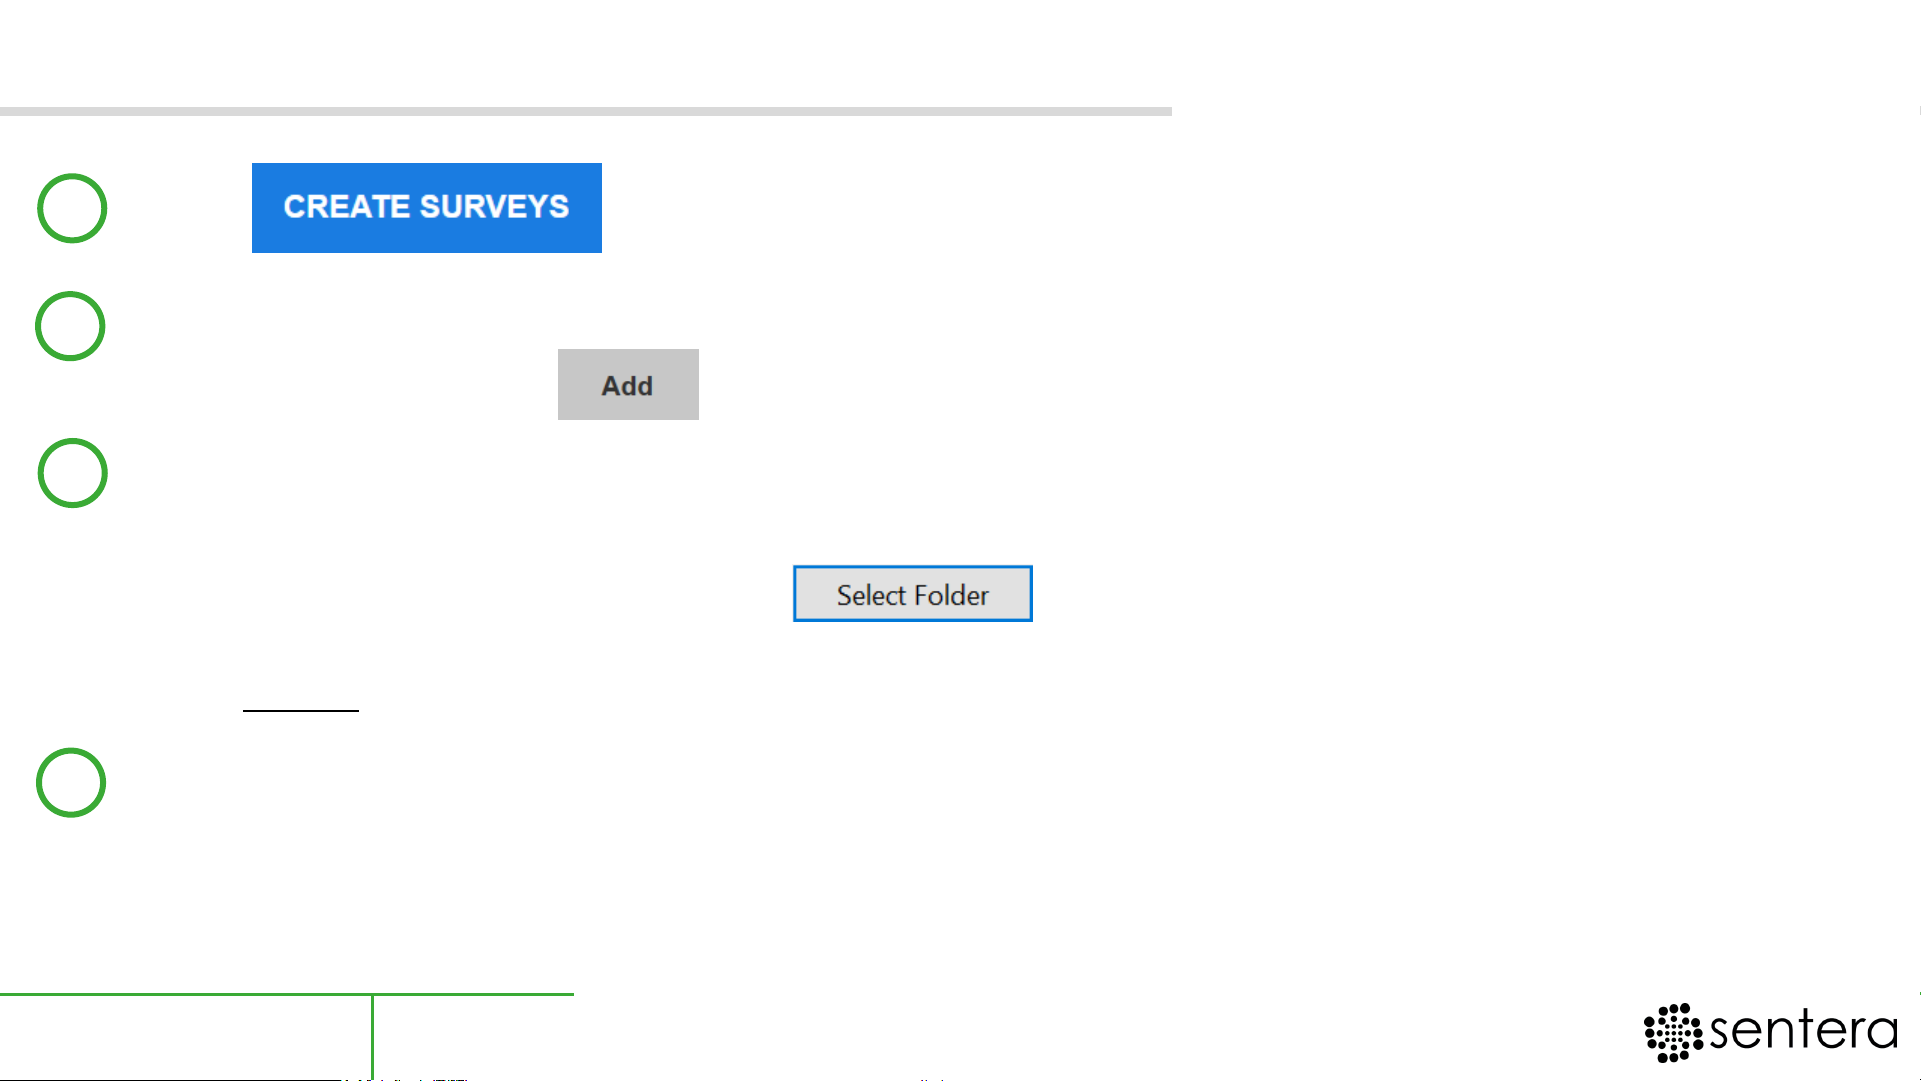
Click in the upper right to get started.
A window will open. Insert the SD card from the green Sentera Single into your
computer and click .
Navigate to the SD card folder labeled, “snapshots” and
select the folder containing the images from
your mission. To confirm, click .
Note: The individual pictures will not show up when choosing a folder.
Repeat
steps 2 & 3 with the 2
nd
SD Card from the side of the drone to include
your color (RGB) images.
Selecting Images for Import
Section 5 Pg. 15
3
2
4
1
Page 19
Click to populate photo dots on your field.
Note: Clicking dots will remove associated images from import.
Click again, and then to name your field.
Fill out the field name, click next for a final time to start processing your images.
Finally, in the summary screen, click on the map pin icon ( ) to go to your field.
Navigating the Import Process
Section 5 Pg. 16
7
6
8
5
Page 20
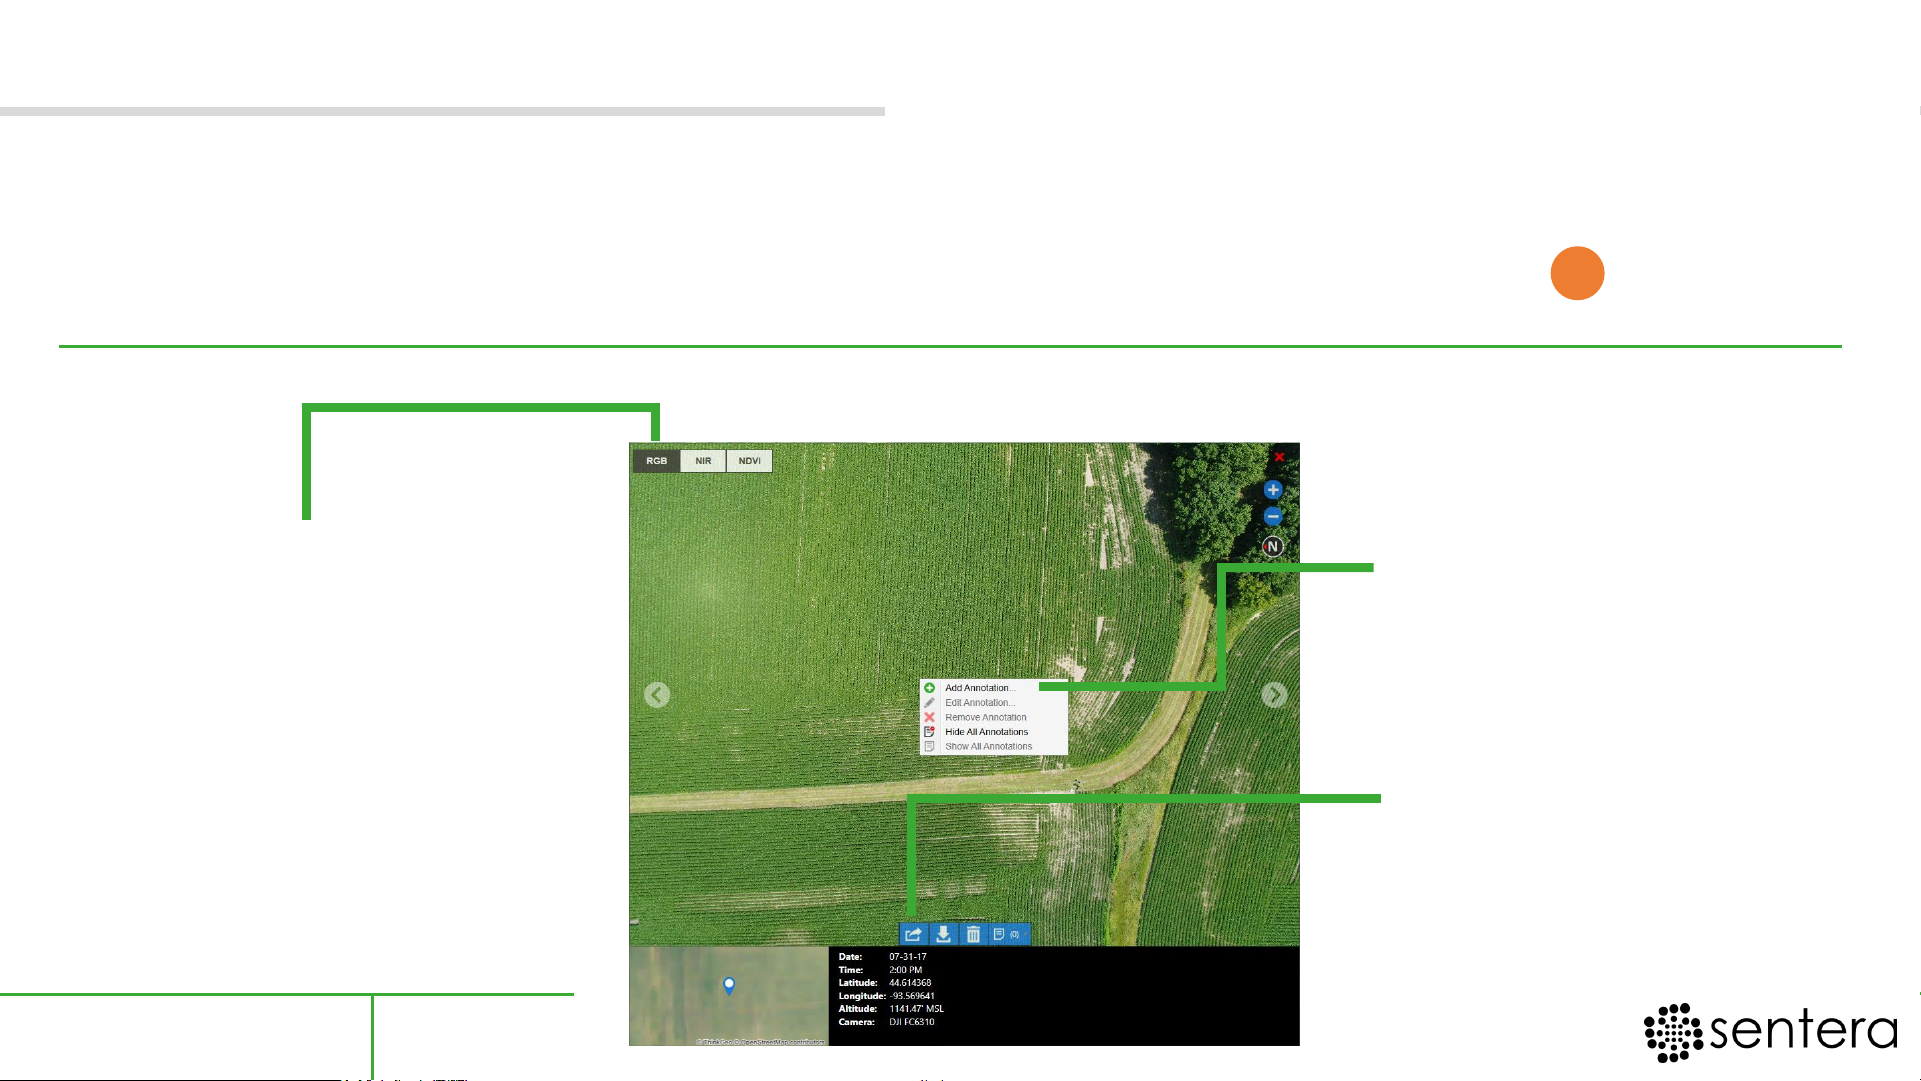
To view full resolution images from a specific location in the field, click
a colored dot on the field. These are called “Photo Dots” ( )
Switch between
photo types from
the same location
on the field
Right click to add
an annotation to
the image
Share the image
and annotations
via email
Making Annotations
Section 5 Pg. 17
Page 21
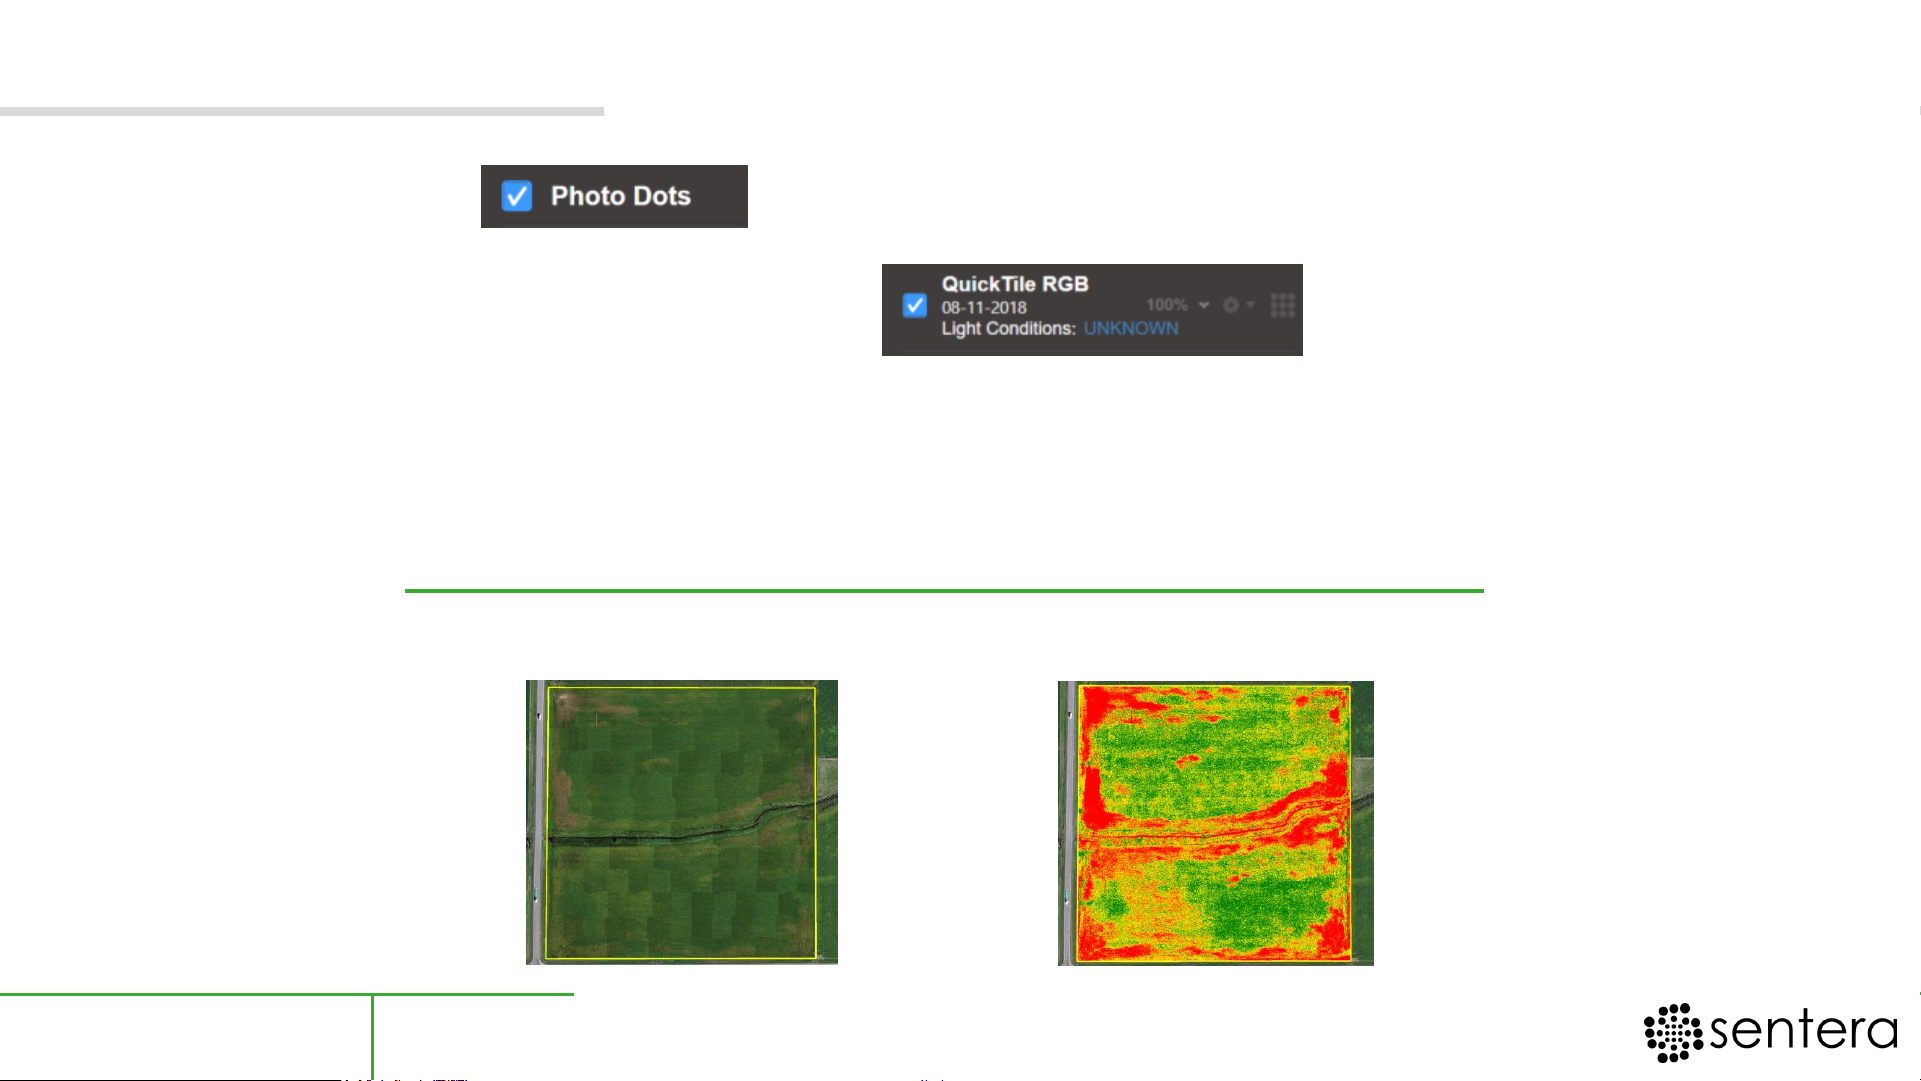
De-select . from the “Image Layers” section on the left
Select .
You’ll notice a map created from your data populate on the screen.
You can also select QuickTile™ NDVI to populate a health map on your screen.
RGB
NDVI
vs.
Viewing Maps
Section 5 Pg. 18
Page 22
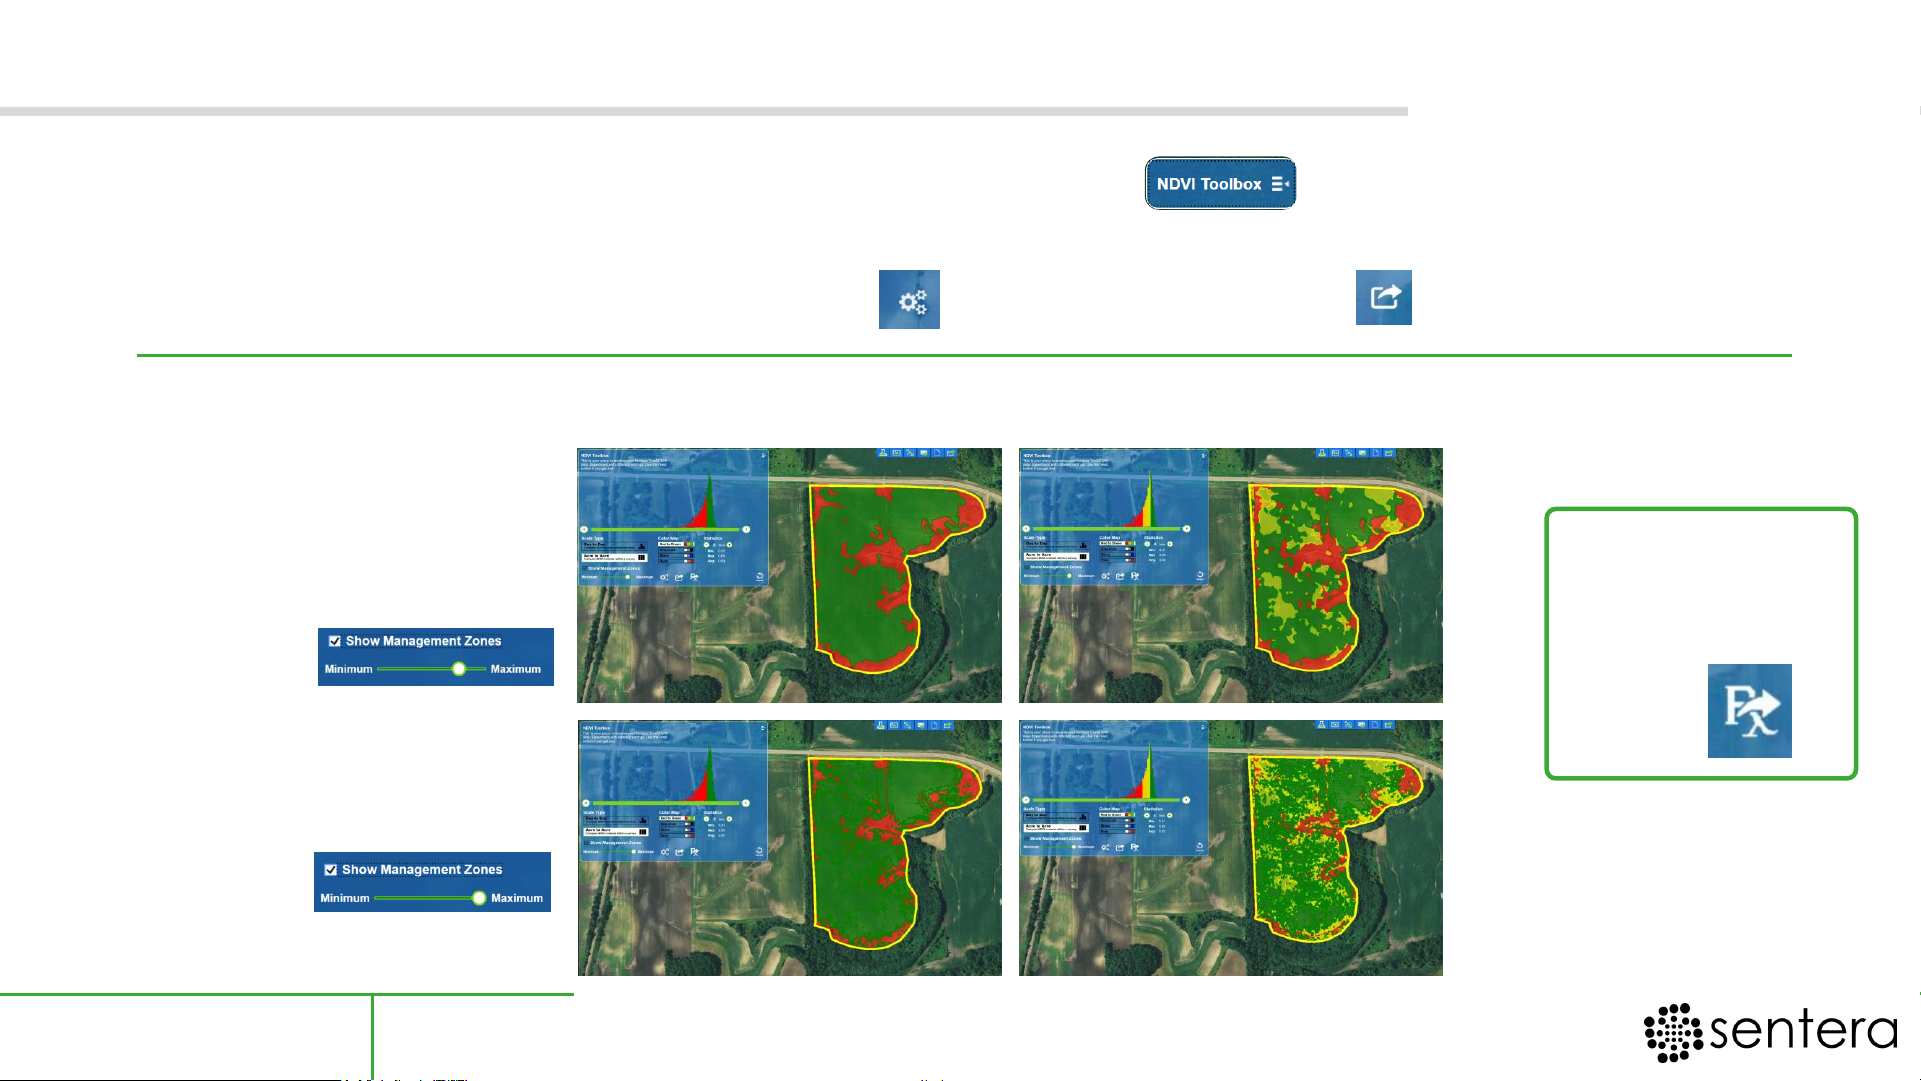
To further analyze the health of your field, select . in the top left of the map.
Use the sliders and bin count to inspect your field. If management zones are
desired , select . . To export, select .
Less
Resolution
More
Resolution
2 Bins (Colors) 4 Bins (Colors)
Need to write a
prescription?
Click .
Adjusting Your NDVI Heath Maps
Section 5 Pg. 19
Page 23
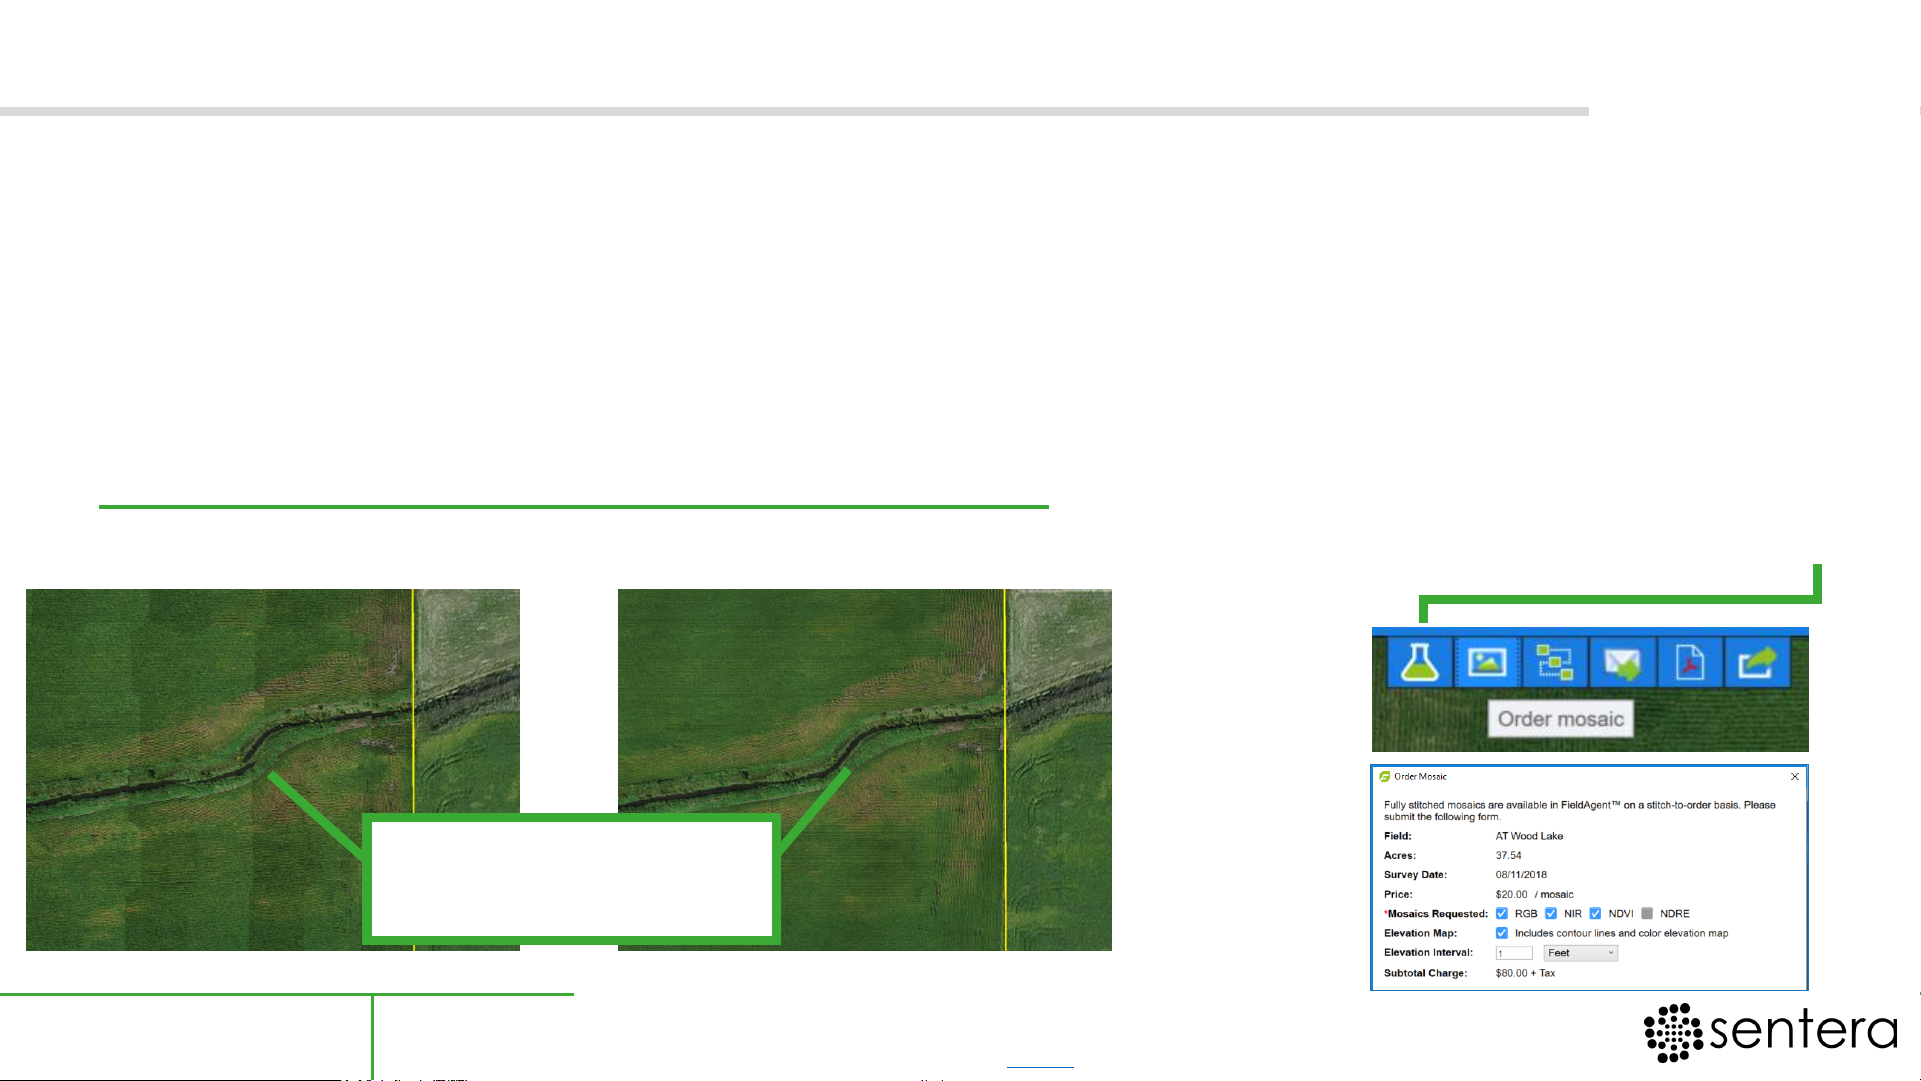
A QuickTile places all individual images from a survey onto a map to create a snapshot of
your field. These are created locally on your machine and can be produced within
minutes at the field’s edge.
A Mosaic stitches all the pictures from a survey together into a single .tiff file. A mosaic is
more precise than a QuickTile and useful in combination with variable rate technology.
QuickTile
Mosaic
vs.
Notice the difference
in the irrigation ditch
More Precise Data (Ordering Mosaics)
Section 5 Pg. 20
*Sentera offers a free stitching software for compatible
computers. Click here to see if your computer qualifies.
To order mosaics of your
survey, click here*
Page 24
S e c t i o n 6 F i n e T u n i n g P a r a m e t e r s t o
W o r k F o r Y o u
Section 6 Pg. 21
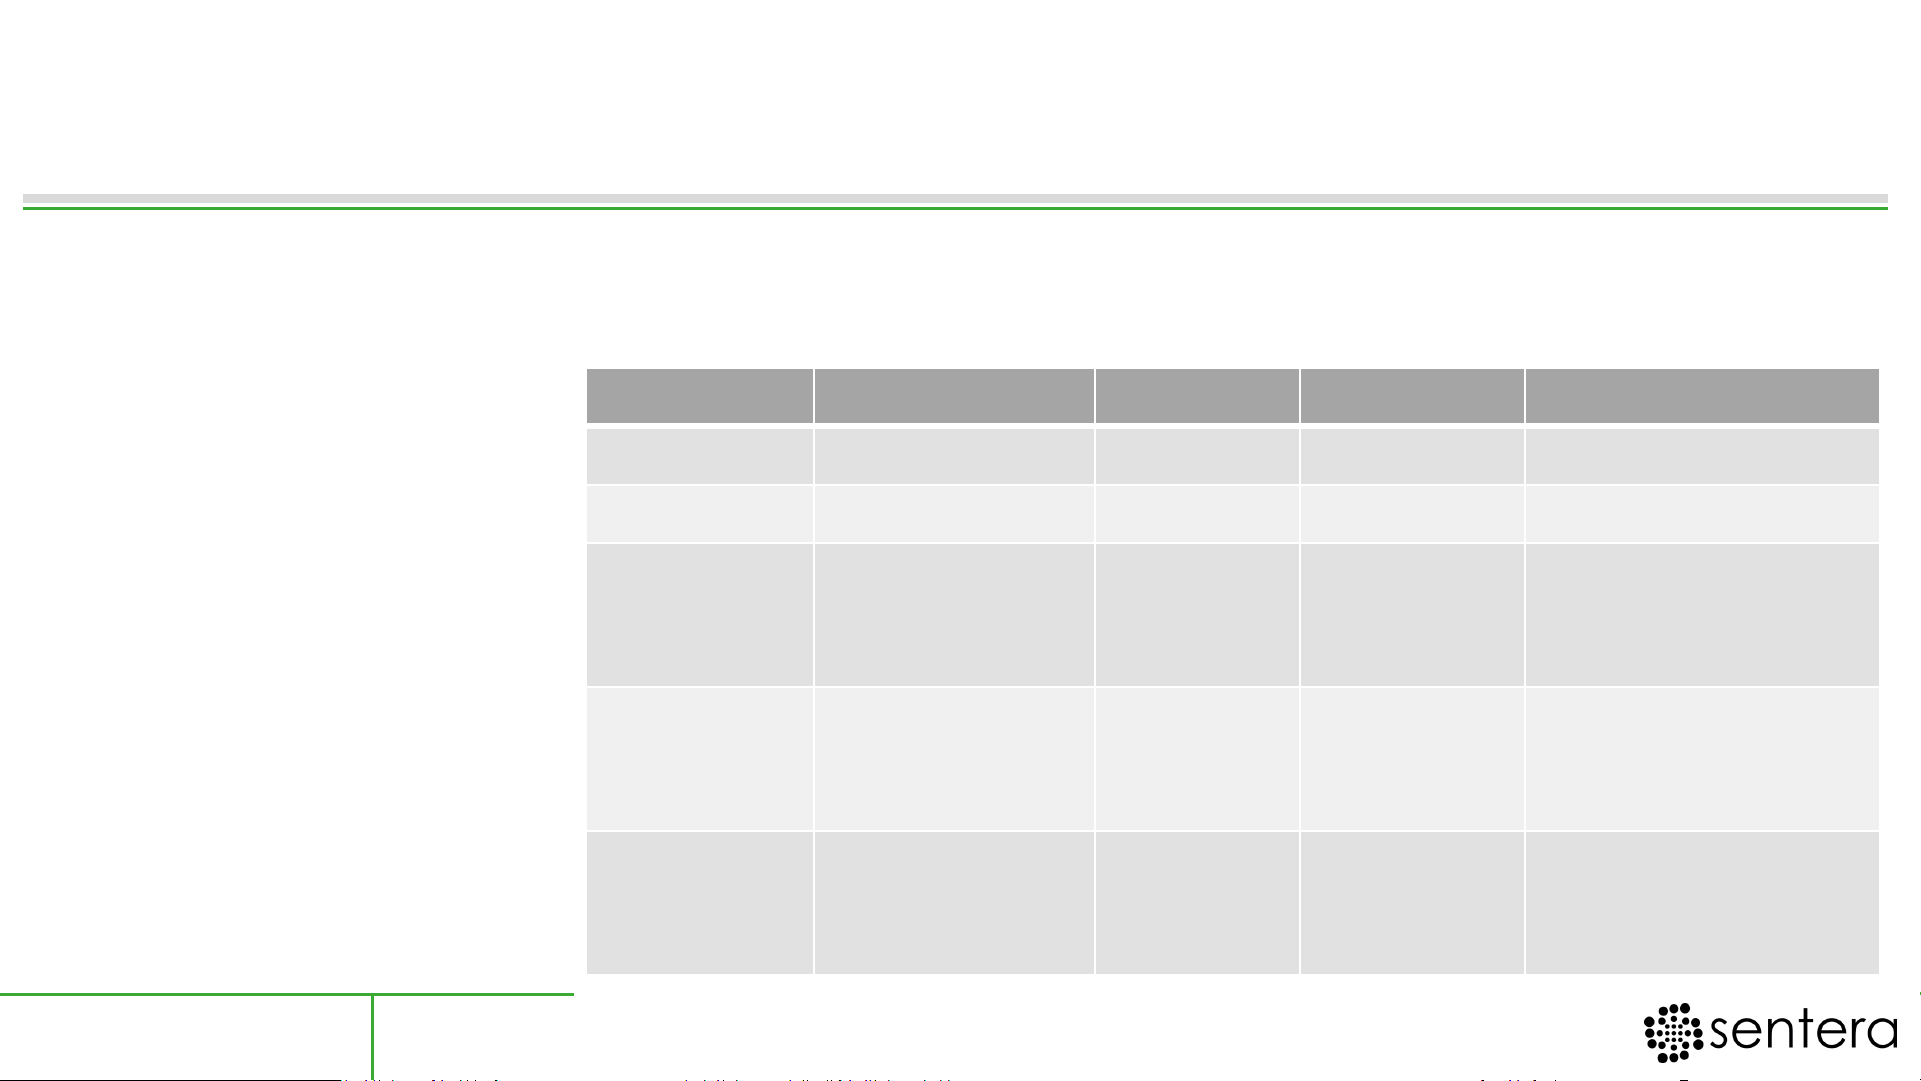
In section 3 a flight designed for ordering mosaics was completed. But what if you
don’t need the precision of a mosaic and can get away with a QuickTile (reduced
flight time)?
Flight Type
Overlap Setting
Altitude (ft)
Speed (mph)
Other Notes
QuickTile
QuickTile
200
-400ft.
15mph
Mosaic
DSM/Ortho
200
-400ft.
15mph
3D Mapping
DSM/Ortho
400ft.
15mph
Fly Field Twice:
1
st
: North/South 2nd:
East/West
Stand Count
Spot
50ft.*
20mph
V2 or a leaf length of
at least 2in.(5cm)
from tip to tip.
Weed
Density Maps
Weed
150ft.
20mph
V2 or a leaf length of
at least 2in.(5cm)
from tip to tip.
This table indicates the
best flight parameters
for different flight types.
Use this in conjunction
with the considerations
on the following page
to set parameters that
work for you.
*Take note of surroundings and adjust accordingly to avoid
collisions
Page 25
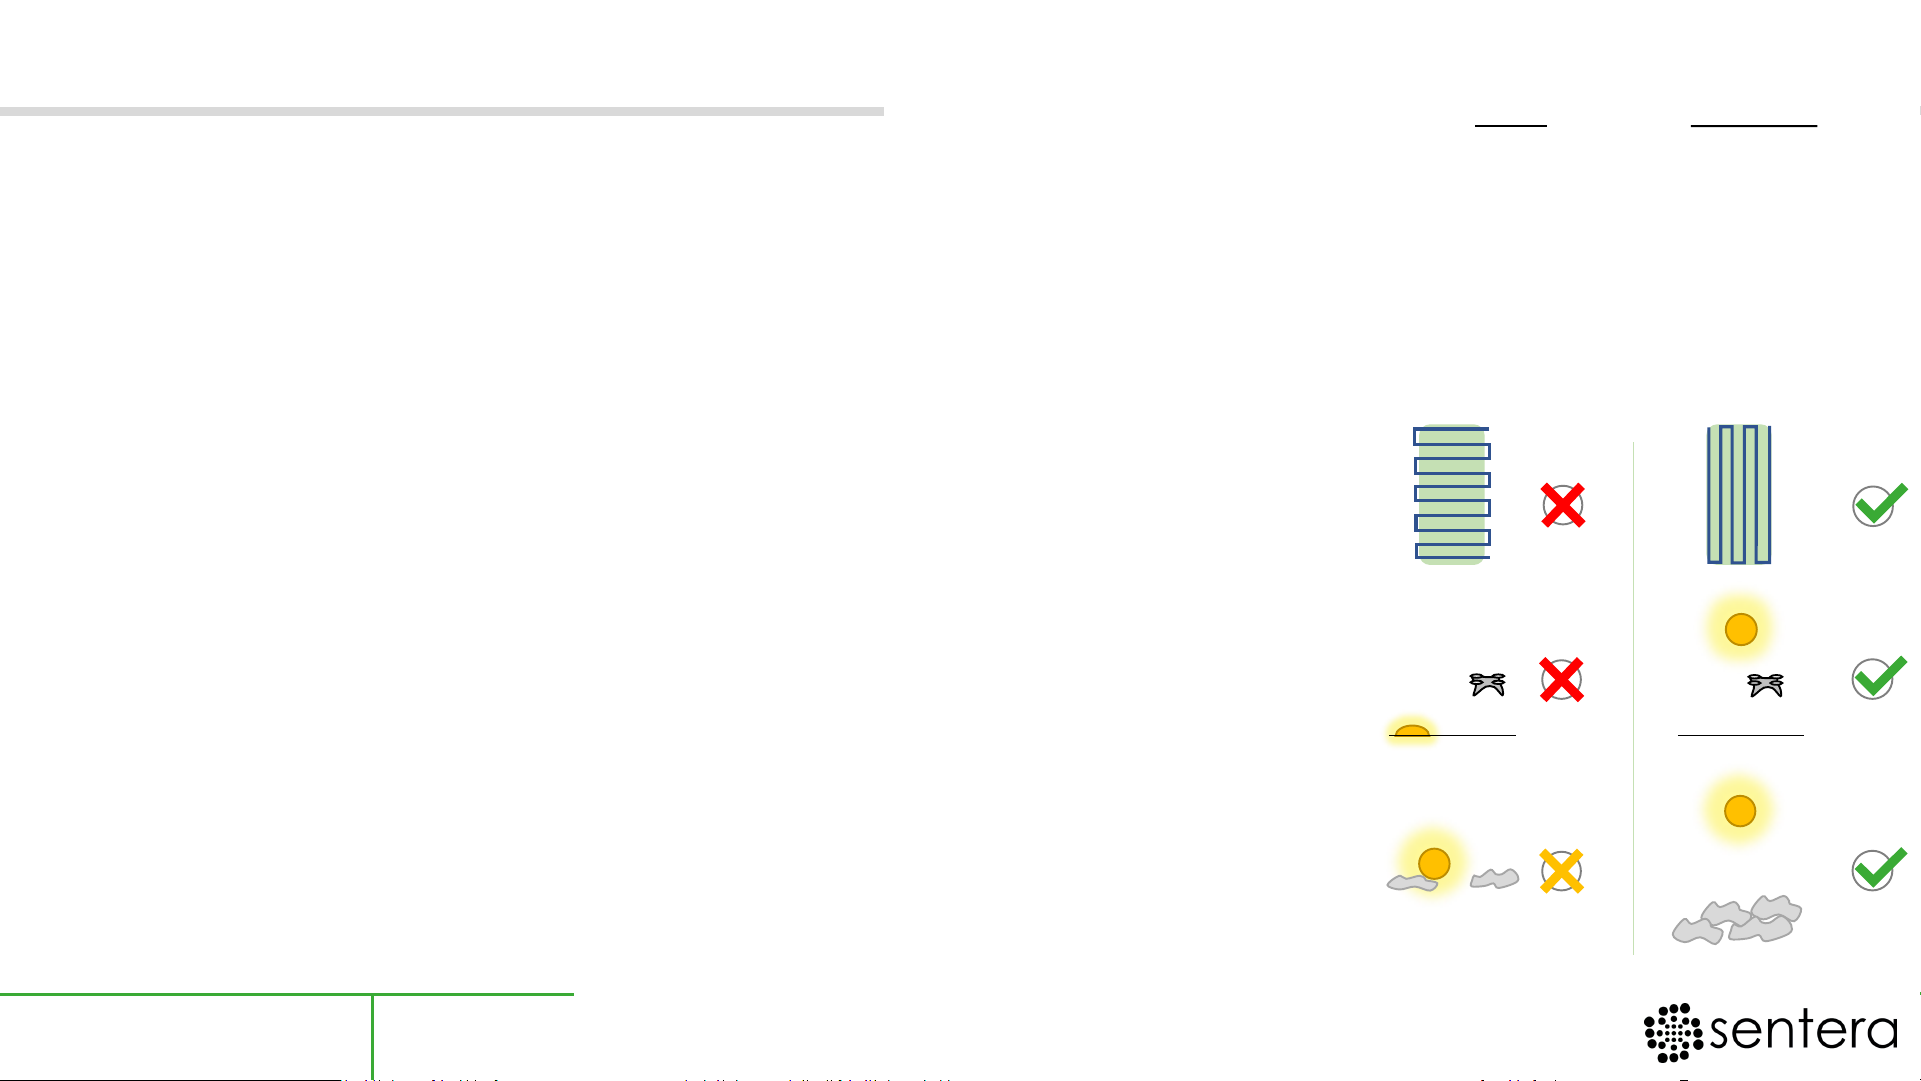
Flight Considerations
Desired Resolution: The NDVI camera’s Ground Sample Distance
(GSD)/pixel is shown right. Alter flight altitude accordingly.
Wind Speed: If the wind is near the upper limit of your vehicle’s operating
limit (22mph for the Phantom), set a lower flight speed (~10mph).
Flight Direction: Every field is a different shape. Try to orient your flight
for minimal passes. This will increase data quality and reduce flight time.
Time of Day: Always try to fly when the sun is highest in the sky. Flying
close to dawn or dusk will have a negative impact on the data collected.
Cloud Cover: Data is most true when the sky is consistent (100% sunny
OR 100% cloudy). Flying with a mix of sun and clouds may provide varying
results, but shouldn’t stop you from flying.
GSD Altitude
2.1 in. | 200 ft
3.3 in. | 300 ft
4.3 in. | 400 ft
OR
Section 6 Pg. 22
Page 26

Visit us: sentera.com/support
Email us: [email protected]
Call us: +1 (844) SENTERA (844.736.8372) | Direct Dial: +1 612.204.2000
Questions?
Copyright ©2019 Sentera, Inc.
All Rights Reserved
 Loading...