


HRM-TDC
USER MANUAL
High Resolution Time-to-Digital Converter Module
Document Overview
This document provides the user with a comprehensive
description of the hardware and software of the HRMTDC module, including system description, the various
timing modes, software GUI and DLL drivers. The
document is split up into the following sections:
GETTING STARTED
This section provides instructions for unpacking the HRM-TDC and a brief overview.
SYSTEM DESCRIPTION
This section gives a description of the system hardware, the various ports and communication channels, the internal
processor, and the specic timing features.
SENSL INTEGRATED ENVIRONMENT (SIE)
The SIE is a user interface for setting up and controlling the HRM-TDC module. While the interface provides an
extensive range of operating modes and measurement processes, including graphical presentation, it does not fully
cover all features available in the HRM-TDC module. This section of the User Manual includes instructions for the
installation of the necessary software, and detailed description of each part of the SIE and how to set up and use it.
APPENDIX
The HRM-TDC DLL provides a set of functions that will allow full control of the HRM-TDC for all features. For
complex experiments that require control beyond the scope of the SIE, it is expected that the user will write their own
real-time application utilizing the various functions in this DLL. The Appendix of the User Manual covers Registers,
low level DLL functions, high level DLL functions, DLL error reporting and examples, as well as help and examples
for resolving time-tag values,an explanation of the correlation function used and the Labview drivers provided.
SensL © 2011
1

HRM-TDC
USER MANUAL
> Contents > Getting Started
Contents
Document Overview .................................................................................................................................. 1
Glossary ..................................................................................................................................................... 5
Getting Started .......................................................................................................................................... 6
Contact & Support ................................................................................................................................. 6
Unpacking the System and Preparing for Use ........................................................................................ 6
Safety Considerations ............................................................................................................................ 6
System Installation Procedures .............................................................................................................. 6
Signal Inputs and Outputs ..................................................................................................................... 8
I/O Port Connector Pin Allocation .......................................................................................................... 8
HRM-TDC System Description ................................................................................................................. 9
Block Diagram ....................................................................................................................................... 9
Memory ........................................................................................................................................ 9
Time-to-Digital Converter Module ................................................................................................. 9
High Speed USB 2.0 Interface ...................................................................................................... 9
16-Bit General Purpose I/O Port ................................................................................................... 10
System Processor and Controller .................................................................................................. 10
System Processor and Controller Detailed Description ........................................................................... 10
Command Interpreter.................................................................................................................... 10
DMA to USB Fast Transfer Interface .............................................................................................. 11
Time-Bin and Time-Tag Controller ................................................................................................. 11
Data Router Module ...................................................................................................................... 11
Address Router Module ................................................................................................................ 11
Dual Port Memory Arbiter ............................................................................................................. 11
HRM-TDC Specic Feature Overview .................................................................................................... 12
HISTOGRAM ................................................................................................................................ 13
FIFO ............................................................................................................................................. 13
Histogram – Single-stop (“TCSPC” MODE) ............................................................................................ 14
Histogram – Multi-stop (“Multiscaler/Counter”) ....................................................................................... 15
SensL © 2011
SensL © 2011
2
2

HRM-TDC
USER MANUAL
> Contents > Getting Started
FIFO – Single-stop (“TCSPC - with Macro-Time”) ................................................................................... 16
FIFO – Multi-stop (“FIFO - Time Tagging”) .............................................................................................. 17
SensL Integrated Environment (SIE) ........................................................................................................ 18
System Requirements ............................................................................................................................ 18
Installation ............................................................................................................................................. 18
Using the SensL Integrated Environment (SIE) ....................................................................................... 19
Main Page .................................................................................................................................... 19
Module Information ....................................................................................................................... 19
“HISTOGRAM –TCSPC” (Histogram Single-stop) .......................................................................... 20
“HISTOGRAM – Multi-scaler” (Histogram Multi-stop) .................................................................... 22
“FIFO – TCSPC with MACRO time” (FIFO Single-stop) .................................................................. 23
“FIFO – Time Tagging” (FIFO – Multi-stop) ..................................................................................... 26
Correlation .................................................................................................................................... 30
Appendix ................................................................................................................................................... 32
HRM-TDC Registers and Low Level DLL Functions ............................................................................... 32
Initialization Low Level Drivers ....................................................................................................... 32
ARR – Address Route Register ..................................................................................................... 33
DRR – Data Route Register ........................................................................................................... 35
LAL, LAH – Load Address LO/HI Register ..................................................................................... 36
LFL, LFH – Load Fill Value LO/HI Register ..................................................................................... 37
UAL, UAH – Load Address LO/HI Register ................................................................................... 37
MBR – Mode Bits Register ............................................................................................................ 38
ESR – Edge Sensitivity Register .................................................................................................... 39
RRR – Routing Reset Register ....................................................................................................... 40
MCL, MCH – Memory Count LO/HI Register ................................................................................ 40
FSR – Frequency Select Register .................................................................................................. 41
IDR – I/O Direction Register .......................................................................................................... 41
IVR – I/O Value Register ................................................................................................................ 41
BCL, BCH – Bin Count LO/HI Register ......................................................................................... 42
UCL, UCH – USB Count HI/LO Register ....................................................................................... 42
SensL © 2011
SensL © 2011
3
3

HRM-TDC
USER MANUAL
> Contents > Getting Started
HRS, HRM-TDC Status Register ................................................................................................... 43
PCR – Product Code Register ...................................................................................................... 44
SRR – Software Revision Register ................................................................................................. 44
MIR – Module ID 1, 2, 3, 4 Register .............................................................................................. 44
WCH – Write Count HI Register .................................................................................................... 45
WCL – Write Count LO Register .................................................................................................... 45
Non-Register Specic Low Level Drivers ....................................................................................... 46
High Level DLL Functions ...................................................................................................................... 48
DLL Error Reporting ............................................................................................................................... 56
DLL Application Examples ..................................................................................................................... 57
Resolving Free Running FIFO Time-Tag Values ...................................................................................... 66
Free Running Algorithm Explained ................................................................................................. 66
Resync Algorithm Explained .......................................................................................................... 68
Correlation Function Algorithm ............................................................................................................... 70
Labview Driver details ............................................................................................................................ 71
HRM-TDC LabView Driver VI List .................................................................................................. 71
Sample LabView Application ......................................................................................................... 84
SensL © 2011
SensL © 2011
4
4

HRM-TDC
USER MANUAL
> Glossary > Getting Started
Glossary
Here are words and phrases used in this user manual in relation to the HRM-TDC module.
SIE - SensL Integrated Environment - the GUI that runs on the SensL DLL and provides an example
program allowing the user to make measurements with the HRM-TDC.
LSB - Least Signicant Bit: The right most bit in a binary integer, and in the case of the HRM-TDC
it determines the minimum timing resolution possible.
Histogram - The use of consecutive memory locations to store counts that represent points on a graph.
Each memory location represents a time range that can be specied via software, down to
the LSB value of the HRM-TDC (27ps).
FIFO - First In, First Out: in the HRM-TDC, timing data can be stored in memory before being
downloaded to the PC. FIFO is analogous to putting the data into a queue in memory,
whereby the rst loaded in, will also be the rst downloaded to the PC.
TCSPC - Time Correlated Single Photon Counting: A technique used to study properties of molecules
by exciting with a laser source and measuring the subsequent relaxation time through the
acquisition of lifetime curves.
Time bin - The time interval covered by one memory location in one of the HRM-TDC’s Histogram
modes.
Time Tag - The timing value recorded between a START of a STOP signal, in one of the HRM-TDC’s
FIFO modes.
Curve - The data resulting from one of the HRM-TDCs histogramming modes.
Micro time - The timing value between a START signal and any given STOP signal in FIFO single-stop
(TCSPC) mode. In the FIFO multi-stop (time-tagging) mode, it refers to the value of the highresolution TDC when the event occured.
Macro time - The time elapsed since the experiment began in FIFO single-stop (TCSPC) mode. In FIFO
multi-stop (time-tagging) mode, it refers to the the coarse timer that, used in conjunction with
the micro-time, allows the user to determine the absolute time of the event.
SensL © 2011
SensL © 2011
5
5

HRM-TDC
USER MANUAL
> Getting Started > Contact & Support
Getting Started
CONTACT & SUPPORT
For all enquiries, please email: support@sensl.com
Supporting documentation can be found on the SensL website at www.sensl.com/documentation/
Downloadable copies of the SensL HRM-TDC software and release note can be found at
www.sensl.com/support/sw/
UNPACKING THE SYSTEM AND PREPARING FOR USE
Unpack the contents and identify each of the components.
• HRM-TDC Module
• Power Supply, with country specic connector
• USB cable
SAFETY CONSIDERATIONS
1. Only use the power supply supplied with the HRM-TDC module.
2. The power supply should be disconnected from the mains supply when the module is not in use.
3. The module is not intended for outdoor use
4. The power supply should not be opened nor should the module covers be removed at any time as there
are no user adjustable components or settings, except via the SensL Integrated Environment Software.
5. Liquids should not be spilled on or into the module.
SYSTEM INSTALLATION PROCEDURES
For software driver and SensL Integrated Environment installation instructions see the SIE User Guide on page 18
of this document.
Please follow the instructions carefully and ensure you have installed the QuickUSB drivers as instructed.
SensL © 2011
SensL © 2011
6
6

HRM-TDC
USER MANUAL
> Getting Started > System Installation Procedures
SYSTEM CHARACTERISTICS AND SPECIFICATIONS
Dimensions 164mm (L) x 96mm (W) x 34 mm (H)
Weight 680g
Power +5V @ 0.65 A
Temperature Operating: 0°C to +50°C
Storage: -20°C to +70°C
Specications
Number of channels per module 4
Time channels per curve 1 to 4,194,304
Number of curves in memory 1 to 4,194,304
Input voltage range LVTTL (5V TTL tolerant)
START/STOP channels input impedance 51kW
Minimum input pulse width 6ns
Minimum Time/Channel 27ps
Histogram/channel depth 65,535 or 4,294,967,295 bits (16 or 32 bits)
Dead time 190ns
Saturated count rate 4.5MHz
Usable count rate 9MHz *
Burst rate timing Up to 100MHz (Mode dependent)
Macro Timing resolution Down to 5ns
Memory size 8Mbytes
Memory format Dual ported linear or dual ported FIFO (mode
dependent)
Readout during operation Fully dual-ported memory (no stop start operation
required)
Multi detector operation Up to 4
Multi module operation Number depends on USB capability of PC
I/O control 16 fully programmable I/O ports
Software SensL Integrated Environment (SIE) and DLL
drivers
PC Interface High speed USB 2.0
* Useful count rate is maximum count rate without loss of greater than 50%
SensL © 2011
SensL © 2011
7
7

HRM-TDC
USER MANUAL
> Getting Started > Signal Inputs And Outputs
SIGNAL INPUTS AND OUTPUTS
L K
ABCD
JIEFGH
Figure 1 HRM-TDC ports and connectors labelled
A Channel 0 Start Input (SMA LVTTL*) B Channel 0 Stop Input (SMA LVTTL*)
C Channel 1 Start Input (SMA LVTTL*) D Channel 1 Stop Input (SMA LVTTL*)
E Channel 2 Start Input (SMA LVTTL*) F Channel 2 Stop Input (SMA LVTTL*)
G Channel 3 Start Input (SMA LVTTL*) H Channel 3 Stop Input (SMA LVTTL*)
I USB connector J LEMO power supply connector (for SensL PSU use only)
K 26-way I/O port connector L Programmable Clock output (SMA LVTTL 50W)
* 5V TTL tolerant
I/O PORT CONNECTOR PIN ALLOCATION
Pins 1 to 16: I/O ports 0 to 15 respectively
Pin 17: Test clock signal ENABLE (LO to disable test clocks)
Pin 18 to 22: Test clock signals (outputs)
Pin 23, 24: +5v
Pin 25, 26: Ground
SensL © 2011
SensL © 2011
8
8

HRM-TDC
Data
Control
Start 0
Stop 0
High Speed 2.0
USB Interface
Time to Digital
Converter Module
Time to Digital
Converter Module
Time to Digital
Converter Module
Time to Digital
Converter Module
Memory
(8 MB)
16-bit General
Purpose
I/O Port LVTTL
System Processor
and
Controller (FPGA)
Start 1
Stop 1
Start 2
Stop 2
Start 3
Stop 3
USER MANUAL
> Hrm-tdc System Description > Block Diagram
HRM-TDC System Description
BLOCK DIAGRAM
The HRM-TDC system consists of 4 ‘time-to-digital’ modules (each having a START and a STOP input), 16 I/O
ports, a high speed USB interface, memory storage and an FPGA based processor, as depicted in Fig. 2. The
purpose of each element is as follows:
Memory
The memory module is an HRM-TDC format plug-in mezzanine board providing 8 Mbytes of memory.
Time-to-Digital Converter Module
This module is the front end of the system and is responsible for resolving the timing between the START and STOP
inputs of each of up to four channels. Each channel is controlled by the FPGA and can be programmed to start and
stop on either LO-HI or HI-LO transitions.
Figure 2 An overview of the HRM-TDC operation
High Speed USB 2.0 Interface
The USB interface is used to command/congure the HRM-TDC as well as download, in real-time, timing data to the
host computer. This USB interface implements high speed USB 2.0 protocol allowing real time continuous logging
of timing data up to rates of 4.5MHz without data loss.
SensL © 2011
SensL © 2011
9
9

HRM-TDC
USER MANUAL
> Hrm-tdc System Description > System Processor And Controller Detailed Description
16-Bit General Purpose I/O Port
This general purpose I/O port is used to allow multi-dimensional curve readings. The position of curve data, within
the system memory, can be dened by these ports. These ports can be set directly by outside control lines (inputs)
or by software to drive outside equipment (outputs).
System Processor and Controller
The ‘System Processor/Controller’ is responsible for implementing all the functionality of the HRM-TDC module.
This module decodes commands from the USB and executes the timing function accordingly. All results are saved
in memory as either time-bins for curve measurements or time-tags for continuous recording. In this latter mode
the memory is congured as a large FIFO to allow continuous downloading of time-tag data up to rates of 4.5MHz.
SYSTEM PROCESSOR AND CONTROLLER DETAILED DESCRIPTION
Figure 3 Overview of the system processor and controller
Command Interpreter
This module is responsible for receiving a set of commands from the host computer and controlling the system
accordingly. HRM-TDC is a fully programmable system with a wide range of parameters that can be user dened.
The Command Interpreter is responsible for setting these parameters and starting the execution of a particular task.
SensL © 2011
SensL © 2011
10
10

HRM-TDC
USER MANUAL
> Hrm-tdc System Description > System Processor And Controller Detailed Description
DMA to USB Fast Transfer Interface
The system memory is dual ported between the USB and the Time-Bin/Time-Tag controller. This module controls
the reading of data from memory to the USB interface by means of high speed DMA block transfers. The Command
Interpreter initializes this module with a start address and block data count. When commanded to start, this module
interfaces with the Dual Port Memory Arbiter to read the pre-programmed data block. The rate of this process is
such that data can be transferred from the memory to the USB port as fast as required. This allows the USB 2.0 high
speed interface to operate at full speed without loss of data.
Time-Bin and Time-Tag Controller
This module is responsible for carrying out the particular Time-Tag or Time-Bin process as dened by the Command
Interpreter. This module communicates with the Timing Modules and saves the results of the measurements in the
dual ported memory. The format of these results is determined by the mode of operation. In time-bin mode, this
module will use the time information from the Timing Modules to determine the particular bin to be incremented. In
time-tag mode this module will treat the memory as a large FIFO, saving time-tag data in consecutive locations. The
format of the time-tag data is determined by the Data Router Module.
Data Router Module
The Data Router Module is a complex programmable multiplexer that allows any of a wide range of inputs to be
routed to any of the 32 memory data bits. In time-bin mode this module is bypassed to allow the Time-Bin and
Time-Tag Controller to directly access the memory for the purpose of incrementing time-bins. In Time-Tag mode this
module determines the format of the time-tag data. The Command Interpreter presets the routing of this module
to dene which bits of the time-tag are Time-Tag data (both Micro and Macro) from the Time-Bin and Time-Tag
Controller and I/O data from external equipments.
Address Router Module
The Address Router Module is a complex programmable multiplexer that allows any of a wide range of inputs, plus
an internal address counter, to be routed to any of the memory address lines. In time-tag mode this module will
normally be programmed to present the internal address counter bits as the memory address. The internal address
counter automatically increments after each memory write, creating a FIFO type interface. In time-bin mode the
Command Interpreter presets the routing of this module to a mix of the address counter, time-tag data and I/O data.
Routing the time-tag data to the address will create a range of consecutive bins separated by the time resolution of
the LSB. The address counter bits can be used to dene the base address of a particular curve whilst the I/O data
can be used by external equipments to move the curve for multi-dimensional measurements.
Dual Port Memory Arbiter
This module controls the data transfers to/from system memory to the USB and Time-Bin/Time-Tag Controller. Each
port presents an address, direction (R/W) and request signal. This module detects the particular request, carries out
the memory access and directs the data to/from the requesting port at the requested address.
SensL © 2011
SensL © 2011
11
11

HRM-TDC
USER MANUAL
> Hrm-tdc System Description > Hrm-tdc Specic Feature Overview
HRM-TDC TYPICAL APPLICATION
Figure 4 Example application using the HRM-TDC
Note: Figure 4 shows a typical application setup utilizing a wide range of the HRM-TDC features. In this example the
experiment is a TCSPC application where a LASER is stimulated by a clock and the time before a photon is detected
is measured. The LASER is continually pulsed at a xed frequency (typically 50MHz). The LASER output will affect a
setup resulting in a photon arriving at the APD Detector such as the SensL PCDMiniSL. It is assumed that the rate
of photons arriving at the APD is far less than the rate of the LASER pulses. As a photon is not guaranteed for each
cycle of the LASER, the system will use the photon event as the start of the TCSPC process and a delayed version
of the LASER pulse as the stop signal. This technique avoids countless dead cycles and simplies the associated
electronics required for recording the events.
The HRM-TDC module measures and records the time delay between clock and photon from the experiment and
uploads the results, in real time, to the host computer via the USB interface. In some cases the experiment will
involve multiple TCSPC curve measurements as the experiment changes the settings of external equipment. The
programmable I/O of the HRM-TDC module is used to cater for such applications. The external equipment, such
as a microscope, can indicate its X,Y movement to the HRM-TDC module allowing multiple curves to be measured.
Alternatively, the HRM-TDC module can be programmed as outputs to control the external equipment and cause
the actual X,Y positioning of the equipment.
HRM-TDC SPECIFIC FEATURE OVERVIEW
The exibility of the HRM-TDC allows it to be used in a variety of modes. The following are examples of how the SIE
software utilizes the START and STOP signals in different ways to cater for different applications.
SensL © 2011
SensL © 2011
12
12

HRM-TDC
USER MANUAL
> Hrm-tdc System Description > Hrm-tdc Specic Feature Overview
HISTOGRAM
Histogram modes use consecutive memory locations to store counts that represent points on a graph. These
memory locations or time bins are incremented based on the value of a time measurement. Each memory location
represents a time range equal to the resolution of the timer. Within the HISTOGRAM category there are two distinct
modes of operation, single-stop and multi-stop.
Single-stop histogram
Following a START event, the rst stop event is measured and the corresponding time bin is incremented. This is
repeated to build up a histogram (curve) in memory showing the distribution of 1st events following a start input.
This mode is also referred to as “TCSPC” mode due to its application in Time Correlated Single Photon Counting.
Multi-stop histogram
Following a START event, all stop events are measured and their corresponding time bins incremented. The next
START input will reset the timer and the following events processed again. This is repeated to build up a histogram
in memory showing the distribution of STOP events following a START input. This mode is also referred to as
“Multiscaler/Counter” mode.
FIFO
FIFO modes continually record the timing of events and save the results in consecutive locations in memory. When
the last location in memory is lled, if not commanded to stop, the module continues to record data starting at the
beginning of memory again. The host PC, via the USB interface, keeps up in time with the module, reading the data
from memory to a le in the host computer. Hence the memory can be regarded as a very large FIFO. Providing the
host PC can keep up with the module, timing data can be recorded indenitely. Within the FIFO category there are
two distinct modes of operation, single-stop and multi-stop.
Single-stop FIFO
In this mode the module carries out the single-stop histogram process as described previously. However, along with
the single-stop measurement, the information stored in the FIFO also has a MACRO time that denes what time
during the experiment the timing measurement was made. This mode is also referred to as “TCSPC with Macro
time”.
Multi-stop FIFO
This mode is also referred to as “FIFO time tagging” and offers 2 options:
Free Running:
Using this option the process is started with a single start pulse. The module will then ll the memory with time
tags dening the time of each stop event with relation to the initial single start pulse. Any further Start inputs will
be ignored.
Resync:
This option uses a 250KHz clock output from the module as the Start input. The clock continuously resynchronizes the module to eliminate long term drift between channels. This is the preferred method when it is
required to compare the data from more than one channel.
SensL © 2011
SensL © 2011
13
13

HRM-TDC
Fig.1c
USER MANUAL
> Hrm-tdc System Description > Histogram – Single-stop (“tcspc” Mode)
HISTOGRAM – SINGLE-STOP (“TCSPC” MODE)
a)
b)
c)
d)
Figure 5
Histogram modes use consecutive memory locations to store counts that represent successive timing values (Fig.5a).
These memory locations or “time bins” are incremented based on the result of a time measurement between a
START and the rst STOP received. In this single-stop mode, this is repeated to build up a histogram in memory
showing the distribution of rst events (STOPs) following a START input. This process is illustrated in Fig.5b and
Fig.5c, and an example GUI data plot is shown in Fig.5d. Data is saved to the PC in .CSV format. This mode is also
referred to as ‘TCSPC’ in the SIE, due to its application in Time Correlated Single Photon Counting.
Note: In this mode the START of each channel will be the event and the STOP will be a delayed version of the
LASER clock. On receipt of an event the timing value will be read and then the timing module will immediately be
reset. The reset will clear the channel ready for the next event. Each time-stamp from the timing module will be used
as an address to increment a memory location (time-bin). The resolution of the bins and the position of the curve in
memory will be dened by the highly exible Address Routing Module. The timing value, address counter and I/O
bits can all be routed to the memory address lines. This exibility allows many options, from a simple single curve to
multiple curves dened by the address counter and external control from the I/O port.
Min Time Bin Size: 27ps
Max Time Bin Size: 143ms
Max No. Time Bins: 4,194,304
Time Bin Depth: 65,536 or 4,294,967,296
Max Count Rate: 4.5Mcps
Max Image Size: 2048 x 4096
SensL © 2011
SensL © 2011
14
14

HRM-TDC
Fig.2b
USER MANUAL
> Hrm-tdc System Description > Histogram – Multi-stop (“multiscaler/counter”)
HISTOGRAM – MULTI-STOP (“MULTISCALER/COUNTER”)
a)
b)
c)
Figure 6
In this mode, multiple STOP events following a single START event are recorded and their corresponding time bins in
the histogram incremented (Fig.6a). The following START input will reset the timer and the following STOP events will
be again recorded until another START is received. The process is illustrated in Fig.6b and Fig.6c. This is repeated to
build up a histogram in memory. Data is saved in .CSV format. The GUI will display a plot similar to that in Fig.5d. This
mode is also referred to as “Multiscaler/Counter” in the SIE. Please note that FIFO is not employed in this mode.
The Td (dead time) parameter is applicable in histogram multi-stop mode and limits the maximum frequency
achievable. Tm is the minimum time between any start and a subsequent stop.
Note: In this mode the START signal is a low frequency clock (less than 7 MHz). The STOP signals will be the events.
Unlike the single-stop mode, the 27ps timing module is not reset after the rst event. Due to the long clock period it
will be possible for the same channel to receive a number of events per clock cycle. Hence, in this mode the time-
bins will ll up to plot the occurrence of events over the period of the clock cycle. Each new START signal will reset
the 27ps timing module. This allows the system to build up a plot of all the events within the START pulse cycle.
Once again the exibility of the Address Routing Register provides a wide range of options from single to multiple
curves.
Min Time Bin Size: 27ps
Max Time Bin Size: 143ms
Max No. Time Bins: 4,194,304
Time Bin Depth: 65,536 or 4,294,967,296
Max Count Rate: 4.5Mcps
Max Image Size: 2048 x 4096
SensL © 2011
SensL © 2011
15
15

HRM-TDC
Fig.3c
Fig.3d
USER MANUAL
> Hrm-tdc System Description > Fifo – Single-stop (“tcspc - With Macro-time”)
FIFO – SINGLE-STOP (“TCSPC - WITH MACRO-TIME”)
a)
c) d)
b)
Figure 7
FIFO modes continually record the timing of events and save the results in consecutive locations in memory as
shown in Fig.7a. When the last location in memory is lled, if not commanded to STOP, the module continues to
record data starting at the beginning of memory again. The host PC, via the USB interface, keeps up in time with the
module, reading the data from memory to a le in the host computer. Hence the memory can be regarded as a very
large FIFO. Providing the host PC can keep up with the module, timing data can be recorded indenitely.
In this mode the module carries out the Single-STOP process as described previously and illustrated in Fig.7b and
Fig.7c. However, along with the timing of the Single-STOP event, a MACRO time (the time during the experiment that
this measurement is made) is also recorded. Both times are recorded in the FIFO. An example of the data recorded
is shown in Fig.5d. Data is saved in .CSV format. This mode is also referred to as ‘TCSPC (with Macro Time)’ in
the SIE, due to its application in Time Correlated Single Photon Counting.
Note: In this mode the START of each channel will be the event and the STOP will be a delayed version of the LASER
clock. On receipt of an event the timing value will be read and the MICRO time will be immediately reset. The reset
will clear the channel ready for the next event. All subsequent STOP pulses will be ignored until a new START pulse
arrives. Each time-stamp will be a 32-bit word giving the time since the last START (MICRO-time Tt1 or Tt2 in Fig.7c)
and the value of a free running clock dening the time within the experiment (MACRO-time Tc). Due to the highly
exible Data Routing Module the resolution and number of bits for the micro time, macro time and channel ID bits is
selectable using the USB selection registers. When this process begins, 32-bit timing values will be inserted into the
shared memory. The memory will be congured as a large FIFO interfacing to the USB interface. Suitable handshake
signals are implemented allowing continuous transfer of time-tags from the FIFO to the PC via the USB port. With
counts of up to 4.5MHz this process can run indenitely without loss of data.
SensL © 2011
SensL © 2011
16
16

HRM-TDC
Fig.4b
Fig.4c
USER MANUAL
> Hrm-tdc System Description > Fifo – Multi-stop (“fo - Time Tagging”)
FIFO – MULTI-STOP (“FIFO - TIME TAGGING”)
a)
c)
b)
Figure 8
In this mode the process is started with a single START pulse. The module will then ll the memory with time tags
dening the time of each STOP event with relation to the initial single START pulse. Any further START inputs will be
ignored. This mode is illustrated in Fig.8a and Fig.8c and is also referred to as ‘Time Tagging’. Data is saved as a
.CSV le. A typical data le is shown in Fig.8b.
There is a further ‘Re-Sync’ option within this mode that uses a 250KHz clock output from the module as the START
input. The clock continuously re-synchronizes the module to eliminate long term drift between channels. This is the
preferred method when it is required to compare the data from more than one channel.
Note: In this mode all STOP events will be time-stamped and saved to memory. Each time-tag will be comprised
of two 32-bit words. These two words will provide timing value, with a resolution of 27ps, and the channel ID.
The memory will be congured as a large FIFO interfacing to the USB interface. Suitable handshake signals are
implemented allowing continuous transfer of these time-tags from the FIFO to the PC via the USB port. Hence, in
this mode, continuous time tagging to the host PC can be achieved indenitely.
SensL © 2011
SensL © 2011
17
17

HRM-TDC
USER MANUAL
> Sensl Integrated Environment (sie) > System Requirements
SensL Integrated Environment (SIE)
The SIE is a user interface for setting up and controlling the HRM-TDC module. While the interface provides an
extensive range of operating modes and measurement processes, including graphical presentation, it does not fully
cover all features available in the HRM-TDC module.
The SIE communicates with the module via a low level DLL. This DLL has been designed to provide a set of functions
that will allow full control of the HRM-TDC for all features. For complex experiments that require control beyond the
scope of the SIE, it is expected that the user will write their own real-time application utilizing the various function in
this DLL. For details of the DLL functions, see the Appendix in this document.
SYSTEM REQUIREMENTS
• Windows XP SP2 operating system
• 1 GByte of RAM
• At least one spare High Speed USB 2.0 port
• .NET Framework installed (included)
• JAVA runtime environment installed (included)
• Microsoft Visual C++ runtime components (included)
INSTALLATION
To install the TDC software and USB drivers, follow these steps:
• Go to www.sensl.com/support/sw/ and download both the ‘Release Note’ PDF and the ‘HRM-TDC
Software’ EXE les.
• Run the HRM-TDC_Install_XpXX.exe (where the XpXX is the revision number) le and follow the
instructions. After the GUI and DLLs are installed, you will be prompted to install QuickUSB drivers which
are necessary for communication with the TDC.
• Now power up the HRM-TDC module and connect the USB cable.
• The PC will recognize that new hardware has been added. Depending on the operating system the drivers
may be located automatically, or it may be necessary to select them manually by directing the PC to the
directory c:\Program Files\SensL\HRM-TDC\QuickUSB* where the necessary le will be located.
• The PC is ready to launch the TDC software. It can be found in the directory C:\Program Files\SensL\
HRM-TDC *
* This assumes you have used the default directory settings for your installation.
SensL © 2011
SensL © 2011
18
18

HRM-TDC
USER MANUAL
> Sensl Integrated Environment (sie) > Using The Sensl Integrated Environment (sie)
USING THE SENSL INTEGRATED ENVIRONMENT (SIE)
Main Page
When the SIE software is launched it will search the USB for available HRM-TDC modules and initialize them ready
for use. Once this has been carried out the main SIE page will appear as shown in Figure 9. A list of available devices
will be shown. To inspect and select the various operating modes available, right click on the module name and then
select the particular mode you require (see Fig. 9).
Figure 9 SIE Main Page screen
Module Information
This page displays the conguration information unique to this module. This information includes the module ID
number and the various measurement modes. This page also allows the user to upgrade the internal FPGA image.
To upgrade the FPGA image the user must rst click on the Update FPGA button. This will launch the Update Wizard
as shown in Figure 10. Use the Browse button to nd the RPD le for upgrading. Finally click the Update Device
button to start the upgrade.
WARNING:
USB communication must be maintained during this process. Do NOT disconnect the USB cable during the update.
SensL © 2011
SensL © 2011
19
19

HRM-TDC
USER MANUAL
> Sensl Integrated Environment (sie) > Using The Sensl Integrated Environment (sie)
Updating the FPGA should only be carried out if you are instructed to do so by SensL. This procedure requires a
valid RPD le as provided by SensL.
Failure to carry out this process correctly may render the module inoperable resulting in the need to return it to SensL
for reconguration.
Figure 10 SIE Module Information screen
“HISTOGRAM –TCSPC” (Histogram Single-stop)
When this page is launched the top half will display a graph page. Left click on this graph to reveal the conguration
settings. The size of the conguration and graph area can be adjusted by dragging the partition to suite. Figure 11
show this page with the partition adjusted to reveal the entire conguration controls.
Programmable Clock Output
The Programmable Clock Output is made available for all modes and is used to set the frequency and duty cycle of
the internal programmable clock. This clock is available at an SMA output for test purposes. This clock is provided
for testing and diagnostics. The clock will exhibit a level of jitter that would not be suitable for accurate measurements
as part of an experiment.
External Clock Period
This should be set to the period of the external LASER clock.
SensL © 2011
SensL © 2011
20
20

HRM-TDC
USER MANUAL
> Sensl Integrated Environment (sie) > Using The Sensl Integrated Environment (sie)
Reverse Plot
Due to the method of TCSPC measurement, where the start and stop events are reversed, it is sometimes useful to
plot the curves with the TIME axis reversed. Selecting this option will reverse the time axis for the plot.
Show Time Bins as Bars
Selecting this option will result in the graphical output being displayed as histogram bars rather than as a single best
t line as shown in Fig 11.
Microtime LSB
The smallest bin width is 27ps. In some cases it may not be necessary to be this accurate. Selecting the LSB of the
microtime denes the bin resolution. Bit 0 is the highest resolution of 27ps. Bit 1 will set the bin width to 54ps (2 x
27) bit 2 will set the bin width to 108ps (4 x 27) and so forth.
The choice of bin width is application specic. Should the experiment not require such accuracy it may be better
to select a lower resolution than 27ps. This will give the added advantage of allowing a wider time range over the
available memory and/or more room for multiple curves.
Channel Enable and Edge Selection
These check boxes allow the individual channels to be enabled/disabled and the sensitivity of the START/STOP
inputs to be specied.
Note: Press the Apply changes button to set your selected conguration.
Figure 11 SIE Histogram TCSPC screen
SensL © 2011
SensL © 2011
21
21

HRM-TDC
USER MANUAL
> Sensl Integrated Environment (sie) > Using The Sensl Integrated Environment (sie)
Graphical Presentation
Once the conguration is selected, the conguration page can be removed by clicking on the X tab to display the
graph section only (see Figure 12).
To start processing, click on the green right arrow at the top of the page. This can be done numerous times to
display multiple traces on the same graph. Fig 11 shows the result of a simple TCSPC experiment. The right hand
side of the display shows the traces. In this case two traces are displayed both from channel0. These traces can be
saved to le or cleared by selecting them with the relevant checkbox and using the save and clear buttons.
Once the processing has been stopped, the graph can be analyzed.
To zoom in, hold right mouse button down and size selection box over area of interest.
To zoom out, sweep mouse from right to left with right mouse button held down.
To measure between points, click on the graph with right button and left button to position the two cursors. The
position of these two cursors and their X and Y differences will be displayed at the top of the graph (see Fig 12).
Figure 12 SIE Histogram - TCSPC, graph section only
“HISTOGRAM – Multi-scaler” (Histogram Multi-stop)
When in this mode the conguration setup and operation is identical to the HISTOGRAM-TCSPC mode. In TCSPC
mode the system repeatedly plots the time of the rst event after a LASER pulse. In Multi-scaler/Counter mode the
operation is very different. The start event is a slow clock of less than 7MHz. The system records and saves all stop
SensL © 2011
SensL © 2011
22
22

HRM-TDC
USER MANUAL
> Sensl Integrated Environment (sie) > Using The Sensl Integrated Environment (sie)
events in their respective time bins. Each start event will reset the timer and a new set of stop events will be added
to the existing array of time bins. This process will result in a histogram being built up of all the events following the
start. This is particularly useful for plotting pulse shapes, decay curves etc.
“FIFO – TCSPC with MACRO time” (FIFO Single-stop)
When this page is launched the top half will display a graph page. Left click on this graph to reveal the conguration
settings. The size of the conguration and graph area can be adjusted by dragging the partition to suite.
This page is a graphical demonstration of the TCSPC with MACRO time feature of the HRM-TDC module. The HRMTDC allows the user to carry out TCSPC and save time tags. These time tags consist of the TCSPC measurement
plus a MACRO time dening at what time during the experiment the measurement was made. For normal operation,
this feature would use data streaming that would allow the user to continually record time-tags indenitely to a PC
le. This mode of the SIE records for a given period or until the HRM-TDC memory is full.
Programmable Clock Output
The Programmable Clock Output is made available for all modes and is used to set the frequency and duty cycle of
the internal programmable clock. This clock is available at an SMA output for test purposes. This clock is provided
mainly for testing and diagnostics. The clock will exhibit a level of jitter that would not be suitable for accurate
measurements as part of an experiment.
Recording Length
The recording length should be set to the desired period over which the TCSPC measurements are to be taken.
Note that the processing will stop prematurely if the Maximum Event Count is reached.
Maximum Event Count
This denes the maximum number of events to be stored before recording stops. This value is used to ensure the
storage data size does not exceed the capacity of the system.
External Clock Period
This should be set to the period of the external LASER clock.
Reverse Plot
Due to the method of TCSPC measurement, where the start and stop events are reversed, it is sometimes useful to
plot the curves with the TIME axis reversed. Selecting this option will reverse the time axis for the plot.
Macro and Micro Time Conguration Selection
These elds allow the user to select the number of MACRO and MICRO bits and resolution to appear in the 32-bit
time tag word. As bit counts and resolution are changed the resulting roll over times and resolution values will be
automatically displayed in the boxes to the right hand side. If the user attempts to input an illegal value the relevant
text boxes will turn red.
SensL © 2011
SensL © 2011
23
23

HRM-TDC
USER MANUAL
> Sensl Integrated Environment (sie) > Using The Sensl Integrated Environment (sie)
Channel Enable and Edge Selection
These check boxes allow the individual channels to be enabled/disabled and the START/STOP inputs sensitivity to
be specied.
Note: Press Apply changes button to set your selected conguration.
Data Recording
Once the conguration is selected, the mode is now ready for recoding data. In FIFO – TCSPC mode two forms of
data recording are available, Graphical Presentation and Streaming TCSPC Time Tags.
Graphical Presentation
In this mode recording is carried out at the module until the recording length or the maximum event count is
reached. To start processing, click on the green right arrow at the top of the page. Figure 13 shows the result
of a simple experiment. The right hand side of the display will show which channels are active. In this example
only channel 0 is active.
After starting the experiment the module will run for the Recording Length or until the memory is full. Once the
process has stopped the top graph will display a plot of the event frequency over time. The user can now use
the cursors to select a time period of the top graph. When this is done the software will automatically plot the
TCSPC curve for the time tags over that particular period.
The user can, at any time, save these curves and run the experiment again. Fig 13 shows an example of this
mode of operation. The user can, for each run, save a particular TCSPC curve or set of curves and compare it
with other curves at different MACRO time ranges and/or runs.
Once the processing has been stopped, the graphs can be analyzed.
To zoom in, hold right mouse button down and size selection box over area of interest.
To zoom out, sweep mouse from right o left with right mouse button held down.
To measure between points click on graph with right button and left button to position two cursors. The position
of these two cursors and their X and Y differences will be displayed at the top of the graph (see Fig 13).
This mode of operation is particularly useful for carrying out preliminary tests to determine the best conguration,
before carrying out a full experiment using continuous streaming of results to a PC le.
Streaming TCSPC Time Tags
Once the conguration is selected, the user can now select a path and le name for saving the data. It is
recommended that the le name have a sufx of CSV. Doing this will allow the le to be easily viewed using a
spreadsheet package. Once this is done the process can be started by clicking the Start button. Clicking the
Start button will start the module streaming all time tags to the chosen le until the recording time is reached, the
maximum event count is reached or the process is manually stopped.
After the process is stopped the le will be available for viewing. Figure 14 shows a section of a typical output le.
As can be seen in Fig 14, four columns are used to dene the tag number, channel ID, macro time and micro
time.
The example experiment used the test waveform set to 1MHz with a 50% duty cycle. This signal was fed directly
into both the start and stop inputs of channel 0. The start was set to trigger on the LO-HI transition and the stop
SensL © 2011
SensL © 2011
24
24

HRM-TDC
USER MANUAL
> Sensl Integrated Environment (sie) > Using The Sensl Integrated Environment (sie)
was set o trigger on the HI-LO transition. As can be seen in Fig 14, the time-tags are repeating every 200 counts
of the MACRO time. As the resolution of the MACRO time was set to 5ns, this represents a repetition rate of
1ms (200 x 5 ns). The TCSPC time is typically 18712. As the resolution of the MICRO time was set to 27ps, this
represents a TCSPC MICRO time of ~505ns (18712 x 27ps). The value of 505ns rather than the theoretical value
of 500ns is due to the jitter of the clock and the quality of the cabling.
Figure 13 SIE showing the “FIFO - TCSPC with Macro Time” screen
SensL © 2011
SensL © 2011
25
25

HRM-TDC
USER MANUAL
> Sensl Integrated Environment (sie) > Using The Sensl Integrated Environment (sie)
Figure 14 Typical output data from streaming TCSPC Time Tags
“FIFO – Time Tagging” (FIFO – Multi-stop)
This page is used to continuously stream event time tags, as shown in Fig. 15. This mode offers 2 methods that are
selected by the value of the programmable clock. If the programmable clock is set to 1280 HI and 1280 LO then the
Resync option is selected. Any other clock value will select the Free Running option.
Free Running:
Once the conguration is selected, the user can start the module recording. The module will wait for the rst
single start pulse and then start recording every stop event until the recording time is reached, the maximum
event count is reached or the process is manually stopped. The rst start pulse will begin recording. All following
stop events will be stamped and saved. Any following start pulses during the process will be ignored. Hence, all
events, after the initial start signal, can be saved indenitely.
SensL © 2011
SensL © 2011
26
26

HRM-TDC
USER MANUAL
> Sensl Integrated Environment (sie) > Using The Sensl Integrated Environment (sie)
Resync:
Using this method, the user must feed the programmable clock output to the Start input of any channel being
used. Once the conguration is selected, the user can start the module recording. The module will wait for the
rst Start pulse and then start recording every stop event until the recording time is reached, the maximum event
count is reached or the process is manually stopped.
Programmable Clock Output
Free Running:
The Programmable Clock Output is made available for all modes and is used to set the frequency and duty
cycle of the internal programmable clock. This clock is available an SMA output for test purposes. This clock
is provided for testing and diagnostics only. The clock will exhibit a level of jitter that would not be suitable for
accurate measurements as part of an experiment.
Resync:
With the clock programmed to 1280 HI, 1280 LO (FSR register set to 0xFFFF) the module will operate in Resync.
Figure 15 SIE screen for FIFO - Time Tagging
SensL © 2011
SensL © 2011
27
27

HRM-TDC
USER MANUAL
> Sensl Integrated Environment (sie) > Using The Sensl Integrated Environment (sie)
Recording Length
The recording length should be set to the desired period over which the TCSPC measurements are to be taken.
Maximum Event Count
This denes the maximum number of events to be stored before recording stops. This value is used to ensure the
storage data size does not exceed the capacity of the system.
Timer LSB
This is used to select the resolution of the time tag. Selecting bit 0 will give the time tag a resolution of 27ps. Bit 1
will set the resolution to 54ps (2 x 27), bit 2 will set the resolution to 108ps (4 x 27) and so forth.
Channel Enable and Edge Selection
These check boxes allow the individual channels to be enabled/disabled and the START/STOP inputs sensitivity to
be specied.
Note: Press the Apply changes button to set your selected conguration.
Data Recording
Once the conguration is selected, the mode is now ready for recoding data. In FIFO – Time Tagging mode two
forms of data recording are available, Graphical Presentation and Streaming FIFO Time Tags.
Graphical Presentation
In this mode recording is carried out at the module until the recording length or the maximum event count
is reached. To start processing, click on the green right arrow at the top of the page. The right hand side of
the display will show which channels are active. On completion the graph will display a plot of event density
(frequency) over time.
This mode of operation is particularly useful for carrying out preliminary tests to determine the best conguration,
before carrying out a full experiment using continuous streaming of results to a PC le.
Streaming FIFO Time Tags
Once the conguration is selected, the user can now select a path and le name for saving the data. It is
recommended that the le name have a sufx of CSV. Doing this will allow the le to be easily viewed using a
spreadsheet package. Once this is done the process can be started by clicking the Start button. Clicking the
Start button will start the module streaming all time tags to the chosen le until the recording time is reached, the
maximum event count is reached or the process is manually stopped. In this mode there is no TCSPC. The rst
start pulse will begin recording. All following stop events will be stamped and saved in the target PC le. Hence,
all events, after the initial start signal, can be saved to le indenitely.
After the process is stopped the le will be available for viewing. The format of the output le will differ depending
on whether the mode used the Free Running or Resync option. Figure 16 shows a section of a typical output
le for both options.
As can be seen in Fig. 16, four columns are used to dene the tag number, channel ID, macro time and micro
SensL © 2011
SensL © 2011
28
28

HRM-TDC
USER MANUAL
> Sensl Integrated Environment (sie) > Using The Sensl Integrated Environment (sie)
time.
The time tag for this mode consists of 2 x 32-bit words. The rst word is a micro time that has a resolution down
to 27ps. Using the Free Running option this timer will roll over at the count of 5308415 (Hex 50FFFF). Using the
Resync option this timer will roll over every 4 microseconds. In both cases the MACRO counter is a count of how
many times the MICRO counter has rolled over.
Note: The LSB value of 27ps is not an exact value. This value is a simplied (rounded up) value that is suitable for
all other modes. The true LSB value is 26.9851ps. As this mode involves the continuous running of the MICRO
clock for very long periods it is recommended that the value of 26.9851 is used to avoid a cumulative error
occurring over long periods of time.
Figure 16 Data from Free Running mode Data from Resync mode
Example: If the MACRO time value is 28 and the MICRO time is 11232 then the absolute time of the tag from the
start pulse is:
Free Running
((28 x 5308416) + 11232) x 26.9851ps = 4011250921ps. Note: 5308416 = Hex 510000.
Resync
(28 x 4000000) + (11232 x 26.9851) = 112303097 ps. Note: Rollover is every 4000000 ps.
SensL © 2011
SensL © 2011
29
29

HRM-TDC
USER MANUAL
> Sensl Integrated Environment (sie) > Using The Sensl Integrated Environment (sie)
Correlation
The Correlation feature allows the user to carry out cross and auto correlation on FIFO-TCSPC streams for both the
TCSPC values and the MACRO times. The correlation screen is shown in Fig. 17.
In Correlation mode the conguration setup is identical to FIFO-TCSPC mode. However, channel select is restricted
to a maximum of two channels. A single channel selected will result in auto-correlation on that input. Two channels
will result in cross-correlation on the two channels. Further correlation specic settings are as follows:
Target Data Set
Use these two mutually exclusive radio buttons to select correlation on the MICRO (TCSPC) or MACRO time.
Bin Size/Resolution
This setting determines the bin size to be used for the correlation function. Increasing this value will direct the
correlation function to group greater numbers of consecutive time tags into software bins. These bins are then used
for phase sweeping the streams to create the correlation curve.
Maximum Lag
This denes the maximum number of bins to be used for carrying out the correlation algorithm.
Graphical Presentation
Once the conguration is selected, the mode is now ready for recording data. In this mode recording is carried out
at the module until the recording length or the maximum event count is reached. To start processing, click on the
green right arrow at the top of the page.
After starting the experiment the module will run for the Recording Length, the maximum event count is reached or
until the memory is full. Once the process has stopped the top graph will display a plot of the event frequency over
time. The bottom graph will display the correlation curve as specied by the conguration parameters. For details of
the correlation algorithm see the Appendix in this document.
SensL © 2011
SensL © 2011
30
30

HRM-TDC
USER MANUAL
> Sensl Integrated Environment (sie) > Using The Sensl Integrated Environment (sie)
Figure 17 SIE Correlation screen
SensL © 2011
SensL © 2011
31
31

HRM-TDC
USER MANUAL
> Appendix > Hrm-tdc Registers And Low Level Dll Functions
Appendix
HRM-TDC REGISTERS AND LOW LEVEL DLL FUNCTIONS
The control and setup of the HRM-TDC is carried out by a series of commands to a set of conguration registers
within the module. To simplify the control of these registers, a set of low level drivers, in a DLL, is available. The low
level drivers will return an HRM_STATUS of value HRM_OK or HRM_ERROR.
For standard ‘C’ programming the user must use the DLL HRMTimeAPI.DLL
For LabVIEW the user must use the modied version of the DLL providid called HRMTimeALI_LV.DLL
In both cases a copy of the relevant DLL MUST reside in the same folder as the application.
Initialization Low Level Drivers
Before the user can read/write to these conguration registers communication must be established with the module.
To do this the following low level driver functions must be used.
Driver - HRM_GetDLLVersion
HRM_API const char* WINAPI HRM_GetDLLVersion(void)
This function returns a pointer to a text string describing the revision level of the drivers.
Driver - HRM_SetCongurationPath
HRM_API void WINAPI HRM_SetCongurationPath(char* path)
path: Pointer to text string dening path.
This function is used to dene the path where the conguration data for the module resides.
Driver - HRM_RefreshConnectedModuleList
HRM_API bool HRM_RefreshConnectedModuleList(void)
This function can be called at any time to determine if the list of connected modules has changed. This can be used
to periodically poll the USB bus to determine if modules have been connected or disconnected.
Driver - HRM_GetConnectedModuleCount(void)
HRM_API UINT WINAPI HRM_GetConnectedModuleCount(void)
This function is used to determine how many HRM-TDC modules are currently connected to the USB bus.
Driver - HRM_GetConnectedModuleList
HRM_API void WINAPI HRM_GetConnectedModuleList(HANDLE* handleList)
handleList: Pointer to array of HRM-TDC handles for initialization.
SensL © 2011
SensL © 2011
32
32

HRM-TDC
USER MANUAL
> Appendix > Hrm-tdc Registers And Low Level Dll Functions
This function initializes an array of HRM-TDC handles to allow communication with all HRM-TDC modules present
on the USB bus. The size of the array must be greater or equal to the number of modules detected using the function
HRM_GetConnectedModuleCount.
Driver - HRM_CloseModule
HRM_STATUS WINAPI HRM_CloseModule(HANDLE handle)
On completion of the application, this function must be called to release the handle and close the session.
Example:
int moduleCount;
HANDLE handleArr[20];
HRM_RefreshConnectedModuleList();
moduleCount = HRM_GetConnectedModuleCount();
if(moduleCount)
{
HRM_GetConnectedModuleList(handleArr);
APPLICATION CODE HERE
HRM_CloseModule(handleArr);
}
else
printf(“No HRM-TDC modules detected”);
In this example the APPLICATION CODE can address up to ‘moduleCount’ HRM-TDC modules.
Now that communication with the module has been established the conguration registers can be programmed
using the associated low level driver.
ARR – Address Route Register
Register Description
The method of time-binning is based on using the received time-tag data and discrete I/O inputs to form the address
in memory for time-bin processing. In its simplest form, a time-tag could be used as the address bus so that each
time-bin is separated by the resolution of the least signicant bit. On receipt of a time-tag the system outputs the
time-tag as an address and then increments that location (time-bin). In the HRM-TDC system further data bits are
included in the address selection to allow multiple curve plotting based on multiple channel inputs and discrete
inputs for X, Y array plotting. To allow maximum exibility the AAR register can dene any bit to be placed in any
SensL © 2011
SensL © 2011
33
33

HRM-TDC
USER MANUAL
> Appendix > Hrm-tdc Registers And Low Level Dll Functions
position within the address bus for the shared memory.
Understanding the ARR is critical as it is the controller that denes the resolution, curve count and array size of all
measurements.
Before programming the ARR the user must rst assert an RRR (Route Register Reset) command to initialize the
system. Once this is done the ARR is then programmed by sending 27 consecutive writes. The address bus of the
memory is 27 bits (A26-A0). Starting with A0, each write denes the bit number of the ‘Address Option Bits’ to be
routed to that particular address bit. The ‘Address Option Bits’ are as follows:
AOB[24.. 0] TagData
AOB[51..25] Address Counter
AOB[67..52] 16-bit I/O Data
AOB[79..68] Pixel Counter
AOB[91..80] Line Counter
AOB[92] Fix to logic 0
TagData
This is the time-tag data as received by the Pico-Second Timing Interface. Bits 23,24 dene on which channel
the time-tag was received – 00, 01, 10 or 11. The bits 22 down to 0 dene the time with bit 0 being the LSB
(LSB = 26.9851ps).
Address Counter
These bits provide a 27-bit counter that can be routed to the address bus. This counter can be pre-loaded
with a given value. After each write to memory this counter will be automatically incremented. This counter
would be most used when the system is in time-tag mode. Here the system reads time-tags and stores them
in consecutive locations in memory. These bits are also available to be used in Time-bin mode. However, in this
case the address is not incremented. Instead the address counter bits are used purely as an offset address in
memory for saving curves.
16-Bit I/O Data
The value of the 16 I/O data bits can be routed to any address line. This would be useful for plotting X, Y curves.
For example, the I/O could be used as 8-bit X and 8-bit Y inputs allowing a 256 x 256 array of curves to be
plotted.
Pixel Counter/Line Counter/Frame Reset
The 16-bit I/O method of X,Y plotting is limited to 256 x 256 arrays. An alternative method that allows larger
arrays is to use 2 discrete inputs to clock counters that in turn can be used as the address in memory. The
HRM-TDC module provides a 12-bit Pixel Counter and a 12-bit Line Counter. The Pixel Counter is incremented
by clock inputs to IODATA(0) and the line counter is incremented by clock inputs to IODATA(1). If these bits are
routed to the address lines then the user can command the HRM-TDC module to move from one curve to the
next by clocking the IODAT(0) and IOADAT(1) lines. This allows arrays of up to 4096 x 4096.
The contents of the LINE and PIXEL counters are cleared when:
1. A write is sent to the Routing Reset Register (RRR)
2. A LO-HI transition is detected on the IODATA(2) port.
SensL © 2011
SensL © 2011
34
34

HRM-TDC
USER MANUAL
> Appendix > Hrm-tdc Registers And Low Level Dll Functions
The IODATA(2) can be used as a Frame Reset clock input for synchronizing an X,Y pixel image with an external
instrument such as a microscope.
Fix to logic 0
Selecting this bit will drive the particular address line low. This is used for driving the chip select line of a single
memory card. If two memory cards are used then the chip select should be an address counter bit.
Example:
WRITE: 1,2,3,4,5,6,7,8, 23,24, 25,26,27,28,29,30,31,32,33,34,35,36,37,38,39,40,41
This would set up the system recording 4 curves, one from each channel. Each curve would consist of 256 bins
(8 bits) with a bin size of 54ps. This reduced resolution is due to bit 1 (second bit) of the time-tag being routed to
address bit 0. The channel bits 23, 24 will move each channel event to a different curve. The base start address
of these curves will be dened by the pre-programmed value of the Address Counter.
Driver - HRM_SetAddressRouteRegister
HRM_STATUS WINAPI HRM_SetAddressRouteRegister(HANDLE handle, BYTE* arrData)
handle: HRM-TDC module handle
arrData: Array of bytes to write to the address route register.
Note:
The arrData bytes must be padded with 0 values after each routing value. Therefore, for the example, the arrData
array must be set to:
1,0,2,0,3,0,4,0,5,0,6,0,7,0,8,0,23,0,24,0,25,0,26,0,27,0,28,0,29,0,
30,0,31,0,32,0,33,0,34,0,35,0,36,0,37,0,38,0,39,0,40,0,41,0
DRR – Data Route Register
Register Description
When the HRM-TDC system is in time-tag mode it will continually save time-stamps to memory. Each time-stamp
will always be 32-bits, however the format of the time-stamp is programmable using the DRR. To allow maximum
exibility the DRR register can dene any ‘Data Option Bit’ bit to be placed in any position within the 32-bit time-tag.
Before programming the DRR the user must rst assert an RRR (Route Register Reset) command to initialize the
system. Once this is done the DRR is then programmed by sending 32 consecutive writes. Starting with D0, each
write denes the bit number of the ‘Data Option Bits’ to be routed to that particular data bit within the time-tag. The
‘Data Option Bits’ are as follows:
DOB[24.. 0] TagData
DOB[56..25] Macro Counter
DOB[57] Fix to logic 0
SensL © 2011
SensL © 2011
35
35

HRM-TDC
USER MANUAL
> Appendix > Hrm-tdc Registers And Low Level Dll Functions
TagData
This is the time-tag data as received by the Pico-Second Timing Interface. Bits 23,24 dene the channel the
time-tag was received on – 00, 01, 10 or 11. The bits 22 down to 0 dene the time with bit 0 being the LSB
(LSB = 26.9851ps).
Macro Counter
When time-tag recording the user may, along with the TCSPC time, wish to record the chronological time
that the event occurred. A 32-bit Macro Time Counter is made available that is cleared at the start of time-tag
processing and will increment every 5ns. The user can select a range of these bits to provide a macro time to
time-stamp each time-tag.
Example:
WRITE: 0,1,2,3,4,5,6,7 26,27,28,29,30,31,32,33,34,35,36,37,38,39,40,41,42,43,44,45,46,47 23,24
This would set up the time-tag as follows:
D[7..0] = TCSPC time (LSB = 26.9851ps)
D[29..8] = 22-bit Macro time with LSB resolution of 5ns
D[31..30] = 2-bit channel code 00, 01, 10, 11 for channels 0 to 3.
Driver - HRM_SetDataRouteRegister
HRM_STATUS WINAPI HRM_SetDataRouteRegister(HANDLE handle, BYTE* drrData)
handle: HRM-TDC module handle
drrData: Array of bytes to write to the data route register.
Note:
The drrData bytes must be padded with 0 values after each routing value. Therefore, for the example, the drrData
array must be set to:
0,0,1,0,2,0,3,0,4,0,5,0,6,0,7,0,26,0,27,0,28,0,29,0,30,0,31,0,32,0,33,0,34,0,
35,0,36,0,37,0,38,0,39,0,40,0,41,0,42,0,43,0,44,0,45,0,46,0,47,0,23,0,24,0
LAL, LAH – Load Address LO/HI Register
Register Description
These two registers are used to initialize the ‘Address Counter’ (see ARR register) to a pre-dened value. The order
of loading the initialization address must be LAL followed by LAH. The LAL command will dene the least signicant
16 bits (A15 down to A0) of the counter. The least signicant 11 bits of the LAH command will dene counter bits
A26 down to A16. On completion of the LAH command the ‘Address Register’ will be loaded with the new value.
SensL © 2011
SensL © 2011
36
36

HRM-TDC
USER MANUAL
> Appendix > Hrm-tdc Registers And Low Level Dll Functions
Driver - HRM_SetAddressRegister
HRM_STATUS WINAPI HRM_SetAddressRegister(HANDLE handle, ULONG arData)
handle: HRM-TDC module handle
arData: 32-bit address to set LAH, LAL to.
LFL, LFH – Load Fill Value LO/HI Register
Register Description
The user can command the HRM-TDC module to ll a range of memory with a given value. The value used for this
command is dened using these 2 commands. The initialization value is a 32-bit value. The most signicant 16 bits
is dened by LFH and the least signicant 16 bits is dened bits LFL.
Driver - HRM_SetFillValueRegister
HRM_STATUS WINAPI HRM_SetFillValueRegister(HANDLE handle, ULONG fvrData)
handle: HRM-TDC module handle
arData: 32-bit value to set LFH, LFL to.
UAL, UAH – Load Address LO/HI Register
Register Description
These two registers are used to initialize the USB address counter. The block DMA transfers from memory to the
USB start at the address dened by these two commands. On completion of each USB transfer the USB address
counter is automatically incremented. This address is a 32-bit ‘long word’ address. All USB block transfers are
carried out in long words (4 bytes at a time). The order of loading the initialization address must be UAL followed by
UAH. The UAL command will dene the least signicant 16 bits (A15 down to A0) of the counter. The least signicant
10 bits of the UAH command will dene counter bits A25 down to A16. On completion of the UAH command the
‘Address Register’ will be loaded with the new value.
UAL:
D15 D14 D13 D12 D11 D10 D09 D08 D07 D06 D05 D04 D03 D02 D01 D00
A15 A14 A13 A12 A11 A10 A9 A8 A7 A6 A5 A4 A3 A2 A1 A0
UAH:
D15 D14 D13 D12 D11 D10 D09 D08 D07 D06 D05 D04 D03 D02 D01 D00
Nu Nu Nu Nu Nu Nu A25 A24 A23 A22 A21 A20 A19 A18 A17 A16
SensL © 2011
SensL © 2011
37
37

HRM-TDC
USER MANUAL
> Appendix > Hrm-tdc Registers And Low Level Dll Functions
Driver - HRM_SetUSBAddressRegister
HRM_STATUS WINAPI HRM_SetUSBAddressRegister(HANDLE handle, ULONG uarData)
handle: HRM-TDC module handle
uarData: 32-bit address to set UAH, UAL to.
MBR – Mode Bits Register
Register Description
This register denes a number of settings for the HRM-TDC module as follows:
D15 D14 D13 D12 D11 D10 D09 D08 D07 D06 D05 D04 D03 D02 D01 D00
Rmd Mem Nu Nu Nu Nu Nu Nu Nu BCe Rvd Rvd Size Md2 Md1 Md0
Md[2..0] These bits dene in which mode the HRM-TDC module will operate.
000 = Fill ‘n’ memory locations with the LFL,LFH value.
The value of ‘n’ is dened by the MCL,MCH registers.
The start address is dened by the LAL,LAH registers.
001 = Run in TIME-TAG with TCSPC mode.
010 = Run in TIME-TAG continuous mode.
011 = Run in TIME-BIN with TCSPC mode.
100 = Run in TIME-BIN continuous mode.
All other Md[] combinations are reserved. Power-up default = 000.
Size
In TIME-BIN mode the bin size can be set for 16 bits or 32 bits. If ‘Size’ is set to ‘1’ the bin size will be 16 bits.
With ‘Size’ set to ‘0’ the bin size will be 32 bits. Note that when the size is 16 bits the memory address dened
by the ARR (Address Route Register) is a 16-bit word address. In all other cases the ARR shall dene a 32-bit
long words address.
Power-up default = 1
Rvd
Bits reserved. Must be set to ‘1’.
BCe
With this bit set to ‘1’ the BINCNT (BCH, BCL) feature is enabled. If this bit is ‘0’ then the effect of the BCH
SensL © 2011
SensL © 2011
38
38

HRM-TDC
USER MANUAL
> Appendix > Hrm-tdc Registers And Low Level Dll Functions
and BCL is disabled.
Mem
This bit, when set to ‘1’, will start the high speed USB memory or time-tag transfer processor. Taking this bit to
‘0’, at any time, will immediately put the processor into reset.
Rmd
This bit, when set to ‘1’ will start the mode processor. The mode of operation is dened by the Md bits. Taking
this bit to ‘0’, at any time, will immediately put the processor into reset.
Driver - HRM_SetModeBitsRegister
HRM_STATUS WINAPI HRM_SetModeBitsRegister(HANDLE handle, USHORT mbrData)
handle: HRM-TDC module handle
mbrData: 16-bit value to write to the MBR.
ESR – Edge Sensitivity Register
Register Description
All start and stop inputs can be programmed to produce an event on either a +Ve or -Ve transition. This register
denes the edge sensitivity for each input as follows:
D15 D14 D13 D12 D11 D10 D09 D08 D07 D06 D05 D04 D03 D02 D01 D00
FN3 FP3 SN3 SP3 FN2 FP2 SN2 SP2 FN1 FP1 SN1 SP1 FN0 FP0 SN0 SP0
SP3, SP2, SP1, SP0 = Set to ‘1’ for start event of corresponding channel on positive edge.
SN3, SN2, SN1, SN0 = Set to ‘1’ for start event of corresponding channel on negative edge.
FP3, FP2, FP1, FP0 = Set to ‘1’ for end event of corresponding channel on positive edge.
FN3, FN2, FN1, FN0 = Set to ‘1’ for end event of corresponding channel on negative edge.
Note:
The positive and negative settings must never both be set to ‘1’. Only one edge is allowed.
To disable an input, set both the negative and positive bits to ‘0’.
SensL © 2011
SensL © 2011
39
39

HRM-TDC
USER MANUAL
> Appendix > Hrm-tdc Registers And Low Level Dll Functions
Driver - HRM_SetEdgeSensitivityRegister
HRM_STATUS WINAPI HRM_SetEdgeSensitivityRegister(HANDLE handle, USHORT esrData)
handle: HRM-TDC module handle
esrData: 16-bit value to write to the ESR.
RRR – Routing Reset Register
Register Description
A write to this register:
Resets the ARR and DRR registers ready for programming
Clears the WCH and WCL registers
Clears the LINE and PIXEL counters.
Clears the Memory Wrap Error bit in the status register
Driver - HRM_SetRoutingResetRegister
HRM_STATUS WINAPI HRM_SetRoutingResetRegister(HANDLE handle, USHORT rrrData)
handle: HRM-TDC module handle
rrrData: Don’t care
MCL, MCH – Memory Count LO/HI Register
Register Description
When the system is commanded to initialize the memory, these registers will dene the block size of 32-bit memory
locations to be written to with the value dened by the Load Fill Value registers. When the system is put into Time-
Tag or TCSPC Time-Tag mode, these registers will dene the number of 32-bit memory locations to be stored as
time-tag data before halting. If these registers are set to 0 the time-tag processor will run until commanded to stop
by resetting the state machine.
For further details see MBR (Md bits = 000).
Driver - HRM_SetMemoryCountRegister
HRM_STATUS WINAPI HRM_SetMemoryCountRegister(HANDLE handle, ULONG mcrData)
handle: HRM-TDC module handle
mcrData: Number of 32-bit locations to process
SensL © 2011
SensL © 2011
40
40

HRM-TDC
USER MANUAL
> Appendix > Hrm-tdc Registers And Low Level Dll Functions
FSR – Frequency Select Register
Register Description
The HRM-TDC module provides a programmable frequency output. This register denes the number of 5ns cycles
required to complete the HI and LO parts of the cycle. The most signicant 8 bits of the FSR denes the HI time and
the least signicant 8 bits denes the LO time. However, there is an offset of 1 such that:
Setting this value to 0x0000 would result in an output waveform 5ns low followed by 5ns high.
Setting this value to 0x0309 would result in an output waveform 20ns HI, 50ns LO.
When in FIFO Time-Tagging mode, setting the FSR to the value of 0xFFFF will force the module to operate in
Resync and the output frequency will be xed to 250KHz.
Driver - HRM_SetFrequencySelectionRegister
HRM_STATUS WINAPI HRM_SetFrequencySelectionRegister(HANDLE handle,USHORT fsrData)
handle: HRM-TDC module handle
fsrData: Value to write to the FSR
IDR – I/O Direction Register
Register Description
The 16-bit I/O signals of the HRM-TDC can be programmed to be inputs or outputs. The value of this register
denes the direction of each I/O bit. Setting a bit in this register to ‘1’ will program the corresponding I/O bit as an
output. Setting a bit in this register to ‘0’ will program the corresponding I/O bit as an input.
Driver - HRM_SetIODirectionRegister
HRM_STATUS WINAPI HRM_SetIODirectionRegister(HANDLE handle, USHORT iodrData)
handle: HRM-TDC module handle
iodrData: Value to write to the IDR
IVR – I/O Value Register
Register Description
Writing to this register sets any I/O bit, enabled as an output, to the value of its corresponding bit.
SensL © 2011
SensL © 2011
41
41

HRM-TDC
USER MANUAL
> Appendix > Hrm-tdc Registers And Low Level Dll Functions
Driver - HRM_SetIOValueRegister
HRM_STATUS WINAPI HRM_SetIOValueRegister(HANDLE handle, USHORT iovrData)
handle: HRM-TDC module handle
iovrData: Value to write to the IVR
BCL, BCH – Bin Count LO/HI Register
Register Description
These registers dene the maximum number bins that can occur during the period of the TCSPC clock. This count
can be calculated as:
Bin Count = MOD(Clock Period/Resolution) + 1
Resolution = 26.9851ps.
The Bin Count is a 23-bit number. BCL denes the least signicant 16 bits and BCH denes the most
signicant 7 bits. It is important that this value is correctly set for both Time-Binning and Time-Tagging.
Note: This feature is disabled if bit 6 of the mode register is clear.
Driver - HRM_SetBinCountRegister
HRM_STATUS WINAPI HRM_SetBinCountRegister(HANDLE handle, ULONG bcrData)
handle: HRM-TDC module handle
bcrData: 32-bit value to write to the BCH, BCL registers
UCL, UCH – USB Count HI/LO Register
Register Description
These registers dene the number of 32-bit words to be read from the USB high-speed interface.
Driver - HRM_SetUSBCountRegister
HRM_STATUS WINAPI HRM_SetUSBCountRegister(HANDLE handle, ULONG ucrData)
handle: HRM-TDC module handle
ucrData: Number of 32-bit words to be read from the USB high-speed interface
SensL © 2011
SensL © 2011
42
42

HRM-TDC
USER MANUAL
> Appendix > Hrm-tdc Registers And Low Level Dll Functions
HRS, HRM-TDC Status Register
Register Description
Reading this register will report the status of the HRM-TDC module as follows:
D15 D14 D13 D12 D11 D10 D09 D08 D07 D06 D05 D04 D03 D02 D01 D00
MC MT2 MT1 MT0 CH1 CH0 RSY 0 0 0 0 OV ME FC HS TP
TP: If set to ‘1’, the TCSPC time-tag/time-bin processor is active.
HS: If set to ‘1’, the memory high-speed data transfer processor to the USB port will be active.
FC: If set to ‘1’ the FPGA conguration processor is active.
ME: If set to ‘1’ indicates that a TIME-TAG memory WRAP-ROUND error has occurred.
OV: This bit will be cleared when the state machine is reset.
OV will go to ‘1’ if, during processing, the 32-bit 5ns resolution macro timer wraps-round from maximum
back to 0.
RSY: If set to ‘1’ the module is set such that, when in FIFO Time-Tagging mode, it will operate in Resync (FSR is
set to 0xFFFF).
CH: These two bits dene the module type 1, 2 or 4 channels.
CH1 CH0 TYPE
0 0 1 Channel
0 1 2 Channel
1 0 3 Channel
1 1 4 Channel
MT: These three bits dene the memory card type/size being used:
MT2 MT1 MT0 SIZE
0 0 0 Reserved
0 0 1 Reserved
0 1 0 Reserved
0 1 1 Reserved
1 0 0 32 Mbytes
1 0 1 16 Mbytes
1 1 0 8 Mbytes
1 1 1 No card installed
MC: If set to ‘1’, only one card of MT type is installed. If ‘0’, two cards of MT type are installed.
SensL © 2011
SensL © 2011
43
43

HRM-TDC
USER MANUAL
> Appendix > Hrm-tdc Registers And Low Level Dll Functions
Driver - HRM_GetStatusRegister
HRM_STATUS WINAPI HRM_GetStatusRegister(HANDLE handle, USHORT *srData)
handle: HRM-TDC module handle
srData: Pointer for saving current 16-bit HRS value
PCR – Product Code Register
Register Description
Reading from this register will report the PRODUCT code. The LS byte will report the product ID and the MS byte
denes any variants from the standard product. For a standard HRM-TDC module this value should read 0x0001.
Low Level Driver
HRM_STATUS WINAPI HRM_GetProductCodeRegister(HANDLE handle, USHORT *pcrData)
handle: HRM-TDC module handle
pcrData: Pointer for saving current 16-bit PCR value
SRR – Software Revision Register
Register Description
Reading from this register will report the current rev of the FPGA code.
Low Level Driver
HRM_STATUS WINAPI HRM_GetSoftwareRevisionRegister(HANDLE handle, USHORT *srrData)
handle: HRM-TDC module handle
srrData: Pointer for saving current 16-bit SRR value
MIR – Module ID 1, 2, 3, 4 Register
Register Description
Reading from these four registers will report the contents of the ‘on-board’ serial ID chip. The contents of the serial
ID chip is comprised of 64 bits. The MSB of ID-1 will be the rst bit returned from the ID chip. The LSB of ID-4 will
be the last bit returned from the ID chip.
SensL © 2011
SensL © 2011
44
44

HRM-TDC
USER MANUAL
> Appendix > Hrm-tdc Registers And Low Level Dll Functions
Driver - HRM_GetModuleIDRegister
HRM_STATUS WINAPI HRM_GetModuleIDRegister(HANDLE handle, BYTE *midData)
handle: HRM-TDC module handle
midData: Pointer for saving text string of the HRM-TDC module ID
WCH – Write Count HI Register
Register Description
When operating in time-tag mode, this register will contain the number of 1K (1024 bytes) blocks of data that have
been written to memory by the time-tag processor. When the time-tag processor is running, this register should be
used to track the memory for continuous download of data.
Note: This register automatically wraps around at the maximum address as dened by the memory conguration
bits in the status register.
Driver - HRM_GetWriteCountRegister
HRM_STATUS WINAPI HRM_GetWriteCountRegister(HANDLE handle, ULONG *wrrData)
handle: HRM-TDC module handle
wrrData: Pointer for saving current 32-bit value of WCH and WCL registers
WCL – Write Count LO Register
Register Description
When operating in time-tag mode, this register will contain the residual bytes (0-1023 bytes) that have been written
to memory by the time-tag processor. The value of the WCH and WCL are not locked. The WCH should be used for
tracking the memory data. Once the time-tagging has been stopped the WCL register should be used to download
any remaining data.
Driver – HRM_GetWriteCountRegister
See WCH register
SensL © 2011
SensL © 2011
45
45

HRM-TDC
USER MANUAL
> Appendix > Hrm-tdc Registers And Low Level Dll Functions
Non-Register Specic Low Level Drivers
Driver - HRM_InitMemory
HRM_STATUS WINAPI HRM_InitMemory( HANDLE handle,
ULONG addr,
ULONG len,
ULONG llData)
Fill a block of memory with a specic bit pattern.
handle: HRM-TDC module handle
addr: 32-bit starting address
len: Number of 32-bit locations to ll
llData: 32-bit value to ll the memory with
Driver - HRM_ReadMemory
HRM_STATUS WINAPI HRM_ReadMemory( HANDLE handle,
USHORT modeMask,
ULONG addr,
ULONG len,
BYTE *buf)
Read a block of data from a given location in memory.
handle: HRM-TDC module handle
modeMask: Mask to dene desired state of mode register bits when executing the function
addr: 32-bit starting address
len: Number of 32-bit locations to read
buf: Pointer to buffer for storing the data
Driver - HRM_ReadFIFOMemory
HRM_STATUS WINAPI HRM_ReadFIFOMemory( HANDLE handle,
USHORT modeMask,
ULONG addr,
ULONG len,
BYTE *buf)
Read a block of data from a given location in memory when card is operating in FIFO mode.
handle: HRM-TDC module handle
modeMask: Mask to dene desired state of mode register bits when executing the function
addr: 32-bit starting address
len: Number of 32-bit locations to read
buf: Pointer to buffer for storing the data
SensL © 2011
SensL © 2011
46
46

HRM-TDC
USER MANUAL
> Appendix > Hrm-tdc Registers And Low Level Dll Functions
Driver - HRM_GetMemorySize
HRM_STATUS WINAPI HRM_GetMemorySize( HANDLE handle,
ULONG *size)
Gets the memory size of the module in bytes.
handle: HRM-TDC module handle
size: Pointer to location for storing number of memory bytes.
SensL © 2011
SensL © 2011
47
47

HRM-TDC
USER MANUAL
> Appendix > High Level Dll Functions
HIGH LEVEL DLL FUNCTIONS
The HRM-TDC DLL (HRMTimeAPI.DLL) contains a set of high level drivers designed to allow the user to easily
stream date from the module to memory or le. These drivers are as follows:
Driver - HRM_StartHistogramFSM
HRM_STATUS WINAPI HRM_StartHistogramFSM( HANDLE handle,
USHORT tcspc,
USHORT microlsb)
Setup the module in histogram mode and start it running.
handle: HRM-TDC module handle
tcspc: Value 1 for TCSPC histogram mode. Value 0 for multiscalar/averaging mode.
microlsb: Time-bin resolution. 0=27ps, 1=54ps, 2=108ps etc.
HRM_STATUS returned equal to HRM_OK if success
Driver - HRM_StreamTCSPC2File
HRM_STATUS WINAPI HRM_StreamTCSPC2File( HANDLE handle,
BYTE* outfname,
ULONG recordinglength,
ULONG esr,
USHORT microbits,
USHORT microlsb,
USHORT macrobits,
USHORT macrolsb)
Stream FIFO date to le (TCSPC with MACRO mode).
handle: HRM-TDC module handle
outfname: File name for storing data
recordinglength: Time in msec to stream data to le
esr: Module ESR register value for dening channels and edge sensitivity
microbits: Number of micro TCSPC measurement bits to use
microlsb: TCSPC resolution. 0=27ps, 1=54ps, 2=108ps etc.
macrobits: Number of MACRO bits to use
macrolsb: MACRO time resolution. 0=5ns, 1=10ns, 2=20ns etc.
HRM_STATUS returned equal to HRM_OK if success
SensL © 2011
SensL © 2011
48
48

HRM-TDC
USER MANUAL
> Appendix > High Level Dll Functions
Data format
Each time-tag value will be a 32 bit unsigned value.
The 2 LSBs, C1 and C0, will dene the channel the time-tag was received on.
C1 C0 Channel
0 0 0
0 1 1
1 0 2
1 1 3
The remaining 30 bits are shared between the MICRO and MACRO bits.
Note:
The total of the MICRO and MACRO bits must add up to 30. If this is not true the function will return an error.
Driver - HRM_StreamTCSPC2FMem
HRM_STATUS WINAPI HRM_StreamTCSPC2Mem( HANDLE handle,
BYTE *buf,
ULONG bufsize,
ULONG recordinglength,
ULONG esr,
USHORT microbits,
USHORT microlsb,
USHORT macrobits,
USHORT macrolsb,
ULONG *recordedbytes)
Stream FIFO date to memory buffer (TCSPC with MACRO mode).
handle: HRM-TDC module handle
buf: Pointer to memory buffer
bufsize: Memory buffer size in bytes. Recording stops if this is reached.
recordinglength: Time in msec to stream data to buffer (while buffer not full)
esr: Module ESR register value for dening channels and edge sensitivity
microbits: Number of micro TCSPC measurement bits to use
microlsb: TCSPC resolution. 0=27ps, 1=54ps, 2=108ps etc.
macrobits: Number of MACRO bits to use
macrolsb: MACRO time resolution. 0=5ns, 1=10ns, 2=20ns etc.
recordedbytes: Pointer to location for storing total number of bytes saved to buffer
HRM_STATUS returned equal to HRM_OK if success
SensL © 2011
SensL © 2011
49
49

HRM-TDC
USER MANUAL
> Appendix > High Level Dll Functions
Data format
See HRM_StreamTCSPC2File
Driver - HRM_StreamTimeTags2File
HRM_STATUS WINAPI HRM_StreamTimeTags2File( HANDLE handle,
BYTE *outfname,
ULONG recordinglength,
ULONG esr,
USHORT microlsb)
Stream FIFO date to le (FIFO Time-Tagging mode).
handle: HRM-TDC module handle
outfname: File name for storing data
recordinglength: Time in msec to stream data to le
esr: Module ESR register value for dening channels and edge sensitivity
microlsb: Micro resolution. 0=27ps, 1=54ps, 2=108ps etc.
HRM_STATUS returned equal to HRM_OK if success
Data format
Each time-tag consists of two 32-bit unsigned values.
1st word
The 2 LSBs, C1 and C0, will dene the channel the time-tag was received on.
C1 C0 Channel
0 0 0
0 1 1
1 0 2
1 1 3
The remaining bits are reserved for the MICRO time.
SensL © 2011
SensL © 2011
50
50

HRM-TDC
USER MANUAL
> Appendix > High Level Dll Functions
2nd word
Free Running:
The second word is a free running 32-bit counter with an LSB of 5ns. The MICRO counter is a 23 bit counter with
an LSB value of 26.9851ps. This counter rolls over at a value of 0x50FFFF. By comparing the previous MACRO
time with the current MACRO time the number of roll overs, if any, of the MICRO counter can be determined.
This allows the time-tag values to be resolved indenately.
For details of the MICRO counter and how this is achieved see article in appendix.
Resync:
The second word is a 40MHz (25ns LSB) counter synchronized to the 250KHz START clock. By comparing the
previous MACRO time with the current MACRO time the number of roll overs, if any, of the MICRO counter can
be determined. This allows the time-tag values to be resolved indenately.
For details of the MICRO counter and how this is achieved see article in appendix.
Driver - HRM_StreamTimeTags2Mem
HRM_STATUS WINAPI HRM_StreamTimeTags2Mem( HANDLE handle,
BYTE *buf,
ULONG bufsize,
ULONG recordinglength,
ULONG esr,
USHORT microlsb,
ULONG *recordedbytes)
Stream FIFO date to memory buffer (FIFO Time-Tagging mode).
handle: HRM-TDC module handle
buf: Pointer to memory buffer
bufsize: Memory buffer size in bytes. Recording stops if this is reached.
recordinglength: Time in msec to stream data to buffer (while buffer not full)
esr: Module ESR register value for dening channels and edge sensitivity
microlsb: TCSPC resolution. 0=27ps, 1=54ps, 2=108ps etc.
recordedbytes: Pointer to location for storing total number of bytes saved to buffer
HRM_STATUS returned equal to HRM_OK if success
Data format
See HRM_StreamTimeTags2File
SensL © 2011
SensL © 2011
51
51

HRM-TDC
USER MANUAL
> Appendix > High Level Dll Functions
Driver - HRM_GetTimeTagGap
HRM_STATUS WINAPI HRM_GetTimeTagGap( ULONG pMacro,
ULONG pMicro,
ULONG cMacro,
ULONG cMicro,
BYTE *channel,
double *gap)
Calculates the gap between the previous FIFO time-tag and the current time-tag and saves it in picoseconds. This
function is for FREE RUNNING mode only.
pMacro: 32-bit MACRO value of previous time-tag
pMicro: 32-bit MICRO value of previous time-tag
cMacro: 32-bit MACRO value of current time-tag
cMicro: 32-bit MICRO value of current time-tag
channel: Storage location for channel ID (0, 1, 2 or 3)
gap: Storage location for calculated gap value in picoseconds
HRM_STATUS returned TRUE if error
Note:
All four input parameters, pMacro, pMicro, cMacro and cMicro, are data values as read directly from a FIFO TimeTagging RAW buffer or le.
Driver - HRM_GetFifoTCSPCinfo
HRM_STATUS WINAPI HRM_GetFifoTCSPCinfo( ULONG tag,
ULONG microBits,
ULONG microLSB,
ULONG macroLSB,
BYTE *channel,
double *micro,
double *macro)
Get the channel ID, and the macro and micro times from the FIFO TCSPC 32-bit time-tag.
The macro time is returned in nanoseconds and the micro time is returned in picoseconds.
tag: 32-bit time-tag
microBits: Number of micro bits in time-tag (0 to 23).
microLSB: LSB of micro time (0 to 22)
macroLSB: LSB of micro time (0 to 31)
channel: Storage location for channel ID (0, 1, 2 or 3)
micro: Storage location for micro time in picoseconds
macro: Storage location for macro time in nanoseconds
HRM_STATUS returned equal to HRM_OK if success
SensL © 2011
SensL © 2011
52
52

HRM-TDC
USER MANUAL
> Appendix > High Level Dll Functions
Driver - HRM_CorrelateTimeBins
HRM_STATUS WINAPI HRM_CorrelateTimeBins( HANDLE handle,
ULONG *x,
ULONG lx,
ULONG *y,
ULONG ly,
ULONG maxlag,
double *corr
Carries out a correlation algorithm on two sets of Time Bins.
handle: HRM-TDC module handle
x: Pointer to an array of time bin values
lx: Number of bins in x array
y: Pointer to an array of time bin values
ly: Number of bins in y array
maxlag: Total number of bins to be used as the lag time
corr: Pointer to array for storing the correlation results
HRM_STATUS returned equal to HRM_OK if success
Note: For autocorrelation the user must input the same set of time bins for x and y.
For details of the correlation algorithm used see article in appendix.
Driver - HRM_RunFifoTimeTagging
HRM_STATUS WINAPI HRM_RunFifoTimeTagging( HANDLE handle,
USHORT ESRreg,
USHORT microlsb
USHORT mode)
Starts running the FIFO time tagging mode. Once this has been executed the function HRM_GetFifoData can be
used to continuously download the data.
handle: HRM-TDC module handle
ESRreg: Module ESR register value for dening channels and edge sensitivity
microlsb: Resolution. 0=27ps, 1=54ps, 2=108ps etc.
mode: 1 = FIFO_FREE_RUNNING or 2 = FIFO_RESYNC
HRM_STATUS returned equal to HRM_OK if success
SensL © 2011
SensL © 2011
53
53

HRM-TDC
USER MANUAL
> Appendix > High Level Dll Functions
Driver - HRM_RunFifoTCSPC
HRM_STATUS WINAPI HRM_RunFifoTCSPC( HANDLE handle,
USHORT ESRreg,
USHORT microbits,
USHORT microlsb,
USHORT macrolsb)
Starts running the FIFO TCSPC mode. Once this has been executed the function HRM_GetFifoData can be used
to continuously download the data.
handle: HRM-TDC module handle
ESRreg: Module ESR register value for dening channels and edge sensitivity
microbits: Number of micro TCSPC bits in time-tag (max value = 23)
microlsb: TCSPC resolution. 0=27ps, 1=54ps, 2=108ps etc.
macrolsb: Macro time resolution. 0=5ns, 1=10ns, 2=20ns etc.
HRM_STATUS returned equal to HRM_OK if success.
Note: Each time tag consists of 1 x 32-bit word. The least signicant 2 bits are reserved for the channel ID leaving
30 bits to be shared between the macro and micro time.
Driver - HRM_GetFifoData
HRM_STATUS WINAPI HRM_GetFifoData(HANDLE handle,
USHORT mode,
ULONG max,
ULONG *size,
ULONG *buffer)
Once the module is running in FIFO time tagging or FIFO TCSPC mode (see HRM_RunFifoTimeTagging and
HRM_RunFifoTCSPC) this function can be used to continuosly download the data from the FIFO. This function
will download all the data available up to a specied max count from the FIFO and save it in the buffer. The actuaI
number of 32-bit values read from the FIFO will be stored in the location pointed at by ‘size’. This function keeps a
pointer that is updated as data is downloaded from the FIFO. Hence, consecutive calls to this function will read the
data in sequence as it is stored in the FIFO. This function allows the user to continuosly download the FIFO data in
blocks allowing processing of the data between each call.
Note:
• The data transferred will be rounded to a number of 256 x 32-bit elements. Therefore the minimum data transfer
is 256 x 32-bit elements. The minimum allowable value of max is 256.
• The amount of processing time available between each call is dependant on the hit rate at the module input(s).
handle: HRM-TDC module handle
mode: 0 = FIFO_TCSPC or 1 = FIFO_FREE_RUNNING or 2 = FIFO_RESYNC
max: Maximum elements to store
size: Pointer to location for storing actual number of elements read from the FIFO
buffer: Pointer to 32-bit buffer for storing the data
HRM_STATUS returned equal to HRM_OK if success
SensL © 2011
SensL © 2011
54
54

HRM-TDC
USER MANUAL
> Appendix > High Level Dll Functions
Driver - HRM_ConvertRAWtoCSV
HRM_STATUS WINAPI HRM_ConvertRAWtoCSV( USHORT mode,
USHORT mocroBits,
BYTE *rawFile,
BYTE *csvFile)
Converts a previously generated RAW binary le into a CSV le for importing into a spreadsheet or TEXT editor.
mode: FIFO_TCSPC, FIFO_FREE_RUNNING or FIFO_RESYNC
microBits: Number of micro bits. Only applicable for FIFO_TCSPC mode.
rawFile: Name of RAW binary le
csvFile: Name of le to store TEXT formatted data
HRM_STATUS returned equal to HRM_OK if success
SensL © 2011
SensL © 2011
55
55

HRM-TDC
USER MANUAL
> Appendix > Dll Error Reporting
DLL ERROR REPORTING
All DLL functions return TRUE on error and FALSE on success. When a DLL function encounters an error it also
updates a global ERROR word describing the reason for the error. This error can be inspected at any time by calling
the function HRM_GetLastError( ).
Driver - HRM_GetLastError
HRM_STATUS WINAPI HRM_GetLastError( HRM_STATUS newVal)
This function returns the last error that was encountered by the DLL functions.
newVal: Value to update the ERROR word with after returning the current value.
Note:
For normal operation the value of newVal should be set to one of two values:
0 HRM_OK : Clear error after reading value
9999 HRM_NO_CHANGE : Do not change error value
The possible values returned by this function are as follows:
0 HRM_OK :No error
1 HRM_ERROR :Function error
2 HRM_NO_LICENSE :License error
3 HRM_OPEN_USB :Could not open USB module
4 HRM_CLOSE_USB :Could not close USB module
5 HRM_INV_HANDLE :Invalid HANDLE
6 HRM_RAW_FILE :Could not open RAW le
7 HRM_OUTPUT_FILE :Could not open O/P le
8 HRM_INV_PARAMETER :Invalid function parameter
9 HRM_WRITE_COMMAND :Error writing command
10 HRM_READ_COMMAND :Error reading command
11 HRM_READ_DATA :Error reading data block
12 HRM_FIFO_OVERFLOW :FIFO has overowed
13 HRM_BUFFER_FULL :Memory buffer full
14 HRM_TIMEOUT :Timeout error
15 HRM_NO_MODULE_FOUND :Could not detect module
SensL © 2011
SensL © 2011
56
56

HRM-TDC
USER MANUAL
> Appendix > Dll Application Examples
DLL APPLICATION EXAMPLES
Streaming Time-Tags to le
Description
The following example streams Time-Tags to a binary le and then creates a TEXT le from the RAW binary le. If
there is no additional argument (argc = 1) then streaming will be carried out in FIFO Time-Tagging mode. If there
is an additional argument (argc > 1) then streaming will be carried out in FIFO TCSPC with MACRO time mode.
Source Code
#include <stdio.h>
#include <stdlib.h>
#include <windows.h>
#include “HRM-TDCAPI.h”
typedef unsigned char Ubyte; /* Unsigned byte */
typedef char Sbyte; /* Signed byte */
typedef unsigned short Uword; /* Unsigned 16 bits */
typedef short Sword; /* Signed 16 bits */
typedef unsigned int Ulong; /* Unsigned 32 bits */
typedef int Slong; /* Signed 32 bits */
typedef double Sdoub; /* Double */
void main(Sword argc, Sbyte *argv[])
{
HANDLE hdl[10];
HRM_STATUS error;
FILE *, *fo;
Sbyte ch;
Sword i, ag;
Ulong moduleCount, ttag[2], pMAC, pMIC, cMAC, cMIC, Num;
Sdoub gapT, Tot, mac, mic;
error = HRM_OK;
pMAC = 0;
pMIC = 0;
= NULL;
fo = NULL;
/*
Detect the number of HRM-TDC modules
*/
HRM_RefreshConnectedModuleList();
moduleCount = HRM_GetConnectedModuleCount();
SensL © 2011
SensL © 2011
57
57

HRM-TDC
USER MANUAL
> Appendix > Dll Application Examples
/*
If a module is present connect to the rst module.
If no module set error and reason in last error report.
*/
if(moduleCount)
HRM_GetConnectedModuleList(hdl);
else
{
HRM_GetLastError(HRM_OPEN_USB);
error = HRM_ERROR;
}
/*
If no argument do FIFO Time_tagging for 1ms on channel 0.
If an argument then do FIFO TCSPC with macro time.
*/
if(error == HRM_OK && argc == 1)
error = HRM_StreamTimeTags2File(hdl[0],”FIFO.RAW”,1,0x0009, 0);
else
if(error == HRM_OK)
error = HRM_StreamTCSPC2File(hdl[0],”FIFO.RAW”,1,0x0009,13,0,17,0);
/*
Open the RAW le and create a TXT le
*/
if(error == HRM_OK)
{
= fopen(“FIFO.RAW”, “r+b”);
fo = fopen(“FIFO.TXT”, “w+t”);
}
/*
If le open error, set error and reason in last error report.
*/
if(error == HRM_OK && ( == NULL || fo == NULL))
{
HRM_GetLastError(HRM_OUTPUT_FILE);
error = HRM_ERROR;
}
/*
If an argument then read the TCSPC time-tags, get the macro and
micro values in ns and ps and put to the TXT le
*/
for(Num=1, ag=1; ag && error == HRM_OK && argc != 1; Num++)
{
if((fread(ttag, 4, 1, )) == 0)
ag = 0;
SensL © 2011
SensL © 2011
58
58

HRM-TDC
USER MANUAL
> Appendix > Dll Application Examples
else
{
HRM_GetFifoTCSPCinfo(ttag[0], 13, 0, 0, &ch, &mic, &mac);
fprintf(fo, “%ld\t%d\t%.0f\t\t%.0f\n”, Num, ch, mac, mic);
}
}
/*
If no argument then read the FIFO time-tags, convert them into ps gap
times and and put to the TXT le
*/
for(Num=1, Tot=0, ag=1; ag && error == HRM_OK && argc == 1; Num++)
{
if((fread(ttag, 4, 2, )) == 0)
ag = 0;
else
{
cMAC = ttag[1];
cMIC = ttag[0];
HRM_GetTimeTagGap(pMAC, pMIC, cMAC, cMIC, &ch, &gapT);
Tot = (gapT + Tot);
fprintf(fo, “%ld\t%.0f\t%.0f\n”, Num, Tot, gapT);
pMAC = cMAC;
pMIC = cMIC;
}
}
/*
Close the les and report any error
*/
if( != NULL)
fclose();
if(fo != NULL)
fclose(fo);
if(error == HRM_OK)
printf(“Done”);
else
{
error = HRM_GetLastError(HRM_OK);
printf(“Failed: Error code = %d”, error);
}
}
Histogram Example
Description
The following example sets up the module in TCSPC or Multi-scalar Histogram mode. This console-based
application allows input parameters to dene setup information as follows:
SensL © 2011
SensL © 2011
59
59

HRM-TDC
USER MANUAL
> Appendix > Dll Application Examples
Histogram.exe <tcspc> <channels> <time> <clock_period>
<tcspc> A single char 1 or 0. 1 = tcspc mode, 0 = multi-scalar mode
<channels> 4 chars of value 1 or 0 dening if channel is enabled or disabled
0001 = Channel 0 only, 1000 = Channel 3 only, 1111 = All channels enabled
<time> Time in msec to run the histogram mode
<clock_period> Period of programmable clock in ns.
This value should be set to a value divisible by 10
Example:
Histogram.exe 1 0101 2000 1000
TCSPC mode, channels 2 and 0 enabled, run for 2 seconds, frequency = 1MHz
This program assumes that the programmable clock output is connected to all START and STOP inputs of all
channels.
The time-bin size, as set in the mode bits register, is set to 32 bits. For this example assume that there is 8Mbytes
of memory formatted as 2 Mbytes of 32-bit time-bins.
The function HRM_StartHistogramFSM( ) uses the AAR register to route the channel ID bits to the most signicant
address lines. This automatically splits the memory into 4 blocks, 1 for each channel. The histogram for channel 0
will start at 32-word address 0. The histogram for channel 1 will start at 32-word address 0x80000. The histogram
Figure 18
SensL © 2011
SensL © 2011
60
60

HRM-TDC
USER MANUAL
> Appendix > Dll Application Examples
for channel 2 will start at 32-word address 0x100000. The histogram for channel 3 will start at 32-word address
0x180000. The resolution of the timing is xed at 27ps per bin.
The edge sensitivity register sets an enabled channel to START on the LO-HI edge of the clock and STOP on the HILO edge. After the histogram is run for <time> milliseconds the histogram is stopped and all the memory is read to
a buffer. This program then uses the clock period to calculate the address of the time-bins corresponding to ~20ns
before the STOP (HI-LO transition of the clock). It then reads to le a range of time-bins that nishes ~20ns after the
STOP. This is done to save the time-bins where the histogram resides whilst keeping the le size to a minimum. As
the STOP signals are from a clock the resulting histogram will be a narrow peak. The width of this peak will represent
the amount of noise/jitter on the clock.
The screen shot shows a section of the output le (Histogram.csv) using EXCEL. The right hand side shows the 4
columns of time-tag values. The graph is a simple EXCEL representation of this data.
Source Code
#include <stdio.h>
#include <stdlib.h>
#include <windows.h>
#include “HRM-TDCAPI.h”
typedef unsigned char Ubyte; /* Unsigned byte */
typedef char Sbyte; /* Signed byte */
typedef unsigned short Uword; /* Unsigned 16 bits */
typedef short Sword; /* Signed 16 bits */
typedef unsigned int Ulong; /* Unsigned 32 bits */
typedef int Slong; /* Signed 32 bits */
typedef double Sdoub; /* Double */
#dene CH0_ADDR 0
#dene CH1_ADDR CH0_ADDR+0x80000
#dene CH2_ADDR CH1_ADDR+0x80000
#dene CH3_ADDR CH2_ADDR+0x80000
Ulong buer [0x200000];
void main(Sword argc, Sbyte *argv[])
{
HRM_STATUS error;
Uword tcspc, delay, chann;
Uword period, clock;
Ulong moduleCount, oset, range, i;
HANDLE hdl[10];
FILE *;
/*
Initialise variables and clear error report
*/
error = HRM_OK;
tcspc = 0;
SensL © 2011
SensL © 2011
61
61

HRM-TDC
USER MANUAL
> Appendix > Dll Application Examples
delay = 0;
chann = 0;
period = 2000;
= NULL;
HRM_GetLastError(HRM_OK);
/*
Set error if too few input parameters and set reason in last error.
*/
if(argc < 4)
{
HRM_GetLastError(HRM_INV_PARAMETER);
error = HRM_ERROR;
}
/*
If dene frequency then read period in ns and ensure
not greater than maximum allowable value of 2500.
*/
if(argc > 4)
period = (Uword)atoi(argv[4]);
if(period > 2500)
period = 2500;
/*
Read from ~20ns before 1/2 cycle to ~20ns after.
Form the oset in the memory where reading is to start.
This is ~ 20ns before half period of clock. Then set the
range for reading results of 40ns.
*/
clock = (Uword)(period / 2);
i = (Ulong)clock;
if (i >= 20)
i = (Ulong)(i - 20);
oset = (Ulong)(i * 1000 / 27);
range = (Ulong)(40 * 1000 / 27);
/*
Form the programmable clock value. Upper byte and lower byte
are set to 1/2 period in 5ns per bit - 1.
*/
clock = (Uword)(clock / 5);
if(clock)
clock--;
clock = (Uword)((clock << 8) | clock);
/*
1. Set the ag for TCSPC or MULTI-SCALAR mode
2. Read in the time in ms for running the histogram.
3. Form the 4 channel edge enables based on the input parameter.
SensL © 2011
SensL © 2011
62
62

HRM-TDC
USER MANUAL
> Appendix > Dll Application Examples
*/
if(error == HRM_OK)
{
tcspc = (Uword)(argv[1][0] & 1);
delay = (Sword)atoi(argv[3]);
if(argv[2][0] == ‘1’)
chann |= 0x9000;
if(argv[2][1] == ‘1’)
chann |= 0x0900;
if(argv[2][2] == ‘1’)
chann |= 0x0090;
if(argv[2][3] == ‘1’)
chann |= 0x0009;
}
/*
Detect the number of HRM-TDC modules
*/
if(error == HRM_OK)
{
HRM_RefreshConnectedModuleList();
moduleCount = (Ulong)HRM_GetConnectedModuleCount();
}
/*
If a module is present connect to the rst module.
If no module, set error and reason in last error report.
*/
if(error == HRM_OK)
{
if(moduleCount)
HRM_GetConnectedModuleList(hdl);
else
{
HRM_GetLastError(HRM_OPEN_USB);
error = HRM_ERROR;
}
}
/*
Set the clock frequency.
*/
if(error == HRM_OK)
error = HRM_SetFrequencySelectionRegister(hdl[0], clock);
/*
Set the channel edge enables.
*/
if(error == HRM_OK)
error = HRM_SetEdgeSensitivityRegister(hdl[0], chann);
SensL © 2011
SensL © 2011
63
63

HRM-TDC
USER MANUAL
> Appendix > Dll Application Examples
/*
Clear the memory.
*/
if(error == HRM_OK)
error = HRM_InitMemory(hdl[0], 0, 0x200000, 0);
/*
Start the histogram running.
*/
if(error == HRM_OK)
error = HRM_StartHistogramFSM(hdl[0], tcspc, 0);
/*
Run the histogram for the programmed time in ms.
*/
if(error == HRM_OK)
for(i = GetTickCount(); (Uword)(GetTickCount() - i) < delay;);
/*
Stop the histogram process.
*/
if(error == HRM_OK)
error = HRM_SetModeBitsRegister(hdl[0], 0x0030);
/*
Read all the memory into the buer.
*/
if(error == HRM_OK)
error = HRM_ReadMemory(hdl[0], 0x0030, 0, 0x200000, buer);
/*
Open the le and set the headings.
*/
if(error == HRM_OK)
{
= fopen(“HISTOGRAM.csv”, “w+t”);
fprintf(, “Chan 0,Chan 1,Chan 2,Chan 3\n”);
}
/*
For each channel read all the time-bins from 20ns before to 20ns
after the 1/2 clock cycle and save then in the le.
*/
for(i=0; i!=range && error == HRM_OK; i++)
{
fprintf(, “%ld,%ld,%ld,%ld\n”,
buer[i+CH0_ADDR+oset], buer[i+CH1_ADDR+oset],
buer[i+CH2_ADDR+oset], buer[i+CH3_ADDR+oset]);
}
/*
SensL © 2011
SensL © 2011
64
64

HRM-TDC
USER MANUAL
> Appendix > Dll Application Examples
Close the le and print error code if failed.
*/
if()
fclose();
if(error == HRM_OK)
printf(“Done”);
else
{
error = HRM_GetLastError(HRM_OK);
printf(“Failed: Error code = %d”, error);
}
}
SensL © 2011
SensL © 2011
65
65

HRM-TDC
USER MANUAL
> Appendix > Resolving Free Running Fifo Time-tag Values
RESOLVING FREE RUNNING FIFO TIME-TAG VALUES
Free Running Algorithm Explained
When the module operates in Free Running FIFO Time-Tagging mode, resolving the time-tag values can be quite
complicated. A FIFO time-tag consists of two 32-bit unsigned values. The rst word reports the MICRO time and
channel number. The second word, called the MACRO time, is a 32 bit free running counter value with an LSB of
5ns.
The MICRO counter is a 23 bit counter with an LSB value of 26.9851ps. This counter rolls over at a value of 0x50FFFF.
The time for a complete rollover of the MACRO counter is ~21.5 seconds. So, assuming that the intervals between
consecutive time-tags is not greater than ~21.5 seconds each time-tag interval can be calculated as follows:
1. Calculate MACRO change dMACRO
If previous MACRO value is less than current MACRO value then
dMACRO = cMACRO – pMACRO
If previous value (pMACRO) is greater than current (cMACRO) then counter has rolled over so
dMACRO = 0x100000000 – pMACRO + cMACRO
2. Calculate complete MICRO rollover time rMICRO
Complete rollover time for MICRO:
rMICRO = 0x510000 * 26.9851ps = 143248136.6016ps
3. Calculate number of complete MICRO rollovers nMICRO
nMICRO = (dMACRO x 5000) / rMICRO (x 5000 to convert dMACRO into ps)
4. Calculate change in MICRO counter dMICRO
If previous value (pMICRO) is less than current value (cMICRO) then
dMICRO = cMICRO – pMICRO
If previous value (pMICRO) is greater than current (cMACRO) then counter has rolled over so
dMICRO = 0x510000 – pMICRO + cMICRO
5. Calculate total time between time-tags dTIME
dTIME = (nMICRO x rMICRO) + (dMICRO x 26.9851) ps
SensL © 2011
SensL © 2011
66
66

HRM-TDC
USER MANUAL
> Appendix > Resolving Free Running Fifo Time-tag Values
Software Implementation in ‘C’
int iMACRO;
double pMICRO, cMICRO, pMACRO, cMACRO;
double rMICRO, dMICRO, dMACRO, dTIME;
•
•
•
/*
Remove channel ID bits from MICRO values and
Convert to doubles.
*/
pMACRO = (double)PreviousMacroValue;
pMICRO = (double)(PreviousMicroValue >> 2);
cMACRO = (double)CurrentMacroValue;
cMICRO = (double)(CurrentMicroValue >> 2);
/*
Calculate the MICRO counter rollover time
*/
rMICRO = 0x510000 * 26.9851;
/*
Calculate the number of MICRO counter rollovers
*/
if(cMACRO >= pMACRO)
dMACRO = (cMACRO - pMACRO) * 5000.0 / rMICRO;
else
dMACRO = (cMACRO + 0xFFFFFFFF – pMACRO + 1) * 5000.0 / rMICRO;
/*
Cast rollover count to get dMACRO as a whole number then
convert count into picoseconds.
*/
iMACRO = (int)dMACRO;
dMACRO = (double)iMACRO;
dMACRO = dMACRO * rMICRO;
/*
Calculate the change in MICRO counter in picoseconds
*/
if(cMICRO > pMICRO)
dMICRO = (cMICRO - pMICRO) * 26.9851;
else
dMICRO = (cMICRO + 0x510000 – pMICRO) * 26.9851;
/*
Calculate the change in time from previous to current time-tag
*/
dTIME = dMICRO + dMACRO;
SensL © 2011
SensL © 2011
67
67

HRM-TDC
USER MANUAL
> Appendix > Resolving Free Running Fifo Time-tag Values
RESOLVING RESYNC FIFO TIME-TAG VALUES
Resync Algorithm Explained
When the module operates in Resync FIFO Time-Tagging mode, resolving the time-tag values can be quite
complicated. A FIFO time-tag consists of two 32-bit unsigned values. The rst word reports the MICRO time and
channel number. The second word, called the MACRO time, is a 32 bit counter value with an LSB of 25ns that is
synchronized to the 250KHz START clock.
The MICRO counter has an LSB value of 26.9851ps. This counter is reset to 0 on every cycle of the 250KHz START
clock. So each time-tag value can be calculated as follows:
1. Calculate offset between MACRO and MICRO timers
The rst time tag is used to calculate the MACRO offset ‘MACoffset’ as follows:
MACROoffset = FirstMACRO – ((FirstMICRO * 26.9851) / 25000) (25000ps = 25ns)
The gives the count of the MACRO when the rst 4us (250KHz) frame started.
2. Calculate the current 4ms frame
FrameNo = (MACRO – MACROoffset) / 160 (160 x 25ns = 4us – 250KHz)
3. Calculate the remainder of MACRO counts
Remainder = REM of (MACRO – MACROoffset) / 160
4. Now adjust the FrameNo based on possible boundary conditions
If (Remainder < 60 and MICRO > 100000) If MACRO is just past boundary and MICRO
FrameNo = FrameNo – 1; is large then Rollover hasn’t occurred yet.
If (Remainder > 110 and MICRO < 40000) If MACRO is near end of boundary and MACRO
FrameNo = FrameNo + 1; is small the ROLLOVER has already occurred.
5. Now calculate the time in picoseconds
Time = (FrameNo x 4000000) + (MICRO x 26.9851)
SensL © 2011
SensL © 2011
68
68

HRM-TDC
USER MANUAL
> Appendix > Resolving Free Running Fifo Time-tag Values
Software Implementation in ‘C’
long MACOFF, MACRO, MICRO, FRACT;
double dv1, dv2, dTIME;
/*
Calculate the MACRO oset count.
*/
dv1 = (double)(FirstMicroValue >> 2);
dv1 = (double)(dv1 * 26.9851);
dv1 = (double)(dv1 / 25000.0);
MACOFF = (long)dv1;
MACOFF = (long)(FirstMacroValue – MACOFF);
•
•
•
/*
Remove oset and calculate the MACRO and the fraction of frame.
*/
dv1 = (double)(MacroValue – MACOFF);
dv1 /= 160.0;
MACRO = (long)dv1;
dv2 = oor(dv1);
dv2 = (double)(dv1 - dv2);
dv2 = (double)(dv2 * 160.0);
FRACT = (long)dv2;
/*
Increment or decrement the MACRO based on boundary positions.
If MACRO is just past boundary and MICRO is large then ROLLOVER
hasn’t occurred yet. If MACRO is near end of boundary and MACRO
is small the ROLLOVER has already occurred.
*/
MICRO = MicroValue >> 2;
if(FRACT < 60 && MicroValue > 100000)
MACRO--;
if(FRACT > 110 && MicroValue < 40000)
MACRO++;
/*
Calculate the time in picoseconds.
*/
dv1 = (double)MACRO;
dv2 = (double)MicroValue;
dTIME = (dv1 * 4000000) + (dv2 * 26.9851);
SensL © 2011
SensL © 2011
69
69

HRM-TDC
[(x(i)−mx)∗( y(i−d)−my) ]
i
i
[(x(i)−mx)∗( y(i−d)−my) ]
USER MANUAL
> Appendix > Correlation Function Algorithm
CORRELATION FUNCTION ALGORITHM
In correlation mode the system will carry out a single sweep of software bins with all the bins initially set to 0. On
completion the system will calculate the correlation between two inputs (cross correlation) or correlation on a single
input (auto correlation) and save the result. The number of time-bins to be used for the calculation and the resolution
of the bin is programmable. The results will comprise of a number of values equal to the number of time-bins used
for the calculation. The position of each value represents the level of phase shift between the input streams. The rst
value corresponds to a shift of 0, the second a shift of ‘T’ etc, where ‘T’ is the resolution of the time-bin. The value
of each result represents the level of correlation at that particular phase.
Cross/ Auto correlation is a standard method of estimating the degree to which two series are correlated. Consider
two series x(i) and y(i) where i=0,1,2...N-1. The cross correlation r at delay d is dened as
∑
r =
i
(x(i) − m x)
∑
2
(y(i − d) − my)
∑
2
Where mx and my are the means of the corresponding series. If the above is computed for all delays d=0,1,2,...N-1
then it results in a cross correlation series of twice the length as the original series.
∑
r(d) =
There is the issue of what to do when the index into the series is less than 0 or greater than or equal to the number
of points. (i-d < 0 or i-d >= N) The most common approaches are to either ignore these points or assuming the series
x and y are zero for i < 0 and i >= N. In many signal processing applications the series is assumed to be circular in
which case the out of range indexes are “wrapped” back within range, ie: x(-1) = x(N-1), x(N+5) = x(5) etc
The range of delays d and thus the length of the cross correlation series can be less than N, for example the aim
may be to test correlation at short delays only. The denominator in the expression above serves to normalize the
correlation coefcients such that -1 <= r(d) <= 1, the bounds indicating maximum correlation and 0 indicating no
correlation. A high negative correlation indicates a high correlation but of the inverse of one of the series.
i
(x(i) − m x)
∑
i
2
(y(i − d) − my)
∑
i
2
SensL © 2011
SensL © 2011
70
70

HRM-TDC
USER MANUAL
> Appendix > Labview Driver Details
LABVIEW DRIVER DETAILS
The HRM-TDC Labview driver has been designed to allow the construction of a wide variety of custom applications
based on the HRM-TDC module. The library contains VI wrappers for all functions dened in the HRM-TDC API
DLL. The following naming convention has been used: the VI wrapper for HRM-TDC API DLL function HRM_XXXX
is HRM_XXXX.vi.
For LabVIEW the user must use the modied version of the DLL providid called HRMTimeALI_LV.DLL
In both cases a copy of the relevant DLL MUST reside in the same folder as the application.
HRM-TDC LabView Driver VI List
HRM_GetDLLVersion.vi
HRMTime API DLL Version Returns the HRMTime API
DLL version
HRM_SetCongurationPath.vi
Conguration path Path to the folder where the HRMTime
feature les are located
SensL © 2011
SensL © 2011
71
71

HRM-TDC
USER MANUAL
> Appendix > Labview Driver Details
HRM_RefreshConnectedModuleList.vi
HRM_GetConnectedModuleCount.vi
Connected module count Returns the number of
connected modules detected by the previous HRM_
RefreshConnectedModuleList call
HRM_GetConnectedModuleList.vi
Handle list
Numeric Holds the list of handles for the connected
moduled detected by the previous
HRM_RefreshConnectedModuleList call
SensL © 2011
SensL © 2011
72
72

HRM-TDC
USER MANUAL
> Appendix > Labview Driver Details
HRM_CloseModule.vi
Handle The module handle
HRM_SetAddressRouteRegister.vi
Address routing data
Numeric Data to be written to the address route
register
Handle Module handle
HRM_SetDataRouteRegister.vi
Handle Module handle
Data route routing data
Numeric Data to be written to the Data Route Register
SensL © 2011
SensL © 2011
73
73

HRM-TDC
USER MANUAL
> Appendix > Labview Driver Details
HRM_SetAddressRegister.vi
Address Data to be written to the Address Register
Handle Module handle
HRM_SetFillValueRegister.vi
Handle Module handle
Fill value Memory ll value
HRM_SetUSBAddressRegister.vi
Handle Module handle
USB Address USB block transfer address
SensL © 2011
SensL © 2011
74
74

HRM-TDC
USER MANUAL
> Appendix > Labview Driver Details
HRM_SetModeBitsRegister.vi
Handle Module handle
Mode bits data Mode bits data
HRM_SetEdgeSensitivityRegister.vi
Handle Module handle
Edge sensitivity Edge sensitivity data
HRM_SetRoutingResetRegister.vi
Handle Module handle
Routing reset Routing reset data
SensL © 2011
SensL © 2011
75
75
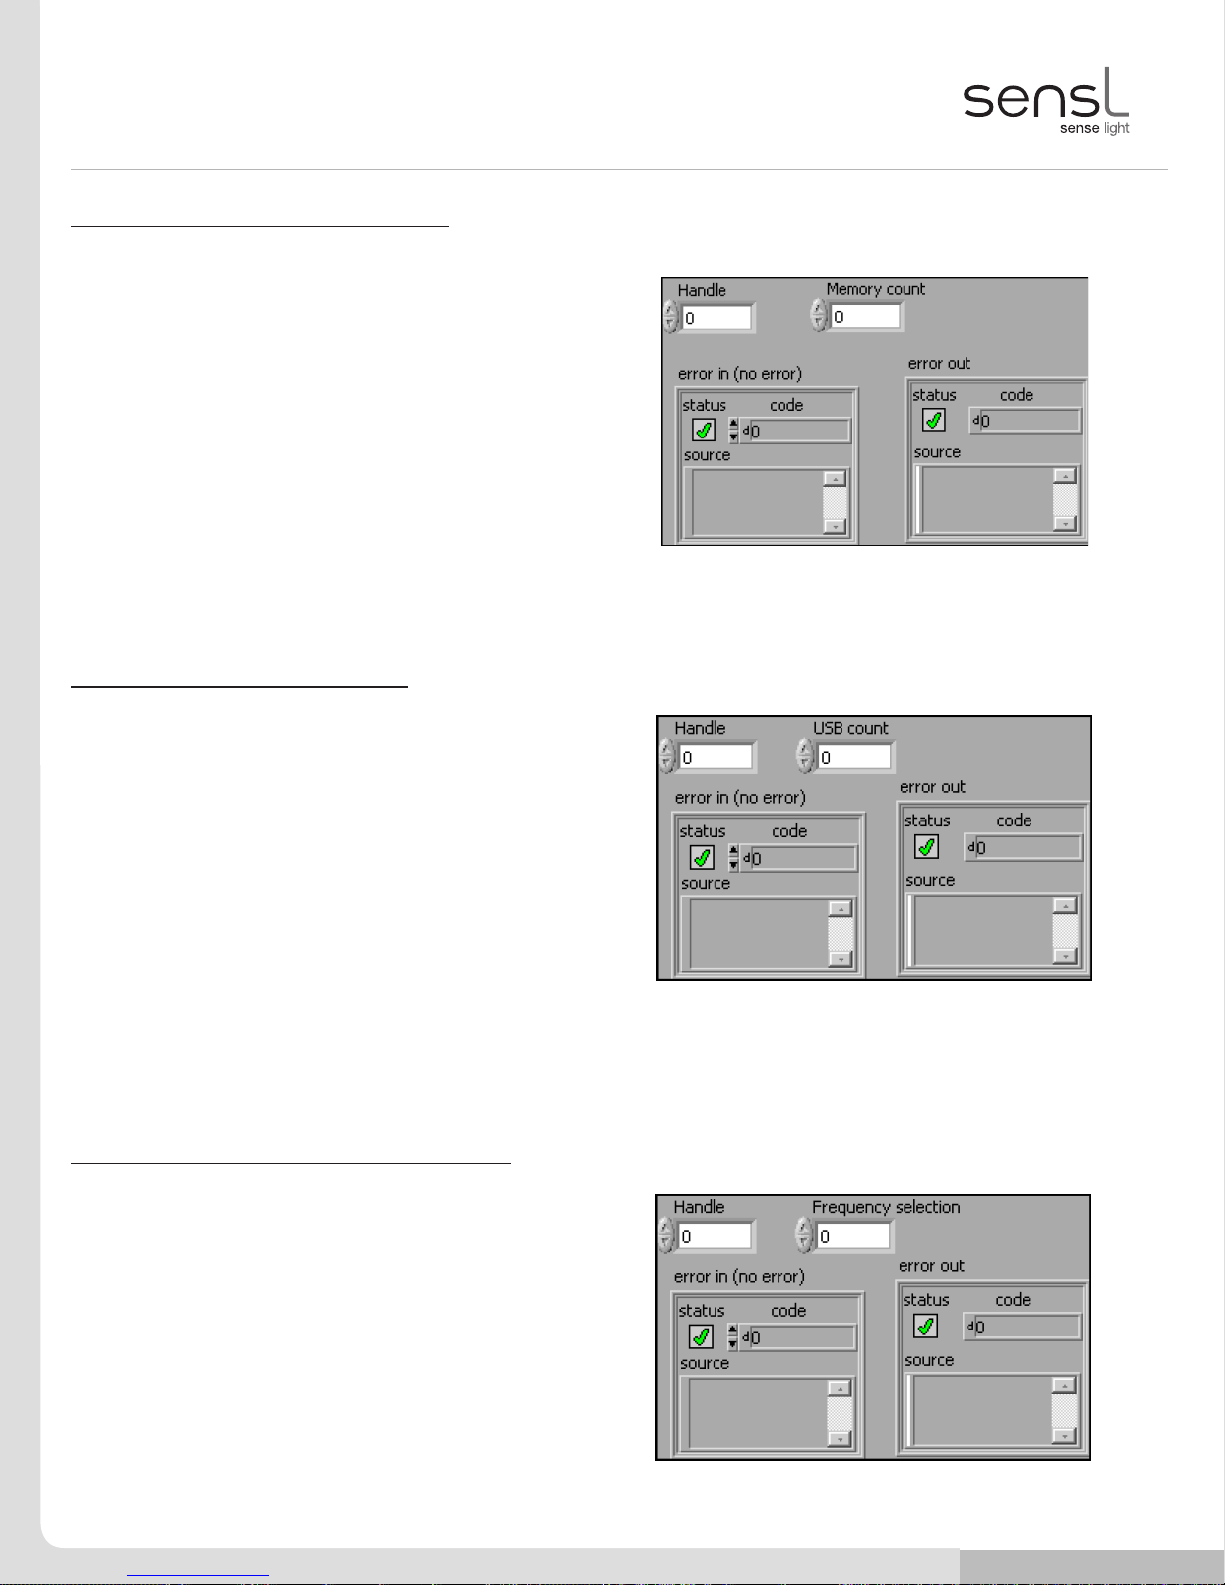
HRM-TDC
USER MANUAL
> Appendix > Labview Driver Details
HRM_SetMemoryCountRegister.vi
Handle Module handle
Memory count Memory count
HRM_SetUSBCountRegister.vi
Handle Module handle
USB count USB count data
HRM_SetFrequencySelectionRegister.vi
Handle Module handle
Frequency selection Frequency selection data
SensL © 2011
SensL © 2011
76
76

HRM-TDC
USER MANUAL
> Appendix > Labview Driver Details
HRM_SetIODirectionRegister.vi
Handle Module handle
IO direction GPIO direction data
HRM_SetIOValueRegister.vi
Handle Module handle
IO value IO value data
HRM_SetBinCountRegister.vi
Handle Module handle
Bin Count Bin Count
SensL © 2011
SensL © 2011
77
77

HRM-TDC
USER MANUAL
> Appendix > Labview Driver Details
HRM_GetStatusRegister.vi
Handle Module handle
Status Status data
HRM_GetSoftwareRevisionRegister.vi
Handle Module handle
FPGA revision FPGA revision
HRM_GetWriteCountRegister.vi
Handle Module handle
Write count Write count
SensL © 2011
SensL © 2011
78
78

HRM-TDC
USER MANUAL
> Appendix > Labview Driver Details
HRM_GetModuleIDRegister.vi
Handle Module handle
Module ID
Numeric Module serial number
HRM_InitMemory.vi
Handle Module handle
Start address Start address
Length Block length
Fill data Fill data
HRM_ReadMemory.vi
Handle Module handle
Mode mask Mode bits mask
Start address Read start address
Length Read block size
Buffer Read buffer
Numeric
SensL © 2011
SensL © 2011
79
79

HRM-TDC
USER MANUAL
> Appendix > Labview Driver Details
HRM_ReadFIFOMemory.vi
Handle Module handle
Mode mask Mode bits mask
Start address Read start address
Length Read block size
Buf Read buffer
Numeric
HRM_RequestStop.vi
Handle Module handle
SensL © 2011
SensL © 2011
80
80

HRM-TDC
USER MANUAL
> Appendix > Labview Driver Details
HRM_StreamTCSPC2Mem.vi
Handle Module handle
Buffer size Read buffer size
Recording length Recording time in ms
Micro bits Number of microtime bits
Micro LSB Microtime least signicant bit
Macro bits Number of macrotime bits
Macro LSB Macrotime least signicant bit
Edge selection Edge selection data
Recorded byte count Number of recorded bytes
Buffer
Numeric Read buffer
HRM_StreamTCSPC2File.vi
Handle Module handle
Recording length Recording time in ms
Micro bits Number of microtime bits
Micro LSB Microtime least signicant bit
Macro bits Number of macrotime bits
Macro LSB Macrotime least signicant bit
File name Output lename
Edge selection Edge selection data
SensL © 2011
SensL © 2011
81
81

HRM-TDC
USER MANUAL
> Appendix > Labview Driver Details
HRM_ConvertRawTCSPCFile2CSV.vi
Raw input le Input (raw) lename
CSV output le Output (CSV) lename
Microtime bits Number of microtime bits
(must match the value used in the HRM_
StreamTCSPC2File call)
Microtime lsb Microtime least signicant bit (must
match value used for the HRM_StreamTCSPC2File
call)
Macrotime bits Number of macrotime bits
(must match the value used for the HRM_
StreamTCSPC2File call)
Macrotime lsb Macrotime least signicant bit (must
match value used for the HRM_StreamTCSPC2File
call)
HRM_StreamTimeTags2Mem.vi
Handle Module handle
Buffer size Read buffer size
Recording length Recording time in ms
Edge selection Edge selection data
Microtime lsb Microtime least signicant bit
Number of recorded bytes Number of recorded bytes
Buffer
Numeric Read buffer
SensL © 2011
SensL © 2011
82
82

HRM-TDC
USER MANUAL
> Appendix > Labview Driver Details
HRM_StreamTimeTags2File.vi
Handle Module handle
Output le Output lename
Recording length Recording time in ms
Edge selection Edge selection data
Microtime lsb Microtime least signicant bit
HRM_ConvertRawContTTagsFile2CSV.vi
Input le Input (raw) lename
Output le Output (CSV) lename
Microtime lsb Microtime least signicant bit (must match the
value used for the HRM_StramTimeTags2File call)
SensL © 2011
SensL © 2011
83
83

HRM-TDC
USER MANUAL
> Appendix > Labview Driver Details
Sample LabView Application
Test_TCSPC.vi
This is a sample application demonstrating the TCSPC stream-to-le functionality.
SensL © 2011
SensL © 2011
84
84

HRM-TDC
USER MANUAL
> Appendix > Labview Driver Details
Rev. 3.0, December 2017
All specications are subject to change without notice
SensL © 2011
SensL © 2011
SensL © 2011
www.sensl.com
sales@sensl.com
+353 21 240 7110 (International)
+1 650 641 3278 (North America)
85
85
85
 Loading...