

Page 1
STRIPS MULTI-SENSOR: DRIP ENGLISH
MODEL NO.: 11 02 012 /2
US/INS 11 02 012/2 R5
Your Strips Drip is a Z-Wave multi-sensor that can be added to any certified
Z-Wave system and operate with any Z-Wave device.
Strips Drip is a water leak sensor that includestemperature and light sensing
options.
Strips Drip’s range is up to 40 meters, but can be extended by any
non-battery Z-Wave device placed between Strips Drip and the controller
as it will automatically act as a repeater to increase reliability and rangeof
your system.
Visit www.sensative.com/driptofind
YOUR NEW STRIPS (A)
Strips Drip will now report sensor levels and alarms according to the set
configuration (see TableA on the backside).
Note: Strips auto-add modeis started whenthe magnet isremoved forthe first timeout of thebox. If
your Strips didnot get addedwith auto-add, use thewake up command to add.
out more, including instructional videos or for any
support inquires.
Mounting Strips Drip (Figure 5-8)
5
Remove the protective tape from Strips Drip adhesive.
6
Mount Strips Drip on the marked “Strips side” of the mounting plate.
Make sure that the surface is clean. You may then remove the
7
protective tape from the mounting plate and place Strips Drip firmly
on the surface. Note that the adhesive is permanent and may
GETTING STARTED (C)
damage your surface upon removal.
Place Strips Drip so that the moisture detection pads will soak any
8
leaking water.
Adding Strips Drip to your Z-Wave system (Figure 1-4)
Strips Drip comes in auto-add mode. Follow the process below to add
Strips Drip to your network:
Set your Z-Wave controller in add mode. See your controller’s
1
manual.
Keep Strips Drip near its intended location during the add
2
process. Remove the magnet from Strips Drip.
3
YourZ-Wave controller application should now add Strips Drip.
You may verify that your controller shows Strips Drip reporting
4
correctly by holding it firmly according to figure 4 for about 15
GETTING STARTED (B)USING YOUR NEW STRIPS
seconds. Strips Drip will then sense the proximity and send a
leakage alarm.
Do not remove Strips Drip if a leak occurs. The sensor pads will dry after
the water has been removed.
Your Strips Drip is now mounted and added to your Z-Wave system.
It will give you valuable sensor data that may be used foralarms or
controlling other devices. Strips Drip analyzes the moisture ofthe pads
to indicate leaks.
Please note that poornetwork reliability will affect Strips Drip battery
life. When Strips Drip blinks 5 times, this indicates that Strips Dripfailed
to communicate with the controller. If it happens frequently you may
move the controller closer or add an extender between the controller and
Strips Drip.
Need more help? Contact [email protected]
Youmay configureStrips to bettersupport your needs usingthe configurationparameters (see
Table Aon the backside).
Z-Wave is aninternational standard forwireless communication insmart homes andbuildings
enabling you to monitor andcontrol yourhome remotely.
Strips supports association group1 (lifeline).Max 1 node.
Strips useslow power(< 2 dBm) radiosignals to communicatewith your Z-Wave controller.
The radiofrequencies usedare: 868.42/869.85 MHz(EU), 908.4/916.0 MHz (US/Can)
Hint 1
To extend the battery life of your
Strips Drip you may turn off
temperature/light reporting.
Hint 2
Make sure to save the included
magnet. It can be used to wake
up/add/remove Strips Drip.
Note that most magnets will
work as a replacement.
Hint 3
In certain locations, Strips Drip can be
mounted using the screw holes in the
mounting plate, or by simply placing
Strips Drip (including the mounting
plate) without mounting it in a fixed
position.
Page 2
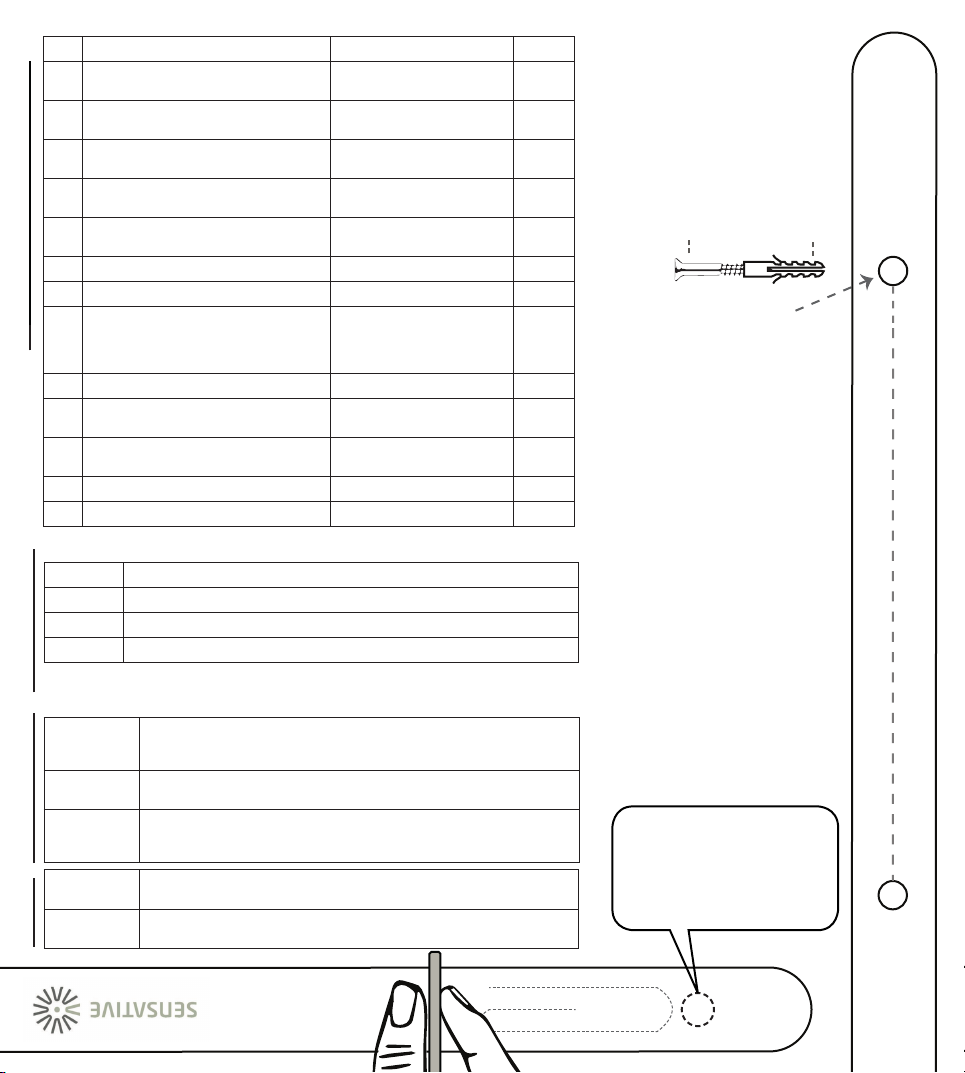
Wake up
Wake up Strips manually for Z-Wave communication.Move the magnet to the rounded
edge, and once the LED blinks, move the magnet away (see figure below). Repeat two
more times within 10 seconds. A successful wake-up is confirmed with one LED blink.
Add/remove
Set your controller to add/remove mode (see your controller’s manual). Then followthe
instruction above for the “Wake up” command.
Reset
You may need to reset Strips if your Z-Wave controller is missing or not responding. Follow
the instructions for “Wake up” above, but on the 3rd repetition, leave the magnet as
shown in the figure below (20mm from the rounded edge) for 10 seconds.
No. Description Values Default
2 LED alarm event reporting (1 byte)
0: Off
1: On
1
3 Temperature & Light reporting frequency (1 byte)
1: Normal
2: Frequent
1
4
Temperature reporting (1 byte)
(Does not affect temperature alarms)
0: Off
1: On
1
5 Temperature reporting unit (1 byte)
0: Celsius
1: Fahrenheit
0
6 Temperature alarms (1 byte)
0: Off
1: On
0
7 High temperature alarm level (1 byte) -20 to +60 (degree C) 60
8 Low temperature alarm level (1 byte) -20 to +60 (degree C) -20
9 Ambient light reporting (1 byte) 0: Off
1: On
2: Report only when levels defined
in parameter 10 & 11 are passed.
1
10 High ambient light report level (4 bytes) 3 - 64 000 40 000
11
Low ambient light report level (4 bytes)
(Must be significantly lower than parameter 10)
1 - 42 000 5 000
12 Leakage alarm (1 byte)
0: Off
1: On
1
13 Leakage alarm level (1 byte) 1 to 100 (1 = almost dry, 100 = wet) 10
14 Moisture reporting period (1 byte) 0-120 (Hours between reports) 0 (Off)
TEMPLATE FOR DRILLING
1 short blink Seen when doing user commands (Table C) or alarm event - when Strips is added in network.
2 short Seen when doing user commands (Table C) - when Strips is not added in a network.
1 long Indicates successful transmission of User commands (Table C)
5 short Error (E.g. communication with controller failed)
Ø 3mm
110 mm
Ø 4mm
Ø 4mm
Wake up time
Strips wake up time is set to 24 hours by default, it is possible to change this value
between 30 minutes and 24 hours butthis will affectthe battery life.
Association
Strips supports association group 1 (lifeline). Max 1 node. Normally usedto send Strips’
status to the Z-Wave controller.
A) CONFIGURATION PARAMETERS
B) LED LIGHT SIGNALSC) USER COMMANDS
OTHER
In order tosend commands, hold the magnet
in the position you see below and move it over
the user command sensor(LED will signal),then
move the magnet away.Repeat this according
to the user commanddirections (Table C) ofthe
command you wantto send.
 Loading...