

Page 1

Contents
Contents
Safety instructions .................................................................... 2
Delivery includes ....................................................................... 4
Product overview ...................................................................... 5
Putting the Set 840 S system into operation ......................... 6
Setting up the transmitter ................................................... 6
Connecting the transmitter to a sound source ................... 7
Connecting the transmitter to the mains .......................... 11
Connecting the induction loop or headphones
for hearing aids to the receiver
Wearing the receiver .......................................................... 13
Using the Set 840 S system .................................................... 15
Switching the transmitter on/off ...................................... 15
Switching the receiver on/off ............................................ 16
Adjusting the volume ......................................................... 16
Searching for a sound source ............................................. 17
Changing the transmission channel .................................. 17
Adjusting the balance ........................................................ 18
Switching between mono and stereo operation ............... 18
Individually enhancing the speech intelligibility .............. 19
Storing and charging the receiver ..................................... 20
Charging a rechargeable battery in the transmitter’s
charging compartment
What if ... .................................................................................. 22
... this indicator lights up? .................................................. 22
... you press this button? .................................................... 23
... you change the position of this control/switch? ........... 23
... you hear acoustic signals or warning signals? .............. 24
Cleaning the Set 840 S system ............................................... 25
Cleaning the transmitter and the receiver ........................ 25
If a problem occurs ... .............................................................. 26
Additional technical information ........................................... 28
Accessories and spare parts ................................................... 30
Specifications ........................................................................... 32
Manufacturer Declarations ..................................................... 34
Index ......................................................................................... 36
....................................................... 21
.......................................... 12
1
Page 2

Safety instructions
Safety instructions
• Please read this instruction manual carefully and completely before
using the products.
• Make this instruction manual easily accessible to all users at all
times. Always include this instruction manual when passing the
products on to third parties.
• Do not use the products in situations which require special attention (e.g. when performing skilled jobs).
• Always keep the products dry and do not expose them to extreme
temperatures.
• Use the products with care and set them up in a clean, dust-free
environment.
• Varnish or furniture polish may degrade the feet of the transmitter,
which could stain your furniture. You should therefore place
the transmitter on a non-slip pad to avoid potential staining of
furniture.
• This receiver allows you to set higher volumes than conventional
receivers to which headphones can be connected. This can cause
hearing damage in persons with healthy hearing and especially in
children.
• Refer all servicing to qualified service personnel. Servicing is
required if the products have been damaged in any way, liquid has
been spilled, objects have fallen inside, the products have been
exposed to rain or moisture, do not operate properly or have been
dropped.
• WARNING: To reduce the risk of fire or electric shock, do not expose
the products to rain or moisture.
• Use only the supplied mains unit.
• Disconnect the mains connector from the wall socket
– to completely disconnect the products from the mains,
– during lightning storms or when unused for long periods of time.
• Ensure that the mains unit is
– always readily operable and easily accessible,
– properly plugged into the wall socket,
– not covered or exposed to direct sunlight for longer periods of
time in order to prevent heat accumulation,
– only operated within the permissible temperature range (see
“Specifications” on page 32),
– not operated near heat sources.
2
Page 3
Safety instructions
Intended use
Intended use includes
• having read this instruction manual, especially the chapter “Safety
instructions” on page 2,
• using the products within the operating conditions and limitations
described in this instruction manual.
“Improper use” means using the products other than as described in
this instruction manual, or under operating conditions which differ
from those described herein.
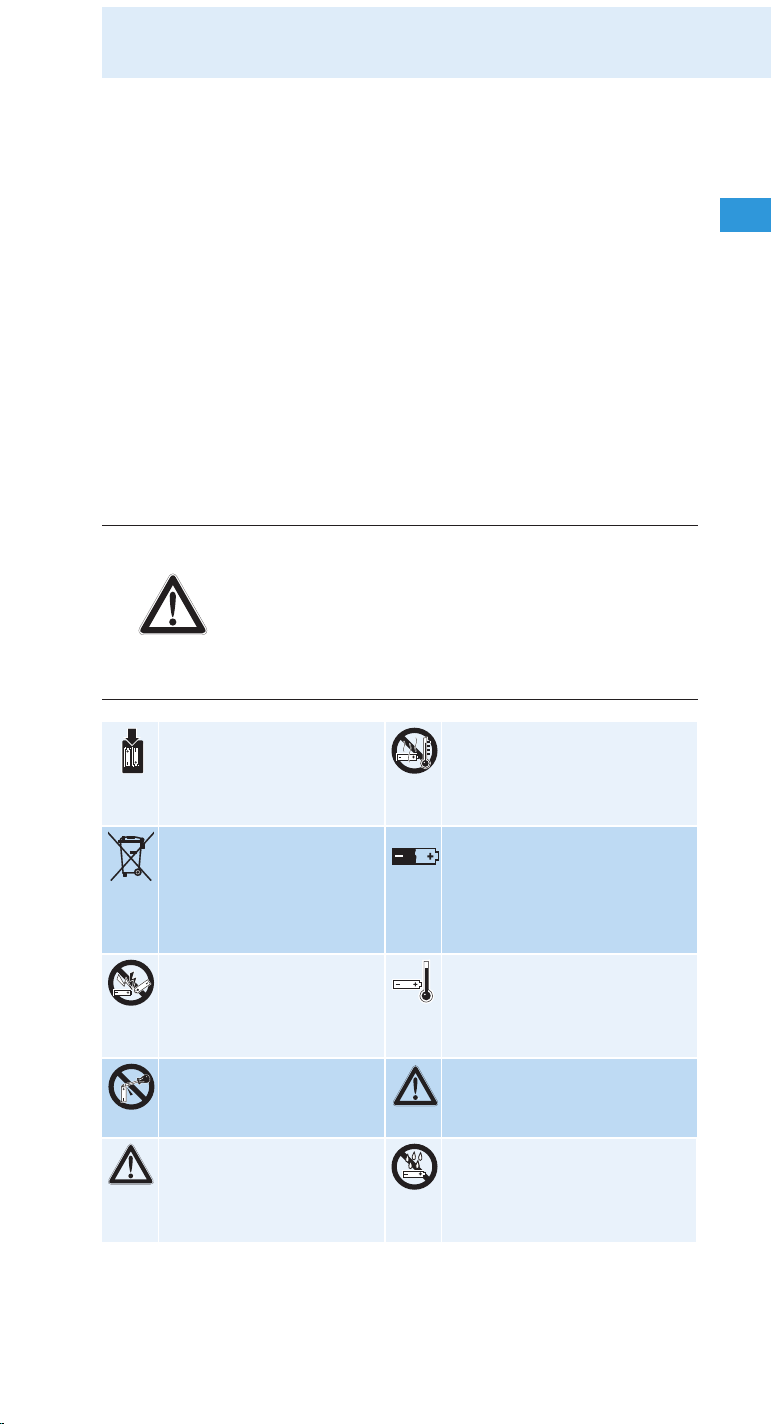
Safety instructions for the Lithium-Polymer rechargeable battery
The BA 300 is a Lithium-Polymer rechargeable battery. If abused or
misused, this rechargeable battery may be damaged. Please understand that Sennheiser does not accept liability for damage arising from
abuse or misuse.
WARNING! In extreme cases, the rechargeable battery may even
present a
•heat hazard,
•fire hazard,
•explosion hazard,
•smoke and gas hazard.
Only charge rechargeable
batteries with the appropriate Sennheiser char-
Do not heat above 70°C/
158°F, e.g. do not expose to
sunlight or throw into a fire.
gers.
Return defective
devices or exhausted
rechargeable batteries to
your specialist dealer.
When not using the
rechargeable battery for
extended periods of time,
charge it regularly (every
6 months for about 1 hour).
Do not short-circuit. Only charge rechargeable
batteries at ambient
temperatures between
10°C/50°F and 40°C/104°F.
Do not mutilate or
dismantle.
Do not charge the rechargeable battery if the device is
obviously defective.
Store the devices/
Do not expose to moisture.
rechargeable batteries in
a cool and dry place at
room temperature.
3
Page 4
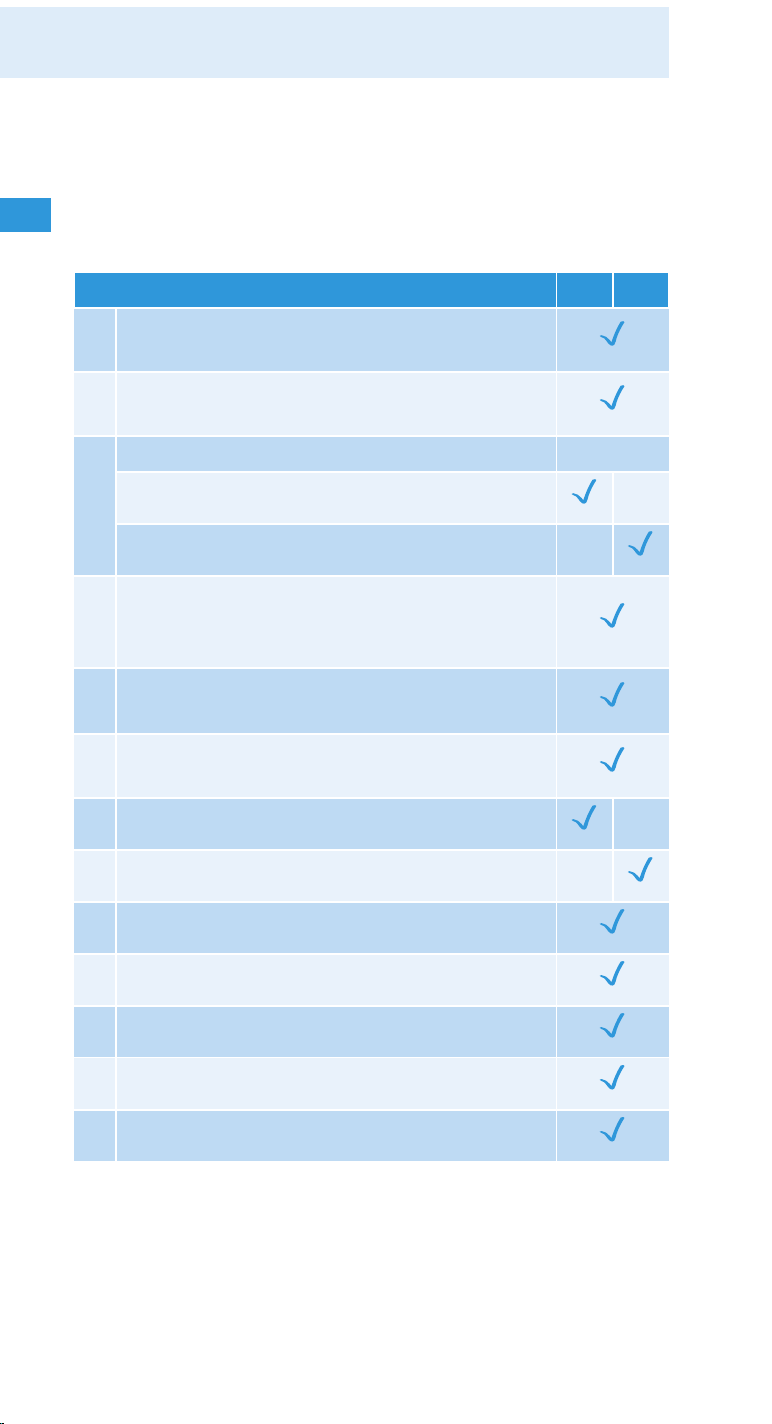
Delivery includes
Delivery includes
The Set 840 S system is available as an EU and a US version.
The following table shows which items are included with
the respective version.
Components of the Set 840 S system EU US
1 RR 840 S receiver with BA 300
Lithium-Polymer rechargeable battery
1 TR 840 transmitter with integrated
charging compartments
1 NT 13 mains unit with
2 country adapters (EU, UK)
1 country adapter (US)
1 connection cable
with two 3.5 mm stereo jack plugs
for connection to a headphone socket
1 audio adapter
(3.5 mm to ¼” (6.3 mm) jack plug)
1 audio adapter for RCA socket
(e.g. TB/Aux-Out)
1 audio adapter for SCART socket
1 MKE 800 TV-N microphone
1 EZT 3011 induction loop
1 lanyard
1 clip for attaching the receiver
1 instruction manual
1 installation manual
4
Page 5

Product overview
I
II
Product overview
The overview pictures of the receiver and the transmitter
can be found on the inside front cover of this instruction
manual.
Receiver
1 Channel indicator
2 Volume control
3 On/off button
4 Balance control
5 Socket for headphones, induction loop or
connection cable to hearing aid
6 Channel search button
7 Battery compartment
R Induction loop
Transmitter
8 Charging compartment for receiver
9 Charging compartment for optional spare
rechargeable battery
0 Charging indicator for optional spare
rechargeable battery
A Charging indicator for receiver’s rechargeable
battery
B Operation indicator
C “Speech intelligibility” button
D Indicator for the selected speech intelligibility
E Socket (marked blue) for connection of sound
source or external microphone
F ST/MO slide switch (stereo/mono)
G Treble adjustment control
H Channel selector switch
I DC socket (marked yellow) for connection of
mains unit
5
Page 6

Putting the Set 840 S system into operation
Putting the Set 840 S system into
operation
Setting up the transmitter
왘 Choose a suitable place near your sound source (e.g. TV).
왘 Do not place the transmitter close to metal objects such
as shelf bars, reinforced concrete walls, etc. as this can
decrease the transmitter’s range.
It is not necessary that the transmitter and receiver are in
the same room, so you can move around freely in the home
or outside in the garden.
When the receiver leaves the range of the transmitter, it
produces warning signals and then automatically switches
off after 3 minutes.
One transmitter can be used to transmit to several
receivers on the same frequency.
6
Page 7

Putting the Set 840 S system into operation
Connecting the transmitter to a sound source
왘 Switch your sound source (e.g. TV) off before connecting
the transmitter.
E
왘 Plug one end of the connection cable J into the blue
J
socket E of the transmitter.
왘 Check the available connection possibilities of your
sound source (e.g. TV):
Connection possibility Name of connection possibility
A
B
Headphone socket
RCA socket
LR
C
SCART socket
(SCART adapter included with the
EU version)
What if your sound source doesn’t have any of these
connection possibilities?
D
MKE 800 TV-N external
microphone
(included with the US version)
왘 Connect the transmitter as described in the corre-
sponding chapter , , or .
If possible, use the SCART connection .
A B C D
C
SCART adapter and microphone are also available as
accessories (see page 30).
7
Page 8

Putting the Set 840 S system into operation
Connecting the transmitter to a headphone socket
A
왘 Plug the other end of the
connection cable J into the
headphone socket on your
sound source.
K
J
Is the plug on the connection
cable too small for the headphone socket?
왘 Plug the adapter to ¼”
(6.3 mm) jack socket K onto
the connection cable J
왘 Adjust the volume of the headphone socket on your
.
sound source to a medium level.
This improves the quality of wireless sound transmission. For detailed information, please refer to the
instruction manual of your sound source (e.g. TV).
With most TVs, the headphone socket is located at
the front or sides.
Connecting the transmitter to an RCA socket
B
왘 Plug the audio adapter for
RCA socket L onto the
connection cable J.
왘 Connect the red connector of
the audio adapter L to the
red RCA socket R of your
sound source.
왘 Connect the white connector
of the audio adapter L to the
white or black RCA socket L of
your sound source.
With most TVs, the RCA socket is located at the rear.
If your TV has several RCA sockets, use the socket
RCA output.
L
J
8
Page 9

Putting the Set 840 S system into operation
Connecting the transmitter to a SCART socket
C
왘 Plug the SCART adapter M
onto the connection cable J.
왘 Connect the SCART adapter M
J
M
to the SCART socket on
your TV.
If your TV has several SCART sockets, use the socket
SCART output.
Using the MKE 800 TV-N external microphone
D
What if your sound source doesn’t have any of the connections mentioned above? You can then use the optional
MKE 800 TV-N microphone.
What if your sound source mutes the external loudspeakers if you use one of the connections mentioned
above?
왘 Via the operating menu of your TV, check if the muting
can be deactivated.
왘 If the muting persists, use the optional MKE 800 TV-N
microphone instead of the connection cable.
E
9
Page 10

Putting the Set 840 S system into operation
To connect the MKE 800 TV-N microphone:
왘 If possible, adhere the supplied Velcro tape directly in
front of the loudspeaker of your TV.
왘 Press the microphone onto the Velcro tape.
왘 Connect the jack plug of the microphone to the blue
socket E of the transmitter.
You can change the sound by varying the position of
the microphone in front of the loudspeaker.
10
Page 11

Putting the Set 840 S system into operation
Connecting the transmitter to the mains
The EU and UK country adapters are included with the
EU version of the Set 840 S; the US country adapter is
included with the US version of the Set 840 S.
왘 Slide the supplied country
adapter O onto the mains
unit N.
왘 Connect the yellow connector
of the mains unit to the yellow
socket I of the transmitter.
왘 Plug the mains unit N into a
wall socket.
The operation indicator B
on the transmitter lights up
green.
When connecting the transmitter to the mains for
the first time, charge the rechargeable battery for
3 hours as described in the chapter “Storing and
3h
charging the receiver” on page 20.
If there is no audio signal from the sound source for
about 3 minutes, the transmitter automatically
switches off. The operation indicator B goes off.
EU
UK
N
US
I
O
N
To disconnect the transmitter from the mains, pull
out the mains connector from the wall socket.
When not using the transmitter for extended periods
of time (e.g. when you are on holiday), pull out the
mains connector from the wall socket. In this case,
however, the receiver’s rechargeable battery will not
be recharged.
11
Page 12

Putting the Set 840 S system into operation
Connecting the induction loop or headphones
for hearing aids to the receiver
The socket 5 of the receiver allows you to connect
• the supplied induction loop R,
•headphones or
• a connection cable to your hearing aid or to induction
couplers.
Connecting the induction loop
왘 Carefully remove the clip P from the receiver.
왘 Attach the clip of the induction loop as shown.
왘 Connect the induction loop R to the socket 5 of the
receiver.
3
0
T
1
Z
E
왘 Set your hearing aid to position “T”.
5
1
R
If your hearing aid has no position “T”, please contact your
hearing aid acoustician.
For alternative connection possibilities to your
hearing aid as well as the connection to cochlea
implants, please contact your hearing aid acoustician.
12
Page 13

Putting the Set 840 S system into operation
Connecting headphones
5
왘 Connect the 3.5 mm jack plug of the headphones to the
socket 5 of the receiver.
Wearing the receiver
In order to wear the receiver, you can use the supplied
lanyard Q, the clip P or the supplied induction loop R
The induction loop is suitable for users of hearing aids, the
lanyard and the clip are useful if you are using headphones
.
.
Wearing the receiver around the neck
If you want to wear the receiver around your neck, use
• the supplied lanyard Q or
• the connected induction loop R (where applies).
To attach the lanyard Q:
왘 Connect the fasteners of the
Q
lanyard Q to the metal ring
at the rear of the receiver.
왘 Wear the receiver around your
neck, with the Sennheiser logo
facing away from your body.
13
Page 14

Putting the Set 840 S system into operation
Attaching the receiver to clothing or belt
If you want to attach the receiver to your clothing or belt,
use the attachment clip P.
To attach the receiver:
왘 Attach the clip P to your
clothing or belt.
To remove the receiver:
왘 Pull the clip P with the receiver
away from your clothing or belt.
P
14
 Loading...