

Sennheiser HSP 2,HSP 4 Instructions For Use Manual
Bedienungsanleitung
Instructions for use
Notice d‘emploi
Istruzioni per l‘uso
Instrucciones para el uso
Gebruiksaanwijzing
HSP 2
HSP 4
HSP2.book Seite 1 Donnerstag, 27. Januar 2005 10:11 10
Bedienungsanleitung..............................................................3
Instructions for use...............................................................15
Notice d’emploi......................................................................27
Istruzioni per l’uso................................................................ .39
Instrucciones para el uso......................................................51
Gebruiksaanwijzing...............................................................63
HSP2.book Seite 2 Donnerstag, 27. Januar 2005 10:11 10
15
English
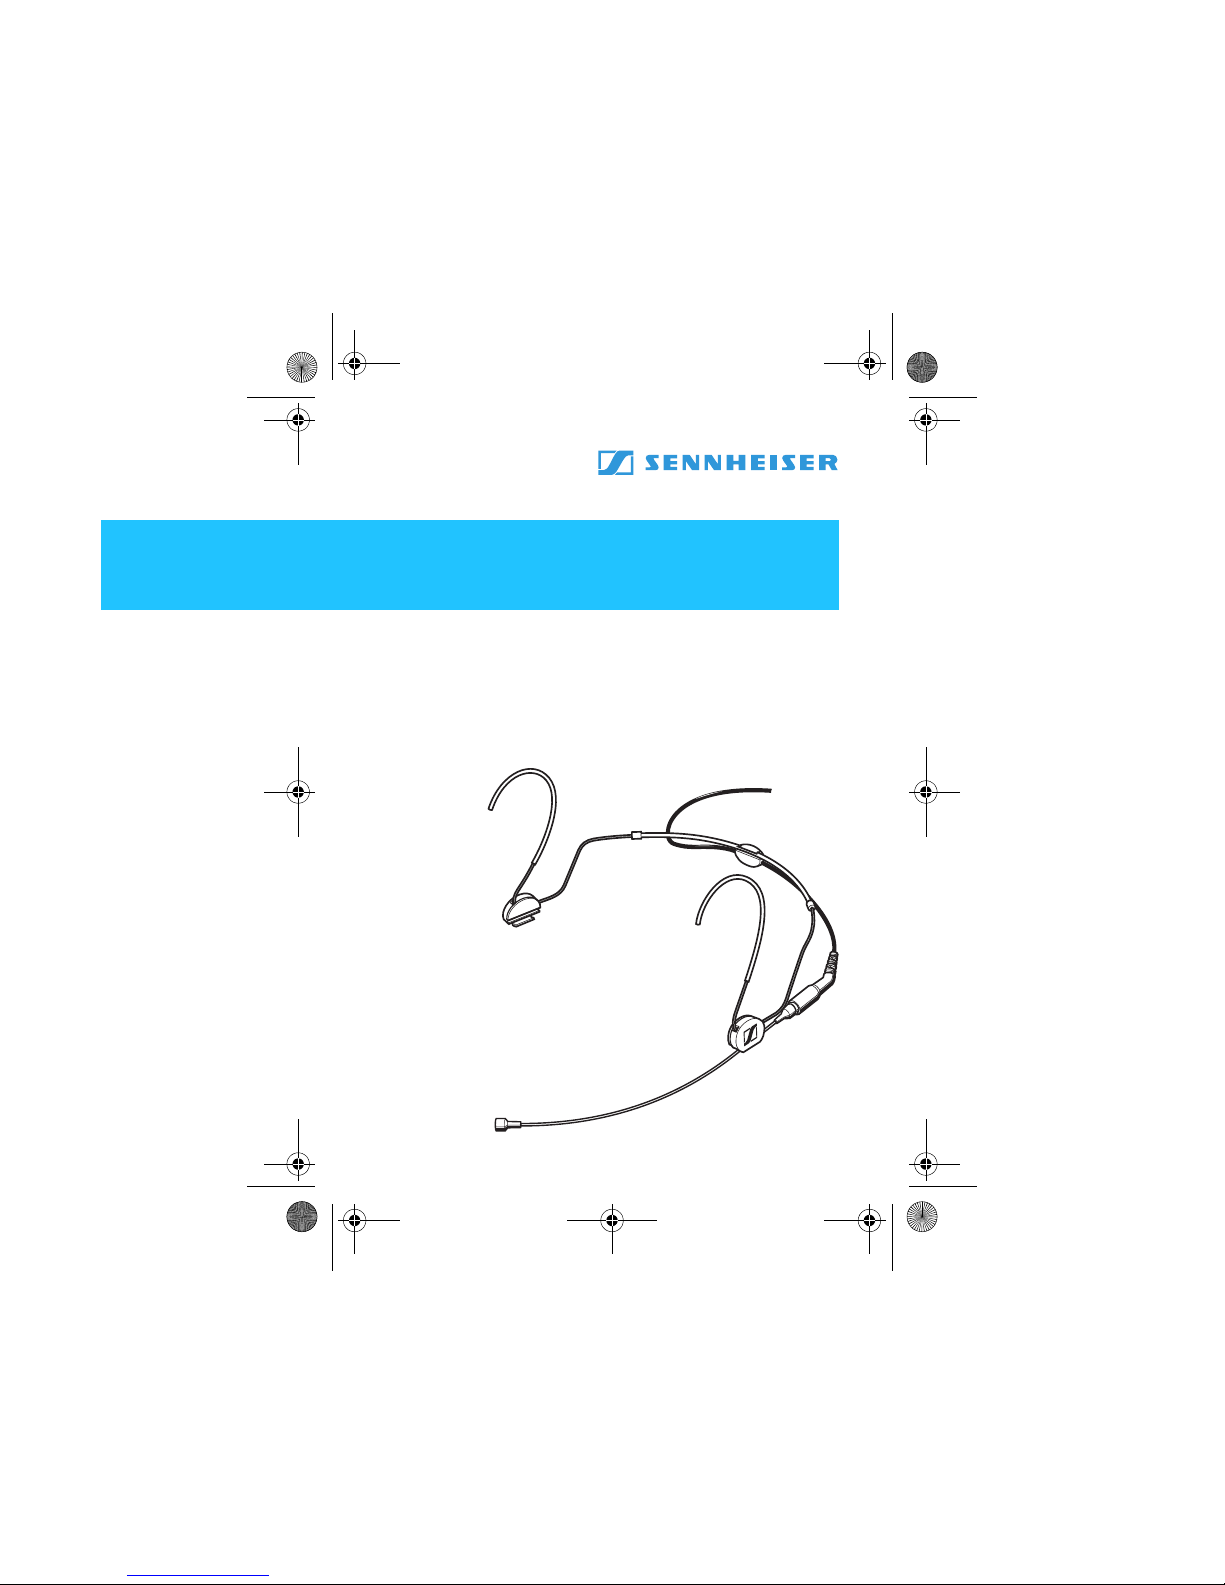
HSP 2/HSP 4
High-quality back-electret condenser headmics, designed for
professional “hands free” applications. The adjustable
neckband is visually unobtrusive and very comfortable to
wear.
The 12 available HSP variants differ in pick-up pattern,
colour and connector.
There are two pick-up patterns available:
HSP 2: omni-directional
HSP 4: cardioid
Features
y
Individually adjustable to all head sizes
y
Neckband design keeps the microphone clear from shirtcollar or clothing
y
Thin microphone boom, interchangeable
y
Microphone boom can be attached to the left or right side
y
Angle of microphone boom can be adjusted in three steps
y
Microphone boom is adjustable in length
y
Connection cable can easily be interchanged
y
All metal parts are coated in a physical vapour deposition
process (scratch-resistant)
HSP2.book Seite 15 Donnerstag, 27. Januar 2005 10:11 10

16
English
Delivery includes
y
Boom microphone
y Neckband
y
Neckband connecting cable
y
Plastic transport case, foam-lined with cut-outs
y
Instructions for use
y
Warranty Certificate
Attaching the microphone boom
The neckband has two holders which are designed so that
the microphone booms can be worn on either side of the
mouth.
To change the microphone
boom, carefully lever it out of
the holder. To attach the microphone boom, press it into the
holder until it snaps in. The upper round recess is for the HSP 2
(
∅
1.1 mm). The lower square recess at the front keeps the
HSP 4 in a fixed, non-rotating position, thus ensuring that
the sound inlet is reliably directed towards the mouth.
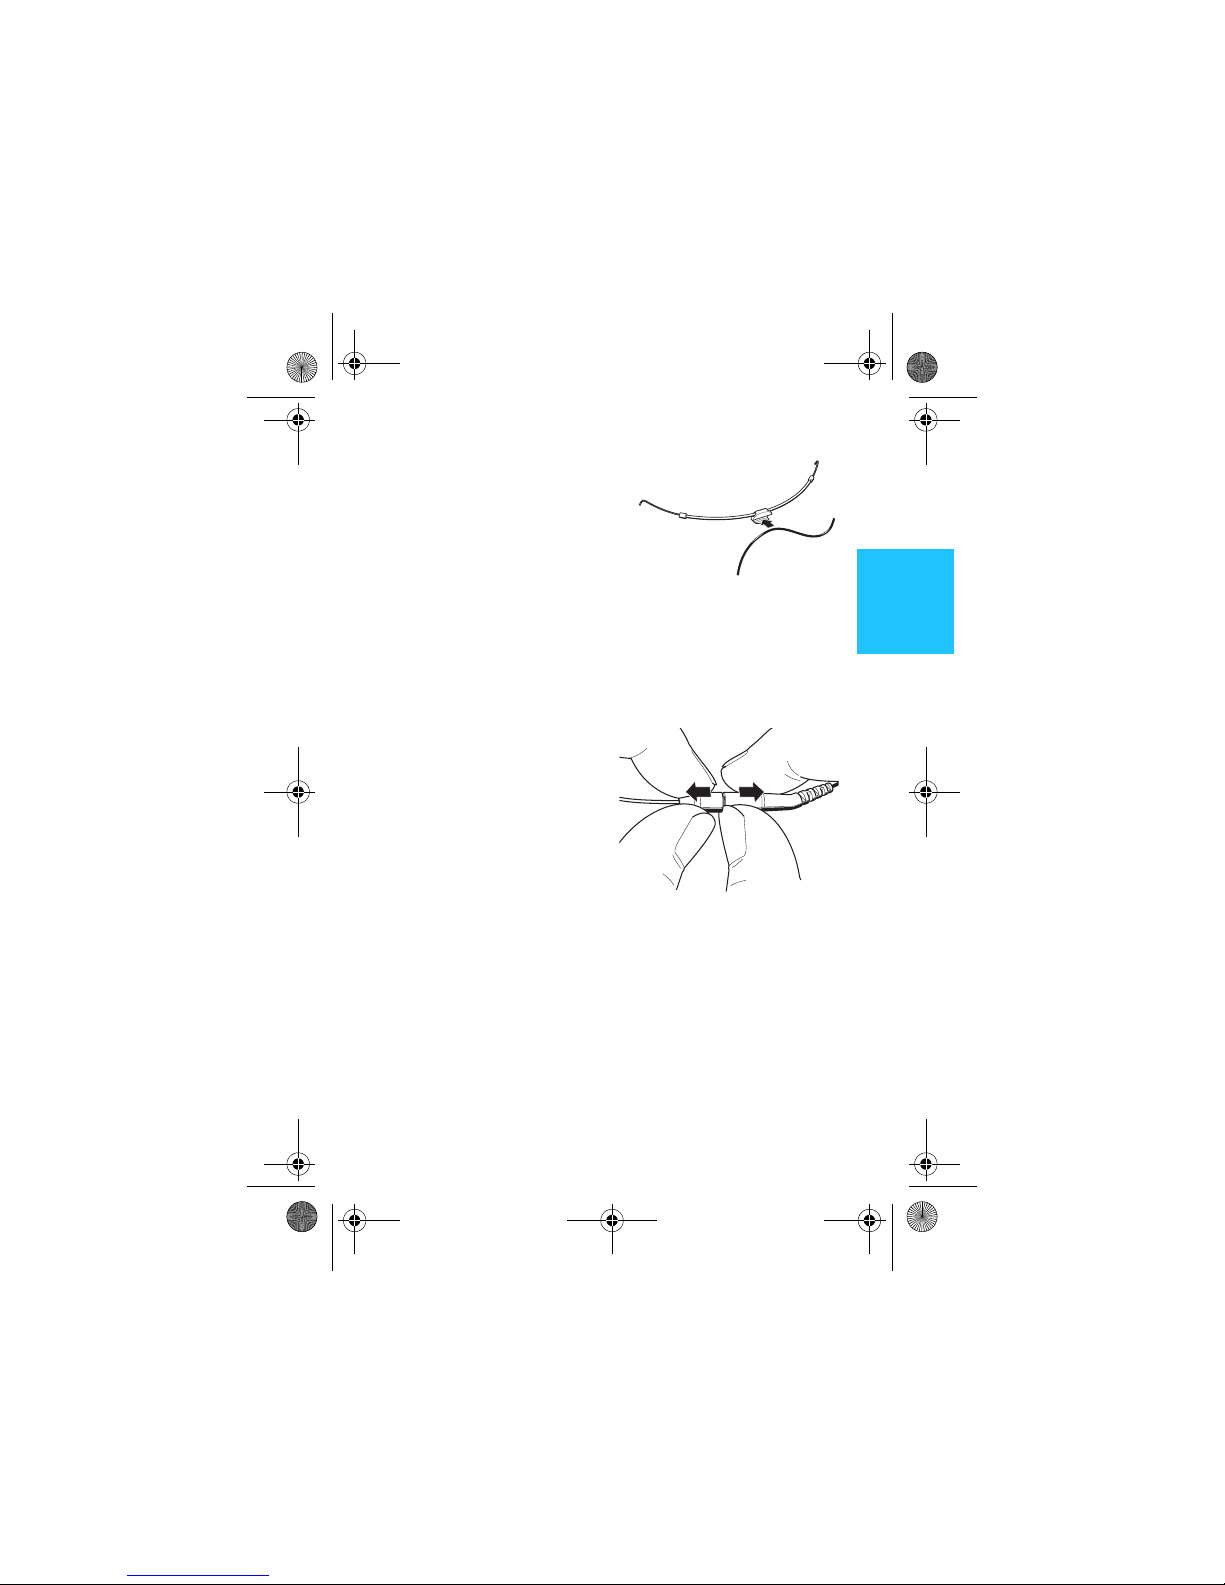
Adjusting the neckband
You can adjust the neckband to
fit all head sizes. To do so,
change the length of the
neckband by pushing in or
pulling out the ear bows.
HSP2.book Seite 16 Donnerstag, 27. Januar 2005 10:11 10
17
English
Cable holder
Attach the microphone cable to
the holder in the centre of the
neckband.
Note:
When attaching the thin cable,
make sure you also press the snall
cable sleeve into the holder or
the cable will fall out.
Changing the microphone
The connection between the
microphone boom and the
microphone cable ist very tight.
To loosen this connection, insert your fingernail into the join
and then pull the connector and
the socket apart as shown .
Note:
When pulling apart, make sure you hold the thick end of
the connector and the socket (NOT the cable).
Pulling the thin microphone boom or the cable sleeve can damage the microphone boom or cable. This will invalidate the
Sennheiser warranty
HSP2.book Seite 17 Donnerstag, 27. Januar 2005 10:11 10
 Loading...