

Sennheiser HSL 10 Quick Manual
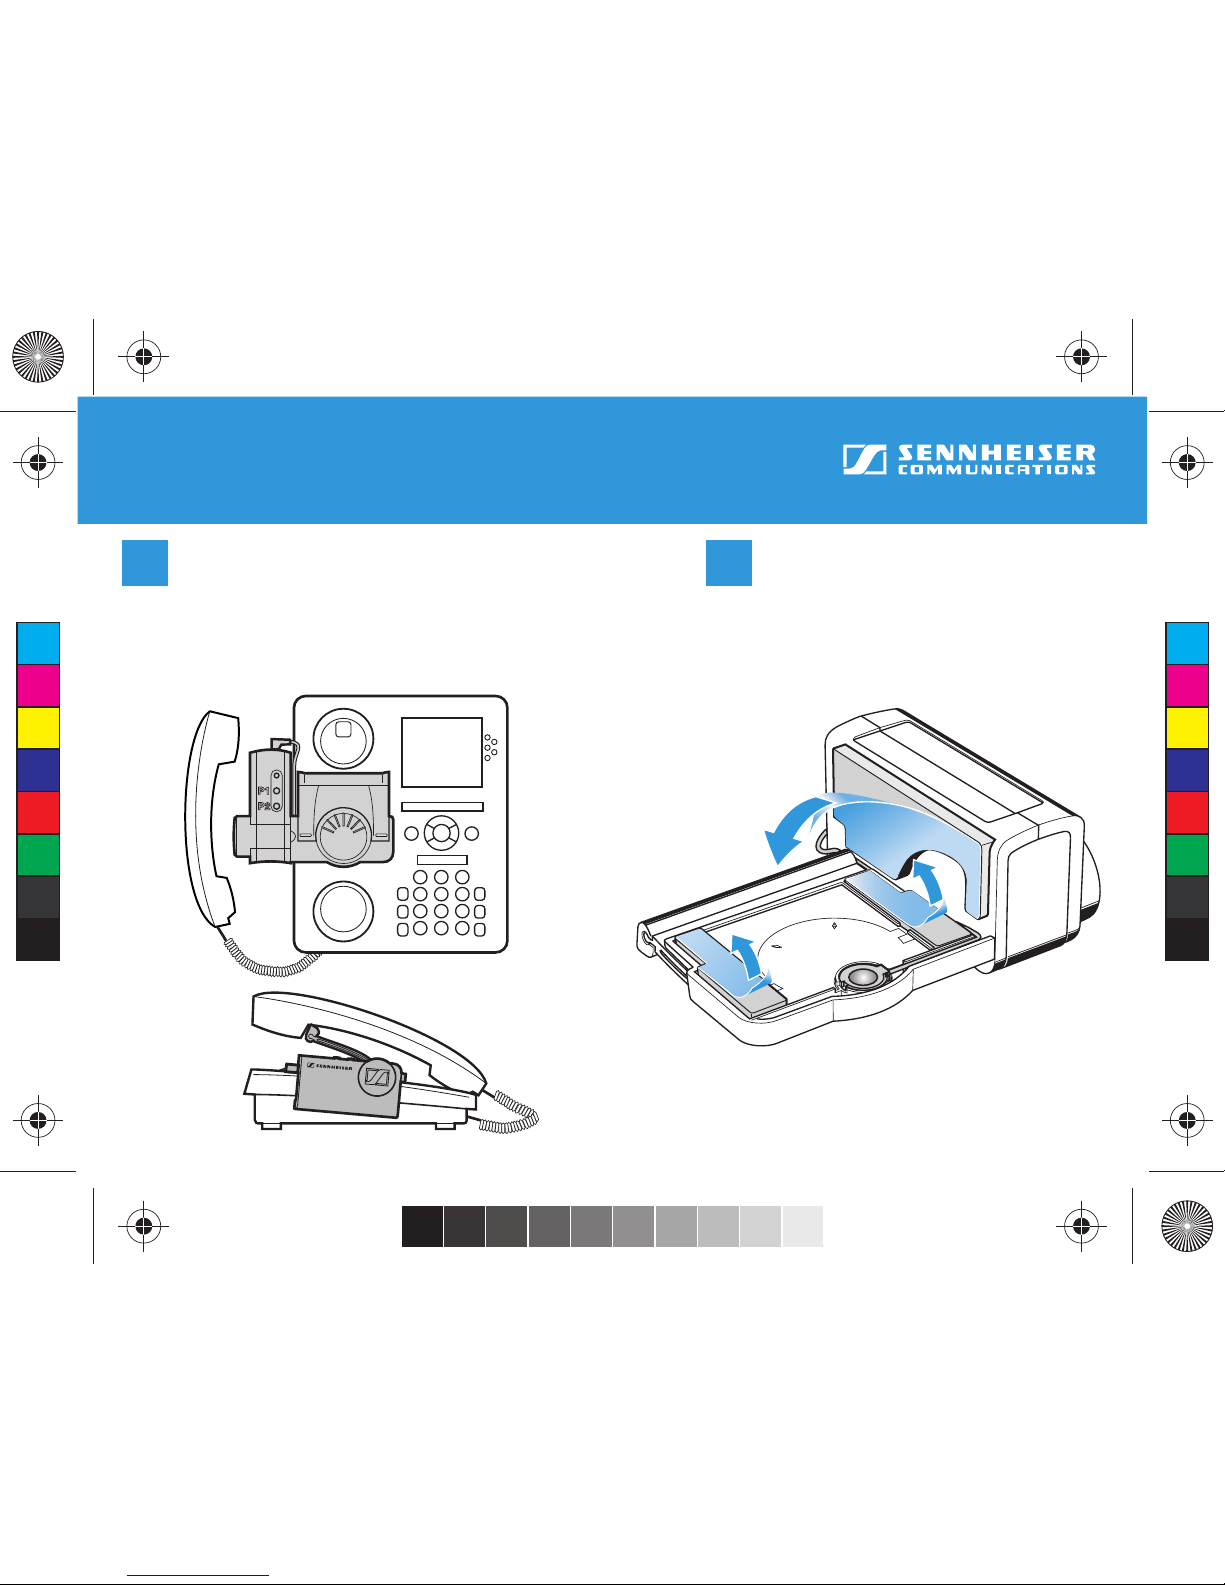
Once you have found the best place
to attach the HSL 10 to the
telephone, remove the backing
from the adhesive mounting tapes
and attach it.
Before removing the adhesive tapes, hold the
HSL 10 on top of or close to the loudspeaker of
your telephone. Test the lifter’s position by
making sure that the HSL 10 lifts and lowers
the handset in the proper place.
1 2
HSL 10 Handset Lifter
Quick Guide
C
M
Y
CM
MY
CY
CMY
K
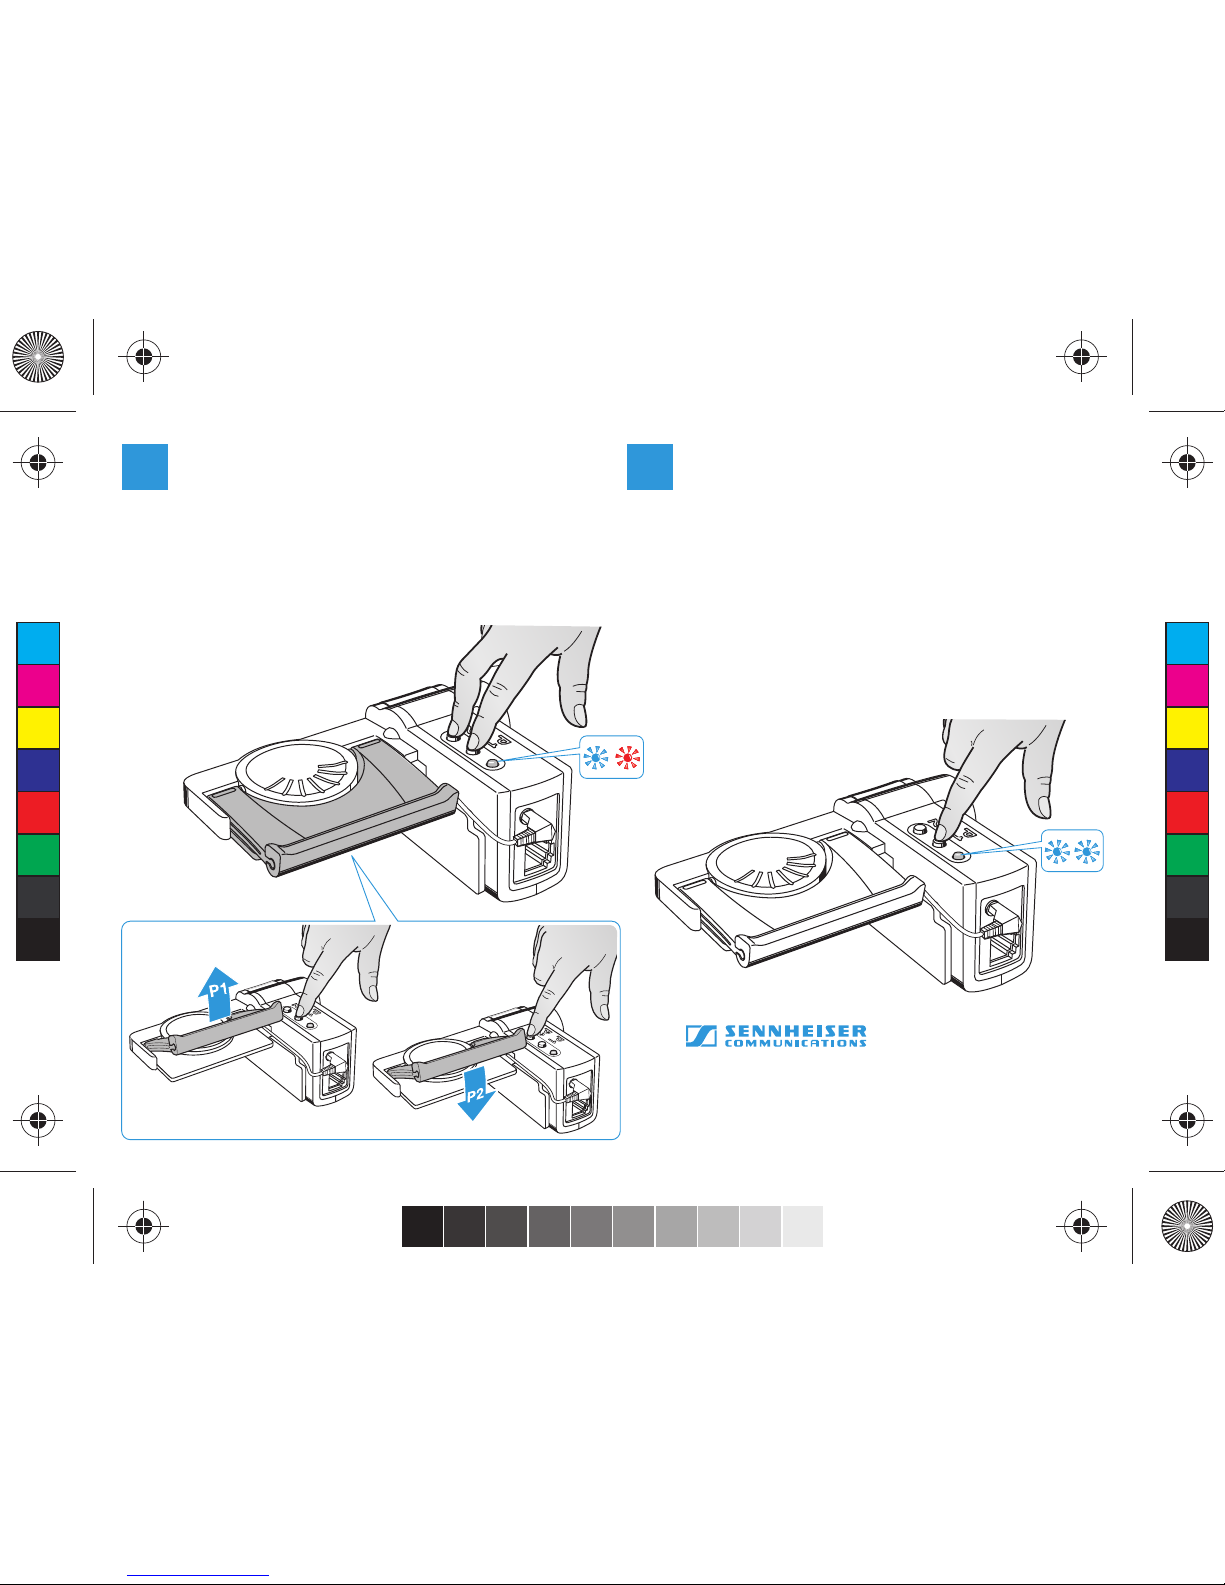
Adjust the lifting height of the HSL 10
as follows:
1. Press and hold the “P1“ and “P2“ buttons
until the LED flashes blue and red.
2. Press the “P1“ button to increase or the
“P2“ button to decrease the lifting height.
3. Press and hold the “P1“ and “P2“ buttons
until the LED stops flashing.
The settings are stored.
Teach/record one or two different ring
tones of your telephone as follows:
1. Press and hold the “P1“ or “P2“ button
until the LED flashes (holding P1 will
cause blue flash, P2 will cause red flash).
2. Make a call to your telephone to detect
and record the ring tone. If the recording
was successful, the LED flashes three times
(these flashes will be red if P1 was used,
blue if P2 was used). If the recording was
not successful, try again or use the other
button “P1“ or “P2“.
3 4
Sennheiser Communications A/S
Langager 6, 2680 Solrød Strand, Denmark
www.senncom.com
Printed in China, Publ. 01/10, A01
C
M
Y
CM
MY
CY
CMY
K
 Loading...