

Page 1
e 602-II
Instruction manual
Page 2
Delivery includes
• e 602-II
• pouch
• quick guide
• safety guide
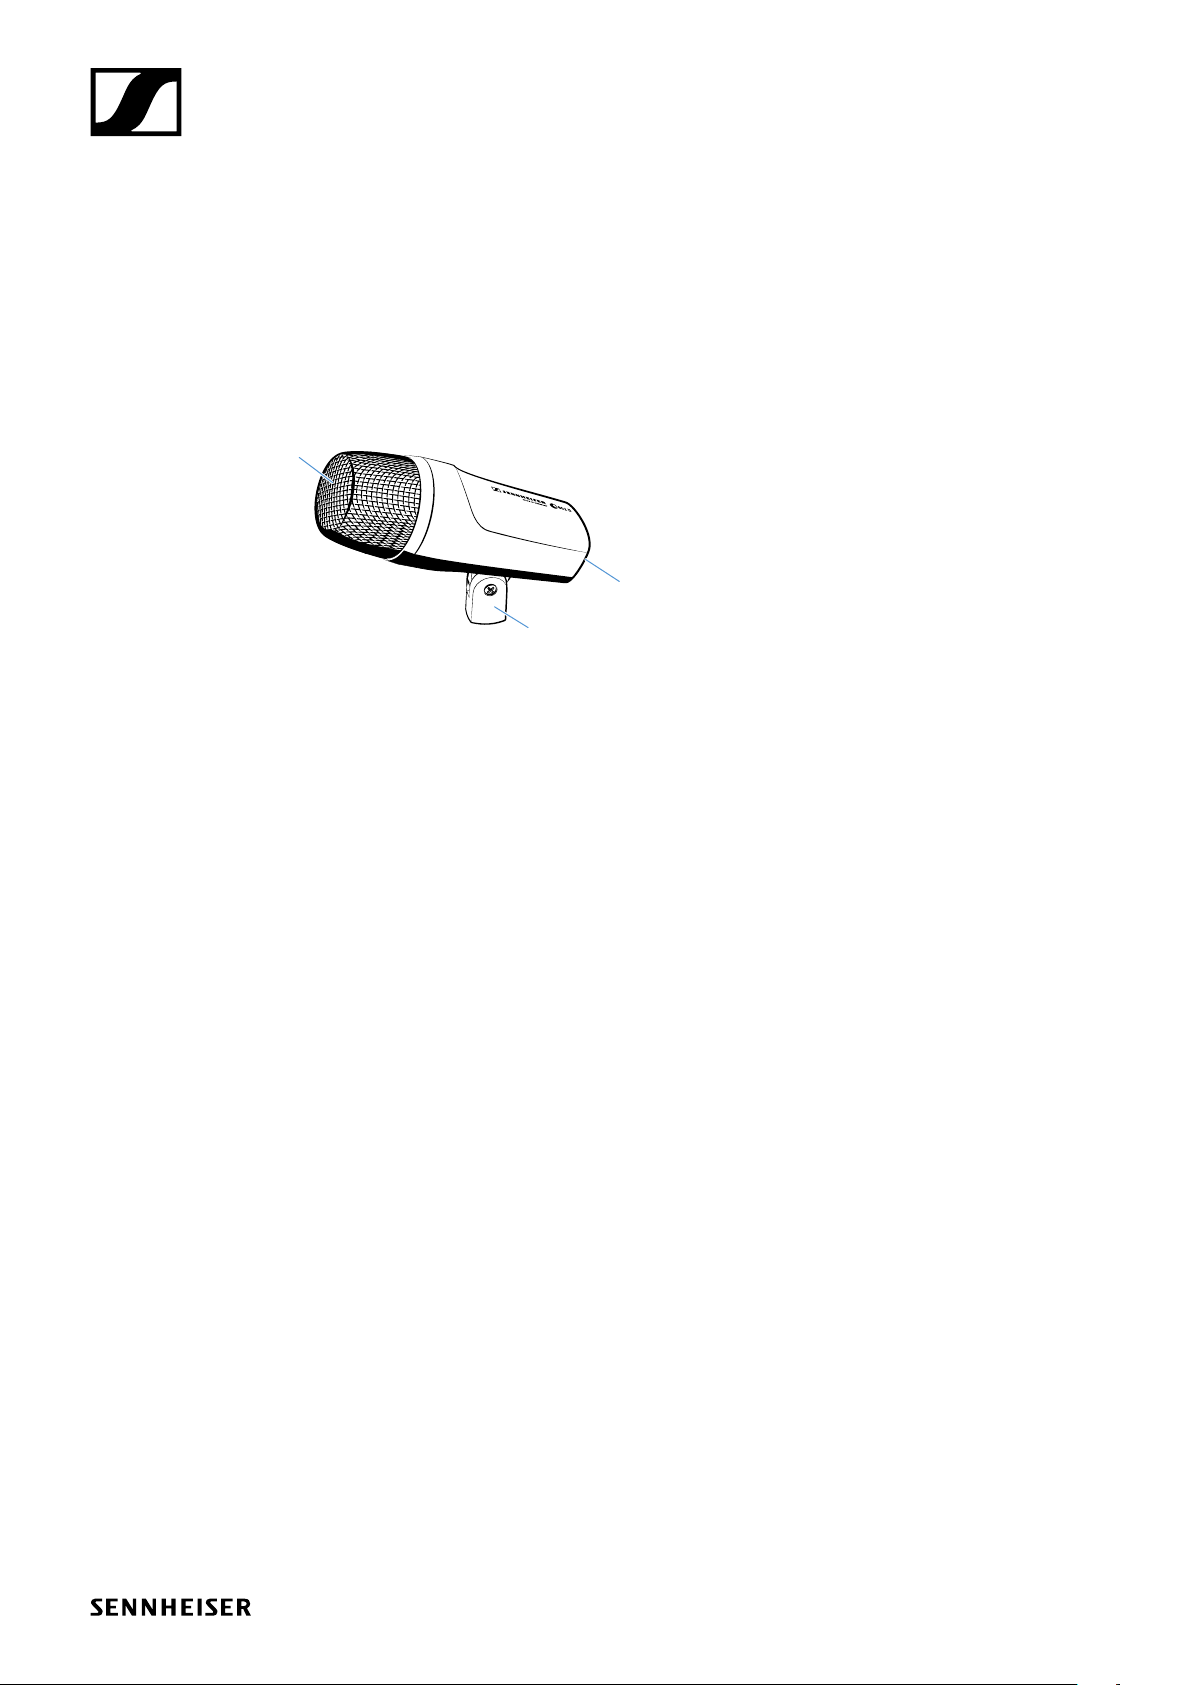
Product overview
1
Delivery includes
2
3
1. sound inlet basket
2. XLR-3 connector
3. integral stand mount
e 602-II | 2/7
Page 3
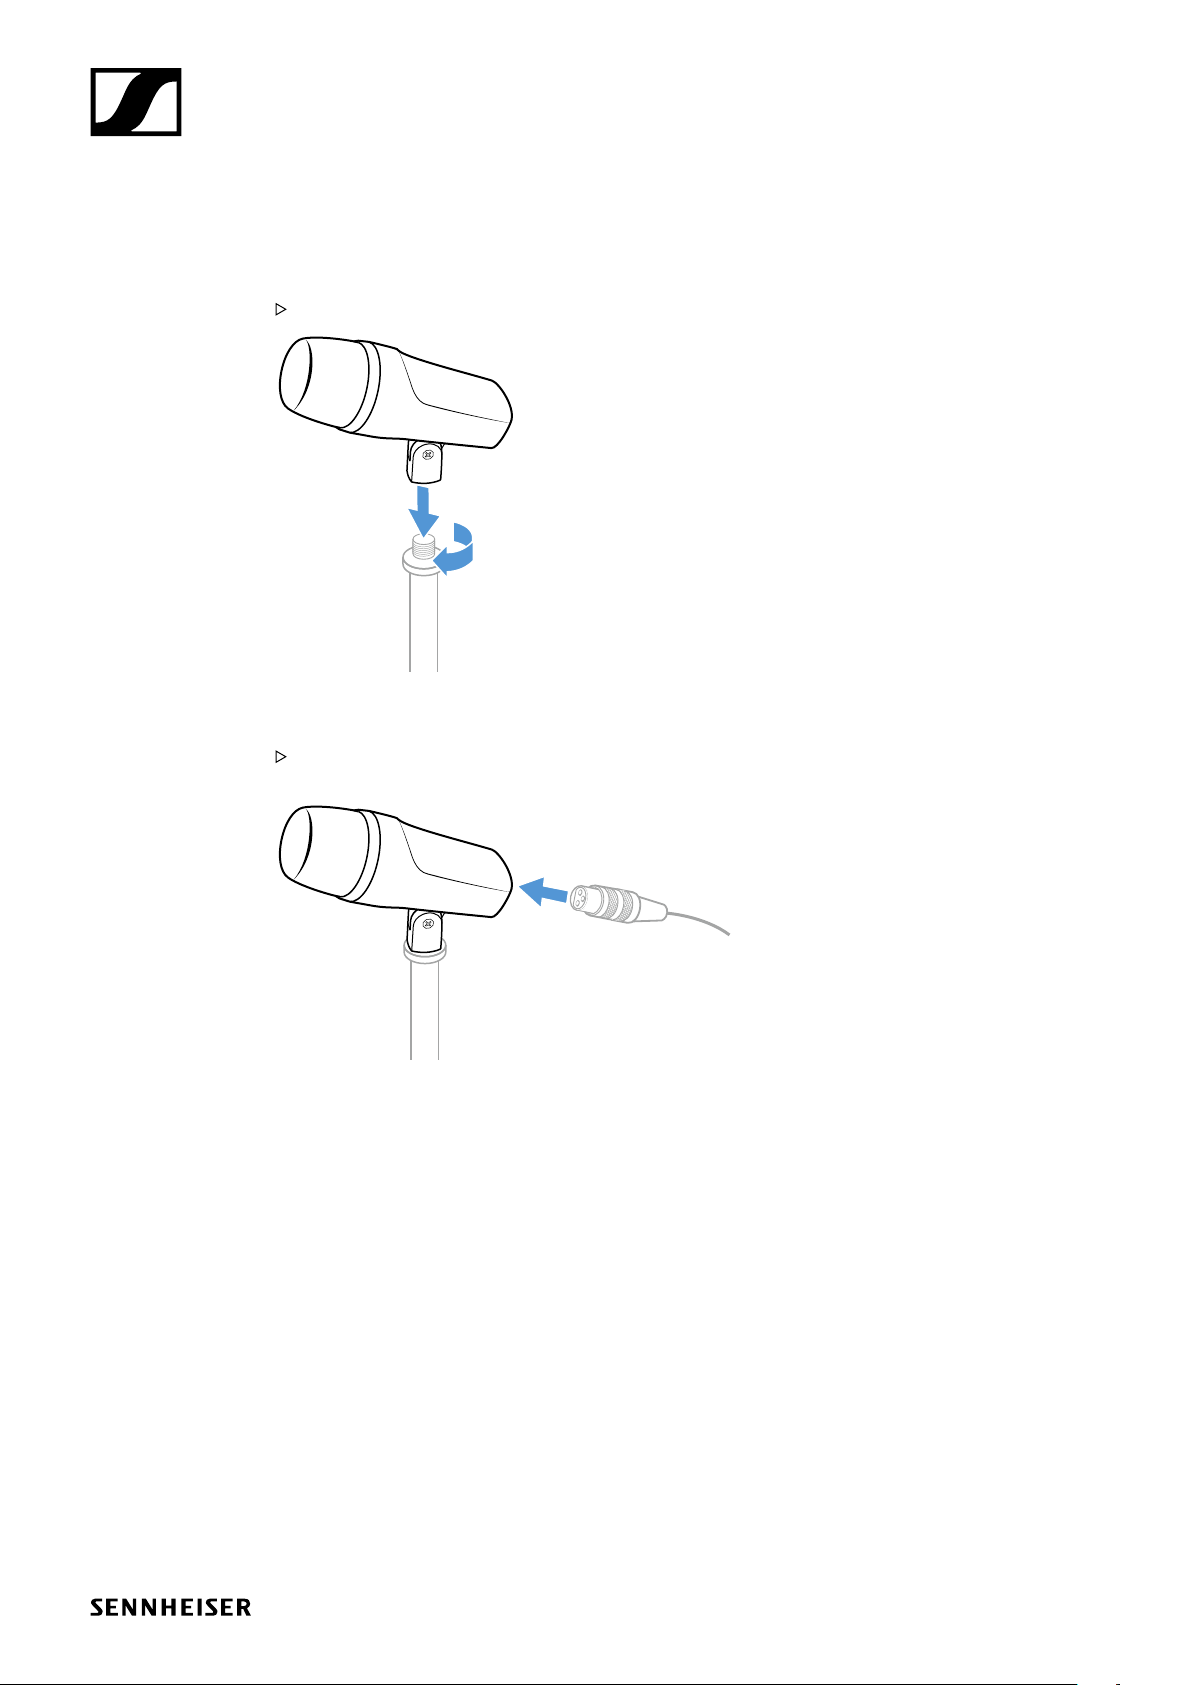
Installation
Attaching the microphone
Screw the microphone’s built-in mount onto a sufficiently stable microphone stand.
Installation
Connecting the microphone
Connect the XLR-3 socket of the microphone cable (optional accessories) to the XLR-3 socket of
the microphone.
e 602-II | 3/7
Page 4

Operation
Operation
Positioning the microphone on a kick drum
It is vital to observe the following notes:
Position Resulting sound Commentary
A much attack
little resonance
dry
B less attack
much resonance
smooth and voluminous
C less Attack Position the microphone in the middle between the
For less attack in all three positions, turn the microphone away from where the beater strikes.
A B C
Position the microphone at a distance of a few centimeters from the batter head.
Position the microphone at the level of the resonant
head.
batter head and the resonant head.
Positioning the monitor loudspeakers
To prevent feedback and crosstalk, postion your monitor loudspeakers in the angle area of the
highest cancellation of the microphone (approx. 180°).
180°
e 602-II | 4/7
Page 5

Cleaning and maintaining the e 602-II
Cleaning and maintaining the e 602-II
CAUTION
LIQUIDS CAN DAMAGE THE ELECTRONICS OF THE PRODUCT!
Liquids entering the housing of the product can cause a short-circuit and damage the electronics.
Keep all liquids away from the product.
Do not use any solvents or cleansing agents.
Disconnect the products from the power supply system and remove rechargeable batteries and
batteries before you begin cleaning.
Clean all products only with a soft, dry cloth.
Cleaning the sound inlet basket of the microphone module
Unscrew the sound inlet basket.
Remove the foam insert from the sound inlet basket.
Use a slightly damp cloth to clean the sound inlet basket from the inside and ouside.
If necessary, clean the foam insert with a mild detergent or replace the foam insert.
Dry the foam insert.
Reinsert the foam insert.
Replace the sound inlet basket on the microphone head and screw it tight.
e 602-II | 5/7
Page 6

Specifications
Transducer principle dynamic
Frequency response 20 - 16,000 Hz
Pick-up pattern cardioid
Sensitivity (free field, no load) 0.9 mV/Pa (at 50 Hz)
0.25 mV/Pa (at 1 kHz)
Nominal impedance (at 1 kHz) 350 Ω
Min. terminating impedance 1 kΩ
Connector XLR-3
Dimensions Ø 60 mm, length 153 mm
Weight 318 g
Polar pattern
0°
0°
10
15
20
25
dB
0
5
30°
60°
120°
90°
125 Hz
250 Hz
500 Hz
1,000 Hz
2,000 Hz
4,000 Hz
8,000 Hz
16,000 Hz
30°
60°
90°
120°
Specifications
150°
180°
Frequency response
dBV
-40
-50
-60
-70
-80
-90
50
0°, 1 m
0°, 5 cm
100
200
180°
500
150°
1,000
2,000
5,000
10,000
20,000
Hz
e 602-II | 6/7
Page 7

Connector assignment
••
••
••
••
••
••
• •• ••
Overview of applications
e 602 II
+ +
1
2
3
XLR
+
2
1
3
XLR
+
2
1
3
XLR 6.3 mm
XLR
6.3 mm
12
3
+
+
+
UNBALANCED
BALANCED
Overview of applications
Primary application
Secondary application
•••• •
+
12
3
XLR
e 604
e 608
e 609
e 614
e 835
e 845
e 865
e 901
e 902
e 904
e 906
e 908
e 914
• •••
• ••
silver
• • ••• •
•• • •• • • •
•• •
•• •
•• •
• • •
•• •
• •••
• • ••• •
••• •
• • • •• • • •
e 935
e 945
e 965
• •
• •
e 602-II | 7/7
 Loading...